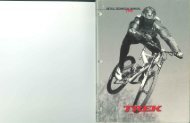
TECHNOLOGY STORIES BIKE INFO, GEOMETRY ... - Vintage Trek
TECHNOLOGY STORIES BIKE INFO, GEOMETRY ... - Vintage Trek
TECHNOLOGY STORIES BIKE INFO, GEOMETRY ... - Vintage Trek

Create successful ePaper yourself
Turn your PDF publications into a flip-book with our unique Google optimized e-Paper software.
Inspect the parts<br />
1. With a clean rag, wipe off<br />
all the surfaces. If any part is<br />
worn, it should be replaced. Signs<br />
of wear on the pivot and link<br />
axles are discoloration or a high<br />
degree of polish.<br />
Some dark deposits may be<br />
left as the bushings and axle ‘seat<br />
in’ to each other. When this hap-<br />
Fig. 40<br />
pens, some of the bearing material<br />
is sort of plated onto the axle.<br />
Its normal, and actually makes the pivot run smoother.<br />
The bushings are harder to inspect; some discoloration<br />
is normal as the bushings and axle ‘seat in’ to each other.<br />
If wear looks uneven or non-concentric, its best to replace<br />
them.<br />
Note: When in doubt, throw out old parts. Its relatively<br />
cheap to replace the parts, and time consuming to perform<br />
a rebuild. You do the customer a favor by only tearing their<br />
bike apart once.<br />
Prepare the parts for reassembly<br />
1. Clean the bonding surfaces of the main pivot bushings<br />
and frame. These surfaces include the outside of the<br />
tubular main pivot bushing, the seating surfaces of the main<br />
pivot ‘top hat’ bushings that go into the swingarm, and the<br />
parts of the frame and swingarm that the bushings contact.<br />
These surfaces should be cleaned with Loktite Kleen ‘n<br />
Prime.<br />
Be careful not to get Kleen n Prime on the paint or<br />
bushing material. It will remove paint, and also remove the<br />
lubrication in the bushings.<br />
2. To clean the rocker pivot bushings and upper swingarm<br />
pivot bushings, simply wipe clean of dust or other<br />
debris.<br />
3. Do not lubricate any bushings.<br />
4. Clean the pivot axle bolts, shock mount bolts, and<br />
rocker bridge bolts with Kleen n Prime.<br />
Install the main pivot bushings<br />
1. Check the fit of the bushings in the frame and swingarm<br />
by dry-assembling them (practice installation, but without<br />
Loktite). Normally the bushings are a light press fit,<br />
meaning they are snug but easily go into place with hand<br />
pressure. If the parts fit correctly, go to Step 2. If they seem<br />
very loose, go to Step 3.<br />
2. If the parts fit correctly, apply Loktite 290 to all<br />
contact surfaces between the bushings and the frame or<br />
swingarm, and install the bushings.<br />
3. If the parts seem very loose, Loktite RC680 is<br />
required. 290 is a thread locker, and it works best where<br />
parts are in tight contact. RC 680 is a filler, so it has the<br />
ability to fill larger gaps and securely bond parts that do not<br />
fit tightly together.<br />
4. After installing the bushings, wipe off any excess<br />
Loktite, particularly removing any Loktite that contacts the<br />
bearing surface.<br />
2002 <strong>Trek</strong> Technical Manual<br />
Install the main pivot axle.<br />
1. Carefully align the swingarm with the main pivot<br />
of the frame. The fit is tight. Avoid contact between the<br />
bushings and any residual Loktite. Avoid scarring of the<br />
pivot surfaces as you slide the parts together.<br />
2. Align the swingarm and install the main pivot axle<br />
(the long one) from the right side of the bike. Slide it all<br />
the way through the frame and swingarm eyes.<br />
3. Apply Loktite 290 to the threads of the pivot bolt,<br />
and install the bolt from the left side of the bike. Tighten to<br />
61-75 lb in (6.9-8.5Nm).<br />
Install the rocker bushings<br />
1. The bushings in the rocker pivot lug and the upper<br />
swingarm are all installed dry. Simply press them into<br />
place, being careful to keep them aligned during insertion.<br />
Install the rocker and pivot axle.<br />
1. Apply Loktite 290 to the threads of the rocker bridge<br />
bolts.<br />
2. Loosely assembly the back of the rocker, but do not<br />
attach the small cylindrical spacer yet. Leave the bolts 4-5<br />
turns unthreaded.<br />
3. Slide the rocker around the seat tube. Install the<br />
cylindrical spacer and remaining rocker bridge bolts.<br />
4. Insert the rocker axle from the right side of the<br />
bike.<br />
5. Apply Loktite 290 to the threads of the rocker pivot<br />
bolt, and install the bolt from the left side of the bike.<br />
Tighten to 50-75 lb in (5.7-8.5 Nm).<br />
6. Tighten the rocker bridge bolts to 50-85 lb in<br />
(5.7-9.6 Nm).<br />
Install the rocker and pivot axle.<br />
1. This axle goes through the swingarm, and rocker.<br />
Apply Loktite 290 to the threads of the pivot bolt, and<br />
install the axle from the right side of the bike. Tighten the<br />
axle bolt to 50-85 lb in (5.7-9.6 Nm).<br />
Install the shock mount bolt.<br />
1. Make sure the shock orientation is how you would<br />
like it. Insert the upper shock mount bolt from the right<br />
side of the bike.<br />
2. Insert the lower shock mount bolt from the right<br />
side of the bike.<br />
2. Apply Loktite 290 to the threads of the bolts. Install<br />
the nuts and tighten to 133-164 lb in (15-18.5 Nm).<br />
Allow to Dry<br />
Loktite normally requires 24 hours to completely set.<br />
During this time, the bike should not be ridden. Do not<br />
compress the suspension or in other ways disturb the<br />
Loktite until is has fully set.<br />
121