

CVX050/100 Surge Protective Device Installation and ... - Download
CVX050/100 Surge Protective Device Installation and ... - Download
CVX050/100 Surge Protective Device Installation and ... - Download

You also want an ePaper? Increase the reach of your titles
YUMPU automatically turns print PDFs into web optimized ePapers that Google loves.
Instruction Manual IM0<strong>100</strong>5016E<br />
Effective July 2011<br />
Supersedes IM0<strong>100</strong>5016E Rev.3 Rev. 4<br />
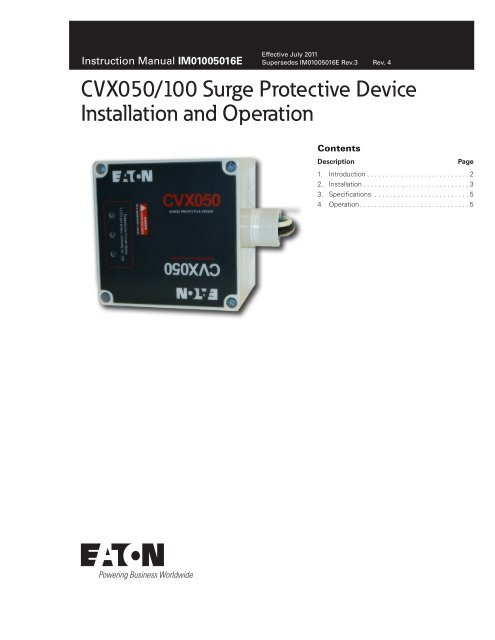
<strong>CVX050</strong>/<strong>100</strong> <strong>Surge</strong> <strong>Protective</strong> <strong>Device</strong><br />
<strong>Installation</strong> <strong>and</strong> Operation<br />
Contents<br />
Description Page<br />
1. Introduction . . . . . . . . . . . . . . . . . . . . . . . . . . . 2<br />
2. <strong>Installation</strong> . . . . . . . . . . . . . . . . . . . . . . . . . . . . 3<br />
3. Specifications . . . . . . . . . . . . . . . . . . . . . . . . . 5<br />
4 Operation. . . . . . . . . . . . . . . . . . . . . . . . . . . . . 5
Instruction Manual IM0<strong>100</strong>5016E<br />
Effective July 2011<br />
1.0 introduction<br />
This manual describes how to install a <strong>CVX050</strong> or CVX<strong>100</strong> <strong>Surge</strong><br />
<strong>Protective</strong> <strong>Device</strong> (SPD) in parallel (shunt) across the AC supply of<br />
the following types of electrical systems:<br />
• Single Phase<br />
• Split Phase<br />
• 3-Phase Wye (Star)<br />
• 3-Phase Delta (no Neutral)<br />
The SPD is designed to be installed on service entrance, branch<br />
panels, <strong>and</strong>/or individual equipment disconnects, <strong>and</strong> functions to<br />
protect sensitive electronic equipment from damaging voltage transients.<br />
The connecting wires do not carry supply current. Instead,<br />
they carry only short-duration currents that are associated with a<br />
transient event.<br />
These instructions do not cover all details, variations, or combinations<br />
of the equipment, its storage, delivery, installation, checkout,<br />
safe operation, or maintenance. If you require further information<br />
regarding a particular application or installation that is not covered in<br />
this manual, please contact Eaton’s Power Quality Technical Support<br />
at 1-800-809-2772.<br />
1.1 Safety Precautions<br />
A licensed/qualified electrician must complete all instructions<br />
described in this manual in accordance with the U.S. National<br />
Electrical Code, state <strong>and</strong> local codes, or other applicable country<br />
codes. All electrical codes supersede these instructions.<br />
Warning<br />
improper installation can cause death, injury, <strong>and</strong>/or equipment<br />
damage. FolloW all Warnings <strong>and</strong> cautions. completely<br />
read <strong>and</strong> underst<strong>and</strong> the inFormation in this instruction manual<br />
beFore attempting to install or operate this equipment.<br />
improper Wiring could cause death, injury, <strong>and</strong>/or equipment<br />
damage. only licensed/qualiFied electricians Who are trained<br />
in the installation <strong>and</strong> service oF electrical devices are to<br />
install this equipment.<br />
use appropriate saFety precautions <strong>and</strong> equipment For arc<br />
Flash protection.<br />
during normal operation, hazardous voltages are present<br />
inside the spd.<br />
When installing the spd, FolloW all saFe Work practices to<br />
avoid electrical shock.<br />
caution<br />
do not perForm a high-pot test With the spd connected to the<br />
electrical system. Failure to disconnect the spd during a highpot<br />
test Will result in damage to the spd.<br />
aFter installation this device is not repairable <strong>and</strong> contains<br />
no servicable parts. iF the unit should malFunction or needs<br />
replaced contact a qualiFied electrician or eaton care at 877<br />
etn care (877-386-2273).<br />
2<br />
eaton Corporation www.eaton.com<br />
1.2 Catalog Numbering System<br />
2.0 installation<br />
<strong>CVX050</strong>/<strong>100</strong> <strong>Surge</strong> <strong>Protective</strong> <strong>Device</strong><br />
<strong>Installation</strong> <strong>and</strong> Operation<br />
Refer to Section 1.2 <strong>and</strong> look at the label on the SPD to verify that<br />
the SPD’s voltage rating <strong>and</strong> wiring configuration matches that of the<br />
electrical system. Use an AC voltmeter to measure the system’s line<br />
voltage to ensure that the correct model of SPD is being installed.<br />
Damage to the SPD may result if it is connected to an electrical system<br />
of a higher voltage or different wiring configuration.<br />
2.1 Mounting<br />
CVX 050 - 480Y<br />
Per Phase Peak<br />
<strong>Surge</strong> Current (kA)<br />
050 = 50<br />
<strong>100</strong> = <strong>100</strong><br />
Configuration & Voltage Ranges (Vac)<br />
230L = Single-Phase – 200, 208, 220, 230, 240, 277<br />
480L = Single Phase – 480<br />
240S = Split-Phase – <strong>100</strong>/200, 110/220, 120/240 , Single Phase 120<br />
240H = Three-Phase High Leg Delta – 120/240<br />
208Y = Three-Phase Wye (Star) – <strong>100</strong>/174, 110/190, 120/208, 127/220<br />
480Y = Three-Phase Wye (Star) – 220/380, 230/400, 240/415, 277/480<br />
600Y = Three-Phase Wye (Star) – 305/525, 347/600<br />
240D = Three-Phase Delta – 200, 208, 220, 230, 240<br />
480D = Three-Phase Delta – 380, 400, 415, 440, 480<br />
600D = Three-Phase Delta – 525, 600 (600D available in 50kA only)<br />
In this example, Catalog Number <strong>CVX050</strong>-480Y identifies<br />
a CVX model with the following features <strong>and</strong> ratings:<br />
• <strong>Surge</strong> Current Rating of 50 kA peak per phase<br />
• Three-Phase Wye Wiring Configuration<br />
• Voltage Range of 220/380 through 277/480 Vac<br />
The SPD can be mounted directly to the electrical panel, or mounted<br />
to a wall using the enclosure’s internal mounting holes or optional<br />
external mounting feet.<br />
important<br />
• choose a mounting location For the spd that provides the<br />
shortest <strong>and</strong> straightest possible Wiring (lead length) From<br />
the spd to the electrical system connections. excessive lead<br />
length <strong>and</strong> sharp bends Will degrade spd perFormance.<br />
• iF the electrical system uses an isolated ground, the spd must<br />
be isolated From ground using insulated conduit Fittings.<br />
• When using conduit, avoid using 90° elboWs <strong>and</strong> keep the<br />
conduit run as short <strong>and</strong> straight as possible.
<strong>CVX050</strong>/<strong>100</strong> <strong>Surge</strong> <strong>Protective</strong> <strong>Device</strong><br />
<strong>Installation</strong> <strong>and</strong> Operation<br />
2.1.1 Conduit <strong>Installation</strong><br />
Mount the SPD directly to the electrical panel using a 3/4” chase<br />
nipple as shown in Figure 1.<br />
When mounting the SPD outdoors, use weatherproof conduit <strong>and</strong><br />
fittings to maintain the enclosure’s NEMA 4X rating. See Figure 2.<br />
3/4" Chase Nipple<br />
Phase,<br />
Ground,<br />
& Neutral<br />
Wires*<br />
Drill or punch a<br />
7/8" hole in wall<br />
of electrical panel<br />
Figure 1. 3/4" Chase Nipple Mounting.<br />
Figure 2. Conduit <strong>Installation</strong>.<br />
Internally Threaded<br />
Conduit Fitting<br />
<strong>CVX050</strong><br />
SURGE PROTECTIVE DEVICE<br />
SURGE PROTECTIVE DEVICE<br />
<strong>CVX050</strong><br />
* Number <strong>and</strong> type of wires vary with SPD model.<br />
Refer to Section 2.3 SPD Wiring Diagrams.<br />
Avoid sharp bends<br />
in conduit <strong>and</strong> longer<br />
than necessary wire<br />
lengths.<br />
<strong>CVX050</strong><br />
SURGE PROTECTIVE DEVICE<br />
DANGER<br />
HIGH VOLTAGE<br />
SEE WARNING LABEL<br />
Suppression Circuit Status<br />
1 LED per phase, normally on - OK<br />
2.1.2 Wall Mounting<br />
Mount the SPD directly on a wall using the SPD’s internal mounting<br />
holes as follows:<br />
<strong>CVX050</strong><br />
SURGE PROTECTIVE DEVICE<br />
<strong>CVX050</strong><br />
1. Gain access to the internal mounting holes by first removing<br />
the SPD's four front cover screws, <strong>and</strong> then removing the front<br />
cover. See Figure 3.<br />
2. Place the SPD against the wall <strong>and</strong> mark the locations of the four<br />
mounting holes.<br />
3. Attach the SPD to the wall using #8 hardware.<br />
4. Reinstall the front cover.<br />
SURGE PROTECTIVE DEVICE<br />
SURGE PROTECTIVE DEVICE<br />
<strong>CVX050</strong><br />
DANGER<br />
HIGH VOLTAGE<br />
SEE WARNING LABEL<br />
DANGER<br />
HIGH VOLTAGE<br />
SEE WARNING LABEL<br />
Suppression Circuit Status<br />
1 LED per phase, normally on - OK<br />
Suppression Circuit Status<br />
1 LED per phase, normally on - OK<br />
Keep conduit length<br />
as short <strong>and</strong><br />
straight as possible.<br />
Cover Screws<br />
(4 places)<br />
Torque to 6 in-lbs<br />
Instruction Manual IM0<strong>100</strong>5016E<br />
Mounting Holes<br />
Under Cover (4)<br />
4.17" (106 mm)<br />
#8 Hardware<br />
(4 places)<br />
Installer Supplied<br />
Mounting Surface<br />
Figure 3. Wall Mounting Using Internal Mounting Holes.<br />
eaton Corporation www.eaton.com<br />
Effective July 2011<br />
2.1.3 External Mounting Feet (Optional)<br />
Optional External Mounting Feet w/screws (Cat # MNTGFTX) can be<br />
used to mount the SPD to a wall without removing the front cover<br />
as shown in Figure 4.<br />
Figure 4. Wall Mounting With External Mounting Feet.<br />
3.39" (86 mm)<br />
3
Instruction Manual IM0<strong>100</strong>5016E<br />
Effective July 2011<br />
2.2 Wiring<br />
important<br />
• be sure to FolloW all national, state, <strong>and</strong> local electrical codes<br />
When making Wiring connections.<br />
• When connecting the Wires From the spd to the electrical<br />
system, cut the Wires as necessary to keep them as short as<br />
possible.<br />
• to maximize the spd’s perFormance, tWist <strong>and</strong> bind the Wires<br />
together to reduce the impedance oF the Wire (one tWist/<br />
inch).<br />
• iF the system utilizes an isolated ground, the spd’s ground<br />
Wire must be connected to the system’s isolated ground<br />
bus.<br />
1. Locate the electrical system’s applicable wiring diagram in<br />
Section 2.3. Reference this wiring diagram as necessary in<br />
Steps 2, 3, <strong>and</strong> 4.<br />
2. Connect the SPD’s ground wire (green) to the system’s<br />
ground connection.<br />
3. Connect the SPD’s neutral wire (white) to the system’s neutral<br />
connection (not required for 3-phase delta systems –<br />
240D, 480D, 600D).<br />
4. Connect the SPD’s phase A, B, <strong>and</strong> C wires (black) to the system’s<br />
corresponding phase A, B, <strong>and</strong> C connections according<br />
to applicable national, state, <strong>and</strong> local electrical codes.<br />
2.3 SPD Wiring Diagrams<br />
4<br />
Single Phase<br />
(230L, 480L)<br />
Split Phase<br />
(240S)<br />
PHASE A<br />
NEUTRAL<br />
GROUND<br />
PHASE A<br />
NEUTRAL<br />
PHASE B<br />
GROUND<br />
Grounding <strong>and</strong><br />
bonding per<br />
national <strong>and</strong> local<br />
electrical codes<br />
eaton Corporation www.eaton.com<br />
Ground (GRN)<br />
Ground (GRN)<br />
SPD<br />
Neutral (WHT)<br />
Phase A (BLK)<br />
Neutral (WHT)<br />
SPD<br />
Phase B (BLK)<br />
Phase A (BLK)<br />
High Leg<br />
(240H)<br />
<strong>CVX050</strong>/<strong>100</strong> <strong>Surge</strong> <strong>Protective</strong> <strong>Device</strong><br />
<strong>Installation</strong> <strong>and</strong> Operation<br />
3-Phase Wye<br />
(Star)<br />
(208Y, 480Y, 600Y)<br />
3-Phase Delta<br />
(No Neutral)<br />
(240D, 480D, 600D)<br />
Grounding <strong>and</strong><br />
bonding per<br />
national <strong>and</strong> local<br />
electrical codes<br />
PHASE A<br />
PHASE B (High Leg)<br />
PHASE C<br />
NEUTRAL<br />
GROUND<br />
Ground (GRN)<br />
Neutral (WHT)<br />
Phase C (BLK)<br />
Phase B (BLK)<br />
Phase A (BLK)<br />
PHASE A<br />
PHASE B<br />
PHASE C<br />
NEUTRAL<br />
GROUND<br />
SPD<br />
Ground (GRN)<br />
Neutral (WHT)<br />
PHASE A<br />
PHASE B<br />
PHASE C<br />
GROUND<br />
Ground (GRN)<br />
SPD<br />
Phase C (BLK)<br />
Phase B (BLK)<br />
SPD<br />
Phase C (BLK)<br />
Phase B (BLK)<br />
Phase A (BLK)<br />
Phase A (BLK)
<strong>CVX050</strong>/<strong>100</strong> <strong>Surge</strong> <strong>Protective</strong> <strong>Device</strong><br />
<strong>Installation</strong> <strong>and</strong> Operation<br />
3.0 Specifications<br />
Description Specification<br />
Peak kA per Phase <strong>CVX050</strong>=50 kA; CVX<strong>100</strong>=<strong>100</strong> kA<br />
Peak kA per Mode 50<br />
Nominal Discharge Current 20kA (480L, 600D, 600Y = 10kA)<br />
Single-Phase Voltages 200, 208, 220, 230, 240, 277, 480<br />
Split-Phase Voltages <strong>100</strong>/200, 110/220, 120/240, 120<br />
Wye System Voltages <strong>100</strong>/175, 110/190, 120/208, 127/220, 220/380,<br />
230/400, 240/415, 277/480, 305/525, 347/600<br />
Delta System Voltages 200, 208, 220, 230, 240, 380, 400, 415, 440, 480,<br />
525, 600<br />
Input Power Frequency 47 to 420 Hz (50/60 Hz typical)<br />
Protection Modes Single Phase L-N, N-G, L-G<br />
Split Phase L-N, N-G, L-G, L-L<br />
Wye L-N, N-G, L-G, L-L<br />
Delta L-G, L-L<br />
Ports 1<br />
Specific Energy <strong>100</strong> kJ/Ohm<br />
Operating Temperature –13 to 140 °F (–25 to 60 °C)<br />
Weight ≈2.0 lbs (1.0 kg)<br />
Certification/Listing UL1449 3rd Edition Type 1 <strong>and</strong> Type 2 SPD, CSA<br />
Type 2 SPD<br />
4.0 operation<br />
Instruction Manual IM0<strong>100</strong>5016E<br />
eaton Corporation www.eaton.com<br />
Effective July 2011<br />
4.1 Power Up <strong>and</strong> System Checkout<br />
Apply system power. One LED should light for each phase voltage<br />
being monitored (see Figure 4-1). Single-phase electrical systems<br />
will light only one LED, split-phase systems light two LEDs, while<br />
three-phase systems light all three.<br />
If the connected LEDs do not light, remove power, check connections,<br />
<strong>and</strong> test again. If the LEDs still do not light, contact your supplier.<br />
4.2 Routine Operation<br />
After system power has been applied, the SPD automatically begins<br />
to protect down-stream electrical devices from damaging voltage transients.<br />
With all phase voltages present, if an LED turns OFF, the SPD has<br />
disconnected itself from that phase of the electrical system because<br />
one of its Thermally Protected MOVs has failed. If a Thermally<br />
Protected MOV fails, power will be maintained to the load; however,<br />
the load is now unprotected.<br />
The <strong>CVX050</strong>/<strong>100</strong> is not repairable <strong>and</strong> contains no user serviceable<br />
parts. If the unit fails, as shown by at least one of the LEDs turning<br />
OFF, the unit must be replaced. Please contact your distributor as<br />
the SPD may be under warranty.<br />
Warning<br />
do not use the suppression circuit status leds as an indication<br />
oF the presence or absence oF system phase voltages.<br />
1 LED per phase<br />
LEDs that light<br />
indicate MOVs<br />
for that phase are<br />
operational.<br />
An LED that turns<br />
OFF indicates a<br />
failed MOV or loss<br />
of power<br />
Figure 5. Suppression Circuit Status LEDs.<br />
5
Instruction Manual IM0<strong>100</strong>5016E<br />
Effective July 2011<br />
Notes:<br />
6<br />
eaton Corporation www.eaton.com<br />
<strong>CVX050</strong>/<strong>100</strong> <strong>Surge</strong> <strong>Protective</strong> <strong>Device</strong><br />
<strong>Installation</strong> <strong>and</strong> Operation
<strong>CVX050</strong>/<strong>100</strong> <strong>Surge</strong> <strong>Protective</strong> <strong>Device</strong><br />
<strong>Installation</strong> <strong>and</strong> Operation<br />
Notes:<br />
Instruction Manual IM0<strong>100</strong>5016E<br />
eaton Corporation www.eaton.com<br />
Effective July 2011<br />
7
Instruction Manual IM0<strong>100</strong>5016E<br />
Effective July 2011<br />
This instruction manual is published solely for information purposes<br />
<strong>and</strong> should not be considered all-inclusive. If further information is<br />
required, you should consult an authorized Eaton sales representative.<br />
The sale of the product shown in this literature is subject to the<br />
terms <strong>and</strong> conditions outlined in appropriate Eaton selling policies<br />
or other contractual agreement between the parties. This literature<br />
is not intended to <strong>and</strong> does not enlarge or add to any such contract.<br />
The sole source governing the rights <strong>and</strong> remedies of any purchaser<br />
of this equipment is the contract between the purchaser <strong>and</strong> Eaton.<br />
NO WARRANTIES, EXPRESSED OR IMPLIED, INCLUDING<br />
WARRANTIES OF FITNESS FOR A PARTICULAR PURPOSE OR<br />
MERCHANTABILITY, OR WARRANTIES ARISING FROM COURSE<br />
OF DEALING OR USAGE OF TRADE, ARE MADE REGARDING<br />
THE INFORMATION, RECOMMENDATIONS, AND DESCRIPTIONS<br />
CONTAINED HEREIN. In no event will Eaton be responsible to the<br />
purchaser or user in contract, in tort (including negligence), strict<br />
liability or otherwise for any special, indirect, incidental or consequential<br />
damage or loss whatsoever, including but not limited to<br />
damage or loss of use of equipment, plant or power system, cost<br />
of capital, loss of power, additional expenses in the use of existing<br />
power facilities, or claims against the purchaser or user by its customers<br />
resulting from the use of the information, recommendations<br />
<strong>and</strong> description contained herein.<br />
Eaton Corporation<br />
Electrical Sector<br />
1111 Superior Ave.<br />
Clevel<strong>and</strong>, OH 44114<br />
United States<br />
877-ETN-CARE (877-386-2273)<br />
Eaton.com<br />
© 2011 Eaton Corporation<br />
All Rights Reserved<br />
Printed in USA<br />
Publication No. IM0<strong>100</strong>5016E / TBG000625<br />
July 2011<br />
<strong>CVX050</strong>/<strong>100</strong> <strong>Surge</strong> <strong>Protective</strong> <strong>Device</strong><br />
<strong>Installation</strong> <strong>and</strong> Operation<br />
Eaton is a registered trademark of Eaton<br />
Corporation.<br />
All other trademarks are property of their<br />
respective owners.


