Installation and operating instructions - Haas + Sohn
Installation and operating instructions - Haas + Sohn
Installation and operating instructions - Haas + Sohn

You also want an ePaper? Increase the reach of your titles
YUMPU automatically turns print PDFs into web optimized ePapers that Google loves.
Cleaning the combustion pot may only be done<br />
with a cooled down stove in “OFF” <strong>operating</strong> mode.<br />
Otherwise there is a risk of burns!<br />
To this end the combustion pot must be removed from<br />
the stove. Once the combustion pot has been removed,<br />
any residual ash that is in the stove underneath the<br />
combustion pot must also be removed.<br />
After cleaning, the combustion pot is to be put back into<br />
the right position in the burner seat. Check the correct<br />
seating of the combustion pot again so as to avoid poor<br />
seals.<br />
A visual check of the dirt on the burner <strong>and</strong> the<br />
combustion chamber for combustion residues must<br />
be carried out by the operator at regular intervals!!!<br />
Press the left key on the operator console repeatedly<br />
until the Info screen appears – then press the right key<br />
(Menu) – with the two middle keys move the cursor to<br />
Operating Modes – press the right key (Select) – with<br />
the two middle keys move the cursor to OFF – press the<br />
right key (Save) - the stove begins to cool down.<br />
Once the stove has completely cooled down, cleaning<br />
work can begin.<br />
Attention!!<br />
The stove’s Cooling down programme is ended after<br />
about 15 minutes. The stove may still be hot after<br />
the end of the cooling down phase.<br />
Do not start cleaning until the stove is completely<br />
cooled down! “Risk of burns!”<br />
The frequency of ash removal depends directly on the<br />
quality of the wood pellets used. We recommend<br />
removing the ash from the combustion chamber with an<br />
ash vacuum cleaner.<br />
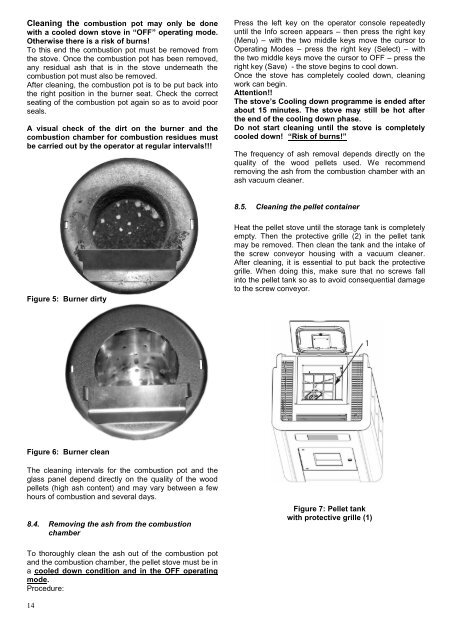
8.5. Cleaning the pellet container<br />
Figure 5: Burner dirty<br />
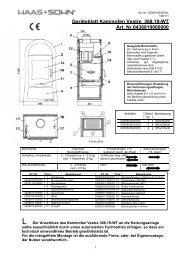
Heat the pellet stove until the storage tank is completely<br />
empty. Then the protective grille (2) in the pellet tank<br />
may be removed. Then clean the tank <strong>and</strong> the intake of<br />
the screw conveyor housing with a vacuum cleaner.<br />
After cleaning, it is essential to put back the protective<br />
grille. When doing this, make sure that no screws fall<br />
into the pellet tank so as to avoid consequential damage<br />
to the screw conveyor.<br />
Figure 6: Burner clean<br />
The cleaning intervals for the combustion pot <strong>and</strong> the<br />
glass panel depend directly on the quality of the wood<br />
pellets (high ash content) <strong>and</strong> may vary between a few<br />
hours of combustion <strong>and</strong> several days.<br />
8.4. Removing the ash from the combustion<br />
chamber<br />
Figure 7: Pellet tank<br />
with protective grille (1)<br />
To thoroughly clean the ash out of the combustion pot<br />
<strong>and</strong> the combustion chamber, the pellet stove must be in<br />
a cooled down condition <strong>and</strong> in the OFF <strong>operating</strong><br />
mode.<br />
Procedure:<br />
14