


You also want an ePaper? Increase the reach of your titles
YUMPU automatically turns print PDFs into web optimized ePapers that Google loves.
AVR<br />
Operating Your AVR<br />
ENGLISH<br />
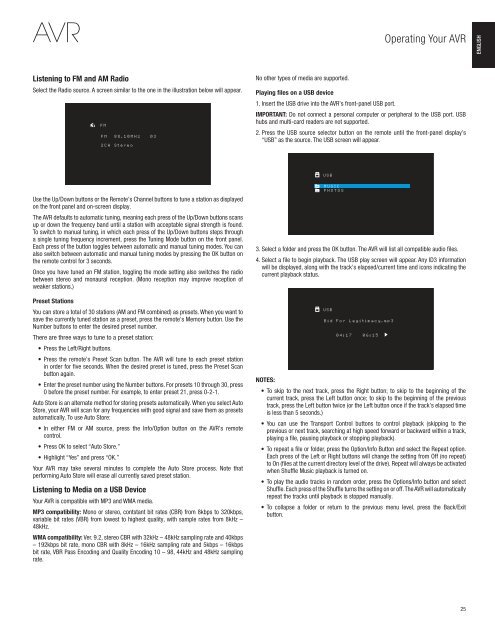
Listening to FM and AM Radio<br />
Select the Radio source. A screen similar to the one in the illustration below will appear.<br />
No other types of media are supported.<br />
Playing files on a USB device<br />
1. Insert the USB drive into the AVR’s front-panel USB port.<br />
IMPORTANT: Do not connect a personal computer or peripheral to the USB port. USB<br />
hubs and multi-card readers are not supported.<br />
2. Press the USB source selector button on the remote until the front-panel display’s<br />
“USB” as the source. The USB screen will appear.<br />
Use the Up/Down buttons or the Remote’s Channel buttons to tune a station as displayed<br />
on the front panel and on-screen display.<br />
The AVR defaults to automatic tuning, meaning each press of the Up/Down buttons scans<br />
up or down the frequency band until a station with acceptable signal strength is found.<br />
To switch to manual tuning, in which each press of the Up/Down buttons steps through<br />
a single tuning frequency increment, press the Tuning Mode button on the front panel.<br />
Each press of the button toggles between automatic and manual tuning modes. You can<br />
also switch between automatic and manual tuning modes by pressing the OK button on<br />
the remote control for 3 seconds.<br />
Once you have tuned an FM station, toggling the mode setting also switches the radio<br />
between stereo and monaural reception. (Mono reception may improve reception of<br />
weaker stations.)<br />
Preset Stations<br />
You can store a total of 30 stations (AM and FM combined) as presets. When you want to<br />
save the currently tuned station as a preset, press the remote’s Memory button. Use the<br />
Number buttons to enter the desired preset number.<br />
There are three ways to tune to a preset station:<br />
Press the Left/Right buttons.<br />
Press the remote’s Preset Scan button. The AVR will tune to each preset station<br />
in order for five seconds. When the desired preset is tuned, press the Preset Scan<br />
button again.<br />
Enter the preset number using the Number buttons. For presets 10 through 30, press<br />
0 before the preset number. For example, to enter preset 21, press 0-2-1.<br />
Auto Store is an alternate method for storing presets automatically. When you select Auto<br />
Store, your AVR will scan for any frequencies with good signal and save them as presets<br />
automatically. To use Auto Store:<br />
In either FM or AM source, press the Info/Option button on the AVR’s remote<br />
control.<br />
Press OK to select “Auto Store.”<br />
Highlight “Yes” and press “OK.”<br />
Your AVR may take several minutes to complete the Auto Store process. Note that<br />
performing Auto Store will erase all currently saved preset station.<br />
Listening to Media on a USB Device<br />
Your AVR is compatible with MP3 and WMA media.<br />
MP3 compatibility: Mono or stereo, contstant bit rates (CBR) from 8kbps to 320kbps,<br />
variable bit rates (VBR) from lowest to highest quality, with sample rates from 8kHz –<br />
48kHz.<br />
WMA compatibility: Ver. 9.2, stereo CBR with 32kHz – 48kHz sampling rate and 40kbps<br />
– 192kbps bit rate, mono CBR with 8kHz – 16kHz sampling rate and 5kbps – 16kbps<br />
bit rate, VBR Pass Encoding and Quality Encoding 10 – 98, 44kHz and 48kHz sampling<br />
rate.<br />
3. Select a folder and press the OK button. The AVR will list all compatible audio files.<br />
4. Select a file to begin playback. The USB play screen will appear. Any ID3 information<br />
will be displayed, along with the track’s elapsed/current time and icons indicating the<br />
current playback status.<br />
NOTES:<br />
To skip to the next track, press the Right button; to skip to the beginning of the<br />
current track, press the Left button once; to skip to the beginning of the previous<br />
track, press the Left button twice (or the Left button once if the track’s elapsed time<br />
is less than 5 seconds.)<br />
You can use the Transport Control buttons to control playback (skipping to the<br />
previous or next track, searching at high speed forward or backward within a track,<br />
playing a file, pausing playback or stopping playback).<br />
To repeat a file or folder, press the Option/Info Button and select the Repeat option.<br />
Each press of the Left or Right buttons will change the setting from Off (no repeat)<br />
to On (files at the current directory level of the drive). Repeat will always be activated<br />
when Shuffle Music playback is turned on.<br />
To play the audio tracks in random order, press the Options/Info button and select<br />
Shuffle. Each press of the Shuffle turns the setting on or off. The AVR will automatically<br />
repeat the tracks until playback is stopped manually.<br />
To collapse a folder or return to the previous menu level, press the Back/Exit<br />
button.<br />
25


