Pilatus PC-21 Depron-Version - HT-Modellbau
Pilatus PC-21 Depron-Version - HT-Modellbau
Pilatus PC-21 Depron-Version - HT-Modellbau

Create successful ePaper yourself
Turn your PDF publications into a flip-book with our unique Google optimized e-Paper software.
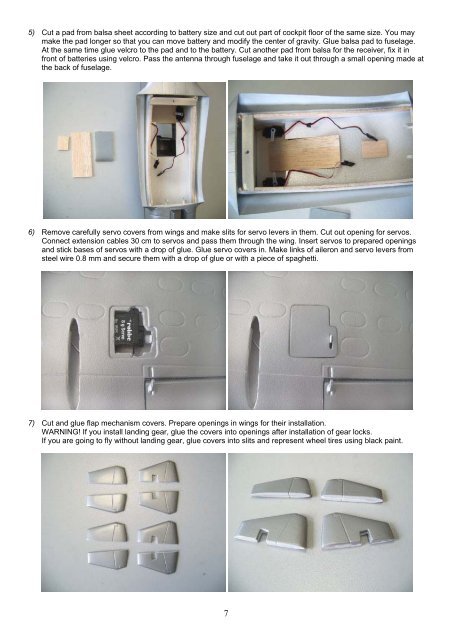
5) Cut a pad from balsa sheet according to battery size and cut out part of cockpit floor of the same size. You may<br />
make the pad longer so that you can move battery and modify the center of gravity. Glue balsa pad to fuselage.<br />
At the same time glue velcro to the pad and to the battery. Cut another pad from balsa for the receiver, fix it in<br />
front of batteries using velcro. Pass the antenna through fuselage and take it out through a small opening made at<br />
the back of fuselage.<br />
6) Remove carefully servo covers from wings and make slits for servo levers in them. Cut out opening for servos.<br />
Connect extension cables 30 cm to servos and pass them through the wing. Insert servos to prepared openings<br />
and stick bases of servos with a drop of glue. Glue servo covers in. Make links of aileron and servo levers from<br />
steel wire 0.8 mm and secure them with a drop of glue or with a piece of spaghetti.<br />
7) Cut and glue flap mechanism covers. Prepare openings in wings for their installation.<br />
WARNING! If you install landing gear, glue the covers into openings after installation of gear locks.<br />
If you are going to fly without landing gear, glue covers into slits and represent wheel tires using black paint.<br />
7