Pilatus PC-21 Depron-Version - HT-Modellbau
Pilatus PC-21 Depron-Version - HT-Modellbau
Pilatus PC-21 Depron-Version - HT-Modellbau

Create successful ePaper yourself
Turn your PDF publications into a flip-book with our unique Google optimized e-Paper software.
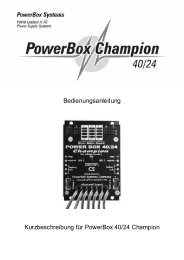
9) Assemble the spinner, propeller and install it. You can glue front part of the spinner or fix it with two screws.<br />
10) Deflections setting - ailerons can have slightly negative angle in basic position, max. 1 mm. Elevator slightly up at<br />
basic position, cca 1 mm.<br />
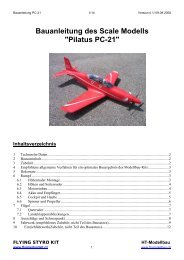
11) Insert batteries, install wing and verify correct position of the center of gravity. Modify it using batteries movement.<br />
67 - 72 mm from center leading edge at fuselage. Fix the wing with a plastic screw when connectors from<br />
receiver to aileron servos are connected. Be aware of a reaction moment of propeller when you launch model<br />
from the hand. It causes model tilting to left. Do not decrease throttle rapidly, make landing maneuver with<br />
running motor.<br />
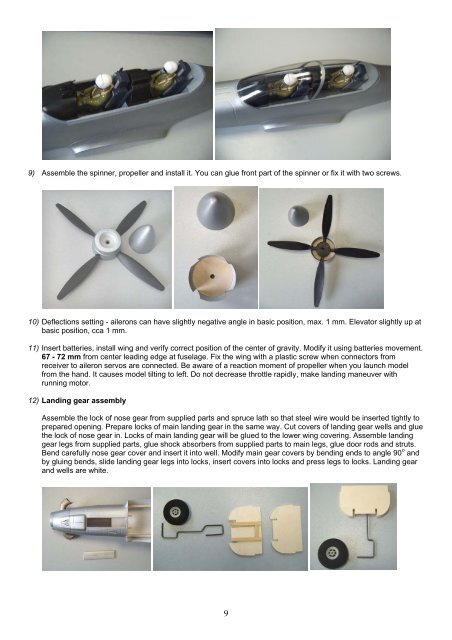
12) Landing gear assembly<br />
Assemble the lock of nose gear from supplied parts and spruce lath so that steel wire would be inserted tightly to<br />
prepared opening. Prepare locks of main landing gear in the same way. Cut covers of landing gear wells and glue<br />
the lock of nose gear in. Locks of main landing gear will be glued to the lower wing covering. Assemble landing<br />
gear legs from supplied parts, glue shock absorbers from supplied parts to main legs, glue door rods and struts.<br />
Bend carefully nose gear cover and insert it into well. Modify main gear covers by bending ends to angle 90 o and<br />
by gluing bends, slide landing gear legs into locks, insert covers into locks and press legs to locks. Landing gear<br />
and wells are white.<br />
9