

1992-1996 Dodge Viper RT/10 - Paxton Superchargers
1992-1996 Dodge Viper RT/10 - Paxton Superchargers
1992-1996 Dodge Viper RT/10 - Paxton Superchargers

Create successful ePaper yourself
Turn your PDF publications into a flip-book with our unique Google optimized e-Paper software.
Section 4<br />
CRANK PULLEY INSTALLATION<br />
4. CRANK PULLEY INSTALLATION<br />
A. Remove the harmonic damper retaining<br />
screw. Placing the vehicle in first gear with<br />
the emergency brake applied should keep<br />
the engine from turning over.<br />
B. Dowel pins must be installed through the<br />
damper and into the crankshaft to assure that<br />
the damper does not rotate on the crankshaft<br />
snout during engine operation.<br />
C. Install the supplied drill guide onto the<br />
damper using two of the screws that held the<br />
crankshaft pulley on. Orient the damper so<br />
that the hardened drill insert is rotated to be<br />
as high as possible.<br />
D. Using a right angle drill and the supplied<br />
#31 (.120") drill bit, drill into the damper<br />
face at least 1-1/4". (See Fig. 4-a.)<br />
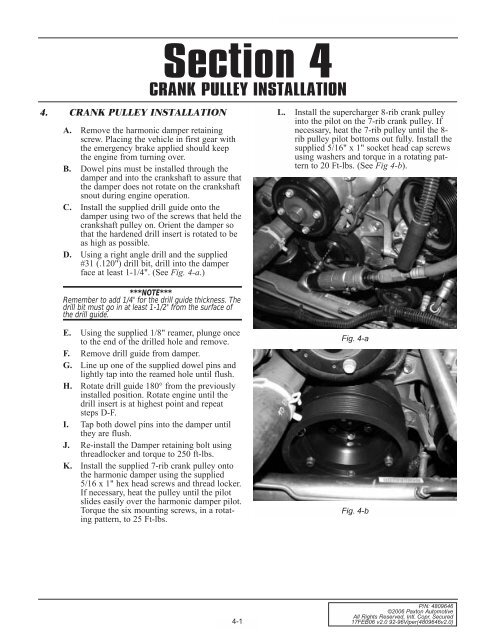
L. Install the supercharger 8-rib crank pulley<br />
into the pilot on the 7-rib crank pulley. If<br />
necessary, heat the 7-rib pulley until the 8-<br />
rib pulley pilot bottoms out fully. Install the<br />
supplied 5/16" x 1" socket head cap screws<br />
using washers and torque in a rotating pattern<br />
to 20 Ft-lbs. (See Fig 4-b).<br />
***NOTE***<br />
Remember to add 1/4" for the drill guide thickness. The<br />
drill bit must go in at least 1-1/2" from the surface of<br />
the drill guide.<br />
E. Using the supplied 1/8" reamer, plunge once<br />
to the end of the drilled hole and remove.<br />
F. Remove drill guide from damper.<br />
G. Line up one of the supplied dowel pins and<br />
lightly tap into the reamed hole until flush.<br />
H. Rotate drill guide 180° from the previously<br />
installed position. Rotate engine until the<br />
drill insert is at highest point and repeat<br />
steps D-F.<br />
I. Tap both dowel pins into the damper until<br />
they are flush.<br />
J. Re-install the Damper retaining bolt using<br />
threadlocker and torque to 250 ft-lbs.<br />
K. Install the supplied 7-rib crank pulley onto<br />
the harmonic damper using the supplied<br />
5/16 x 1" hex head screws and thread locker.<br />
If necessary, heat the pulley until the pilot<br />
slides easily over the harmonic damper pilot.<br />
Torque the six mounting screws, in a rotating<br />
pattern, to 25 Ft-lbs.<br />
Fig. 4-a<br />
Fig. 4-b<br />
4-1<br />
P/N: 4809646<br />
©2006 <strong>Paxton</strong> Automotive<br />
All Rights Reserved, Intl. Copr. Secured<br />
17FEB06 v2.0 92-96<strong>Viper</strong>(4809646v2.0)


