
Create successful ePaper yourself
Turn your PDF publications into a flip-book with our unique Google optimized e-Paper software.
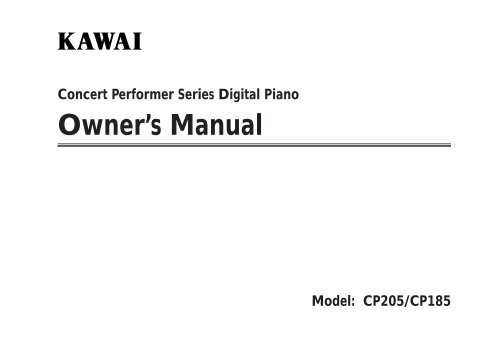
Concert Performer Series Digital Piano<br />
Owner’s Manual<br />
Model: CP205/CP185
All descriptions and specifications in this <strong>manual</strong> are subject to change without notice.<br />
II
Important Safety Instructions<br />
SAVE THESE INSTRUCTIONS<br />
INSTRUCTIONS PERTAINING TO A RISK OF FIRE, ELECTRIC SHOCK, OR INJURY TO PERSONS<br />
CAUTION<br />
RISK OF ELECTRIC SHOCK<br />
DO NOT OPEN<br />
AVIS : RISQUE DE CHOC ELECTRIQUE - NE PAS OUVRIR.<br />
TO REDUCE THE RISK OF ELECTRIC SHOCK, DO NOT REMOVE COVER (OR BACK).<br />
NO USER-SERVICEABLE PARTS INSIDE. REFER SERVICING TO QUALIFIED SERVICE PERSONNEL.<br />
The lighting flash with arrowhead symbol, within<br />
an equilateral triangle, is intended to alert the user<br />
to the presence of uninsulated "dangerous voltage"<br />
within the product's enclosure that may be of<br />
sufficient magnitude to constitute a risk of electric<br />
shock to persons.<br />
WARNING<br />
TO REDUCE THE RISK OF<br />
FIRE OR ELECTRIC<br />
SHOCK, DO NOT EXPOSE<br />
THIS PRODUCT TO RAIN<br />
OR MOISTURE.<br />
The exclamation point within an equilateral triangle<br />
is intended to alert the user to the presence of<br />
important operating and maintenance (servicing)<br />
instructions in the leterature accompanying the<br />
product.<br />
Examples of Picture Symbols<br />
denotes that care should be taken.<br />
The example instructs the user to take care<br />
not to allow fingers to be trapped.<br />
denotes a prohibited operation.<br />
The example instructs that disassembly of<br />
the product is prohibited.<br />
denotes an operation that should be<br />
carried out.<br />
The example instructs the user to remove the<br />
power cord plug from the AC outlet.<br />
Read all the instructions before using the product.<br />
WARNING - When using electric products, basic precautions should always be followed, including the following.<br />
Indicates a potential hazard that could result in death<br />
or serious injury if the product is handled incorrectly.<br />
WARNING<br />
Do not use this product near water - for example, near a bathtub,<br />
washbowl, kitchen sink, in a wet basement, or near a swimming<br />
pool, or the like.<br />
Do not touch the power plug with wet<br />
hands. There is a risk of electrical shock.<br />
Treat the power cord with care as well.<br />
Stepping on or tripping over it can break<br />
or short-circuit the wire inside.<br />
Pulling the AC power cord itself may damage<br />
the cord, causing a fire, electric shock or<br />
short-circuit.<br />
When disconnecting the AC power cord's plug,<br />
always hold the plug and pull it to remove it.<br />
The product should be connected to a<br />
power supply only of the type described<br />
in the operatiing instructions or as<br />
marked on the product.<br />
120V<br />
230V<br />
240V<br />
Do not attempt to service the product beyond that<br />
described in the user-maintenance instructions. All<br />
other servicing should be reffered to qualified<br />
service personnel.<br />
III
This product in combination with an amplifier<br />
and headphones or speakers, may be capable<br />
or producing sound level that could cause<br />
permanent hearing loss. Do not operate for a<br />
long period of time at a high volume level or at<br />
a level that is uncomfortable. If you experience<br />
any hearing loss or ringing in the ear, you<br />
should consult an audiologist.<br />
This product may be equipped with a polarized<br />
line plug (one blade wider than the other). This<br />
is a safety feature.<br />
If you are unable to insert the plug into the<br />
outlet, contact an electrician to replace your<br />
obsolete outlet.<br />
Do not defeat the safety purpose of the plug.<br />
CAUTION<br />
Indicates a potential hazard that could result in injury or damage to<br />
the product or other property if the product is handled incorrectly.<br />
Do not use the product in the following areas.<br />
● Areas, such as those near windows, where the product is<br />
exposed to direct sunlight<br />
● Extremely hot areas, or close to heat sources such as<br />
radiators, heat registers, or other products that produce heat.<br />
● Extremely cold areas, such as outside<br />
● Extremely humid areas<br />
● Areas where a large amount of sand or dust is present<br />
● Areas where the product is exposed to excessive vibrations<br />
Using the product in such areas may result in product<br />
breakdown.<br />
Always turn the power off when the instrument is not in<br />
use. The product is not completely disconnected from<br />
the power supply even when the power switch is<br />
turned off. The power supply cord of the product<br />
should be unplugged from the outlet when left unused<br />
for a long period of time.<br />
OFF<br />
The product should be located so that its location or position<br />
does not interfere with its proper ventilation.<br />
Keep the instrument away from electrical<br />
motors, neon signs, fluorescent light<br />
fixture, and other sources of electrical<br />
noises.<br />
Care should be taken so that objects do not<br />
fall and liquids are not spilled into the<br />
enclosure through openings. The product shall<br />
not be exposed to dripping or splashing. No<br />
objects filled with liquids, such as vases, shall be<br />
placed on the product.<br />
When connecting the AC power cord and<br />
other cords, take care not to get them tangled.<br />
Failure to do so may damage them, resulting<br />
in fire, electric shock or short-circuit.<br />
Before connecting cords, make sure that<br />
the power to this product and other devices<br />
is turned OFF.<br />
Failure to do so may cause breakdown of<br />
this product and other devices.<br />
OFF<br />
Take care not to drop the product.<br />
Please note that the product is heavy and<br />
must be handled by more than one person.<br />
Dropping the product may result in<br />
breakdown.<br />
Do not stand on the product or exert<br />
excessive force.<br />
Doing so may cause the product to become<br />
deformed or fall over, resulting in breakdown<br />
or injury.<br />
Do not lean against the product.<br />
Doing so may cause the product to move<br />
unexpectedly, resulting in injury.<br />
IV
Do not wipe the product with benzene or thinner.<br />
Doing so may result in discoloration or deformation of<br />
the product.<br />
When cleaning the product, put a soft cloth in<br />
lukewarm water, squeeze it well, then wipe the<br />
product.<br />
To reduce the risk of injury, close supervision is necessary<br />
when a product is used near children.<br />
Close the topboard when the instrument is not in use.<br />
The product should be serviced by qualified service personnel<br />
when:<br />
● The power supply cord or the plug has been damaged.<br />
● Objects have fallen, or liquid has been spilled into the product.<br />
● The product has been exposed to rain.<br />
● The product does not appear to operate normally or exhibits a<br />
marked change in performance.<br />
● The product has been dropped, or the enclosure damaged.<br />
Should an abnormality occur in the product, immediately turn<br />
the power OFF, disconnect the power cord plug, and<br />
then contact the shop from which the product was purchased.<br />
CAUTION:<br />
To prevent electric shock, match wide blade of plug to wide slot, fully<br />
insert.<br />
ATTENTION:<br />
Pour viter les chocs lectriques, introduire la lame la plus large de<br />
la fiche dans la borne correspondante de la prise et pousser jusqu’au<br />
fond.<br />
Instruction for AC power cord (U.K.)<br />
Do not plug either terminal of the power cord to the ground of the AC<br />
outlet on the wall.<br />
FCC Information<br />
This equipment has been tested and found to comply with the limits for a Class B<br />
digital device, pursuant to Part 15 of the FCC Rules. These limits are designed to<br />
provide reasonable protection against harmful interference in a residential<br />
installation. This equipment generates, uses and can radiate radio frequency<br />
energy and, if not installed and used in accordance with the instructions, may<br />
cause harmful interference to radio communications.<br />
If this equipment does cause harmful interference to radio or television reception,<br />
which can be determined by turning the equipment off and on, the user is<br />
encouraged to try to correct the interference by one or more of the following<br />
measures:<br />
¥ Reorient or relocate the receiving antenna.<br />
¥ Increase the separation between the equipment and receiver.<br />
¥ Connect the equipment into an outlet on a different electrical circuit from the<br />
receiver.<br />
¥ Consult the dealer or an experienced radio/TV technician for help.<br />
Canadian Radio Interference Regulations<br />
This instrument complies with the limits for a class B digital apparatus, pursuant to<br />
the Radio Interference<br />
Regulations, C.R.C., c. 1374.<br />
V
VI<br />
Introduction<br />
Thank you for purchasing the <strong>Kawai</strong> Concert Performer<br />
(CP) Series Ensemble Digital Piano.<br />
The CP Series piano has been designed to provide you with<br />
the ultimate musical experience, no matter your skill level.<br />
Featuring superbly realistic instrument tones and the most finely<br />
crafted keyboard in its class, the CP is a unique musical instrument<br />
resulting from the combination of <strong>Kawai</strong>’s seventy-plus years<br />
experience in making acoustic pianos along with cutting-edge<br />
digital music technologies.<br />
With over 900 different instrument and drum sounds at your<br />
disposal, you will have the flexibility to perform any kind of music<br />
ranging from traditional to contemporary. The Auto-<br />
Accompaniment Styles provides the enjoyment of playing rich,<br />
fully orchestrated music in hundreds of musical genres. Thanks<br />
to the Song Stylist feature, you will never have to worry about<br />
finding the best sounds and style to perform a particular song.<br />
The Concert Performer incorporates many professional<br />
features, such as a 16-track Recorder, Microphone Input, and a<br />
3.5-inch Floppy Disk Drive. For the non-player, <strong>Kawai</strong>’s unique<br />
Concert Magic feature creates the thrill of being a performing<br />
musician simply by tapping any key on the keyboard.<br />
Finally, the CP205 is the world’s first ensemble piano with<br />
a CD-R drive, allowing anyone to make their own audio CD<br />
recordings right on the instrument. The Concert Performer offers<br />
tremendous opportunities for anyone who is interested in learning,<br />
playing, and listening to music. Please read this <strong>manual</strong><br />
thoroughly and keep it handy as a reference so that you can get<br />
the most out of this incredible instrument.<br />
We hope you enjoy every moment that you spend with your<br />
Concert Performer.<br />
Table of Contents<br />
Parts and Names . . . . . . . . . . . . . . . . . . . . . . . . . . . . . 2<br />
Overview<br />
LCD Screen . . . . . . . . . . . . . . . . . . . . . . . . . . . . . . . 6<br />
Select Buttons . . . . . . . . . . . . . . . . . . . . . . . . . . . . . . 6<br />
Dial . . . . . . . . . . . . . . . . . . . . . . . . . . . . . . . . . . . . . . 8<br />
Basic Controls<br />
Selecting a Part to Play . . . . . . . . . . . . . . . . . . . . . 9<br />
Splitting the keyboard. . . . . . . . . . . . . . . . . . . . . . 10<br />
Selecting Sounds . . . . . . . . . . . . . . . . . . . . . . . . . 11<br />
Mixer . . . . . . . . . . . . . . . . . . . . . . . . . . . . . . . . . . 13<br />
Effects . . . . . . . . . . . . . . . . . . . . . . . . . . . . . . . . . . 15<br />
Effect Types . . . . . . . . . . . . . . . . . . . . . . . . . . . . . . 19<br />
Effect Priority Guidelines . . . . . . . . . . . . . . . . . . . 20<br />
Transpose and Octave Shift . . . . . . . . . . . . . . . . 22<br />
Metronome . . . . . . . . . . . . . . . . . . . . . . . . . . . . . . 24<br />
Piano Only . . . . . . . . . . . . . . . . . . . . . . . . . . . . . . 25<br />
Using a Style<br />
Selecting and Playing a Style . . . . . . . . . . . . . . . 26<br />
Fill-In and Variation . . . . . . . . . . . . . . . . . . . . . . . 28<br />
Auto Accompaniment System . . . . . . . . . . . . . . . 28<br />
Bass Inversion . . . . . . . . . . . . . . . . . . . . . . . . . . . . 29<br />
1-2 Play . . . . . . . . . . . . . . . . . . . . . . . . . . . . . . . . 30<br />
Registration . . . . . . . . . . . . . . . . . . . . . . . . . . . . . 31<br />
Registration Groups . . . . . . . . . . . . . . . . . . . . . . . 31<br />
Style Lock . . . . . . . . . . . . . . . . . . . . . . . . . . . . . . . . 35<br />
Song Stylist . . . . . . . . . . . . . . . . . . . . . . . . . . . . . 36<br />
Harmony . . . . . . . . . . . . . . . . . . . . . . . . . . . . . . . 40<br />
Recording a Song<br />
Easy Recording . . . . . . . . . . . . . . . . . . . . . . . . . . 42<br />
Part Status . . . . . . . . . . . . . . . . . . . . . . . . . . . . . . . 44<br />
Saving the song . . . . . . . . . . . . . . . . . . . . . . . . . . . 45<br />
Erasing the song . . . . . . . . . . . . . . . . . . . . . . . . . . 45<br />
Advanced Recording . . . . . . . . . . . . . . . . . . . . . . 47<br />
Real-time Recording . . . . . . . . . . . . . . . . . . . . . . . 48<br />
Mixer . . . . . . . . . . . . . . . . . . . . . . . . . . . . . . . . . . . 49<br />
Track Settings . . . . . . . . . . . . . . . . . . . . . . . . . . . . 51<br />
<strong>Kawai</strong> Concert Performer Series Digital Piano
Loop Settings . . . . . . . . . . . . . . . . . . . . . . . . . . . . . 52<br />
Style Paste . . . . . . . . . . . . . . . . . . . . . . . . . . . . . . . 53<br />
Punch-In Recording . . . . . . . . . . . . . . . . . . . . . . . 54<br />
Step Recording . . . . . . . . . . . . . . . . . . . . . . . . . . . . 57<br />
Song Edit . . . . . . . . . . . . . . . . . . . . . . . . . . . . . . . . 60<br />
Bar Editing . . . . . . . . . . . . . . . . . . . . . . . . . . . . . . 61<br />
Event Edit . . . . . . . . . . . . . . . . . . . . . . . . . . . . . . . 74<br />
Creating Your Own Styles<br />
Conductor . . . . . . . . . . . . . . . . . . . . . . . . . . . . . . 76<br />
Making a New Style . . . . . . . . . . . . . . . . . . . . . . . 82<br />
Auto-accompaniment System . . . . . . . . . . . . . . . . 86<br />
Making a Style with Phrase Combination . . . . . 89<br />
Style Convert . . . . . . . . . . . . . . . . . . . . . . . . . . . . 92<br />
Editing Sounds<br />
Editing the Preset Effect Settings . . . . . . . . . . . . 96<br />
Making a User Sound . . . . . . . . . . . . . . . . . . . . . 98<br />
Playing Songs from a Floppy Disk<br />
About songs on Floppy Disk . . . . . . . . . . . . . . . 102<br />
Selecting a Song from Disk . . . . . . . . . . . . . . . . 103<br />
Controlling Playback of a Song . . . . . . . . . . . . . 105<br />
Playing with Concert Magic<br />
Selecting a Concert Magic Song . . . . . . . . . . . . 108<br />
Performing a Concert Magic Song . . . . . . . . . . 109<br />
Concert Magic Song Arrangements . . . . . . . . . . 113<br />
Creating a Concert Magic Song . . . . . . . . . . . . 114<br />
System Menu . . . . . . . . . . . . . . . . . . . . . . . . . . . . . . 116<br />
Tuning . . . . . . . . . . . . . . . . . . . . . . . . . . . . . . . . . 118<br />
Touch Curve . . . . . . . . . . . . . . . . . . . . . . . . . . . . . 119<br />
System EQ . . . . . . . . . . . . . . . . . . . . . . . . . . . . . . 122<br />
Virtual Voicing . . . . . . . . . . . . . . . . . . . . . . . . . . 124<br />
Resonance . . . . . . . . . . . . . . . . . . . . . . . . . . . . . . 125<br />
Concert Magic Sound . . . . . . . . . . . . . . . . . . . . . 126<br />
Pedal Assign . . . . . . . . . . . . . . . . . . . . . . . . . . . . . 127<br />
Fill-in Mode . . . . . . . . . . . . . . . . . . . . . . . . . . . . . 130<br />
Solo Settings . . . . . . . . . . . . . . . . . . . . . . . . . . . . . 131<br />
Video Out . . . . . . . . . . . . . . . . . . . . . . . . . . . . . . . 132<br />
Effect for Sound . . . . . . . . . . . . . . . . . . . . . . . . . . 133<br />
Temperament . . . . . . . . . . . . . . . . . . . . . . . . . . . . 134<br />
MIDI Menu . . . . . . . . . . . . . . . . . . . . . . . . . . . . . . 138<br />
Power Up Settings . . . . . . . . . . . . . . . . . . . . . . . . 143<br />
Soft Reset . . . . . . . . . . . . . . . . . . . . . . . . . . . . . . . 144<br />
Software Version . . . . . . . . . . . . . . . . . . . . . . . . . 145<br />
Display Control . . . . . . . . . . . . . . . . . . . . . . . . . 146<br />
Mic Harmony and Effect<br />
Mic Harmony . . . . . . . . . . . . . . . . . . . . . . . . . . . 148<br />
About Mic Harmonis . . . . . . . . . . . . . . . . . . . . . . 150<br />
Mic Effect . . . . . . . . . . . . . . . . . . . . . . . . . . . . . . 152<br />
Floppy Disk Operations<br />
Disk Menu . . . . . . . . . . . . . . . . . . . . . . . . . . . . . 156<br />
Saving Data to a Floppy Disk . . . . . . . . . . . . . . 157<br />
Loading Data from a Floppy Disk . . . . . . . . . . 160<br />
Erasing Data from a Floppy Disk . . . . . . . . . . . 163<br />
Formatting a Floppy Disk . . . . . . . . . . . . . . . . . 164<br />
CD-R Operations (CP205 only) . . . . . . . . . . . . . . . . 166<br />
Playing an audio CD . . . . . . . . . . . . . . . . . . . . . 167<br />
Recording onto a CD . . . . . . . . . . . . . . . . . . . . . 169<br />
Closin (Finalizing) Your CD . . . . . . . . . . . . . . 171<br />
Getting Assistance: Using Help and Demo<br />
Using the Help . . . . . . . . . . . . . . . . . . . . . . . . . . 172<br />
Using the Demonstrations . . . . . . . . . . . . . . . . . 174<br />
Playing Piano Music . . . . . . . . . . . . . . . . . . . . . . . . 177<br />
Appendices<br />
List of Preset Sound . . . . . . . . . . . . . . . . . . . . . . 180<br />
List of Style . . . . . . . . . . . . . . . . . . . . . . . . . . . . . 185<br />
List of Song Stylist . . . . . . . . . . . . . . . . . . . . . . . 187<br />
Concert Magic Songs . . . . . . . . . . . . . . . . . . . . . 192<br />
Table of Chord Form . . . . . . . . . . . . . . . . . . . . . 196<br />
Example of Connection . . . . . . . . . . . . . . . . . . . 198<br />
USB . . . . . . . . . . . . . . . . . . . . . . . . . . . . . . . . . . . 200<br />
MIDI Data Format . . . . . . . . . . . . . . . . . . . . . . . 201<br />
MIDI Implementation Chart . . . . . . . . . . . . . . . 206<br />
Specifications . . . . . . . . . . . . . . . . . . . . . . . . . . 207<br />
Introduction<br />
VII
Parts and Names<br />
2 3<br />
VOLUME<br />
MASTER ACCOMP/SONG<br />
4<br />
SPECIAL<br />
DEMO<br />
5<br />
CONCERT<br />
MAGIC<br />
1<br />
6<br />
SONG<br />
STYLIST<br />
7<br />
PIANO<br />
MUSIC<br />
1. Power<br />
Turns the piano on/off.<br />
2. Master Volume Slider<br />
This slider is used to adjust the overall volume level of the instrument.<br />
3. Accomp/Song Volume Slider<br />
This slider is used to adjust the volume level of the Auto Accompaniment Styles.<br />
Also used to adjust the volume level of a song played from the CP Recorder or directly<br />
from a floppy disk. This slider does not affect the Master Volume Slider setting.<br />
4. Demo (page 174)<br />
This button is used to select the built-in demo songs and function demos which<br />
explain important features of the CP piano.<br />
5. Concert Magic (page 108)<br />
This button is used to select the built-in Concert Magic songs.<br />
6. Song Stylist (page 36)<br />
This button is used to select the Song Stylist Registrations.<br />
7. Piano Music (page 177)<br />
This button is used to select the built-in piano music.<br />
8. Style Conductor (page 76)<br />
These buttons are used to modify or create your own Accompaniment Styles.<br />
P. 2<br />
12<br />
13<br />
8<br />
9<br />
22<br />
CONDUCTOR<br />
EDIT<br />
SWING &<br />
BIG BAND<br />
50’S &<br />
60’S<br />
POP &<br />
ROCK<br />
STYLE<br />
BALLAD COUNTRY<br />
BLUES &<br />
GOSPEL<br />
JAZZ &<br />
CONTEMP LATIN ISLAND<br />
&<br />
RESET<br />
CLASSIC<br />
PIANO<br />
INTIMATE<br />
PIANO<br />
SOLO<br />
PIANO<br />
KIDS &<br />
HOLIDAY<br />
TRADI-<br />
TIONAL<br />
WALTZ<br />
BROADWAY<br />
USER<br />
USER<br />
ACC ON/OFF<br />
BASS<br />
INVER<br />
ACCOMPANIMENT<br />
FULL<br />
KBD FINGERED<br />
ONE<br />
FINGER<br />
1-2<br />
PLAY<br />
11<br />
METRONOME<br />
TAP TEMPO<br />
10<br />
SYNC /<br />
FADE OUT<br />
BEAT<br />
START/<br />
STOP<br />
14 15<br />
INTRO/ENDING<br />
1 2<br />
16<br />
FILL IN<br />
1 2 3<br />
VARIATION<br />
1 2 3<br />
4<br />
4<br />
17<br />
18<br />
HELP<br />
19<br />
EXIT<br />
20<br />
9. Style (page 26)<br />
These buttons are used to select an Accompaniment Style to play along with.<br />
10. Accompaniment (page 28)<br />
These buttons are used to turn the Auto-Accompaniment function on/off, and select<br />
the Auto-Accompaniment mode.<br />
11. 1-2 Play (page 30)<br />
This button is used to automatically choose an appropriate sound and setup for the<br />
selected style.<br />
12. Metronome (page 24)<br />
This button is used to turn the Metronome on/off.<br />
13. Tap (page 24, 26)<br />
This button is used to tap in the desired tempo for a song or Style.<br />
14. Sync/Fade out (page 27)<br />
When active, the accompaniment style will start as soon as you play a note or chord<br />
on the keyboard. Press this button while a Style is playing to fade in or out of the<br />
Style.<br />
15. Start/Stop (page 27)<br />
This button is used to start and stop the accompaniment style.<br />
<strong>Kawai</strong> Concert Performer Series Digital Piano
22<br />
25<br />
29<br />
42<br />
21<br />
26<br />
DISPLAY<br />
CONTROL<br />
TEMPO / VALUE<br />
SOUND<br />
PIANO FEATURE VOCAL DRAWBAR ORGAN STRING<br />
HARPSI &<br />
MALLET<br />
GUITAR<br />
BASS<br />
PAD &<br />
SYNTH<br />
SPECIALTY<br />
DRUM<br />
PART<br />
LEFT/<br />
SPLIT 2 RIGHT 1 SOLO PORTAMENTO<br />
WOOD-<br />
WIND<br />
SFX<br />
PIANO<br />
ONLY<br />
BRASS<br />
USER<br />
33<br />
34<br />
35<br />
REVERB<br />
CHORUS<br />
EFFECT<br />
37 38 39 40<br />
22<br />
SAVE<br />
REGIST<br />
23<br />
REGIST<br />
GROUPS<br />
24<br />
27<br />
28<br />
TRANSPOSE<br />
OCTAVE SHIFT<br />
30<br />
REGISTRATION<br />
1 2 3 4 5 6 7 8<br />
32<br />
31<br />
36<br />
STYLE LOCK<br />
HARMONY<br />
MIC<br />
HARMONY EFFECT<br />
ADVANCED<br />
RECORDER<br />
SYSTEM<br />
MEDIA<br />
DISK<br />
RECORDER<br />
RESET REC PLAY/STOP RWD FWD<br />
41<br />
CD<br />
16. Intro/Ending (page 27)<br />
These buttons are used to play an intro section that leads into the style. If you press<br />
this button while the stye is playing an ending section will be played before stopping.<br />
17. Fill-in (page 28)<br />
These buttons are used to select one of the four short fill-in sections that embellish<br />
the style and lead into the different variation sections of the Style.<br />
18. Variation (page 28)<br />
These buttons are used to select one of the four variation sections within the chosen<br />
Style.<br />
19. Help (page 172)<br />
These buttons are used to access Help menus which contain explanations of the CP<br />
piano’s features.<br />
20. Exit<br />
This button is used to back up to the next-higher screen level. Repeatedly pressing<br />
the Exit button from any screen on the CP will bring you back to the CP’s main play<br />
screen.<br />
21. LCD Screen<br />
Displays information about the CP’s current sound selections, settings, options, etc.<br />
22. Select Buttons<br />
These buttons are used to select items displayed on the LCD screen.<br />
23. Save Regist<br />
This button is used to save up to 160 of your own favorite panel settings.<br />
24. Regist Groups (page 31)<br />
This button is used to select one of the 20 groups of preset and user sound<br />
registrations.<br />
25. Display Control (page 146)<br />
This button is used to access and adjust settings for the LCD screen.<br />
26. Tempo/Value Dial (page 8)<br />
This dial is used to adjust tempo, scroll through different selections, and adjust data<br />
values for items on the LCD screen.<br />
27. Transpose (page 22)<br />
This button is used to change the overall pitch of the CP in half-note steps.<br />
28. Octave Shift (page 22)<br />
These buttons are used to change the overall pitch of the CP in octave steps.<br />
29. Sound Selection (page 11)<br />
These buttons are used to select the desired sound category. Use the SELECT buttons<br />
or the DIAL to select a sound within the category.<br />
30. Part (page 9)<br />
Selects which of the four parts (Left/Split, Right 1, Right 2, Solo) are active andready<br />
to be played with the sounds assigned to them.<br />
Basic Controls P. 3
Pedals<br />
P. 4<br />
43 44 45<br />
31. Piano Only (page 25)<br />
This button is used to automatically assign the Concert Grand sound to the Right 1<br />
part.<br />
32. Registrations (page 31)<br />
These buttons are used to recall one of the eight panel settings available in the<br />
currently selected Registration group.<br />
33. Reverb (page 15)<br />
This button turns on/off the Reverb. Press and hold the button to select the Reverb<br />
settings menu.<br />
34. Chorus (page 16)<br />
This button turns on/off the Chorus. Press and hold the button to select the Chorus<br />
settings menu.<br />
35. Effects (page 18)<br />
This button turns on/off the Effects. Press and hold the button to select the Effect<br />
settings menu.<br />
36. Harmony (page 40)<br />
This button turns on/off the Harmony for the instrument sounds. Press and hold the<br />
button to select the Harmony settings menu.<br />
Front Terminals<br />
46 47 48<br />
37. MIC Harmony/Effect (page 148)<br />
This button turns on/off the MIC Harmony/Effect for the Microphone jack. Press<br />
and hold the button to select the MIC Harmony/Effect settings menu.<br />
38. Advanced Recorder (page 47)<br />
This button is used to access the Advanced Recorder functions.<br />
39. System (page 116)<br />
This button is used to access the system settings menu.<br />
40. Media Disk/CD (page 102, 156, 166)<br />
These buttons are used to access the Floppy Disk functions and CD-R Drive functions<br />
(CP205 only).<br />
41. Recorder (page 42)<br />
Used to record and play back a song.<br />
42. Disk Drive<br />
Reads and writes data to a standard 3.5” floppy disk..<br />
43. Soft Pedal<br />
Depressing this pedal softens the sound and reduces its volume. This pedal can<br />
also be assigned to control other functions. (See page 127)<br />
<strong>Kawai</strong> Concert Performer Series Digital Piano
Rear Terminals<br />
49 50 51 52 53 54 55 56<br />
44. Sostenuto Pedal<br />
Depressing this pedal after playing the keyboard and before releasing the keys<br />
sustains the sound of only the keys just played. This pedal can also be assigned to<br />
control other functions. (See page 128)<br />
45. Sustain Pedal<br />
Sustains the sound after lifting your hands from the keyboard. The sustain pedal is<br />
capable of responding to half pedaling.<br />
46. Headphone Jacks<br />
These jacks are used to connect up to two headphones to the CP piano.<br />
47. Mic In Volume<br />
This knob adjusts volume level of the microphone input.<br />
48. Microphone Jack<br />
This jack is used to connect a microphone or other comparable mic-level sound<br />
source.<br />
49. EXP Pedal<br />
This jack is used to connect an optional expression pedal.<br />
50. Video Out<br />
This jack is used to connect the CP to a TV set or external monitor display.<br />
51. Line Out Jacks<br />
These jacks are used to provide stereo output of the CP’s sound to amplifiers, tape<br />
recorders or similar equipment. The audio signal coming through the LINE IN jacks<br />
is also routed to these jacks.<br />
52. Line In Jacks<br />
These jacks are used to connect stereo outputs from other audio equipment or<br />
electronic instruments to the CP’s speakers. The audio signal coming through these<br />
jacks bypasses the CP’s volume control.<br />
53. MIDI-USB Switch<br />
Switches between the MIDI jacks and USB jack.<br />
54. MIDI Jacks<br />
These jacks are used to connect external MIDI devices to the CP. Enabled only<br />
when the MIDI-USB switch is set to MIDI.<br />
55. USB Jacks<br />
This jack is used to connect a personal computer to the CP. Enabled only when the<br />
MIDI-USB switch is set to USB.<br />
56. Receptacle for Pedal Cable<br />
This jack is used to connect the cable from the pedal unit.<br />
Basic Controls P. 5
Overview<br />
This <strong>manual</strong> provides you with all the information you will need in<br />
order to take full advantage of the Concert Performer’s potential.<br />
Before you begin learning how to use the specific features, it is<br />
important to understand some of the basic ideas behind the<br />
instrument’s design.<br />
The Concert Performer has been designed to have an easy and<br />
intuitive user interface. However, the instrument has so many<br />
features that it is simply impractical to have a dedicated button for<br />
every single one. As a result, many features and functions are<br />
selected by choosing them from lists, or “menus”, that are presented<br />
to you on the CP’s large display screen. Often times selecting an<br />
item from a menu may access another “sub-menu” of options<br />
specific to that item. This system of menus and sub-menus keeps<br />
everything logical and straightforward and becoming familiar with<br />
how to make your way through them is very easy.<br />
LCD Screen<br />
The LCD Screen is the window through which the Concert Performer communicates with you. The<br />
large display size allows many items to be clearly displayed at the same time, allowing for not only<br />
words but graphics to be shown as well.<br />
Select Buttons<br />
Most of the buttons on the front panel are used to directly select a function on the CP that you<br />
would like to work with. In most cases, the specific function name is printed on the front panel<br />
directly above the button. For example, there are buttons labeled 1-2 PLAY, FILL-IN, and so on. In<br />
this <strong>manual</strong>, references to these buttons are always printed in capital letters for clarity. Most of<br />
these buttons have an LED Indicator (small light) on them. This Indicator will be turned ON when<br />
a function is in use so that you can quickly see if that function is active.<br />
There are 17 SELECT buttons surrounding the LCD screen that do not have labels printed next to<br />
them because they do not have predetermined functions. Instead, they are used to select whatever<br />
items are currently displayed next to them on the LCD screen. For example, a SELECT button<br />
might be used to select an instrument sound on one screen, while on another screen the same<br />
SELECT button might serve to activate a feature related to Floppy Disk or CD-R Drive operation.<br />
P. 6<br />
<strong>Kawai</strong> Concert Performer Series Digital Piano
To keep things simple, this <strong>manual</strong> will refer to the five SELECT buttons along the left side of the<br />
LCD screen as L1-L5. Likewise, the five SELECT buttons along the right side of the screen will be<br />
referred to as R1-R5. The seven SELECT buttons along the bottom of the screen, which are also<br />
known as function buttons, will be referred to as F1-F7.<br />
In some cases when you see an item displayed on the screen and press the L or R button next to it,<br />
that item on the screen will become highlighted (shown in reverse color) to indicate you have<br />
selected that item. Sometimes a submenu screen relating to that item will be displayed and present<br />
you with further options.<br />
When you press one of the F buttons, the corrosponding function on the LCD screen will be<br />
highlighted to indicate that it has been selected.<br />
L1<br />
L2<br />
Selects Style. Use the F2,F3<br />
buttons, Style buttons, or the Dial<br />
to change the active Style.<br />
Selects Tempo. Use the Dial or the<br />
TAP TEMPO button to change the<br />
Tempo<br />
L3 Selects the LEFT Part. Use the F6,<br />
F7buttons, Sound buttons, or the<br />
Dial to change the Sound.<br />
No functions are assigned to the L4 and L5<br />
buttons on this screen.<br />
HELP<br />
EXIT<br />
SAVE<br />
REGIST<br />
REGIST<br />
GROUPS<br />
R1<br />
R2<br />
Selects the SOLO Part. Use the F6, F7<br />
buttons, Sound buttons, or the Dial to<br />
change the Sound.<br />
Selects the RIGHT1 Part. Use the F6, F7<br />
buttons, Sound buttons, or the Dial to<br />
change the Sound.<br />
R3 Selects the RIGHT2 Part. Use the F6,<br />
F7buttons, Sound buttons, or the Dial to<br />
change the Sound.<br />
No functions are assigned to the R4 and R5<br />
buttons on this screen.<br />
F1 Takes you to the MIXER settings screen.<br />
F2, F3 Selects a Style.<br />
F4, F5 Adjusts the volume level for the Part currently selected.<br />
F6, F7 Selects a sound for the selected Part. "Sound" is highlighted<br />
to indicate this graphic button is active.<br />
"RIGHT1" is highlighted to indicate that this Part<br />
is now selected.<br />
Basic Controls P. 7
P. 8<br />
TEMPO / VALUE<br />
Dial<br />
The Dial is used to change data values and scroll through options that are displayed on the LCD<br />
screen.<br />
When you turn the Dial, you will notice that whatever item on the LCD screen is currently selected<br />
(highlighted) will be affected. Or in some cases when the screen presents you with a list of choices,<br />
turning the Dial will allow you to quickly scroll through the list until you arrive at your choice. It<br />
can also be used instead of the L, R, and F buttons as another way of selecting or changing an item<br />
or value on the LCD screen.<br />
<strong>Kawai</strong> Concert Performer Series Digital Piano
Basic Controls<br />
This chapter discusses the basic operations that are used to play<br />
the Concert Performer, such as sound selection, Part configuration<br />
and effect settings.<br />
Selecting a Part to Play<br />
When the CP’s main play screen is displayed (For example, when the CP is first turned on), you are<br />
presented with four sound Parts that can be played from the keyboard. These four Parts are named<br />
LEFT/SPLIT, RIGHT 1, RIGHT 2, and SOLO, and each one has an instrument sound assigned to it.<br />
You can selectively turn on/off any combination of these four Parts, allowing you to have up to four<br />
different sounds at the same time across the keyboard.<br />
Sounds assigned to Parts RIGHT 1, RIGHT 2 and SOLO will be layered on top of each other when all<br />
three Parts are active at the same time. Activating the LEFT/SPLIT Part automatically splits the<br />
keyboard so that only the sound that is assigned to the LEFT/SPLIT Part is heard when you play in<br />
the lower octave keys. Each Part has a dedicated button on the front panel that selects and turns<br />
on/off that Part. You can Also select a Part by pressing the appropriate L or R button.<br />
Selecting a Part is easy:<br />
1) Press the PART button for the Part you wish to activate. The PART button LED will light.<br />
2) Press the PART button again to turn that Part off.<br />
• If the LCD screen is currently showing the main play screen, you can tell which Parts are active<br />
by looking at the name of the sound assigned to it. If the name of a sound is in large typeface,<br />
then the Part it is assigned to is active. If the sound name is displayed in small typeface, then the<br />
Part is not active.<br />
L 1<br />
L 2<br />
L 3<br />
R 1<br />
R 2<br />
R 3<br />
This example indicates:<br />
RIGHT1 is currently active<br />
SOLO, RIGHT2, LEFT are inactive.<br />
L 4<br />
R 4<br />
Basic Controls P. 9
Splitting the keyboard.<br />
When the LEFT/SPLIT Part is activated, the CP automatically splits the keyboard and only the<br />
sound assigned to the LEFT/SPLIT Part will be heard when you play below a specified key (split<br />
point) on the keyboard. The default split point is between F2 and F#2 but you can freely change the<br />
split point to any key on the keyboard.<br />
To change the split point:<br />
1) Press the LEFT/SPLIT button to activate the LEFT/SPLIT Part. The LEFT/SPLIT button LED will light<br />
and the LCD screen will display a diagram of the CP’s 88 note keyboard.<br />
2) Press the LEFT/SPLIT button again, and while holding it down, press the desired key on the keyboard<br />
that you want to serve as the split point. The key you press will become the lowest note the Right<br />
hand Parts will play (RIGHT1, RIGHT2, and SOLO). The LEFT/SPLIT sound will be heard when keys<br />
below the split point are played.<br />
You may also use the L4 and R4 buttons to move the split point. On the LCD screen the split point<br />
marker will move across the 88 note keyboard diagram as you press these buttons.<br />
L 1<br />
R 1<br />
L 2<br />
R 2<br />
L 3<br />
R 3<br />
L4 Lowers the split point. L 4<br />
R 4 R4 Raises the split point.<br />
L 5<br />
R 5<br />
F 1 F 2 F 3 F 4 F 5 F 6 F 7<br />
• Moving the split point completely to the LEFT end of the keyboard will allow the LEFT/SPLIT<br />
Part to function as a layer with the three right hand Parts. In this manner you can create four<br />
part layered across the entire keyboard.<br />
P. 10<br />
<strong>Kawai</strong> Concert Performer Series Digital Piano
Portamento for the Solo Part<br />
The Solo Part is monophonic (only plays one note at a time) regardless of which sound is assigned<br />
to it. You can use Portamento on this Part. Portamento is a gradual slide in pitch from one note to<br />
the next, and is useful for adding very expressive qualities to many instruments.<br />
To use Portamento:<br />
1) Press the PORTAMENTO button. The PORTAMENTO button LED will light.<br />
2) Press the button again to turn Portamento off.<br />
You can adjust the Portamento Time, which determines how quickly the pitch will slide from one<br />
note to the next. You can also set the note priority for Portamento. (See “Solo Settings” on page<br />
131).<br />
Selecting Sounds<br />
The Concert Performer has over 900 instrument and drum sounds available from the front panel.<br />
You can freely assign any of these sounds to the four Parts. Remember that there is always a sound<br />
assigned to each of the Parts, even if some of the Parts are not currently active.<br />
The sounds span a tremendous variety of instruments, ranging from traditional acoustic sounds to<br />
modern electronic tones. To help you quickly find the sound that you want, the sounds have been<br />
organized into 15 categories. Each category has a dedicated Sound Selection button on the front<br />
panel.<br />
To select a Sound:<br />
1) In the main play screen, select the Part to which you wish to assign a new sound using the L3, or R1-<br />
R3 buttons. The selected Part will become highlighted.<br />
SOUND<br />
PIANO FEATURE VOCAL DRAWBAR ORGAN STRING<br />
HARPSI &<br />
MALLET<br />
GUITAR<br />
BASS<br />
PAD &<br />
SYNTH<br />
SPECIALTY<br />
DRUM<br />
WOOD-<br />
WIND<br />
SFX<br />
BRASS<br />
USER<br />
The USER button lets you select any sounds<br />
that may be stored in the User Sound category.<br />
Basic Controls P. 11
P. 12<br />
2) Press the SOUND button for the sound category that your are interested in. The first page of sounds in<br />
that category will be displayed. There are at least three pages of sounds in each category (except<br />
User). Use the F1-6 buttons to view the other pages in a category.<br />
3) Select a sound by pressing the L or R button that is next to the displayed name.<br />
4) Press the F1-F6 buttons to show the Sounds on the other pages for the same category.<br />
5) You can also use the Dial to scroll through all of the categories and sounds one by one.<br />
L 1<br />
R 1<br />
Use the L or R buttons to select your desired Sound.<br />
L 2<br />
R 2<br />
L 3<br />
R 3<br />
L 4<br />
R 4<br />
L 5<br />
R 5<br />
F 1 F 2 F 3 F 4 F 5 F 6 F 7<br />
F1-F6 Selects the different pages of Sounds within a category.<br />
F7 Takes you to the Sound Edit menu. (See "Editing Sounds"<br />
on page 96.)<br />
<strong>Kawai</strong> Concert Performer Series Digital Piano
Mixer<br />
This Mixer screen allows you to change the volume, panning, reverb and chorus levels, as well as<br />
turn the effect on/off for each Part.<br />
To use the Mixer:<br />
1) Press the MIXER button (F1) while on the main play screen.<br />
2) Use the F2–F7 buttons to select which Part you wish to adjust.<br />
3) Use the L and R buttons to select a setting to change.<br />
4) Use the Dial to change the value.<br />
L1<br />
Selects the Effect On and Off.<br />
L 1<br />
R 1<br />
L2<br />
Selects reverb level.<br />
L 2<br />
R 2<br />
L3<br />
L4<br />
L5<br />
Selects chorus level.<br />
Selects Panning.<br />
Selects volume level.<br />
After you make your desired selection, use the Dial to<br />
change the value.<br />
L 3<br />
L 4<br />
L 5<br />
R 3<br />
R 4<br />
R 5<br />
F 1 F 2 F 3 F 4 F 5 F 6 F 7<br />
F1 Takes you to the next page of the Mixer.<br />
F2–F6 Selects the part to change.<br />
F7 Adjusts the volume level for the Harmony.<br />
• Volume level can be also adjusted from the main play screen, using the VOLUME buttons (F4,<br />
F5).<br />
Basic Controls P. 13
P. 14<br />
The Mixer not only lets you set the overall volume level for the Style, but set individual volume<br />
levels for the 6 Sections within a Style.<br />
To adjust the individual Section level:<br />
1) On the Mixer screen, press the STYLE MIXER button (F1). The Style Mixer screen will be selected.<br />
2) Use the F2–F7 buttons to choose a Section, then use the Dial to change the volume.<br />
3) Press the BACK button (F1) to go back the previous Mixer screen, or press the EXIT button to go back<br />
to the main play screen.<br />
L 1<br />
R 1<br />
L 2<br />
R 2<br />
L 3<br />
R 3<br />
L 4<br />
R 4<br />
L 5<br />
R 5<br />
F 1 F 2 F 3 F 4 F 5 F 6 F 7<br />
F1 Takes you to the previous Mixer screen.<br />
F2–F7 Selects the Section that you wish to change.<br />
<strong>Kawai</strong> Concert Performer Series Digital Piano
REVERB<br />
CHORUS<br />
EFFECT<br />
Effects<br />
You might have noticed that when you select some of the sounds, the LED indicator for the REVERB,<br />
CHORUS, or EFFECTS button is turned on. The reason for this is some of the sounds are set up<br />
with one or more of these effects on as part of their initial setting.<br />
Adding an effect to the sound enhances tonal quality and improves acoustical realism. The CP<br />
piano is provided with three separate groups of effects. The first is REVERB, the second is CHORUS,<br />
and third group EFFECTS contains other useful effects such as Delay, Phaser, Rotary Speaker etc.<br />
There is a dedicated button on the front panel for each Effects group and each of the three Effect<br />
groups can be turned on/off separately or used in combination for each part. The Concert Performer<br />
has a selection of 27 different Reverb, Chorus, and Effect types that can be used to enhance or even<br />
dramatically alter the instrument sounds. Each of the over 900 instrument and drum sounds has<br />
already been assigned a REVERB and CHORUS setting and an additional EFFECT that suits that<br />
particular type of instrument. For example, a moderate Delay effect is used on the Church Organ to<br />
recreate the sense of being in a large church, and a Rotary speaker effect is used on the Drawbar<br />
organ to give it an authentic, vintage feel.<br />
If you wish, you can change any of these effect settings to suit your tastes separately for each sound<br />
save them as the new Preset effect settings for that Sound (See Sound Edit on page 96). In addtion,<br />
by setting the Effect For Sound function in the System to “Panel” the CP will ignore the preset<br />
effects settings for each Sound (see Effect For Sound on page 133).<br />
(The CP piano can also remember your Effect settings as part of a Registration. See Registration on<br />
page 31.)<br />
To add Reverb :<br />
1) Press the REVERB button. The REVERB button LED will light.<br />
2) If you wish to edit the settings, hold down the REVERB button for a moment until the Reverb Settings<br />
screen is displayed.<br />
3) Use the F3-F7 buttons to select the Part you want to edit.<br />
4) Use the L2-L4 buttons to select the specific setting that you wish to change.<br />
5) Use the Dial to change the value.<br />
6) Press the EXIT button to leave the Reverb Settings menu.<br />
7) If you wish to turn the reverb effect off, press the REVERB button again.<br />
Basic Controls P. 15
L 1<br />
R 1<br />
L2 Selects the Reverb type. Use the Dial to choose<br />
one of the 7 Reverb types.<br />
L 2<br />
R 2<br />
L 3<br />
L 4<br />
L 5<br />
R 3<br />
R 4<br />
R 5<br />
L3 Selects Reverb on/off. Use the Dial to turn the<br />
Reverb on/off for the selected Part.<br />
L4 Selects Reverb depth. Use the Dial to change<br />
the Reverb depth for the selected Part.<br />
F 1 F 2 F 3 F 4 F 5 F 6 F 7<br />
F3–F6 Selects the Part you want to change. Repeatedly pressing<br />
the appropriate button also turns the Reverb on/off for<br />
that Part.<br />
Type of Reverb<br />
Hall 1, Hall 2 Simulates the ambiance of a concert hall or theater.<br />
Stage 1, Stage 2 Simulates the ambiance of a small hall or live house.<br />
Room 1, Room 2 Simulates the ambiance of a living room or small rehearsal room.<br />
Plate Simulates the sound of a metallic plate reverb.<br />
• The LED Indicator on the REVERB button will be lit whenever Reverb is turned on for the any<br />
Part except ACC (regardless of each part’s Effect Priority). See “Effect Priority Guidelines”<br />
later in this chapter for an explanation of Effect Priority.<br />
To add Chorus:<br />
1) Press the CHORUS button. The CHORUS button LED will light.<br />
2) If you wish to edit the settings, hold down the CHORUS button for a moment until the Chorus Settings<br />
screen is displayed.<br />
3) Use the F3–F6 buttons to select the Part you want to edit<br />
4) Use the L2–L4 buttons to select the specific setting that you wish to change.<br />
P. 16<br />
<strong>Kawai</strong> Concert Performer Series Digital Piano
5) Turn the Dial to change the value.<br />
6) Press the EXIT button to leave the Chorus Settings menu.<br />
7) If you wish to turn the chorus off, press the CHORUS button again.<br />
L2<br />
Selects the Chorus type. Use the Dial to choose<br />
one of the 4 Chorus types.<br />
L 1<br />
L 2<br />
R 1<br />
R 2<br />
L3<br />
Selects Chorus on/off. Use the Dial to turn the<br />
Chorus on/off for the selected Part.<br />
L 3<br />
R 3<br />
L4<br />
Selects Chorus depth. Use the Dial to change<br />
the Chorus depth for the selected Part.<br />
L 4<br />
L 5<br />
R 4<br />
R 5<br />
F 1 F 2 F 3 F 4 F 5 F 6 F 7<br />
F3–F6 Selects the Part you want to change. Repeatedly pressing the<br />
appropriate button also turns the Chorus on/off for that Part.<br />
• The Indicator light on the CHORUS button will be lit only when Chorus is turned on for the<br />
active “Priority Part”. See “Effect Priority Guidelines” later in this chapter for an explanation of<br />
this.<br />
• You can select from four chorus types when in the Chorus Settings menu. There is a fifth chorus<br />
type which is assigned as an Effect from the Effect Settings menu. In this way, you can actually<br />
have two chorus effects active if so desired.<br />
Basic Controls P. 17
1) Press the EFFECT button. The EFFECT button LED will light.<br />
2) If you wish to edit the settings, hold down the button for a moment until the Effect Settings screen is<br />
displayed.<br />
3) Use the F3–F6 button to turn ON/OFF the Effect for each part.<br />
4) Use the L2–L5, R3 buttons to select the specific setting that you wish to change.<br />
5) Turn the Dial to change the value.<br />
6) Press the EXIT button to leave the Effect Settings screen.<br />
7) If you wish to turn the Effect off, push the EFFECTS button again.<br />
To add an Effect:<br />
L 1<br />
L2 Selects Effect type. Use the Dial to choose one<br />
of the 16 Effect types.<br />
L 2<br />
L3 Selects Wet Balance. Use the Dial to change the<br />
value.<br />
L 3<br />
L4 Selects a different editable setting for each Effect<br />
type. Use the Dial to change the value.<br />
L 4<br />
L 5<br />
F 1 F 2 F 3 F 4 F 5 F 6 F 7<br />
F3–F6 Turns the Effect on/off for each Part.<br />
P. 18<br />
R 1<br />
R 2<br />
R 3<br />
R 4<br />
R 5<br />
R3 Selects a different editable setting for<br />
each Effect type. Use the Dial to<br />
change the value.<br />
<strong>Kawai</strong> Concert Performer Series Digital Piano
Effect Types<br />
Chorus<br />
Flanger<br />
Celeste<br />
Ensemble<br />
Delay 1-3<br />
Auto Pan<br />
Tremolo<br />
Tremulant<br />
Phaser<br />
Rotary 1-2<br />
Auto Wah<br />
Enhancer<br />
Distortion<br />
Simulates the rich character of a vocal choir or string ensemble, by layering a<br />
slightly detuned version of the sound over the original to enrich it.<br />
Creates a shifting comb-filter, which adds motion and a “hollow” tone to the<br />
sound.<br />
A three-phase chorus without modulation.<br />
A three-phase chorus with a slight modulation to each phase.<br />
Adds echoes to the sound. The three types differ in the length of time between<br />
the echoes.<br />
Moves the sound left and right across the stereo field at a variable rate.<br />
Modulates the volume of the sound. This is a vibrato type effect.<br />
A combination of Tremolo and Vibrato. It simulates the tremulant pipes of a<br />
church organ.<br />
Creates a phase change, adding motion to the sound.<br />
This effect simulates the sound of the Rotary Speaker cabinet commonly used<br />
with electric organs. Rotary 2 adds distortion. The soft pedal is used to change<br />
the speed of the rotor between SLOW and FAST.<br />
Sweeps a tone filter up and down at the beginning of a note, recreating the popular<br />
vintage wah wah pedal sound.<br />
Emphasizes high frequencies to make a sound more easily discernible in a mix.<br />
Adds frequencies that were not present in the original sound, resulting in a “fuzzy”<br />
or warmer tone.<br />
Basic Controls P. 19
P. 20<br />
Effect Priority Guidelines<br />
Reverb and Chorus are global effects. In other words, all of the Parts and the Accompaniment Style<br />
must share the same Reverb and Chorus type. However each of these Parts can have a different<br />
amount of Reverb and Chorus applied to them. In addition Reverb and Chorus can be independently<br />
turned on/off for each part. However, since the CP’s EFFECT section can only have one Effect<br />
turned on at a time (in addition to the REVERB and CHORUS), what happens if you have two (or<br />
more) Parts active, with entirely different sounds, each with a different Effect setting?<br />
In these cases, the CP’s Effects section can only use the Effect settings for one of the Parts. The<br />
EFFECT section chooses which Effect settings to use based upon a predetermined priority order<br />
for each of the Parts. The Priority order is SOLO > RIGHT 1> RIGHT 2 > LEFT/SPLIT. The preset<br />
effect settings for the Priority Part will be used and the other Parts will either share these settings<br />
or may have their Effects automatically turned off.<br />
This “Priority Part” depends on the current situation. If you only have one Part active, regardless<br />
of which Part it is, the preset effect settings for that sound will be used. If you have two or more<br />
Parts active, then the CP will treat one of them as the Priority Part, and ignore the settings of the<br />
other(s).<br />
If the the Effect For Sound is set to “Panel” in the System then the Preset effect settings for each<br />
Sound will be ignored and the Part Priority will be ignored. (See Effect For Sound on page 131).<br />
Here are some guidelines for Effect Priority:<br />
• Priority is given to the Parts in the following order: SOLO>RIGHT1>RIGHT2>LEFT. This means<br />
that anytime the SOLO Part is active, its Effect settings will be used, not only for its sound but<br />
for any sound in any other Part, that you want to add effects to. Likewise, the only time an<br />
active LEFT Part’s settings will be applied is if the other 3 Parts are inactive.<br />
• Unlees you change them, the Effect settings will only change in response to a change in the<br />
Priority Part being activated/deactivated, or a new sound is assigned to an active Priority Part.<br />
In the latter case, the new Effect settings will reflect the Preset effect settings for the new<br />
sound.<br />
• When the Effect settings change for the Piority Part, the Effects will be automatically turned off<br />
for the other Parts. (This is so that your Flute sound on RIGHT2 doesn’t suddenly get effected<br />
by the Distortion settings of the Electric Guitar that you’ve just assigned to the SOLO Part!)<br />
• You can, however, turn the effect on for any Part by adjusting the Effect On/Off option in the<br />
display for that Part.<br />
<strong>Kawai</strong> Concert Performer Series Digital Piano
• The LED Indicator on the EFFECT and CHORUS buttons will be on only when the active Priority<br />
Part has these effects turned on.<br />
Example<br />
Assume that your CP is set up according to the following chart:<br />
SOLO RIGHT1 RIGHT 2 LEFT INDICATOR<br />
Part Inactive Active Inactive Active<br />
Effect On On Off On On<br />
If you then select a different sound for RIGHT1, the Effect setting for the SOLO, RIGHT2, LEFT will<br />
be turned off automatically. This is because RIGHT1 is the Priority Part (note that the SOLO Part is<br />
NOT the Priority Part because it was inactive).<br />
The chart would now look like this:<br />
SOLO RIGHT1 RIGHT 2 LEFT INDICATOR<br />
Part Inactive Active Inactive Active<br />
Effect Off On Off Off On<br />
Even if you now assign a new sound to the SOLO Part, the Effect settings for the other Parts won’t<br />
change, because SOLO is still inactive, so therefore would not have priority.<br />
Once you make the SOLO Part active, however, it would now be considered the Priority Part. The<br />
Effect settings for the other Parts will again be turned off. The Indicator light on the EFFECT<br />
button will now reflect the Effect status for the sound assigned to SOLO.<br />
SOLO RIGHT1 RIGHT 2 LEFT INDICATOR<br />
Part Active Active Inactive Active<br />
Effect Off Off Off Off Off<br />
At this point, if the Effect that has been called up along with the SOLO sound is one that you’d like<br />
to use for the other Parts, simply select Effect On in the LCD display for those Parts.<br />
Basic Controls P. 21
P. 22<br />
TRANSPOSE<br />
OCTAVE SHIFT<br />
Transpose and Octave Shift<br />
Transpose raises or lowers the CP’s pitch in half- step increments. Octave Shift does the same but<br />
in octave increments.<br />
Transpose can be especially useful when you have learned a song in one key and have to play it in<br />
another key. The transpose feature allows you to play the song in the original key, but hear it in<br />
another key. You can transpose the Concert Magic songs, the Accompaniment Styles, any songs<br />
played back by the Easy/Advanced Recorder and any of the over 900 instrument and drum sounds<br />
available in the CP. Songs recorded on the CD-R Drive cannot be transposed once they have been<br />
recorded.<br />
Octave shift can be very useful when you are playing multiple sounds across the keyboard. You<br />
may want to use the octave shift to adjust a bass sound assigned to the LEFT/SPLIT Part to play in<br />
the proper pitch range, or to set one sound in a layer to play in a different octave so that it mixes<br />
well with other sounds in the layer. Octave shift is only available for the four Parts: LEFT/SPLIT,<br />
RIGHT1, RIGHT 2, and SOLO.<br />
To Transpose:<br />
1) Press either the ß or † TRANSPOSE buttons. The LCD screen shows you a number telling you how<br />
many half steps up or down you have transposed the piano. -5, for example, represents a transposition<br />
that is 5 half steps lower.<br />
2) To cancel the Transpose setting, press both the ß and † buttons at the same time. The transpose<br />
amount will disappear from the LCD screen, indicating that the CP is now back to its original setting.<br />
To use the Octave Shift:<br />
1) Select the Part that you would like to apply the shift to.<br />
2) Press either the ß or † OCTAVE SHIFT buttons. The number of shifted octaves (up or down) will be<br />
displayed with an “ß” in the LCD screen.<br />
3) To cancel the octave shift, press both the ß and † buttons at the same time. The symbols will<br />
disappear from the screen, indicating that the selected Part is back to its normal octave range.<br />
<strong>Kawai</strong> Concert Performer Series Digital Piano
L3<br />
Selects the LEFT Part to be Transposed or Octave<br />
Shifted.<br />
L 1<br />
L 2<br />
L 3<br />
L 4<br />
R 1<br />
R 2<br />
R 3<br />
R 4<br />
R1<br />
R2<br />
R3<br />
Selects the SOLO Part to be Transposed or<br />
Octave Shifted.<br />
Selects the RIGHT1 Part to be Transposed<br />
or Octave Shifted.<br />
Selects the RIGHT2 Part to be Transposed<br />
or Octave Shifted.<br />
L 5<br />
R 5<br />
The number of octaves shifted is represented by<br />
the number of triangles shown above the sound<br />
name for each Part.<br />
F 1 F 2 F 3 F 4 F 5 F 6 F 7<br />
Transpose amount is shown at the bottom of the<br />
screen.<br />
• The Octave Shift has a range of four octaves in each direction. However, some on board sounds<br />
may have a limited range in which they play properly. If you shift too far out of this range, the<br />
instrument may sound strange or may not play at all. This has no affect on the CP’s proper<br />
function though, and you should feel encouraged to use this feature as a means of getting<br />
interesting tonal variations out of the preset Sounds.<br />
Basic Controls P. 23
P. 24<br />
METRONOME<br />
TAP TEMPO<br />
Metronome<br />
Rhythm is one of the most important elements when learning music. It is important to practice<br />
playing the piano at the correct tempo and with a steady rhythm. The CP piano’s metronome is a<br />
tool that helps you to achieve this by providing a steady beat for you play along with.<br />
To use the Metronome:<br />
1) Press the METRONOME button. The CP piano will start counting with an audible steady beat. You<br />
will see Volume level, Beat (time signature), as well as the Metronome icon appear in the LCD<br />
screen next to the Tempo value.<br />
2) Use the BEAT, VOLUME, or TEMPO buttons (F2–F7) to select the setting you wish to change.<br />
3) Use the F buttons (F2-F7) or the Dial to change the values.<br />
You can also adjust the tempo by tapping on the TAP TEMPO button. Simply tap on the button with<br />
your finger three or more times at the desired tempo, and the CP will automatically translate that<br />
into a tempo value on the screen!<br />
4) To stop the metronome, press the METRONOME button again.<br />
L 1<br />
R 1<br />
L 2<br />
R 2<br />
L 3<br />
R 3<br />
L 4<br />
R 4<br />
L 5<br />
R 5<br />
F 1 F 2 F 3 F 4 F 5 F 6 F 7<br />
F1 Takes you to the Mixer menu.<br />
F2, F3 Changes the Beat. Choose from 1/4, 2/4, 3/4, 4/4, 5/4,<br />
6/8, 7/8, 9/8 and 12/8 time signatures.<br />
F4, F5 Adjusts the volume level.<br />
F6, F7 Adjusts the tempo.<br />
<strong>Kawai</strong> Concert Performer Series Digital Piano
Piano Only<br />
The Piano Only button provides a way to quickly set the Concert Performer up to play the Concert<br />
Grand piano sound. Pressing the Piano Only button immediately turns off all Parts except the Right<br />
1 part and sets the Right 1 sound to Concert Grand.<br />
PIANO<br />
ONLY<br />
The Piano Only button also turns off all auto-accompaniment functions and stops the Easy/Advanced<br />
Recorder. Additionally, pressing the Piano Only button will cause the CP to exit any function or<br />
editing screen (except for Concert Magic) and immediately return to the Main Screen.<br />
We you are using Concert Magic, pressing the Piano Only button will change the Concert Magic<br />
song’s preset sounds to Concert Grand piano.<br />
• You can also use the Piano Only button as a “panic button” to immediately stop any unintended<br />
accompaniment style or recording, or to quickly exit any confusing situation and return to a<br />
familiar piano sound.<br />
To use Piano Only:<br />
Press the PIANO ONLY button. The Main Screen is displayed and the Concert Grand sound is assigned<br />
to RIGHT1.<br />
Basic Controls P. 25
Using a Style<br />
The Concert Performer contains 220 built-in Styles for you to play<br />
along with covering a wide variety of musical genres. You can<br />
choose from a simple drum or percussion accompaniment or add<br />
in a fully orchestrated arrangement. In addition to the Full Styles<br />
which provide a full musical arrangement including Drums, Bass,<br />
and other accompanying instruments there are Intimate Styles with<br />
simpler more “Intimate” arrangements. There is also a selection of<br />
Solo Piano Styles if you just want to play along with a piano<br />
accompaniment. If the on board variety of styles is not enough, or<br />
if you have creative ideas of your own, the CP contains other<br />
features such as Style Maker and Conductor to help you edit or<br />
create your own custom Styles. These features are explained in<br />
the section of this <strong>manual</strong> “Creating Your Own Styles”, page 76.<br />
Selecting and Playing a Style<br />
Just like the Sounds the Styles are organized into 15 categories, each with a dedicated STYLE SELECT<br />
button on the front panel.<br />
To select a Style:<br />
1) Press the STYLE button for the category of your choice. The LCD screen will display the the first Style<br />
Selection page for that category.<br />
2) Press the L or R button next to the on-screen name of the Style you wish to select.<br />
3) Each Style category has two pages of styles. If you don't see your desired Style on the currently<br />
displayed page, you can use the F1- F2 buttons to select the other page. Press another STYLE button<br />
to jump to another category, or turn the Dial to scroll through all the Styles one by one.<br />
4) If you wish play the selected Style, press either<br />
the START/STOP button to start the Style playing immediately,<br />
or the INTRO/ENDING button to start the Style with an Intro pattern.<br />
You can also press the SYNC/FADE OUT button before starting a Style or pressing the INTRO/END<br />
buttons. When the SYNCFADE OUT button is pressed, the Style will not start until you play a note or<br />
chord on the keyboard.<br />
5) To adjust the tempo of the Style, select Tempo on the main play screen and use the Dial to change the<br />
Tempo.<br />
You can also use the TAP TEMPO button. Tap the button three or more times at the desired tempo,<br />
and the CP will automatically translate your taps into an on-screen Tempo value.<br />
6) To stop the Style, press either,<br />
the START/STOP button to stop the Style immediately,<br />
or the INTRO/ENDING button to stop with an ending pattern,<br />
You can also press the SYNC/FADE OUT button and have the Style fade out gradually.
L 1<br />
R 1<br />
Use the L or R buttons to select your desired Style.<br />
L 2<br />
R 2<br />
L 3<br />
R 3<br />
L 4<br />
R 4<br />
L 5<br />
R 5<br />
F 1 F 2 F 3 F 4 F 5 F 6 F 7<br />
F1, F2 Select the different pages within a Style category.<br />
SYNC /<br />
FADE OUT<br />
START/<br />
STOP<br />
INTRO/ENDING<br />
1 2<br />
When this button is pressed before starting a Style or before pressing the<br />
INTRO/ENDING button, the Style will not start until you play a note or chord<br />
on the keyboard. When this button is pressed while the Style is running the<br />
Style will gradually fade out. When this button is pressed during a fade out<br />
the Style will gradually fade back in and you may resume playing the Style.<br />
You can press the SYNC/FADE OUT button at any time while any of the<br />
patterns (Intro, Variation, Ending) in the Style are running to fade in or out<br />
of the Style.<br />
Starts or stops the Style immediately.<br />
When one of these buttons is pressed to start a Style the selected Intro<br />
pattern will be played before the selected Variation pattern plays. There are<br />
both major and minor versions for each Intro. The Auto-accompaniment<br />
System will decide which Intro to use based upon the first Chord you play<br />
(major or minor). The LCD screen will display a countdown in bars to show<br />
how many bars you have until the the variation begins playing. When one<br />
of these buttons is pressed while the Style is running the selected Ending<br />
pattern will be played before the Style stops. There are major and minor<br />
versions for each Ending.<br />
• When you are in the main play screen, you can select a Style by just using the Dial. Press the L1<br />
button or F2–F3 (STYLE) and “Style” will become highlighted. Use the Dial or press the F2–F3<br />
button to select another Style.
ACC ON/OFF<br />
FILL IN<br />
1 2 3<br />
VARIATION<br />
1 2 3<br />
BASS<br />
INVER<br />
ACCOMPANIMENT<br />
FULL<br />
ONE<br />
KBD FINGERED FINGER<br />
4<br />
4<br />
• The CP remembers the last Style selection that you made within each category while the power<br />
is on. When you press a STYLE button, the CP will automatically select the Style previously<br />
chosen in the same category.<br />
• When you switch from one Style to another while it is running, the new Style will wait until the<br />
beginning of the next measure before it begins to play.<br />
Fill-In and Variation<br />
Each Style is made of four Variation patterns and four Fill-in patterns.<br />
Fill-ins are short patterns that temporarily embellish the Style. Fill-ins can add excitement and<br />
rhythmic change to the Style and be used as a musical lead in between the Variations. To use a Fillin,<br />
just press one of the FILL IN buttons. You will hear the fill-in begin playing immediately from a<br />
musically appropriate spot.<br />
Fill-ins can also be used as a short intro. First press the SYNC/FADE OUT button then press one of<br />
the FILL-IN buttons to select a desired Fill-in. Press any key on the keyboard to start the style. After<br />
the Fill-in plays, the selected Variation will play.<br />
To select a Variation, press one of the four VARIATION buttons to select the desired Variation. The<br />
Selected VARIATION button LED will light.<br />
• You can set the CP to automatically play a Fill-in anytime you press a VARIATION button as you<br />
switch from one Variation to another. Select your preferred option in the Fill-in mode. (See page<br />
130)<br />
Auto Accompaniment System<br />
The Auto-accompaniment System (ACC) is a powerful feature that determines how the Styles will<br />
interact with you as you play. The ACC System analyzes your playing and adjusts the notes the<br />
Style plays to follow the Chords that you play on the keyboard. The ACC System is capable of<br />
recognizing single finger as well as more complex chord voicings. The CP recognizes 61 chord<br />
types as well as most of their inversions. (See page 196 for a chord table.) There are three modes of<br />
key recognition—One Finger, Fingered, and Full Keyboard. Your choice of which mode to use<br />
depends on your skill level and the selected musical style.
Fingered<br />
One Finger<br />
Full Keyboard<br />
The player must play at least three notes of a chord below the split point (LEFT/<br />
SPLIT Part) before the ACC System will recognize the chord type. (See page 196<br />
for chord table.)<br />
Uses a simplified chord method that allows beginners to specify a chord type by<br />
playing only one or two notes below the split point. The types of chords that can<br />
be recognized in this manner are limited to Major, Minor, 7th and Major 7th.<br />
While the player can trigger basic chords with as little as one finger, the ACC<br />
System will recognize more complex chord types if you play them, even you are<br />
in the One Finger mode.<br />
The player must play at least three notes of a chord anywhere across the 88 keys<br />
before the ACC System will recognize the chord type. This mode is similar to<br />
Fingered however, Full Keyboard recognizes chord types from three or more<br />
notes played anywhere across the 88 keys not just below the split point.<br />
Bass Inversion<br />
When Bass Inversion is on, the Bass Section of the Style will follow the lowest note of the chord<br />
voicing played on the keyboard. With Bass Inversion on it is possible to specify a chord over a<br />
certain bass note by the chord voicing you play. For example, a C chord over a G bass, or a Bb7<br />
chord over a C Bass. Bass Inversion will work with all three key recognition modes but when in<br />
One Finger mode, you play at least two notes of a chord for Bass Inversion to function.<br />
To turn Auto-accompaniment (ACC) on:<br />
1) Select a Style that you would like to play.<br />
2) Press one of the ACCOMPANIMENT buttons to select the Key Recognition mode. The selected Key<br />
recognition mode will be displayed at the bottom of the LCD screen if you're on the main play screen.<br />
3) Press the BASS INVERSION button if you would like to turn it on.<br />
4) Press the ACC ON/OFF button to activate the Auto-accompaniment System (ACC).<br />
5) Press the START/STOP button to start the Style, and play some chords in the LEFT/SPLIT Part. You<br />
will hear the Style start and also change keys and chord types as you play different chords.<br />
6) If you want to cancel or stop the Auto-accompaniment, press the ACC ON/OFF button again. If you<br />
turn the ACC off without stopping the Style the drum rhythms will continue to play.
1-2<br />
PLAY<br />
• When you play along with the Auto-accompaniment using the Fingered or Full Keyboard modes,<br />
you may hear two sounds playing the chords: one is selected by the front panel and the other is<br />
pre programmed for the Style. This is because the sounds used by the Auto-accompaniment<br />
Style are independent of the Left and Right Part sound settings. Therefore you will hear the<br />
instrument sounds played by your hand as well as those generated by the accompaniment.<br />
In most cases, these are just duplicate notes being played using different sounds. In some cases<br />
however, you may hear different notes or an unexpected chord inversion. If the overall musical<br />
effect is undesirable, try turning the LEFT/SPLIT Part off and let the accompaniment play alone.<br />
• You can use the Auto-accompaniment (ACC) System without the Style running. In this way you<br />
can make use of the chord recognition without having the pre programmed rhythms or patterns<br />
playing. Just turn the ACC on and play without starting the Style. You will hear the bass and<br />
chord parts only. This may be useful when you play a musical piece that is not played with<br />
drums. The accompaniment sounds are pre programmed to best suit the different Styles, and<br />
you cannot alter them. When playing in One Finger mode, however, you can replace the chord<br />
sound with the sound chosen for the LEFT/SPLIT Part. Assign your preferred sound and make<br />
the LEFT/SPLIT Part active.<br />
You can also start a Style without the ACC on. In this way you can have just drums and percussion<br />
accompany you.<br />
1-2 Play<br />
If you want to play using an Accompaniment Style, but have no idea as to what sounds you should<br />
use for the right and left-hand parts, try using the 1-2 Play feature. This feature gives you a<br />
preprogrammed panel setup with appropriate sounds and settings for the Style you have chosen.<br />
To use 1-2 Play:<br />
1) Select the Style you would like to play.<br />
2) Press the 1-2 PLAY button. The 1-2 Play indicator will become lit, and the words “1-2 Play” are<br />
displayed in the Main Screen. The SYNC button is activated as well.<br />
3) Activate one of the INTO/ENDING buttons if you want the Style to begin with an introduction. Start the<br />
Style by playing a key on the left side of the keyboard, or by pressing the START/STOP button.<br />
4) Press the 1-2 PLAY button again to turn it off.
• Among the settings contained in the 1-2 Play setting are the Sounds assigned to the keyboard<br />
Parts (Solo, Right 1/2, Left), Tempo, and Mixer settings.<br />
Registration<br />
A Registration is a setup that remembers the panel settings along with many other performance<br />
functions so that you can recall them at the touch of a button. This lets you begin to play quickly<br />
instead of spending a lot of time programming all the settings and values <strong>manual</strong>ly.<br />
There are 8 Registration buttons on the panel of the Concert Performer. Each button contains a<br />
different registration. Pressing any of the Registration buttons activates the setup stored there.<br />
Pressing another Registration button changes to the registration stored in that button. Pressing the<br />
active Registration button again deactivates the registration and returns you to the original panel<br />
setup.<br />
Registration Groups<br />
There are 20 Registration Groups in the Concert Performer. Each group contains settings for the 8<br />
Registration buttons on the panel. Each group represents a “family” of settings for the CP. The<br />
sound and performance capability of the Concert Performer is remarkable, and each registration<br />
group is designed to take full advantage of certain types of sounds available in the instrument.<br />
Switching from one Registration Group to another instantly changes the Registration buttons from<br />
Pipe Organ settings to Orchestra settings, for example.<br />
• The default Registration Group is “American Pop”, a family of registrations designed to play<br />
popular music from the 1940’s through today.<br />
With 8 Registration buttons and 20 Registration Groups, you have a total of 160 preprogrammed<br />
Registrations available. Plus, you can overwrite any registration with your own unique setups.<br />
To use a Registration:<br />
REGIST<br />
GROUPS<br />
1) Press the REGIST GROUP button. Ten Registration Groups will be displayed.<br />
2) Press the F1 and F2 buttons to view the Registration Groups on the other page.<br />
3) Highlight any Group from the list by using the L and R buttons.<br />
4) Press one of the eight REGISTRATION buttons to activate a Registration from your selected Registration<br />
Group.<br />
5) To return to the Main Screen, press the EXIT button.
L 1<br />
L 2<br />
R 1<br />
R 2<br />
Use the L and R buttons to select the Group. Then<br />
press one of eight REGISTRATION buttons to call<br />
the desired setup.<br />
L 3<br />
R 3<br />
L 4<br />
R 4<br />
L 5<br />
R 5<br />
F 1 F 2 F 3 F 4 F 5 F 6 F 7<br />
F1, F2 Searches for the Registration Groups on the other pages.<br />
F6, F7 Takes you to the Registration Group Name screen.<br />
• The CP remembers how the front panel was setup before you chose a Registration so that after<br />
exiting the Registration, the prior settings will be restored.<br />
• It is not necessary to always begin with the REGIST GROUP button when selecting a Registration.<br />
If the group you want to use is already selected, pressing one of the REGISTRATION buttons will<br />
activate a setup from that group. The CP will remember the Registration Group last chosen as<br />
long as the power remains on.<br />
• You cannot use the 1-2 Play function and Registrations at the same time. Choosing one always<br />
cancels the other.
To create your own Registration:<br />
1) Set up the panel and functions in the way that you’d like to save them.<br />
2) Press the SAVE REGIST button. Use the R1 – R4 buttons to select the Registration Group in which to<br />
save your setup. Use the F1 – F4 buttons to view the 20 Registration Groups in sets of five.<br />
3) Press one of the 8 REGISTRATION buttons to specify which location you’d like to save your Registration<br />
to.<br />
L 1<br />
R 1<br />
R1–R5 Selects the Registration Group to save in.<br />
L 2<br />
R 2<br />
L 3<br />
R 3<br />
L 4<br />
R 4<br />
L 5<br />
R 5<br />
F 1 F 2 F 3 F 4 F 5 F 6 F 7<br />
Press the F1-F4 buttons to display the Registration<br />
Groups on the other pages.<br />
REGISTRATION<br />
1 2 3 4 5 6 7 8<br />
S<br />
Press the specific REGISTRATION button where<br />
you’d like to save to.<br />
• The following settings can be stored in a Registration:<br />
Sounds (Solo, Right1, Right2, Left), Split Point, Style and Variation, Fill-in mode, Tempo,<br />
Accompaniment settings, Mixer settings, Chorus settings, Effect settings, Harmony settings,<br />
Voicing, Detune, Resonance, Left Pedal functions, Mic Harmony, and Mic Effect<br />
• You can save your Registrations on a floppy disk and load them into the CP later. (See page 156.)
To rename the Registration Group:<br />
1) Press the REGIST GROUPS button.<br />
2) Use the F1, F2, L and R buttons to select the Group to rename.<br />
3) Press the NAME (F6, F7) button.<br />
L 1<br />
R 1<br />
L 2<br />
R 2<br />
L 3<br />
R 3<br />
L 4<br />
R 4<br />
L 5<br />
R 5<br />
F 1 F 2 F 3 F 4 F 5 F 6 F 7<br />
Use the F1, F2, L and R buttons to select the Group to rename.<br />
4) In the Registration Group Name screen, use the CURSOR (F2, F3) buttons and the CHARACTER (F4,<br />
F5) buttons to change the name. You can also use the Dial to change the characters.<br />
5) Press the SAVE (F6, F7) button to confirm the name.
L 1<br />
R 1<br />
L 2<br />
R 2<br />
L 3<br />
R 3<br />
L 4<br />
R 4<br />
L 5<br />
R 5<br />
F 1 F 2 F 3 F 4 F 5 F 6 F 7<br />
F1 Takes you to the previous menu.<br />
F2, F3 Moves the cursor over the characters in the name.<br />
F4, F5 Selects a character.<br />
F6, F7 Saves the name.<br />
STYLE LOCK<br />
Style Lock<br />
Pressing the STYLE LOCK button keeps the current Style, even if another Registration is selected.<br />
This allows you to change Sounds and settings by the Registration button while keeping the Style<br />
as-is. As long as the STYLE LOCK button is on, changing registrations will not change the style.<br />
However, you can always <strong>manual</strong>ly change the style, even if the Style Lock is on.<br />
Press the STYLE LOCK button again to turn it off.
SONG<br />
STYLIST<br />
Song Stylist<br />
With over 900 Sounds and 220 Styles, it can sometimes be difficult to decide the best settings with<br />
which to play a song. Even if you are very familiar with the Concert Performer, you may want a<br />
quick way to change the CP’s setup to play another song. The Song Stylist feature was created to<br />
handle this situation for you. You simply pick the name of the song you want to play and the<br />
Concert Performer sets up everything for you.<br />
The Song Stylist contains a list of 700 popular song titles. In the Song Stylist, there is an appropriate<br />
setup for each of those songs. You may search for your favorite title either alphabetically by song<br />
name, or by category of musical genre. Once you’ve found the song you want to play, simply press<br />
one button and the CP is immediately setup for that song and ready for you to begin.<br />
• The Song Stylist contains no prerecorded music, only the setup to play the chosen song. You<br />
must play the actual music yourself.<br />
To use the Song Stylist:<br />
1) Press the SONG STYLIST button. The Category list appears, showing the different musical genres for<br />
the SONG STYLIST.<br />
2) Use the SEARCH BY CATEGORY buttons (F1, F2) to display the Category choices on the other page.<br />
When you have found the category you want, use the L and R buttons to select it. A list of songs<br />
within that musical category appears.
L 1<br />
L 2<br />
R 1<br />
R 2<br />
Use the L, R buttons to select your desired category.<br />
L 3<br />
R 3<br />
L 4<br />
R 4<br />
L 5<br />
R 5<br />
F 1 F 2 F 3 F 4 F 5 F 6 F 7<br />
F1, F2 Shows the other categories.<br />
F3, F4 Shows the song list in alphabetical order.<br />
F6 Searches for a title from a floppy disk.
Selecting a song from a floppy disk.<br />
3) Use the PAGE buttons (F1, F2) to display the Song Titles on the other pages in the same category.<br />
4) Use the L and R buttons to select one of the ten songs displayed in the screen. The CP automatically<br />
returns to the Main Screen ready with all of the settings for that song.<br />
5) You may start and play the song in your usual manner. You can operate the CP normally and make<br />
any changes to the Song Stylist setup that you wish.<br />
6) To play another song, press the Songlist (F7) button. To exit, press the SONG STYLIST button again<br />
or press the EXIT button.<br />
L 1<br />
R 1<br />
L 2<br />
R 2<br />
Use the L or R buttons to select your desired song.<br />
L 3<br />
R 3<br />
L 4<br />
R 4<br />
L 5<br />
R 5<br />
F 1 F 2 F 3 F 4 F 5 F 6 F 7<br />
F1, F2 Searches for a title on the other pages.<br />
F3 Jumps to the Song Stylist Category menu.<br />
F4 Searches for a title listed in alphabetical order.<br />
F6 Searches for a title from a floppy disk.<br />
F7 Selects the song.<br />
L 5<br />
R 5<br />
F 1 F 2 F 3 F 4 F 5 F 6 F 7<br />
F1, F2 Searches for a title on the other page.<br />
F4 Starts the Chain Play.<br />
F6 Searches for a title from the internal presets.<br />
F7 Selects the song.
L1<br />
Highlights the Style.<br />
L 1<br />
R 1<br />
R1<br />
Highlights the SOLO Part.<br />
L2<br />
Adjusts the Tempo.<br />
L 2<br />
R 2<br />
R2<br />
Highlights the RIGHT 1 Part.<br />
L3<br />
Highlights the LEFT Part.<br />
L 3<br />
R 3<br />
R3<br />
Highlights the RIGHT 2 Part.<br />
L4<br />
Changes the split point.<br />
L 4<br />
R 4<br />
R4<br />
Changes the split point.<br />
L 5<br />
R 5<br />
F 1 F 2 F 3 F 4 F 5 F 6 F 7<br />
F1, F2 Turns on the Auto Chord Progression (if available).<br />
F3, F4 Turns on the Melody part (if available).<br />
F5, F6 Adjusts the volume level for the sound.<br />
F7 Takes you back to the Song Stylist menu.<br />
• You may use different Sounds, Styles, Tempo and other settings to customize to your taste.<br />
• When choosing a Song Stylist created by you (or someone else) and saved to floppy disk, there<br />
may be a recorded melody and chord track available. The chord track, called the Auto Chord<br />
Progression, will provide you with the chord changes to the song.<br />
You may also find a song title by searching the list alphabetically.<br />
To search the Song Stylist by Song Title:<br />
1) Press the SONG STYLIST button. The Category list appears, showing the different musical genres for<br />
the SONG STYLIST.<br />
2) Press the SEARCH BY NAME (F3, F4) buttons. In the Name Menu, press the L or R buttons to take you<br />
to the first letter of the name of the song. For example, if your song title starts with “G”, press the L4<br />
button.<br />
3) Use the PAGE (F1, F2) to search for the name of your song. When you find the song, press the<br />
corresponding L or R button. The CP automatically returns to the Main Screen ready with all of the<br />
settings for that song.
HARMONY<br />
Harmony<br />
When the Auto-Accompaniment is on, you can use Harmony function. The Harmony function<br />
automatically adds notes to your right hand (melody) part to help you sound more professional.<br />
This function analyzes the notes you play and automatically adds notes from the Accompaniment<br />
chord (shown in the Main Screen when the Accompaniment is on), creating a “harmony” part (even<br />
if you are only playing single notes in the left and right hands).<br />
There are 10 types of Harmony.<br />
Block Adds three or four notes based on the chord.<br />
Open Adds three or four notes based on the chord. Harmony notes may extend over<br />
one octave below the lowest right-hand note.<br />
Jazz Adds three or four notes based on the chord.<br />
Rockn’ Adds a note at a fifth (or fourth) interval to the lowest note played in the RIGHT<br />
Part.<br />
Dynamic Adds three or four notes based on the chord. Harmony notes are played within<br />
one octave below the lowest note played in the right hand.<br />
Duet Adds a note according to the lowest note played in the right hand and based on<br />
the chord.<br />
Octave Takes the highest note played in the right hand and doubles it an octave down.<br />
Octave Duet Adds an Octave note and a Duet note.<br />
Vocal 1 Adds a single note above the top note of the right hand based on the chord.<br />
Vocal 2 Adds three notes based on the chord. The lowest note will always be the root of<br />
the chord.
To use Harmony:<br />
1) Press the HARMONY button. The button will be lit to show that it is active. The Harmony symbol will<br />
also appear in the Main Screen.<br />
2) To change the Harmony type, hold down the Harmony button for a moment until the Harmony Select<br />
menu is displayed.<br />
3) Choose the Harmony type using the L and R buttons.<br />
4) Press the EXIT button to leave the Harmony Select menu.<br />
5) To turn off the Harmony, press the HARMONY button again.<br />
L 1<br />
R 1<br />
L 2<br />
L 3<br />
R 2<br />
R 3<br />
Use the L or R buttons to select your desired<br />
Harmony type.<br />
L 4<br />
R 4<br />
L 5<br />
R 5<br />
F 1 F 2 F 3 F 4 F 5 F 6 F 7<br />
• The additional notes created by Harmony are added to the RIGHT 1 Part, if that part is on. If the<br />
RIGHT 1 Part is off, the additional notes are added to the RIGHT 2 Part. If both parts are off,<br />
there will be no Harmony even though the HARMONY button is lit. The Harmony notes are<br />
played with the same sound as the part they are added to.<br />
• You can volume mix the Harmony separately in the MIXER screen.<br />
• If the Accompaniment in not on, you will not be able to activate Harmony
Recording a Song<br />
The CP has built-in recording capabilities that allow you to record<br />
and play back your performances. Since the CP records your<br />
performances as digital data not audio data you can easily edit your<br />
performances after recording them. There are two ways to use the<br />
CP’s recording feature:<br />
up to 16 independent tracks separately. In addition, with Advanced<br />
Recorder you can edit your recorded data one measure or even<br />
one note at a time. There is also a step recording mode in which<br />
you can enter notes or other MIDI data events one step at a time<br />
for even more accurate control.<br />
Easy Recorder records your playing much like a tape recorder and<br />
is just as easy to use. The CP will record all of your playing as well<br />
as any changes you make to the front panel settings during the<br />
recording.<br />
Advanced Recorder is useful for creating more complex<br />
recordings. Advanced Recorder gives you the ability to record on<br />
Song data created on other instruments in the Standard MIDI File<br />
format (SMF) can also be loaded into the CP’s recorder to be played<br />
or edited. The CP’s recorder can read both Type 1 and 0 SMF files.<br />
Please read the following sections carefully to learn more about<br />
the capabilities of the Easy and Advanced recorder.<br />
Easy Recording<br />
The Easy Recorder will record all of your playing as well as any settings you have made on the front<br />
panel or in the mixer screen at the touch of a button. Simply press the REC button and the CP will<br />
begin recording with the first note you play. You can also record a Style along with your playing if<br />
you like. Before you begin recording its a good idea to select your desired sound(s) and make any<br />
panel settings you would like to record.<br />
To record:<br />
RECORDER<br />
RESET REC PLAY/STOP RWD FWD<br />
1) Press the REC button. The REC button LED will blink and the LCD screen will show Rec Ready. If you<br />
want to, you can still change sounds or panel settings before proceeding.<br />
2) Start recording in one of the following ways:<br />
A. Play the keys and the CP will automatically start recording with the first note you play.<br />
B. If you are recording with a Style, press the START/STOP button to start the recorder with the Style.<br />
Pressing the INTRO/ENDING button will include an Intro phrase at the beginning of the recording.<br />
C. You can also press the SYNC button to begin recording the Style and your own playing together.<br />
D. Press the PLAY/STOP button to start with a 2-bar countdown to help you get ready.<br />
3) When you are finished recording, press the PLAY/STOP button.<br />
You may resume recording from the point where you stopped by repeating these steps from step 2.<br />
P. 42<br />
<strong>Kawai</strong> Concert Performer Series Digital Piano
The current bar number is displayed.<br />
L 1<br />
L 2<br />
R 1<br />
R 2<br />
You can make changes to the panel settings before<br />
and during recording using the L and R buttons.<br />
L 3<br />
R 3<br />
L 4<br />
R 4<br />
L 5<br />
R 5<br />
F 1 F 2 F 3 F 4 F 5 F 6 F 7<br />
F1<br />
F2<br />
F3-F7<br />
Takes you to the Mixer menu.<br />
Deletes the recorded song data<br />
Changes the part status.<br />
• You may resume recording from the bar where you stopped by repeating these steps. You can<br />
also change sounds, tempo, and make other changes to the panel settings before you continue<br />
recording.<br />
• To Re-record or make other changes to a previously recorded section of a song, please read the<br />
section titled “Re-recording or adding another Part” on page 44.<br />
RECORDER<br />
RESET REC PLAY/STOP RWD FWD<br />
To play back the recorded song:<br />
1) Press the RESET button in the RECORDER section of the front panel to return to the first bar of the<br />
song.<br />
2) Press the PLAY/STOP button to play back the song.<br />
3) Press the PLAY/STOP button again to stop at any time.<br />
4) Pressing the PLAY/STOP button again resumes the playback from the bar where you stopped.<br />
5) Use the RWD or FWD buttons to rewind or fast-forward through the recording.<br />
Recording a Song P. 43
P. 44<br />
Part Status<br />
The playback and record status for the RIGHT/ LEFT Parts and the Style are displayed at the bottom<br />
of the LCD screen. Whether you are in the process of recording or playing back your song it is<br />
helpful to know the status for each of these Parts.<br />
The LCD screen will show the following Part status messages at the bottom of the screen:<br />
REC This Part is ready to be recorded. This message is only displayed after the REC button has<br />
been pressed.<br />
PLAY This Part has been recorded and will be heard both on playback and while recording.<br />
MUTE This Part has been recorded but will be silent both on playback and while recording.<br />
– – – This part has not been recorded.<br />
After you have recorded a song you can change the status for a Part by pressing the appropriate<br />
button, F3-7 below the LCD screen. Pressing the F buttons during playback will select PLAY or<br />
MUTE. REC can only be selected after you press the REC button but before you begin recording.<br />
During recording you can however set any Part to PLAY or MUTE by pressing the appropriate F<br />
button.<br />
You can record all RIGHT/LEFT Parts as well as the Style simultaneously or only certain Parts as<br />
you choose. When you first record a song all Parts and the Style will be automatically set to REC<br />
but only the active Parts and the Style will be recorded. When you are finished recording the status<br />
for any active Parts and the Style will automatically change from REC to PLAY. After recording, the<br />
status for any RIGHT/LEFT Parts that were not active during recording will be automatically changed<br />
to - - - to show they have not been recorded yet.<br />
When you press the PLAY/STOP button to listen to your song any Parts set to PLAY status will be<br />
heard.<br />
Re-recording or adding another Part<br />
After you have recorded a song you can Re-record a Part or add (overdub) other Parts if you like<br />
with the following procedure. Re-recording a Part completely erases the previous performance for<br />
that Part automatically.<br />
To Re-record or add a Part:<br />
1) Make sure the Part(s) you wish to Re-record are active, then select any sounds or change panel<br />
settings as desired.<br />
<strong>Kawai</strong> Concert Performer Series Digital Piano
2) Press the REC button.<br />
3) Press the appropriate F button(s) below the LCD screen to set the desired Part(s) to REC.<br />
4) Begin recording by following step 2 in the “To Record” section on page 42.<br />
Remember Re-Recording a Part completely erases the previously recorded performance for that<br />
Part. You can Re-record or add any of the RIGHT/LEFT Parts as many times as you like but you can<br />
only have one performance/sound for each RIGHT/LEFT Part.<br />
Saving the song<br />
Once you finish recording a song you should save it to disk before you turn the power OFF. Once<br />
the power is turned OFF your song data will be lost.<br />
See the section titled “Saving Data to a Floppy Disk” on page 157.<br />
• If you press the EXIT button to get out of the Easy Recorder, the CP will automatically prompt<br />
you to save your work.<br />
Erasing the song<br />
Whenever a Part is selected for recording, the new performance is written right over any existing<br />
one that may be there for that Part. In this sense, the Easy Recorder is just like a tape machine. A<br />
new song will simply erase the old song during the recording process.<br />
However, if you wish to simply erase all the Parts and the Style in a song at once you can use the<br />
Delete function.<br />
To delete a song:<br />
1) Press the DELETE button (F2) while the Recorder is not recording or currently ready to record. The<br />
CP will ask if you are sure.<br />
2) Use either the YES (F7) button to proceed or NO (F1) to cancel.<br />
Recording a Song P. 45
P. 46<br />
L 1<br />
R 1<br />
L 2<br />
R 2<br />
L 3<br />
R 3<br />
L 4<br />
R 4<br />
L 5<br />
R 5<br />
F 1 F 2 F 3 F 4 F 5 F 6 F 7<br />
F1 Cancels erasing the song.<br />
F7 Proceeds with erasing the song.<br />
• DELETE erases all of the performance data for all Parts and the Style in the song. The panel<br />
setup, such as Style, Tempo, and Sound settings are not erased by the DELETE function.<br />
<strong>Kawai</strong> Concert Performer Series Digital Piano
ADVANCED<br />
RECORDER<br />
Advanced Recording<br />
The Advanced Recorder is a full featured sixteen track MIDI recorder that includes many of the<br />
same professional features found on dedicated MIDI sequencing (recording) devices. In addition<br />
to sixteen MIDI tracks the CP Advanced recorder provides a separate Style, chord, and tempo track<br />
for even more flexibility.<br />
Even though you can create recordings of great musical complexity using the Advanced recorder<br />
you will find that it is still very straightforward and easy to use.<br />
Using the Advanced Recorder allows you much greater control over the recording and compositional<br />
process than that offered by the Easy Recorder. However, songs created using the Easy Recorder<br />
can also be edited using the Advanced Recorder by simply pressing the ADVANCED RECORDER<br />
button.<br />
To go to the Advanced Recorder Menu:<br />
Press the ADVANCED RECORDER button. The recording options will be displayed on the screen.<br />
L1<br />
L2<br />
L3<br />
L4<br />
L5<br />
Change the Reverb, Effect, Panning, Volume level<br />
and Chorus for each of the 16 tracks.<br />
Prepares the track for real-time recording.<br />
Re-record specific measures within your song.<br />
Record by entering data note by note.<br />
Select the sound to be assigned to each of the<br />
16 tracks, and change the track's recording and<br />
play back status.<br />
L 1<br />
L 2<br />
L 3<br />
L 4<br />
L 5<br />
R 1<br />
R 2<br />
R 3<br />
R 4<br />
R 5<br />
R1<br />
R2<br />
R3<br />
R4<br />
R5<br />
Edit loop settings for the song.<br />
Edit the general settings for the song.<br />
Edit the song by bars.<br />
Edit the song by MIDI events.<br />
Create your own new user Style.<br />
F 1 F 2 F 3 F 4 F 5 F 6 F 7<br />
F1<br />
Converts recorded Style data into MIDI note data that can then<br />
be edited in the Advanced Recorder. Style Paste will only be<br />
displayed if the current song was recorded using a Style.<br />
Recording a Song P. 47
Real-time Recording<br />
With Real-time record, the CP records your performance as you are playing it, in real-time. You can<br />
select any of the sixteen instrument tracks or the Style and tempo tracks to record, but you can<br />
only record on one track at a time. Since the Advanced Recorder only records on one track at a<br />
time, only the RIGHT 1 Part is active in the Advanced Recorder. Any other active Parts are<br />
automatically turned OFF when the ADVANCED RECORDER button is pressed. In addition to<br />
selecting the desired track to record, the Real-time recording screen provides many other useful<br />
Real-time recording functions.<br />
To use Real-time recording:<br />
1) From the Advanced Recorder menu, press the L2 button to select “Real Time REC”, or simply press<br />
the REC button. The REC button LED will blink and the LCD screen will display the “Real Time REC”<br />
screen.<br />
2) Use the F, L and R buttons to select a function to edit. Use the Dial to change the values.<br />
3) If necessary, you can go to the Mixer and Track Settings screens by pressing the appropriate F<br />
buttons.<br />
L 1<br />
L 2<br />
L 3<br />
L 4<br />
L 5<br />
R 1<br />
R 2<br />
R 3<br />
R 4<br />
R 5<br />
R1 Changes the time signature.<br />
R2 Changes the tempo.<br />
R3 Selects the recording mode. REPLACE<br />
erases the previous data and records the<br />
new data in its place. OVERDUB mixes the<br />
new data with the previous data so that both<br />
are heard together. Repeatedly pressing the<br />
R3 button switches between the REPLACE<br />
and OVERDUB.<br />
L1 Selects the track on which you want to record.<br />
There are 16 Instrument tracks, 1 Tempo track,<br />
and 1 Style track.<br />
L2 Selects the sound or Style that you want to<br />
record with.<br />
L3 Shows the current bar and beat number.<br />
L4 Selects the starting bar for the Loop feature. This<br />
function is a available only when Loop is turned<br />
ON.<br />
F 1 F 2 F 3 F 4 F 5 F 6 F 7<br />
R4 Selects the ending bar for the Loop feature.<br />
This function is available only when Loop<br />
is turned on.<br />
F1 Cancels the real-time recording setup and returns you to the Advanced<br />
Recorder menu.<br />
F2 Takes you to the Mixer menu.<br />
F4, F5 Takes you to the Track Settings menu.<br />
F6 Turns the Loop feature on/off<br />
P. 48<br />
<strong>Kawai</strong> Concert Performer Series Digital Piano
4) Start recording by pressing the PLAY/STOP button while the REC button LED is blinking. There is an<br />
automatic two bar count in before the CP begins recording. If you are recording on the Style track you<br />
must press the START/STOP or INTRO buttons instead of the PLAY/STOP button. When recording a<br />
Style there is no two bar count in, recording begins immediately.<br />
You can cancel recording at anytime by pressing the REC button again or by pressing the F1 button to<br />
return to the Advanced Recorder menu.<br />
• When you select a Style to record the default tempo for that Style is ignored. The Style will use<br />
the current tempo setting for the song instead. You can set the desired tempo on the Real-time<br />
record screen before recording or change the tempo after you have recorded in Song Edit or on<br />
the tempo track in Event Edit.<br />
• When you are recording on the Style track only the Style will be recorded. The style track will<br />
record any chords (to the chord track) you play but the actual notes you are playing will not be<br />
recorded.<br />
• When the recording is done, the Mixer screen will automatically be displayed.<br />
To play back the recorded song:<br />
1) Press the RESET button in the RECORDER section of the front panel to return to the first bar of the<br />
song.<br />
2) Press the PLAY/STOP button to play back the song.<br />
3) Press the PLAY/STOP button again to stop at any time.<br />
4) Pressing the PLAY/STOP button again resumes the playback from the bar where you stopped.<br />
5) Use the RWD or FWD buttons to rewind or fast-forward through the recording.<br />
Mixer<br />
On the Mixer screen, you can change the following settings for each of the 16 tracks: Reverb level,<br />
Chorus level, Effect on/off, Panning, Track mute, Volume level.<br />
To use the Mixer:<br />
1) Use the TRACK buttons (F2, F3) to select which of the 16 tracks you wish to make changes to.<br />
2) Use the L1 and L5 buttons to choose the track setting that you want to change.<br />
3) Use the Dial to change the value.<br />
Recording a Song P. 49
4) At this point, you can start recording or go to another menu to continue setting up.<br />
• You can make changes on the Mixer screen at any time except while the CP is busy recording.<br />
The Mixer screen is accessible from the Advanced Recorder menu, Track Settings screen and<br />
Real-time Rec screen.<br />
• You can save any changes you have made to the settings on the Mixer screen at any bar or beat<br />
in your song. Simply play back the song or press the FWD/RWD buttons until you reach the<br />
exact bar and beat where you want to make changes to the Mixer settings and stop the song.<br />
Make any changes on the Mixer screen, then press the SAVE button (F7). You can do this as<br />
many times and in as many places within your song as you wish.<br />
Note<br />
“Saving” here only means any changes you made on the Mixer screen were saved as part of the<br />
song. Once you finish recording a song or after you make any important changes you should save<br />
it to disk before you turn the power OFF. Once the power is turned OFF your song data and any<br />
changes you have made will be lost.<br />
See the section titled “Saving Data to a Floppy Disk” on page 157.<br />
L 1<br />
L 2<br />
R 1<br />
R 2<br />
L1, L5 Used to select the track setting you want to<br />
change. Use the Dial to change the value.<br />
L 3<br />
R 3<br />
L 4<br />
R 4<br />
L 5<br />
R 5<br />
F 1 F 2 F 3 F 4 F 5 F 6 F 7<br />
F1 Returns you to the Advanced Recorder menu.<br />
F2, F3 Selects the track that you wish to edit.<br />
F4, F5 Takes you to the Track Settings menu.<br />
F6 Turns Loop ON/OFF.<br />
F7 Saves the Mixer settings as part of the song.<br />
P. 50<br />
<strong>Kawai</strong> Concert Performer Series Digital Piano
Track Settings<br />
The Track Settings screen shows you the Play, Record, and Mute status for each track. In addition<br />
it shows you what sound is assigned for the sixteen instrument tracks. You can change the track<br />
status or select a different sound for each track.<br />
The Track Status screen will show the following Status messages.<br />
Rec<br />
Play<br />
MIDI Rec<br />
Mute<br />
Empty<br />
This track is ready to be recorded.<br />
This track has been recorded and will be heard both on playback and while recording.<br />
MIDI Rec enables the CP to record incoming MIDI data from an external MIDI<br />
instrument connected to the MIDI jacks. You can set more than one track to MIDI<br />
Rec, enabling the CP to record on several tracks simultaneously over MIDI.<br />
This track has been recorded but will be silent both on playback and while recording.<br />
This track has not been recorded.<br />
After you have recorded a song you can change the status for a track by pressing the STATUS<br />
button (F3) below the LCD screen. Pressing the STATUS button during playback will select Play or<br />
Mute. Pressing the STATUS button after entering Real-time record but before recording begins, will<br />
select Play, MIDI Rec, or Mute. Rec can only be selected from the Real-time Record screen. The<br />
Track settings screen cannot be accessed during recording.<br />
To use the Track Settings screen:<br />
1) Press the TRACK SETTINGS button (L5) on the Advanced Recorder menu.<br />
2) Press the L3 and L4 buttons to select the track that you wish to edit. If you wish to select tracks 10-<br />
16, the Style, or Tempo tracks, press the L5 button to jump to these tracks. Press the L2 button to<br />
return to tracks 1-9.<br />
3) Press the STATUS button (F3) to change the status to PLAY, MUTE or MIDI REC.<br />
4) If you wish to change the sound assigned to the track, press the SOUND buttons (F5, F6). You can<br />
also select sounds by pressing any of the SOUND buttons.<br />
5) When you are finished, press the MENU button (F1) to return to the Advanced Recorder menu or<br />
press the MIXER button (F2) to go to the Mixer menu.<br />
Recording a Song P. 51
L2 Jumps to tracks 1-9.<br />
L3, L4 Selects the tracks one at a time.<br />
L5 Jumps to tracks 10-16, Tempo, and Style.<br />
P. 52<br />
L 1<br />
L 2<br />
R 1<br />
R 2<br />
R1 Changes the tempo. Use the Dial to change<br />
the value.<br />
L 3<br />
R 3<br />
L 4<br />
R 4<br />
L 5<br />
R 5<br />
F 1 F 2 F 3 F 4 F 5 F 6 F 7<br />
F1 Returns you to the Advanced Recorder menu.<br />
F2 Takes you to the Mixer.<br />
F3 Changes the track’s status.<br />
F5, F6 Selects a different sound for the track.<br />
F7 Saves the Track settings as part of the song.<br />
• As discussed in the above section, MIDI Rec enables the CP to record incoming MIDI data from<br />
an external MIDI instrument connected to the MIDI jacks. You can set more than one track to<br />
MIDI REC, enabling the CP to record on several tracks simultaneously over MIDI. Each MIDI<br />
Rec track will record on the incoming MIDI channel that corresponds to its track number. Track<br />
1 records MIDI channel 1 and so on.<br />
Loop Settings<br />
The Loop function lets you specify certain bars or your entire song to repeat over and over. Loop is<br />
a global function and all tracks will be looped equally. You cannot have different loop settings for<br />
each track.<br />
To set the Loop:<br />
1) Go to the Loop Settings screen by pressing the R1 button in the Advanced Recorder menu.<br />
2) Use the L2–L4 buttons to select the different settings, then use the Dial to change the values.<br />
3) Press the L2 button to turn the Loop ON/OFF.<br />
4) Press the L3 button to specify the bar where you want the Loop to start.<br />
<strong>Kawai</strong> Concert Performer Series Digital Piano
5) Press the L4 button to specify the bar where you want the Loop to end.<br />
6) Press the MENU button (F1) to return to the Advanced Recorder menu when you are finished.<br />
L 1<br />
R 1<br />
L2<br />
Turns the Loop ON/OFF.<br />
L 2<br />
R 2<br />
L3<br />
Specifies the starting bar.<br />
L 3<br />
R 3<br />
L4<br />
Specifies the ending bar.<br />
L 4<br />
R 4<br />
L 5<br />
R 5<br />
F 1 F 2 F 3 F 4 F 5 F 6 F 7<br />
F1<br />
Takes you back to the Advanced Recorder menu.<br />
• You can turn looping on and off in the Mixer menu. However, you still have to set the Start and<br />
End Bar from the Loop Settings menu.<br />
• You can set up looping for recording in the Real-time REC menu as well. In the Real-time REC<br />
menu, when you turn on the looping, the Start Bar and End Bar information will be automatically<br />
copied from the Loop Settings menu.<br />
Style Paste<br />
When you record a Style as part of your song, the Style data is automatically recorded on the Style<br />
track. This data is unique to the CP, and cannot be used with any other musical instruments.<br />
Additionally the instrument tracks that are part of the Style cannot be edited individually.<br />
Style Paste converts any Style data recorded on the Style track into MIDI note and event data and<br />
places it on separate tracks (Trks 9-16). Once the Style data is converted into actual note data, you<br />
can view and edit the individual Style tracks as if you had recorded the data yourself. Also your<br />
song including the Style can now be played back by any other MIDI instrument that reads Standard<br />
MIDI File (SMF) format song data.<br />
Recording a Song P. 53
P. 54<br />
• Before you use Style Paste, you need to make sure Tracks 9-16 are empty or don’t contain important<br />
data. When the Style is pasted, the data from the Style track will be pasted into these tracks and<br />
will replace any existing data.<br />
To use Style Paste:<br />
1) Press the STYLE PASTE button (F1) while you are in the Advanced Recorder menu. The LCD screen<br />
will prompt you for confirmation.<br />
2) If you would like to proceed, press the YES button (F7), or press the NO button (F1) to cancel.<br />
L 1<br />
R 1<br />
L 2<br />
R 2<br />
L 3<br />
R 3<br />
L 4<br />
R 4<br />
L 5<br />
R 5<br />
F 1 F 2 F 3 F 4 F 5 F 6 F 7<br />
F1 Cancels the Style Paste.<br />
F7 Proceeds with Style Paste.<br />
Punch-In Recording<br />
Punching In means being able to automatically start recording right in the middle of a track that is<br />
playing back, continue recording new data on that track for a specified number of measures, and<br />
then automatically stop recording at a specific measure and hear the rest of the track play to the<br />
end. This tool is very valuable if you wish to record over some misplayed notes in the middle of a<br />
track, but would like to preserve the music in the measures leading up to, and following, the trouble<br />
spot.<br />
<strong>Kawai</strong> Concert Performer Series Digital Piano
To use Punch-in recording:<br />
1) Select Punch In/Out in the Advanced Recorder menu.<br />
2) Use the L and R buttons to select the options and change their values using the Dial. Select AUTO<br />
with the R5 button to have the CP automatically handle the punching in/out while you play.<br />
3) Press the REHEARSAL button (F4, F5) to listen to the song for rehearsal. If you need to adjust mixing<br />
or if you would like to loop the song, use the MIXER (F2) or LOOP ON/OFF (F6) button.<br />
4) When you are ready to record, press the REC button and then the PLAY button. The music will start<br />
immediately from the Start Bar that you have chosen. Once the song reaches the Punch In Bar, any<br />
notes that you play on the keyboard will be recorded.<br />
Recording will stop when the song reaches the Punch-Out Bar, but the CP will keep playing back the<br />
song to the end unless you press the STOP button.<br />
You can repeat the punch-in/out section by turning the looping on with the F6 button.<br />
5) Listen to what you have recorded and re-record if necessary.<br />
L1<br />
Selects the track to Punch in on.<br />
L 1<br />
R 1<br />
R1<br />
Changes the time signature.<br />
L 2<br />
R 2<br />
R2<br />
Changes the tempo.<br />
L3<br />
L4<br />
L5<br />
Selects the measure in the song from where you<br />
want the CP to start playing.<br />
Selects the measure where the CP will punch-in<br />
and start recording.<br />
Selects the measure where the CP will punchout<br />
and stop recording.<br />
L 3<br />
L 4<br />
L 5<br />
F 1 F 2 F 3 F 4 F 5 F 6 F 7<br />
F1 Takes you to the Advanced Recorder menu.<br />
F2 Takes you to the Mixer Settings menu.<br />
F4, F5 Plays the song for rehearsal.<br />
F6 Turns Loop on/off.<br />
R 3<br />
R 4<br />
R 5<br />
R3<br />
R5<br />
Selects the recording mode. REPLACE<br />
erases the previous data and records the<br />
new data in its place. OVERDUB mixes the<br />
new data with the previous data so that both<br />
are heard together. Repeatedly pressing the<br />
R3 button switches between the REPLACE<br />
and OVERDUB.<br />
Selects the Punch-in method, Auto or Pedal.<br />
Repeatedly pressing the R5 button switches<br />
between the Auto and Pedal.<br />
Recording a Song P. 55
• If you set the CP to Punch-In at the very first measure of the song, the metronome will<br />
automatically play a two-measure intro to assist you with the timing. These “ticks” will not be<br />
recorded as part of the track.<br />
Punch-In recording using the pedal<br />
Instead of specifically setting an automatic Punch-In and Punch-Out Bar, you can use the center<br />
pedal to <strong>manual</strong>ly Punch In and Out.<br />
• You can punch in and out with pedal one time for each pass over the track that you make.<br />
To use the pedal to Punch-In/Out:<br />
1) Use the R5 button to select Pedal in the Punch In/Out menu.<br />
2) Use the L and R buttons to set up other recording options.<br />
3) Press the REC button to start. The song will start playing.<br />
4) When the song reaches the bar where you wish to punch in, press the center pedal and play the<br />
keyboard.<br />
5) When you reach the bar where you wish to punch out, press the pedal again to stop recording. Notice<br />
that the song keeps playing to the end (it’s just no longer recording) or until you press STOP.<br />
L1 Selects the track to Punch in.<br />
L 1<br />
R 1 R1 Changes the time signature.<br />
L 2<br />
R 2<br />
R2 Changes the tempo.<br />
L 3<br />
L 4<br />
L 5<br />
R 3<br />
R 4<br />
R 5<br />
L3 Selects the measure in the song from where you<br />
want the CP to start playing.<br />
R3 Selects the recording mode. REPLACE<br />
erases the previous data and records the new<br />
data in its place. OVERDUB mixes the new<br />
data with the previous data so that both are<br />
heard together. Repeatedly pressing the R3<br />
button switches between the REPLACE and<br />
OVERDUB.<br />
F 1 F 2 F 3 F 4 F 5 F 6 F 7<br />
F1 Takes you to the Advanced Recorder menu.<br />
F2 Takes you to the Mixer Settings menu.<br />
F4, F5 Plays the song for reharsal.<br />
F6 Turns Loop on/off.<br />
R5 Selects Auto or Pedal as the Punch-In<br />
method. Repeatedly pressing the R5 button<br />
switches between the Auto and Pedal.<br />
P. 56<br />
<strong>Kawai</strong> Concert Performer Series Digital Piano
Step Recording<br />
Step Recording is a method of recording a song by <strong>manual</strong>ly entering notes one after another as<br />
data, instead of playing the keyboard in real-time. This method may be useful when trying to create<br />
a phrase with a precise rhythm, or when recording a phrase that is beyond your playing skill level.<br />
To set up Step recording:<br />
1) In the Advanced Recorder menu select Step Rec (L4). The Step Record menu will be displayed.<br />
2) Use the L and R buttons and the Dial to set up recording options.<br />
3) Press the START button (F7). You will be presented with the data entry screen.<br />
L1<br />
Selects the recording track.<br />
L 1<br />
R 1<br />
R1<br />
Changes the time signature.<br />
L2<br />
L3<br />
Selects which sound is assigned to the track.<br />
Selects which measure you’d like to start<br />
recording at.<br />
L 2<br />
L 3<br />
L 4<br />
L 5<br />
R 2<br />
R 3<br />
R 4<br />
R 5<br />
R3<br />
Selects recording mode. REPLACE erases<br />
the previous data and records the new data<br />
in its place. OVERDUB mixes the new data<br />
with the previous data so that both are<br />
heard together. Repeatedly pressing the R3<br />
button switches between the REPLACE and<br />
OVERDUB.<br />
F 1 F 2 F 3 F 4 F 5 F 6 F 7<br />
F1<br />
F7<br />
Cancels Step recording and takes you to the Advanced Recorder menu.<br />
Proceeds to the data entry screen of the Step Record menu.<br />
To use the Step Recorder:<br />
1) Use the F1–F3 buttons to select a setting (Note value, Note length, Velocity) and use the Dial to<br />
change its value. The value will be displayed above the buttons at the bottom of the screen.<br />
Velocity value can be entered by actually hitting a key on the keyboard. To enable this, select “Key”<br />
for the Velocity value instead of a number.<br />
Recording a Song P. 57
L2, L3 Moves the cursor up and down the list of entered<br />
notes in OVERDUB mode.<br />
P. 58<br />
2) To enter a note event, play the note using the keyboard. The note data will be displayed on the<br />
screen. Continue entering as many notes as you wish; notice how previously entered notes continue<br />
to be displayed as a list, screen room permitting. The graphic navigator near the bottom of the<br />
screen gives you feedback as to what bar you are in.<br />
3) If you enter a wrong note and wish to delete it, press the L2 button. When you are using the REPLACE<br />
mode for recording, every time you press L2 the list of your entered notes on the screen scrolls back<br />
one event, and that event is erased immediately. Therefore, if you scroll back to the first beat of bar<br />
5 of a 10-bar list of notes, everything from bar 5 on will be erased. In OVERDUB mode, however, you<br />
can delete only the most recently added note, and scrolling back over the list using L2 will not<br />
automatically erase events. When using OVERDUB, you need to press the Delete button (R1) to<br />
erase the event.<br />
L 1<br />
L 2<br />
R 1<br />
R 2<br />
R1 Deletes the last note entered in OVERDUB<br />
mode.<br />
L 3<br />
R 3<br />
L 4<br />
R 4<br />
L 5<br />
R 5<br />
F 1 F 2 F 3 F 4 F 5 F 6 F 7<br />
F1 Selects the note value.<br />
F2 Adjusts the note length.<br />
F3 Selects the velocity value. Values are from 1–127 or Key.<br />
F4 Enters Tied note values.<br />
F5 Enters a rest.<br />
F6 Takes you to the beginning of the next measure.<br />
F7 Stops recording.<br />
<strong>Kawai</strong> Concert Performer Series Digital Piano
4) If you would like to enter a rest, press the REST button (F5). This moves the cursor to the next beat<br />
without entering any data. The rest value is same as the note value selected for the F1 button.<br />
If you would like to enter a rest for the remainder of the measure, press the NEXT BAR button (F6).<br />
This will bring the cursor to the top of the next measure.<br />
5) When you like to tie notes, press the TIE button (F4) while holding down the key. This doubles the<br />
length of the note. If you press the TIE button twice while holding down the key, the length of the note<br />
is tripled.<br />
6) In OVERDUB mode, if you go back to certain point to enter a note, use the L2 and L3 buttons to move<br />
the cursor up and down to get to the event time where you want to insert the new data.<br />
7) Press the STOP (F7) button or the PLAY/STOP button to stop recording.<br />
Note Rest Clock value<br />
384<br />
192<br />
96<br />
( ) 64<br />
48<br />
( ) 32<br />
24<br />
( ) 16<br />
12<br />
( ) 8 BAR<br />
3<br />
• Transpose and Octave Shift can be in effect as you are entering notes. The transposed pitches<br />
are the note values that are recorded.<br />
• The navigator graphic represents the current bar that you are recording. The partitions represent<br />
each beat, and thus the number of partitions matches the time signature of the music. For example,<br />
there would be 4 partitions if the time signature is 4/4, and 6 partitions if it is 6/8. Each partition<br />
consists of a number of spaces where dots (•) will be displayed to mark time. Each space<br />
represents 24 clock pulses. Therefore the number of displayed spaces per partition represents<br />
the duration of the beat.<br />
For example, if you choose the 4/4 time signature in the Step Recording settings, the navigator<br />
should look as illustrated below.<br />
Beat<br />
Measure<br />
• • • •<br />
––––––––––––––––<br />
4 partitions: 4 beat rhythm<br />
4 dot spaces: 4 x 24 = 96 clock pulses = a quarter note rhythm<br />
The dots do not represent the duration of the notes. They just tell you where they are.<br />
For a further explanation of the CP’s Clock, and what is meant by “clock pulses” see the Clock<br />
Move description in the Bar Edit section.<br />
Recording a Song P. 59
L2 Names the song.<br />
L3 Adjusts transposition.<br />
L4 Sets the initial tempo of the song.<br />
P. 60<br />
Song Edit<br />
Song Edit lets you name, transpose, and change initial tempo settings for your song.<br />
To edit the song:<br />
1) Select Song Edit from the Advanced Recorder menu. The Song Edit screen is displayed.<br />
2) Use the L and R buttons to select the setting that you wish to change, then use the Dial to change the<br />
value.<br />
3) To name to the song, use the F2 and F3 buttons to move the cursor over the characters in the name,<br />
then use the Dial to select characters.<br />
4) Press the L3 button to set the transpose amount. You can transpose your song +/- 24 in half step<br />
increments.<br />
5) Press L4 to change the initial tempo setting of the song.<br />
6) When you are finished, press the MENU button (F1) to return to the Advanced Recorder menu.<br />
L 1<br />
R 1<br />
L 2<br />
R 2<br />
L 3<br />
R 3<br />
L 4<br />
R 4<br />
L 5<br />
R 5<br />
F 1 F 2 F 3 F 4 F 5 F 6 F 7<br />
F1 Takes you to the Advanced Recorder menu.<br />
F2, F3 Moves the cursor over the characters when naming the song.<br />
<strong>Kawai</strong> Concert Performer Series Digital Piano
Bar Editing<br />
Bar Edit contains many useful editing functions. You can edit your song one bar or any number of<br />
bars at a time.<br />
To use Bar Edit:<br />
1) In the Advanced Recorder menu select Bar Edit (R3). The Bar Edit screen will be displayed.<br />
2) Use the L and R buttons to select the desired editing function. The editing screen for that function<br />
will be displayed.<br />
L 1<br />
L 2<br />
R 1<br />
R 2<br />
Use the L and R buttons to select the desired edit<br />
function.<br />
L 3<br />
R 3<br />
L 4<br />
R 4<br />
L 5<br />
R 5<br />
F 1 F 2 F 3 F 4 F 5 F 6 F 7<br />
F1<br />
Takes you to the Advanced Recorder menu.<br />
Recording a Song P. 61
Quantize<br />
Quantize automatically shifts the timing of a note. This can be used to correct imperfect timing in a<br />
performance by shifting notes that were played either too early or too late so they will fall exactly<br />
on the correct beat. For example, you can accurately align any out of time notes to the nearest 8thor<br />
16th-note beat depending on the type of song you are quantizing. Sometimes quantizing all of<br />
your notes to exactly the same beat can make your playing sound too stiff. The Advanced Recorder<br />
quantize function allows you to set a quantize “Range” so only the notes that were very early or late<br />
are quantized. Notes that were almost perfect are not quantized thus keeping more of the original<br />
feeling in your music.<br />
L1 Selects the track that you wish to quantize.<br />
L 1<br />
R 1<br />
L2, L3 Selects the bar range that you want to quantize.<br />
Use the Dial to set the bar numbers.<br />
L 2<br />
R 2<br />
R2 Selects the note Resolution for quantization.<br />
Use the Dial to change the value.<br />
L4 Selects the lowest note that you want to quantize.<br />
Use the Dial to change the note value.<br />
L 3<br />
L 4<br />
R 3<br />
R 4<br />
R3, R4 Sets the Low and High Range for<br />
quantization. Use the Dial to change the<br />
value.<br />
L5 Selects the highest note that you want to<br />
quantize. Use the Dial to change the note value.<br />
L 5<br />
R 5<br />
F 1 F 2 F 3 F 4 F 5 F 6 F 7<br />
F1 Returns you to the Advanced Recorder menu.<br />
F2 Undoes the quantization which was just applied. This option<br />
is not always available.<br />
F7 Applies the quantization to your recording.<br />
• Resolution determines the timing value the quantize function will use to shift the notes you want<br />
to quantize. For example, setting a quarter note resolution will shift all of the quantized notes to<br />
the nearest quarter beat. Setting an eighth note resolution will shift all of the quantized notes to<br />
the nearest eighth beat and so on. In the Advanced Recorder, quantize values are expressed in<br />
note values and as a number that indicates how many clock beats each note value contains. The<br />
Advanced Recorder divides each beat in a bar into 96 smaller clock beats. A Quarter note is 96<br />
clock beats, an eighth note is 48 clock beats, and a sixteenth note is 24 clock beats and so on.<br />
The quantize resolution range is from quarter notes (96 clocks), to 64th note triplets (4 clocks).<br />
P. 62<br />
<strong>Kawai</strong> Concert Performer Series Digital Piano
○ ○ ○ ○ ○ ○ ○ ○ ○<br />
○ ○ ○ ○ ○ ○ ○ ○ ○<br />
○ ○ ○ ○ ○ ○ ○ ○ ○<br />
○ ○ ○ ○ ○ ○ ○ ○ ○<br />
○ ○ ○ ○ ○ ○ ○ ○ ○<br />
○ ○ ○ ○ ○ ○ ○ ○ ○<br />
○ ○ ○ ○ ○ ○ ○ ○ ○<br />
○ ○ ○ ○ ○ ○ ○ ○ ○<br />
○ ○ ○ ○ ○ ○ ○ ○ ○<br />
• Range sets up timing “borders” around the Resolution value you specify. Notes within these<br />
borders will not be quantized and notes outside the borders will be moved to the nearest beat<br />
specified by the resolution value (Quarter note, Eighth note, etc.). The negative value represents<br />
the placement of the “border” before the beat, and the positive value represents the placement<br />
the “border” after the beat. Together, these two “borders” form a timing “range” around the<br />
specified beat.<br />
Resolution<br />
24 Beat 12 Beat 12<br />
Selecting zero Range results in no<br />
“range”, and all notes are shifted<br />
to the precise beat.<br />
Range<br />
0, 0 « » «<br />
» « «<br />
Resolution<br />
24 Beat 12 Beat 12<br />
The notes that fall beyond the<br />
Range are moved to the closest<br />
“border” of the Range.<br />
Range<br />
-3, 3 « <br />
<br />
» <br />
Resolution<br />
48 Beat 24 Beat 24<br />
The notes that fall inside the Range<br />
are not shifted at all.<br />
Range<br />
2, 10 « <br />
<br />
» <br />
By experimenting with Resolution and Range settings, you can correct the timing of the notes in your<br />
recording while still allowing for a natural, human feel.<br />
Recording a Song P. 63
Copy<br />
The Copy function allows you to copy a section or all of the data on a track to another location.<br />
The destination may be on the same track, or it can be on another track.<br />
• The destination of the copied data must either be:<br />
1) A location that already has data in it.<br />
2) The first blank bar after the end of a track (Bar 1 if the destination track is empty).<br />
For example, if a track only has 10 bars in it, you cannot copy data onto bar 20. You can, however,<br />
copy data to bars 1 through 11.<br />
• Copied data replaces any current data that may be at the destination.<br />
L2 Selects the track to be copied. Use the Dial to<br />
select the track numbers 1-16, Tempo, or Chord.<br />
L3 Selects the bar where the data that you are<br />
copying starts. Use the Dial to change the bar<br />
number.<br />
L4 Selects the bar where the data that you are<br />
copying ends. Use the Dial to change the bar<br />
number.<br />
L 1<br />
L 2<br />
L 3<br />
L 4<br />
L 5<br />
R 1<br />
R 2<br />
R 3<br />
R 4<br />
R 5<br />
R2 Selects the destination track. Use the Dial<br />
to select the track number 1-16, Tempo, or<br />
Chord.<br />
R3 Selects the bar in the destination track where<br />
the copied data will be placed.<br />
F 1 F 2 F 3 F 4 F 5 F 6 F 7<br />
F1 Returns you to the Advanced Recorder menu.<br />
F2 Undoes the copying. This option is not always available.<br />
F7 Proceed with copying.<br />
P. 64<br />
<strong>Kawai</strong> Concert Performer Series Digital Piano
Delete<br />
Delete completely erases and removes the bars that you specify.<br />
L 1<br />
R 1<br />
L2<br />
Selects the track to be deleted. Use the Dial to<br />
choose 1-16, Tempo, Chord or All.<br />
L 2<br />
R 2<br />
L3<br />
Selects the first bar that has the data you want<br />
to delete. Use the Dial to change bars.<br />
L 3<br />
L 4<br />
R 3<br />
R 4<br />
L4<br />
Selects the last bar that contains the data that<br />
you want to delete. Use the Dial to change bars.<br />
L 5<br />
R 5<br />
F 1 F 2 F 3 F 4 F 5 F 6 F 7<br />
F1<br />
F2<br />
F7<br />
Returns you to the Advanced Recorder menu.<br />
Undoes the deletion. This option is not always available.<br />
Proceed with the deletion.<br />
Recording a Song P. 65
Insert<br />
The Insert function duplicates data from specified bars and copies it to a certain location. However,<br />
the current data at the destination is not erased, but instead is pushed back to make room for the<br />
copied data.<br />
L 1<br />
R 1<br />
L2 Selects the track that contains the data you wish<br />
to duplicate. Choose from 1-16, Tempo, Chord<br />
or All.<br />
L3 Selects the first bar that has the data you want<br />
to duplicate.<br />
L 2<br />
L 3<br />
L 4<br />
R 2<br />
R 3<br />
R 4<br />
R2 Selects the destination track where you want<br />
this data inserted. Choose from 1-16,<br />
Tempo, Chord or All.<br />
R3 Selects the bar in the destination track where<br />
you want this data inserted.<br />
L4 Selects the last bar that has the data you want to<br />
duplicate.<br />
L 5<br />
R 5<br />
F 1 F 2 F 3 F 4 F 5 F 6 F 7<br />
F1 Takes you to the Advanced Recorder menu.<br />
F2 Undoes the Insert. This option is not always available.<br />
F3, F4 Takes you to the Insert Bar menu.<br />
F7 Proceeds with the Insert.<br />
• If you just wish to insert empty bars into a track, select INSERT BAR (F3 or F4), and a sub-menu<br />
will be displayed. You can insert empty bars into a track between bars that have data, or at the<br />
first blank bar at the end of the track.<br />
P. 66<br />
<strong>Kawai</strong> Concert Performer Series Digital Piano
L 1<br />
R 1<br />
L2<br />
L3<br />
Selects the number of empty bars you wish to<br />
insert. Use the Dial to change the value.<br />
Selects the time signature for the bars that are<br />
going to be inserted. Use the Dial to change the<br />
value.<br />
L 2<br />
L 3<br />
L 4<br />
L 5<br />
R 2<br />
R 3<br />
R 4<br />
R 5<br />
R2<br />
R3<br />
Selects the track where the empty bars are<br />
going to be inserted. Choose 1-16, Tempo,<br />
Chord or All.<br />
Selects the location in the destination track<br />
where you want the empty bars inserted.<br />
Use the Dial to choose the location.<br />
F 1 F 2 F 3 F 4 F 5 F 6 F 7<br />
F1<br />
F2<br />
F7<br />
Takes you to the previous menu.<br />
Undoes the Insert. This option is not always available.<br />
Proceeds with the Insert.<br />
Recording a Song P. 67
Erase<br />
Erases data in the bars that you specify, and leaves them as empty bars.<br />
L 1<br />
R 1<br />
L2 Selects the track that has the bars you want to<br />
erase. Choose 1-16, Tempo or Chord.<br />
L 2<br />
R 2<br />
L 3<br />
L 4<br />
L 5<br />
R 3<br />
R 4<br />
R 5<br />
L3 Selects the first bar to be erased. Use the Dial to<br />
change the bar.<br />
L4 Selects the last bar to be erased. Use the Dial to<br />
change the bar.<br />
F 1 F 2 F 3 F 4 F 5 F 6 F 7<br />
F1 Takes you to the Advanced Recorder menu.<br />
F2 Undoes the Erase. This option is not always available.<br />
F7 Proceeds with the Erase.<br />
P. 68<br />
<strong>Kawai</strong> Concert Performer Series Digital Piano
Merge<br />
Merge combines data from two tracks. You can make complex musical phrases using several tracks,<br />
then combine them together on one track. Remember that there can only be one instrument sound<br />
assigned to each track, so the resulting merged track will play all the combined data using one<br />
instrument sound. Merge can be useful for making rhythm patterns by first recording different<br />
drum/ percussion parts using the same drum kit on several tracks for easy editing of each instrument,<br />
or recording the right and left hand parts of a piano piece and combining them later on one track to<br />
free up extra tracks for more recording.<br />
• Merge does not automatically erase the track from where you copied the data.<br />
L 1<br />
R 1<br />
L2<br />
Selects the track from where you want to copy<br />
data. Choose 1-16.<br />
L 2<br />
R 2<br />
R2<br />
Select the track where you want this data<br />
merged to. Choose 1-16.<br />
L 3<br />
R 3<br />
L 4<br />
R 4<br />
L 5<br />
R 5<br />
F 1 F 2 F 3 F 4 F 5 F 6 F 7<br />
F1<br />
F2<br />
F7<br />
Takes you to the Advanced Recorder menu.<br />
Undoes the Merge. This option is not always available.<br />
Proceed with the Merge.<br />
Recording a Song P. 69
Gate Time Modify<br />
Gate time refers to the length of a note as a percentage. Whatever the length of a note is when it is<br />
first recorded, this value is considered as its Gate time of 100%. By editing the length of the note,<br />
you can shorten it to 10% or lengthen it to 300% of the original value.<br />
L 1<br />
R 1<br />
L2 Selects the track in which you want to modify<br />
Gate times. Use the Dial to choose the track.<br />
L3 Selects the first bar of the data that you want to<br />
modify Gate times for. Use the Dial to change<br />
bars.<br />
L 2<br />
L 3<br />
L 4<br />
R 2<br />
R 3<br />
R 4<br />
R2 Adjusts the Gate time in 10% increments.<br />
Use the Dial to select a value from 10%-<br />
300%.<br />
L4 Selects the last bar of the data that you want to<br />
modify Gate times for. Use the Dial to change<br />
bars.<br />
L 5<br />
R 5<br />
F 1 F 2 F 3 F 4 F 5 F 6 F 7<br />
F1 Takes you to the Advanced Recorder menu.<br />
F2 Undoes the Gate time adjustment. This option is not always<br />
available.<br />
F7 Proceeds with applying the Gate time adjustment.<br />
P. 70<br />
<strong>Kawai</strong> Concert Performer Series Digital Piano
Velocity Modify<br />
Velocity refers to how hard a key is struck, which translates into the dynamics of how loud the<br />
produced sound is.<br />
A note’s Velocity is a numerical value from 1-127. When editing the note Velocities in your recording,<br />
you can change them within a +/-100 range of their original values.<br />
L 1<br />
R 1<br />
L2<br />
Selects the track in which you want to adjust<br />
Velocity.<br />
L 2<br />
R 2<br />
R2<br />
Adjusts Velocity from -100 to +100 of their<br />
current values.<br />
L3<br />
L4<br />
Selects the bar where the data you want to adjust<br />
starts.<br />
Selects the bar where the data you want to adjust<br />
ends.<br />
L 3<br />
L 4<br />
L 5<br />
R 3<br />
R 4<br />
R 5<br />
F 1 F 2 F 3 F 4 F 5 F 6 F 7<br />
F1<br />
F2<br />
F7<br />
Takes you to the Advanced Recorder menu.<br />
Undoes the Velocity adjustment. This option is not always<br />
available.<br />
Proceeds with adjusting the Velocity values.<br />
Recording a Song P. 71
Clock Move<br />
In the Resolution section of this <strong>manual</strong> we learned that the CP Advanced recorder divides each<br />
beat in a bar into 96 clock beats, also expressed as a quarter note. Therefore there are 48 clocks per<br />
eighth note, and 24 clocks per sixteenth note and so on. This relationship holds true regardless of<br />
the song’s tempo.<br />
On the CP, you can shift the timing of all notes in a track by shifting the entire track ahead (negative<br />
values) or behind (positive values) the beat by a certain clock value. Clock move is useful for<br />
adjusting the overall timing of a track. For example, if a certain sound you recorded responds<br />
slowly and sounds behind the beat, you could shift the timing of the notes ahead of the beat to<br />
compensate for the sounds slow response and make its timing feel more natural.<br />
L 1<br />
R 1<br />
L2 Selects the track that you wish to move. Choose<br />
from 1-16.<br />
L 2<br />
R 2<br />
R2 Sets how many clocks you wish to move the<br />
track. Choose from –999 to +999.<br />
L 3<br />
R 3<br />
L 4<br />
R 4<br />
L 5<br />
R 5<br />
F 1 F 2 F 3 F 4 F 5 F 6 F 7<br />
F1 Takes you to the Advanced Recorder menu.<br />
F2 Undoes the clock move. This option is not always available.<br />
F7 Proceeds with applying the clock move.<br />
P. 72<br />
<strong>Kawai</strong> Concert Performer Series Digital Piano
Transpose<br />
This will transpose the notes within a specified bar(s) up or down in half-step increments.<br />
L 1<br />
R 1<br />
L2<br />
Selects the track that has the notes you want to<br />
transpose. Choose from 1-16.<br />
L 2<br />
R 2<br />
R2<br />
Adjusts transposition amount in half-step<br />
increments from -24 to 24.<br />
L3<br />
L4<br />
Selects the bar where the notes you want to<br />
transpose start.<br />
Selects the bar where the notes you want to<br />
transpose end.<br />
L 3<br />
L 4<br />
L 5<br />
R 3<br />
R 4<br />
R 5<br />
F 1 F 2 F 3 F 4 F 5 F 6 F 7<br />
F1<br />
F2<br />
F7<br />
Takes you to the Advanced Recorder menu.<br />
Undoes the transposition. This option is not always available.<br />
Proceeds with applying the transposition.<br />
Recording a Song P. 73
L2 Moves the cursor to the previous bar.<br />
L3 Moves the cursor up the event list.<br />
L4 Moves the cursor down the event list.<br />
L5 Moves the cursor to the next bar.<br />
P. 74<br />
Event Edit<br />
Event Edit enables you to examine and edit your performance note by note.<br />
To use Event Edit:<br />
1) Select Event Edit in the Advanced Recorder menu. The Event Edit screen will be displayed.<br />
2) Choose the track that you want to edit using the TRACK buttons (F3, F4). Note that Style, Chord, and<br />
Tempo track can be edited as well.<br />
3) Use the L buttons to scroll up or down the event list until you find the specific event that you want to<br />
edit. You can also use the Dial to scroll through the event list. You will hear the individual events<br />
being played as you scroll over them.<br />
4) Use the CURSOR buttons (F5, F6) buttons to determine how you want to scroll through the event list.<br />
Selecting Bar scrolls through the event list bar by bar, selecting Beat scrolls through the event list<br />
beat by beat and so on. The selection will become highlighted.<br />
L 1<br />
R 1<br />
R1 Removes the selected event.<br />
L 2<br />
R 2<br />
R2 Creates a new event.<br />
L 3<br />
R 3<br />
R3 Modifies the existing event.<br />
L 4<br />
R 4<br />
L 5<br />
R 5<br />
F 1 F 2 F 3 F 4 F 5 F 6 F 7<br />
F1 Takes you to the Advanced Recorder menu.<br />
F3, F4 Selects the track to work with.<br />
F5, F6 Moves the cursor across the columns in the event list.<br />
F7 Starts playing the Track.<br />
<strong>Kawai</strong> Concert Performer Series Digital Piano
5) Select the function that you would like to apply to this event. You can select DELETE (R1) to remove<br />
the event, INSERT (R2) to create a new event at any specified location, or REPLACE (R3) to change<br />
the existing event. Enter new values in the pop up Entry Box when you select INSERT or REPLACE.<br />
When Inserting or Replacing an event, use the CURSOR buttons to select the specific part of the<br />
event you want to edit. Use the Dial to change the value.<br />
6) Press the EXEC (F7) button to proceed, or press CANCEL (F2). The CP will prompt you for confirmation.<br />
7) Use the MENU button (F1) to return to the Advanced Recorder menu when you are done editing.<br />
L 1<br />
R 1<br />
L 2<br />
R 2<br />
L 3<br />
R 3<br />
L 4<br />
R 4<br />
L 5<br />
R 5<br />
F 1 F 2 F 3 F 4 F 5 F 6 F 7<br />
FI Takes you to the Advanced Recorder Menu.<br />
F2 Cancel the edit.<br />
F5, F6 Moves the cursor across the columns in the event list.<br />
Recording a Song P. 75
Creating Your Own Styles<br />
The Concert Performer contains 220 built-in Styles covering a wide<br />
variety of musical genres. There are two powerful features that<br />
allow you to edit any of these Styles to better suit your musical<br />
tastes, or even create your own Style entirely from scratch! These<br />
are the Conductor and the Style Maker.<br />
The Conductor allows you to edit the Style data and personalize it<br />
to your taste. The Conductor offers two ways to edit: Easy Edit<br />
and Advanced Edit.<br />
The CP can store up to 20 User Styles on board at one time.<br />
However since you can also save your original Styles onto a floppy<br />
disk, your library of Styles is virtually unlimited.<br />
Thanks to the Style Convert Software developed by EMC Software,<br />
you can also convert style data from many other manufacturers<br />
for use on the CP. That way you can take advantage of the hundreds<br />
of Style disks that are available on the market!<br />
The Style Maker allows you to create Styles of your own.<br />
There are three ways of using this feature: Make a New Style, Edit<br />
an Existing Style, and Phrase Combination.<br />
Conductor<br />
The Conductor is used to edit Preset or User Style data.<br />
There are two editing methods offered by the Conductor.<br />
Easy Style Edit This is an easy way to edit the Style data. The CP built-in styles are comprised<br />
three different types, Full, Intimate, and Solo Piano Styles. A Full Style<br />
consists of six instrument tracks called Sections. These are the Drums,<br />
Bass, and four Accompaniment tracks. The Intimate Styles have four<br />
Sections, Drum, Bass, And Two Accompaniment tracks. The Solo piano<br />
Styles have two Accompaniment Tracks (Right and Left hand) and no Drum<br />
or Bass tracks.<br />
When you play a Style, each of these sections plays a musical Phrase<br />
composed for that type of instrument. Each section can play one of four<br />
different musical phrases, one for each of the four variations within a Style.<br />
Easy Edit lets you assign which of these four Phrases will be played by each<br />
section for each of the four variations within the style. This means you can<br />
mix and match the different phrases for each section to create your own<br />
unique arrangements. Once you are satisfied with your edits, you can save<br />
your Easy Style edits to the PRESET STYLE.<br />
P. 76<br />
<strong>Kawai</strong> Concert Performer Series Digital Piano
Advanced Style Edit<br />
This allows you to edit the finer details within a Style. You have control<br />
over each Section’s Sound Assignment, volume level, panning, chorus, and<br />
reverb settings. Once you are satisfied with your edits, you can save your<br />
Advanced Style edits to the USER CONDUCTOR.<br />
To use Easy Edit:<br />
CONDUCTOR<br />
EDIT<br />
RESET<br />
USER<br />
1) Select the Style and the Variation (1–4) that you would like to edit.<br />
2) Press the EDIT button. The LCD screen will display the Easy Style Edit screen.<br />
3) Use the F2–F7 buttons to select a Section to edit.<br />
4) Use the L buttons to select the desired Phrase (1-4) for each Section. You can edit while the Style is<br />
running to hear your changes.<br />
5) To mute a Section, press the corresponding F button. Pressing the F button again will un-mute the<br />
section.<br />
6) If you would like to save your edits, press the SAVE TO PRESET (R1) button. The saved contents will<br />
be written to the PRESET STYLE. If you don't save your edits, they will be lost when you turn the<br />
power OFF.<br />
7) Press the MORE (F1) button to go to the Advanced Style Edit screen.<br />
8) Press the EXIT button to leave the Easy Style Edit screen.<br />
L 1<br />
R 1<br />
L2–L5 Selects a Phrase for the Section.<br />
L 2<br />
R 2<br />
R1<br />
Saves the changes to the Preset Style.<br />
L 3<br />
R 3<br />
L 4<br />
R 4<br />
L 5<br />
R 5<br />
F 1 F 2 F 3 F 4 F 5 F 6 F 7<br />
F1 Go to Advanced Edit section.<br />
F2–F7 Selects which Section is being changed. Pressing again will<br />
mute the Section.<br />
Creating Your Own Styles P. 77
P. 78<br />
• Pressing the SAVE button will save all Styles at one time. You cannot save individually.<br />
• For Intimate Styles the ACC 3/4 Sections are not used and cannot be edited.<br />
• For Solo Piano Styles the Drum, Bass, and ACC 3/4 Sections are not used and cannot be edited.<br />
Resetting the Style<br />
The CP always remembers the original Preset Style settings. If you wish to restore those factory<br />
settings before saving your edits, simply press the RESET button in the Conductor.<br />
• If you would like to revert all Styles back to their original factory settings, after you have pressed<br />
the SAVE button, use reset Conductor on the Soft Reset screen. See the section titled “Soft<br />
Reset” on page 144.<br />
Note:<br />
Easy Edit doesn’t allow you to edit the Intro, Ending and Fill-ins. However, muting a Section in the<br />
Style will result in automatic muting of the same Section in the Intro, Ending and Fill-ins. If you<br />
mute a certain Section, you need to consider what effect it will have on the overall Style.<br />
<strong>Kawai</strong> Concert Performer Series Digital Piano
To use Advanced Edit:<br />
1) Select the Style and the Variation (1–4) that you would like to edit.<br />
2) In the EASY STYLE EDIT screen, press the MORE button (F1). The Advanced Style Edit screen will be<br />
displayed.<br />
3) Use the F2–F7 buttons to select a Section to edit.<br />
L1<br />
Selects a sound for the Section.<br />
L 1<br />
R 1<br />
R1<br />
Saves the changes to the User Conductor.<br />
L2<br />
Adjiusts the Reverb level.<br />
L 2<br />
R 2<br />
L3<br />
Adjiusts the Chorus level.<br />
L 3<br />
R 3<br />
L4<br />
Adjusts panning.<br />
L 4<br />
R 4<br />
L5<br />
Adjusts the volume level.<br />
L 5<br />
R 5<br />
F 1 F 2 F 3 F 4 F 5 F 6 F 7<br />
F1<br />
Back to the EVENT STYLE EDIT settings.<br />
F2–F7 Selects the Section to change. Pressing again will mute the<br />
Section.<br />
4) Use the L buttons to select a setting and use the Dial to change its value. You can make your edits<br />
while the Style is playing to hear your changes.<br />
5) Press the BACK (F1 button) to return to the Easy Style Edit screen.<br />
Creating Your Own Styles P. 79
6) If you would like to save your edits, press the SAVE TO USER (R1) button. Your edits will be written<br />
to the USER CONDUCTOR. If you don't save your edits, they will be lost as soon as you exit the<br />
Advanced Style Edit screen.<br />
7) Press the EXIT button to exit the Advanced Style Edit screen.<br />
L 1<br />
R 1<br />
L 2<br />
R 2<br />
L3 Selects the memory location (1 through 40)<br />
where you wish to save your User Conductor<br />
Style.<br />
L 3<br />
L 4<br />
R 3<br />
R 4<br />
L4 Names your Style.<br />
L 5<br />
R 5<br />
F 1 F 2 F 3 F 4 F 5 F 6 F 7<br />
F1 Back to the Advanced Style Edit<br />
F2, F3 Moves the cursor over the characters in the Style name.<br />
F4, F5 Selects a character to enter as part of the name.<br />
F7 Proceeds with saving the Style.<br />
Important Note:<br />
If you are using a User Style as the Source Style of your User Conductor, that User Style must<br />
always be kept at the same location in the CP, or else the User Conductor will not be able to locate<br />
it.<br />
P. 80<br />
<strong>Kawai</strong> Concert Performer Series Digital Piano
RESET<br />
Resetting the Style<br />
You can restore the original Style settings by pressing the RESET button. This will completely clear<br />
the changes made to the Styles except any data already saved as a User Conductor Style. You can<br />
also instantly discard the current changes by pressing the EXIT button to leave the Advanced Edit<br />
screen.<br />
To use a saved User Conductor Style:<br />
1) Press the USER CONDUCTOR button. If there are any User Conductor Styles available, they will be<br />
displayed.<br />
2) Use the F1–F4 buttons to select the page that contains your desired User Conductor Style.<br />
3) Use the L or R button to select the desired User Conductor Style.<br />
L 1<br />
L 2<br />
R 1<br />
R 2<br />
Use the L or R buttons to select your desired User<br />
Conductor Style.<br />
L 3<br />
R 3<br />
L 4<br />
R 4<br />
L 5<br />
R 5<br />
F 1 F 2 F 3 F 4 F 5 F 6 F 7<br />
F1-F4<br />
F7<br />
Search for User Conductor Styles on the other pages.<br />
Deletes the selected User Conductor Style.<br />
Creating Your Own Styles P. 81
P. 82<br />
Making a New Style<br />
This is the most flexible way to create a new Style.<br />
You can make a completely new style from scratch or edit an existing style. First, read the explanation<br />
below about the configuration of a style and understand how a style is made.<br />
Configuration of a Style<br />
A complete Style consists of the following patterns:<br />
Basic pattern 4 patterns (Variation 1–4) Max 16 measures<br />
Fill-in 4 patterns (Fill-In 1–4) 1 or 2 measures<br />
Intro Major 2 patterns Max 16 measures<br />
Intro Minor 2 patterns Max 16 measures<br />
Ending Major 2 patterns Max 16 measures<br />
Ending Minor 2 patterns Max 16 measures<br />
• Each of these patterns in a Full Style is made up of six Sections—Drum, Bass, ACC1, ACC2,<br />
ACC3 and ACC4. In an Intimate Style there are four Sections—Drum, Bass, ACC1, ACC2. In a<br />
Solo Piano Style there are two Sections— ACC1, ACC2. You can use up to six sections in a User<br />
Style but you don’t necessarily have to use all of the sections to create a Style. For example, just<br />
like the Intimate and Solo Piano Styles you may not need to use some Variations or Sections to<br />
accomplish your musical idea. These unused sections or variations may be left blank.<br />
• The different Sections can be of varying bar lengths as long as they stay within the limit. Having<br />
them all the same length may make the Style easier to use in a song, but you may find that having<br />
uneven bar lengths among the Sections can create interesting musical results.<br />
• For simplicity’s sake it is advisable to record your new style in the key of C.<br />
To create a Style:<br />
1) Press the ADVANCED RECORDER button. The LCD screen will display the Advanced Recorder menu.<br />
2) In the Advanced Recorder menu, press the Style Maker button (R5). The LCD screen will display the<br />
first Style Maker screen.<br />
3) To make a completely new Style, press the Make New Style button (L1) and use the Dial to select the<br />
time signature for the style you are going to make. To edit an existing style, press the Edit Existing<br />
Style button (L3) and use the Dial to select the style you want to edit.<br />
<strong>Kawai</strong> Concert Performer Series Digital Piano
4) Press the ENTER button (F7). The Style Maker Record screen will be displayed.<br />
L1<br />
Selects Make New Style.<br />
L 1<br />
R 1<br />
R1<br />
Changes the Time Signature.<br />
L 2<br />
R 2<br />
L3<br />
Selects Edit Existing Style.<br />
L 3<br />
R 3<br />
R3<br />
Selects the Style you want to edit.<br />
L 4<br />
R 4<br />
L5<br />
Selects Phrase Combination.<br />
L 5<br />
R 5<br />
R5<br />
Selects the Initial Style.<br />
F 1 F 2 F 3 F 4 F 5 F 6 F 7<br />
F1<br />
F7<br />
Go to the Advanced Recorder menu.<br />
Enters the selected Style Maker menu.<br />
5) Use the L and R buttons to select which pattern to record.<br />
6) Press the Bar Length button (R1) and use the Dial to change the bar length of the pattern.<br />
7) Press the REC button (F7). The Style Maker Record screen will be displayed.<br />
L 1<br />
R 1<br />
R1<br />
Changes the bar length.<br />
L 2<br />
R 2<br />
L3<br />
Selects an Intro and Ending to record.<br />
L 3<br />
R 3<br />
R3<br />
Selects an Intro and Ending to record.<br />
L4<br />
Selects a Variation and Fill-in to record<br />
L 4<br />
R 4<br />
R4<br />
Selects a Variation and Fill-in to record.<br />
L5<br />
Copies a phrase from another pattern.<br />
L 5<br />
R 5<br />
R5<br />
Saves the new Style to User Style.<br />
F 1 F 2 F 3 F 4 F 5 F 6 F 7<br />
F1<br />
F7<br />
Takes you to the Style Maker menu.<br />
Takes you to Style Maker Record screen.<br />
Creating Your Own Styles P. 83
L1 Selects the Part to be recorded.<br />
L2 Sets the recording tempo.<br />
L5 Takes you to the Detail Setting menu.<br />
P. 84<br />
8) Use the L, R and F buttons to select the different record functions. Use the Dial to change the values.<br />
9) Press the REC START button (R4) to start recording. There will be an automatic 2-bar count in.<br />
10) Start playing on the keyboard. The recording is looping, which means when it comes to the end of<br />
the last bar, it automatically goes back to the beginning of the first bar. In the Edit Existing Style, the<br />
existing style will play.<br />
L 1<br />
R 1<br />
R1 Selects the Sound for the selected Part.<br />
L 2<br />
L 3<br />
R 2<br />
R 3<br />
R2 Selects the Quantize resolution. This is input<br />
Quantize and your playing will automatically be<br />
Quantized as you play.<br />
L 4<br />
R 4<br />
R4 Starts the recording.<br />
L 5<br />
R 5<br />
R5 Saves the Style to User Style.<br />
F 1 F 2 F 3 F 4 F 5 F 6 F 7<br />
F1 Takes you to the Style Maker menu.<br />
F2-F7 Switches between Play and Mute for the recorded Part.<br />
Note:<br />
Press the Detail Setting button (L5) to edit the detail settings for the Auto-accompaniment system.<br />
See page 87 for an explanation of the Detail Settings.<br />
<strong>Kawai</strong> Concert Performer Series Digital Piano
11) To erase any unnecessary or incorrect notes, use the ERASE (F1) button. While the pattern is still<br />
recording the notes will be erased as long as you press and hold the button.<br />
12) When finished recording, press the REC STOP button (R4).<br />
13) Follow the above procedure to record any other desired patterns as needed.<br />
14) To save the recorded Style, press the SAVE button (R5). The Style Save screen will be displayed.<br />
L 1<br />
R 1<br />
L 2<br />
R 2<br />
L 3<br />
R 3<br />
L 4<br />
R 4<br />
R4<br />
Stops the recording.<br />
L 5<br />
R 5<br />
F 1 F 2 F 3 F 4 F 5 F 6 F 7<br />
F1<br />
Erases the recorded notes.<br />
Creating Your Own Styles P. 85
L1 Sets the default tempo for the style.<br />
L3 Selects the location to be saved.<br />
L4 Names the style.<br />
P. 86<br />
15) Press the PRESET TEMPO button (L1) and use the dial to set the default tempo for the style.<br />
16) Press the SAVE TO button (L3) and use the Dial to select the location to save your new Style.<br />
17) Press the NAME button (L4). Use the F2 and F3 buttons to move the cursor and use the F4 and F5<br />
buttons or the Dial to select the characters to name the style.<br />
18) Press the SAVE button (F7).<br />
L 1<br />
R 1<br />
L 2<br />
R 2<br />
L 3<br />
R 3<br />
L 4<br />
R 4<br />
L 5<br />
R 5<br />
F 1 F 2 F 3 F 4 F 5 F 6 F 7<br />
F1 Takes you to the Style Maker Record screen.<br />
F2, F3 Moves the cursor.<br />
F4, F5 Selects the characters.<br />
F7 Saves the style to User Style.<br />
<strong>Kawai</strong> Concert Performer Series Digital Piano
Auto-accompaniment System<br />
The Concert Performer Auto-Accompaniment System (ACC) analyzes your playing and adjusts the<br />
note data recorded in the different Phrases in a pattern to match the root key and chord type you<br />
are playing. The ACC System also shifts the octave for each phrase to keep each section playing<br />
within its musically useful range. To get the most out of this System, any new Style you create can<br />
benefit from some fine tuning of these settings.<br />
When you press the DETAIL SETTINGS button (L5) on the Style Maker Record screen, the Style<br />
Maker Detail Settings screen will be displayed.<br />
Accompaniment Type (ACC Type)<br />
This setting determines how Phrases being played by a particular section in a pattern will be analyzed<br />
by the Auto-accompaniment (ACC) System. There are Two Accompaniment Types: Chordal and<br />
Scalic (melodic). Chordal Phrases usually consist of block chords or arppegiated chords. You<br />
should set this kind Phrase to Chordal. Scalic Phrases usually play melodic phrases that serve to<br />
add interest to the style as well as provide counter melodies and riffs. Melodic Phrases or Phrases<br />
that contain chromatic passages should be set to Scalic. Scalic Phrases can also contain chords but<br />
they will be analyzed differently than chords in a Chordal Phrase. The Bass section is automatically<br />
set to Scalic since it will rarely if ever play chords.<br />
The terms Open and Close apply to Chordal Phrases, and refer to how the CP will regulate the<br />
voicing of a Chordal Phrase. Setting a Section to Open will allow for open-voiced chords, which<br />
might be good for guitar and string sounds. Setting a Section to Close maintains closed voiced<br />
chords, which are better suited to piano parts and other chording or comping instruments.<br />
Range<br />
This determines the chord inversions that a Chordal Phrase will play.<br />
The term “range” here has nothing to do with the span of actual chord notes. It selects which note<br />
in the chord will serve as the basis of the chord inversion.<br />
HI is the initial setting and is recommended as a starting point. MID plays an inversion based on the<br />
next lower note in relation to HI, while LO plays an inversion based two-notes lower.<br />
Crossover<br />
This determines the point where a Scalic Phrase will be transposed to keep the notes in a musically<br />
useful range. When notes in a Scalic Phrase fall below the Crossover point you select they will be<br />
transposed up one octave by the Accompaniment System. For example if you set the Crossover<br />
Creating Your Own Styles P. 87
L2 Changes ACC Type.<br />
L3 Changes RANGE.<br />
L4 Changes CROSS OVER.<br />
L5 Changes BASS LIMIT.<br />
P. 88<br />
point to E, the Phrase would begin to be transposed up one octave whenever you play a chord with<br />
an E as the root.<br />
Experiment with the different Chordal and Scalic settings to find the one that works best with each<br />
Phrase.<br />
Bass Limit<br />
This is an option for the Bass section and sets the limit for the lowest note the Bass will play. If a<br />
note in a Bass Phrase falls below the limit, it will automatically be transposed up an octave.<br />
To adjust the auto-accompaniment system:<br />
1) Use the L2-L4 buttons to select the setting you wish to change.<br />
2) Use the F3-F7 buttons to select the Section.<br />
3) Use the Dial to select or change a value.<br />
4) When done, press the BACK button (F1) to go back the previous menu. Then save the Style if necessary.<br />
L 1<br />
R 1<br />
L 2<br />
R 2<br />
L 3<br />
R 3<br />
L 4<br />
R 4<br />
L 5<br />
R 5<br />
F 1 F 2 F 3 F 4 F 5 F 6 F 7<br />
F1 Takes you to the previous menu.<br />
F2 Plays the style.<br />
F3-F7 Selects the Section.<br />
<strong>Kawai</strong> Concert Performer Series Digital Piano
Making a Style with Phrase Combination<br />
Phrase Combination is similar to Easy Style Edit in the Conductor. Phrase Combination however,<br />
lets you not only combine Phrases from within the selected Style but you can also combine Phrases<br />
from any of the Styles in the CP to create a new Style. Additionally you can edit Fill-ins and basic<br />
patterns (Variations).<br />
• You cannot change the Intro and Ending Phrases. These will remain the same as in your selected<br />
Style.<br />
To use Phrase Combination:<br />
1) In the Advanced Recorder menu, press the Style Maker button (R5). The LCD screen will display the<br />
first Style Maker screen.<br />
2) Press the Phrase Combination button (L5) and use the dial to select the initial style.<br />
3) Press the ENTER button (F7) to proceed to the next screen.<br />
4) Use the L2 and L3 buttons to select which of the four Fill-ins and Variations you would like to change.<br />
5) Use the L3 and L5 buttons to select the Section to change.<br />
6) Use the F4 and F5 buttons to move the cursor between the Style and Phrase column.<br />
7) Use the Dial to change the current Style or Phrase. You can jump to the desired Style category by<br />
pressing the Style select buttons directly.<br />
8) Press the PLAY button (F2) to listen to the new Style.<br />
9) Press the SAVE button (F7) to save the new Style.<br />
Creating Your Own Styles P. 89
L2 Selects the pattern to change. Choose Variation<br />
1–4 or Fill-in 1–4.<br />
L3, L5 Selects the Section to be modified.<br />
P. 90<br />
L 1<br />
R 1<br />
L 2<br />
L 3<br />
R 2<br />
R 3<br />
R2 Selects the pattern to change. Choose<br />
Variation 1–4 or Fill-in 1–4.<br />
L 4<br />
R 4<br />
L 5<br />
R 5<br />
F 1 F 2 F 3 F 4 F 5 F 6 F 7<br />
F1 Takes you to the previous menu.<br />
F2 Plays the new style.<br />
F4, F5 Moves the cursor between the Style and Phrase columns.<br />
F7 Saves the modified data as a new Style.<br />
10) Press the PRESET TEMPO button (L1) and use the dial to set the default tempo for the style.<br />
11) Press the SAVE TO button (L3) and use the Dial to select the location to be saved.<br />
12) Press the NAME button (L4). Use the F2 and F3 buttons to move the cursor and use the F4 and F5<br />
buttons or the Dial to select the characters to name the style.<br />
13) Press the SAVE button (F7).<br />
<strong>Kawai</strong> Concert Performer Series Digital Piano
L1<br />
Sets the default tempo for the style.<br />
L 1<br />
R 1<br />
L 2<br />
R 2<br />
L3<br />
Selects the location to be saved.<br />
L 3<br />
R 3<br />
L4<br />
Names the style.<br />
L 4<br />
R 4<br />
L 5<br />
R 5<br />
F 1 F 2 F 3 F 4 F 5 F 6 F 7<br />
F1 Takes you to the Style Maker Record screen.<br />
F2, F3 Moves the cursor.<br />
F4, F5 Selects the characters.<br />
F7 Saves the style to User Style.<br />
Creating Your Own Styles P. 91
P. 92<br />
Style Convert<br />
Style Convert is a technology originally developed for personal computers by EMC Software. <strong>Kawai</strong><br />
is proud to have licensed it for use in our musical instruments. This software reads many of the<br />
commercially available Style data disks made by several popular keyboard manufacturers and<br />
converts them for use with the Concert Performer. This conversion process is extremely easy, and<br />
once converted the Style can be re saved in The CP’s own Style format.<br />
To use the Style Convert Program:<br />
1) Make sure that there is an empty location in the User Style area to hold the converted Style. The<br />
Style Convert program will automatically save the converted Style there.<br />
2) Press the DISK button. The LCD screen will display the Disk Menu.<br />
3) Press the STYLE CONVERT button (R4) on the DISK menu. The Style Convert screen will be displayed<br />
and prompt you to insert the Style Convert program disk in the floppy drive.<br />
4) Insert the program disk in the drive and then press the F7 button to continue. Press the F1 button to<br />
cancel the Style Convert process.<br />
L 1<br />
R 1<br />
L 2<br />
R 2<br />
L 3<br />
R 3<br />
L 4<br />
R 4<br />
L 5<br />
R 5<br />
F 1 F 2 F 3 F 4 F 5 F 6 F 7<br />
F1 Cancels conversion process and goes back to the DISK<br />
menu.<br />
F7 Proceeds with the conversion.<br />
<strong>Kawai</strong> Concert Performer Series Digital Piano
5) After the CP reads the program, it will display a list of the manufacturers Style formats that can be<br />
converted. Use the L2 and L4 buttons to select the format you would like to convert. Press the F7<br />
button to continue.<br />
L 1<br />
R 1<br />
L2, L4 Selects a Style format.<br />
L 2<br />
R 2<br />
L 3<br />
R 3<br />
L 4<br />
R 4<br />
L 5<br />
R 5<br />
F 1 F 2 F 3 F 4 F 5 F 6 F 7<br />
F1<br />
F7<br />
Takes you to the previous screen.<br />
Proceeds with the conversion.<br />
Creating Your Own Styles P. 93
L2, L4 Selects the desired Style from the disk.<br />
P. 94<br />
6) Insert the appropriate manufacturers Style disk when you are asked to do so. Press the EXEC button<br />
to proceed.<br />
7) Select the desired Style to convert and press EXEC button. The CP will begin converting that Style.<br />
L 1<br />
R 1<br />
L 2<br />
R 2<br />
L 3<br />
R 3<br />
L 4<br />
R 4<br />
L 5<br />
R 5<br />
F 1 F 2 F 3 F 4 F 5 F 6 F 7<br />
F1 Takes you to the previous menu.<br />
F7 Proceeds with the conversion.<br />
8) When the conversion is complete, the SAVE USER STYLE screen will be displayed. Save the new<br />
converted Style using the same procedure as saving a new User Style.<br />
• You have just learned the basic procedure to convert other manufacturers Style formats. For<br />
detailed information on the Style Convert program, read the instruction sheet that comes with<br />
the software. There you will find a list of which manufacturers formats are supported. For<br />
technical information contact EMC Software directly at the location listed on the instruction<br />
sheet.<br />
• An optional style conversion software package for use with a personal computer is also available<br />
from EMC software. It is called “Style Works 2000 <strong>Kawai</strong>”. It offers more features than the<br />
internal conversion program. To inquire about obtaining it, contact your local <strong>Kawai</strong> dealer or<br />
distributor.<br />
<strong>Kawai</strong> Concert Performer Series Digital Piano
Creating Your Own Styles P. 95
Editing Sounds<br />
Even though the Concert Performer has over 900 high quality<br />
instrument and drum sounds built-in, there may be times when you<br />
would like to change some of the qualities of a sound to really get<br />
the tonal character that you have in mind. The CP allows you edit<br />
certain settings for individual sounds. You can choose to change<br />
subtle nuances of the sound or even drastically change the sound’s<br />
character to the point where you can no longer recognize what it<br />
was originally! Once you have made these changes, you can save<br />
up to 20 User Sounds in the User Sound Category, or a virtually<br />
unlimited number onto floppy disks.<br />
Editing the Preset Effect Settings<br />
Each of the CP instrument Sounds has preset Chorus and Effect settings that are applied<br />
automatically whenever that sound is selected.<br />
You can change these settings to suit your tastes and save them so they become the preset settings<br />
for that Sound.<br />
To adjust the settings:<br />
1) Select the sound you want to edit and press the SOUND EDIT button (F7). The LCD screen will<br />
display the Sound Edit Menu.<br />
2) Press the L2 button to select Edit Preset Sound Settings. The Preset Sound Settings screen will be<br />
displayed.<br />
L 1<br />
R 1<br />
L2 Selects Edit Preset Effect Settings<br />
L 2<br />
R 2<br />
L3 Selects Make User Sound.<br />
L 3<br />
R 3<br />
L 4<br />
R 4<br />
L 5<br />
R 5<br />
F 1 F 2 F 3 F 4 F 5 F 6 F 7<br />
P. 96<br />
<strong>Kawai</strong> Concert Performer Series Digital Piano
3) Press the L1 button and then turn the Dial to select which preset sound you wish to modify.<br />
4) Use the L and R buttons to select the different effect settings and use the Dial to change their value.<br />
5) When you are finished, press the SAVE button (F7) to save your settings.<br />
L1<br />
Selects the preset sound to edit.<br />
L 1<br />
R 1<br />
L2<br />
Turns the Chorus on/off.<br />
L 2<br />
R 2<br />
R2<br />
Adjusts the chorus level.<br />
L3<br />
Turns the Effect on/off.<br />
L 3<br />
R 3<br />
L4<br />
Selects an effect type.<br />
L 4<br />
R 4<br />
R4, R5 Adjusts the effect setting.<br />
L5<br />
Adjusts the effect setting.<br />
L 5<br />
R 5<br />
F 1 F 2 F 3 F 4 F 5 F 6 F 7<br />
F1<br />
F7<br />
Takes you to the previous menu.<br />
Saves the settings.<br />
• Pressing the SAVE (F7) button will save all changes made in the Preset Effect Settings menu. If<br />
you exit the Preset Effect Settings menu without saving your changes, the settings will remain<br />
unchanged.<br />
Editing Sounds P. 97
P. 98<br />
Making a User Sound<br />
There are two steps to making a User Sound: Editing the effect settings—same as described in the<br />
previous section—and editing the sound’s character.<br />
You can adjust six parameters of the sound character: Vibrato Depth, Brightness, Attack, Decay,<br />
Sustain, and Release.<br />
Brightness controls the Strength of the high frequencies. Higher values produce a brighter sound,<br />
lower values produce a darker sound.<br />
Vibrato Depth controls the depth of the Vibrato effect. Positive values produce a deeper Vibrato.<br />
Negative values produce a shallower Vibrato. The actual speed of the vibrato is preset for each<br />
sound.<br />
Attack determines how quickly a sound reaches its maximum volume after you press a key. Positive<br />
values produce a slower attack that is more gradual and smooth, while negative values produce a<br />
faster attack that is more percussive in nature.<br />
Decay determines how quickly the volume of the sound decreases after it reaches it maximum<br />
volume while the key is still held down. Positive values produce a slower decay, while negative<br />
values produce a faster decay.<br />
Sustain determines the volume level of the sound after the decay portion of the sound is complete.<br />
Positive values produce a louder volume, while negative values produce a softer volume.<br />
Release determines how long it takes for the sound to fade away to silence after you release the<br />
key. Positive values produce a slower fade, while negative values produce a faster fade.<br />
Note:<br />
For some sounds, changing the values for these parameters may have no effect. Each sound has a<br />
pre-programmed setting for each of these parameters. When you change the values you are increasing<br />
or decreasing the value from the pre-programmed setting. If the setting for a certain sound parameter<br />
is 0 for example, then changing the value will have no effect.<br />
<strong>Kawai</strong> Concert Performer Series Digital Piano
To make a User Sound:<br />
1) Select the sound you want to edit and press the SOUND EDIT button (F7). The LCD screen will display<br />
the Sound Edit Menu.<br />
2) In the Sound Edit menu, select Make User Sound (L3). The User Sound Settings screen will be<br />
displayed.<br />
3) You can edit the settings for Vibrato, Brightness, Attack, Decay, Sustain and Release.<br />
4) Use the F3 and F4 buttons to select a setting and use the Dial to change its value. You can always<br />
play the keys as you edit the sound, enabling you to hear what changes are being made.<br />
5) Press the MORE button (F2) to edit the Effect Settings for your new sound, which is the same screen<br />
as described in the previous section.<br />
6) If you would like to save the changes you have made, press SAVE (F7). Otherwise press BACK (F1) to<br />
return to the previous menu or use the EXIT button to go back to the main Sound Edit menu.<br />
L 1<br />
R 1<br />
L 2<br />
R 2<br />
L 3<br />
R 3<br />
L 4<br />
R 4<br />
L 5<br />
R 5<br />
F 1 F 2 F 3 F 4 F 5 F 6 F 7<br />
F1 Takes you to the previous menu.<br />
F2 Takes you to the Preset Effect Settings menu.<br />
F3, F4 Move the cursor.<br />
F7 Proceeds with saving the sound.<br />
7) If you press SAVE (F7), the Save To User Sound screen will be displayed. Use the L3 button to select<br />
Save to User Sound on the screen. Use the Dial to select the User Sound location number where you<br />
want to save your new Sound. You can name the sound by using the F2-F5 buttons. Pressing the<br />
SAVE button (F7) one more time will save the sound.<br />
Editing Sounds P. 99
L 1<br />
R 1<br />
L 2<br />
R 2<br />
L3 Selects the location where the sound will be<br />
saved.<br />
L 3<br />
R 3<br />
L4 Names the Sound<br />
L 4<br />
R 4<br />
L 5<br />
R 5<br />
F 1 F 2 F 3 F 4 F 5 F 6 F 7<br />
F1 Takes you to the previous menu.<br />
F2, F3 Moves the cursor.<br />
F4, F5 Selects the character.<br />
F7 Saves the editted sound to User Sound.<br />
• To select and play your new User Sound, press the USER SOUND button located in the SOUND<br />
section of the front panel, then select the desired User Sound.<br />
P. 100<br />
<strong>Kawai</strong> Concert Performer Series Digital Piano
Editing Sounds P. 101
Playing Songs from a Floppy Disk<br />
The Concert Performer’s floppy disk drive provides a convenient<br />
way to playback songs recorded in the CP’s Internal Format or<br />
Standard MIDI File (SMF) format. Songs in the CP’s internal format<br />
typically are ones that you have recorded on your own instrument.<br />
There are many sources of SMF songs, including disks for sale from<br />
professional musicians and publishers, songs shared among<br />
musicians and hobbyists, and Internet sites that feature SMF songs<br />
available for download.<br />
If you wish to play a song without any intentions to make permanent<br />
changes or additional recordings, you can use the CP’s Disk Song<br />
Play function to load the song very quickly for playback. Using the<br />
disk drive in this way makes the Concert Performer an enjoyable<br />
source of entertainment for parties and other social events, as well<br />
as a great tool for the professional musician or music educator.<br />
About songs on Floppy Disk<br />
If you will use a blank disk to store and play your own compositions made on the Concert Performer,<br />
there isn’t much to worry about. The CP can format the disk (if it isn’t already formatted), and the<br />
CP’s internal song format remembers everything about your song, including which sounds to use<br />
with the recorded tracks. However, if you wish to purchase a disk of songs from your music store<br />
or publisher, play a disk given to you by someone else, or play songs downloaded from the Internet,<br />
you will need to remember a few simple points:<br />
• The CP reads only DOS formatted disks, either double-sided double-density (720KB) or high<br />
density (1.4MB). These are the most commonly used disk formats in both computers and musical<br />
instruments.<br />
• The CP recognizes song files written in the Standard MIDI File format as long as they have DOS<br />
file names ending with “.MID”. There are two types of Standard MIDI File formats, Format 0 and<br />
1. The CP can read the song data of both formats, however it will only display the lyrics of a song<br />
written as format 0.<br />
• Songs that have been composed with the General MIDI (GM) standard will sound fine without<br />
any additional work, because data in the files will inform the CP as to what sounds to use when<br />
playing the song. If the song was not composed to the GM standard, you may find it necessary to<br />
edit the song to assign the correct sounds to the various tracks. Fortunately, almost all<br />
commercially available MIDI files adhere to the General MIDI standard.<br />
P. 102<br />
<strong>Kawai</strong> Concert Performer Series Digital Piano
• The CP can also recognize most songs formatted for the PianoDisc player piano system and<br />
songs formatted for Yamaha’s Disk Orchestra Collection. (Please check with your <strong>Kawai</strong> dealer<br />
or distributor for further information).<br />
Selecting a Song from Disk<br />
A single floppy disk can store dozens of song files at one time, depending on the length of the songs.<br />
To select a song:<br />
MEDIA<br />
DISK<br />
CD<br />
1) Put the disk in the Floppy Disk Drive and press the DISK button. In the Disk menu, select Song Play<br />
(R3). After the CP searches the disk it will display the first ten available songs. If there are more<br />
than ten songs on the disk, use the SEARCH buttons (F2, F3) to list the additional songs.<br />
2) Use the L and R buttons to select the song you want to hear. You can also select a song by using the<br />
Dial.<br />
3) Once your desired song is highlighted, press PLAY/STOP to have the CP load the song and automatically<br />
start playing. You may also press SELECT (F7) to have the CP load the data and wait for you to start<br />
it <strong>manual</strong>ly.<br />
4) Press the SONG CHAIN (F4, F5) buttons to have the CP automatically play all songs, one after another.<br />
5) When your selected song is ready to play, the Disk Song Play screen is displayed. Use the Recorder<br />
control buttons on the left side of the panel to control the playback of the song.<br />
Playing Songs From a Floppy Disk P. 103
P. 104<br />
L 1<br />
L 2<br />
L 3<br />
L 4<br />
L 5<br />
R 1<br />
R 2<br />
The L and R buttons select the song you want to<br />
hear.<br />
R 3<br />
R 4<br />
R 5<br />
F 1 F 2 F 3 F 4 F 5 F 6 F 7<br />
F1 Takes you to the Disk menu.<br />
F2, F3 Lists the next or previous ten titles.<br />
F4, F5 Starts the Chain Play.<br />
F7 Selects the song and takes you to the Disk Song Play screen.<br />
<strong>Kawai</strong> Concert Performer Series Digital Piano
Controlling Playback of a Song<br />
As the song plays, you can adjust the tempo, play or sing along with on the keyboard, and even turn<br />
on/off the different instrument parts (tracks) in the song.<br />
The status of the song parts is displayed at the bottom of the LCD screen. You will see the parts<br />
referred to as the CP’s four Parts + Style if the song was created on the CP, or as Channels (ch 1-16)<br />
if the song is a MIDI file. Displayed above each part is its current status:<br />
PLAY The part will be heard when you play the song.<br />
MUTE The part has data, but it won’t be heard when you play the song.<br />
– – – – The part has no data to play.<br />
• Transpose and Octave Shift are available when a song is playing. Octave Shift affects only the<br />
notes you play “live” on the keyboard, not the music playing from the song file. Transpose can<br />
be applied separately to the keyboard sound and the song sounds. This lets you play the keyboard<br />
in your preferred key along with a song recorded in a different (or more difficult) key.<br />
Use the front panel’s dedicated TRANSPOSE buttons to affect the keyboard sound. Use the<br />
Song Transpose option (R4 and R5) in the Disk Song Play menu to affect the song data.<br />
• The Song Transpose option is available only for the song data in Standard MIDI file.<br />
To make adjustments to the song:<br />
1) In the Disk Song Play screen, use the R1, R2, R3, and L3 buttons to highlight and assign sounds to<br />
the CP’s four keyboard Parts. These will be the sounds that you can play live from the keyboard as<br />
the song is playing. Once a Part is highlighted, press any of the Sound category buttons to select a<br />
new sound.<br />
2) Use the F buttons to play and mute any of the song’s instrument parts.<br />
3) Press the L4 button to use the Mixer to make adjustments to the song’s instrument parts. (See page<br />
49 for the Mixer function.)<br />
4) Use the R4 and R5 buttons to transpose the song data.<br />
5) Use the panel TRANSPOSE and OCTAVE SHIFT buttons to adjust the CP’s keyboard Parts.<br />
6) Press the PLAY/STOP button to start the song.<br />
7) To adjust the tempo, press the L2 button and use the Dial to change values.<br />
8) Press the PLAY/STOP button again to stop the song.<br />
Playing Songs From a Floppy Disk P. 105
L2 Adjusts the song’s tempo.<br />
L3 Highlights the LEFT Part.<br />
L4 Takes you to the Mixer screen.<br />
L5 Displays the song’s lyrics (if available in the data).<br />
P. 106<br />
L 1<br />
L 2<br />
L 3<br />
L 4<br />
L 5<br />
R 1<br />
R1 Highlights the SOLO Part.<br />
R 2<br />
R2 Highlights the RIGHT1 Part.<br />
R 3<br />
R3 Highlights the RIGHT2 Part.<br />
R 4<br />
R4, R5 Transposes the song (but not the keyboard).<br />
R 5<br />
F 1 F 2 F 3 F 4 F 5 F 6 F 7<br />
F1 Takes you to the Disk Song Select menu.<br />
F2-F5 Turns the song part on/off.<br />
F6, F7 Displays the status of the next set of 4 song parts. (Ch 5–8,<br />
Ch9–12, Ch 13–16).<br />
<strong>Kawai</strong> Concert Performer Series Digital Piano
If the song you are playing has lyrics included in the data, the Show Lyrics (L5) button will appear<br />
on the Song Play screen. If you press the Show Lyrics button, the song’s lyrics will then appear<br />
inside a box. You can follow a ball moving over the lyrics as the song plays. Press the Full Screen<br />
(R5) button to expand the lyrics display to the full screen. Press the Normal Screen (F1) button to<br />
return to the normal lyrics screen.<br />
In the normal lyrics screen, press the F1 button to return to the Song Play screen<br />
L2<br />
Adjusts tempo.<br />
L 1<br />
L 2<br />
R 1<br />
R 2<br />
R1, R2 Transposes the song.<br />
L 3<br />
R 3<br />
L 4<br />
R 4<br />
L 5<br />
R 5<br />
R5<br />
Displays the lyrics on the full screen.<br />
F 1 F 2 F 3 F 4 F 5 F 6 F 7<br />
F1 Returns to the Song Play screen.<br />
F2-F5 Turns the song parts on/off.<br />
F6, F7 Displays the status of the next set of 4 song parts (Ch 5–8, Ch9–<br />
12, Ch 13–16).<br />
• You cannot record or permanently edit the song while using the Disk Song Play function. If you<br />
would like to record your live performance along with the song from the disk, or if you want to<br />
make detailed and permanent edits to the song, you will need to load the song’s data into the<br />
Recorder using the Disk Load function. See the chapter “Recording a Song” (page 42) for details<br />
on how to record a song, and “Floppy Disk Operations” (page 156) for an explanation of how to<br />
load a song into the Recorder.<br />
Playing Songs From a Floppy Disk P. 107
Playing with Concert Magic<br />
Thanks to <strong>Kawai</strong>’s innovative CONCERT MAGIC (CM) feature,<br />
absolutely anyone can sit at the Concert Performer and experience<br />
the joy of being a real performing musician… even if they have<br />
never touched a musical instrument in their life!<br />
Concert Magic allows you to play a song by simply tapping any key<br />
on the keyboard. Regardless of what keys you play, the notes that<br />
are heard will be the correct ones for the song. However, what<br />
makes this really exciting is that you control the timing of the notes,<br />
as well as their dynamics. This lets you add a level of expressiveness<br />
and individuality to the song that makes it real musical performance.<br />
As you play a CM song, a handy Note Navigator display helps you<br />
keep track of where you are in the music, as well as suggesting<br />
how the rhythm of the song should be tapped out on the keys.<br />
Many of the CM songs have lyrics that can be displayed as the song<br />
is being performed. As the song is played, a Bouncing Ball makes<br />
its way over the lyrics, following the player’s performance and<br />
encouraging everyone around the instrument to sing along.<br />
The Concert Performer can also automatically play any of the<br />
Concert Magic songs. Listening to the song first can make it easier<br />
to play. There is also a Chain Play mode, giving you options to<br />
listen to groups of CM songs.<br />
Selecting a Concert Magic Song<br />
The 176 on-board Concert Magic songs are divided into eight groups by song category: Children’s<br />
Songs, American Classics, Patriotic Songs, Christmas Songs, Hymns, Classics, Special Occasions,<br />
and International songs.<br />
• In addition, you can create and play your own Concert Magic songs using the floppy disk drive.<br />
To select a song:<br />
CONCERT<br />
MAGIC<br />
1) Press the CONCERT MAGIC button. The song selection menu will be displayed.<br />
2) Ten song titles from the Children’s Songs category will be displayed. The category name is displayed<br />
at the very top of the screen. If you want to go to another song category, press SEARCH BY CATEGORY<br />
(F1, F2). You can also search for a specific title by using SEARCH BY NAME (F3, F4), which will list<br />
all 176 song titles in alphabetical order. You may also use the Dial to scroll through all the titles one<br />
after another.<br />
• If you wish to play a CM song from floppy disk, press the DISK button (F6) to see the list of songs<br />
on disk.<br />
3) When you have found the song that you want to play, use the L or R buttons to move the box over the<br />
title. Press the SELECT button (F7) to choose it. The Note Navigator screen will be displayed, and<br />
you are ready to perform!<br />
P. 108<br />
<strong>Kawai</strong> Concert Performer Series Digital Piano
L 1<br />
R 1<br />
The L and R buttons select the desired song.<br />
L 2<br />
R 2<br />
L 3<br />
R 3<br />
L 4<br />
R 4<br />
L 5<br />
R 5<br />
F 1 F 2 F 3 F 4 F 5 F 6 F 7<br />
F1, F2 Searches by song category.<br />
F3, F4 Searches by song name.<br />
F5 Enters the Chain Play mode of the Concert Magic.<br />
F6 Searches for a song on floppy disk.<br />
F7 Can also select the song.<br />
Performing a Concert Magic Song<br />
Playing the Concert Magic song you’ve selected is very easy. Just begin tapping any key on the<br />
keyboard and the song will play. Concert Magic plays the correct notes of the song, but you must<br />
provide the rhythm. Being familiar with how a particular song sounds does make it easier, but<br />
watching the Note Navigator screen can help you play a song that you’ve never heard before.<br />
The Note Navigator provides an outline of the song’s rhythm that looks a lot like the real music. The<br />
dots (•) in the display are the notes that you play. The spacing of the notes gives a clue to the timing<br />
(rhythm) of the notes. Notes that are closer together are played faster; notes that are farther apart<br />
are played longer. Notes that are evenly spaced are played evenly, and so on.<br />
Up to four lines of music are displayed. After you’ve played past a note in the song, the dot becomes<br />
a cross (+) to help you keep track of where you now are. When you get to the bottom of the screen,<br />
the top lines change to show the next lines of music, as if you had turned the page. When you get to<br />
the end of the song you will see a double line, and then the song will reset to the beginning.<br />
Playing with the Concert Magic P. 109
P. 110<br />
To play a selected CM song:<br />
1) In the Note Navigator screen press START (F4) if you want to first listen to the song. The CP will play<br />
the song. Press the STOP (F4) button to stop. Notice how the Note Navigator displays the rhythm as<br />
the song is playing.<br />
2) If you wish to play the CM song yourself, start tapping any of 88 keys while the song is stopped, and<br />
the song will play.<br />
3) Press the RESET (F4) button at any time to start at the beginning of the song again.<br />
4) To play another song, press the SONG LIST buttons (F6, F7) to display the list.<br />
5) If you have selected a song that has lyrics, you may view them by pressing the LYRICS button (F1,F2)<br />
6) If you would like to play any song by steady tapping (instead of following the original rhythm), press<br />
the STEADY BEAT button (F3).<br />
7) To exit Concert Magic, simply press the CONCERT MAGIC button again.<br />
L 1<br />
R 1<br />
L 2<br />
R 2<br />
L 3<br />
R 3<br />
L 4<br />
R 4<br />
L 5<br />
R 5<br />
F 1 F 2 F 3 F 4 F 5 F 6 F 7<br />
F1, F2 Displays the selected song’s lyrics, if available.<br />
F3 Allows you to play any song by steady tapping.<br />
F4 Starts and stops the song. Also used to reset the song when<br />
performing.<br />
F5 Saves the changed Sounds.<br />
F6, F7 Selects another song.<br />
<strong>Kawai</strong> Concert Performer Series Digital Piano
L 1<br />
R 1<br />
L 2<br />
R 2<br />
L 3<br />
R 3<br />
L 4<br />
R 4<br />
L 5<br />
R 5<br />
F 1 F 2 F 3 F 4 F 5 F 6 F 7<br />
F1, F2 Returns to the Note Navigator screen.<br />
F3 Allows you to play any song by steady beat tapping.<br />
F4 Starts and stops the song. Also used to reset the song when<br />
performing.<br />
F5 Saves the changed Sounds.<br />
F6, F7 Selects another song.<br />
• When you reach the end of the song, press any key one more time. This will not produce sound,<br />
but instead resets the song to the beginning for another performance.<br />
• The Bouncing Ball only works with song files that are specifically designed for Concert Magic to<br />
take advantage of this feature.<br />
• A Concert Magic song is made of two parts - a melody part and accompaniment part. Many of the<br />
songs have different instrument sounds assigned each part to make the music more interesting.<br />
You can select different sounds for each part separately. The RIGHT1 Part plays the melody. To<br />
change its sound, press any Sound category button and select a new sound. The LEFT Part<br />
handles the accompaniment. To change its sound, first turn off the RIGHT1 Part and then press<br />
any Sound category button to select a new sound. Don’t forget to turn the RIGHT1 Part back on<br />
before you begin to play.<br />
• You can use the PIANO ONLY button to quickly change the sound for both parts to the Concert<br />
Grand piano.<br />
Playing with the Concert Magic P. 111
L2 Selects Play mode.<br />
L4 Selects Sound mode.<br />
P. 112<br />
TRANSPOSE<br />
• You can also activate the RIGHT2 Part to use as a layer (additional sound) for the melody. In<br />
addition, if you know the melody to a Concert Magic song you can play along by activating the<br />
SOLO Part. Remember, you must play the notes of the melody when the SOLO sound is active.<br />
You can also select any new sound for the RIGHT2 and SOLO parts. Turn off all Parts except the<br />
one you wish to change, and then select the new sound. Don’t forget to turn all necessary Parts<br />
back on before you begin to play.<br />
• You can save your new sound settings by pressing the SAVE button (F4). The Soft Reset function<br />
will be required to return the sounds to their original settings (see page 144).<br />
• You can transpose the song by pressing the TRANSPOSE buttons.<br />
To enter the Chain Play mode of the Concert Magic:<br />
1) Press the CONCERT MAGIC button. The song selection menu will be displayed.<br />
2) Press the CHAIN PLAY button (F4). The Chain Play menu will be displayed.<br />
3) Use the L and R buttons to highlight a setting, then turn the Dial to change that setting. You can<br />
choose to play songs from any one category, or to play all 176 CM songs. You can also choose to use<br />
each song’s preset sounds, or to play the songs using the Concert Grand piano sound only.<br />
4) Press the PLAY button (F4) to start playing the songs.<br />
5) To exit Concert Magic, press the CONCERT MAGIC button again.<br />
L 1<br />
R 1<br />
L 2<br />
R 2<br />
R2 Selects the song category.<br />
L 3<br />
R 3<br />
L 4<br />
R 4<br />
L 5<br />
R 5<br />
F 1 F 2 F 3 F 4 F 5 F 6 F 7<br />
F4 Starts the chain play.<br />
F6, F7 Returns to the song list.<br />
<strong>Kawai</strong> Concert Performer Series Digital Piano
Concert Magic Song Arrangements<br />
Concert Magic songs are specially arranged so that they will work well with your key tapping. Each<br />
of the 176 CM songs falls into one of three categories of musical arrangements of varying difficulty.<br />
EASY BEAT<br />
These are the easiest songs to play. To perform them, simply tap any key with a constant beat. You<br />
can easily see which songs are Easy Beat songs when you look at the Note Navigator. The dots will<br />
line up at a constant interval in the screen, indicating a constant beat.<br />
MELODY PLAY<br />
These songs are also quite easy to play, especially if you are familiar with them. To perform them,<br />
tap the keys to the rhythm of the melody (as if you were singing).<br />
SKILLFUL<br />
These songs are more challenging. To perform them, carefully follow the rhythm as shown in the<br />
Note Navigator. It may require some practice to successfully play these songs. Even skilled players<br />
will enjoy the challenge that these songs offer.<br />
Steady Beat Play<br />
After you choose a song, you can press the STEADY BEAT button (F3) to play the song by steady<br />
tapping instead of the original rhythm. You can play any song from any arrangement category by<br />
tapping steady beats.<br />
Playing with the Concert Magic P. 113
P. 114<br />
Creating a Concert Magic Song<br />
You can also use Concert Magic to play a song that isn’t one of the 176 built-in titles. You can record<br />
a new song using the Concert Performer’s Recorder and then save on a floppy disk as a Standard<br />
MIDI File (SMF). The song can now be selected by pressing the DISK button when you are in the<br />
Concert Magic song selection screen.<br />
• You can also record a song for Concert Magic by using an external sequencer. Remember to save<br />
it to a floppy disk as a Standard MIDI File.<br />
As you might imagine, getting your song to sound exactly the way you want it to in Concert Magic<br />
may require a few adjustments to the original arrangement. The most important consideration is to<br />
keep the musical arrangement as simple as possible. Concert Magic “pauses” the song after every<br />
note as it waits for you to tap the next key. If there are complex rhythm patterns that have many<br />
notes per beat, the song may become overly difficult to play. Here are some suggestions for creating<br />
a Concert Magic song:<br />
1) Record the melody first using the RIGHT 1 Part in the Easy Recorder (or Track 2 in the Advanced<br />
Recorder).<br />
2) Then record the accompaniment using the LEFT Part in the Easy Recorder (or Track 4 in the Advanced<br />
Recorder).<br />
3) Arrange the accompaniment so that its notes fall on the same beats as the melody. (This creates a<br />
Melody Play arrangement.)<br />
4) If you want to be a little more adventurous, insert a few carefully placed accompaniment notes in<br />
between melody notes. (This creates a Skillful arrangement.)<br />
5) If you are recording your song using an external sequencer, record the melody on channel 2 and the<br />
accompaniment on channel 4.<br />
6) For best results, you should quantize your parts.<br />
• Of course, these are merely suggestions. There are no steadfast rules for how to compose your<br />
CM song. In fact, very rewarding musical experiences may come out of simple trial and error.<br />
<strong>Kawai</strong> Concert Performer Series Digital Piano
Playing with the Concert Magic P. 115
System Menu<br />
The System Menu contains all of the functions that affect the overall<br />
performance of the CP piano. This includes functions such as the<br />
System settings, tuning, and MIDI Setup. By adjusting these settings<br />
you can tailor the CP’s performance to your taste.<br />
To use the System menu:<br />
SYSTEM<br />
1) Press the SYSTEM button. The SYSTEM button LED will light and the System menu is displayed.<br />
2) Use the F1 and F2 buttons to access the System Menu pages.<br />
3) Use the L, R and F buttons to select the function you wish to change. A sub-menu with further options<br />
for that function will be displayed.<br />
4) Use the L, R and F buttons to choose a setting from the sub-menu and use the Dial to change its<br />
value.<br />
• If you would like to have the CP remember your settings and have them immediately applied<br />
every time you turn the instrument on, select Power Up Setting (Page 2-R1) from the System<br />
menu, and choose “Save Current Settings” (L2).<br />
• For further details on resetting data, see page 144.<br />
P. 116<br />
<strong>Kawai</strong> Concert Performer Series Digital Piano
L1<br />
Selects the overall tuning of the CP.<br />
L 1<br />
R 1<br />
R1<br />
Selects the Concert Magic Sound mode.<br />
L2<br />
Selects the Touch Curve (Key velocity sensitivity).<br />
L 2<br />
R 2<br />
R2<br />
Selects the Pedal functions.<br />
L3<br />
Selects the Equalizer settings for the CP.<br />
L 3<br />
R 3<br />
R3<br />
Selects the Fill-in mode for the<br />
Accompaniment Styles.<br />
L4<br />
Selects the Voicing settings.<br />
L 4<br />
R 4<br />
R4<br />
Selects the SOLO part settings.<br />
L5<br />
Selects the Resonance effect for the sustain<br />
pedal.<br />
L 5<br />
R 5<br />
R5<br />
Selects Video Out settings<br />
F 1 F 2 F 3 F 4 F 5 F 6 F 7<br />
F1, F2 Selects the different System Menu pages.<br />
L1<br />
Selects the Effect priority settings.<br />
L 1<br />
R 1<br />
R1<br />
Selects the Power up mode settings<br />
L2<br />
Selects the Temperament settings.<br />
L 2<br />
R 2<br />
R2<br />
Restores the initial factory settings.<br />
L3<br />
Selects the MIDI settings.<br />
L 3<br />
R 3<br />
R3<br />
Displays the software version.<br />
L 4<br />
R 4<br />
L 5<br />
R 5<br />
F 1 F 2 F 3 F 4 F 5 F 6 F 7<br />
F1, F2 Selects the different System Menu pages.<br />
System Menu P. 117
L2 Selects the master pitch.<br />
L3 Selects the pitch for the LEFT Part.<br />
L4 Selects the pitch for the SOLO Part.<br />
P. 118<br />
Tuning<br />
Tuning allows you to adjust the CP’s pitch. You may need to adjust the tuning when you play with<br />
other instruments.<br />
The master pitch is displayed in Hertz. The range of adjustment is from 427.0 to 453.0 Hz. The<br />
factory preset value is set to the modern standard A = 440.0 Hz.<br />
• You can also adjust the tuning for each Part separately. This can be used to simulate a choruslike<br />
effect by layering the same sound in RIGHT1 and RIGHT2 and slightly detuning them. Each<br />
Part can be raised or lowered by up to 50 cents. (50 cents = 1/4 tone).<br />
L 1<br />
R 1<br />
L 2<br />
R 2<br />
L 3<br />
R 3<br />
R3 Selects the pitch for the RIGHT1 Part.<br />
L 4<br />
R 4<br />
R4 Selects the pitch for the RIGHT2 Part.<br />
L 5<br />
R 5<br />
F 1 F 2 F 3 F 4 F 5 F 6 F 7<br />
F1 Takes you to the System menu.<br />
<strong>Kawai</strong> Concert Performer Series Digital Piano
Touch Curve<br />
When playing a piano, the volume of the sound produced increases in direct relation to how hard a<br />
key is struck. The CP’s Normal Touch curve offers the standard feel of an acoustic piano for practicing<br />
music. The CP offers six other touch curves ranging from light to heavy. You can also create your<br />
own touch curves tailored to your personal playing style.<br />
Normal<br />
Light 1, 2<br />
Heavy 1, 2<br />
Off<br />
User 1, 2<br />
This is the standard touch of an acoustic piano.<br />
For those still developing finger strength, such as a child, a louder sound is<br />
produced even when the piano is played with a soft touch. Light 2 is lighter than<br />
Light 1.<br />
Perfect for those with strong fingers. Requires a heavier touch to produce a loud<br />
volume. Heavy 2 is heavier than Heavy 1.<br />
A constant volume is produced regardless of how hard the keys are struck. This<br />
setting is suitable for sounds that have a fixed dynamic range such as Organ or<br />
Harpsichord.<br />
You can create two of your own custom touch curves.<br />
• LIGHT and HEAVY do not represent the physical weight of the keys. These are settings that<br />
affect the sensitivity of the keys, which determines the volume level in response to the key<br />
movement.<br />
L1<br />
Selects the normal setting.<br />
L 1<br />
R 1<br />
L2<br />
Selects a moderately light touch.<br />
L 2<br />
R 2<br />
R2<br />
Selects the User 1 touch.<br />
L3<br />
Selects a light touch.<br />
L 3<br />
R 3<br />
R3<br />
Selects the User 2 touch.<br />
L4<br />
Selects a moderately heavy touch.<br />
L 4<br />
R 4<br />
R4<br />
Turns off the Touch sensitivity entirely.<br />
L5<br />
Selects a heavy touch.<br />
L 5<br />
R 5<br />
F 1 F 2 F 3 F 4 F 5 F 6 F 7<br />
F1<br />
F7<br />
Takes you to the System menu.<br />
Takes you to the User Touch Curve screen.<br />
System Menu P. 119
P. 120<br />
User Touch Curve<br />
You can create your own custom touch curve to fit your playing style. Two User Touch curves can<br />
be saved.<br />
To create a User Touch Curve:<br />
1) Press the EDIT button (F7) in the Touch Curve screen. The LCD screen will display the User Touch<br />
screen.<br />
2) Now start playing dynamically from soft to loud in order to let the CP analyze your playing style.<br />
While you are playing, a musical note e will blink in the right corner of the LCD display.<br />
3) Press the CREATE button (F7) when you finish playing. The CP will analyze your playing and create<br />
a custom touch curve for you based upon your playing style. The User Touch Exec screen will be<br />
displayed.<br />
L 1<br />
R 1<br />
L 2<br />
R 2<br />
L 3<br />
R 3<br />
L 4<br />
R 4<br />
L 5<br />
R 5<br />
F 1 F 2 F 3 F 4 F 5 F 6 F 7<br />
F1 Takes you to the previous menu.<br />
F7 Creates a user touch curve.<br />
<strong>Kawai</strong> Concert Performer Series Digital Piano
4) Use the Dial to select either User 1 or User 2 as the location for your new touch curve.<br />
5) Press the EXEC button (F7) to save your new touch curve.<br />
6) The CP will ask for your confirmation. Press YES (F7) to confirm.<br />
L 1<br />
R 1<br />
L 2<br />
L 3<br />
R 2<br />
R 3<br />
Use the Dial to select either User 1 or User 2 as the<br />
location for your new touch curve.<br />
L 4<br />
R 4<br />
L 5<br />
R 5<br />
F 1 F 2 F 3 F 4 F 5 F 6 F 7<br />
F1<br />
F7<br />
Cancels the saving procedure.<br />
Proceeds with saving procedure.<br />
• The user touch curve data is saved automatically even after the power is turned off. However,<br />
You must re select the user touch curve each time the power is turned on unless you make your<br />
User touch curve the default by selecting “Save Current Settings” from the Power Up Settings<br />
screen (See Power Up settings on page 143).<br />
System Menu P. 121
P. 122<br />
System EQ<br />
The System EQ allows you to adjust the tone character of the CP piano to your taste. In addition to<br />
a Flat EQ setting (no EQ), there are four special EQ settings optimized for each of the CP models<br />
and four general purpose EQ settings. There is also a User EQ, that allows you to edit the existing<br />
EQ settings or create your own EQ settings.<br />
• The System EQ affects the overall tone character of the CP speakers and the Line Out Jacks<br />
(The CD-R Drive is not affected by the System EQ). The special CP EQ’s are optimized for the<br />
speaker systems on different CP models. When connecting the Line Out Jacks to an external<br />
source the Flat EQ setting is recommended.<br />
• The Flat EQ setting is the default. If you want to save a different EQ setting as the default you<br />
must select the “Save Current Settings” on the Power Up Settings screen (See Power Up Settings,<br />
page 143).<br />
L 1<br />
L 2<br />
R 1<br />
R 2<br />
Use the L and R buttons to select your desired EQ setting.<br />
L 3<br />
R 3<br />
L 4<br />
R 4<br />
L 5<br />
R 5<br />
F 1 F 2 F 3 F 4 F 5 F 6 F 7<br />
F1 Takes you to the previous menu.<br />
F7 Takes you to the User System EQ screen.<br />
<strong>Kawai</strong> Concert Performer Series Digital Piano
To create a User EQ:<br />
1) Select one the ten EQ settings to edit and press the EDIT button (F7). The LCD screen will display the<br />
User System EQ screen.<br />
2) Use the F2, F3 buttons to move the cursor and use the Dial to change the value.<br />
3) Press the SAVE button (F7) to save the edited EQ settings to the User EQ.<br />
L 1<br />
R 1<br />
L 2<br />
R 2<br />
L 3<br />
R 3<br />
L 4<br />
R 4<br />
L 5<br />
R 5<br />
F 1 F 2 F 3 F 4 F 5 F 6 F 7<br />
F1 Takes you to the System EQ menu.<br />
F2, F3 Moves the cursor.<br />
F7 Saves the edited EQ settings to User EQ.<br />
System Menu P. 123
L2 Selects Normal.<br />
L3 Selects Mellow.<br />
P. 124<br />
Virtual Voicing<br />
Voicing is a technique used by piano technicians to mold the character of a piano’s sound. The<br />
Voicing function lets you change the CP piano’s tone quality by choosing one of four types of voicings.<br />
Normal Produces the normal timbre of an acoustic piano throughout the entire dynamic<br />
range. This is the default setting.<br />
Bright Produces a brighter tone throughout the entire dynamic range.<br />
Mellow Produces a mellower tone throughout the entire dynamic range.<br />
Dynamic The tone will change dramatically from mellow to bright according to your<br />
playing.<br />
• The current voicing selection is global for all the instrument Sounds. You can not have an<br />
individual setting for each Sound.<br />
• While voicing is a technique used for optimizing the tone of an acoustic piano, this function can<br />
be used on all the Sounds on the CP piano.<br />
L 1<br />
R 1<br />
L 2<br />
R 2<br />
R2 Selects Dynamic.<br />
L 3<br />
R 3<br />
R3 Selects Bright.<br />
L 4<br />
R 4<br />
L 5<br />
R 5<br />
F 1 F 2 F 3 F 4 F 5 F 6 F 7<br />
F1 Takes you to the System menu.<br />
<strong>Kawai</strong> Concert Performer Series Digital Piano
Resonance<br />
When the sustain pedal is depressed on an acoustic piano, all the dampers are lifted up allowing the<br />
strings to vibrate freely. In this condition, when you play a note not only will the strings for the note<br />
you played vibrate but other strings will vibrate due to sympathetic resonance. The Resonance<br />
function simulates this phenomenon. You can select from three levels of Resonance.<br />
Off<br />
Normal<br />
Deep<br />
No resonance.<br />
Simulates the natural resonance characteristics of an acoustic piano.<br />
Produces a more intense resonance.<br />
L 1<br />
R 1<br />
L2<br />
Selects normal resonance.<br />
L 2<br />
R 2<br />
R2<br />
Turns off the resonance.<br />
L3<br />
Selects deep resonance.<br />
L 3<br />
R 3<br />
L 4<br />
R 4<br />
L 5<br />
R 5<br />
F 1 F 2 F 3 F 4 F 5 F 6 F 7<br />
F1<br />
Takes you to the System menu.<br />
System Menu P. 125
L2 Selects Preset sounds.<br />
L3 Selects Piano sound.<br />
P. 126<br />
Concert Magic Sound<br />
This function determines which sounds the Concert Magic songs will be played with.<br />
Preset Plays all the Concert Magic songs with the Preset Sounds assigned to each song.<br />
Piano Plays all the Concert Magic songs with the Concert Grand piano.<br />
L 1<br />
R 1<br />
L 2<br />
R 2<br />
L 3<br />
R 3<br />
L 4<br />
R 4<br />
L 5<br />
R 5<br />
F 1 F 2 F 3 F 4 F 5 F 6 F 7<br />
F1 Takes you to the System menu.<br />
<strong>Kawai</strong> Concert Performer Series Digital Piano
Pedal Assign<br />
The Soft and Sostenuto pedals on the Concert Performer function as much more than just traditional<br />
piano pedals. These pedals can be assigned to control various other functions on the CP piano.<br />
With an optional expression pedal connected to the EXP pedal jack, you can also control the volume<br />
for each Part.<br />
Damper Pedal (Right)<br />
Sustain only<br />
Can be activated or deactivated separately for each Part.<br />
Pedal assignment options for Soft Pedal (Left) and Sostenuto Pedal (Center)<br />
Soft<br />
Softens the sound and reduces its volume.<br />
Sostenuto Sustains only notes that were held when pedal was depressed.<br />
Start/Stop Controls start/stop for Styles and Songs.<br />
Harmony on/off Turns the instrument Harmony function on/off.<br />
Registration Switches from one Registration to another. You may choose the order,<br />
1 to 8 or 8 to 1.<br />
Style Variation Switches from one Style Variation to another. You may choose the<br />
order, 1 to 4 or 4 to 1.<br />
Intro/Ending Plays the Intro or Ending.<br />
Fill In<br />
Plays the Fill-in currently selected.<br />
Break<br />
Interrupts the whole Style.<br />
Drums Only Interrupts the Style except Drum part.<br />
Sync/Fade Out Controls the SYNC/FADE OUT button.<br />
Glide<br />
Bends the pitch up and down as programmed by you.<br />
Modulation Applies programmable vibrato to the sound.<br />
Rotary Fast/Slow Controls the speed of rotary speaker effect. This function will be<br />
automatically assigned to the Soft Pedal (Left) when a sound that has<br />
the rotary effect turned on is selected as the Priority Part.<br />
Left Hand Hold Holds the notes played in the LEFT/SPLIT Part as long as the pedal is<br />
depressed.<br />
Panel Lock Locks all buttons on the panel to prevent them from being tampered<br />
with or pressed accidently while you are playing. Press the assigned<br />
pedal once to lock the panel buttons. Press the assigned pedal again to<br />
unlock the panel buttons.<br />
System Menu P. 127
L1 Selects the Right pedal (Damper).<br />
L2 Selects the Center pedal (Sostenuto).<br />
L3 Selects the Left pedal (Soft).<br />
L4 Selects the Expression pedal.<br />
P. 128<br />
EXP Pedal (Optional)<br />
Expression The Expression pedal controls the volume of Parts. Expression can be<br />
activated or deactivated separately for each Part.<br />
• The pedal assignments made to the Left pedal will be saved as part of a Registration. The pedal<br />
assignments made to the Center pedal are global and are not saved as part of a Registration.<br />
1) Select the Pedal Assign (R2) option in the System menu (page 1). The LCD screen will display the<br />
Pedal Assign screen. Use the L buttons to select which pedal you want to make assignments for.<br />
L 1<br />
R 1<br />
L 2<br />
R 2<br />
L 3<br />
R 3<br />
L 4<br />
R 4<br />
L 5<br />
R 5<br />
F 1 F 2 F 3 F 4 F 5 F 6 F 7<br />
F1 Takes you to the System menu.<br />
<strong>Kawai</strong> Concert Performer Series Digital Piano
2) Use the L and R buttons to select the setting and use the Dial to change its value.<br />
L 1<br />
R 1<br />
L2 Selects a function to assign to the pedal. L 2<br />
R 2 Use the other L and R buttons to adjust parameters.<br />
L 3<br />
R 3<br />
L 4<br />
R 4<br />
L 5<br />
R 5<br />
F 1 F 2 F 3 F 4 F 5 F 6 F 7<br />
F1<br />
F3-F6<br />
Back to the pedal Assign menu.<br />
Selects the different pedals.<br />
System Menu P. 129
L2 Selects Normal mode.<br />
L3 Selects Auto mode.<br />
P. 130<br />
Fill-in Mode<br />
This determines whether or not a Fill-in will be automatically played each time a VARIATION button<br />
is pressed.<br />
There are two options.<br />
Normal A Fill-in will not be automatically played each time a VARIATION button is<br />
pressed. Fill ins will only be played if a FILL button is pressed.<br />
Auto A Fill-in will be played each time a VARIATION button is pressed. The Fill-in<br />
that is played will be the one that accompanies the Variation that you are leaving.<br />
For example, if Variation 1 is currently active, and you select Variation 2, the<br />
Fill-in for Variation 1 will be played.<br />
L 1<br />
R 1<br />
L 2<br />
R 2<br />
L 3<br />
R 3<br />
L 4<br />
R 4<br />
L 5<br />
R 5<br />
F 1 F 2 F 3 F 4 F 5 F 6 F 7<br />
F1 Takes you to the System menu.<br />
<strong>Kawai</strong> Concert Performer Series Digital Piano
Solo Settings<br />
This configures the special settings for the Solo part.<br />
Since the Solo part allows you to play only one note at a time (monophonic), it is important to select<br />
which note will be played by the SOLO Part when more than one key is played at a time.<br />
There are three options.<br />
Top Note<br />
Last Note<br />
No Retrigger<br />
The SOLO Part plays only the highest note among the notes played at one time.<br />
The SOLO Part plays only the last key played among the notes played at one<br />
time. When the last key is released, the SOLO Part will play the last previous key<br />
played and so on.<br />
The SOLO Part plays only the last key played among the notes played at one<br />
time, but when that key is released the SOLO Part will stop playing.<br />
When using Portamento, you can adjust Portamento Time which determines how long it takes for<br />
the pitch to slide up or down from one note to the next.<br />
L 1<br />
R 1<br />
L2<br />
Selects the note priority.<br />
L 2<br />
R 2<br />
L3<br />
Adjusts Portamento time.<br />
L 3<br />
R 3<br />
L 4<br />
R 4<br />
L 5<br />
R 5<br />
F 1 F 2 F 3 F 4 F 5 F 6 F 7<br />
F1<br />
Takes you to the previous menu.<br />
• You can access this screen by holding down the PORTAMENTO button for a few seconds.<br />
System Menu P. 131
L2 Selects NTSC.<br />
L3 Selects PAL.<br />
L4 Selects OFF.<br />
P. 132<br />
Video Out<br />
This function is used select the type of video signal that will be output by the Video Out Jack.<br />
NTSC The TV video signal system mainly used in North American countries and Japan.<br />
PAL The TV video signal system mainly used in the European countries.<br />
OFF The video signals are not output.<br />
L 1<br />
R 1<br />
L 2<br />
R 2<br />
L 3<br />
R 3<br />
L 4<br />
R 4<br />
L 5<br />
R 5<br />
F 1 F 2 F 3 F 4 F 5 F 6 F 7<br />
F1 Takes you to the System menu.<br />
<strong>Kawai</strong> Concert Performer Series Digital Piano
Effect for Sound<br />
This function determines whether or not the Preset Effects settings assigned to each Sound will be<br />
used or not.<br />
Preset<br />
Panel<br />
The Preset Effect settings for each Sound will be used. This is the default setting.<br />
The Preset Effect settings for each Sound will not be used. In other words, changing<br />
the Sounds will not change the Effect types and other settings for the Effects. This<br />
allows you to set each Effect section (REVERB, CHORUS, and EFFECTS) to your own<br />
taste and use your Effect settings for all sounds. The Panel setting is very useful if you<br />
only want to use certain Effects at all times or if you want to prevent the Effects from<br />
constantly changing each time you select a new Sound.<br />
L 1<br />
R 1<br />
L2<br />
Selects Preset.<br />
L 2<br />
R 2<br />
L3<br />
Selects Panel.<br />
L 3<br />
R 3<br />
L 4<br />
R 4<br />
L 5<br />
R 5<br />
F 1 F 2 F 3 F 4 F 5 F 6 F 7<br />
F1<br />
Takes you to the System menu.<br />
System Menu P. 133
L1 Selects Equal.<br />
L2 Selects Meantone.<br />
L3 Selects Pure Major.<br />
L4 Selects Pure minor.<br />
L5 Selects Pythagorean.<br />
P. 134<br />
Temperament<br />
The CP offers not only equal temperament (the modern standard) but also immediate access to<br />
temperaments popular during the Renaissance and Baroque periods.<br />
You can also create your own User tuning Temperament as well.<br />
1) Select Temperament form the System Menu. The LCD screen will display the Temperament screen.<br />
2) Select your desired Temperament with the L and R buttons.<br />
3) Set the Temperament Key with the F2 and F3 buttons.<br />
4) If you select Equal temperament, use the F5 and F6 buttons to set Stretch Tuning to On, Off, or Piano<br />
Only. (For an explanation of Equal and Equal Stretched tuning see page 135).<br />
Stretch=On: Applies the Stretched Tuning to all instrument Sounds.<br />
Stretch=Off: Stretched Tuning is turned Off for all the instrument Sounds Off.<br />
Stretch=Piano (only): Applies the Stretched Tuning only to the Piano Sound. The tuning for any other<br />
active sounds layered with a piano sound will be stretched to match the piano. If no piano sound is<br />
active the tuning for any active sounds will not be stretched.<br />
L 1<br />
R 1<br />
R1 Selects Werckmeister.<br />
L 2<br />
R 2<br />
R2 Selects Kirnberger.<br />
L 3<br />
R 3<br />
R3 Selects Arabic 1.<br />
L 4<br />
R 4<br />
R4 Selects Arabic 2.<br />
L 5<br />
R 5<br />
R5 Selects User.<br />
F 1 F 2 F 3 F 4 F 5 F 6 F 7<br />
F1 Takes you to the System menu.<br />
F2, F3 Selects the Temperament Key.<br />
F5 Selects the Stretch tuning type On/Off/Piano.<br />
F7 Takes you to the User Temperament screen.<br />
<strong>Kawai</strong> Concert Performer Series Digital Piano
Brief explanation of temperaments<br />
Temperament Keys<br />
Limitless modulation of the key became available only after the invention of Equal temperament.<br />
When you use a temperament other than Equal temperament, you must carefully choose the key to<br />
play in. For example, if the song you are going to play is written in D major, choose “D” to set the<br />
temperament key.<br />
Equal Temperament (Flat)<br />
This is an “unstretched” equal temperament that divides the scale into twelve equal semitones. This<br />
produces the same chordal intervals in all twelve keys, and has the advantage of limitless modulation<br />
of the key. However the tonality of each key becomes less characteristic and no chord is in pure<br />
consonance.<br />
Equal Temperament (Stretched)<br />
This is the most popular piano temperament and is the initial setting. The hearing ability of a<br />
human is uneven and is not as accurate with high frequency and low frequency as it is with the<br />
middle range. This temperament’s tuning is stretched to compensate for this so the sound will be<br />
heard naturally to the ears. This “Stretched” equal temperament is a practical variation of the<br />
“unstretched” equal temperament which was invented on a mathematical basis.<br />
Pure Temperament<br />
This temperament, which eliminates dissonances for thirds and fifths is still popular for choral<br />
music because of its perfect harmony.<br />
You need to be aware what key you are playing in with this temperament. Any key modulation will<br />
result in dissonances. When you play music in a particular key, you need to match the key of the<br />
temperament as well.<br />
Pythagorean Temperament<br />
This temperament, which uses mathematical ratios to eliminate dissonance for fifths, is very limited<br />
for use with chords, but it produces very characteristic melodic lines.<br />
Meantone Temperament<br />
This temperament, which uses a mean between a major and minor whole tone to eliminate dissonance<br />
for thirds, was devised to eliminate the lack of consonance’s experienced with certain fifths for the<br />
Pure temperament. It produces chords that are more beautiful than those with the equal temperament.<br />
System Menu P. 135
P. 136<br />
Werckmeister III, Kirnberger III Temperament<br />
These two temperaments are placed in between Meantone and Pythagorean. For music with few<br />
accidentals, this temperament produces the beautiful chords of the mean tone, but as accidentals<br />
increase, the temperament produces the characteristic melodies of the Pythagorean temperament.<br />
It is used primarily for classical music written in the Baroque era to revive the original characteristics.<br />
Arabic<br />
Some oriental scales, including the Arabic, are characterized for “quarter-tone” which is half of a<br />
half-tone (50 cents). This makes the music sound very different from traditional western music.<br />
The CP Piano provides two of the most popular Arabic scales, although you can create more<br />
variations with the User Temperament function. With Arabic 1, the notes B and E are a quartertone<br />
lower than the Occidental Scale, while the notes A and E are lower with Arabic 2.<br />
To create a User Temperament:<br />
1) On the Temperament screen, press the EDIT button (F7). The User Temperament screen will be<br />
displayed.<br />
2) Use the KEY buttons (F3, F4) to select the note to edit.<br />
3) Use the Dial or TUNE buttons (F5, F6) to change the value. The value is represented in cents above<br />
or below Equal temperament and ranges from –50 to +50.<br />
4) Press the SAVE button (F7) to save the User Temperament.<br />
<strong>Kawai</strong> Concert Performer Series Digital Piano
L 1<br />
R 1<br />
L 2<br />
R 2<br />
L 3<br />
R 3<br />
L 4<br />
R 4<br />
L 5<br />
R 5<br />
F 1 F 2 F 3 F 4 F 5 F 6 F 7<br />
F1 Takes you to the Temperament menu.<br />
F3, F4 Selects the note to edit.<br />
F7 Saves the User Temperament.<br />
• The User Temperament alters the tuning for each octave equally. In other words, you cannot<br />
alter the tuning of different sections of the CP’s keyboard range separately.<br />
System Menu P. 137
P. 138<br />
MIDI Menu<br />
The letters MIDI stand for Musical Instrument Digital Interface, an international standard for<br />
connecting MIDI equipped synthesizers, drum machines, and other electronic instruments so that<br />
they can exchange data. Personal computers can also be equipped for MIDI communication.<br />
Electronic instruments equipped with MIDI can transmit and receive performance data such as,<br />
notes, what sound to play, pedal information, volume, etc. through the MIDI In/Out/Thru Jacks.<br />
This data can be recorded with a device like a sequencer or a computer.<br />
• In this <strong>manual</strong> we will only discuss the basic MIDI functions that pertain directly to the CP. For<br />
detailed literature on MIDI, please visit the music department of your local bookstore.<br />
On page one of the MIDI Settings menu you can configure the following settings.<br />
Right Transmit Channel<br />
Sets the MIDI Transmit Channel for the RIGHT hand Parts. You can select MIDI Channels 1-16.<br />
Left Transmit Channel<br />
Sets the MIDI Transmit Channel for the LEFT/SPLIT Part. You can select MIDI Channels 1-16.<br />
Chord Transmit Channel<br />
Sets the MIDI Transmit channel the Chord data created by the Accompaniment System when it<br />
analyzes the notes you play in the lower section of the keyboard. You can select MIDI Channels 1-<br />
16 and OFF. OFF disables MIDI transmission of the chord data.<br />
Chord Detect Channel<br />
Sets the MIDI receive channel for chord data being sent to the CP. The Accompaniment System can<br />
be controlled remotely on this MIDI channel by an external MIDI controller. You can select MIDI<br />
channels 1-16, OFF, All, or MIDI Accordion. When set to ALL the Accompaniment System will<br />
respond to any chord data it receives on ANY MIDI channel.<br />
Local Control ON/OFF<br />
This determines whether the CP’s sound will be played from the piano’s keyboard (“ON”) or only<br />
from an external MIDI instrument (“OFF”). Even with local control “off” the CP’s keyboard will<br />
still transmit to an external MIDI instrument or personal computer.<br />
<strong>Kawai</strong> Concert Performer Series Digital Piano
Clock<br />
Clock is a data code that a MIDI instrument uses as the reference for its Tempo settings as well as<br />
Style Start/Stop commands. When it is set to INTERNAL, the CP uses its own built-in clock to<br />
control tempo settings. When set to EXTERNAL, the CP reads the clock data that it receives via<br />
MIDI and uses this data to control the Tempo.<br />
To configure the MIDI Settings:<br />
1) On page 2 in the System menu, press the MIDI (L3) button. The LCD screen will display the first MIDI<br />
page.<br />
2) Use the L and R buttons to select the setting and use the Dial to change the values.<br />
L2<br />
Selects Transmit channel for the RIGHT Part.<br />
Choose 1–16.<br />
L 1<br />
L 2<br />
R 1<br />
R 2<br />
R2<br />
Turns Local Control on/off.<br />
L3<br />
Selects Transmit channel for the LEFT Part.<br />
Choose 1–16.<br />
L 3<br />
R 3<br />
R3<br />
Selects the Clock source.<br />
L4<br />
Selects Transmit channel for the chord data.<br />
Choose 1-16 or OFF.<br />
L 4<br />
R 4<br />
L5<br />
Selects the chord detect Receive channel.<br />
Choose 1–16, OFF, All, or MIDI Accordion.<br />
L 5<br />
R 5<br />
F 1 F 2 F 3 F 4 F 5 F 6 F 7<br />
F1-F4<br />
Selects the other MIDI Settings pages.<br />
System Menu P. 139
Transmit MIDI Data<br />
On page two of the MIDI Setting menu you can determine what MIDI data will be transmitted from<br />
the CP.<br />
“Keyboard = On/Off” Determines whether or not note data that is generated by the keys being<br />
played will be transmitted.<br />
“Program = On/Off” Determines whether or not the CA piano will transmit program change<br />
information when a Sound is selected on the CP.<br />
“Control = On/Off” Determines whether or not changes in controllers (such as the pedals being<br />
depressed) will be transmitted.<br />
“Expression = Key/Acc/Both” Determines whether or not the Expression data (CC# 11) for notes<br />
played on the keyboard, by the Auto Accompaniment System, or both should be transmitted.<br />
“System Exclusive = On/Off” Determines whether or not all of the CP’s settings will be transmitted<br />
in a special format that is understood by another CP.<br />
“Clock = On/Off” Determines whether or not the CP’s Clock data will be transmitted.<br />
“ACC = On/Off” Determines whether or not the data from the Auto Accompaniment System will be<br />
transmitted.<br />
L 1<br />
R 1<br />
L2 Selects whether note data is transmitted.<br />
L 2<br />
R 2<br />
R2 Selects whether System Exclusive data is<br />
transmitted.<br />
L3 Selects whether Bank and Program Change data<br />
is transmitted.<br />
L 3<br />
R 3<br />
R3 Selects whether Clock data is transmitted.<br />
L4 Selects whether Controller data is transmitted.<br />
L 4<br />
R 4<br />
R4 Selects whether Auto-accompaniment data is<br />
transmitted.<br />
L5 Selects whether Expression data is transmitted<br />
L 5<br />
R 5<br />
F 1 F 2 F 3 F 4 F 5 F 6 F 7<br />
F1-F4 Selects the other MIDI Settings pages.<br />
P. 140<br />
<strong>Kawai</strong> Concert Performer Series Digital Piano
On page three of the MIDI Settings menu, you can determine which MIDI channels the CP will<br />
receive MIDI data on. The CP can receive MIDI data on all 16 MIDI channels at once or only certain<br />
MIDI channels.<br />
Channel Receive On/Off<br />
Each of the 16 MIDI channels can be set separately to On or Off.<br />
L 1<br />
L 2<br />
L 3<br />
R 1<br />
R 2<br />
R 3<br />
Use the L2, R2, L4 and R4 buttons to select the channel<br />
and use the Dial to change the setting, On and Off.<br />
L 4<br />
R 4<br />
L 5<br />
R 5<br />
F 1 F 2 F 3 F 4 F 5 F 6 F 7<br />
F1-F4<br />
Selects the other MIDI Settings pages.<br />
System Menu P. 141
MIDI Accordion<br />
On page four of the MIDI Settings Menu you can configure the CP to be played from a MIDI Accordion.<br />
L 1<br />
R 1<br />
L2 Selects receive channel for the Solo (Solo) part.<br />
Choose 1-16.<br />
L 2<br />
R 2<br />
R2 Selects receive channel for the Bass (Right2)<br />
part. Choose 1-16.<br />
L3 Selects receive channel for the Melody (Right1)<br />
part. Choose 1-16.<br />
L 3<br />
L 4<br />
R 3<br />
R 4<br />
R3 Selects receive channel for the Chord (Left)<br />
part. Choose 1-16.<br />
L 5<br />
R 5<br />
F 1 F 2 F 3 F 4 F 5 F 6 F 7<br />
F1-F4 Selects the other MIDI Settings pages.<br />
P. 142<br />
<strong>Kawai</strong> Concert Performer Series Digital Piano
Power Up Settings<br />
This determines whether the CP stores your preferred panel and system settings as the default<br />
settings and applies them automatically when the instrument is turned on.<br />
Select Save Current Settings (L2) in the Power Up Setting menu to save the current panel settings<br />
automatically as the default settings when the CP is turned on.<br />
Select Restore Factory Settings (L3) to return the CP to the factory default settings. The original<br />
factory settings will now be used by the CP when it is turned on.<br />
• The CP never automatically stores Panel and System settings. If you make any new changes that<br />
you want to save, you must use the Save Current Settings (L2) command.<br />
L 1<br />
R 1<br />
L2<br />
Saves the current settings.<br />
L 2<br />
R 2<br />
L3<br />
Restores the initial factory settings.<br />
L 3<br />
R 3<br />
L 4<br />
R 4<br />
L 5<br />
R 5<br />
F 1 F 2 F 3 F 4 F 5 F 6 F 7<br />
F1<br />
F7<br />
Takes you to the System menu.<br />
Applies the selected settings.<br />
System Menu P. 143
L1 Selects Regist Groups.<br />
L2 Selects Conductor.<br />
L3 Selects Sound Settings.<br />
L4 Selects Concert Magic.<br />
L5 Selects System Settings.<br />
P. 144<br />
Soft Reset<br />
The Soft Reset function allows you to return all of the User Settings back to the original Factory<br />
Settings. You can instantly reset all of the user settings or only the ones you want to Reset at the<br />
touch of a button.<br />
To perform a Soft Reset:<br />
1) Press SOFT RESET button (R2) on Page two in the System menu. The Soft Reset screen will be<br />
displayed.<br />
2) Use the L and R buttons to choose type of data you want to reset.<br />
3) Press EXEC button (F7).<br />
4) Press YES (F7) to proceed, or NO (F1) to back out.<br />
L 1<br />
R 1<br />
R1 Selects User Sounds.<br />
L 2<br />
R 2<br />
R2 Selects User Styles.<br />
L 3<br />
R 3<br />
R3 Selects User Conductor.<br />
L 4<br />
R 4<br />
L 5<br />
R 5<br />
R5 Selects ALL.<br />
F 1 F 2 F 3 F 4 F 5 F 6 F 7<br />
F1 Takes you to the System menu without resetting data.<br />
F7 Proceeds with the Reset.<br />
<strong>Kawai</strong> Concert Performer Series Digital Piano
Software Version<br />
This function is used to show what system software version is currently installed in the CP.<br />
To show the software version:<br />
1) Press the Software Version button (R3) on page two in the System menu.<br />
2) The software version will appear in the LCD screen.<br />
L 1<br />
R 1<br />
L 2<br />
R 2<br />
L 3<br />
R 3<br />
L 4<br />
R 4<br />
L 5<br />
R 5<br />
F 1 F 2 F 3 F 4 F 5 F 6 F 7<br />
F1<br />
Takes you to the System menu.<br />
System Menu P. 145
L1-L3 TSelects the background screen design.<br />
L4 Adjusts the brightness of the screen (0-9).<br />
P. 146<br />
Screen Hold<br />
Most of the on-screen menus that you work with on the Concert Performer will remain displayed<br />
until you select something or press a particular button. However, some screens may be displayed<br />
only temporarily, switching back to a main screen if you allow the CP to sit idle without pressing<br />
any buttons. You can adjust a time setting for how long these screens stay displayed before switching,<br />
or even choose to have them hold without switching.<br />
Display Control<br />
This function controls the background screen design, brightness and Screen Hold of the display.<br />
This adjustable time function is effective with the following menus:<br />
• Sound Select menu<br />
• Style Select menu<br />
• Solo Settings menu called up by holding down the PORTAMENTO button.<br />
• Effect Settings menu called up holding down the EFFECT button.<br />
• Chorus Settings menu called up by holding down the CHORUS button.<br />
• Harmony Settings menu called up by holding down the HARMONY button.<br />
1) Press the DISPLAY CONTROL button on the panel.<br />
2) Use the L and R buttons and the Dial to change the settings.<br />
L 1<br />
R 1<br />
R1-R3 Selects the background screen design.<br />
L 2<br />
R 2<br />
L 3<br />
R 3<br />
L 4<br />
R 4<br />
R4 Turns the Screen Hold On and Off.<br />
L 5<br />
R 5<br />
R5 Adjusts the time before switching when the<br />
Screen Hold is Off (5-20 seconds).<br />
F 1 F 2 F 3 F 4 F 5 F 6 F 7<br />
<strong>Kawai</strong> Concert Performer Series Digital Piano
Display Control P. 147
Mic Harmony and Effect<br />
The Concert Performer has a microphone input jack. You can plug<br />
in a microphone and sing while playing on the CP. You can also<br />
“mic” other instruments or plug other electric instruments into the<br />
microphone input. The Mic Harmony and Effect buttons add<br />
various harmonies and effects to your mic input.<br />
Mic Harmony<br />
This function adds many types of harmony to your mic input coming into the microphone input of<br />
the CP.<br />
Type of Harmony<br />
Vocorder Trio (Sub) Octave Duet (Sub)<br />
Gender Male to Female Trio Mix (Sub) Octave Duet Up (Sub)<br />
Gender Female to Male Duet Octave Up<br />
Quartet Duet Spread Octave Down<br />
Quartet Mix Duet Close Octave Up (Sub)<br />
Quartet with Bass Duet Up Octave Down (Sub)<br />
Jazzy Quartet Duet (Sub) 2 Octaves Down<br />
Jazzy Qurtet Mix Duet Spread (Sub) 2 Octaves Down (Sub)<br />
Chorale Duet Close (Sub) Double<br />
Trio Duet Up (Sub) Stereo Double<br />
Trio Mix Octave Duet Double (Sub)<br />
Trio Up Octave Duet Up Lead Substitution<br />
MIC<br />
HARMONY EFFECT<br />
To add Mic Harmony:<br />
1) Press the MIC HARMONY button. The button’s indicator light will show that it has been activated.<br />
2) If you wish to change the Harmony type, hold down the MIC HARMONY button for a moment until the<br />
Mic Harmony types are listed in the LCD display.<br />
3) Use the L and R buttons to choose Harmony type. If you want to edit the settings, press EDIT (F7)<br />
button. Use the L buttons and the Dial to change the settings.<br />
4) Use the F1-F4 buttons to list more Harmony types on the other pages.<br />
P. 148<br />
<strong>Kawai</strong> Concert Performer Series Digital Piano
L 1<br />
L 2<br />
R 1<br />
R 2<br />
Use the L and R buttons to choose a Harmony type.<br />
L 3<br />
R 3<br />
L 4<br />
R 4<br />
L 5<br />
R 5<br />
F 1 F 2 F 3 F 4 F 5 F 6 F 7<br />
F1-F4<br />
F7<br />
Searches for a Harmony type on the other pages.<br />
Enters the detailed settings.<br />
L 1<br />
R 1<br />
L2<br />
Adjusts the Harmony level.<br />
L 2<br />
R 2<br />
L3<br />
Selects the source of chord recognition if the<br />
Vocoder harmony is selected.<br />
L 3<br />
R 3<br />
L 4<br />
R 4<br />
L 5<br />
R 5<br />
F 1 F 2 F 3 F 4 F 5 F 6 F 7<br />
F1<br />
Back to Mic Harmony menu.<br />
Mic Harmony and Effect P. 149
P. 150<br />
About Mic Harmonies<br />
Many of the microphone harmonies rely upon chord information generated by the Auto-<br />
Accompaniment style system. For these harmonies to operate, the ACC button music be ON. Other<br />
harmonies do not rely on the Auto-Accompaniment stystem for chordal information. These<br />
harmonies will operate whether or not the ACC is ON.<br />
Non-Chordal Harmonies<br />
These harmonies do not rely on chordal information from the ACC system. They include the Vocodor,<br />
Gender, Octave, Double, and Lead Substitution harmonies. In the case of the Vocodor, the harmonies<br />
created are taken from the notes actually played on the keyboard, or the notes actually found in a<br />
chosen sequencer track.<br />
Use the EDIT button to choose the KEYBOARD or SEQUENCER TRACK to use as the harmony<br />
source.<br />
The Gender Male to Female and Gender Female to Male harmonies actually change the pitch and<br />
quality of your voice as indicated by the harmony names. The various Octave harmonies add a<br />
voice up or down as indicated by the harmony names.<br />
The Double harmonies add a recording studio quality effect to your voice to make it thicker and<br />
smoother sounding. The effect is similar to the “double-tracking” vocal technique performed in<br />
professional recordings. The Lead Substitution harmony replaces your voice with one that has<br />
been pitch-corrected.<br />
Chordal Harmonies<br />
All other harmonies rely on chordal information from the Auto-Accompaniment system to operate.<br />
If the ACC button is ON, then you will hear harmony based upon the note that you are singing,<br />
chord you are playing and the harmony that is chosen. The active chord will be indicated in the<br />
upper left-hand portion of the display. You can play chords in the Single Finger, Fingered, or Whole<br />
Kybd Modes of the ACCOMPANIMENT system.<br />
<strong>Kawai</strong> Concert Performer Series Digital Piano
Duet Harmonies create one harmony note in addition to the lead note. Trio harmonies create two<br />
harmony notes in addition to the lead note. Quartet harmonies create three harmony notes in<br />
addition to the lead note. Octave Duet harmonies create one harmony note and one octave note in<br />
addition to the lead note.<br />
The lead note will be your own voice, unless the harmony name contains the word (Sub). In this<br />
case, your voice will be substituted with one that is pitch-corrected.<br />
Note:<br />
If you have chosen a chordal harmony but do not turn on the ACC ON/OFF button, the instrument<br />
will substitute the Vocoder harmony. Once you turn on the ACC ON/OFF button, the harmony will<br />
switch to the one you have actually chosen.<br />
Tips and Suggestions<br />
Don’t be afraid to experiment with different harmony types. After a little trial and error, you will<br />
begin to learn which harmony type will be most appropriate for a particular musical setting. The<br />
Harmony names will help you find the appropriate harmony type. For a fuller harmony effect,<br />
choose one of the Quartet harmonies.<br />
For lighter harmonies, choose a Trio or Duet harmony. Words such as “Mix”, “Up”, and “Spread”<br />
will give you further clues to the function and sound of the harmony.<br />
Make sure to adjust both your mic input volume (found beside the Mic Input Jack) and the Mic<br />
Level parameter in the Mic Effects menu. Also, adjust the Harmony Level (found by pressing the<br />
EDIT button in the Harmony Type screen) for the best results.<br />
All Mic Harmony and Effects settings are saved in a Registration. This makes recalling any Mic<br />
Harmony and Effects quick and easy.<br />
Mic Harmony and Effect P. 151
P. 152<br />
Mic Effect<br />
There are six different Mic Effects available to enhance the audio signal (Voice or instrument sound)<br />
coming from the microphone jack. All effects, except the Echo/Vibrato, operate independently of<br />
one another. The Mic Effect function is separate from the Effects assigned to the keyboard Parts.<br />
Therefore, you can use different effects on the keyboard sounds and on Vocal/instrument sounds<br />
from the microphone.<br />
Type of Effect<br />
Equalizer<br />
The equalizer allows you to adjust the tonal Character of the Mic input (voice, instrument, etc) by<br />
raising or lowering the volume level of the High, Mid and Low frequencies separately. Raising the<br />
Values increases the level of the frequency. Lowering the values reduces the level of the frequency.<br />
Gate<br />
This effect mutes the signal from the Mic input (Voice, Instrument, etc) when the input level (volume)<br />
falls below a specified setting. This is useful for cutting out softer, extraneous background noise<br />
(cars, air conditioners, etc) while still allowing the desired, louder signal (Vocal, instrument etc.) to<br />
be heard. This can be very useful for recording to the CD-R in a noisy room.<br />
Higher Gate settings cut out more background noise. 0 - All sounds are heard. 100 - Almost no<br />
sound is heard.<br />
Compressor<br />
This effect reduces the volume of very loud input levels above the specified threshold. Reducing the<br />
loud input levels can enhance soft signal levels that are weak and helps to smooth out the overall<br />
volume level of a performance.<br />
Threshold - Determines how loud the input must be before it is compressed. Higher settings provide<br />
less compression. 0 - All input levels are compressed. 100 - No input level is compressed. Setting<br />
Threshold to 50 will compress only the louder input levels for more natural compression.<br />
Ratio - Determines how much the input level will be compressed (reduced). Higher values produce<br />
more compression. Compression ratios between 1.6 and 5 are best for Vocals.<br />
<strong>Kawai</strong> Concert Performer Series Digital Piano
Note:<br />
The suggestions given for the Gate and Compressor should be considered starting points. By<br />
experimenting you will find the settings that work best for you. Remember often times it is not<br />
necessary to use any Gating or Compression at all.<br />
Echo<br />
Adds delay or echoes to the sound.<br />
Time - Determines the delay time between each echo. Higher values add longer delays.<br />
Level - Determines the volume of the first echo. Each echo will become softer after that. Higher<br />
values create louder echoes.<br />
Feedback - Determines how many echoes will be heard after the first echo. Higher settings produce<br />
more echoes.<br />
Vibrato<br />
Adds a controlled vibrato to the sound.<br />
Rate - Determines how fast the vibrato will be. Higher values produce faster vibrato.<br />
Depth - Determines how strong the vibrato effect will be. Higher values produce deeper vibrato.<br />
Note:<br />
Echo and Vibrato cannot be used together.<br />
Reverb<br />
Adds reverberation to the sound simulating the ambience of a stage or concert hall. Reverb can be<br />
used along with the above effects. Higher settings add more Reverb.<br />
Mic Harmony and Effect P. 153
L2 Adjusts the Mic level.<br />
L3 Turns the EQ On and Off.<br />
L4 Adjusts the Gate time.<br />
P. 154<br />
MIC<br />
HARMONY EFFECT<br />
Mic Effect Parameters<br />
MIC LEVEL EQ GATE COMPRESSOR ECHO/VIBRATO REVERB<br />
To add Mic Effect:<br />
Low<br />
Mid<br />
High<br />
THRESHOLD<br />
RATIO<br />
ECHO<br />
VIBRATO<br />
TIME<br />
LEVEL<br />
FEED BACK<br />
RATE<br />
DEPTH<br />
1) Press the MIC EFFECT button. The button’s indicator light will show that it has been activated. Any<br />
effect that is active in the Mic Effect menu will be turned on.<br />
2) If you wish to change or edit the effect types, hold down the MIC EFFECT button for a moment until<br />
the Mic Effect menu is displayed.<br />
3) Use the L and R buttons to highlight the Effect types. Use the DIAL to adjust the value of the highlighted<br />
effect.<br />
4) If you want to edit the settings of a highlighted effect, press EDIT (F7) button. Use the L buttons and<br />
the Dial to change the settings.<br />
L 1<br />
R 1<br />
L 2<br />
R 2<br />
R2 Turns the Compressor On and Off.<br />
L 3<br />
R 3<br />
R3 Turns the Echo/Vibrato On and Off.<br />
L 4<br />
R 4<br />
R4 Adjusts the Reverb level.<br />
L 5<br />
R 5<br />
F 1 F 2 F 3 F 4 F 5 F 6 F 7<br />
F7 Edits the chosen Effect.<br />
<strong>Kawai</strong> Concert Performer Series Digital Piano
L 1<br />
R 1<br />
L 2<br />
R 2<br />
L 3<br />
R 3<br />
L 4<br />
R 4<br />
L 5<br />
R 5<br />
F 1 F 2 F 3 F 4 F 5 F 6 F 7<br />
F1 Back to Mic Effect menu.<br />
F2, F3 Selects Low Range.<br />
F4, F5 Selects Mid Range.<br />
F6, F7 Selects High Range<br />
Mic Harmony and Effect P. 155
Floppy Disk Operations<br />
The Concert Performer has a built-in 3.5” floppy disk drive that<br />
can read and write to double-density (720KB) or high-density<br />
(1.4MB) disks. These are the exact same disks that are used with<br />
your personal computer. You can use floppy disks to quickly and<br />
easily build up an extensive library of Concert Performer data that<br />
can be shared with other CP owners.<br />
disk so the student may play along. This can greatly assist the<br />
learning process. Finally, there are numerous sites on theWorld<br />
Wide Web dedicated to the sharing and selling of MIDI music that<br />
can be downloaded and played on your Concert Performer<br />
instrument. For instructions on how to use one of these Song Disks<br />
on your CP, see “Playing Songs from a Floppy Disk” on page 102.<br />
There are many companies who specialize in just making MIDI song<br />
files of popular and traditional tunes that can be purchase on floppy<br />
disk. In fact, these days almost any popular song that you can think<br />
of has probably been turned into a MIDI file by someone! Many<br />
publishers of piano lesson books now provide the music on floppy<br />
The CP comes with a special program called Style Converter on a<br />
floppy disk. This allows you to convert Styles that were made for<br />
a number of other manufacturers’ machines, and use them as if<br />
they were designed for the CP. See the separate instructions that<br />
came with the Style Converter disk for additional information.<br />
Disk Menu<br />
The Disk menu is where you can work with various disk operations. There are six functions that<br />
you can choose from, including access to the Style Converter feature.<br />
To work with a disk:<br />
MEDIA<br />
DISK CD<br />
1) Press the DISK button. The Disk menu will be displayed.<br />
2) Use the L and R buttons to select the preferred function.<br />
P. 156<br />
<strong>Kawai</strong> Concert Performer Series Digital Piano
L 1<br />
R 1<br />
L2<br />
Loads data from a floppy disk.<br />
L 2<br />
R 2<br />
R2<br />
Formats a floppy disk.<br />
L3<br />
L4<br />
Saves data onto a floppy disk.<br />
Erases data from a floppy disk.<br />
L 3<br />
L 4<br />
L 5<br />
R 3<br />
R 4<br />
R 5<br />
R3<br />
R4<br />
Plays the song data from a floppy disk.<br />
(See page 106.)<br />
Converts other manufacturers’ Style data<br />
for use in the CP. (See page 89.)<br />
F 1 F 2 F 3 F 4 F 5 F 6 F 7<br />
Saving Data to a Floppy Disk<br />
This important function stores your custom data to disk so that you can retrieve it at a later time.<br />
You can save the following data:<br />
Song<br />
Song data currently in the Recorder. You can save it as the CP’s<br />
own unique format (Internal) or as Standard MIDI File format<br />
(SMF) or Stylist format (Internal format plus Registration setting).<br />
User Style Each User Style or all 20 User Styles at once.<br />
User Conductor Each User Conductor setting or all 40 User Conductor settings at<br />
once.<br />
User Sound Each User Sound or all 20 User Sounds at once.<br />
Regist Group Each Registration Group, containing 8 Registrations, or all 20<br />
Registration Groups at once.<br />
User Touch Two User Touch Curve settings.<br />
User System EQ One User System EQ setting.<br />
Temperament<br />
All Settings<br />
One User Temperament setting.<br />
This allows you to save the current settings of all 8 of the above<br />
data types at once, as a single file.<br />
Floppy Disk Operations P. 157
P. 158<br />
To save your data:<br />
1) In the Disk menu, select SAVE (L3). The Disk Save menu will be displayed.<br />
2) Use the L and R buttons to select the type of data to save. Then the particular sub-menu for that data<br />
type will be displayed.<br />
L 1<br />
R 1<br />
L 2<br />
R 2<br />
Use the L and R buttons to select the type of data<br />
to save.<br />
L 3<br />
R 3<br />
L 4<br />
R 4<br />
L 5<br />
R 5<br />
F 1 F 2 F 3 F 4 F 5 F 6 F 7<br />
F1 Takes you to the Disk menu.<br />
3) Use the appropriate L button, CURSOR buttons (F2, F3) and CHARACTER buttons (F4, F5) to give the<br />
data file a name.<br />
When saving a Song, use the L3 button and the Dial to select whether the song data file will be in the<br />
INTERNAL (CP’s unique) format, or SMF (Standard MIDI File) format or Stylist format.<br />
• The data saved in Stylist format can be called up only in Song Stylist mode.<br />
• When you select SMF format, data in the style track will be automatically pasted to tracks 9-16.<br />
This will erase any existing data on tracks 9-16.<br />
4) Make sure that a formatted floppy disk is in the drive. Then press the SAVE button (F6, F7) to save<br />
the selected data to the disk.<br />
<strong>Kawai</strong> Concert Performer Series Digital Piano
Example: Saving a Style<br />
L 1<br />
R 1<br />
L 2<br />
R 2<br />
L3<br />
Selects which file you would like to save, or if all<br />
files are to be save as a single “all” file.<br />
L 3<br />
R 3<br />
L4<br />
Names the data file.<br />
L 4<br />
R 4<br />
L 5<br />
R 5<br />
F 1 F 2 F 3 F 4 F 5 F 6 F 7<br />
F1 Takes you to the previous menu.<br />
F2, F3 Moves the cursor over the characters in the name.<br />
F4, F5 Selects a character to use in the name.<br />
F7 Saves the data file to floppy disk.<br />
Example: Saving a Song<br />
L 1<br />
R 1<br />
L2<br />
Names the data file.<br />
L 2<br />
R 2<br />
L3<br />
Selects which format the data should be saved<br />
as.<br />
L 3<br />
R 3<br />
L 4<br />
R 4<br />
Floppy Disk Operations P. 159
P. 160<br />
Loading Data from a Floppy Disk<br />
This function allows you to retrieve the stored data from disk.<br />
Song One Song can be loaded into the Recorder from disk.<br />
User Style Up to 20 Styles can be loaded from disk. This number varies depending on the<br />
size of the data contained in the Styles.<br />
User Conductor Up to 40 User Conductor setups can be loaded from disk.<br />
User Sound Up to 20 User Sounds can be loaded from disk.<br />
Regist Group Up to 20 Groups, containing 8 Registrations each, can be loaded from disk.<br />
User Touch Two User Touch Curves can be loaded from disk.<br />
User System EQ One User System EQ can be loaded from disk.<br />
Temperament One User Temperament can be loaded from disk.<br />
All Settings Loads the “All Settings” file on disk.<br />
To load the data from a disk:<br />
1) In the Disk menu, press LOAD (L2). The Disk Load menu will be displayed.<br />
2) Insert your floppy disk into the drive.<br />
3) Use the L and R buttons to select the type of data to load. Then a sub-menu will be displayed that<br />
lists all available files of that type.<br />
L 1<br />
R 1<br />
L 2<br />
R 2<br />
Use the L and R buttons to select the type of data<br />
to load.<br />
L 3<br />
R 3<br />
L 4<br />
R 4<br />
L 5<br />
R 5<br />
F 1 F 2 F 3 F 4 F 5 F 6 F 7<br />
F1 Takes you to the disk menu.<br />
<strong>Kawai</strong> Concert Performer Series Digital Piano
4) When loading User Style, User Conductor, User Sound or Registration data, you can choose whether<br />
to load data that was stored individually or to load all the data that was saved as an “All” file. Press<br />
ALL (F4) to load data that was saved as an “All” file. Press EACH (F5) if data files were saved<br />
individually.<br />
5) Use the L and R buttons to select the data to load. Use the PAGE (F1, F2) buttons to display more<br />
data, if available.<br />
6) Press the EXEC (F7) button to proceed. The screen will display the destination where the data will be<br />
loaded.<br />
L 1<br />
L 2<br />
R 1<br />
R 2<br />
Use the L and R buttons to select the data to load.<br />
L 3<br />
R 3<br />
L 4<br />
R 4<br />
L 5<br />
R 5<br />
F 1 F 2 F 3 F 4 F 5 F 6 F 7<br />
F1 Takes you to the previous menu.<br />
F2, F3 Displays more selections.<br />
F4 Selects the “All” file type if that is how the files were<br />
saved.<br />
F5 Displays data files that were saved individually.<br />
F7 Proceeds to the next screen.<br />
Floppy Disk Operations P. 161
L3 Selects the destination to load individually a Style,<br />
Conductor, Sound or Registration.<br />
P. 162<br />
7) When loading an individual data file, use the L3 button and the Dial to select the preferred destination.<br />
8) Then press the EXEC button to load the selected data into the CP. Press BACK (F1) to cancel loading.<br />
L 1<br />
R 1<br />
L 2<br />
R 2<br />
L 3<br />
R 3<br />
L 4<br />
R 4<br />
L 5<br />
R 5<br />
F 1 F 2 F 3 F 4 F 5 F 6 F 7<br />
F1 Takes you to the previous menu.<br />
F7 Loads the data.<br />
<strong>Kawai</strong> Concert Performer Series Digital Piano
Erasing Data from a Floppy Disk<br />
This lets you erase unnecessary data from the floppy disk.<br />
You can erase Song, User Style, User Conductor, User Sound, Registrations, User Temperament and<br />
ALL.<br />
To erase the data from a disk:<br />
1) In the Disk menu press DELETE (L4). The Disk Delete menu will be displayed.<br />
2) Insert the floppy disk into the drive.<br />
3) Use the L and R buttons to select the type of data to erase. A sub-menu of file names will be<br />
displayed.<br />
4) When you erase User Style, User conductor, User Sound or Registration, determine whether you are<br />
going to erase individual data files by pressing EACH (F5) or the “All” data file by pressing ALL (F4).<br />
5) Press EXEC (F7) to erase the selected data from the disk. Or press BACK (F1) to cancel erasing and<br />
go back to the previous menu.<br />
L 1<br />
R 1<br />
L 2<br />
R 2<br />
Use the L and R buttons to select the data.<br />
L 3<br />
R 3<br />
L 4<br />
R 4<br />
L 5<br />
R 5<br />
F 1 F 2 F 3 F 4 F 5 F 6 F 7<br />
F1 Takes you to the previous menu.<br />
F2, F3 Displays more selections.<br />
F4 Displays the “All” data file if present.<br />
F5 Displays individual files.<br />
F7 Proceeds to the next screen.<br />
Floppy Disk Operations P. 163
P. 164<br />
Formatting a Floppy Disk<br />
Before a floppy disk can be used to save data for the first time, it will need to be formatted. This<br />
simply means that the disk must be “prepared” to hold data.<br />
The Concert Performer can read and write to MS-DOS formatted disks. You can purchase preformatted<br />
floppy disks from any computer or office supply store. Floppy disks may also be formatted<br />
on a PC computer, or the CP can format them itself. There are two types of 3.5” floppy disk in the<br />
market, 2DD (which can hold 720KB of data) or 2HD (which can hold 1,440KB or 1.44MB of data).<br />
Both can be used in the exact same fashion with the Concert Performer.<br />
• You can always re-format a disk at any time. Keep in mind, though, that every time you format a<br />
disk, all data that is currently on it will be erased. Re-formatting is a good way to completely<br />
erase a disk that might have been used previously on a computer, since there may be all sorts of<br />
irrelevant data files left on it otherwise.<br />
To format a disk:<br />
1) In the Disk menu, press FORMAT (R2). The Disk Format menu will be displayed.<br />
2) Insert the floppy disk into the drive.<br />
3) Use the L2 or L3 buttons to select the size of disk you are using, 2HD or 2DD.<br />
4) Press EXEC (F7) to proceed. The screen prompts you for confirmation.<br />
5) Press YES (F7) again to start formatting. Or press NO (F1) to cancel formatting and go back to the<br />
previous menu.<br />
• It takes about a minute to format a floppy disk. Once the formatting is complete, the LCD screen<br />
returns to the Disk menu automatically.<br />
<strong>Kawai</strong> Concert Performer Series Digital Piano
L 1<br />
R 1<br />
L2<br />
Formats a 2HD disk.<br />
L 2<br />
R 2<br />
L3<br />
Formats a 2DD disk.<br />
L 3<br />
R 3<br />
L 4<br />
R 4<br />
L 5<br />
R 5<br />
F 1 F 2 F 3 F 4 F 5 F 6 F 7<br />
F1<br />
F7<br />
Cancels formatting and takes you to the Disk menu.<br />
Starts formatting the disk.<br />
Floppy Disk Operations P. 165
CD-R Operations (CP205 only)<br />
With the Concert Performer’s built-in CD-R drive, you can record<br />
your performances to CD-R and CD-RW discs. You can record a<br />
“live” keyboard performance, a pre-recorded song from the<br />
Recorder, or both. Even your live vocal performance can be<br />
recorded to CD. Your finished CD can be played in any audio CD<br />
player.<br />
The Concert Performer can also playback CD-R and CD-RW discs,<br />
along with any regular audio CD, including commercial CD’s.<br />
1) Insert a blank CD-R or CD-RW into the CD-R drive and press the CD button on the panel.<br />
2) The LCD screen shows the CD menu.<br />
3) Use the L and R buttons to select your desired function.<br />
• When you insert a blank CD into the drive, only the Record option will be available in the menu.<br />
Unavailable options will be shown in gray. After your first recording, all options will be available.<br />
• When a Closed (finalized) audio CD is in the CD drive, pressing the CD button will automatically<br />
jump to the CD Play menu in the LCD screen. You can return to the CD menu by pressing the<br />
MENU button.<br />
L 1<br />
R 1<br />
L2 Shows CD Play screen.<br />
L 2<br />
R 2<br />
R2 Shows Close CD screen.<br />
L3 Shows CD Record screen.<br />
L 3<br />
R 3<br />
R3 Plays the CD only from the headphone jack<br />
on the CD drive unit.<br />
L 4<br />
R 4<br />
L 5<br />
R 5<br />
F 1 F 2 F 3 F 4 F 5 F 6 F 7<br />
P. 166<br />
<strong>Kawai</strong> Concert Performer Series Digital Piano
Playing an audio CD<br />
The operation of the Concert Performer’s CD is similar to a regular CD player.<br />
1) Insert an audio CD in the CD drive and press the CD button on the panel. If the CD is closed (finalized),<br />
then the LCD screen will jump to the CD Play screen. If the CD is open (not finalized), then press the<br />
Play (L2) button in the menu to go to the Play screen.<br />
2) Press the F3 button to start the CD.<br />
3) Use the L, R and F buttons to select the various CD songs and functions. Use the Dial to change the<br />
value.<br />
L1<br />
L2<br />
L3<br />
Turns the Repeat mode On and Off.<br />
Selects the track number.<br />
Adjusts the CD volume.<br />
L 1<br />
L 2<br />
L 3<br />
R 1<br />
R 2<br />
R 3<br />
R1<br />
R3<br />
Selects the Play mode. All = Plays all tracks.<br />
Select = Plays the selected track only. Random<br />
= Plays all tracks at random. Program = Plays<br />
the tracks in programmed order.<br />
Shows the Play Time.<br />
L 4<br />
R 4<br />
L 5<br />
R 5<br />
F 1 F 2 F 3 F 4 F 5 F 6 F 7<br />
F1<br />
F2<br />
F3<br />
F4<br />
F5<br />
F6<br />
F7<br />
Returns to the CD menu.<br />
Stops the CD.<br />
Plays the CD.<br />
Returns to the beginning of the playing track or goes back<br />
to the previous track.<br />
Rewinds the CD.<br />
Forwards the CD.<br />
Skips to the next track.<br />
• Some of the copy protected CD’s may not play in the CD drive of the Concert Performer.<br />
CD-R Operations P. 167
Use the F7 button and the Dial to program.<br />
P. 168<br />
To program the playing order:<br />
1) Press the R1 button in the menu and use the Dial to change the play mode to Program.<br />
2) Press the L2 button and use the Dial to select the first playing track.<br />
3) Press the F7 button to move the cursor to the next position and use the Dial to select the second<br />
track.<br />
4) Repeat step #3 to program up to ten tracks.<br />
L 1<br />
R 1<br />
Select “Program” with the Dial.<br />
L 2<br />
R 2<br />
L 3<br />
R 3<br />
L 4<br />
R 4<br />
L 5<br />
R 5<br />
F 1 F 2 F 3 F 4 F 5 F 6 F 7<br />
<strong>Kawai</strong> Concert Performer Series Digital Piano
Recording onto a CD<br />
You can record any performance on the Concert Performer directly onto a CD-R or CD-RW disc.<br />
Your performance can be “live” playing with or without auto-accompaniment styles. It can also be<br />
a previously recorded song playing from the Easy or Advanced Recorder, and even a voice or<br />
instrument from the Mic input. Any, and all, of these performances can be recorded onto the CD.<br />
You must record vocals, or any instrument using the Mic Input, directly to the CD. (The Easy/<br />
Advanced Recorder cannot record from the Mic Input)<br />
Multiple songs (tracks) can be recorded onto CD, up to the full time capacity of the disc. Once a<br />
song is recorded to CD, the Concert Performer cannot erase it.<br />
1) Insert a blank or open CD in the CD drive and press the Record button (R3) in the CD menu. The CD<br />
Record screen will be displayed in the LCD screen.<br />
2) The Concert Performer will check the CD and automatically set the recording track number.<br />
3) Press the REC button (F3). The CD is ready to start recording.<br />
4) If you start an Accompaniment Style, or start the Recorder, the CD recording will automatically start.<br />
5) You can <strong>manual</strong>ly start the recording by pressing the PLAY button (F5) in the screen.<br />
L1<br />
L2<br />
L3<br />
L4<br />
Shows the recording track number.<br />
Adjusts the volume for the Style.<br />
Adjusts the Tempo.<br />
Adjusts the volume for the LEFT Part.<br />
L 1<br />
L 2<br />
L 3<br />
L 4<br />
R 1<br />
R 2<br />
R 3<br />
R 4<br />
R1<br />
R2<br />
R3<br />
R4<br />
Shows the remaining time available for<br />
recording.<br />
Adjusts the volume for the SOLO Part.<br />
Adjusts the volume for the RIGHT 1 Part.<br />
Adjusts the volume for the RIGHT 2 Part.<br />
L 5<br />
R 5<br />
F 1 F 2 F 3 F 4 F 5 F 6 F 7<br />
F1<br />
F2<br />
F4<br />
F5<br />
Takes you to the CD menu.<br />
CD Record button (Record Ready)<br />
Stops the recording.<br />
Starts the CD recording.<br />
CD-R Operations P. 169
P. 170<br />
Recording Tips and Suggestions<br />
• Anyone can have fun making CD recordings and sharing them with family and friends. You do not<br />
have to be a professional musician to record your own CD. If you are not a great player, you can first<br />
record your song using the Concert Performer’s Easy Recorder. You can record the song slowly and<br />
speed it up later. You can even re-record it if you make a mistake. Advanced users can edit mistakes<br />
and add extra tracks in the Advanced Recorder. When your song is perfect, set the CD to Record<br />
and press Play on the Recorder. Your perfected performance will be recorded to the CD.<br />
• If you want to begin your CD recording with live playing or vocals, you will need to press the PLAY<br />
button (F5) to <strong>manual</strong>ly start the recording. (See steps #4 and #5 above). If you want to begin with<br />
a Style or Recording, press the Play or Start button in the corresponding areas of the panel.<br />
• Vocals can be sung along with the Easy/Advanced Recorded songs and/or live keyboard performances<br />
while recording onto the CD. In other words, you can play up to a 16-part sequence (from the Easy/<br />
Advanced Recorder), play along with the sequence on the keyboard, and sing into the microphone<br />
at the same time. All of this will be recorded to the CD.<br />
• The Style Start/Stop and Recorder Play/Stop functions are independent from the CD Record Start/<br />
Stop functions. You can start and stop Styles and Recordings while continuing to record to CD.<br />
• While recording to CD, the panel of the Concert Performers operates normally. You can add and<br />
change sounds, balance the volumes, and change accompaniment styles during your CD recording.<br />
Highlight a Part or Style field with the L and R buttons, then turn the Dial to change the volume.<br />
Press any SOUND category button to change the sound for a highlighted part. Press any STYLE<br />
category button to change the Style.<br />
• You can also change Registrations while recording to CD. This is a quick and easy way to make lots<br />
of changes to sounds and styles while recording to CD.<br />
• Advanced Users with computer sequencers can even record an external sequence into the CD using<br />
the Concert Performer’s internal sounds.<br />
• It may take a few experimental recordings to get volumes mixes and settings perfected for a good<br />
result. This is especially true if you plan to sing and play or play “live” along with the Easy/Advanced<br />
Recorder.<br />
<strong>Kawai</strong> Concert Performer Series Digital Piano
Closing (Finalizing) Your CD<br />
To listen to your recorded CD in a regular (audio) CD player, you must first Close (finalize) the CD.<br />
Until you close the CD, you can listen to it only with the CD drive on the Concert Performer. Once<br />
you close the CD, you cannot record on it any more.<br />
1) Press the Close CD button (R2) in the CD menu.<br />
2) Press the EXEC button (F7) to close the CD. Press the MENU button (F1) to cancel and go back to the<br />
CD menu.<br />
L 1<br />
R 1<br />
L 2<br />
R 2<br />
L 3<br />
R 3<br />
L 4<br />
R 4<br />
L 5<br />
R 5<br />
F 1 F 2 F 3 F 4 F 5 F 6 F 7<br />
F1<br />
F7<br />
Cancels and goes back to the CD menu.<br />
Closes the CD-R<br />
Tips and Suggestions<br />
• A Closed CD can be played on any audio CD player, including car stereo and personal computers.<br />
You can give your CD to friends, family, or anyone.<br />
• If you have a personal computer with the appropriate CD drive and software, you can save your<br />
CD recordings to computer. You can then make duplicate CD copies to send to others, deleting<br />
any bad tracks (songs), or mixing and matching songs from other CD’s that you’ve recorded.<br />
• The Concert Performer’s CD drive records and plays audio CD’s only. You cannot play or record<br />
other forms of CD’s, including CD-ROM’s and data CD’s.<br />
• A song recorded on a CD-RW disc can be erased by a personal computer with the appropriate CD<br />
drive and software, or by a stand-alone CD-RW recorder/player.<br />
CD-R Operations P. 171
Getting Assistance: Using Help and Demo<br />
The first time you sit at the Concert Performer, you may feel<br />
overwhelmed by the wealth of features and options that it offers.<br />
You will find, though, that if you keep this Owner’s Manual handy<br />
you can learn to use the different functions as you need them, at<br />
your own pace. And, there is certainly nothing wrong with only<br />
using a few basic features, and thoroughly enjoying them. After<br />
all, the Concert Performer is first and foremost a musical<br />
instrument, and its whole purpose is to provide you with the tools<br />
for musical expression and fun no matter your skill level.<br />
There are times when you might not have the Owner’s Manual at<br />
your side, and you need an explanation of a button or feature.<br />
Fortunately, there are built-in Help guides to give you a hand. The<br />
Help function provides a basic introduction and overview of most<br />
of the features found in the CP.<br />
There are also many built-in Demostration songs that really show<br />
of the musical potential of the Concert Performer. These songs<br />
were composed by some of the top musicians in the music industry,<br />
and will undoubtedly impress and inspire you.<br />
Using the Help<br />
To get Help, simply press the HELP button to the left of the display. The display will show an<br />
explanation on the function or feature that you are presently working on. Help is available at any<br />
time, except when the CP is busy recording your performance or accessing a floppy disk.<br />
To use the Help:<br />
HELP<br />
1) Press the HELP button. The Help text will be displayd in the LCD screen.<br />
2) If the text is not what you are looking for, press the INDEX (F1) button to list the HELP topics. Use the<br />
F1 and F2 buttons to list more topics on the other pages.<br />
3) Use the appropriate L or R button to select the topic, and the text will be displayed.<br />
4) Use the F3 or F4 button to change the language. English, German, French, and Spanish are available.<br />
5) To leave Help, press the EXIT button.<br />
P. 172<br />
<strong>Kawai</strong> Concert Performer Series Digital Piano
L 1<br />
L 2<br />
R 1<br />
R 2<br />
Use the L and R buttons to selct a Help topic.<br />
L 3<br />
R 3<br />
L 4<br />
R 4<br />
L 5<br />
R 5<br />
F 1 F 2 F 3 F 4 F 5 F 6 F 7<br />
F1, F2 Searches for more Help topics on the other<br />
pages.<br />
L 1<br />
R 1<br />
L 2<br />
R 2<br />
L 3<br />
R 3<br />
L 4<br />
R 4<br />
L 5<br />
R 5<br />
F 1 F 2 F 3 F 4 F 5 F 6 F 7<br />
F1 Takes you to the Help menu.<br />
F3, F4 Selects the language.<br />
Getting Assisted—Help and Demo P. 173
P. 174<br />
DEMO<br />
Using the Demonstrations<br />
There are five types of Demonstrations programmed in the CP piano.<br />
Main Demo<br />
An exciting and entertaining long song that shows off the CP’s musical potential as a whole.<br />
Function Demos<br />
Songs, Text, and Graphics that help explain the most important features and functions of the Concert<br />
Performer.<br />
Sound Category Demos<br />
Each Sound category has a song, or songs, that demonstrate the sound choices and capabilities<br />
found in the category.<br />
Style Category Demos<br />
Each Style category has a song, or songs, that demonstrate how the Auto-Accompaniment Styles<br />
can be used.<br />
Piano Music<br />
The initial DEMO menu screen will play Classical and Contemporary piano music as long as you<br />
remain in that screen. The songs are randomly selected from the Piano Music feature.<br />
To listen to a Main/Sound/Style Demo:<br />
1) Press the DEMO button. The Demonstration menu will be displayed.<br />
2) Select your preferred Demo piece by either,<br />
pressing the Main Demo Song button (F2,F3) to select the Main Demo,<br />
or pressing any of the SOUND category buttons to select a Sound Demo,<br />
or pressing any of the STYLE category buttons to select a Style Demo.<br />
Sound or Style categories may have more than one demo songs played in sequence. Press the<br />
Sound or Style button repeatedly to skip to the next demo song.<br />
3) To exit, press the EXIT, PLAY/STOP or the DEMO button.<br />
<strong>Kawai</strong> Concert Performer Series Digital Piano
L 1<br />
R 1<br />
L 2<br />
R 2<br />
L 3<br />
R 3<br />
L 4<br />
R 4<br />
L 5<br />
R 5<br />
F 1 F 2 F 3 F 4 F 5 F 6 F 7<br />
F2, F3 Plays the Main Demo.<br />
F5, F6 Enters the Function Demo menu.<br />
SOUND<br />
PIANO FEATURE VOCAL DRAWBAR ORGAN STRING<br />
WOOD-<br />
WIND<br />
BRASS<br />
HARPSI &<br />
MALLET<br />
GUITAR<br />
BASS<br />
PAD &<br />
SYNTH<br />
SPECIALTY<br />
DRUM<br />
SFX<br />
USER<br />
The SOUND category buttons are used to select the demo for that<br />
sound category.<br />
SWING &<br />
BIG BAND<br />
50’S &<br />
60’S<br />
POP &<br />
ROCK<br />
STYLE<br />
BALLAD COUNTRY BLUES GOSPEL<br />
&<br />
JAZZ &<br />
CONTEMP<br />
LATIN &<br />
ISLAND<br />
CLASSIC<br />
PIANO<br />
INTIMATE<br />
PIANO<br />
SOLO<br />
PIANO<br />
KIDS &<br />
HOLIDAY<br />
TRADI-<br />
TIONAL<br />
WALTZ<br />
BROADWAY<br />
USER<br />
The STYLE category buttons are used to select the demo for that<br />
Style category.<br />
• When a selected Demo song ends, another song of the same type will be randomly chosen from<br />
another category and played. You can select another demo song at any time by pressing the<br />
appropriate button.<br />
Getting Assisted—Help and Demo P. 175
P. 176<br />
To listen to a Function Demo:<br />
1) Press the DEMO button. The Demonstration menu will be displayed.<br />
2) Enter the Function Demo menu by pressing the Function Demo button (F4 or F5).<br />
3) Use the L and R buttons to select the topic you want to see. The selected topic’s text and graphics are<br />
displayed in the LCD screen.<br />
4) To exit, press the EXIT, PLAY/STOP or the DEMO button.<br />
L 1<br />
R 1<br />
L 2<br />
R 2<br />
Use the L and R buttons to select the topic you like to<br />
see.<br />
L 3<br />
R 3<br />
L 4<br />
R 4<br />
L 5<br />
R 5<br />
F 1 F 2 F 3 F 4 F 5 F 6 F 7<br />
F2, F3 Plays the Main Demo.<br />
L 1<br />
R 1<br />
L 2<br />
R 2<br />
L 3<br />
R 3<br />
L 4<br />
R 4<br />
L 5<br />
R 5<br />
F 1 F 2 F 3 F 4 F 5 F 6 F 7<br />
<strong>Kawai</strong> Concert Performer Series Digital Piano
Playing Piano Music<br />
The Concert Performer has over five hours of prerecorded Piano<br />
Music available for your listening pleasure. The Piano Music is<br />
divided into three sections: Classical, Contemporary, and Holiday<br />
music. You can listen to all selections in a category, or you can<br />
program a list of your favorite ten selections from each category.<br />
To listen to the Piano Music:<br />
1) Press the PIANO MUSIC button. The Piano Music menu will be displayed.<br />
2) Select your preferred category, CLASSICAL (F1, F2), CONTEMPORARY (F3, F4) or HOLIDAY (F5, F6).<br />
L 1<br />
R 1<br />
L 2<br />
R 2<br />
L 3<br />
R 3<br />
L 4<br />
R 4<br />
L 5<br />
R 5<br />
F 1 F 2 F 3 F 4 F 5 F 6 F 7<br />
F1, F2 Selects the Classical category.<br />
F3, F4 Selects the Contemporary category<br />
F5, F6 Selects the Holiday category.<br />
3) Use the L and R buttons to select the song you like to listen.<br />
4) Use the F1 and F2 buttons to search more songs on the other pages.<br />
5) Press the PLAY button (F7) to start the song. When the song is finished, another song from that will<br />
be played at random. Songs from the category will continue to play randomly until you exit the<br />
screen.<br />
6) Press the F7 button to pause the song. Press the F5 and F6 buttons to return to category’s song list.<br />
7) To exit, press the EXIT, PLAY/STOP, or PIANO MUSIC button.<br />
Getting Assisted—Help and Demo P. 177
P. 178<br />
L 1<br />
L 2<br />
L 3<br />
L 4<br />
L 5<br />
L 1<br />
L 2<br />
L 3<br />
L 4<br />
L 5<br />
F 1 F 2 F 3 F 4 F 5 F 6 F 7<br />
F1, F2 Searches more songs on the other pages.<br />
F3, F4 Takes you to the category selection menu.<br />
F5, F6 Enters the Favorites menu.<br />
F7 Plays the selected song.<br />
F 1 F 2 F 3 F 4 F 5 F 6 F 7<br />
F5,F6 Displays the song list.<br />
F7 Pauses the playback.<br />
R 1<br />
R 2<br />
R 3<br />
R 4<br />
R 5<br />
R 1<br />
R 2<br />
R 3<br />
R 4<br />
R 5<br />
Use the L and R buttons to select the song you like to<br />
listen.<br />
<strong>Kawai</strong> Concert Performer Series Digital Piano
Making your Favorites list<br />
You can make your Favorites list for each Piano Music category. Ten songs can be programmed in<br />
the order of playback.<br />
NOTE:<br />
You cannot select between songs in different categories.<br />
To make your Favorites list:<br />
1) Select one of the three Piano Music categories. Press the FAVORITES button (F5 or F6) in the Category<br />
song screen. A default list is displayed in the LCD screen.<br />
2) Use the L and R buttons to highlight one of the ten locations. Use the Dial or the SELECT SONG<br />
buttons (F2, F3) to select a new song for that location.<br />
3) Repeat step #2 to program your ten favorite songs in any order you wish.<br />
4) Press the SAVE button (F1) to save the edited list.<br />
L 1<br />
L 2<br />
R 1<br />
R 2<br />
Use the L and R buttons to select a location to edit.<br />
L 3<br />
R 3<br />
L 4<br />
R 4<br />
L 5<br />
R 5<br />
F 1 F 2 F 3 F 4 F 5 F 6 F 7<br />
F1 Saves the edited list.<br />
F2, F3 Selects a song.<br />
F5, F6 Goes back to the song list in the selected category.<br />
F7 Plays the song.<br />
Getting Assisted—Help and Demo P. 179
Appendices<br />
Preset Sounds<br />
PIANO<br />
PAGE 1 PAGE 2 PAGE 3 PAGE 4 PAGE 5<br />
Concert Grand Mellow Grand Jazz Grand New Age Piano Piano & Vibes<br />
Studio Grand Rock Grand Crystal EP New Age Piano 2 Piano & Guitar 2<br />
Modern Piano Hony Tonk Piano & Guitar New Age Piano 3 Piano & Organ 3<br />
Electric Grand Electric Grand 2 Mono Grand New Age EP EP Dolce<br />
Piano Octaves Piano Octaves 2 Wide Honky Tonk New Age EP 2 Toy Piano<br />
Classic EP Classic EP 2 Piano & EP New Age EP 3<br />
Modern EP Classic EP 3 Piano & EP 2<br />
Modern EP 2 Modern EP 3 Piano & EP 3<br />
60’s EP EP Legend Piano & Organ<br />
Tremolo EP EP Phase Piano & Organ 2<br />
FEATURE<br />
PAGE 1 PAGE 2 PAGE 3 PAGE 4 PAGE 5 PAGE 6<br />
Plunger Trumpet Lead Trumpet Lead Flugel Horn Exp Guitar 2 Flugel & Tenor Cello Up Bow<br />
Trumpet Shake Harmon Mute Tpt Exp Trumpet Ballad Guitar Mute Tpt & Bone Cello Down Bow<br />
Lead Trombone Ballad Trumpet Closed Mute Tpt Pick Nylon Gtr Flugel & Mute Tpt Violin Upbow<br />
Exp Guitar Exp Trombone Plunger Trombone Finger Nylon Gtr Soft Tpt & Bone Violin Downbow<br />
Exp Nylon Guitar Ballad Trombone Closed Mute Bone Ac Gtr Harmonics Medium Tpt & Alto Exp Brass<br />
Exp Flute Lead Soprano Ballad Flute Classical Violin Soft Tenor & Alto Exp Saxes<br />
Soft Alto Exp Alto Flute Overblow Dolce Violin Med Tenor & Alto<br />
Ballad Tenor Exp Tenor Flute Flutter Classical Cello Lead Tenor & Alto<br />
Passionate Violin Breathy Tenor Lead Alto Dolce Cello Lead Bone & Tenor<br />
Passionate Cello Growl Tenor Quartet Tpt & Bone & Tenor<br />
VOCAL<br />
PAGE1 PAGE 2 PAGE 3 PAGE 4 PAGE 5 PAGE 6<br />
Jazz Ensemble 40’s Auto 40’s Dah Bah Male Aah 50’s Shoo 40’s Doo<br />
Female Scat 50’s Auto 40’s Doo Dah Male Ooh 50’s Bee 40’s Dah<br />
50’s Ensemble Jazz Doo Dao Slow Choir Male/Female Aah 50’s Doo 40’s Bee<br />
50’s Females Jazz Doo Bop Choir & String Male/Female Ooh 50’s Hey 40’s Bah<br />
Jazz Auto Jazz Bah Bop Ooh 60’s Ooh 50’s La 40’s Shoo<br />
60’s Ensemble Contemp Males Bass Vocal Pop Ooh 50’s Ooh Choir Aahs 2<br />
60’s Ensemble 2 60’s Ooh Wah Choir Aahs Pop Aah 50’s Aah Choir Aahs 3<br />
Pop Ensemble 50’s Doo Wop Breathy Choir Pop Wah Female Doo Choir Aahs Sfz<br />
Pop Ensemble 2 50’s Ooh Aah Voice Oohs 60’s Wah Female Dao Voice<br />
Contemp Ensemble 40’s Doo Bee Humming 60’s Bop Female Duya Choir<br />
P. 180<br />
<strong>Kawai</strong> Concert Performer Series Digital Piano
DRAWBAR<br />
PAGE 1 PAGE 2 PAGE 3 PAGE 4<br />
Be 3 Be More Drawbar Bass Jazz Organ<br />
Jazzer Be Nice 16’ Drawbar Jazz Organ 2<br />
Hi-Lo Odd Man 8’ Drawbar Rock Organ<br />
Full Organ Screamin’ 5 1/3’ Drawbar Pedal Percussion<br />
Mellow Hollow 4’ Drawbar Pedal Percussion 2<br />
Drawbar Drawbar 2 2 2/3’ Drawbar<br />
Percussive Organ Percussive Organ 3 2’ Drawbar<br />
Percussive Organ 2 Drawbar 3 1 3/5’ Drawbar<br />
4’ percussion Soft Solo 1 1/3’ Drawbar<br />
2 2/3’ percussion Key Click 1’ Drawbar<br />
ORGAN<br />
PAGE 1 PAGE 2 PAGE 3 PAGE 4 PAGE 5 PAGE 6<br />
Full Pipes Baroque Mix 8’ Reed Stopped Pipe Pipe Ensemble Pedal Mixer<br />
Small Ensemble 8’ Diapason 8’ Flute Celeste Principal Pipe Resultant Pedal<br />
8’ Celeste Church Organ 3 8’ Flute Chiff Princial Choir Contra Gambe Pedal 2<br />
Church Organ Puff Organ 2 2/3’ Flute Chiff 8’ & 4’ Diapason Kinura Pedal 3<br />
Church Organ 2 Electronic Organ 2 8’ Flute Small Ensemble 2 Post Horn Pedal 4<br />
Electronic Organ 60’s Organ 8’ & 2’ Flute Reed Pipes Vox Celeste 8 Theater Organ 5<br />
Mixer Reed Organ 4’ & 2’ Flute Posaune Chiffy Tibia Theatre Full<br />
Theater Organ Theater Organ 3 2 2/3’ Flute Bass Pipe Full Pipes 2 Theatre Tibia<br />
Theater Organ 2 Theater Organ 4 1 3/5’ Flute Bass Pipe 2 Baroque Theatre Vox<br />
Reeds 8’ Diapason 2 8’ Diapason 3 Cornopean Pump Organ<br />
STRING<br />
PAGE 1 PAGE 2 PAGE 3 PAGE 4 PAGE 5<br />
Beautiful Strings String Quartet Violin Ensemble Harp Sweep Up Warm Strings 2<br />
String Ensemble Strings & Brass Cello Ensemble Harp Sweep Down Warm Strings 3<br />
String Ensemble 2 Warm Strings String Bass Ens Harp Cascade Up Strings Sustaining<br />
Synth Strings Synth Strings 3 Mono Strings Harp Cascade Down Strings Sforzando<br />
Synth Strings 2 60’s Strings Octave Strings String & Harp<br />
Passionate Violin Violin Strings & Bell Slow Violin<br />
Passionate Cello Viola Strings & Piano Tremolo Strings<br />
Full Orchestra Cello Strings & Piano 2 String Quartet 2<br />
Small String Ens Contrabass Slow Cello Orchestra Hit<br />
Harp Pizzicato Synth String Orch<br />
Appendice P. 181
WOODWIND<br />
PAGE 1 PAGE 2 PAGE 3 PAGE 4 PAGE 5 PAGE 6<br />
Ballad Tenor Alto Sax Flute & Mute Tpt Classic Alto Sax Recorder 2 Pan Flute<br />
Exp Alto Tenor Sax Flute & Strings Alto Sax 2 Oboe & Bassoon Slow Pan Flute<br />
Baritone Sax Soft Alto Sax Octave Saxes Alto Sax Bend Bassoon & Euphonium Pan Flute 2<br />
Soprano Sax Soft Tenor sax Big Band Winds 2 Tenor Sax 2 Clarinet & Bassoon Recorder 3<br />
Big Band Winds Breathy Tenor Sax Orchestral Flute Tenor Sax 3 Jazz Clarinet 2 Piccolo 2<br />
Exp Flute Jazz Flute Orch Clarinet Piccolo Flute & Clarinet Clarinet 3<br />
Flute Jazz Clarinet Orchestral Winds 2 Clarinet 2 Oboe & Clarinet Flute Key Click<br />
Clarinet Recorder Reeds Ensemble Bass Clarinet<br />
Oboe English Horn Reeds Ensemble 2 Oboe 2<br />
Orchestral Winds Bassoon Sax Section Bassoon 2<br />
BRASS<br />
PAGE 1 PAGE 2 PAGE 3 PAGE 4 PAGE 5<br />
Trumpet Shake Flugel Horn Bright Solo Tpt Cornet Brass Section 3<br />
Lead Trombone Muted Trumpet 2 Trumpet Ensemble Classic Trumpet Brass Section 4<br />
Solo Trumpet Cup Mute Trombone Trumpet & Alto Dixieland Trumpet Synth Brass 3<br />
Muted Trumpet Bright Trombone Trombone & Tenor Trumpet 2 Synth Brass 4<br />
Cup Mute Trumpet Trombone 2 Brass & Sax Sentimental Bone Trombone & Tpt<br />
French Horns Warm French Horn Brass Pad Euphonium Trombone & Tpt 2<br />
Tuba Jump Brass Mute Brass Ens Sousaphone Wide Horn Section<br />
Trumpet Brass Section 2 Brass & Synth Tuba 2<br />
Trombone Synth Brass Brass & Synth 2<br />
Brass Section Synth Brass 2 French Horn & Strg<br />
HARPSI & MALLET<br />
PAGE 1 PAGE 2 PAGE 3 PAGE 4<br />
Harpsichord Harpsichord Octave Soft Marimba Harpsi & Strings<br />
Clavi Synth Clavi Wide Marimba Harpsi & Strings 2<br />
Celeste Glockenspiel Wide Vibraphone Harpsi & Pipes<br />
Hand Bells Carillon Harpsichord 2 Harpsi & Pipes 2<br />
Church Bells Tubular Bells Wide Harpsichord Bells<br />
Steel Drums Rolling Steel Drum Muted Handbells Bell Lyra<br />
Vibraphone Rolling Vibes Vibes & Guitar Hand Bells 2<br />
Marimba Rolling Marimba Octave Vibes Music Box 2<br />
Xylophone Synth Mallet Steel Drums 2<br />
Music Box Hard Marimba<br />
P. 182<br />
<strong>Kawai</strong> Concert Performer Series Digital Piano
GUITAR<br />
PAGE 1 PAGE 2 PAGE 3 PAGE 4 PAGE 5<br />
Exp Guitar Nylon Acoustic 3 Mellow Steel Strg Spanish Guitar Electric Guitar 4<br />
Exp Nylon Guitar Steel String 2 Lazz Guitar 2 Folk Guitar Electric Guitar 5<br />
Nylon Acoustic 12 String Nylon Electric Folk Guitar 2 Delayed Elec Gtr<br />
Nylon Acoustic 2 Electric Guitar 2 Guitar & Strings Delayed Folk Gtr Overdrive<br />
Steel Guitar Electric Guitar 3 Guitar Pad Pedal Steel 2 Distortion<br />
Pedal Steel Hawaiian Guitar Guitar Feedback Delay Pedal Steel Gtr Cutting Noise<br />
Country Lead Rhythm Guitar Dynamic Overdrive Jazz Guitar 3<br />
Jazz Guitar Ukulele Dist Feedback Muted Guitar 2<br />
Electric Guitar Cutting Guitar Dist Rhythm<br />
Muted Electric Elec Gtr Harmonics Gtr Fret Noise<br />
BASS<br />
PAGE 1 PAGE 2 PAGE 3<br />
Acoustic Bass Acoustic Bass 2 Octave Fretless<br />
Electric Bass Finger Slap Bass Poly Synth Bass<br />
Finger Bass Warm Synth Bass Clavi Bass 2<br />
Pick Bass Clavi Bass Electric Bass 2<br />
Fretless Bass Hammer Bass Finger Bass 2<br />
Ac Bass & Ride Elec Bass & Ride Ac Bass & Piano<br />
Slap Bass Slap Bass 2 Elec Bass & Piano<br />
Synth Bass Synth Bass 3 Acoustic Bass 3<br />
Synth Bass 2 Synth Bass 4 Acoustic Bass 4<br />
Attack Bass Rubber Bass Ac Bass Slap<br />
PAD & SYNTH<br />
PAGE 1 PAGE 2 PAGE 3 PAGE 4 PAGE 5 PAGE 6<br />
Itopia Bowed Classic Synth Classic Synth 3 Multi Sweep Echoes<br />
Warm Pad Metallic Classic Synth 2 Fifth Warm Sweep Sci-Fi<br />
Brightness Soundtrack Square Square 2 Bowed 2 Goblin<br />
Atmosphere Analog Voice Sine Sequenced Analog Saw Pad Echo Pan<br />
New Age Halo 2 Chiff Charang Analog Brass 3 New Age 3<br />
Sweep Bright Warm Pad Bass & Lead Lead Big Saw New Age 4<br />
Polysynth Metallic Pad 2 Wire Lead Soft Wire Lead Octave Saw Saw Comp<br />
Sine Pad Polysynth 2 Crystal Echo Bell Clean Square Square Comp<br />
Halo New Age 2 Rain Pad Caliope Square Lead Saw Comp 2<br />
Synth Vocal Brightness 2 Analog Brass Analog Brass 2 Square Pad Chiff Comp<br />
Appendice P. 183
SPECIALTY<br />
PAGE 1 PAGE 2 PAGE 3 PAGE 4 PAGE 5 PAGE 6<br />
Strumming Ac Gtr Picking Elec Gtr Accordion Shakuhachi Bag Pipe Kokyu<br />
Strumming Ac Gtr 2 Pick/Strum Gtr French Accordion Sitar Balalaika Sho<br />
Picking Ac Gtr Pick/Strum Gtr 2 Tango Accordion Blown Bottle Ryuteki Hichiriki<br />
Picking Ac Gtr 2 Strumming Mandolin French Accordion 2 Koto Nokan Atarigane<br />
Mandolin Strumming Banjo Accordion 2 Kalimba Biwa Mokugyo<br />
Banjo Blues Harmonica Celtic Harp Ocarina Kenban Harmonica Tsuzumi<br />
Picking Banjo Wah Harmonica Mellow Mandolin Shamisen Mandolin 2 Ainote<br />
Harmonica Wah Harmonica 2 Hammer Dulcimer Sitar 2 Celtic Harp 2 Euro Hit<br />
Fiddle Dulcimer Banjo 2 Shanai Cordovox 6th Hit<br />
Strumming Elec Gtr Slow Fiddle Whistle Taisho Koto Whistlers Bass Hit Plus<br />
DRUM<br />
PAGE 1 PAGE 2 PAGE 3 PAGE 4 PAGE 5<br />
Standard Kit Marching Set Sleigh Bells Timpani Bass Drum<br />
Jazz Kit Nogaku Set Triangle Rolling Timpani Talking Drum<br />
Brush kit Taiko Drums Repeating Castanet Soft Timpani Slit Drum<br />
Room Kit Melodic Toms Cym & Bass Drum Soft Timpani Roll Room Tom<br />
Power Kit Concert Bass Drum Snare Roll Orch Cymbal & BD Brush Tom<br />
Analog Kit Woodblock Melodic Tom 2 Finger Snap Cymbal Roll<br />
Dance Kit Agogo Synth Drum Hand Clap Ride Cymbal<br />
Electric Kit Tinkle Bell Rhythm Box Tom Metronome Crash Cymbal<br />
Orchestra Kit Castanet Electric Drum Conga Splash Cymbal<br />
Standard Kit 2 Reverse Cymbal Snare Roll 2 Tambourine Crash Cymbal Mute<br />
SFX<br />
PAGE 1 PAGE 2 PAGE 3 PAGE 4 PAGE 5 PAGE 6<br />
SFX Kit Applause Helicopter Car Passing Train Latin “Huh”<br />
SFX Kit 2 Seashore Gunshot Car Stopping Jet plane Scratch<br />
Nature Stream Explosion Breath Noise Crickets Rooster<br />
Transportation Rain Machine Gun Cat Crickets 2 Trolley Bell<br />
War Games Thunder Siren Horse Gallop Cu-Coo Typewriter<br />
Animal Farm Wind Foot Step Crow Starship Whistle Down<br />
Mystery Theatre Bird Tweet Door Slam Plane Punch Whistle Up<br />
Game Show Laughing Dog Barking Door Creak Heartbeat Organ Bell<br />
Counting Screaming Telephone 2 Car Engine Laser Gun Cow<br />
Trip to Japan Telephone Wind Chime Car Crash Kiss Bubble<br />
P. 184<br />
<strong>Kawai</strong> Concert Performer Series Digital Piano
List of Styles<br />
SWING & BIG BAND 50’S & 60’S POP & ROCK<br />
PAGE 1 PAGE 2 PAGE 1 PAGE 2 PAGE 1 PAGE 2<br />
Fast Big Band Night Club 50’s Rock 50’s Rock 3 Philly Soul Disco<br />
Fast Big Band 2 Jitterbug 50’s Rock 2 60’s Rock 70’s R&B Disco 2<br />
Medium Big Band Big Band Samba 50’s Rockabilly 60’s Rock 2 70’s R&B 2 Disco 3<br />
Sing It Big Band Cha Cha 50’s Folk 60’s Folk Rock Cont Pop 80’s Dance<br />
Jump Swing Big Band Foxtrot Rock Rhumba 60’s Pop 2 Pop / Funk 80’s Dance 2<br />
Medium Swing Slow Big Band 60’s Beach 60’s R&B Latin Rock Classic Rock<br />
Nice and Easy Medium Swing 2 Surf Rock 60’s R&B 2 80’s Rock 70’s Country Rock<br />
Slow Swing Slow Swing 2 60’s Pop Pop / Rock Rock Shuffle<br />
Motown Folk Rock Pop Shuffle<br />
Motown 2 Slow Rock 70’s Pop<br />
BALLAD COUNTRY BLUES & GOSPEL<br />
PAGE 1 PAGE 2 PAGE 1 PAGE 2 PAGE 1<br />
Cont R&B Ballad Modern Ballad 2 Country Shuffle Bluegrass KC Blues<br />
Modern Ballad Modern Ballad 3 Country Stomp Texas Swing Slow R&B<br />
Pop Ballad Pop Ballad 2 Boot Scootin Country Pop Fast R&B<br />
R&B Ballad R&B Ballad 2 Train Beat Country Two Beat Blues / Rock<br />
70’s Pop Ballad 70’s Rock Ballad Mod Country Shuffle Country Rock 2 Slow Blues<br />
Mod Country Ballad Country Ballad Redneck Rock Gospel Shuffle<br />
Country Pop Ballad Rock Ballad Country Rock Southern Gospel<br />
6/8 Ballad Folk Rock Ballad Modern Train Beat Fast Gospel<br />
50’s Ballad 50’s Ballad 2 Slow Gospel<br />
50’s Orch Ballad 6/8 Gospel<br />
JAZZ & CONTEMP LATIN & ISLAND CLASSIC PIANO<br />
PAGE 1 PAGE 2 PAGE 1 PAGE 2 PAGE 1<br />
Smooth Jazz Smooth Jazz 3 Bossa Nova Modern Bossa Showman<br />
Smooth Jazz 2 Jazz R&B Bossa Nova 2 Bolero Pops Piano<br />
Jazz / Pop Latin Jazz 2 Salsa Salsa 2 Table for Two<br />
Latin Jazz Cont 16 Beat 2 Samba Salsa 3 Ragtime<br />
Cont 16th Shuffle Cont 8 Beat Beguine Balenato Country Piano<br />
Cont 16 Beat Cont 8 Beat 2 Hawaiian Bachata Rock Legend<br />
Jammin Organ Reggae Reggae 2 Toons<br />
5/4 Jazz Calypso Gypsi Boogie<br />
Mambo<br />
Rhumba<br />
Appendice P. 185
INTIMATE PIANO SOLO PIANO KIDS & HOLIDAY<br />
PAGE 1 PAGE 2 PAGE 1 PAGE 2 PAGE 1 PAGE 2<br />
Pop Ballad Rock Swing Fast Show Kids March Holiday 4/4<br />
Rock Ballad Blues Two Beat Swing Standard Kids 6/8 March Holiday Two Beat<br />
Country Ballad Pop Two Beat Shuffle Standard Ballad Kids 2 Beat Holiday Shuffle<br />
Swing Ballad Bossa Pop Waltz Kids 2 Beat Shuffle Holiday Rock<br />
Pop / Rock Shuffle Boogie Jazz Waltz Kids 3/4 Holiday Waltz<br />
Pop 3/4 Pop Country Ballad Kids Folk 2 Beat Holiday Waltz 2<br />
Bossa Pop Ballad Country Waltz 3/4 Lullaby Holiday Waltz 3<br />
Medium Swing 3/4 Standard New Age 2 4/4 Lullaby Holiday Waltz 4<br />
Dixieland New Age 3<br />
New Age 6/8 Pop / Rock<br />
TRADITIONAL WALTZ BROADWAY<br />
PAGE 1 PAGE 2 PAGE 1 PAGE 1<br />
Foxtrot Foxtrot 2 Orchestral Waltz Medium Show Beat<br />
Soft Shoe Polka 2 Classic Waltz Fast Show Beat<br />
Polka Polka 3 Traditional Waltz Fast Show Beat 2<br />
Cha Cha Cha Cha 2 French Waltz Medium Show Swing<br />
Dixieland Tango 2 European Waltz Medium Show Beat 2<br />
Ballroom Dixieland 2 Country Waltz Slow 12/8<br />
Tango March 3 Country Waltz 2 Slow Show<br />
Jive Alps March Modern Waltz Dixieland 4/4<br />
March 1 Jazz Waltz 3/4 Show<br />
March 2 Vienna Waltz Fast 6/8<br />
P. 186<br />
<strong>Kawai</strong> Concert Performer Series Digital Piano
List of Song Stylists<br />
16 Tons<br />
3 Coins In A Fount<br />
76 Trombones<br />
A<br />
A Summer Place<br />
A Whole New World<br />
Achy Breaky Heart<br />
Across the Alley<br />
After The Love Has<br />
Ain’t Misbehavin’<br />
Ain’t No Woman<br />
Ain’t Too Proud<br />
All I Have To Do<br />
All I Wanna Do<br />
All Of Me<br />
All Shook Up<br />
Alley Cat<br />
Aloha Oe<br />
Always A Woman<br />
Always On My Mind<br />
Amapola<br />
Amazing Grace<br />
American Pie<br />
Annie’s Song<br />
Anniversary Waltz<br />
Anything Goes<br />
April Showers<br />
Around The World<br />
Arrivederci Roma<br />
Arthur’s Theme<br />
As Long As He Need<br />
As Tears Go By<br />
As Time Goes By<br />
At The Hop<br />
Auld Lang Syne<br />
Autumn Leaves<br />
Away In A Manger<br />
B<br />
Baby Face<br />
Bad Leroy Brown<br />
Ballad Davy Crockt<br />
Beautiful Morning<br />
Beauty & The Beast<br />
Beer Barrel Polka<br />
Begin The Beguine<br />
Behind Closed Door<br />
Benny And The Jets<br />
Best Of My Love<br />
Bewitched<br />
Bill Bailey<br />
Billie Jean<br />
Bingo<br />
Blue Bayou<br />
Blue Bossa<br />
Blue Moon<br />
Blue Suede Shoes<br />
Blue Velvet<br />
Blueberry Hill<br />
Body And Soul<br />
Boogie Bugle Boy<br />
Boot Scootin’<br />
Boy From NY City<br />
Breeze & I<br />
Brick House<br />
Bridge Over Water<br />
Brown Eyed Girl<br />
Brown Eyes Blue<br />
But Beautiful<br />
Button Up Overcoat<br />
By The Time I Get<br />
Bye Bye Love<br />
C<br />
Cabaret<br />
California Dreamin<br />
California Girls<br />
Can You Feel Love<br />
Canadian Sunset<br />
Candle In The Wind<br />
Candy<br />
Can’t Get Enough<br />
Can’t Get Started<br />
Can’t Help Falling<br />
Can’t Hurry Love<br />
Can’t Smile<br />
Can’t Stop Loving<br />
Cara Mia<br />
Careless Whisper<br />
Celebration<br />
C’est Si Bon<br />
Chain Of Fools<br />
Chances Are<br />
Change The World<br />
Chantilly Lace<br />
Chapel of Love<br />
Chatahoochee<br />
Chatt. Choo Choo<br />
Cherish<br />
Cherry Pink&Apple<br />
Chicago<br />
Christmas Song<br />
Clementine<br />
Climb Ev’ry Mtn<br />
Close To You<br />
Colors Of The Wind<br />
Come In From Rain<br />
Come Rain Or Shine<br />
Comin Up Roses<br />
Consider Yourself<br />
Copacabana<br />
Corcovado<br />
Could I Have Dance<br />
Could It Be I’m<br />
Could’ve Been<br />
Country Roads<br />
Coward Of County<br />
Cracklin Rose<br />
Crazy<br />
Crazy Little Thing<br />
Cruisin Down River<br />
Crusin’<br />
Cry<br />
Cry Me A River<br />
Crying In Chapel<br />
D<br />
Daddy<br />
Dance To The Music<br />
Dancin’ In Street<br />
Daniel<br />
Daydream<br />
Days Of Wine Roses<br />
Deck The Halls<br />
Deep Purple<br />
Deja Vu<br />
Desafinado<br />
Desparado<br />
Didn’t We Almost<br />
Do Re Mi<br />
Do Your Ears Hang<br />
Dock Of The Bay<br />
Domonique<br />
Don’t Be Cruel<br />
Don’t Cry For Me<br />
Don’t Fall In Love<br />
Don’t Fence Me In<br />
Don’t Get Around<br />
Don’t Let The Sun<br />
Don’t Worry B Hapy<br />
Downtown<br />
Dream<br />
Dueling Banjos<br />
Dust In THe Wind<br />
Appendice P. 187
E<br />
Earth Angel<br />
Ebony & Ivory<br />
Edelweiss<br />
Elvira<br />
End Of The Road<br />
Endless Love<br />
Evergreen<br />
Every Breath You<br />
Every Rose Has Its<br />
Everybody Plays<br />
Everything I Do<br />
Everything Is Beau<br />
Evil Ways<br />
Exodus Song, The<br />
Eyes Of Love<br />
F<br />
Falling In Love<br />
Farmer In The Dell<br />
Fascinating Rhythm<br />
Fascination<br />
Fast Car<br />
Feelings<br />
Feels So Good<br />
Feels So Right<br />
Ferry Cross Mersey<br />
Fever<br />
Fields Of Gold<br />
Fire & Rain<br />
First Time Ever I<br />
Flashdance<br />
Fly Me To The Moon<br />
Foggy Day, A<br />
Folsom Prison<br />
For All We Know<br />
Forever And Ever<br />
Free Bird<br />
Free Ride<br />
Freeway Of Love<br />
P. 188<br />
Friends Are For<br />
Friends Low Places<br />
Friends See Me Now<br />
From A Distance<br />
Frosty The Snowman<br />
Fun, Fun, Fun<br />
G<br />
Gambler, The<br />
G’bye Yellow Brick<br />
Georgia On My Mind<br />
Georgy Girl<br />
Get Down Tonight<br />
Getting To Know U<br />
Gimme Some Lovin’<br />
Girl From Ipanema<br />
Give My Regards To<br />
Glory Of Love, The<br />
Glow Worm<br />
God Bless Child<br />
Goin Out Of My Hed<br />
Good Golly MsMolly<br />
Good Morning<br />
Good Thing<br />
Got My Mind Set<br />
Granpa’s Farm<br />
Great Balls O Fire<br />
Green Door, The<br />
Greatest Love<br />
☞ The Greatest Love<br />
Green Green Grass<br />
Green Onions<br />
Groovin<br />
Guitars, Cadillacs<br />
H<br />
Handy Man<br />
Hang On Sloopy<br />
Happy Birthday<br />
Happy Together<br />
Happy Trails<br />
Harbor Lights<br />
Hard Days Night<br />
Hard Habit<br />
Harlem Nocturne<br />
Have I Told You<br />
Hawaiian Wedding<br />
Heard It Grapevine<br />
Heart Will Go On<br />
Heartbreak Hotel<br />
Heat Is On<br />
Heatwave<br />
Heaven<br />
Hello Dolly<br />
Hello Mary Lou<br />
Help<br />
Help Me Make It<br />
Here Comes Santa<br />
Here’s Rainy Day<br />
Hey Jude<br />
Hold Your Hand<br />
Holly Jolly Xmas<br />
Home For Holidays<br />
Honesty<br />
Honey<br />
Honeysuckle Rose<br />
Honky Tonk Man<br />
Honky Tonk Woman<br />
Hound Dog<br />
How Am I Supposed<br />
How Are Thing In<br />
How Can You Mend<br />
How Deep Is Love<br />
How Great Thou Art<br />
How High The Moon<br />
How Insensitive<br />
How Sweet It Is<br />
Hurts So Good<br />
Hustle<br />
☞ The Hustle<br />
I<br />
I Believe<br />
I Could Have Dance<br />
I Could Write Book<br />
I Don’t Know How<br />
I Don’t Want 2 Set<br />
I Fall To Pieces<br />
I Get Around<br />
I Got A Name<br />
I Got Rhythm<br />
I Just Called To<br />
I Love Paris<br />
I Love Rock n Roll<br />
I Love You<br />
I Need Your Lovin<br />
I Only Have Eyes<br />
I Saw Mommy Kiss<br />
I Shot The Sheriff<br />
I Talk To Trees<br />
I Walk The Line<br />
I Want To Know<br />
I Will Always Love<br />
I Will Survive<br />
I Write The Songs<br />
If I Had A Hammer<br />
If I Were Carpentr<br />
If You Don’t Know<br />
I’ll Be Around<br />
I’ll Be Home Xmas<br />
I’ll Be Loving You<br />
I’ll Be There<br />
I’ll Fly Away<br />
I’ll Remember April<br />
I’m A Believer<br />
I’m A Country Boy<br />
I’m A Little Teapt<br />
I’m Beginning 2See<br />
Imagination<br />
Imagine<br />
In The Mood<br />
<strong>Kawai</strong> Concert Performer Series Digital Piano
Islands In Stream<br />
Isn’t It Romantic<br />
Isn’t She Lovely<br />
It Had To Be You<br />
It’s A Grand Night<br />
It’s A Small World<br />
It’s All In Game<br />
It’s Beginning To<br />
Its Matter Of Time<br />
It’s My Party<br />
It’s Not For Me<br />
It’s Not Unusual<br />
It’s Now Or Never<br />
It’s Too Late<br />
It’s Unusual Day<br />
Itsy Bitsy Spider<br />
I’ve Been Working<br />
J<br />
Jailhouse Rock<br />
Jambalaya<br />
Jingle Bell Rock<br />
Jingle Bells<br />
Jive Talkin<br />
John Jacob Jingle<br />
Johnny B. Goode<br />
Joy To The World<br />
Juke Box Sat. Nite<br />
Jump<br />
June Is Bustin’<br />
Just a Closer Walk<br />
Just a Gigolo<br />
Just As I Am<br />
Just In Time<br />
Just My Imagine…<br />
Just Once<br />
Just The Two Of Us<br />
Just Way You Are<br />
K<br />
Kansas City<br />
King Of The Road<br />
Knock 3 Times<br />
Kokomo<br />
L<br />
La Bamba<br />
Lady<br />
Lady Is A Tramp<br />
Last Dance<br />
Last Date<br />
Last Time Saw Pari<br />
Laughter In Rain<br />
Lay Down Sally<br />
Layla<br />
Leaving Jet Plane<br />
Let It Be<br />
Let It Snow!<br />
Lets Get It On<br />
Let’s Stay Togethr<br />
Light My Fire<br />
Lilli Marlene<br />
Little Dog Gone<br />
Little Green Apples<br />
Locomotion<br />
Lollipop<br />
London Bridge<br />
Long Winding Road<br />
Look Of Love<br />
Lose My Faith<br />
Lost In Your Eyes<br />
Love Boat<br />
☞ The Love Boat<br />
Love First Degree<br />
Love Is A Many<br />
Love In Blue<br />
Love Me Tender<br />
Love Will Keep Us<br />
Loves Me… Rock<br />
Love’s Theme<br />
Lovin’ Feeling<br />
Luchenbach Texas<br />
Lucille<br />
Lyin Eyes<br />
M<br />
Macho Man<br />
Mack The Knife<br />
Maizry Doats<br />
Mammas Don’t Let<br />
Man In The Mirror<br />
Managua Nicaragua<br />
Mandy<br />
Maniac<br />
Margaritaville<br />
Mary Little Lamb<br />
Me And Bobby McGee<br />
Me And My Shadow<br />
Meditation<br />
Memory<br />
Mercy Mercy Me<br />
Merry Little Xmas<br />
Miami Vice<br />
Midnight Hour<br />
Midnight Train-GA<br />
Misty<br />
Monday Monday<br />
Moon River<br />
Moolight In VT<br />
More<br />
Morning Dance<br />
Most Wondrful Time<br />
Mr. Bojangles<br />
Mr. Wonderful<br />
Mrs. Robinson<br />
Muffin Man<br />
Music Box Dancer<br />
Music Music Music<br />
Music Of The Night<br />
My Cherie Amore<br />
My Coloring Book<br />
My Cup Runneth Ovr<br />
My Favorite Things<br />
My Funny Valentine<br />
My Girl<br />
My Life<br />
My Love<br />
My Wild Irish Rose<br />
N<br />
Na Na Hey Hey Gbye<br />
Nadia’s Theme<br />
New Kid In TownNew York, New York<br />
Night And Day<br />
Night Fever<br />
Nightingale Sang<br />
Nights In White Satin<br />
O<br />
Oh My Pa-Pa<br />
Oklahoma<br />
Old Cape Cod<br />
Old Devil Moon<br />
Old Lamplighter<br />
Old MacDonald<br />
Old Rugged Cross<br />
Old Soft Shoe<br />
Old Time R & R<br />
Old Time Religion<br />
On Street Where U<br />
On The Road Again<br />
On Top Ole Smoky<br />
One (Chorus Line)<br />
One More Try<br />
One Tin Soldier<br />
Only You<br />
Ooh Baby Baby<br />
Open Arms<br />
Opus One<br />
Orange Blossom<br />
Appendice P. 189
Our Day Will Come<br />
Over The Rainbow<br />
P<br />
Paper Roses<br />
Party’s Over, The<br />
Peace in Valley<br />
Peaceful Easy Feel<br />
Peanuts’ Theme<br />
Peg<br />
Penn. 6-5000<br />
People<br />
People Will Say<br />
Physical<br />
Piano Man<br />
Pink Panther<br />
☞ The Pink Panther<br />
Please Mr. Postman<br />
Please Please Me<br />
Poinciana<br />
Polka Dots Moonbms<br />
Pop Goes Weasel<br />
Precious Memories<br />
Pretty Woman<br />
Proud Mary<br />
Puff Magic Dragon<br />
Q<br />
Quando, Quando<br />
Que Sera, Sera<br />
R<br />
Rag Mop<br />
Rainbow Connection<br />
Red Red Wine<br />
Red Roses<br />
Red Sails Sunset<br />
Release Me<br />
Rescue Me<br />
Respect<br />
P. 190<br />
Reunited<br />
Rhinestone Cowboy<br />
Rock A Bye Baby<br />
Rock Around Clock<br />
Rock This Town<br />
Rocket Man<br />
Rockin’ Xmas Tree<br />
Rocky Mtn High<br />
Rocky Top<br />
Rose<br />
☞ The Rose<br />
Rose Garden<br />
Row Your Boat<br />
Rudolf<br />
S<br />
Sailing<br />
Saints Go Marching<br />
San Francisco<br />
Sara<br />
Sara Smile<br />
Sat Nile Is Loneli<br />
Satin Doll<br />
Satisfaction<br />
Save Best For Last<br />
Seasons In The Sun<br />
Seems Like Old Tms<br />
Sentimental Reason<br />
September<br />
SF Flowers In Hair<br />
Shadow Your Smile<br />
Shake Your Booty<br />
Shake, Rattle, Roll<br />
Sh-Boom<br />
She Believes in Me<br />
She Loves You<br />
She’ll Be Coming<br />
She’s In Love<br />
She’s Like Wind<br />
Shoo Fly Pie<br />
Shop Around<br />
Show Business<br />
Signed Sealed Del.<br />
Silent Night<br />
Silly Love Songs<br />
Silver Bells<br />
Singing In Rain<br />
Sleigh Ride<br />
Smile<br />
Smoke Gets In Eyes<br />
Smooth Operator<br />
Snow Bird<br />
So In Love<br />
Soldier Of Love<br />
Some Day My Prince<br />
Some Enchanted Eve<br />
Something<br />
Something To Talk<br />
Sometimes When We<br />
Somewhere<br />
Somewhere Out Ther<br />
Song Sung Blue<br />
Soul Man<br />
Sound Of Music<br />
Spanish Eyes<br />
Spanish Harlem<br />
Speak Low<br />
St. Elmo’s Fire<br />
St. Thomas<br />
Stand By Me<br />
Stand By Your Man<br />
Stangers In Night<br />
Stardust<br />
Starting Over<br />
Stayin Alive<br />
Stompin’ Savoy<br />
Stormy Weather<br />
Street Where U Liv<br />
String Of Pearls<br />
Summer Breeze<br />
Summer Samba<br />
Summertime<br />
Summertime Blues<br />
Sunday Kind Love<br />
Sunny<br />
Sunny Gets Blue<br />
Sunny Side Street<br />
Sunrise, Sunset<br />
Surfin USA<br />
Surrey With Fringe<br />
Sweet Caroline<br />
Sweet Home Alabama<br />
Swingin On A Star<br />
T<br />
Take Five<br />
Take It Easy<br />
Take Me Out<br />
Take The A Train<br />
Take This Job And<br />
Takin’ Care Of<br />
Tammy<br />
Tea For Two<br />
Tears In Heaven<br />
Tell Her About It<br />
Tempted<br />
Tennessee Waltz<br />
Tequila<br />
Tequila Sunrise<br />
Thanks For Memory<br />
That Kind Of Girl<br />
That’ll Be The Day<br />
That’s Amore<br />
That’s Life<br />
That’s The Way<br />
The Christmas Song<br />
The Greatest Love<br />
The Hustle<br />
The Love Boat<br />
The Pink Panther<br />
<strong>Kawai</strong> Concert Performer Series Digital Piano
The Rose<br />
The Way We Were<br />
The Way You Do<br />
Then Came You<br />
There Must Be Way<br />
There’ll Be Sad<br />
These Dreams<br />
They Call The Wind<br />
Things<br />
Things We Did Last<br />
Think<br />
Third Man Theme<br />
This Masquerade<br />
This Ole Man<br />
Those Were The Days<br />
Three Times A Lady<br />
Through The Years<br />
Tico Tico<br />
Time After Time<br />
Time In A Bottle<br />
Tiny Bubbles<br />
To All The Girls<br />
Tom Dooley<br />
Tomorrow<br />
Tonight<br />
Top Of The World<br />
Total Eclipse<br />
Trouble<br />
True Love<br />
Try To Remember<br />
Turn Turn Turn<br />
Tutti Frutti<br />
Tuxedo Junction<br />
Twinkle Twinkle<br />
Twist & Shout<br />
Twist, The<br />
U<br />
Unchained Melody<br />
Under Boardwalk<br />
Unforgettable<br />
Up On Housetop<br />
Up Up & Away<br />
Up Where We Belong<br />
V<br />
Vaya Con Dios<br />
Ventura Highway<br />
W<br />
Wake Little Susie<br />
Wake Me Up<br />
Walk On By<br />
Walkin’ Midnight<br />
Wasted Days and<br />
Watch What Happens<br />
Wave<br />
Way We Were<br />
☞ The Way We Were<br />
Way You Do<br />
☞ The Way You Do<br />
Wayward Wind, The<br />
We Are Family<br />
We Are The World<br />
We Built This City<br />
We Didn’t Start<br />
We Wish You<br />
We’re In This Love<br />
We’ve Got Tonight (Rock Ballad)<br />
We’ve Got Tonight (Modern Country)<br />
We’ve Only Begun<br />
What A Friend<br />
What Child Is This<br />
What I Did 4 Love<br />
What Kind Of Fool<br />
What Would U Think<br />
Wheel Of Fortune<br />
Wheels On The Bus<br />
When A Man Loves A<br />
When Can I See You<br />
When I Fall n Love<br />
When I’m 64<br />
When Irish Eyes<br />
When You’re Smiling<br />
Where Did Love Go<br />
Where Flowers Gone<br />
White Christmas<br />
Whiter Shade Pale<br />
Who Can I Turn To<br />
Whole New World<br />
Why Do Fools Fall<br />
Wide Open Spaces<br />
Wind Beneath Wings<br />
Winter Wonderland<br />
Wipe Out<br />
Wish Upon A Star<br />
With A Little Help<br />
With Or Without U<br />
Woman<br />
Wonderful Wondrful<br />
Wonderful World<br />
Wooden Heart<br />
World On A String<br />
Wunderbar<br />
Y<br />
Yakety Sax<br />
Yesterday<br />
Yesterday When I<br />
YMCA<br />
You Can’t be True<br />
You Don’t Bring Me<br />
You Light Up Life<br />
You Make Me Young<br />
You Needed Me<br />
You Send Me<br />
You’d Be So Nice<br />
You’ll Never Walk<br />
Young At Heart<br />
Your Cheatin Heart<br />
Your Song<br />
You’re 16<br />
You’re So Vain<br />
You’ve Got Friend<br />
Appendice P. 191
Concert Magic Songs<br />
The words in bold type are the title displayed in the LCD screen.<br />
Children’s Songs<br />
P. 192<br />
Song Title Type Lyrics<br />
Twinkle, Twinkle, Little Star . . . . . . . . . . . . . . . . . . . . . . . . . . MP ✔<br />
I’m A Little Teapot . . . . . . . . . . . . . . . . . . . . . . . . . . . . . . . . . MP ✔<br />
This Old Man . . . . . . . . . . . . . . . . . . . . . . . . . . . . . . . . . . . . . MP ✔<br />
Mary Had A Little Lamb . . . . . . . . . . . . . . . . . . . . . . . . . . . . . MP ✔<br />
London Bridge . . . . . . . . . . . . . . . . . . . . . . . . . . . . . . . . . . . . MP ✔<br />
Row, Row, Row Your Boat . . . . . . . . . . . . . . . . . . . . . . . . . . . MP ✔<br />
Hickory Dickory Dock . . . . . . . . . . . . . . . . . . . . . . . . . . . . . . MP ✔<br />
Pop Goes The Weasel . . . . . . . . . . . . . . . . . . . . . . . . . . . . . . MP<br />
Good Morning To You . . . . . . . . . . . . . . . . . . . . . . . . . . . . . . MP ✔<br />
Frère Jacques . . . . . . . . . . . . . . . . . . . . . . . . . . . . . . . . . . . . MP ✔<br />
The Farmer In The Dell . . . . . . . . . . . . . . . . . . . . . . . . . . . . . MP ✔<br />
Bingo . . . . . . . . . . . . . . . . . . . . . . . . . . . . . . . . . . . . . . . . . . . MP ✔<br />
Itsy, Bitsy Spider . . . . . . . . . . . . . . . . . . . . . . . . . . . . . . . . . . MP ✔<br />
Where, O Where Has My Little Dog Gone? . . . . . . . . . . . . . . EB ✔<br />
The Muffin Man . . . . . . . . . . . . . . . . . . . . . . . . . . . . . . . . . . . MP ✔<br />
Three Blind Mice . . . . . . . . . . . . . . . . . . . . . . . . . . . . . . . . . . MP ✔<br />
Old MacDonald Had A Farm . . . . . . . . . . . . . . . . . . . . . . . . . MP ✔<br />
Did You Ever See A Lassie?. . . . . . . . . . . . . . . . . . . . . . . . . . MP ✔<br />
Ten Little Indians . . . . . . . . . . . . . . . . . . . . . . . . . . . . . . . . . . MP<br />
Brahm’s Lullaby. . . . . . . . . . . . . . . . . . . . . . . . . . . . . . . . . . . SK ✔<br />
Rock A Bye Baby . . . . . . . . . . . . . . . . . . . . . . . . . . . . . . . . . . MP ✔<br />
Here We Go Round The Mulberry Bush . . . . . . . . . . . . . . . . . MP ✔<br />
Little Brown Jug . . . . . . . . . . . . . . . . . . . . . . . . . . . . . . . . . . MP ✔<br />
She’ll Be Comin’ Around The Mountain . . . . . . . . . . . . . . . . EB ✔<br />
Whistler And His Dog . . . . . . . . . . . . . . . . . . . . . . . . . . . . . . SK<br />
Polly Wolly Doodle . . . . . . . . . . . . . . . . . . . . . . . . . . . . . . . . MP ✔<br />
Song Title Type Lyrics<br />
Christmas Songs<br />
Hark The Herald Angels Sing . . . . . . . . . . . . . . . . . . . . . . . . MP ✔<br />
Jingle Bells . . . . . . . . . . . . . . . . . . . . . . . . . . . . . . . . . . . . . . MP ✔<br />
Deck The Halls . . . . . . . . . . . . . . . . . . . . . . . . . . . . . . . . . . . MP ✔<br />
O Come All Ye Faithful . . . . . . . . . . . . . . . . . . . . . . . . . . . . . MP ✔<br />
Joy To The World . . . . . . . . . . . . . . . . . . . . . . . . . . . . . . . . . . MP ✔<br />
The First Noel . . . . . . . . . . . . . . . . . . . . . . . . . . . . . . . . . . . . MP ✔<br />
Silent Night . . . . . . . . . . . . . . . . . . . . . . . . . . . . . . . . . . . . . . MP ✔<br />
We Wish You A Merry Christmas. . . . . . . . . . . . . . . . . . . . . . MP ✔<br />
What Child Is This? . . . . . . . . . . . . . . . . . . . . . . . . . . . . . . . . MP ✔<br />
Angels We Have Heard On High . . . . . . . . . . . . . . . . . . . . . . . MP ✔<br />
It Came Upon A Midnight Clear . . . . . . . . . . . . . . . . . . . . . . . MP ✔<br />
Away In A Manger . . . . . . . . . . . . . . . . . . . . . . . . . . . . . . . . . MP ✔<br />
O Holy Night . . . . . . . . . . . . . . . . . . . . . . . . . . . . . . . . . . . . . EB ✔<br />
O Tannenbaum (O Christmas Tree) . . . . . . . . . . . . . . . . . . . . MP ✔<br />
The Twelve Days Of Christmas (12 Days of Christmas) . . . . . MP ✔<br />
We Three Kings Of Orient Are . . . . . . . . . . . . . . . . . . . . . . . . MP ✔<br />
O Little Town Of Bethlehem . . . . . . . . . . . . . . . . . . . . . . . . . . MP ✔<br />
Ave Maria . . . . . . . . . . . . . . . . . . . . . . . . . . . . . . . . . . . . . . . SK<br />
Patriotic Songs<br />
My Country ’Tis Of Thee . . . . . . . . . . . . . . . . . . . . . . . . . . . . MP ✔<br />
Battle Hymn Of The Republic . . . . . . . . . . . . . . . . . . . . . . . . . MP ✔<br />
America The Beautiful . . . . . . . . . . . . . . . . . . . . . . . . . . . . . . MP ✔<br />
Yankee Doodle. . . . . . . . . . . . . . . . . . . . . . . . . . . . . . . . . . . . MP ✔<br />
Hail To The Chief . . . . . . . . . . . . . . . . . . . . . . . . . . . . . . . . . . MP ✔<br />
Washington Post March. . . . . . . . . . . . . . . . . . . . . . . . . . . . . SK<br />
<strong>Kawai</strong> Concert Performer Series Digital Piano
Song Title Type Lyrics Song Title Type Lyrics<br />
You’re A Grand Old Flag . . . . . . . . . . . . . . . . . . . . . . . . . . . . EB<br />
Stars And Stripes Forever . . . . . . . . . . . . . . . . . . . . . . . . . . . SK<br />
Anchors Aweigh . . . . . . . . . . . . . . . . . . . . . . . . . . . . . . . . . . . SK<br />
Under The Double Eagle . . . . . . . . . . . . . . . . . . . . . . . . . . . . SK<br />
American Classics<br />
Danny Boy . . . . . . . . . . . . . . . . . . . . . . . . . . . . . . . . . . . . . . . EB<br />
Down In The Valley . . . . . . . . . . . . . . . . . . . . . . . . . . . . . . . . EB<br />
Let Me Call You Sweetheart . . . . . . . . . . . . . . . . . . . . . . . . . EB<br />
Home Sweet Home . . . . . . . . . . . . . . . . . . . . . . . . . . . . . . . . EB<br />
My Bonnie Lies Over The Ocean . . . . . . . . . . . . . . . . . . . . . . MP<br />
In The Good Old Summertime . . . . . . . . . . . . . . . . . . . . . . . . EB<br />
For He’s A Jolly Good Fellow . . . . . . . . . . . . . . . . . . . . . . . . . MP<br />
Bill Bailey Won’t You Please Come Home . . . . . . . . . . . . . . . EB<br />
Give My Regards To Broadway . . . . . . . . . . . . . . . . . . . . . . . SK<br />
Clementine . . . . . . . . . . . . . . . . . . . . . . . . . . . . . . . . . . . . . . MP<br />
Fascination . . . . . . . . . . . . . . . . . . . . . . . . . . . . . . . . . . . . . . SK<br />
Home On The Range . . . . . . . . . . . . . . . . . . . . . . . . . . . . . . . MP<br />
Take Me Out To The Ballgame . . . . . . . . . . . . . . . . . . . . . . . . EB<br />
Auld Lang Syne . . . . . . . . . . . . . . . . . . . . . . . . . . . . . . . . . . . MP<br />
Michael Row The Boat Ashore . . . . . . . . . . . . . . . . . . . . . . . . MP<br />
Oh, Susanna . . . . . . . . . . . . . . . . . . . . . . . . . . . . . . . . . . . . . SK<br />
On Top Of Old Smokey . . . . . . . . . . . . . . . . . . . . . . . . . . . . . . EB<br />
Bicycle Built For Two . . . . . . . . . . . . . . . . . . . . . . . . . . . . . . . EB<br />
The Camptown Races . . . . . . . . . . . . . . . . . . . . . . . . . . . . . . MP<br />
The Band Played On . . . . . . . . . . . . . . . . . . . . . . . . . . . . . . . EB<br />
When Johnny Comes Marching Home . . . . . . . . . . . . . . . . . . MP<br />
When The Saints Go Marching In . . . . . . . . . . . . . . . . . . . . . EB<br />
✔<br />
✔<br />
✔<br />
✔<br />
✔<br />
✔<br />
✔<br />
✔<br />
✔<br />
✔<br />
✔<br />
✔<br />
✔<br />
✔<br />
✔<br />
✔<br />
✔<br />
✔<br />
✔<br />
✔<br />
✔<br />
✔<br />
✔<br />
Beautiful Dreamer . . . . . . . . . . . . . . . . . . . . . . . . . . . . . . . . . EB ✔<br />
Ta Ra Ra Boom De Ay . . . . . . . . . . . . . . . . . . . . . . . . . . . . . . MP ✔<br />
Turkey In The Straw . . . . . . . . . . . . . . . . . . . . . . . . . . . . . . . . SK<br />
Blue Bells Of Scotland . . . . . . . . . . . . . . . . . . . . . . . . . . . . . . MP ✔<br />
Down By The Riverside . . . . . . . . . . . . . . . . . . . . . . . . . . . . . SK ✔<br />
By The Light Of The Silvery Moon . . . . . . . . . . . . . . . . . . . . . SK ✔<br />
Shine On Harvest Moon . . . . . . . . . . . . . . . . . . . . . . . . . . . . . SK ✔<br />
American Patrol March . . . . . . . . . . . . . . . . . . . . . . . . . . . . . MP<br />
Dixie . . . . . . . . . . . . . . . . . . . . . . . . . . . . . . . . . . . . . . . . . . . SK ✔<br />
Yellow Rose Of Texas . . . . . . . . . . . . . . . . . . . . . . . . . . . . . . SK ✔<br />
I Love Coffee, I Love Tea (Java Jive) . . . . . . . . . . . . . . . . . . . MP ✔<br />
Arkansas Traveler . . . . . . . . . . . . . . . . . . . . . . . . . . . . . . . . . MP ✔<br />
Old Kentucky Home . . . . . . . . . . . . . . . . . . . . . . . . . . . . . . . . SK ✔<br />
Red River Valley . . . . . . . . . . . . . . . . . . . . . . . . . . . . . . . . . . EB ✔<br />
The Entertainer . . . . . . . . . . . . . . . . . . . . . . . . . . . . . . . . . . . SK<br />
Old Folks At Home . . . . . . . . . . . . . . . . . . . . . . . . . . . . . . . . . SK ✔<br />
Maple Leaf Rag . . . . . . . . . . . . . . . . . . . . . . . . . . . . . . . . . . . SK<br />
After The Ball Is Over . . . . . . . . . . . . . . . . . . . . . . . . . . . . . . SK ✔<br />
After You’ve Gone . . . . . . . . . . . . . . . . . . . . . . . . . . . . . . . . . EB ✔<br />
Thunder And Blazes . . . . . . . . . . . . . . . . . . . . . . . . . . . . . . . . SK<br />
Annie Laurie . . . . . . . . . . . . . . . . . . . . . . . . . . . . . . . . . . . . . MP ✔<br />
Wabash Cannonball . . . . . . . . . . . . . . . . . . . . . . . . . . . . . . . SK ✔<br />
I’ve Been Working On The Railroad . . . . . . . . . . . . . . . . . . . . EB ✔<br />
Grandfather’s Clock . . . . . . . . . . . . . . . . . . . . . . . . . . . . . . . . EB ✔<br />
(continue)<br />
EB: Easy Beat, MP: Melody Play, SK: Skilfull<br />
Appendice P. 193
Concert Magic Songs<br />
Song Title Type Lyrics Song Title Type Lyrics<br />
Favorite Hymns<br />
Fairest Lord Jesus . . . . . . . . . . . . . . . . . . . . . . . . . . . . . . . . . MP ✔<br />
Amazing Grace . . . . . . . . . . . . . . . . . . . . . . . . . . . . . . . . . . . MP ✔<br />
Doxology . . . . . . . . . . . . . . . . . . . . . . . . . . . . . . . . . . . . . . . . MP ✔<br />
For The Beauty Of The Earth . . . . . . . . . . . . . . . . . . . . . . . . . MP ✔<br />
O Worship The King . . . . . . . . . . . . . . . . . . . . . . . . . . . . . . . . MP ✔<br />
The Old Rugged Cross . . . . . . . . . . . . . . . . . . . . . . . . . . . . . . MP ✔<br />
Holy, Holy, Holy . . . . . . . . . . . . . . . . . . . . . . . . . . . . . . . . . . . MP ✔<br />
What A Friend We Have In Jesus . . . . . . . . . . . . . . . . . . . . . . MP ✔<br />
Rock Of Ages . . . . . . . . . . . . . . . . . . . . . . . . . . . . . . . . . . . . . MP ✔<br />
Trust And Obey. . . . . . . . . . . . . . . . . . . . . . . . . . . . . . . . . . . . MP ✔<br />
Sweet Hour Of Prayer . . . . . . . . . . . . . . . . . . . . . . . . . . . . . . MP ✔<br />
Just As I Am . . . . . . . . . . . . . . . . . . . . . . . . . . . . . . . . . . . . . . MP ✔<br />
Jesus Loves The Little Children . . . . . . . . . . . . . . . . . . . . . . MP ✔<br />
How Great Thou Art . . . . . . . . . . . . . . . . . . . . . . . . . . . . . . . . MP ✔<br />
Great Is Thy Faithfulness . . . . . . . . . . . . . . . . . . . . . . . . . . . . MP ✔<br />
A Mighty Fortress . . . . . . . . . . . . . . . . . . . . . . . . . . . . . . . . . MP ✔<br />
Christ The Lord Is Risen Today . . . . . . . . . . . . . . . . . . . . . . . MP ✔<br />
It Is Well With My Soul (When Peace Like) . . . . . . . . . . . . . . MP ✔<br />
Crown Him With Many Crowns . . . . . . . . . . . . . . . . . . . . . . . MP ✔<br />
Blest Be The Tie That Binds . . . . . . . . . . . . . . . . . . . . . . . . . . MP ✔<br />
Come Thou Almighty King . . . . . . . . . . . . . . . . . . . . . . . . . . . MP ✔<br />
My Jesus, I Love Thee . . . . . . . . . . . . . . . . . . . . . . . . . . . . . . MP ✔<br />
The Church’s One Foundation . . . . . . . . . . . . . . . . . . . . . . . . MP ✔<br />
Gloria Patri . . . . . . . . . . . . . . . . . . . . . . . . . . . . . . . . . . . . . . MP ✔<br />
The Solid Rock . . . . . . . . . . . . . . . . . . . . . . . . . . . . . . . . . . . MP ✔<br />
Standing On The Promises . . . . . . . . . . . . . . . . . . . . . . . . . . MP ✔<br />
I Need Thee Every Hour . . . . . . . . . . . . . . . . . . . . . . . . . . . . . MP ✔<br />
Savior Like A Shepherd Lead Us . . . . . . . . . . . . . . . . . . . . . . MP ✔<br />
Stand Up, Stand Up For Jesus . . . . . . . . . . . . . . . . . . . . . . . . MP ✔<br />
Onward Christian Soldiers . . . . . . . . . . . . . . . . . . . . . . . . . . . MP ✔<br />
All Hail The Power Of Jesus Name . . . . . . . . . . . . . . . . . . . . MP ✔<br />
To God Be The Glory . . . . . . . . . . . . . . . . . . . . . . . . . . . . . . . MP ✔<br />
Classical Selections<br />
Andante from Symphony No. 94 by Haydn . . . . . . . . . . . . . . MP<br />
Fur Elise by Beethoven . . . . . . . . . . . . . . . . . . . . . . . . . . . . . EB<br />
An Die Freude (Ode To Joy) . . . . . . . . . . . . . . . . . . . . . . . . . . MP<br />
Clair De Lune by Debussy . . . . . . . . . . . . . . . . . . . . . . . . . . . SK<br />
Skater’s Waltz . . . . . . . . . . . . . . . . . . . . . . . . . . . . . . . . . . . . SK<br />
Peter And The Wolf . . . . . . . . . . . . . . . . . . . . . . . . . . . . . . . . SK<br />
Minuet In G by J.S. Bach . . . . . . . . . . . . . . . . . . . . . . . . . . . . SK<br />
Romeo And Juliet . . . . . . . . . . . . . . . . . . . . . . . . . . . . . . . . . SK<br />
Blue Danube Waltz . . . . . . . . . . . . . . . . . . . . . . . . . . . . . . . . SK<br />
Sleeping Beauty Waltz . . . . . . . . . . . . . . . . . . . . . . . . . . . . . . EB<br />
Gavotte by Gossec . . . . . . . . . . . . . . . . . . . . . . . . . . . . . . . . . SK<br />
Waltz Of The Flowers . . . . . . . . . . . . . . . . . . . . . . . . . . . . . . SK<br />
Toreador Song from “Carmen” by Bizet . . . . . . . . . . . . . . . . . SK<br />
“Fledermaus” by J. Strauss . . . . . . . . . . . . . . . . . . . . . . . . . . EB<br />
Norwegian Dance by Grieg . . . . . . . . . . . . . . . . . . . . . . . . . . SK<br />
William Tell Overture. . . . . . . . . . . . . . . . . . . . . . . . . . . . . . . SK<br />
Can Can . . . . . . . . . . . . . . . . . . . . . . . . . . . . . . . . . . . . . . . . . SK<br />
Emperor Waltz . . . . . . . . . . . . . . . . . . . . . . . . . . . . . . . . . . . . SK<br />
March Militaire by Chopin . . . . . . . . . . . . . . . . . . . . . . . . . . . SK<br />
Grand March from “Aida” by Verdi . . . . . . . . . . . . . . . . . . . . SK<br />
Gymnopedie by Sati . . . . . . . . . . . . . . . . . . . . . . . . . . . . . . . . SK<br />
Gypsy Chorus from “Carmen” by Bizet . . . . . . . . . . . . . . . . . . SK<br />
P. 194<br />
<strong>Kawai</strong> Concert Performer Series Digital Piano
Song Title Type Lyrics<br />
Largo from Symphony No. 9 by Dvorák . . . . . . . . . . . . . . . . . SK<br />
Prelude In A by Chopin . . . . . . . . . . . . . . . . . . . . . . . . . . . . . MP<br />
Pizzicato Polka . . . . . . . . . . . . . . . . . . . . . . . . . . . . . . . . . . . SK<br />
Rondeau by Mouret . . . . . . . . . . . . . . . . . . . . . . . . . . . . . . . . SK<br />
Voice Of Spring . . . . . . . . . . . . . . . . . . . . . . . . . . . . . . . . . . . EB<br />
Allegro Moderato from Symphony Nr. 8 by Schubert . . . . . . SK<br />
Special Occasions<br />
Bridal Chorus from “Lohengrin” by Wagner . . . . . . . . . . . . . MP<br />
Wedding March from “Midsummer Night’s Dream” . . . . . . .<br />
by Mendelssoh . . . . . . . . . . . . . . . . . . . . . . . . . . . . . . . . . . . . SK<br />
Pomp And Circumstance . . . . . . . . . . . . . . . . . . . . . . . . . . . . SK<br />
Mazel Tov . . . . . . . . . . . . . . . . . . . . . . . . . . . . . . . . . . . . . . . . EB<br />
✔<br />
International Songs<br />
When Irish Eyes Are Smiling . . . . . . . . . . . . . . . . . . . . . . . . . EB<br />
Hatikvah . . . . . . . . . . . . . . . . . . . . . . . . . . . . . . . . . . . . . . . . . MP<br />
My Wild Irish Rose . . . . . . . . . . . . . . . . . . . . . . . . . . . . . . . . MP<br />
Hava Nagilah . . . . . . . . . . . . . . . . . . . . . . . . . . . . . . . . . . . . . EB<br />
Ich Bin Ein Musikant . . . . . . . . . . . . . . . . . . . . . . . . . . . . . . . SK<br />
Chiapenacas . . . . . . . . . . . . . . . . . . . . . . . . . . . . . . . . . . . . . SK<br />
Funiculi Funicula . . . . . . . . . . . . . . . . . . . . . . . . . . . . . . . . . . SK<br />
La Marseillaise . . . . . . . . . . . . . . . . . . . . . . . . . . . . . . . . . . . MP<br />
La Paloma . . . . . . . . . . . . . . . . . . . . . . . . . . . . . . . . . . . . . . . SK<br />
Santa Lucia . . . . . . . . . . . . . . . . . . . . . . . . . . . . . . . . . . . . . . SK<br />
Habanera . . . . . . . . . . . . . . . . . . . . . . . . . . . . . . . . . . . . . . . . SK<br />
La Bamba. . . . . . . . . . . . . . . . . . . . . . . . . . . . . . . . . . . . . . . . SK<br />
✔<br />
✔<br />
✔<br />
✔<br />
✔<br />
✔<br />
✔<br />
✔<br />
EB: Easy Beat, MP: Melody Play, SK: Skilfull<br />
Appendice P. 195
Table of Chord Types<br />
This table describes the fingering of 61 types of chords, including inversions, that the CP piano<br />
recognizes. All these are represented here in the key of C, but of course any transposition of these<br />
chords to other keys apply.<br />
Entries on the chart with an asterisk (*) are easy fingerings that can be recognized in the One-<br />
Finger mode.<br />
C Maj<br />
* *<br />
*<br />
C7<br />
*<br />
C ∆7<br />
*<br />
C6 C sus4 C aug<br />
C b5<br />
C6 9 C add9<br />
C9<br />
C11 C13<br />
C7 sus4<br />
C7 #5<br />
C7 b5<br />
C7 b9<br />
Cm<br />
*<br />
Cm7<br />
Cm6 Cm#5<br />
Cm6 9<br />
P. 196<br />
<strong>Kawai</strong> Concert Performer Series Digital Piano
Cm9<br />
Cm add9<br />
Cm7 11 Cm9 11<br />
C7 #9<br />
C7 b9 11 C7 #11<br />
C7 b9 #11 C7 #9 #11<br />
C9 13 C9 11 13<br />
C9 #11 13<br />
C7 b9 13<br />
C7 b9 11 13<br />
C7 #9 13<br />
C7 b13<br />
C9 b13<br />
C7 #9 b13<br />
C7 b9 b13<br />
Cm7 b5<br />
Cm7 b5 9<br />
Cm7 b5 b9<br />
Cm7 b5 11<br />
Cm7 b13<br />
Cm7 11 b13<br />
C ∆7 #5<br />
C ∆9 13<br />
C ∆7 b5<br />
C ∆9 #11<br />
C ∆9<br />
C ∆7 13 C∆7 #11 13 C∆9 #11 13 C∆ 9 #11 13<br />
Cm9<br />
C dim C dim∆7 C dim b13<br />
C dim 9 C dim 11<br />
Appendice P. 197
Connection Examples<br />
A. Using External Speakers<br />
The Concert Performer has an amplifier and built-in speakers and together,<br />
they produce a powerful sound. However, for larger venues or outdoor<br />
performances, you may need to use additional amplification and speaker<br />
systems.<br />
Standard 1/4-inch audio cables can be plugged into the CP’s stereo Line Out<br />
jacks for this purpose. The CP’s Master Volume will affect the signals levels<br />
output from the Line Out Jacks.<br />
B. Using the Concert Performer with Your Home Audio System<br />
You can connect audio cables from your stereo system or another source to<br />
the CP’s Line In jacks. The sound of your stereo playing a tape, CD, or even<br />
radio will be heard through the CP’s speaker system and mixed in with any<br />
sounds from the CP itself, enabling you to play along with your favorite songs!<br />
Connect the CP with your CD player or other device as illustrated.<br />
C. Recording Your Performance with Your Tape Recorder<br />
Even though the CP185 do not have a CD-R Drive you can still make a recording<br />
from your CP using the Line out Jacks. Simply connect an external CD-R<br />
recorder or other recording device (Cassette, Audio software from a personal<br />
computer etc.) to the CP’s Line Out Jacks. Everything that you hear coming<br />
out of the CP’s built-in speaker system is also sent out through the Line Out<br />
Jacks and can be recorded. You can also record anything that is connected to<br />
the Line In Jacks along with anything being played by the CP.<br />
P. 198<br />
Amplifier<br />
A<br />
Tape Recorder CD Player<br />
C<br />
B<br />
<strong>Kawai</strong> Concert Performer Series Digital Piano
D. Using the Concert Performer with an External MIDI<br />
Instrument<br />
MIDI lets you expand the creative possibilities of the CP by<br />
connecting it to an external MIDI device or personal computer.<br />
Use a MIDI cable to connect the CP’s MIDI Out jack to the other<br />
device’s MIDI In. Likewise, connect the MIDI Out jack of the other<br />
device to the CP’s MIDI In.<br />
Sound Module<br />
Personal<br />
Computer<br />
E. Using The Concert Performer with Your Personal<br />
Computer<br />
D<br />
E<br />
Your personal computer can be used as a MIDI device as well. In<br />
order to connect your computer to the CP you will need a MIDI<br />
interface. Check with your local music store or computer dealer<br />
for more information about particular models of these interface<br />
devices. Once you have your computer connected to your Concert<br />
Performer, you can think of it as a powerful extension of the CP’s<br />
own music processing abilities. There are hundreds of software<br />
programs available that you can use to do everything from learn<br />
the basics of piano playing, to creating film scores for your home<br />
movies, to composing the next great digital symphony.<br />
In order for the CP and your computer to properly communicate<br />
over this USB cable, you first need to set the MIDI-USB switch<br />
located next to the MIDI jacks to USB. Also your computer must<br />
have a USB driver installed. Please read the instruction on the<br />
next page for the details about the USB driver.<br />
If you don’t wish to purchase a MIDI interface device for your<br />
computer, the Concert Performer has a special type of interface<br />
built in to it that may make the connection easier. The CP can be<br />
connected directly to the back of your computer via a USB cable.<br />
Appendice P. 199
USB<br />
The Concert Performer can be connected with a personal computer with a USB cable for exchanging MIDI data. You need a USB driver<br />
installed in your computer.<br />
[For Windows XP/Me users]<br />
A standard USB driver is already installed in your computer. You don’t need to install a new driver.<br />
[For Windows 2000/98SE users]<br />
You need to install the designated driver in your computer. Visit the KAWAI web site at http://www.kawai.co.jp/english/Download1.html and<br />
download the program.<br />
[For Macintosh users]<br />
Currently we don’t have a USB driver available for Macintosh computers. Please use an appropriate MIDI interface and MIDI cables when<br />
connecting the Concert Performer to a Macintosh computer.<br />
NOTE:<br />
When both MIDI jacks and USB jack are connected, USB has priority.<br />
When connecting USB cable to the Concert Performer, first connect the USB cable and then turn the power of the Concert Performer on.<br />
It may take some time to startcommunication when the Concert Performer is connected to the computer via USB.<br />
When USB communication is unstable with connection via hub, connect the USB cable directly to the USB port of the computer.<br />
Turning the power of the Concert Performer on/off or disconnecting the USB cable while the following actions may cause unstable<br />
communication.<br />
while installing USB driver<br />
while booting up the computer<br />
while MIDI application is working<br />
while communicating with the computer<br />
while the computer is in energy saver mode<br />
* If you have any problem with USB communication, consult the instruction <strong>manual</strong> of your computer and check your computer set up.<br />
* Windows is registerd trademark of Microsoft Corporation.<br />
* Macintosh is registerd trademark of Apple Computer, Inc.<br />
P. 200<br />
<strong>Kawai</strong> Concert Performer Series Digital Piano
MIDI Data Format<br />
3. Exclusive data<br />
3.1 UNIVERSAL REALTIME SYSTEM EXCLUSIVE MESSAGE<br />
3.1.1 Master Volume<br />
Format: F0 7f 7f 04 01 F7<br />
: VALUE LSB (*round up numbers of five and above and drop anything under five)<br />
: VALUE MSB<br />
00 00 - 7f 7f (- ∞ ~ 0dB) Default = 7fH/7fH<br />
3.1.2 Master Fine Tune<br />
Format: F0 7f 7f 04 03 F7<br />
: VALUE LSB<br />
: VALUE MSB<br />
00 00 - 40 00 - 7f 7f (-100cent ~ 0 ~ +100cent) Default = 40H/00H<br />
*transmitting by Tuning setting: 1e/62 - 40/00 - 60/21 (427.0Hz - 440.0Hz - 453.0Hz )<br />
3.1.3 Master Coarse Tune<br />
Format: F0 7f 7f 04 04 00 F7<br />
: VALUE<br />
28H - 40H - 58H (-24semitone ~ 0 ~ +24semitone) Default = 40H<br />
*transmitting by Transpose setting: 34H - 40H - 4CH (-12 ~ 0 ~+12)<br />
3.1.4 Grobal Parameter Contorl<br />
3.1.4.1: Reverb<br />
Format: F0 7f 7f 04 05 01 01 01 01 01 [pp vv] ••• F7<br />
[pp vv]: pp vv<br />
a: Reverb Type Default = 4<br />
00H 0 = Small Room,1 = Medium Room, 2 = Large Room, 3 = Medium Hall,4 = Large Hall, 5 or 8 = Plate<br />
*transmitting by Reverb Type Select<br />
b: Reverb Time<br />
01H 0 - 64 - 127 (0.36 ~ 1.8 ~ 9 sec) Default = (Preset value)<br />
3.1.4.2: Chorus<br />
Format: F0 7f 7f 04 05 01 01 01 01 02 [pp vv] ••• F7<br />
[pp vv]: pp vv<br />
a: Chorus Type Default = 2<br />
00H 0 = Chorus1, 1 = Chorus2, 2 = Chorus3, 3 = Chorus4, 4 = FB chorus, 5 = Flanger<br />
*transmitting by Chorus Type Select<br />
b: Chorus Rate<br />
01H 0 - 127 (0 ~ 15.5Hz) Default = (Preset value)<br />
c: Chorus depth<br />
02H 0 - 127 (0.31 ~ 40 msec p-p) Default = (Preset value)<br />
d: Feedback<br />
03H 0 - 127 (0 ~ 97%) Default = (Preset value)<br />
e: Chorus Send to Reverb<br />
04H 0 - 127 (0 ~ 100%) Default = (Preset value)<br />
Appendice P. 201
3.1.5 Controller Destination Setting<br />
3.1.5.1: Channel Pressure (After Touch)<br />
P. 202<br />
Format: F0 7f 7f 09 01 [pp vv] ••• F7<br />
: 0H-fH (ch.1 - ch.16)<br />
[pp vv]: pp vv<br />
a: Pitch<br />
b: Cutoff<br />
c: Level<br />
d: Viblato Depth<br />
e:Growl Depth<br />
f: Tremolo Depth<br />
3.1.5.2: Controller (Control Change)<br />
00H 28H - 40H - 4CH (-24 semitone ~ 0 ~ +12 semitone) Default = 40H<br />
01H 0 - 64 - 127 (-9600 cent ~ 0 ~ +9450 cent) Default = 40H<br />
02H 0 - 64 - 127 (-100% ~ 0 ~ +100%) Default = 40H<br />
03H 0 - 127 (0 cent ~ 600 cent) Default = 00H<br />
04H 0 - 127 (0 cent ~ 1200 cent) Default = 00H<br />
05H 0 - 127 (0% ~ 100%) Default = 00H<br />
Format: F0 7f 7f 09 03 [pp vv] ••• F7<br />
: 0H-fH (ch.1 - ch.16)<br />
: controller number (0-5fH) Default = 10H<br />
[pp vv]: pp vv<br />
a: Pitch<br />
b: Cutoff<br />
c: Level<br />
d: Vibrato Depth<br />
e:Growl Depth<br />
f: Tremolo Depth<br />
00H 28H - 40H - 4CH (-24 semitone ~ 0 ~ +12 semitone) Default = 40H<br />
01H 0 - 64 - 127 (-9600 cent ~ 0 ~ +9450 cent) Default = 40H<br />
02H 0 - 64 - 127 (-100% ~ 0 ~ +100%) Default = 40H<br />
03H 0 - 127 (0 cent ~ 600 cent) Default = 00H<br />
04H 0 - 127 (0 cent ~ 1200 cent) Default = 00H<br />
05H 0 - 127 (0% ~ 100%) Default = 00H<br />
<strong>Kawai</strong> Concert Performer Series Digital Piano
3.1.6 Key-Based Instrument Controllers<br />
Format: F0 7f 7f 0a 01 [nn vv] ••• F7<br />
: 0H-fH (ch.1 - ch.16)<br />
: key number (00H - 7fH)<br />
[nn vv]: nn vv<br />
a:Volume<br />
07H 0 - 64 - 127 (-100% ~ 0 ~ +100%) Default = 40H<br />
b:Panpot<br />
*absolute<br />
0aH 0 - 64 - 127 (left - Center - right) Default = (Preset value)<br />
c:Reverb Send level<br />
*absolute<br />
5bH 0 - 127 (0 ~ Max) Default = (Preset value)<br />
d:Chorus Send level<br />
*absolute<br />
5dH 0 - 127 (0 ~ Max) Default = (Preset value)<br />
3.2 UNIVERSAL NON-REALTIME SYSTEM EXCLUSIVE MESSAGE<br />
3.2.1 Scale/Octave Tuning Adjust(non-realtime/1byte format)<br />
Format: F0 7e 7f 08 08 F7<br />
: bits 0 to 1 = channel 15 to 16, bit 2 to 6 = reserved for future expansion<br />
: bits 0 to 6 = channel 8 to 14<br />
: bits 0 to 6 = channel 1 to 7<br />
: value of key ”C” 0 - 64 - 127 (-64 cent ~ 0 ~ +63 cent) Default = 40H<br />
: value of key ”C#” 0 - 64 - 127 (-64 cent ~ 0 ~ +63 cent) Default = 40H<br />
: value of key ”D” 0 - 64 - 127 (-64 cent ~ 0 ~ +63 cent) Default = 40H<br />
: value of key ”D#” 0 - 64 - 127 (-64 cent ~ 0 ~ +63 cent) Default = 40H<br />
: value of key ”E” 0 - 64 - 127 (-64 cent ~ 0 ~ +63 cent) Default = 40H<br />
: value of key ”F” 0 - 64 - 127 (-64 cent ~ 0 ~ +63 cent) Default = 40H<br />
: value of key ”F#” 0 - 64 - 127 (-64 cent ~ 0 ~ +63 cent) Default = 40H<br />
: value of key ”G” 0 - 64 - 127 (-64 cent ~ 0 ~ +63 cent) Default = 40H<br />
: value of key ”G#” 0 - 64 - 127 (-64 cent ~ 0 ~ +63 cent) Default = 40H<br />
: value of key ”A” 0 - 64 - 127 (-64 cent ~ 0 ~ +63 cent) Default = 40H<br />
: value of key ”A#” 0 - 64 - 127 (-64 cent ~ 0 ~ +63 cent) Default = 40H<br />
: value of key ”B” 0 - 64 - 127 (-64 cent ~ 0 ~ +63 cent) Default = 40H<br />
3.2.2 GM System Messages<br />
3.2.2.1: GM2 System On<br />
Format: F0 7e 7f 09 03 F7<br />
3.2.2.2: GM1 System On<br />
Format: F0 7e 7f 09 01 F7<br />
*transmitting when POWER ON<br />
Appendice P. 203
3.3 CP155/175/185/205 EXCLUSIVE MESSAGE<br />
P. 204<br />
F0H Sys-Ex<br />
40H kawai - ID<br />
7FH channel (7f: Global)<br />
33H function (33: Common Parameter)<br />
ggH group-ID (04: Electronic Piano , 7f: Global) *ignore<br />
mmH machine-ID (06: CPxx5 , 7f: Global) *ignore<br />
llH sub-command<br />
data<br />
~ ~data<br />
F7h Eox<br />
function sub-command<br />
33H 01H Common Function mode1<br />
33H 03H Common Function mode2<br />
33H 10H Drum KIT Select for Rhythm Channel<br />
33H 20H Effect Settings<br />
33H 21H Tuning<br />
33H 30H Sound Control<br />
33H 40H Accompaniment Control<br />
33H 41H Chord Change<br />
33H 42H Acc. Mixer Volume<br />
33H 43H Acc. Mixer Reverb Depth<br />
3.3.1.Common Function mode1<br />
Format: F0 40 7F 33 gg mm 03 F7<br />
3.3.2.Drum KIT Select for Rhythm Channel<br />
Format: F0 40 7F 33 gg mm 10 ch tp kk F7<br />
: 0H-fH (ch.1 - ch.16)<br />
: MACHINE TYPE No, 7F = ignore (not use)<br />
: Drum KIT No.<br />
3.3.3.Effect Settings<br />
3.3.3.1.Panel Effects Settings<br />
Format: F0 40 7F 33 gg mm 20 05 pp vv F7<br />
[pp vv]: pp vv<br />
a: Type<br />
00H Effect Type No.<br />
b: Wet-Balance<br />
01H 0 - 7FH<br />
c: Parameter1<br />
02H 0 - 7FH<br />
d: Parameter2<br />
03H 0 - 7FH<br />
e: Send To Reverb<br />
04H 0 - 7FH<br />
f: Send To Chorus<br />
05H 0 - 7FH<br />
g: MIDI Ch ON/OFF<br />
06H 1xH = ON / 0xH = OFF, x = 0-f (1-16ch)<br />
3.3.4.Stretch Tuning Curve On Off<br />
3.3.4.1.Stretch tuning On Off<br />
Format: F0 40 7F 33 gg mm 21 00 ff gg hh nn F7<br />
: channel/options byte 1<br />
bits 0 to 1 = channel 15 to 16<br />
bits 2 to 6 = reserved for future expantion<br />
: channel byte 2 - bits 0 to 6 = channel 8 to 14<br />
: channel byte 3 - bits 0 to 6 = channel 1 to 7<br />
: 0: off 1:on<br />
3.3.4.2.Stretch tuning Part On Off<br />
Format: F0 40 7F 33 gg mm 21 01 ch nn F7<br />
: MIDI ch 0-f (7f = grobal)<br />
0: off 1: on<br />
<strong>Kawai</strong> Concert Performer Series Digital Piano
3.3.5.Accompaniment Control *SMF save only<br />
Format: F0 40 7F 33 gg mm 40 bb cc vv F7<br />
: Beat Bank No. 0-7FH<br />
: Music Style No. 0-7FH<br />
: MSB4bit: VariationNo. / LSB 4bit: PatternNo.<br />
PatternNo.<br />
0 Intro Start<br />
1 Ending Start<br />
2 Basic Start<br />
3 Fill Start<br />
4 Stop / Parameter Off<br />
5 Parameter On<br />
VariationNo.<br />
PatternNo.0-3<br />
0-7 Variation 1-8<br />
On/Off Parameter<br />
0 Stop<br />
1 Long Bass<br />
2 Fade (ON = FadeIn / OFF = FadeOut)<br />
3 Acc. SW<br />
4 DrumOnly SW<br />
5 Break SW<br />
6-7 Undefine<br />
3.3.7.ACC Mixer Volume<br />
Format: F0 40 7F 33 gg mm 42 pt vv F7<br />
: 7FH = master, 0 = drum,1 = bass, 2~5 = chord1~4<br />
: volume 0-7FH (0-100%)<br />
3.3.8.ACC Mixer Reverb Depth<br />
Format: F0 40 7F 33 gg mm 43 pt vv F7<br />
: 7FH = master<br />
: volume 0-7FH (0-100%)<br />
3.3.6.Chord Change Control *SMF save only<br />
Format: F0 40 7F 33 gg mm 41 rt tp bs F7<br />
: Chord Root 0-11 (C~B), bit6:Off Detect Flag (1 = Off Detect, 0 = On Detect)<br />
: Chord Type No. 0-63<br />
: Bass Root 0-11 (C~B), 7FH = Bass Off<br />
* ... minor<br />
Chord Type No.<br />
Chord Type No.<br />
0 Major 32 7<br />
1 sus4 33 7 (b5)<br />
2 add9 34 7 (#5)<br />
3 b5 35 7sus4<br />
4 aug 36 9<br />
5 M omit3rd 37 11<br />
6 *minor 38 13<br />
7 *madd9 39 9 (13)<br />
8 *m (#5) 40 9 (11,13)<br />
9 *m omit3rd 41 7 (b9)<br />
10 M7 42 7 (#9)<br />
11 M7 (#5) 43 7 (#11)<br />
12 M7 (b5) 44 7 (b13)<br />
13 M9 45 7 (b9,b13)<br />
14 M7 (13) 46 7 (#9,b13)<br />
15 M9 (13) 47 7 (b9,13)<br />
16 M9 (#11) 48 9 (b13)<br />
17 M7 (#11,13) 49 7 (#9,13)<br />
18 M9 (#11,13) 50 7 (b9,11)<br />
19 M (9,#11,13) 51 7 (b9,#11)<br />
20 6 52 7 (#9,#11)<br />
21 6 (9) 53 9 (#11,13)<br />
22 *m7 54 *m7 (b5)<br />
23 *m9 55 *m7 (b5,b9)<br />
24 *m7 (11) 56 *m7 (b5,11)<br />
25 *m9 (11) 57 dim<br />
26 *m7 (b13) 58 *dimM7<br />
27 *m7 (11,b13) 59 *dim (b13)<br />
28 *mM7 60 *dim9<br />
29 *mM9 61 *dim11<br />
30 *m6 62 7 (b9,11,13)<br />
31 *m6 (9) 63 m7 (b5,9)<br />
Appendice P. 205
MIDI Implementation Chart<br />
MODEL: <strong>Kawai</strong> Digital Piano CP205/CP185<br />
DATE: APRIL 2003<br />
VERSION 1.0<br />
Function Transmitted*1 Recognized Remarks<br />
Basic Default 1 1-16<br />
Channel Changed 1-16 1-16<br />
Mode Default Mode 3 Mode 3<br />
Messagees X Mode 3, 4<br />
Altered *****<br />
Note 36-96 0-127<br />
Number True voice ***** 0-127<br />
Velocity Note ON O O<br />
Note OFF X X<br />
After Key's X X<br />
Touch Ch's X O<br />
Pitch Bend O*2 O<br />
0, 32 O O Bank Select<br />
1 O*3 O Modulation<br />
5 O O Portamento Time<br />
Control 6, 38 O O Data Entry<br />
Change 7 O O Volume<br />
10 O O Panpot<br />
11 O O Expression<br />
64 O O Damper (Hold 1)<br />
65 O O Portament On/Off<br />
66 O O Sostenuto<br />
67 O O Soft<br />
69 O*4 O Hold 2<br />
70 O O Sustain Level<br />
71 X O Resonance<br />
72 O O Release Time<br />
73 O O Attack Time<br />
74 O O Cutoff<br />
75 O O Decay Time<br />
76 X O Vibrato Speed<br />
77 O O Vibrato Depth<br />
78 X O Vibrato Delay<br />
84 O O Portamento Control<br />
91 O O Reverb Send Level<br />
93 O O Chorus Send Level<br />
0-95*5 X O General Controller<br />
98, 99 X O NRPN LSB, MSB<br />
100, 101 O O RPN LSB, MSB<br />
Program O O *6 Program Number<br />
Change True # 0-127*6 1-128<br />
System Exclusive O O<br />
: Song pos X X<br />
Common : Song sel X X<br />
: Tune X X<br />
System : Clock O O<br />
Real Time : Commands O O<br />
: All Sound OFF X O (120)<br />
: Reset All Controller X O (121)<br />
Aux : Local ON/OFF X X<br />
Messages : All Note OFF X O (123)<br />
: Active Sense O O<br />
: Reset X X<br />
Notes *1 NOT sequencer mode<br />
*2 Glide Pedal<br />
*3 Modulation Pedal<br />
*4 Left Hand Hold Pedal<br />
*5 Possible to Select (default = 16)<br />
Mode 1: OMNI ON, POLY Mode 2: OMNI ON, MONO O: Yes<br />
Mode 3: OMNI OFF, POLY Mode 4: OMNI OFF, MONO X: No<br />
Appendice P. 206
Specifications<br />
CP205 / CP185<br />
Keyboard<br />
88 Wooden Keys, AWA PRO (CP205) / 88 Weighted Key, Advanced Hammer Action III (CP185)<br />
Polyphony Maximum 128<br />
Preset Sounds<br />
Over 900 including Drum kits, 20 User Sounds<br />
Styles<br />
220 Styles (4 Variations per Style)<br />
Maximum 20 User Styles<br />
Style Controls<br />
Start/Stop, Intro/Ending (2 per Style), Fill-in (4 per Style), Fade Out, Sync Start, Tap Tempo<br />
Metronome = 10–300, 1/4, 2/4, 3/4, 4/4, 5/4, 6/8, 7/8, 9/8, 12/8<br />
Auto-Accompaniment<br />
Fingered, One Finger, Full Keyboard, Bass Inversion, Harmony (10 types)<br />
Song Stylist<br />
700 Songs<br />
Conductor<br />
Easy Conductor, Advanced Conductor, 40 User Conductors<br />
Effects<br />
Chorus (5), Flanger, Ensemble, Celeste, Delay (3), Auto Pan, Tremolo,<br />
Tremulant, Phaser, Rotary Speaker (2), Auto Wah, Enhancer, Distortion,<br />
Reverb (Room1/2, Stage1/2, Hall1/2, Plate),<br />
36 Mic Harmony and 5 Mic Effects<br />
Temperaments<br />
9 Types and one User Temperament<br />
Other Features One-Two Play, 160 Registrations, Concert Magic (176 Preset Songs ),<br />
Style Convert, Help, 4 Parts (Right 1/2, Solo, Left), 3-Part Layer, Split (Selectable Split Point),<br />
Mixer, Master Volume, Accompaniment Volume, Transpose, Octave Shift,<br />
Tune, Sympathetic Resonance, Virtual Voicing, Portamento, Metronome<br />
Touch Curve Selection (Light1/2, Normal, Heavy1/2, Off, User 1/2 ),<br />
MIDI (16 Part Multi-Timbral Capability)<br />
Recorder<br />
16 Tracks and separate Style, Chord and Tempo tracks,<br />
Punch-In Recording, Step Recording, Editing capability,<br />
The total memory capacity of the recorder is approximately 50,000 notes.<br />
Disk Song Play (Reads/Writes Standard MIDI file format, Lyrics)<br />
Pedals<br />
Sustain (8-Step Sensitive),<br />
Sostenuto, Soft, (15 Functions can be assigned.)<br />
Jacks<br />
Headphones (2), LINE IN (L, R), LINE OUT (L/MONO, R), MIC IN<br />
MIDI (IN, OUT, THRU), USB for the Personal Computer, Video Out<br />
Data Media<br />
3.5” floppy Disk Drive (2HD/2DD, DOS format), CD-R Drive (CP205 only)<br />
Output Power<br />
200 W (CP205) / 120 W (CP185)<br />
Speakers<br />
10” Woofer x 1, 6” x 9” Mid x 2, 3” Tweeter x 2, 1” Dome Tweeter x 4 (CP205)<br />
8” Woofer x 1, 6” x 9” Mid x 2, 2” Tweeter x 2, 1” Dome Tweeter x 2 (CP185)<br />
Power Consumption<br />
240 W (CP205) / 140 W (CP185)<br />
Finish<br />
Ebony Polish<br />
Dimensions (W x D x H)<br />
4’ 11” x 5’ 3” x 3’ 3” (CP205) / 4’ 8” x 4’ x 3’ 2” (CP185)<br />
Weight (without bench)<br />
430 lbs (CP205) / 289 lbs (CP185)
Concert Performer Series Digital Piano<br />
OW969E-T 0305<br />
Printed in Japan