
You also want an ePaper? Increase the reach of your titles
YUMPU automatically turns print PDFs into web optimized ePapers that Google loves.
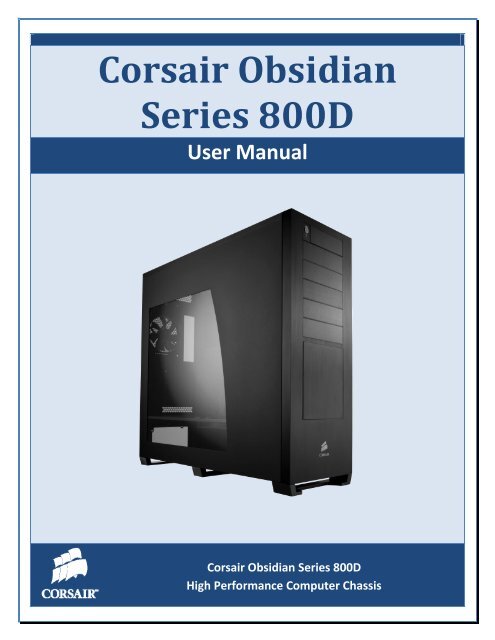
<strong>Corsair</strong> Obsidian<br />
Series 800D<br />
User Manual<br />
<strong>Corsair</strong> Obsidian Series 800D<br />
High Performance Computer Chassis
Obsidian Series 800D USER MANUAL<br />
Congratulations on the purchase of your new <strong>Corsair</strong> Obsidian Series<br />
800D high-performance PC chassis. The Obsidian 800D has been designed<br />
to offer high-end features and performance, such as an innovative cooling<br />
design and support for liquid cooling systems. We hope it serves you well<br />
in your quest to build your ultimate Dream PC!<br />
CONTENTS OF USER MANUAL<br />
Contents<br />
1.0. Product Overview ....................................................................................................... 4<br />
1.1. Specifications ................................................................................................................................ 4<br />
1.2. Parts List ........................................................................................................................................ 5<br />
1.3. Accessories Included ..................................................................................................................... 6<br />
2.0. Operation ................................................................................................................... 7<br />
2.1. How to remove and re-install side panels .................................................................................... 7<br />
2.1.1. Removing the side panel ....................................................................................................... 7<br />
2.1.2. Re-installing the side panel ................................................................................................... 7<br />
2.2. How to remove and re-install the front panel .............................................................................. 8<br />
2.2.1. Removing the front panel ..................................................................................................... 8<br />
2.2.2. Re-installing the front panel ................................................................................................. 9<br />
2.3. How to install a hard drive into the hot-swap drive dock ............................................................ 9<br />
2.3.1. Attaching cables to the SATA backplane ............................................................................... 9<br />
2.3.2. Installing a SATA drive ......................................................................................................... 11<br />
2.3.3. Reversing the front door (optional) .................................................................................... 13<br />
2
Obsidian Series 800D USER MANUAL<br />
2.4. How to install a hard drive into the lower 3.5” drive bays ......................................................... 14<br />
2.5. How to use the CPU heatsink backplate door ............................................................................ 16<br />
2.6. How to install an optical drive .................................................................................................... 17<br />
2.7. How to install the motherboard ................................................................................................. 18<br />
2.8. How to install the power supply ................................................................................................. 20<br />
2.9. How to remove or add case fans ................................................................................................ 20<br />
2.9.1. 140mm HDD Bay fan ........................................................................................................... 20<br />
2.9.2. 120mm lower HDD Bay fan ................................................................................................. 22<br />
2.9.3. Top case exhaust fans ......................................................................................................... 22<br />
2.9.4. Rear case fan ....................................................................................................................... 22<br />
2.9.5. Bottom intake fan ............................................................................................................... 23<br />
2.10. How to remove the dust filter for maintenance ..................................................................... 23<br />
2.11. How to install add-in cards ..................................................................................................... 24<br />
2.12. How to connect the front panel connectors ........................................................................... 25<br />
2.12.1. Audio, USB, 1394A, etc. ..................................................................................................... 25<br />
2.12.2. Power, Reset, HDD LED, PWR LED ..................................................................................... 25<br />
3.0. Support and Warranty Info ........................................................................................ 26<br />
3.1. Contacting Technical Support ..................................................................................................... 26<br />
3.2. Warranty Information ................................................................................................................ 26<br />
3
Obsidian Series 800D USER MANUAL<br />
1.0. Product Overview<br />
1.1. Specifications<br />
Dimensions<br />
24" (H) x 24" (L) x 9" (W) - (609mm x<br />
609mm x 229mm)<br />
Material Aluminum Faceplate, Steel Structure<br />
Color Black<br />
Model 800D<br />
Drive Bays<br />
Cooling<br />
(x5) 5.25"<br />
(x4) 3.5" SATA Hot Swappable<br />
(x2) 3.5" Internal<br />
(x3) 140mm Fans<br />
Expansion Slots 7 (+1 vent)<br />
Motherboard ATX, mATX, EATX<br />
Front I/O<br />
Up to 4x 120mm Fans (not included)<br />
(x4) USB 2.0<br />
(x1) IEEE1394<br />
(x1) Headphone, (x1) MIC<br />
Power Supply ATX (not included)<br />
4
Obsidian Series 800D USER MANUAL<br />
1.2. Parts List<br />
1 – Side Panels 9 – HDD Drive Dock Door 17 – Lower HDD bay shield<br />
2 – 140mm rear fan 10 – Front Bezel 18 – HDD Drive Dock Fan Shroud<br />
3 – 3 x 120mm top fan vents 11 – Lower HDD bay cover 19 – 140mm HDD fan<br />
4 – CPU backplate cover 12 – Lower HDD bay rails 20 – HDD SATA Backplane Shield<br />
5 – Small rubber grommet 13 – 140mm intake fan 21 – Front I/O ports<br />
6 – Large rubber grommet 14 – Case feet 22 – Front I/O port cover<br />
7 – PSU bay shield 15 – HDD Drive Dock trays<br />
8 – 5.25” Bay Covers 16 – Tool-free mechanism<br />
5
Obsidian Series 800D USER MANUAL<br />
1.3. Accessories Included<br />
Image Part Name Qty Used for<br />
Copper Stand Off<br />
(color black)<br />
Hard Drive and Motherboard<br />
Screws<br />
(color black)<br />
Case Fan Screws<br />
(color black)<br />
Lower Hard Drive Bay Fan Screws<br />
(color black)<br />
Drive Rails<br />
(color black)<br />
Rubber Vibration Damper for<br />
120mm fan<br />
(color black)<br />
SATA power connector adapter<br />
(color black)<br />
Nylon zip ties<br />
(color black)<br />
SATA data cables<br />
(color black)<br />
8-pin CPU power connector<br />
extension cable<br />
6<br />
16 M/B Tray<br />
36<br />
Motherboard, Hard<br />
Drives<br />
14 For top mount fans<br />
6<br />
4<br />
1<br />
1<br />
For lower HDD bay<br />
fan<br />
Lower HDD bay drive<br />
install<br />
Lower HDD bay fan<br />
SATA backplane<br />
power<br />
8 Cable management<br />
4 SATA backplane data<br />
1<br />
Extends CPU power<br />
connector on PSUs<br />
with shorter power<br />
leads
Obsidian Series 800D USER MANUAL<br />
2.0. Operation<br />
2.1. How to remove and re-install side panels<br />
2.1.1. Removing the side panel<br />
Press and hold the release button on the rear of the case for the corresponding side panel.<br />
Gently pull the side panel away from case and then lift vertically to remove the panel.<br />
2.1.2. Re-installing the side panel<br />
Step 1 – Slide the side panel back into the case, making sure to catch the three grooved<br />
latches at the locations indicated above.<br />
7<br />
PULL TOWARDS YOU<br />
THEN LIFT
Obsidian Series 800D USER MANUAL<br />
Step 2 - Once the panel is securely latched to the bottom of the case, tilt the side panel<br />
back up into the case while holding the corresponding release button. When the side panel<br />
is flush, release the button and the side panel will lock into place.<br />
2.2. How to remove and re-install the front panel<br />
2.2.1. Removing the front panel<br />
Standing in front of the case, reach under the bottom of the front panel and, using firm<br />
pressure, pull upwards and forwards. The front panel is not held in place with any screws<br />
or wires, but must be removed in order to access the lower drive bay or remove 5.25” bay<br />
covers<br />
Grasp here. Pull<br />
firmly but carefully.<br />
8
Obsidian Series 800D USER MANUAL<br />
2.2.2. Re-installing the front panel<br />
Once you are ready to re-install the front panel, line up the mounting pegs with the holes,<br />
as indicated in the above image. Press the front panel firmly on the locations indicated until<br />
it latches.<br />
2.3. How to install a hard drive into the hot-swap drive dock<br />
2.3.1. Attaching cables to the SATA backplane<br />
Step 1 – Remove the cover of the SATA backplane as shown.<br />
9
Obsidian Series 800D USER MANUAL<br />
Step 2 – Connect the included power cable to the SATA backplane.<br />
Step 3 – Connect the included SATA data cables to the SATA backplane.<br />
10
Obsidian Series 800D USER MANUAL<br />
Step 4 – Re-attach cover.<br />
2.3.2. Installing a SATA drive<br />
Step 1 – Open the door<br />
Gently press on the side of the front door and it will pop open.<br />
11
Obsidian Series 800D USER MANUAL<br />
Step 2 – Remove the drive carrier<br />
Press the release switch and pull the drive carrier out of the drive bay using the pull tab.<br />
Step 3 – Install the SATA hard drive into the drive carrier<br />
Use the four provided screws (two per side).<br />
12
Obsidian Series 800D USER MANUAL<br />
Step 4 – Re-install the drive carrier into the drive bay.<br />
Gently slide the drive carrier back into the drive bay, leaving the pull handle open. Once the<br />
carrier is secure in the bay, close the handle until it latches shut.<br />
2.3.3. Reversing the front door (optional)<br />
Step 1 – Open front door and press in carefully on the two latches highlighted above.<br />
13
Obsidian Series 800D USER MANUAL<br />
Step 2 – Relocate the door as seen here, holding both latches until lined up with the<br />
appropriate holes.<br />
2.4. How to install a hard drive into the lower 3.5” drive bays<br />
Step 1 - With the front panel of the case removed (see 2.2.1), simultaneously press the<br />
top and bottom tabs of the lower hard drive bay cover plate.<br />
14
Obsidian Series 800D USER MANUAL<br />
Step 2 - Use the included drive rails, one per side, as pictured above.<br />
Step 3 - Once the drive rails are installed on the drive, slide it into the bay until it clicks in<br />
place and is secure.<br />
Step 4 - Re-attach the drive bay cover plate as shown.<br />
15
Obsidian Series 800D USER MANUAL<br />
2.5. How to use the CPU heatsink backplate door<br />
Step 1 – Gently press on the tab and pull the CPU heatsink backplate door downwards.<br />
Step 2 – Once you have successfully installed your heatsink, simply lift the door up and<br />
press until it latches shut.<br />
16
Obsidian Series 800D USER MANUAL<br />
2.6. How to install an optical drive<br />
Step 1 – Remove the front panel from the case (see 2.2.1).<br />
Step 2 – Decide which bay you will use and remove the corresponding front drive bay<br />
cover from the front panel.<br />
Step 3 – Slide your optical drive into the appropriate bay.<br />
17
Obsidian Series 800D USER MANUAL<br />
Step 4 – When the screw hole lines up as shown below, push the latch forward until it<br />
locks, then re-install the case front panel as in 2.2.2.<br />
2.7. How to install the motherboard<br />
Step 1 – Determine what type of motherboard you have and install the black colored<br />
copper standoffs appropriately. (NOTE: standoffs may be pre-installed for some common<br />
board layouts)<br />
18
Obsidian Series 800D USER MANUAL<br />
Step 2 – Place the I/O plate in the rear of the case. (This is provided by the motherboard<br />
manufacturer).<br />
Step 3 – Line up the motherboard with the I/O shield and the mounting holes, and use the<br />
screws provided to secure the motherboard into the case.<br />
19
Obsidian Series 800D USER MANUAL<br />
2.8. How to install the power supply<br />
Place the power supply in the bottom power supply bay and install the screws as shown.<br />
2.9. How to remove or add case fans<br />
2.9.1. 140mm HDD Bay fan<br />
Step 1 - Remove the plastic cover from the side of the hot-swap drive bay.<br />
20
Obsidian Series 800D USER MANUAL<br />
Step 2 - You now have access to the four screws that hold the 140mm fan in place.<br />
Remove these screws to remove or replace this fan.<br />
Step 3 – Replace the hot-swap drive bay fan cover.<br />
21
Obsidian Series 800D USER MANUAL<br />
2.9.2. 120mm lower HDD Bay fan<br />
See instructions above for 140mm fan installation for hot-swap drive bay. Use the included<br />
screws and rubber fan grommet to install a 120mm fan in the space provided (see below).<br />
2.9.3. Top case exhaust fans<br />
Use the provided case fan screws to screw the fans into the top of the case.<br />
2.9.4. Rear case fan<br />
Remove screws from rear of case as shown above.<br />
22
Obsidian Series 800D USER MANUAL<br />
2.9.5. Bottom intake fan – Remove screws from case separator, as shown.<br />
2.10. How to remove the dust filter for maintenance<br />
Remove the dust filter – pull the tab from the bottom rear of the case to remove dust<br />
filter. Clean using a clean, damp cloth or canned air. Once the filter is dry, replace it by<br />
sliding it back in between the rails.<br />
23
Obsidian Series 800D USER MANUAL<br />
2.11. How to install add-in cards<br />
Step 1 – Remove the corresponding thumbscrew from the slot cover.<br />
Step 2 – Remove the slot bracket cover.<br />
Step 3 – Install the card, and secure with thumbscrew from step 2.<br />
24
Obsidian Series 800D USER MANUAL<br />
2.12. How to connect the front panel connectors<br />
2.12.1. Audio, USB, 1394A, etc.<br />
Connectors are indicated with the pin-outs as shown.<br />
2.12.2. Power, Reset, HDD LED, PWR LED<br />
Pin 1 is indicated by a small arrow on the connector. For more information, see your<br />
motherboard <strong>manual</strong>.<br />
25
Obsidian Series 800D USER MANUAL<br />
3.0. Support and Warranty Info<br />
3.1. Contacting Technical Support<br />
<strong>Corsair</strong> Technical support can be reached by using any of the methods listed below.<br />
Online: http://www.corsair.com/helpdesk<br />
Forum: http://www.asktheramguy.com<br />
Phone: 1 (888) 222-4346<br />
3.2. Warranty Information<br />
Limited Warranty And Limitation of Liability<br />
The Product is guaranteed for twenty four (24) months from the date of delivery to the<br />
end-<strong>user</strong> against defects in materials or workmanship. During this period, the Product will<br />
be repaired or have parts replaced, at our discretion, provided that: (I) the Product is<br />
returned to the agent from whom it was purchased with shipping prepaid; (II) the Product<br />
has been purchased by the end-<strong>user</strong> and not used for hire purposes; (III) the Product has<br />
not been misused, handled carelessly, or other than in accordance with any instructions<br />
provided with respect to its use; (IV) the Product has not been damaged due to acts of<br />
nature, such as lighting, fire, flood, or earthquake; (V) any and all warranty stickers have<br />
not been removed or tampered with.<br />
<strong>Corsair</strong> Memory’s warranty on the Product is to the first end <strong>user</strong> or consumer only, in<br />
accordance with the <strong>Corsair</strong> Memory’s Limited Warranty. All warranties, express or<br />
implied, including without limitation the implied warranties of merchantability<br />
and fitness for a particular purpose, shall be limited to the duration of the<br />
guarantee above. The repair, replacement, or refund as provided under this<br />
express limited warranty is the exclusive remedy of the consumer, and is<br />
provided in lieu of all other warranties, express or implied. In no event shall<br />
<strong>Corsair</strong> Memory be liable, whether in contract or tort (including negligence) for<br />
damages in excess of the purchase price of the product, or accessory, or for any<br />
indirect, incidental, special or consequential damages of any kind, or loss of<br />
revenue or profits, loss of business, loss of information or data, software or<br />
26
Obsidian Series 800D USER MANUAL<br />
applications or other financial loss arising out of or in connection with the ability<br />
or inability to use the products or accessories to the full extent these damages<br />
may be disclaimed by law.<br />
<strong>Corsair</strong> Memory’s total liability, whether for breach of contract, warranty, tort<br />
(including negligence), indemnification or otherwise, is limited to the price of<br />
the Product sold under these terms with respect to which losses or damages are<br />
claimed. In no event will <strong>Corsair</strong> Memory be liable for any loss of use, loss of<br />
time, inconvenience, commercial loss, lost profits or savings or other indirect,<br />
incidental, special or consequential damages to the full extent that may be<br />
disclaimed by law. The limitations, exclusions and disclaimers in these terms<br />
shall survive a fundamental breach or breach or the failure of the essential<br />
purpose of these terms or of any remedy contained herein. No action will be<br />
brought for any breach of these terms more than one year after the accrual of<br />
such cause of action. For the purpose of this paragraph, "<strong>Corsair</strong> Memory"<br />
includes its affiliates and its and their respective directors, officers, employees<br />
and agents, each of whom shall be considered as a trust beneficiary.<br />
27