Configuration - Knick
Configuration - Knick
Configuration - Knick

Create successful ePaper yourself
Turn your PDF publications into a flip-book with our unique Google optimized e-Paper software.
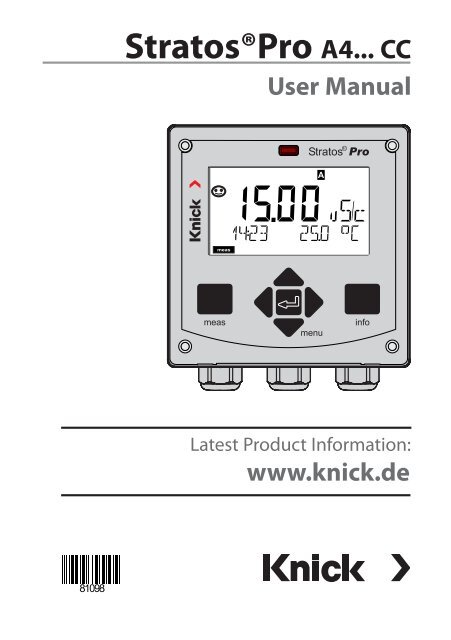
Stratos®Pro A4... CC<br />
User Manual<br />
Latest Product Information:<br />
www.knick.de
Warranty<br />
Warranty<br />
Defects occurring within 3 years from delivery date shall be remedied<br />
free of charge at our plant (carriage and insurance paid by sender).<br />
Sensors, fittings, and accessories: 1 year.<br />
Subject to change without notice.<br />
Return of products under warranty<br />
Please contact our Service Team before returning a defective device.<br />
Ship the cleaned device to the address you have been given.<br />
If the device has been in contact with process fluids, it must be<br />
decontaminated/disinfected before shipment. In that case, please<br />
attach a corresponding certificate, for the health and safety of our<br />
service personnel.<br />
Disposal<br />
Please observe the applicable local or national regulations concerning<br />
the disposal of “waste electrical and electronic equipment”.<br />
2
Documents Supplied<br />
CD-ROM<br />
Complete documentation:<br />
• Instruction manuals<br />
• Safety instructions<br />
• Short instructions<br />
Stratos® Pro Series<br />
Safety Instructions<br />
Safety Information<br />
In official EU languages and others.<br />
• ATEX / IECEX / FM / CSA<br />
• EC Declarations of Conformity<br />
www.knick.de<br />
Stratos® Pro A211 / A411<br />
Short Instructions .........................3<br />
Kurzübersicht .............................. 15<br />
QuickStart .................................... 27<br />
Быстрый старт ........................... 39<br />
Inicio rápido ................................ 51<br />
Início rápido ................................ 63<br />
Guida rapida ................................ 75<br />
Snabbstart.................................... 87<br />
QuickStart .................................... 99<br />
Other languages: www.knick.de<br />
Short Instructions<br />
In German, English, French, Russian,<br />
Spanish, Portuguese, Italian, Swedish<br />
and Dutch.<br />
More languages on CD-ROM and<br />
on our website: www.knick.de<br />
• Installation and commissioning<br />
• Operation<br />
• Menu structure<br />
• Calibration<br />
• Error messages and recommended actions<br />
Specific Test Report<br />
3
Contents<br />
Documents Supplied...................................................................... 3<br />
Introduction..................................................................................... 7<br />
Intended Use.......................................................................................... 7<br />
Safety Information.......................................................................... 8<br />
Overview of Stratos Pro A4... CC.................................................. 9<br />
Assembly........................................................................................10<br />
Package Contents...............................................................................10<br />
Mounting Plan, Dimensions...........................................................11<br />
Pipe Mounting, Protective Hood..................................................12<br />
Panel Mounting...................................................................................13<br />
Installation.....................................................................................14<br />
Installation Instructions...................................................................14<br />
Rating Plates / Terminal Assignments.........................................14<br />
Power Supply, Signal Lines.............................................................15<br />
Sensor Connection............................................................................16<br />
Wiring Examples.................................................................................17<br />
User Interface, Keypad.................................................................20<br />
Display.............................................................................................21<br />
Signal Colors (Display Backlighting)............................................21<br />
Measuring Mode...........................................................................22<br />
Selecting the Mode / Entering Values.......................................23<br />
Operating Modes..........................................................................26<br />
HOLD Mode..........................................................................................28<br />
Alarm.......................................................................................................29<br />
Alarm and HOLD Messages............................................................30<br />
Overview of <strong>Configuration</strong>.........................................................31<br />
Setup and Channel Selection on the Device...........................32<br />
Sensors A and B – Arrangement................................................32<br />
Channel Selection and Display Assignment............................32<br />
4
Contents<br />
Calculations (CALC).......................................................................33<br />
<strong>Configuration</strong> (Original for Copy)..............................................42<br />
Configuring Sensors A, B.................................................................44<br />
Current Output 1................................................................................48<br />
Current Output 2................................................................................56<br />
CONTROL Input...................................................................................58<br />
Alarm Settings.....................................................................................60<br />
Relay Contacts.....................................................................................62<br />
Time and Date.....................................................................................68<br />
Tag Number .................................................................................................68<br />
Calibration......................................................................................70<br />
Calibration by Input of Cell Factor...............................................71<br />
Measurement.................................................................................72<br />
Diagnostics.....................................................................................73<br />
Service.............................................................................................78<br />
Operating States...........................................................................82<br />
Product Line and Accessories.....................................................83<br />
Specifications.................................................................................84<br />
Error Handling...............................................................................89<br />
Error Messages..............................................................................90<br />
Sensoface........................................................................................92<br />
FDA 21 CFR Part 11.......................................................................94<br />
Electronic Signature – Passcodes.................................................94<br />
Audit Trail..............................................................................................94<br />
Index................................................................................................95<br />
Trademarks.........................................................................................103<br />
Passcodes......................................................................................104<br />
5
Contents<br />
6
Introduction<br />
Intended Use<br />
Stratos Pro A4... CC is a 4-wire device for two-channel measurement<br />
of electrical conductivity and temperature in liquids. The device has<br />
been designed for measurements before and after cation exchangers<br />
using commercial 2- and 4-electrode sensors. Different parameters<br />
can be calculated from the two conductivity values, e.g. difference,<br />
ratio, rejection, but also the pH value of feed water.<br />
The sturdy molded enclosure can be fixed into a control panel or<br />
mounted on a wall or at a post. The protective hood, which is available<br />
as accessory, provides additional protection against direct<br />
weather exposure and mechanical damage.<br />
Plain-text messages in a large, backlit display allow intuitive operation.<br />
The colored display backlighting signals alarm messages (red) or<br />
HOLD mode (orange).<br />
The “Sensocheck“ automatic monitoring of sensor and cables and<br />
the “Sensoface“ function for clear indication of the sensor condition<br />
provide excellent diagnostics.<br />
The internal logbook (TAN SW-A002) can handle up to 100 entries –<br />
up to 200 with AuditTrail (TAN SW-A003).<br />
Password protection for granting access rights during operation can<br />
be configured.<br />
The floating, digital control input “HOLD“ allows remote controlled<br />
switching to HOLD mode.<br />
The “CONTROL“ input allows evaluation of external monitoring equipment,<br />
such as a flow monitoring system.<br />
For that purpose, you can also monitor the current input (optional) for<br />
keeping a desired value.<br />
The device provides two current outputs (for transmission of measured<br />
value and temperature, for example) and four floating relay<br />
contacts. Current is provided through a universal power supply<br />
24 ... 230 V AC/DC, AC: 45 ... 65 Hz.<br />
7
Safety Information<br />
Safety information –<br />
Be sure to read and observe the following instructions!<br />
The device has been manufactured using state of the art technology<br />
and it complies with applicable safety regulations.<br />
When operating the device, certain conditions may nevertheless lead<br />
to danger for the operator or damage to the device.<br />
See also separate document:<br />
• “Safety Instructions“<br />
8<br />
CAUTION!<br />
Commissioning must only be performed by trained personnel authorized<br />
by the operating company! Whenever it is likely that protection<br />
has been impaired, the device shall be made inoperative and secured<br />
against unintended operation.<br />
The protection is likely to be impaired if, for example:<br />
• the device shows visible damage<br />
• the device fails to perform the intended measurements<br />
• after prolonged storage at temperatures above 70°C<br />
• after severe transport stresses<br />
Before recommissioning the device, a professional routine test must<br />
be performed. This test must be carried out at the manufacturer's<br />
factory.<br />
Please note:<br />
Before commissioning it must be proved that the device may be<br />
connected with other equipment.<br />
Terminals:<br />
Screw terminal, suitable for single wires / flexible leads up to 2.5 mm 2<br />
(AWG 14).<br />
Recommended torque for the terminal screws: 0,5 ... 0.6 Nm.
Overview<br />
Overview of Stratos Pro A4... CC<br />
A<br />
B<br />
CC<br />
input<br />
Output 1<br />
9<br />
10<br />
C<br />
Output 2 7<br />
D<br />
8<br />
E<br />
R1<br />
14<br />
F<br />
15<br />
G<br />
R2<br />
16<br />
H<br />
I<br />
RS 485<br />
1<br />
2<br />
K<br />
3<br />
4<br />
5<br />
Current<br />
Alarm<br />
17<br />
6<br />
input<br />
18<br />
REL<br />
19<br />
11<br />
12<br />
13<br />
HOLD<br />
input<br />
Control<br />
input<br />
R3<br />
Power<br />
20<br />
21<br />
22<br />
9
Assembly<br />
Package Contents<br />
Check the shipment for transport damage and completeness!<br />
The package should contain:<br />
• Front unit, rear unit, bag containing small parts<br />
• Specific test report<br />
• Documentation (cf Pg 3)<br />
• CD-ROM<br />
11<br />
10<br />
9<br />
1<br />
2<br />
3<br />
8<br />
7 6 5 4<br />
Fig.: Assembling the enclosure<br />
1) Jumper (3 x)<br />
2) Washer (1 x), for conduit<br />
mounting: Place washer<br />
between enclosure and nut<br />
3) Cable tie (3 x)<br />
4) Hinge pin (1 x), insertable<br />
from either side<br />
5) Enclosure screw (4 x)<br />
10<br />
6) Sealing insert (1 x)<br />
7) Rubber reducer (1 x)<br />
8) Cable gland (3 x)<br />
9) Filler plug (3 x)<br />
10) Hexagon nut (5 x)<br />
11) Sealing plug (2 x), for sealing<br />
in case of wall mounting
Assembly<br />
Mounting Plan, Dimensions<br />
148<br />
117<br />
41<br />
14<br />
148<br />
42<br />
42 42<br />
1<br />
21<br />
43<br />
2<br />
34 80<br />
74<br />
6.2<br />
3<br />
4<br />
1) Cable gland (3 x)<br />
2) Knockouts for cable gland or<br />
½" conduit,<br />
21.5 mm dia. (2 knockouts)<br />
Conduits not included!<br />
3) Knockout for pipe mounting<br />
(4 x)<br />
4) Knockout for wall mounting<br />
(2 x)<br />
Fig.: Mounting plan (All dimensions in mm!)<br />
11
Assembly<br />
Pipe Mounting, Protective Hood<br />
ø40...ø60<br />
1<br />
2<br />
3<br />
1) Hose clamp with worm gear<br />
drive to DIN 3017 (2 x)<br />
2) Pipe-mount plate (1 x)<br />
3) For vertical or horizontal posts<br />
or pipes<br />
4) Self-tapping screw (4 x)<br />
4<br />
Fig.: ZU 0274 pipe-mount kit (All dimensions in mm!)<br />
199<br />
147<br />
91<br />
185<br />
Fig.: ZU 0737 protective hood for wall and pipe mounting<br />
(All dimensions in mm!)<br />
12
Assembly<br />
Panel Mounting<br />
Installation<br />
Installation Instructions<br />
• Installation of the device must be carried out by trained experts in<br />
accordance with this instruction manual and as per applicable local<br />
and national codes.<br />
• Be sure to observe the technical specifications and input ratings<br />
during installation!<br />
• Be sure not to notch the conductor when stripping the insulation!<br />
• The supplied current must be galvanically isolated.<br />
If not, connect an isolator module.<br />
• All parameters must be set by a system administrator prior to<br />
commissioning!<br />
Terminals:<br />
suitable for single wires / flexible leads up to 2.5 mm 2 (AWG 14)<br />
Rating Plates / Terminal Assignments<br />
Fig.: Terminal assignments of Stratos Pro A4...<br />
Fig.: Stratos Pro A4...N rating plate at outside bottom of front<br />
14
Connect the power supply for Stratos Pro A4.. CC<br />
to terminals 21 and 22<br />
(24 ... 230 V AC, 45 ... 65 Hz / 24 ... 80 V DC)<br />
Power Supply, Signal Lines<br />
Terminal assignments<br />
Areas for placing the<br />
screwdriver to pull out<br />
the terminals<br />
1 22<br />
Fig.: Terminals, device opened, back of front unit<br />
15
Sensor Connection<br />
Connect the sensor lines with the sensor connection<br />
(module terminals A...K).<br />
Sensor connection<br />
MK-CC module<br />
Areas for placing the<br />
screwdriver to pull out<br />
the terminals<br />
1 22<br />
Fig.: Terminals, device opened, back of front unit<br />
16
Wiring Examples<br />
Example 1:<br />
Measuring task:<br />
Sensors (principle):<br />
Dual conductivity, temperature<br />
2 electrodes, coaxial<br />
A CELL<br />
A<br />
A CELL (GND)<br />
A RTD<br />
A RTD (GND)<br />
A SHIELD<br />
B CELL<br />
B CELL (GND)<br />
B RTD<br />
B RTD (GND)<br />
B SHIELD<br />
B C D E F G H I K<br />
A<br />
B<br />
Sensor(s) Cable Device<br />
17
Wiring Examples<br />
Example 2:<br />
Measuring task: Dual conductivity, temperature<br />
Sensors:<br />
SE 604, 2 electrodes<br />
A CELL<br />
White / Pink<br />
A<br />
A CELL (GND)<br />
A RTD<br />
A RTD (GND)<br />
A SHIELD<br />
B CELL<br />
B CELL (GND)<br />
B RTD<br />
B RTD (GND)<br />
B SHIELD<br />
B C D E F G H I K<br />
Brown / Gray<br />
Yellow / Red<br />
Green<br />
Black<br />
White / Pink<br />
Brown / Gray<br />
Yellow / Red<br />
Green<br />
Black<br />
A<br />
B<br />
Sensor(s) Cable Device<br />
18
Example 3:<br />
Measuring task:<br />
Sensors:<br />
Dual conductivity, temperature<br />
SE 610, 2 electrodes<br />
Wiring Examples<br />
A CELL<br />
White<br />
A<br />
A CELL (GND)<br />
A RTD<br />
A RTD (GND)<br />
A SHIELD<br />
B CELL<br />
B CELL (GND)<br />
B RTD<br />
B RTD (GND)<br />
B SHIELD<br />
B C D E F G H I K<br />
Brown<br />
Yellow<br />
Green<br />
Black<br />
White<br />
Brown<br />
Yellow<br />
Green<br />
Black<br />
A<br />
B<br />
Sensor(s) Cable Device<br />
19
MEMO<br />
SENS<br />
User Interface, Keypad<br />
1<br />
2<br />
4<br />
3<br />
1 IrDA transmitter/receiver<br />
2 Display<br />
3 Keypad<br />
4 Rating plate<br />
(enclosure bottom)<br />
Key<br />
meas<br />
info<br />
enter<br />
menu<br />
Arrow keys<br />
up / down<br />
Arrow keys<br />
left / right<br />
Function<br />
• Return to last menu level<br />
• Directly to measuring mode (press > 2 s)<br />
• Measuring mode: other display<br />
• Retrieve information<br />
• Show error messages<br />
• <strong>Configuration</strong>: Confirm entries,<br />
next configuration step<br />
• Calibration:<br />
Continue program flow<br />
• Measuring mode: Call menu<br />
• Menu: Increase/decrease a numeral<br />
• Menu: Selection<br />
• Previous/next menu group<br />
• Number entry: Move between digits<br />
20
1 2 3 4 5 6 7 8 9 10 11<br />
Display<br />
23<br />
MEMO<br />
SENS<br />
12<br />
13<br />
14<br />
24<br />
15<br />
16<br />
22 21<br />
1 Temperature<br />
2 Sensocheck<br />
3 Interval/response time<br />
4 Sensor data<br />
5 Not used<br />
6 Limit message:<br />
Limit 1 or Limit 2<br />
7 Alarm<br />
8 Service<br />
9 Channel A / Channel B<br />
10 Calibration<br />
11 Not used<br />
12 Waiting time running<br />
20<br />
19 18 17<br />
13 Info available<br />
14 Hold mode active<br />
15 Main display<br />
16 Secondary display<br />
17 Proceed using enter<br />
18 Not used<br />
19 Diagnostics<br />
20 <strong>Configuration</strong> mode<br />
21 Calibration mode<br />
22 Measuring mode<br />
23 Sensoface<br />
24 Unit symbols<br />
Signal colors (display backlighting, see page 25)<br />
Red<br />
Red blinking<br />
Orange<br />
Turquoise<br />
Green<br />
Purple<br />
Alarm (in case of fault: display values blink)<br />
Input error: illegal value or wrong passcode<br />
HOLD mode (Calibration, <strong>Configuration</strong>, Service)<br />
Diagnostics<br />
Info<br />
Sensoface message<br />
21
Measuring Mode<br />
After the operating voltage has been connected and the sensor identified,<br />
the analyzer automatically goes to “Measuring“ mode. To call<br />
the measuring mode from another operating mode (e.g. Diagnostics,<br />
Service): Hold meas key depressed (> 2 s).<br />
Sensoface indicator<br />
(sensor status)<br />
Time (or flow)<br />
Mode indicator<br />
(measuring)<br />
Hold meas key<br />
depressed for calling<br />
the measuring mode<br />
(pressing once more<br />
switches the display)<br />
Display active<br />
measuring<br />
channel<br />
Display indicates<br />
OUT1: e.g.<br />
measured value<br />
of channel A<br />
Display indicates<br />
OUT2: here,<br />
temperature of<br />
channel A<br />
enter key<br />
Depending on the configuration, one of the following displays can be<br />
set as standard display for the measuring mode (see page 24):<br />
• Measured values channel A and channel B as well as time<br />
(default setting)<br />
Measured value and tag number ("TAG")<br />
• Conductivity and temperature of channel A (see example above)<br />
• Conductivity and temperature of channel B<br />
• Time and date<br />
• Measured value channel A, channel B and flow<br />
• Output currents<br />
Note: By pressing the meas key in measuring mode you can view the<br />
displays for approx. 60 sec.<br />
22<br />
The analyzer must be configured for the respective<br />
measurement task!
Selecting the Mode / Entering Values<br />
To select the operating mode:<br />
1) Hold meas key depressed (> 2 s) (directly to measuring mode)<br />
2) Press menu key: the selection menu appears<br />
3) Select operating mode using left / right arrow key<br />
4) Press enter to confirm the selected mode<br />
1<br />
Selection menu<br />
Selected mode<br />
(blinks)<br />
4<br />
3<br />
2<br />
To enter a value:<br />
5) Select numeral: left / right arrow key<br />
6) Change numeral: up / down arrow key<br />
7) Confirm entry by pressing enter<br />
5 7<br />
6<br />
23
Display in Measuring Mode<br />
The MAIN DISPLAY is the display<br />
which is shown in measuring mode.<br />
To call the measuring mode from<br />
any other mode, hold the meas key<br />
depressed for at least 2 sec.<br />
meas key<br />
enter key<br />
By pressing meas briefly you can<br />
step through further displays such as<br />
tag number (TAG) or flow (L/h).<br />
These displays are turquoise.<br />
After 60 sec they switch back to the<br />
main display.<br />
approx. 2 s<br />
Press enter to<br />
select a display as<br />
MAIN DISPLAY –<br />
the secondary display shows<br />
"MAIN DISPLAY – NO“.<br />
Use the UP / DOWN arrow keys to<br />
select "MAIN DISPLAY – YES“<br />
and confirm by pressing enter.<br />
The display color changes to white.<br />
This display is now shown in<br />
measuring mode.<br />
24
Color-Coded User Interface<br />
The color-coded user interface guarantees increased operating safety.<br />
Operating modes are clearly signaled.<br />
The normal measuring mode is white. Information text appears on a<br />
green screen and the diagnostic menu appears on turquoise.<br />
The orange HOLD mode (e.g. during calibration) is quickly visible as is<br />
the magenta screen which indicates asset management messages for<br />
predictive diagnostics – such as maintenance request, pre-alarm and<br />
sensor wear.<br />
The alarm status has a particularly noticeable red display color and is<br />
also signaled by flashing display values. Invalid inputs or false passcodes<br />
cause the entire display to blink red so that operating errors are<br />
noticeably reduced.<br />
White:<br />
Measuring mode<br />
Red blinking:<br />
Alarm, errors<br />
Orange:<br />
HOLD mode<br />
Magenta:<br />
Maintenance request<br />
Turquoise:<br />
Diagnostics<br />
Green:<br />
Information texts<br />
25
Operating Modes<br />
Diagnostics<br />
Display of calibration data, display of sensor data, performing a device<br />
self-test, viewing the logbook entries, display of hardware/software<br />
versions of the individual components.<br />
The logbook can store 100 events (00...99). They can be displayed<br />
directly on the analyzer. The logbook can be extended to 200 entries<br />
using a TAN (Option).<br />
HOLD<br />
Manual activation of HOLD mode, e.g. for servicing. The signal outputs<br />
adopt a defined state.<br />
Calibration<br />
There are no stable calibration solutions for the µS/cm range, and<br />
performing a calibration is very difficult because it only works properly<br />
in the flow under exclusion of air. Therefore, it is easier and more precise<br />
just to enter the cell factor or calibrate by carrying out a reference<br />
measurement, if appropriate.<br />
During calibration the analyzer is in HOLD mode.<br />
During calibration the analyzer remains in the HOLD mode until it is<br />
stopped by the operator.<br />
<strong>Configuration</strong><br />
The analyzer must be configured for the respective measurement<br />
task. In the “<strong>Configuration</strong>“ mode you select the connected sensor, the<br />
measuring range to be transmitted, and the conditions for warning and<br />
alarm messages. During configuration the analyzer is in HOLD mode.<br />
<strong>Configuration</strong> mode is automatically exited 20 minutes after the last<br />
keystroke. The analyzer returns to measuring mode.<br />
Service<br />
Maintenance functions (current source), IrDA operation, passcode<br />
assignment, reset to factory settings, enabling of options (TAN).<br />
26
Operating Modes / Functions<br />
Meas. mode<br />
(main display<br />
selectable)<br />
TAG display<br />
after 60 s<br />
CLK display<br />
after 60 s<br />
<br />
<br />
<br />
<br />
Pressing the menu key (down arrow) opens the selection menu.<br />
Select the menu group using the left/right arrow keys.<br />
Pressing enter opens a menu item. Press meas to return.<br />
Display of calibration data<br />
Self test: RAM, ROM, EEPROM, module<br />
100 events with date and time<br />
Display of direct, uncorrected sensor signals<br />
Display of software version, model designation, serial number<br />
Manual activation of HOLD mode, e.g. for sensor replacement.<br />
The signal outputs behave as configured (e.g. last measured value, 21 mA)<br />
Calibrating sensor A by input of cell factor<br />
Calibrating sensor B by input of cell factor<br />
<strong>Configuration</strong><br />
<br />
(Access via<br />
code, factory<br />
setting:<br />
5555)<br />
Display of measured values for validation (simulators)<br />
Current source, output 1<br />
Current source, output 2<br />
Relay test (A4... only)<br />
Activating the IrDA interface<br />
Specifying access codes for operating modes<br />
Reset to factory setting<br />
Enabling an option via TAN<br />
27
HOLD Mode<br />
The HOLD mode is a safety mode during configuration, calibration,<br />
and servicing. Output current is frozen (LAST) or set to a fixed value<br />
(FIX).<br />
The HOLD mode is indicated by orange display backlighting.<br />
HOLD mode, display icon:<br />
Output signal response<br />
• LAST: The output current is frozen at its last value. Recommended<br />
for short configuration procedures. The process should not change<br />
decisively during configuration. Changes are not noticed with this<br />
setting!<br />
• FIX: The output current is set to a value that is noticeably different<br />
from the process value to signal the control system that the analyzer<br />
is being worked at.<br />
Output signal during HOLD:<br />
Output current<br />
[mA]<br />
21<br />
Output signal for HOLD<br />
FIX setting = 21.0 mA<br />
Output signal for HOLD<br />
LAST setting<br />
4<br />
HOLD active<br />
HOLD active<br />
Terminating the HOLD mode<br />
The HOLD mode is ended by switching to measuring mode (hold<br />
meas key depressed). The display reads “Good Bye“, after that, the<br />
HOLD mode is exited.<br />
When the calibration mode is exited, a confirmation prompt ensures<br />
that the installation is ready for operation (e.g.: sensor reinstalled,<br />
located in process).<br />
28
Alarm<br />
External activation of HOLD<br />
The HOLD mode can be activated from outside by sending a signal to<br />
the HOLD input (e.g. from the process control system).<br />
Power supply<br />
12...24 V AC/DC<br />
HOLD<br />
11<br />
12<br />
input<br />
Stratos Pro A4...<br />
Process control system<br />
HOLD inactive<br />
HOLD active<br />
0...2 V AC/DC<br />
10...30 V AC/DC<br />
Manual activation of HOLD<br />
The HOLD mode can be activated manually from the HOLD menu.<br />
This allows checking or replacing a sensor, for example, without<br />
provoking unintended reactions of outputs or contacts.<br />
Press meas key to return to selection menu.<br />
Alarm<br />
When an error has occurred, Err xx is displayed immediately.<br />
Only after expiry of a user-defined delay time will the alarm be<br />
registered and entered in the logbook.<br />
During an alarm the alarm contact opens.<br />
The display blinks, the display backlighting turns red.<br />
Error messages can also be signaled by a 22 mA output current<br />
(see <strong>Configuration</strong>).<br />
2 sec after the failure event is corrected, the alarm status will be<br />
deleted.<br />
29
Alarm and HOLD Messages<br />
Message Released by Cause<br />
Alarm Sensocheck Polarization / Cable<br />
(22 mA) Error messages Flow (CONTROL input)<br />
Alarm<br />
contact<br />
opens<br />
Flow (current input)<br />
ERR A / ERR B: conductance > 250,000 µS<br />
ERR A / ERR B: conductivity > 1,000 µS/cm<br />
HOLD HOLD HOLD via menu or input<br />
(Last/Fix) CONF <strong>Configuration</strong><br />
CAL<br />
Calibration<br />
SERVICE Service<br />
To generate a message via the CONTROL input:<br />
Open the “<strong>Configuration</strong>“ menu to activate the message:<br />
Power supply<br />
12...24 V AC/DC<br />
13<br />
12<br />
CONTROL<br />
input<br />
Stratos Pro A4...<br />
To generate a message via the current input:<br />
Open the “<strong>Configuration</strong>“ menu to activate the message:<br />
0(4) ... 20 mA:<br />
5<br />
6<br />
Current<br />
input<br />
Stratos Pro A4...<br />
30
Overview of <strong>Configuration</strong><br />
The configuration steps are assigned to different menu groups.<br />
Using and you can jump between the individual menu groups.<br />
Each menu group contains menu items for setting the parameters.<br />
Pressing enter opens a menu item.<br />
Use and to edit a value. Press enter to confirm/save the settings.<br />
To return to measurement: Hold meas key depressed (> 2 s).<br />
Select<br />
menu group<br />
Menu group Code Display<br />
Select<br />
menu item<br />
Sensor A parameters<br />
S_A:<br />
Menu item 1<br />
...<br />
Menu item ...<br />
<br />
Sensor B parameters<br />
S_B:<br />
<br />
<br />
Measuring mode<br />
Current output 1<br />
MES:<br />
OT1:<br />
<br />
<br />
Current output 2<br />
Control input<br />
(flow measurement or<br />
level)<br />
OT2:<br />
IN:<br />
<br />
Alarm mode<br />
ALA:<br />
<br />
Relay outputs<br />
REL:<br />
<br />
<br />
Setting the clock<br />
CLK:<br />
<br />
Tag number<br />
TAG:<br />
31
Setup and Channel Selection on the Device<br />
Sensors A and B – Arrangement<br />
Analyzer<br />
Stratos Pro A... CC<br />
Inlet:<br />
COND A sensor<br />
with fitting<br />
Connection length<br />
max. 3 m<br />
Channel Selection and Display Assignment<br />
Outlet:<br />
COND B sensor<br />
with fitting<br />
DISPLAY:<br />
Display<br />
OUT 1<br />
Display<br />
OUT 2<br />
32
Calculations (CALC)<br />
Calculation<br />
Formula<br />
Difference<br />
Ratio<br />
Passage<br />
Rejection<br />
Deviation<br />
pH value acc. to VBG 450 11+log((COND A – COND B /3)/243)<br />
Variable pH value,<br />
factors specifiable<br />
11+log((COND A – COND B /F1)/F2)<br />
F1, F2 specifiable<br />
PARAMETER W<br />
PARAMETER A<br />
PARAMETER B<br />
33
pH Value Calculation<br />
pH value calculation by means of dual conductivity measurement<br />
When monitoring boiler feed water in power plants, the pH value can be<br />
calculated by means of a dual conductivity measurement. For that purpose,<br />
the boiler feed water conductance is measured before and after the cation<br />
exchanger. This commonly used method of indirect pH value measurement<br />
does not require much maintenance and has the following advantage:<br />
Normal pH measurement in ultrapure water is very critical. Boiler feed water<br />
does not contain many ions. This requires the use of a special electrode,<br />
which must be calibrated constantly and the service life of which is generally<br />
rather short.<br />
Function<br />
Two sensors are used to measure the conductivity before and after the cation<br />
exchanger. The pH value is inferred from these two conductivity values<br />
according to the calculation formulas shown below:<br />
Cation<br />
exchanger<br />
Cond measuring<br />
point A<br />
Cond measuring<br />
point B<br />
H 2 O<br />
Sensor A<br />
TC: NH3 / NaOH<br />
Sensor B<br />
TC: HCl<br />
Calculation Block<br />
pH<br />
Calculating the concentration of sodium hydroxide solution /<br />
pH value:<br />
COND A – 1/3 COND B<br />
c(NaOH) =<br />
pH = 11+log[c(NaOH)]<br />
243<br />
34
Recommended pH ranges:<br />
10 ± 0.2 for < 136 bars operating overpressure or<br />
9.5 ± 0.2 for > 136 bars operating overpressure<br />
60<br />
µS/cm<br />
50<br />
pH = 10.2<br />
40<br />
Conductivity measured before cation exchanger (COND A)<br />
30<br />
20<br />
10<br />
0<br />
pH = 10.0<br />
pH = 9.8<br />
pH = 9.7<br />
pH = 9.5<br />
pH = 9.3<br />
0 10 20 30 40 50<br />
µS/cm<br />
Conductivity measured after cation exchanger (COND B)<br />
Figure:<br />
Conditioning the feed water of natural circulation boilers with sodium<br />
hydroxide. Relationship between the pH value and the conductivity<br />
measured before and after the cation exchanger.<br />
Source: Appendix to VGB guideline for boiler feed water, boiler water and<br />
steam of steam generators above 68 bars permissible operating overpressure<br />
(VGB-R 450 L)<br />
35
<strong>Configuration</strong><br />
<strong>Configuration</strong> Choices Default<br />
(this setting applies to both<br />
channels, A and B)<br />
(Selected in text line)<br />
36
<strong>Configuration</strong><br />
1) The cell factor can be modified by an entry in the configuration<br />
menu or by calibration (one storage position). This means, a cell factor<br />
determined by calibration is taken over by pressing enter during<br />
configuration. It remains unchanged until a new value is entered.<br />
2) For conductivity (μS/cm), the range selection determines the max.<br />
resolution. If the selected range is exceeded, the device automatically<br />
switches to the next higher range until the max. measurement<br />
limit is reached (9999 μS/cm).<br />
This applies to display values and current outputs. The current outputs<br />
are adjusted using a floating-point editor which allows settings<br />
over several decades. The initial range of the editor is the selected<br />
range:<br />
Selected<br />
resolution<br />
Displayed range (or floating-point editor)<br />
37
<strong>Configuration</strong><br />
<strong>Configuration</strong> Choices Default<br />
Output 1 (OUT1)<br />
Input range: selected CHANNEL<br />
Vertex X :<br />
BEGIN ≤ CORNER X ≤ END (rising)<br />
BEGIN ≥ CORNER X ≥ END (falling)<br />
Input range: selected CHANNEL<br />
Default: 12 mA<br />
Vertex Y:<br />
(0) 4 mA ≤ CORNER Y ≤ 20 mA<br />
Output 2 (OUT2)<br />
OT2:<br />
38<br />
Same as for OUT1<br />
All following settings are made as for output 1 (OUT1)
Control input (CNTR_IN)<br />
<strong>Configuration</strong><br />
Alarm (ALARM)<br />
12000<br />
pulses/liter<br />
0 ... 20000<br />
pulses/liter<br />
*) These menu items appear only if selected.<br />
**) LIMIT I-IN can be used to measure and monitor the current input (e.g. flow).<br />
For monitoring, you can enter a setpoint at which an alarm message is released:<br />
"ERR 71 LIMIT I-INPUT“ (22 mA or alarm contact).<br />
***) Hysteresis fixed at 5% of threshold value<br />
39
<strong>Configuration</strong><br />
<strong>Configuration</strong> Choices Default<br />
Relay outputs (Rel1/Rel2/Rel3)<br />
(Option)<br />
Within range; with FLOW selected:<br />
LEVEL 000.0 … 099.9 L/h<br />
0...50% full scale; with FLOW selected:<br />
Hysteresis: 00.0 … 010.0 L/h<br />
(Option)<br />
Within range (see RL1)<br />
0...50% full scale (see RL1)<br />
40<br />
Other parameters<br />
as for RL1, RL2
<strong>Configuration</strong><br />
<strong>Configuration</strong> Choices Default<br />
Switching Real-time clock outputs (CLOCK) (Rel1/Rel2)<br />
Tag number (TAG)<br />
(Input in text line,<br />
max. 32 digits)<br />
___<br />
41
<strong>Configuration</strong> (Original for Copy)<br />
Parameter<br />
S_A: Cell factor A<br />
S_A: Temperature compensation A<br />
S_B: Cell factor B<br />
S_B: Temperature compensation B<br />
MEAS: Measuring range<br />
MEAS: Temperature unit<br />
MEAS: Calculation<br />
MEAS: Factor 1 (for variable pH only, -C7-)<br />
MEAS: Factor 2 (for variable pH only, -C7-)<br />
MEAS: Parameter W (for USER SPEC only, -C8-)<br />
MEAS: Parameter A (for USER SPEC only, -C8-)<br />
MEAS: Parameter B (for USER SPEC only, -C8-)<br />
OT1: Parameter (channel)<br />
OT1: Linear / Bilinear curve<br />
OT1: Current start<br />
OT1: Current end<br />
OT1: Vertex X (bilinear curve only)<br />
OT1: Vertex Y (bilinear curve only)<br />
OT1: Filter time<br />
OT1: 22 mA error current<br />
OT1: HOLD mode<br />
OT1: HOLD-FIX current<br />
OT2: Parameter (CHANNEL)<br />
OT2: Linear / Bilinear curve<br />
OT2: Current start<br />
OT2: Current end<br />
OT2: Vertex X (bilinear curve only)<br />
OT2: Vertex Y (bilinear curve only)<br />
OT2: Filter time<br />
OT2: 22 mA error current<br />
OT2: HOLD mode<br />
OT2: HOLD-FIX current<br />
IN: Level or flow<br />
IN: (Flow meter) Adjusting pulses/liter<br />
42<br />
Setting
<strong>Configuration</strong> (Original for Copy)<br />
Parameter<br />
Setting<br />
ALA: Delay<br />
ALA: Sensocheck on/off<br />
ALA: Flow control FLOW CNTR on/off<br />
ALA: Minimum flow (hysteresis fixed at 5 %)<br />
ALA: Maximum flow (hysteresis fixed at 5 %)<br />
ALA: Monitoring of current input LIMIT I-IN on/off<br />
ALA: FUNCTION (LO LEVEL / Hi LEVEL)<br />
ALA: LEVEL (monitored threshold)<br />
ALA: HYSTERESIS<br />
RL1: Selecting process variable / parameter (CHANNEL)<br />
RL1: Switching behavior (FUNCTION)<br />
RL1: Contact type (CONTACT)<br />
RL1: Setpoint (LEVEL)<br />
RL1: HYSTERESIS<br />
RL1: Delay (DELAYTIME)<br />
RL2: Selecting process variable / parameter (CHANNEL)<br />
RL2: Switching behavior (FUNCTION)<br />
RL2: Contact type (CONTACT)<br />
RL2: Setpoint (LEVEL)<br />
RL2: HYSTERESIS<br />
RL2: Delay (DELAYTIME)<br />
RL3: Selecting process variable / parameter (CHANNEL)<br />
RL3: Switching behavior (FUNCTION)<br />
RL3: Contact type (CONTACT)<br />
RL3: Setpoint (LEVEL)<br />
RL3: HYSTERESIS<br />
RL3: Delay (DELAYTIME)<br />
CLK: Time & Date<br />
TAG: Tag number<br />
43
<strong>Configuration</strong><br />
Configuring Sensors A, B<br />
Specifying cell factor, selecting temperature compensation<br />
1<br />
2<br />
1) Press menu key.<br />
2) Select CONF using keys, press enter.<br />
3) Select SENSOR_A menu using keys,<br />
press enter.<br />
4) All items of this menu group are indicated by<br />
the “S_A:” code.<br />
Press enter to select menu, edit using arrow<br />
keys (see next page).<br />
Confirm (and proceed) using enter.<br />
5) End: Press meas key until the [meas] mode<br />
indicator is displayed.<br />
3<br />
4<br />
Entry of cell factor A<br />
Temperature compensation A<br />
Entry of cell factor B<br />
Temperature compensation B<br />
4<br />
enter<br />
5<br />
44
4<br />
Menu item Action Choices<br />
Sensor A<br />
Select SENSOR_A menu<br />
using keys,<br />
press enter.<br />
<strong>Configuration</strong><br />
Enter cell factor<br />
Sensor A<br />
Modify digit using <br />
keys,<br />
select next digit using<br />
keys.<br />
Press enter to confirm.<br />
Temp compensation<br />
selection<br />
Sensor B<br />
Select using keys.<br />
Press enter to confirm.<br />
Select SENSOR_B menu<br />
using keys,<br />
press enter.<br />
OFF<br />
LIN*<br />
NLF<br />
NaCl<br />
HCl<br />
NH3<br />
NaOH<br />
* With LIN selected:<br />
Enter temperature<br />
coefficient<br />
00.00 %/K ... +19.99 %/K<br />
Enter cell factor<br />
Sensor B...<br />
<strong>Configuration</strong> as for<br />
sensor A<br />
45
<strong>Configuration</strong><br />
Measuring Range, Calculation of Output Parameters<br />
1<br />
2<br />
1) Press menu key.<br />
2) Select CONF using keys, press enter.<br />
3) Select MEAS MODE menu using keys,<br />
press enter.<br />
4) All items of this menu group are indicated by<br />
the “MES:” code.<br />
Press enter to select menu,<br />
edit using arrow keys (see next page).<br />
Confirm (and proceed) using enter.<br />
5) End: Press meas key until the [meas] mode<br />
indicator is displayed.<br />
3<br />
4<br />
Range (resolution)<br />
Temperature unit<br />
Calculations<br />
Parameters<br />
(for -C7- variable pH or -C8-)<br />
4<br />
enter<br />
5<br />
46
4<br />
Menu item Action Choices<br />
Range (resolution)<br />
Select using keys.<br />
Press enter to confirm.<br />
<strong>Configuration</strong><br />
Temperature unit<br />
Select °C or °F using<br />
keys.<br />
Calculation<br />
Press enter to confirm.<br />
Select using keys.<br />
Press enter to confirm.<br />
Calculation type<br />
Select desired calculation<br />
type using keys:<br />
Press enter to confirm.<br />
With<br />
-C7- variable pH<br />
or<br />
-C8- USER SPEC<br />
selected, you are requested<br />
to enter parameters.<br />
-C7- Factor 1: 3.00<br />
(01.00 ... 10.00)<br />
-C7- Factor 2: 0243<br />
(0100 ... 0500)<br />
-C8- Parameter W:<br />
(xxxx E-3 1000 E-3)<br />
-C8- Parameter A:<br />
(xxx.x E-3 000.0 E-3)<br />
-C8- Parameter B:<br />
(xxx.x E-4 000.0 E-4)<br />
47
<strong>Configuration</strong><br />
Current Output 1<br />
Process variable. Current start. Current end.<br />
1 1) Press menu key.<br />
2) Select CONF using keys, press enter.<br />
3) Select OUT1 menu using keys, press<br />
enter.<br />
2<br />
4) All items of this menu group are indicated by<br />
the “OT1:” code.<br />
Press enter to select menu,<br />
edit using arrow keys (see next page).<br />
Confirm (and proceed) using enter.<br />
5) End: Press meas key until the [meas] mode<br />
indicator is displayed.<br />
3<br />
4<br />
5<br />
RANGE: 0 ... 20 mA / 4 to 20 mA<br />
CHANNEL: Channel selection<br />
(process variable)<br />
OUTPUT:<br />
LIN: linear curve<br />
biLIN: bilinear curve<br />
Current start<br />
Current end<br />
Bilinear: vertex X<br />
Bilinear: vertex Y<br />
Time averaging filter<br />
Output current during error<br />
message<br />
Output current during HOLD<br />
Output current for HOLD FIX<br />
4<br />
48
4<br />
Menu item Action Choices<br />
Process variable<br />
Select using keys:<br />
Cond: Conductivity<br />
TMP: Temperature<br />
CALC: Calculation<br />
Press enter to confirm.<br />
<strong>Configuration</strong><br />
Current start<br />
Current end<br />
Modify digit using <br />
keys,<br />
select next digit using<br />
keys.<br />
Press enter to confirm.<br />
Enter value using <br />
keys.<br />
Press enter to confirm.<br />
As selected for process<br />
variable/range<br />
If the adjusted range is<br />
exceeded, the device<br />
automatically switches<br />
to the next higher range<br />
(Autorange)<br />
As selected for process<br />
variable/range<br />
If the adjusted range is<br />
exceeded, the device<br />
automatically switches<br />
to the next higher range<br />
(Autorange)<br />
Assignment of measured values: Current start and current end<br />
Example 1: Range 0...200 µS/cm<br />
Example 2: Range 100...200 µS/cm<br />
[µS/cm]<br />
Advantage: Higher resolution in range<br />
[µS/cm] of interest<br />
200<br />
200<br />
100<br />
0<br />
4<br />
Output current<br />
20<br />
[mA]<br />
100<br />
4<br />
Output current<br />
20 [mA]<br />
49
<strong>Configuration</strong><br />
Current Output 1<br />
Output current curve<br />
1 1) Press menu key.<br />
2) Select CONF using keys, press enter.<br />
3) Select OUT1 menu using keys, press<br />
enter.<br />
2<br />
4) All items of this menu group are indicated by<br />
the “OT1:” code.<br />
Press enter to select menu,<br />
edit using arrow keys (see next page).<br />
Confirm (and proceed) using enter.<br />
5) End: Press meas key until the [meas] mode<br />
indicator is displayed.<br />
3<br />
4<br />
5<br />
4<br />
RANGE: 0 ... 20 mA / 4 to 20 mA<br />
CHANNEL: Channel selection<br />
(process variable)<br />
OUTPUT:<br />
LIN: linear curve<br />
biLIN: bilinear curve<br />
Current start<br />
Current end<br />
Bilinear: vertex X<br />
Bilinear: vertex Y<br />
Time averaging filter<br />
Output current during error<br />
message<br />
Output current during HOLD<br />
Output current for HOLD FIX<br />
50
4<br />
<strong>Configuration</strong><br />
Menu item Action Choices<br />
Output current Select using keys. LIN<br />
curve<br />
Press enter to confirm. Linear curve<br />
biLIN<br />
Bilinear curve<br />
Current start<br />
and current end<br />
Bilinear curve:<br />
Vertex X/Y<br />
Enter value using <br />
keys.<br />
Press enter to confirm.<br />
Enter value using <br />
keys.<br />
Press enter to confirm.<br />
As selected for process<br />
variable/range<br />
If the adjusted range is<br />
exceeded, the device<br />
automatically switches<br />
to the next higher range<br />
(Autorange)<br />
Entered value applies to<br />
selected vertex of bilinear<br />
curve "Corner X“ (process<br />
variable) and "Corner Y<br />
(output current) –<br />
see figure below.<br />
Vertex of bilinear curve<br />
Output current<br />
Example:<br />
Current range set to 4 ... 20 mA,<br />
Current start: 0 µS/cm<br />
Current end: 200 µS/cm<br />
Vertex:<br />
“CORNER X“: 10 µS/cm (process variable)<br />
“CORNER Y“: 12 mA (output current)<br />
Result: The output current change in the range<br />
0 ... 10 µS/cm is much greater than in the range<br />
10 ... 200 µS/cm.<br />
Process variable<br />
51
<strong>Configuration</strong><br />
Current Output 1<br />
Adjusting time interval of output filter<br />
1 1) Press menu key.<br />
2) Select CONF using keys, press enter.<br />
3) Select OUT1 menu using keys, press<br />
enter.<br />
2<br />
4) All items of this menu group are indicated by<br />
the “OT1:” code.<br />
Press enter to select menu,<br />
edit using arrow keys (see next page).<br />
Confirm (and proceed) using enter.<br />
5) End: Press meas key until the [meas] mode<br />
indicator is displayed.<br />
3<br />
4<br />
5<br />
4<br />
RANGE: 0 ... 20 mA / 4 to 20 mA<br />
CHANNEL: Channel selection<br />
(process variable)<br />
OUTPUT:<br />
LIN: linear curve<br />
biLIN: bilinear curve<br />
Current start<br />
Current end<br />
Bilinear: vertex X<br />
Bilinear: vertex Y<br />
Time averaging filter<br />
Output current during error<br />
message<br />
Output current during HOLD<br />
Output current for HOLD FIX<br />
52
4<br />
Menu item Action Choices<br />
Time averaging filter<br />
Enter value using <br />
keys.<br />
<strong>Configuration</strong><br />
Press enter to confirm.<br />
Time averaging filter<br />
To smoothen the current output, a low-pass filter with adjustable filter<br />
time constant can be switched on. When there is a jump at the input<br />
(100 %), the output level is at 63 % after the time interval has been<br />
reached. The time interval can be set from 0 to 120 sec. If the time<br />
interval is set to 0 sec, the current output directly follows the input.<br />
Please note:<br />
The filter only acts on the current output, not on the display or the<br />
limit value!<br />
During HOLD the filter is not applied. This prevents a jump at the<br />
output.<br />
Display<br />
Time interval 0...120 s<br />
Time interval 0...120 s<br />
53
<strong>Configuration</strong><br />
Current Output 1<br />
Output current during Error and HOLD<br />
1 1) Press menu key.<br />
2) Select CONF using keys, press enter.<br />
3) Select OUT1 menu using keys, press<br />
enter.<br />
2<br />
4) All items of this menu group are indicated by<br />
the “OT1:” code.<br />
Press enter to select menu,<br />
edit using arrow keys (see next page).<br />
Confirm (and proceed) using enter.<br />
5) End: Press meas key until the [meas] mode<br />
indicator is displayed.<br />
3<br />
4<br />
5<br />
4<br />
RANGE: 0 ... 20 mA / 4 to 20 mA<br />
CHANNEL: Channel selection<br />
(process variable)<br />
OUTPUT:<br />
LIN: linear curve<br />
biLIN: bilinear curve<br />
Current start<br />
Current end<br />
Bilinear: vertex X<br />
Bilinear: vertex Y<br />
Time averaging filter<br />
Output current during error<br />
message<br />
Output current during HOLD<br />
Output current for HOLD FIX<br />
54
4<br />
Menu item Action Choices<br />
Output current Select ON or OFF using<br />
during error message keys.<br />
Press enter to confirm.<br />
<strong>Configuration</strong><br />
Output current<br />
during HOLD<br />
Output current for<br />
HOLD FIX<br />
LAST: During HOLD the<br />
last measured value is<br />
maintained at the output.<br />
FIX: During HOLD a value<br />
(to be entered) is maintained<br />
at the output.<br />
Select using<br />
Press enter to confirm.<br />
Only with FIX selected:<br />
Enter current which is to<br />
flow at the output during<br />
HOLD<br />
Enter value using keys.<br />
Press enter to confirm.<br />
Output signal during HOLD:<br />
Output current<br />
[mA]<br />
Output signal for HOLD<br />
FIX setting = 21.0 mA<br />
Output signal for HOLD<br />
LAST setting<br />
21<br />
4<br />
HOLD active<br />
HOLD active<br />
55
<strong>Configuration</strong><br />
Current Output 2<br />
Output current range. Process variable.<br />
1 1) Press menu key.<br />
2) Select CONF using keys, press enter.<br />
3) Select OUT2 menu using keys, press<br />
enter.<br />
2<br />
4) All items of this menu group are indicated by<br />
the “OT2:” code.<br />
Press enter to select menu,<br />
edit using arrow keys (see next page).<br />
Confirm (and proceed) using enter.<br />
5) End: Press meas key until the [meas] mode<br />
indicator is displayed.<br />
3<br />
4<br />
5<br />
4<br />
RANGE: 0 ... 20 mA / 4 to 20 mA<br />
CHANNEL: Channel selection<br />
(process variable)<br />
OUTPUT:<br />
LIN: linear curve<br />
biLIN: bilinear curve<br />
Current start<br />
Current end<br />
Bilinear: vertex X<br />
Bilinear: vertex Y<br />
Time averaging filter<br />
Output current during error<br />
message<br />
Output current during HOLD<br />
Output current for HOLD FIX<br />
56
4<br />
Menu item Action Choices<br />
Process variable<br />
Select using keys:<br />
Cond: Conductivity<br />
TMP: Temperature<br />
Press enter to confirm.<br />
<strong>Configuration</strong><br />
.<br />
.<br />
.<br />
All the following adjustments are made as for current output 1<br />
(see there)!<br />
57
<strong>Configuration</strong><br />
CONTROL Input<br />
Flow measurement<br />
1 1) Press menu key.<br />
2) Select CONF using keys, press enter.<br />
3) Select CNTR_IN menu using keys,<br />
press enter.<br />
2<br />
4) All items of this menu group are indicated by<br />
the “IN:” code.<br />
Press enter to select menu,<br />
edit using arrow keys (see next page).<br />
Confirm (and proceed) using enter.<br />
5) End: Press meas key until the [meas] mode<br />
indicator is displayed.<br />
3<br />
4<br />
CONTROL input<br />
5<br />
58
<strong>Configuration</strong><br />
4<br />
Menu item Action Choices<br />
Select function of Select using keys. Level<br />
CONTROL input Press enter to confirm. Flow (for connecting a<br />
pulse-output flow meter)<br />
Adjust to flow meter<br />
With "Flow" selected,<br />
you must adjust the<br />
device to the flow meter<br />
used.<br />
Enter value using arrow<br />
keys.<br />
Press enter to confirm.<br />
12000 pulses/liter<br />
In the alarm menu you can configure flow monitoring. When you have<br />
set CONTROL to FLOW, you can specify 2 additional limit values for<br />
maximum and minimum flow.<br />
If the measured value lies outside this range, an alarm message and a<br />
22-mA error signal (if configured) will be generated.<br />
Display<br />
Flow measurement in measuring mode<br />
Display<br />
Flow measurement (sensor monitor)<br />
59
<strong>Configuration</strong><br />
Alarm Settings<br />
Delay. Sensocheck.<br />
1 1) Press menu key.<br />
2) Select CONF using keys, press enter.<br />
3) Select ALARM menu using keys, press<br />
enter.<br />
2<br />
4) All items of this menu group are indicated by<br />
the “ALA:” code.<br />
Press enter to select menu,<br />
edit using arrow keys (see next page).<br />
Confirm (and proceed) using enter.<br />
5) End: Press meas key until the [meas] mode<br />
indicator is displayed.<br />
3<br />
4<br />
5<br />
Error messages can be signaled by a 22 mA output current<br />
(see Error Messages and <strong>Configuration</strong> of Output 1/Output 2).<br />
The alarm contact opens.<br />
The alarm delay time delays the color change of the display backlighting<br />
to red and the 22 mA signal (if configured).<br />
60<br />
ALARM: Delay<br />
Alarm: Sensocheck<br />
Alarm: CONTROL input<br />
For flow monitoring:<br />
Max. flow alarm<br />
For flow monitoring:<br />
Min. flow alarm<br />
4
4<br />
Menu item Action Choices<br />
Delay<br />
Enter value using <br />
keys.<br />
Press enter to confirm.<br />
<strong>Configuration</strong><br />
Sensocheck<br />
CONTROL input<br />
Select Sensocheck<br />
(continuous monitoring<br />
of sensor).<br />
Select ON or OFF using<br />
keys.<br />
Press enter to confirm.<br />
The CONTROL input<br />
can generate an alarm<br />
depending on its assignment<br />
in the CONF menu:<br />
FLOW (flow measurement):<br />
allows monitoring<br />
the minimum and maximum<br />
flow (pulse counter)<br />
LEVEL (control input):<br />
Level monitoring.<br />
Current input<br />
LIMIT I-IN<br />
Monitoring a flow meter<br />
(4 ... 20 mA) for a limit<br />
value, either MIN (Lo<br />
LEVEL) or MAX (Hi LEVEL).<br />
Press enter to confirm.<br />
Threshold value<br />
Hysteresis<br />
61
<strong>Configuration</strong><br />
Relay Contacts<br />
Relay 1<br />
1 1) Press menu key.<br />
2) Select CONF using keys, press enter.<br />
3) Select RELAYS menu using keys, press<br />
enter.<br />
2<br />
4) All items of this menu group are indicated by<br />
the “RL1:” code.<br />
Press enter to select menu,<br />
edit using arrow keys (see next page).<br />
Confirm (and proceed) using enter.<br />
5) End: Press meas key until the [meas] mode<br />
indicator is displayed.<br />
3<br />
4<br />
5<br />
Select process variable<br />
RL1: CHANNEL<br />
RL1: FUNCTION<br />
RL1: CONTACT<br />
RL1: LEVEL<br />
RL1: HYSTERESIS<br />
RL1: DELAYTIME<br />
4<br />
62
Menu item Action Choices<br />
Select process<br />
Select desired process<br />
variable<br />
variable using keys.<br />
Press enter to confirm.<br />
(CHANNEL)<br />
<strong>Configuration</strong><br />
Switching behavior<br />
(FUNCTION)<br />
Contact type<br />
(CONTACT)<br />
Setpoint<br />
(LEVEL)<br />
Hysterese<br />
(HYSTERESIS)<br />
Delay<br />
(DELAYTIME)<br />
Select desired function<br />
using arrow keys.<br />
Press enter to confirm.<br />
N/O: normally open<br />
contact<br />
N/C: normally closed<br />
contact<br />
Select using keys.<br />
Press enter to confirm.<br />
Enter setpoint using <br />
keys.<br />
Press enter to confirm.<br />
Select hysteresis using<br />
keys.<br />
Press enter to confirm.<br />
The contact is activated<br />
with delay (deactivated<br />
without delay)<br />
Adjust delay using <br />
keys.<br />
Press enter to confirm.<br />
Lo LEVL / Hi LEVL<br />
Limit1 icon:<br />
Within meas. range<br />
If the adjusted range is<br />
exceeded, the device<br />
automatically switches<br />
to the next higher range<br />
(Autorange)<br />
0 ... 50 % full scale<br />
(Autorange – see above)<br />
Limit Lo<br />
Hysteresis +<br />
Setpoint<br />
Signal<br />
Limit Hi<br />
Setpoint<br />
Hysteresis -<br />
Signal<br />
Contact<br />
1<br />
0<br />
Contact<br />
1<br />
0<br />
63
<strong>Configuration</strong><br />
Relay Contacts<br />
Relay 2<br />
1 1) Press menu key.<br />
2) Select CONF using keys, press enter.<br />
3) Select RELAYS menu using keys, press<br />
enter until "RL2" is displayed.<br />
2<br />
4) All items of this menu group are indicated by<br />
the “RL2:” code.<br />
Press enter to select menu,<br />
edit using arrow keys (see next page).<br />
Confirm (and proceed) using enter.<br />
5) End: Press meas key until the [meas] mode<br />
indicator is displayed.<br />
3<br />
4<br />
5<br />
Select process variable<br />
RL2: CHANNEL<br />
RL2: FUNCTION<br />
RL2: CONTACT<br />
RL2: LEVEL<br />
RL2: HYSTERESIS<br />
RL2: DELAYTIME<br />
4<br />
64
Menu item Action Choices<br />
Select process<br />
Select desired process<br />
variable<br />
variable using keys.<br />
Press enter to confirm.<br />
(CHANNEL)<br />
<strong>Configuration</strong><br />
Switching behavior<br />
(FUNCTION)<br />
Contact type<br />
(CONTACT)<br />
Setpoint<br />
(LEVEL)<br />
Hysteresis<br />
(HYSTERESIS)<br />
Delay<br />
(DELAYTIME)<br />
Select desired function<br />
using arrow keys.<br />
Press enter to confirm.<br />
N/O: normally open<br />
contact<br />
N/C: normally closed<br />
contact<br />
Select using keys.<br />
Press enter to confirm.<br />
Enter setpoint using <br />
keys.<br />
Press enter to confirm.<br />
Select hysteresis using<br />
keys.<br />
Press enter to confirm.<br />
The contact is activated<br />
with delay (deactivated<br />
without delay)<br />
Adjust delay using <br />
keys.<br />
Press enter to confirm.<br />
Limit2 icon:<br />
Within meas. range<br />
If the adjusted range is<br />
exceeded, the device<br />
automatically switches<br />
to the next higher range<br />
(Autorange)<br />
0 ... 50 % full scale<br />
(Autorange – see above)<br />
Limit Lo<br />
Limit Hi<br />
Hysteresis +<br />
Setpoint<br />
Signal<br />
Setpoint<br />
Hysteresis -<br />
Signal<br />
Contact<br />
1<br />
0<br />
Contact<br />
1<br />
0<br />
65
<strong>Configuration</strong><br />
Relay Contacts<br />
Relay 3<br />
1 1) Press menu key.<br />
2) Select CONF using keys, press enter.<br />
3) Select RELAYS menu using keys, press<br />
enter until "RL3" is displayed.<br />
2<br />
4) All items of this menu group are indicated by<br />
the “RL3:” code.<br />
Press enter to select menu,<br />
edit using arrow keys (see next page).<br />
Confirm (and proceed) using enter.<br />
5) End: Press meas key until the [meas] mode<br />
indicator is displayed.<br />
3<br />
4<br />
5<br />
Select process variable<br />
RL3: CHANNEL<br />
RL3: FUNCTION<br />
RL3: CONTACT<br />
RL3: LEVEL<br />
RL3: HYSTERESIS<br />
RL3: DELAYTIME<br />
4<br />
66
Menu item Action Choices<br />
Select process<br />
Select desired process<br />
variable<br />
variable using keys.<br />
Press enter to confirm.<br />
(CHANNEL)<br />
<strong>Configuration</strong><br />
Switching behavior<br />
(FUNCTION)<br />
Contact type<br />
(CONTACT)<br />
Setpoint<br />
(LEVEL)<br />
This step is omitted when<br />
"CONTROL“ has been<br />
selected.<br />
Hysterese<br />
(HYSTERESIS)<br />
This step is omitted when<br />
"CONTROL“ has been<br />
selected.<br />
Delay<br />
(DELAYTIME)<br />
Select desired function<br />
using arrow keys.<br />
Press enter to confirm.<br />
N/O: normally open<br />
contact<br />
N/C: normally closed<br />
contact<br />
Select using keys.<br />
Press enter to confirm.<br />
Enter setpoint using <br />
keys.<br />
Press enter to confirm.<br />
Select hysteresis using<br />
keys.<br />
Press enter to confirm.<br />
The contact is activated<br />
with delay (deactivated<br />
without delay)<br />
Adjust delay using <br />
keys.<br />
Press enter to confirm.<br />
This step is omitted when<br />
"CONTROL“ has been<br />
selected. Otherwise:<br />
Lo LEVL / Hi LEVL<br />
Within meas. range<br />
If the adjusted range is<br />
exceeded, the device<br />
automatically switches<br />
to the next higher range<br />
(Autorange)<br />
0 ... 50 % full scale<br />
(Autorange – see above)<br />
67
<strong>Configuration</strong><br />
Time and Date<br />
Tag Number<br />
1<br />
2<br />
enter<br />
3<br />
1) Press menu key.<br />
2) Select CONF using keys,<br />
press enter.<br />
3) Select CLOCK or TAG using keys,<br />
press enter.<br />
4) All items of this menu group are indicated by<br />
the “CLK:” or “TAG” code.<br />
Press enter to select menu,<br />
edit using arrow keys (see next page).<br />
Confirm (and proceed) by pressing enter.<br />
5) End: Press meas key until the [meas] mode<br />
indicator is displayed.<br />
enter<br />
4<br />
4<br />
5<br />
meas<br />
Time format<br />
Time<br />
Day and month<br />
Year<br />
enter<br />
Tag number<br />
68
<strong>Configuration</strong><br />
Time and Date<br />
In measuring mode the time is shown in the lower display.<br />
In addition, the logbook entries (cf Diagnostics) are provided with a<br />
time stamp.<br />
Please note:<br />
• After prolonged power outage (> 5 days) the time display is<br />
replaced by dashes and cannot be used for processing.<br />
Enter the correct time.<br />
• There is no automatic switchover from winter to summer time!<br />
Be sure to manually adjust the time!<br />
Tag Number (“ TAG“)<br />
You can enter a designation for the point of measurement (tag<br />
number) in the lower display line. Up to 32 digits are possible.<br />
Pressing meas (repeatedly) in the measuring mode indicates the tag<br />
number.<br />
Being part of the device configuration, the “TAG“ can be read out<br />
via IrDA. A standardized tag number helps, for example, to correctly<br />
re-install a device after repair.<br />
4<br />
Menu item Action Choices<br />
Tag number<br />
Select character using<br />
keys,<br />
select next digit using<br />
keys.<br />
Press enter to confirm.<br />
A...Z, 0...9, – + < > ? / @<br />
The first 10 characters are<br />
seen in the display without<br />
scrolling.<br />
69
Calibration<br />
Please note:<br />
• All calibration procedures must be performed by trained personnel.<br />
Incorrectly set parameters may go unnoticed, but change the<br />
measuring properties.<br />
Each sensor is calibrated separately by entering the cell factor.<br />
70
Calibration by Input of Cell Factor<br />
You can directly enter the value for the cell factor of a sensor. This<br />
value must be known, e.g. determined beforehand in the laboratory.<br />
The selected process variable and the temperature are displayed.<br />
Display Action Remark<br />
Select Calibration.<br />
Press enter to proceed.<br />
Select<br />
CAL_CELL_A<br />
(or<br />
CAL_CELL_B)<br />
calibration method.<br />
Press enter to proceed.<br />
The calibration procedure<br />
is identical<br />
for sensor A and<br />
sensor B.<br />
The selection (A or<br />
B) is indicated in the<br />
upper display line.<br />
Ready for calibration.<br />
Hourglass blinks.<br />
Display (3 sec)<br />
Now the device is in<br />
HOLD mode.<br />
Enter cell factor.<br />
Press enter to proceed.<br />
The selected process<br />
variable and the temperature<br />
are displayed.<br />
The device shows the<br />
calculated cell factor (at<br />
25 °C).<br />
Sensoface is active.<br />
Use the arrow keys to<br />
select:<br />
• MEAS (end)<br />
• REPEAT<br />
Press enter to proceed.<br />
End:<br />
HOLD is deactivated<br />
after a short time.<br />
71
Measurement<br />
Display<br />
Remark<br />
From the configuration or calibration menus,<br />
you can switch the device to measuring<br />
mode by pressing the meas key (> 2 sec).<br />
In the measuring mode the main display<br />
shows the configured process variable, the<br />
secondary display shows the time and the<br />
second configured process variable.<br />
The [meas] mode indicator lights.<br />
Please note:<br />
• After prolonged power outage (> 5 days)<br />
the time display is replaced by dashes and<br />
cannot be used for processing. In that case,<br />
enter the correct time.<br />
By pressing the meas key you can step through the displays listed<br />
below. When no key has been pressed for 60 sec, the device returns<br />
to the display which has been selected as MAIN DISPLAY.<br />
Depending on the configuration, one of the following displays can<br />
be set as standard display for the measuring mode (MAIN DISPLAY,<br />
see “Color-Coded User Interface“ on page 25):<br />
1) Display of tag number (“TAG“)<br />
with up to 32 digits<br />
2) Conductivity and temperature of channel A<br />
3) Conductivity and temperature of channel B<br />
4) Display of time and date<br />
5) Measured values of channel A, channel B and flow<br />
6) Output currents<br />
72
Diagnostics (DIAG)<br />
Diagnostics<br />
In the Diagnostics mode you can access the following menus without<br />
interrupting the measurement:<br />
Viewing the calibration data<br />
Starting a device self-test<br />
Viewing the logbook entries<br />
Displaying currently measured values<br />
Displaying device type, software version, serial number<br />
Access to diagnostics can be protected with a passcode<br />
(SERVICE menu).<br />
Please note:<br />
HOLD is not active during Diagnostics mode!<br />
Action Key Remark<br />
Activate<br />
Pressing the menu key (down arrow)<br />
diagnostics<br />
opens the selection menu.<br />
(Display color changes to turquoise.)<br />
Select DIAG using keys,<br />
press enter to confirm.<br />
Select<br />
diagnostics<br />
option<br />
Use keys to select from:<br />
Caldata Selftest Logbook<br />
Monitor VERSION<br />
See next pages for further<br />
proceeding.<br />
Exit meas Exit by pressing meas.<br />
73
Diagnostics<br />
Menu item<br />
Remark<br />
Display of calibration data<br />
Select CALDATA using, press enter to confirm.<br />
Use thekeys to select the desired parameter from<br />
the bottom line of the display (LAST CAL CELL_A<br />
CELL_B).<br />
The selected parameter is shown in the main display.<br />
Press meas to return to measurement.<br />
74
Display<br />
Diagnostics<br />
Menu item<br />
Device self-test<br />
(To abort, you can press meas.)<br />
1) Display test: Display of all segments with<br />
changing background colors white/green/red.<br />
Proceed by pressing enter.<br />
2) RAM test: Hourglass blinks,<br />
then display of --PASS-- or --FAIL--<br />
Proceed by pressing enter.<br />
3) EEPROM test: Hourglass blinks,<br />
then display of --PASS-- or --FAIL--<br />
Proceed by pressing enter.<br />
4) FLASH test: Hourglass blinks,<br />
then display of --PASS-- or --FAIL--<br />
Proceed by pressing enter.<br />
5) Module test: Hourglass blinks,<br />
then display of --PASS-- or --FAIL--<br />
Press enter or meas<br />
to return to measuring mode.<br />
75
Diagnostics<br />
Menu item<br />
Remark<br />
Display of logbook entries.<br />
Select LOGBOOK using, press enter to confirm.<br />
Using the keys, you can scroll backwards and<br />
forwards through the logbook (entries -00-...-99-),<br />
-00- being the last entry.<br />
If the display is set to date/time, you can search for a<br />
particular date using the keys.<br />
Pressto view the corresponding message text.<br />
If the display is set to the message text, you can<br />
search for a particular message using the keys.<br />
Pressto display the date and time.<br />
Press meas to return to measurement.<br />
Display example:<br />
Extended logbook / Audit Trail (via TAN)<br />
With the keys, you can scroll backwards and<br />
forwards through the extended logbook (entries<br />
-000-...-199-), -000- being the last entry.<br />
Display: CFR<br />
Audit Trail also records function activations (CAL<br />
CONFIG SERVICE), some Sensoface messages and<br />
opening of the enclosure.<br />
Display of currently measured values<br />
(sensor monitor):<br />
Select MONITOR using, press enter to confirm.<br />
Use the keys to select the desired parameter<br />
from the bottom line of the display: R_COND_A,<br />
R_COND_B, G_COND_A, G_COND_B<br />
(all these apply to cell factor = 1),<br />
RTD_A, RTD_B, TEMP_A, TEMP_B, I-INPUT (Option).<br />
The selected parameter is shown in the main display.<br />
Press meas to return to measurement.<br />
76
Display<br />
Diagnostics<br />
Remark<br />
Version<br />
Here, you find the data you require for requesting a<br />
device-specific option.<br />
Use the keys to switch between software and<br />
hardware version. Press enter to proceed to next<br />
device component.<br />
Display of device type and serial number of device.<br />
Use the keys to switch between software and<br />
hardware version. Press enter to proceed to next<br />
device component.<br />
Display of software/hardware version and<br />
serial number for device components.<br />
(here: measuring module)<br />
Use the keys to switch between software and<br />
hardware version. Press enter to proceed to next<br />
device component.<br />
Display of software version of HART interface.<br />
Press enter to proceed to next device component.<br />
77
Service (SERVICE) A<br />
Service<br />
In the Service mode you can access the following menus:<br />
MONITOR displaying currently measured values<br />
OUT1 testing current output 1<br />
OUT2 testing current output 2<br />
RELAY testing the function of the 4 relays<br />
IRDA<br />
activating and communicating via the IrDA interface<br />
CODES assigning and editing passcodes<br />
DEFAULT resetting the device to factory settings<br />
OPTION enabling options via TAN.<br />
Please note:<br />
HOLD is active during Service mode!<br />
Action Key/Display Remark<br />
Activate<br />
Pressing the menu key (down arrow)<br />
Service<br />
opens the selection menu.<br />
Select SERVICE using keys,<br />
press enter to confirm.<br />
Passcode<br />
Enter passcode “5555“ for service<br />
mode using the keys.<br />
Press enter to confirm.<br />
Display<br />
In service mode the following icons<br />
are displayed:<br />
• HOLD triangle<br />
• Service (wrench)<br />
Exit meas Exit by pressing meas.<br />
78
Menu item<br />
Remark<br />
Service<br />
Display of currently measured values (sensor<br />
monitor) with HOLD mode activated:<br />
Select MONITOR using, press enter to confirm.<br />
Select variable in the bottom text line using.<br />
Display example:<br />
REL1<br />
REL2<br />
REL3<br />
ALARM<br />
The selected parameter is shown in the main display.<br />
As the device is in HOLD mode, you can perform<br />
validations using simulators without influencing the<br />
signal outputs.<br />
Return to Service menu: Hold meas depressed for<br />
longer than 2 sec.<br />
Return to measurement: Press meas once more.<br />
Specify current at outputs 1 and 2:<br />
Select OUT1 or OUT2 using thekeys, press enter<br />
to confirm.<br />
Enter a valid current value for the respective output<br />
using keys.<br />
Press enter to confirm.<br />
For checking purposes, the actual output current is<br />
shown in the bottom right corner of the display.<br />
End by pressing enter or meas.<br />
Relay test (manual test of contacts):<br />
Select RELAIS using, press enter to confirm.<br />
Now the status of the 4 relays is “frozen“. The 4 digits<br />
of the main display represent the respective states<br />
(from left to right: REL1, REL2, REL3, ALARM).<br />
The digit for the selected relay blinks.<br />
Select one of the 4 relays using the keys,<br />
close (1) or open (0) using the keys.<br />
Exit by pressing enter. The relays will be re-set<br />
corresponding to the measured value.<br />
Press meas to return to measurement.<br />
79
Service<br />
Menu item<br />
Remark<br />
Assigning passcodes:<br />
In the “SERVICE - CODES“ menu you can assign passcodes<br />
to DIAG, HOLD, CAL, CONF, and SERVICE modes<br />
(Service preset to 5555).<br />
When you have lost the Service passcode, you have<br />
to request an “Ambulance TAN“ from the manufacturer<br />
specifying the serial number of your device.<br />
To enter the “Ambulance TAN“, call the Service function<br />
and enter passcode 7321. After correct input of<br />
the ambulance TAN the device signals “PASS“ for 4 sec<br />
and resets the Service passcode to 5555.<br />
Reset to factory settings:<br />
In the “SERVICE - DEFAULT“ menu you can reset the<br />
device to factory settings.<br />
Caution!<br />
After a reset to factory setting the device must<br />
be reconfigured completely, including the sensor<br />
parameters!<br />
Option request:<br />
Communicate the serial number and hardware/<br />
software version of your device to the manufacturer.<br />
These data can be viewed in the Diagnostics/Version<br />
menu.<br />
The “transaction number“ (TAN) you will then receive<br />
is only valid for the device with the corresponding<br />
serial number.<br />
Release of options:<br />
Options come with a “transaction number“ (TAN).<br />
This TAN must be entered and confirmed using enter<br />
to release the option.<br />
80
Menu item<br />
Remark<br />
IrDA communication:<br />
Select IRDA using,<br />
press enter to confirm.<br />
Service<br />
When IrDA communication is active, the device<br />
remains in the HOLD mode for reasons of safety.<br />
Further operation is performed via IrDA.<br />
Exit communication by pressing meas.<br />
Exception: Firmware update<br />
(must not be interrupted!)<br />
81
Operating States<br />
Betriebszustände<br />
Operating status<br />
OUT 1<br />
OUT 2<br />
REL1/2/3<br />
(Limit)<br />
REL1/2/3<br />
(Control)<br />
ALARM<br />
contact<br />
Time out<br />
Measuring -<br />
Diag<br />
CAL_CELL_A<br />
Cell factor<br />
CAL_CELL_B<br />
Cell factor<br />
HOLD input<br />
60 s<br />
No<br />
No<br />
No<br />
CONF 20<br />
min<br />
SERVICE<br />
MONITOR<br />
20<br />
min<br />
SERVICE OUT 1 20<br />
min<br />
SERVICE OUT 2 20<br />
min<br />
SERVICE<br />
RELAIS<br />
SERVICE<br />
IRDA<br />
20<br />
min<br />
22 mA 20<br />
min<br />
Explanation:<br />
as configured (Last/Fix)<br />
active<br />
manual<br />
82
Order Code Stratos Pro A 4...<br />
Product Line and Accessories<br />
Channel 1 Channel 2 TAN<br />
Example A 4 0 1 N - PH / 0<br />
4-wire / 20...254 V AC/DC A 4 B,C,E<br />
Communication<br />
Without (HART retrofittable via TAN) 0 A<br />
Version number<br />
Version 1<br />
Approvals<br />
General Safety<br />
N<br />
ATEX / IECEX / FM / CSA Zone 2 / Cl 1 Div 2 B<br />
Meas. channel 1 / Meas. channel 2<br />
Memosens pH (ORP) Digital MSPH 0<br />
Memosens pH (ORP) / pH (ORP) Digital MSPH MSPH<br />
Memosens pH (ORP) / Oxy Digital MSPH MSOXY<br />
Memosens COND Digital MSCOND 0<br />
Memosens COND / COND Digital MSCOND MSCOND<br />
Memosens Oxy Digital MSOxy 0<br />
Dual COND (2x2-electrode, analog) Module CC 0<br />
pH / ORP value (ISM digital: TAN) Module PH 0 F<br />
Cond, 2-/4-electrode Module COND 0<br />
Conductivity, electrodeless Module CONDI 0<br />
Oxygen (ISM digital/Traces: TAN) Module OXY 0 D, F<br />
TAN options<br />
HART SW-A001 (A)<br />
Logbook SW-A002 (B)<br />
Extended logbook (Audit Trail) SW-A003 (C)<br />
Trace oxygen measurement SW-A004 (D)<br />
Current input + 2 digital inputs SW-A005 (E)<br />
ISM digital SW-A006 (F)<br />
Mounting accessories<br />
Pipe-mount kit ZU 0274<br />
Protective hood ZU 0737<br />
Panel-mount kit ZU 0738<br />
83
Specifications<br />
COND inputs A/B<br />
2 inputs for 2-electrode sensors<br />
Measuring range 2-EL sensors 0 … 30,000 µS · c<br />
Display ranges Conductivity 0.000 ... 9.999 µS/cm<br />
00.00 ... 99.99 µS/cm<br />
000.0 ... 999.9 µS/cm<br />
0000 ... 9.999 µS/cm<br />
Resistivity<br />
Response (T90)<br />
00.00 … 99.99 MΩ · cm<br />
Approx. 1 s<br />
Measurement error 1,2,3)<br />
< 1 % meas. val. + 0.4 µS · c<br />
Temp compensation *) (OFF) Without<br />
(reference temp 25°C) (LIN) Linear characteristic 00.00 ... 19.99 %/K<br />
(NLF) Natural waters to EN 27888<br />
(NACL)<br />
Ultrapure water with NaCl traces (0 ... 120 °C)<br />
(HCL)<br />
Ultrapure water with HCl traces (0 ... 120 °C)<br />
(NH3)<br />
Ultrapure water with NH 3 traces (0... 120 °C)<br />
(NaOH)<br />
Ultrapure water with NaOH traces (0 ... 120 °C)<br />
Calculations (CALC) -C1- Difference A – B [µS/cm]<br />
-C2- Ratio A / B 00.00 ... 19.99<br />
-C3- Passage B / A * 100 000.0 ... 199.9 %<br />
-C4- Rejection (A – B ) / A * 100 -199.9 ... 199.9 %<br />
-C5- Deviation (B – A ) / A * 100 -199.9 ... 199.9 %<br />
-C6- pH value acc. to VBG 450 [pH]<br />
-C7- pH value variable, specifiable factors [pH]<br />
-C8- USER SPEC variable, specifiable<br />
parameters<br />
Sensor standardization<br />
channel A / B<br />
Input of cell factor with simultaneous display of conductivity and<br />
temperature<br />
Permissible cell factor 0.0050 ... 1.9999 cm –1<br />
Sensocheck<br />
Delay<br />
Polarization detection and monitoring of cable capacitance<br />
Approx. 30 s<br />
84
Specifications<br />
Sensoface<br />
Sensor monitor<br />
Provides information on the sensor condition<br />
Sensocheck, flow monitoring<br />
Direct display of measured values from sensor for validation<br />
resistance / conductance / temperature<br />
Temperature input A/B *) Pt1000, 2-wire connection<br />
Measuring range –50 ... +200 °C / –58 ... +392 °F<br />
Resolution 0.1 °C / 0.1 °F<br />
Measurement error 1,2,3)<br />
0.5 K (1 K > 100 °C)<br />
I input (TAN)<br />
Characteristic<br />
Measurement error 1.3)<br />
Current input 0/4 ... 20 mA / 50 Ω for flow monitoring<br />
Linear<br />
< 1% current value + 0.1 mA<br />
HOLD input<br />
Function<br />
Galvanically separated (OPTO coupler)<br />
Switches device to HOLD mode<br />
Switching voltage 0 ... 2 V (AC/DC) HOLD inactive<br />
CONTROL input<br />
LEVEL function<br />
FLOW function<br />
10 ... 30 V (AC/DC) HOLD active<br />
Galvanically separated (OPTO coupler),<br />
either for LEVEL or FLOW<br />
Relay input for external monitoring equipment<br />
Pulse input for flow measurement 0 ... 100 pulses/s<br />
Switching voltage 0 ... 2 V (AC/DC) Inactive<br />
Display<br />
10 ... 30 V (AC/DC) Active<br />
Message via 22mA signal and alarm contact<br />
00.0 … 99.9 l/h<br />
Output 1 (0) 4 ... 20 mA, max. 10 V, floating, galv. connected to output 2<br />
HART communication (see further below for specifications)<br />
Process variable *<br />
Characteristic<br />
Overrange *<br />
Output filter *<br />
Measurement error 1)<br />
Start/end of scale *<br />
Bilinear: Vertex X/Y *<br />
Conductivity A/B, resistivity A/B, temperature A/B, or CALC<br />
linear, bilinear<br />
22 mA in the case of error messages<br />
PT 1 filter, time constant 0 ... 120 s<br />
< 0.25 % current value + 0.025 mA<br />
Configurable within selected range<br />
Configurable within selected range<br />
85
Specifications<br />
Minimum span Conductivity 1 % of selected range<br />
Temperature<br />
pH value<br />
10 K<br />
Ratio 0.1<br />
Passage, rejection,<br />
deviation<br />
0.1 pH<br />
Output 2 (Option) (0) 4 ... 20 mA, max. 10 V, floating, galv. connected to output 1<br />
Process variable *<br />
Characteristic<br />
Overrange *<br />
Output filter *<br />
Measurement error 1)<br />
Start/end of scale *<br />
Bilinear: Vertex X/Y *<br />
1 %<br />
Conductivity A/B, resistivity A/B, temperature A/B, or CALC<br />
linear, bilinear<br />
22 mA in the case of error messages<br />
PT 1 filter, time constant 0 ... 120 s<br />
< 0.25 % current value + 0.025 mA<br />
Configurable within selected range<br />
Configurable within selected range<br />
Minimum span Conductivity 1 % of selected range<br />
Temperature<br />
pH value<br />
10 K<br />
Ratio 0.1<br />
Passage, rejection,<br />
deviation<br />
0.1 pH<br />
1 %<br />
Alarm contact<br />
Contact ratings<br />
Contact response<br />
Relay contact, floating<br />
AC < 250 V / < 3 A / < 750 VA<br />
DC < 30 V / < 3 A / < 90 W<br />
N/C (fail-safe type)<br />
Limit values<br />
REL1 / REL 2 / REL 3<br />
Contact ratings<br />
Contact response<br />
Response delay<br />
Setpoints<br />
Hysteresis<br />
Relay contacts, floating,<br />
REL1 and REL2 inter-connected<br />
AC < 250 V / < 3 A / < 750 VA<br />
DC < 30 V / < 3 A / < 90 W<br />
N/C or N/O<br />
0000 ... 9999 s<br />
As desired within range<br />
User-defined<br />
Real-time clock<br />
Power reserve<br />
Different time and date formats selectable<br />
> 5 days<br />
86
Specifications<br />
Display<br />
Main display<br />
Secondary display<br />
Text line<br />
Sensoface<br />
Mode Indicators<br />
Alarm indication<br />
Keypad<br />
LC display, 7-segment with icons<br />
Character height approx. 22 mm, unit symbols approx. 14 mm<br />
Character height approx. 10 mm<br />
14 characters, 14 segments<br />
3 status indicators (friendly, neutral, sad face)<br />
meas, cal, conf, diag<br />
Further icons for configuration and messages<br />
Display blinks, red backlighting<br />
Keys: meas, menu, info, 4 cursor keys, enter<br />
HART communication HART version 6<br />
Digital communication by FSK modulation of output current 1<br />
Device identification, measured values, status and messages,<br />
parameter setting, calibration, records<br />
FDA 21 CFR Part 11<br />
Access control by editable passcodes<br />
Logbook entry and flag via HART in the case of configuration changes<br />
Message and logbook entry when enclosure is opened<br />
Diagnostics functions<br />
Calibration data<br />
Device self-test<br />
Logbook<br />
Extended logbook (TAN)<br />
Service functions<br />
Sensor monitor<br />
Current source<br />
IrDA interface<br />
Data retention<br />
Calibration date, cell factor<br />
Display test, automatic memory test (RAM, FLASH, EEPROM)<br />
100 events with date and time<br />
Audit Trail: 200 events with date and time<br />
Display of direct, uncorrected sensor signals<br />
Current specifiable for output 1 and 2 (00.00 ... 22.00 mA)<br />
Infrared interface for firmware update<br />
Parameters, calibration data, logbook > 10 years (EEPROM)<br />
EMC<br />
EN 61326-1 (General Requirements)<br />
Emitted interference<br />
Class B (residential area)<br />
Immunity to interference Industry EN 61326-2-3<br />
87
Specifications<br />
Power supply<br />
24 (-15%) ... 230 (+10 %) V AC / DC<br />
< 12 VA, < 4 W AC: 45 ... 65 Hz<br />
Overvoltage category II, protection class II<br />
Nominal operating conditions<br />
Ambient temperature –20 ... +55 °C<br />
Transport/Storage temperature –30 ... +70 °C<br />
Relative humidity<br />
10 ... 95% not condensing<br />
Power supply<br />
24 (-15%) ... 230 (+10 %) V AC/DC (DC ≤ 80 V), AC: 45 ... 65 Hz<br />
Enclosure<br />
Molded enclosure made of glass-reinforced PBT, PC<br />
Mounting<br />
Wall, pipe/post, or panel mounting<br />
Color Gray, RAL 7001<br />
Ingress protection<br />
IP 67, NEMA 4X<br />
Flammability UL 94 V-0<br />
Dimensions<br />
148 mm x 148 mm<br />
Control panel cutout 138 mm x 138 mm to DIN 43 700<br />
Weight<br />
Approx. 1200 g<br />
Cable glands<br />
3 knockouts for M20 x 1.5 cable glands<br />
2 knockouts for NPT ½” or rigid metallic conduit<br />
Connections Terminals, conductor cross-section max. 2.5 mm 2<br />
*) User-defined 1) Acc. to EN 60746, at nominal operating conditions<br />
2) ± 1 count<br />
3) Plus sensor error<br />
88
Alarm condition:<br />
• The display backlighting turns red<br />
• The alarm icon is displayed<br />
• The complete measured-value display blinks<br />
• “ERR xxx“ is displayed in the lower menu line<br />
Press the [info] key to view a short error text:<br />
• The error text appears in the lower menu line<br />
• The main display reads “InFo“.<br />
Error Handling<br />
Parameter errors:<br />
<strong>Configuration</strong> data such as current range, limit values, etc are checked<br />
during the input.<br />
If they are out of range,<br />
• “ERR xxx“ is displayed for 3 sec,<br />
• the display backlighting flashes red,<br />
• the respective maximum or minimum value is shown,<br />
• input must be repeated.<br />
If a faulty parameter arrives through the interface (IrDA, HART),<br />
• an error message will be displayed: “ERR 100...199“<br />
• the faulty parameter can be localized by pressing the [info] key<br />
Calibration errors:<br />
If errors occur during calibration,<br />
• an error message will be displayed<br />
Sensoface:<br />
If the Sensoface becomes sad,<br />
• the display backlighting will turn purple<br />
• the cause can be seen by pressing the info key<br />
• the calibration data can be seen in the Diagnostics menu<br />
89
Error Messages<br />
Error<br />
Info text<br />
(is displayed in case of fault<br />
when the Info key is pressed)<br />
Problem<br />
Possible causes<br />
Error in factory settings<br />
EEPROM or RAM defective<br />
This error message only occurs<br />
in the case of a total defect. The<br />
device must be repaired and<br />
recalibrated at the factory.<br />
Error in configuration or<br />
calibration data<br />
Memory error in device program<br />
<strong>Configuration</strong> or calibration data<br />
defective; completely reconfigure<br />
and recalibrate the device.<br />
Supply voltage too low<br />
or no module installed<br />
Wrong module<br />
Please have the module replaced<br />
at the factory.<br />
System error<br />
Restart required.<br />
If error still persists, send in the<br />
device for repair.<br />
Span Out1 configuration error<br />
Span Out2 configuration error<br />
I-Input configuration error<br />
<strong>Configuration</strong> error<br />
OUT1 bilinear,<br />
wrong characteristic<br />
OUT2 bilinear,<br />
wrong characteristic<br />
90
Error<br />
ERR 10<br />
(channel A)<br />
ERR 40<br />
(channel B)<br />
ERR 11<br />
(channel A)<br />
ERR 41<br />
(channel B)<br />
ERR 13<br />
(channel A)<br />
ERR 43<br />
(channel B)<br />
ERR 15<br />
(channel A)<br />
ERR 45<br />
(channel B)<br />
Info text<br />
(is displayed in case of<br />
fault when the Info key is<br />
pressed)<br />
Error Messages<br />
Problem<br />
Possible causes<br />
Conductance value<br />
out of range: > 250 mS<br />
Display range violation<br />
Cond > 9999 µS/cm<br />
< 0.1 kohm cm<br />
Temperature range<br />
violation<br />
Sensocheck<br />
Check cable<br />
Load error<br />
Output current 1<br />
< 3.8 mA<br />
Output current 1<br />
> 20.5 mA<br />
Output current 2<br />
< 3.8 mA<br />
Output current 2<br />
> 20.5 mA<br />
Current input limit value<br />
Flow too low<br />
Flow too high<br />
91
Sensoface<br />
(Sensocheck must have been activated during configuration.)<br />
The smiley in the display (Sensoface) alerts to sensor problems<br />
(defective sensor, defective cable, maintenance required).<br />
The permisible calibration ranges and the conditions for a friendly,<br />
neutral, or sad Sensoface are summarized in the following table.<br />
Additional icons refer to the error cause.<br />
Sensocheck<br />
Continuously monitors the sensor polarization and the sensor<br />
cable capacitance. Critical values make the Sensoface “sad” and the<br />
corresponding icon blinks:<br />
The Sensocheck message is also output as error message Err 15.<br />
The alarm contact is active, the display backlighting turns red, output<br />
current 1 is set to 22 mA (when configured correspondingly).<br />
Sensocheck can be switched off during configuration (then Sensoface<br />
is also disabled).<br />
Exception:<br />
After a calibration a smiley is always displayed for confirmation.<br />
Please note:<br />
The worsening of a Sensoface criterion leads to the devaluation of the<br />
Sensoface indicator (Smiley becomes “sad”). An improvement of the<br />
Sensoface indicator can only take place after calibration or removal of<br />
the sensor defect.<br />
92
Sensoface<br />
Display Problem Status<br />
Sensor defect<br />
Temperature<br />
Wrong or defective sensor, significant<br />
polarization of sensor<br />
or excessive cable capacitance<br />
(see also error message Err 15).<br />
Temperature outside<br />
measuring ranges<br />
Cell factor<br />
channel A, B<br />
Cell factor < 0.005 cm -1<br />
or<br />
cell factor > 1.9999 cm -1<br />
93
FDA 21 CFR Part 11<br />
Conformity with FDA 21 CFR Part 11<br />
In their directive “Title 21 Code of Federal Regulations, 21 CFR Part<br />
11, Electronic Records; Electronic Signatures“ the American health<br />
agency FDA (Food and Drug Administration) regulates the production<br />
and processing of electronic documents for pharmaceutical development<br />
and production. This results in requirements for measuring<br />
devices used for corresponding applications. The following features<br />
ensure that the measuring devices of this Series meet the demands of<br />
FDA 21 CFR Part 11:<br />
Electronic Signature – Passcodes<br />
Access to the device functions is regulated and limited by individually<br />
adjustable codes – “Passcodes“ (see SERVICE). This prevents unauthorized<br />
modification of device settings or manipulation of the measurement<br />
results. Appropriate use of these passcodes makes them suitable<br />
as electronic signature.<br />
Audit Trail<br />
Every (manual) change of device settings can be automatically documented.<br />
Each change is tagged with a “<strong>Configuration</strong> Change Flag“,<br />
which can be interrogated and documented using HART communication.<br />
Altered device settings or parameters can also be retrieved and<br />
documented using HART communication.<br />
Extended logbook<br />
Audit Trail also records function activations (CAL, CONFIG, SERVICE),<br />
some Sensoface messages (cal timer, wear) and opening of the<br />
enclosure.<br />
94
A<br />
Access codes 94, 104<br />
Accessories 83<br />
Alarm 29<br />
Alarm and HOLD messages 30<br />
Alarm settings 60<br />
Ambulance TAN 80<br />
Assembly 10<br />
Audit Trail 94<br />
Autorange 49<br />
B<br />
Backlighting 21<br />
Bilinear curve 51<br />
C<br />
Calculation formulas 33<br />
Calculation of output parameters 46<br />
Calibration 26<br />
Calibration by input of cell factor 71<br />
Calibration errors 89<br />
Calibration data 74<br />
Calibration errors 89<br />
CD-ROM 3<br />
Channel selection and display assignment 32<br />
<strong>Configuration</strong> 26<br />
Alarm 60<br />
CONTROL input 58<br />
Current output 1 48<br />
Current output 2 56<br />
Individual configuration data 42<br />
Measuring range 46<br />
Overview 31<br />
Relay contacts 62<br />
Sensor 44<br />
Tag number 68<br />
Time and date 68<br />
Connection length for sensors 32<br />
Contact type 63<br />
Index<br />
95
Index<br />
CONTROL input 30<br />
<strong>Configuration</strong> 58<br />
Current input 30<br />
Current start/end 49<br />
D<br />
Date 69<br />
Display 72<br />
Device self-test 75<br />
Device type, display 77<br />
Diagnostics 26<br />
Calibration data 74<br />
Device self-test 75<br />
Logbook 76<br />
Sensor monitor 76<br />
Version 77<br />
Dimensions 11<br />
Display 21<br />
Display test 75<br />
Display backlighting 21<br />
Disposal 2<br />
Documentation 3<br />
E<br />
EEPROM test 75<br />
Electronic Signature 94<br />
Enclosure 11<br />
Enclosure components 10<br />
Entering values 23<br />
Error handling 89<br />
Error messages 90<br />
Extended logbook 94<br />
F<br />
FDA 21 CFR Part 11 94<br />
FLASH test 75<br />
Floating-point editor 37<br />
FLOW 59<br />
Flow measurement 58<br />
96
H<br />
Hi LEVL 63<br />
HOLD 26, 28<br />
Exit 28<br />
External activation of HOLD 29<br />
Manual activation of HOLD 29<br />
Output signal during HOLD 28, 55<br />
Output signal response 28<br />
Hysteresis 63, 65<br />
I<br />
Installation 14<br />
Intended use 7<br />
IrDA communication 81<br />
K<br />
Keypad 20<br />
L<br />
Level 59<br />
LIMIT I-IN 30<br />
Limit values 62, 64, 66<br />
Logbook 76<br />
Lo LEVL 63<br />
M<br />
Measurement 22, 72<br />
Measurement setup 32<br />
Measuring range 46<br />
Message via CONTROL input 30<br />
Message via current input 30<br />
Module test 75<br />
Mounting plan 11<br />
O<br />
Operating modes 26<br />
Operating mode, selection 23<br />
Operating states 82<br />
Option request: Conditions 77<br />
Index<br />
97
Index<br />
Options 80, 83<br />
TAN 80<br />
Order code 83<br />
Output current curve 50<br />
Output current, fixed value 79<br />
Output filter 52<br />
Output signal during HOLD 28, 55<br />
Overview 9<br />
P<br />
Package contents 3, 10<br />
Panel mounting 13<br />
Parameter error 89<br />
Passcodes 94, 104<br />
Assigning a passcode 80<br />
pH value calculation 34<br />
Pipe mounting 12<br />
Point of measurement, arrangement 32<br />
Point of measurement (TAG) 69<br />
Power supply 15<br />
Product line 83<br />
Protective hood 12<br />
R<br />
RAM test 75<br />
Rating plates 14<br />
Registered trademarks 103<br />
Relay 1 62<br />
Relay 2 64<br />
Relay 3 66<br />
Relay test 79<br />
Release of options 80<br />
Reset to factory settings 80<br />
Return of products under warranty 2<br />
S<br />
Safety information 7, 8<br />
Safety instructions 3<br />
Selection menu 23<br />
98
Sensocheck 60, 91, 92<br />
<strong>Configuration</strong> 61<br />
Sensoface 89, 92<br />
Sensor connection 16<br />
Sensor monitor 76, 79<br />
Serial number, display 77<br />
Service 26, 78<br />
Factory setting 80<br />
IrDA communication 81<br />
Passcodes 80<br />
Relay test 79<br />
Releasing options 80<br />
Sensor monitor 79<br />
Specifying current outputs 79<br />
Service passcode lost 80<br />
Setpoint 63<br />
Signal colors 21<br />
Signal lines 15<br />
Software version, display 77<br />
Specifications 84<br />
Start-up 8<br />
Switching behavior 63<br />
T<br />
TAG 69<br />
TAN options 80, 83<br />
Terminal assignments 14<br />
Terminals 8, 14<br />
Time 69<br />
Display 72<br />
Time averaging filter 53<br />
Trademarks 103<br />
U<br />
User interface 20<br />
W<br />
Warranty 2<br />
Wiring 15<br />
Wiring examples 17<br />
Index<br />
99
Index<br />
100
101
102
Trademarks<br />
The following names are registered trademarks. For practical reasons<br />
they are shown without trademark symbol in this manual.<br />
Stratos®<br />
Sensocheck®<br />
Sensoface®<br />
Memosens® is a registered trademark of Endress+Hauser Conducta<br />
GmbH and <strong>Knick</strong> Elektronische Messgeräte GmbH & Co. KG.<br />
HART® is a registered trademark of the HART Communication<br />
Foundation.<br />
103
Passcodes<br />
In the SERVICE – CODES menu you can assign passcodes to protect the<br />
access to certain functions.<br />
Operating mode<br />
Passcode<br />
Service (SERVICE) 5555<br />
Diagnostics (DIAG)<br />
HOLD mode<br />
Calibration (CAL)<br />
<strong>Configuration</strong> (CONF)<br />
<strong>Knick</strong><br />
Elektronische Messgeräte<br />
GmbH & Co. KG<br />
P.O. Box 37 04 15<br />
D-14134 Berlin<br />
Tel: +49 (0)30 - 801 91 - 0<br />
Fax: +49 (0)30 - 801 91 - 200<br />
Internet: http://www.knick.de<br />
knick@knick.de<br />
TA-212.065-KNE02 20110301 Software version: 2.x