


Create successful ePaper yourself
Turn your PDF publications into a flip-book with our unique Google optimized e-Paper software.
Locate in the hardware sack kit the Firewall<br />
Block Off Assembly. Install over the hose connections<br />
in the engine compartment. Attach with (2) #10 x ¾<br />
Tek screws.<br />
Seal around the tubes with refrigerant tape.<br />
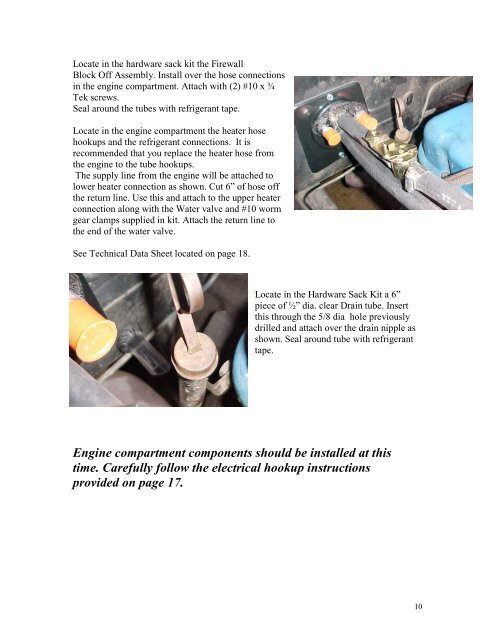
Locate in the engine compartment the heater hose<br />
hookups and the refrigerant connections. It is<br />
recommended that you replace the heater hose from<br />
the engine to the tube hookups.<br />
The supply line from the engine will be attached to<br />
lower heater connection as shown. Cut 6” of hose off<br />
the return line. Use this and attach to the upper heater<br />
connection along with the Water valve and #10 worm<br />
gear clamps supplied in kit. Attach the return line to<br />
the end of the water valve.<br />
See Technical Data Sheet located on page 18.<br />
Locate in the Hardware Sack Kit a 6”<br />
piece of ½” dia. clear Drain tube. Insert<br />
this through the 5/8 dia hole previously<br />
drilled and attach over the drain nipple as<br />
shown. Seal around tube with refrigerant<br />
tape.<br />
Engine compartment components should be installed at this<br />
time. Carefully follow the electrical hookup instructions<br />
provided on page 17.<br />
10


