


You also want an ePaper? Increase the reach of your titles
YUMPU automatically turns print PDFs into web optimized ePapers that Google loves.
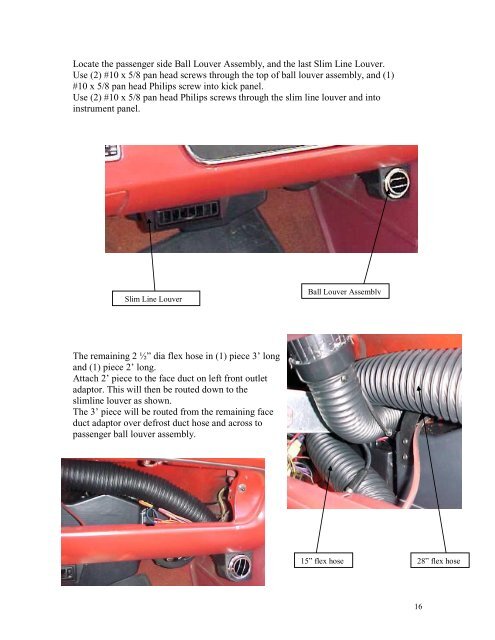
Locate the passenger side Ball Louver Assembly, and the last Slim Line Louver.<br />
Use (2) #10 x 5/8 pan head screws through the top of ball louver assembly, and (1)<br />
#10 x 5/8 pan head Philips screw into kick panel.<br />
Use (2) #10 x 5/8 pan head Philips screws through the slim line louver and into<br />
instrument panel.<br />
Slim Line Louver<br />
Ball Louver Assembly<br />
The remaining 2 ½” dia flex hose in (1) piece 3’ long<br />
and (1) piece 2’ long.<br />
Attach 2’ piece to the face duct on left front outlet<br />
adaptor. This will then be routed down to the<br />
slimline louver as shown.<br />
The 3’ piece will be routed from the remaining face<br />
duct adaptor over defrost duct hose and across to<br />
passenger ball louver assembly.<br />
15” flex hose 28” flex hose<br />
16


