


Create successful ePaper yourself
Turn your PDF publications into a flip-book with our unique Google optimized e-Paper software.
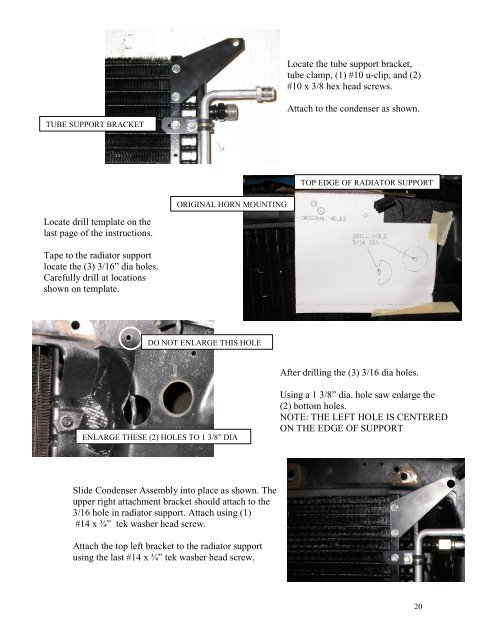
Locate the tube support bracket,<br />
tube clamp, (1) #10 u-clip, and (2)<br />
#10 x 3/8 hex head screws.<br />
Attach to the condenser as shown.<br />
TUBE SUPPORT BRACKET<br />
TOP EDGE OF RADIATOR SUPPORT<br />
ORIGINAL HORN MOUNTING<br />
Locate drill template on the<br />
last page of the instructions.<br />
Tape to the radiator support<br />
locate the (3) 3/16” dia holes.<br />
Carefully drill at locations<br />
shown on template.<br />
DO NOT ENLARGE THIS HOLE<br />
After drilling the (3) 3/16 dia holes.<br />
ENLARGE THESE (2) HOLES TO 1 3/8” DIA<br />
Using a 1 3/8” dia. hole saw enlarge the<br />
(2) bottom holes.<br />
NOTE: THE LEFT HOLE IS CENTERED<br />
ON THE EDGE OF SUPPORT<br />
Slide Condenser Assembly into place as shown. The<br />
upper right attachment bracket should attach to the<br />
3/16 hole in radiator support. Attach using (1)<br />
#14 x ¾” tek washer head screw.<br />
Attach the top left bracket to the radiator support<br />
using the last #14 x ¾” tek washer head screw.<br />
20


