Using GPS - Forests Monitor
Using GPS - Forests Monitor
Using GPS - Forests Monitor

Create successful ePaper yourself
Turn your PDF publications into a flip-book with our unique Google optimized e-Paper software.
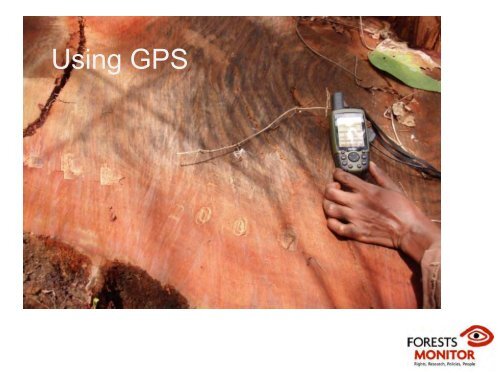
<strong>Using</strong> <strong>GPS</strong>
Introduction to <strong>GPS</strong><br />
• Global Positioning System (<strong>GPS</strong>)<br />
•Used to accurately pinpoint the user’s location<br />
in the world.<br />
•By responding to satellite signals, the <strong>GPS</strong><br />
receiver can determine a latitude and<br />
longitude position and therefore the user’s<br />
location.<br />
<strong>Forests</strong> <strong>Monitor</strong> ‐ <strong>Using</strong> <strong>GPS</strong>
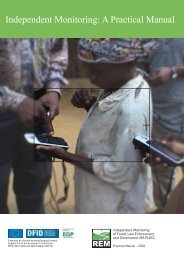
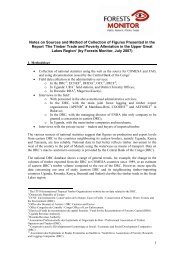
The use of <strong>GPS</strong> in law enforcement<br />
• To mark the exact locations of the<br />
observed evidence of illegal<br />
operations (abandoned logs,<br />
unmarked tree stumps, infrastructure<br />
built etc.)<br />
• To determine, with the use of maps<br />
later on, whether activities observed<br />
during a mission are occurring in<br />
permitted places e.g. logging in a<br />
community forest<br />
• To navigate in unknown locations<br />
• To report the itinerary of your<br />
mission, in case you need to go back<br />
to re‐check<br />
Taking the location of a felled tree<br />
• To record places where important<br />
events took place, e.g. a road check
UTM coordinates<br />
• The Universal Transverse Mercator<br />
(UTM) coordinate system is a gridbased<br />
method of specifying locations<br />
on the surface of the Earth. It is used<br />
to identify locations on the earth, but<br />
differs from the traditional method of<br />
latitude and longitude various ways.<br />
• The UTM system uses a series of sixty<br />
zones. It uses a model of the shape of<br />
the Earth called the WGS84<br />
<strong>Forests</strong> <strong>Monitor</strong> ‐ <strong>Using</strong> <strong>GPS</strong>
http://www.colorado.edu/geography/gcraft/notes/coordsys/gif/utmzones.gif<br />
<strong>Forests</strong> <strong>Monitor</strong> ‐ <strong>Using</strong> <strong>GPS</strong>
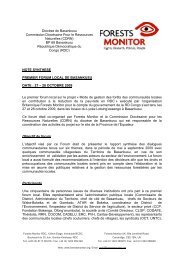
The <strong>GPS</strong><br />
Power key<br />
Backlight/contrast<br />
Battery power left<br />
Zoom out<br />
FIND key<br />
MARK a waypoint key<br />
QUIT key<br />
Zoom in<br />
PAGE key<br />
ROCKER key<br />
ENTER key<br />
<strong>Forests</strong> <strong>Monitor</strong> ‐ <strong>Using</strong> <strong>GPS</strong>
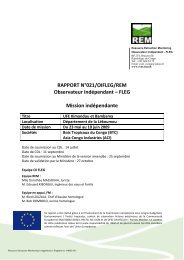
The <strong>GPS</strong><br />
Auxiliary <strong>GPS</strong><br />
antenna connector<br />
USB connector port<br />
External power and<br />
Data connector<br />
Batteries go here<br />
<strong>Forests</strong> <strong>Monitor</strong> ‐ <strong>Using</strong> <strong>GPS</strong>
To turn on/off<br />
Power<br />
key<br />
Garmin 76 Garmin 60
Satellite aquisition<br />
• When you turn the <strong>GPS</strong> on, it automatically<br />
starts looking for satellites to fix its position<br />
on Earth<br />
• The first time you ever turn the <strong>GPS</strong> on it can takes<br />
15 min or more, but after that, only a few seconds<br />
To initialise the <strong>GPS</strong>:<br />
1. Take the <strong>GPS</strong> receiver outdoors where there is a<br />
clear view of the sky ‐ satellite signal cannot pass<br />
through solid materials (except glass), or a dense<br />
tree cover<br />
2. Press and release the power key to turn unit on<br />
3. Observe the “power on” page appear followed by<br />
the Satellite Page<br />
4. While the <strong>GPS</strong> is searching for satellite signals, a<br />
“Locating Satellites” message followed by an<br />
“Acquiring Satellites” appears until enough satellites<br />
are acquired to fix its location<br />
The satellite page
Satellite aquisition<br />
If for some reason the <strong>GPS</strong> does not initialize,<br />
move slightly to avoid objects that may be<br />
blocking the satellite image<br />
5. Press and release the PAGE key until the<br />
map page is displayed. You are now ready to<br />
start using your <strong>GPS</strong><br />
The Map Page
Adjusting the backlight and<br />
If you can’t see the screen very<br />
well:<br />
contrast<br />
1. Press the Power key<br />
2. Press the Rocker key up or<br />
down to increase or<br />
decrease screen brightness<br />
3. Press the Rocker key left or<br />
right to change the screen<br />
contrast. Press Quit to exit.<br />
Adjusting for backlight and<br />
contrast
The status bar<br />
Gives information on:<br />
• Power – if using with<br />
batteries, shows how much<br />
power is left<br />
• Satellite signal status is<br />
shown when searching for<br />
satellites<br />
• Backlighting is OFF usually.<br />
When ON it uses up a lot of<br />
battery power. This icon<br />
shows when it is ON.<br />
Status bar – located at the top of each<br />
page
Viewing the main pages<br />
These are the 5 main pages (or screens) in your<br />
<strong>GPS</strong> receiver: the Satelite Page, Trip Computer<br />
Page, Map Page, Compass Page, and Main<br />
Menu Page.<br />
To view them:<br />
•Press and release the Page key repeatedly to cycle<br />
through the main pages<br />
•With a page displayed, press the Menu key to<br />
display the list of options for that page
The five main pages<br />
Satellite Trip computer Map<br />
Compass<br />
Main Menu
Entering data<br />
On-screen keypad
Taking a waypoint<br />
A Waypoint is any point<br />
on the Map Page that<br />
you store in memory<br />
The Mark waypoint page<br />
allows you to mark and<br />
record your current<br />
location as a waypoint and<br />
displays a name for that<br />
waypoint<br />
The Mark Waypoint page
Taking a waypoint<br />
To mark your current location as a waypoint:<br />
1. From the Map Page, press the MARK key. The<br />
Mark Waypoint page appears<br />
2. To change the name of the waypoint, use the<br />
ROCKER key to highlight the waypoint name<br />
field and press ENTER to display the On‐screen<br />
keypad. Use the ROCKER key and ENTER key to<br />
select a namfe for the waypoint. If you choose a<br />
name that has already been used, a «Waypoint<br />
Already Exists » message will appear. Press<br />
ENTER to acknowledge and choose new name.<br />
On-screen keypad<br />
<strong>Forests</strong> <strong>Monitor</strong> ‐ <strong>Using</strong> <strong>GPS</strong>
Taking a waypoint<br />
3. To assign an identifying symbol to<br />
a waypoint, use the ROCKER key<br />
to highlight the symbol block next<br />
to the waypoint name and press<br />
ENTER to display the symbols<br />
chart.<br />
4. To save the waypoint to the Find<br />
Menu Waypoints list, highlight<br />
«OK» and press ENTER<br />
5. If you do not want to save it as a<br />
new waypoint, press the QUIT<br />
key, before pressing any other<br />
key, to cancel.<br />
Assigning a symbol to a<br />
waypoint<br />
<strong>Forests</strong> <strong>Monitor</strong> ‐ <strong>Using</strong> <strong>GPS</strong>
Editing a waypoint<br />
• A waypoint can be selected from the Find<br />
Feature Waypoints list and edited to change<br />
the map symbol, name, elevation, or to<br />
delete it<br />
To edit a waypoint:<br />
1. Press the FIND key. A screen will come up<br />
with various options, including an icon called<br />
«Waypoints», select and ENTER<br />
2. A list of all the waypoints you have recorded<br />
appears, hightlight and press ENTER to select<br />
the waypoint you want to edit, and make<br />
changes needed by hightlighting each field<br />
and using on‐screen keypad<br />
FIND key to find a waypoint<br />
3. Press QUIT to close and save the changes<br />
<strong>Forests</strong> <strong>Monitor</strong> ‐ <strong>Using</strong> <strong>GPS</strong>
To delete a waypoint<br />
1. Use the FIND key to<br />
display the desired<br />
waypoint information<br />
page<br />
2. Highlight «Delete»<br />
button and press ENTER.<br />
Answer «yes» to popup<br />
prompt and press<br />
ENTER to delete<br />
<strong>Forests</strong> <strong>Monitor</strong> ‐ <strong>Using</strong> <strong>GPS</strong>
To move a waypoint on the map<br />
1. Use the FIND key to display the<br />
desired waypoint information<br />
page<br />
2. Highlight the «Map» button and<br />
press ENTER to display the<br />
waypoint on the map<br />
3. Press ENTER again to place a<br />
«Move» marker next to the<br />
waypoint<br />
4. Use the ROCKER key to drag the<br />
waypoint to the desired location<br />
on the map and release to place it<br />
there. Then press ENTER.<br />
page<br />
<strong>Forests</strong> <strong>Monitor</strong> ‐ <strong>Using</strong> <strong>GPS</strong>
Creating and viewing Tracks<br />
• Tracks are like footprints –they show<br />
you exactly where you have moved.<br />
Tracks appear as a small dotted line<br />
on the Map Page.<br />
• Your <strong>GPS</strong> 60 automatically creates<br />
tracks as you move and displays a<br />
dotted line, called a track log.<br />
To View Tracks:<br />
•Press the Page key until you see the Map<br />
Page.<br />
•Walk away from your location for at least<br />
3 minutes.<br />
•Press IN to zoom in on the Map Page until<br />
you can see your track log.
To create a track log<br />
1. Press and release the QUIT key<br />
until the Main Menu displays.<br />
2. Then use the ROCKER key to<br />
hightlight the Tracks icon. The page<br />
has On and Off buttons to activate<br />
or cancel the Track Log and a Track<br />
Log meter which displays the<br />
percentage of track log space used<br />
3. Under the Track Log field are four<br />
on‐screen buttons to ‘Setup’ a track<br />
log, ‘Clear’ the track log, ‘Save’ a<br />
track log and activate the ‘Tracback’<br />
feature for the current log<br />
To turn Track Log On or Off<br />
<strong>Forests</strong> <strong>Monitor</strong> ‐ <strong>Using</strong> <strong>GPS</strong>
To create a track log<br />
4. To setup a track log, hightlight the<br />
‘Setup’ button and press ENTER to<br />
display the Setup page. Check ‘Wrap<br />
when full’ to continue recording<br />
when full by overwriting the oldest<br />
data with the new<br />
5. Hightlight the ‘Record Method’ field<br />
and press ENTER to display the<br />
Distance, Time, and Auto options. For<br />
most cases, choose ‘Auto’<br />
Selecting Track Log<br />
options<br />
<strong>Forests</strong> <strong>Monitor</strong> ‐ <strong>Using</strong> <strong>GPS</strong>
To create a track log<br />
6. Next, set the interval for setting track<br />
points. You can choose from distance,<br />
time or frequency.<br />
7. When completed, press the QUIT key<br />
to return to the Track Log Page<br />
<strong>Forests</strong> <strong>Monitor</strong> ‐ <strong>Using</strong> <strong>GPS</strong>
To save a Track Log<br />
1. With the tracks Page displayed, highlight the ‘Save’ button and press<br />
ENTER. You will be asked ‘Do you want to save the entire track?’ If you<br />
select ‘Yes’ a ‘Saving Track’ message appears followed by the Saved Track<br />
Page. The new saved track will be a representation of the entire Track Log<br />
from beggining to end.<br />
2. If you select ‘No’, a map showing the entire track appears and prompts<br />
‘Select the beggining point for the saved track’. Use the ROCKER key to move<br />
the arrow to the point on the track line that you want to become the beggining<br />
of the Saved Track, press ENTER.<br />
<strong>Forests</strong> <strong>Monitor</strong> ‐ <strong>Using</strong> <strong>GPS</strong>
To save a Track Log<br />
3. The next prompt asks you ‘Select the<br />
ending point for the saved track’. Use<br />
the arrow to identify a point on the<br />
track that you want as the End Point<br />
and press ENTER. A ‘saving track’<br />
message appears followed by the<br />
Saved Track page<br />
4. The Saved Track page allows you to<br />
rename the track, view the track<br />
distance, and specify a color for the<br />
track when displayed on the map page<br />
(Show On Map). On‐screen buttons at<br />
the bottom of the page allow you to<br />
Save the track (Ok), delete, view it on<br />
the Map<br />
<strong>Forests</strong> <strong>Monitor</strong> ‐ <strong>Using</strong> <strong>GPS</strong>
To view a Track on the Map<br />
1. With the Saved Tracks Page for the<br />
track or the Track Log displayed,<br />
hightlight the Map button and press<br />
ENTER to display the Map Page<br />
2. A map showing the entire track<br />
appears bith Begin and End markers.<br />
Any User Waypoints added to the Track<br />
will be displayed as well<br />
<strong>Forests</strong> <strong>Monitor</strong> ‐ <strong>Using</strong> <strong>GPS</strong>
Finding places<br />
Finding Places:<br />
• <strong>Using</strong> the Find Page, you can search<br />
for waypoints, geocache points, or<br />
cities.<br />
To find a waypoint:<br />
•Press the Find key. The Find Page appears.<br />
Highlight Waypoints and press Enter.<br />
•Use the Rocker key to scroll down the list and<br />
highlight the waypoints you want to find. Press<br />
Enter to select the waypoint. The Waypoint<br />
Information Page appears.<br />
•Use the Rocker key to highlight “Map” and press<br />
Enter. If you want to view the waypoint on the<br />
map. Select “Go To” to begin navigation. (See<br />
“Creating Routes”.
Creating routes<br />
• With routes you can create a<br />
sequence of intermediate waypoints<br />
that lead you to your final<br />
destination.<br />
•The <strong>GPS</strong> map 60 stores 60 routes with<br />
up to 250 waypoints each.<br />
•A route can be created and<br />
modified from the Routes page, and<br />
waypoints can be added to a Route<br />
from the Find Menu Find menu.
To create and save a route<br />
1. Access the ‘Routes’ page from the<br />
Main Menu. The page has a ‘New’<br />
button, an ‘Active’ button and a list of<br />
saved routes.<br />
2. Use the ROCKER key to highlight the<br />
‘New’ button and press ENTER to<br />
display the route Setup page.<br />
3. With an empty row (dashed) in the<br />
route list hightlighted, press ENTER to<br />
display the Find Menu.<br />
<strong>Forests</strong> <strong>Monitor</strong> ‐ <strong>Using</strong> <strong>GPS</strong>
To create and save a route<br />
4. Use the Find Menu to select a route<br />
waypoint from one of the Find Menu<br />
groups and display the Information<br />
Page for the selected waypoint, city,<br />
etc. Highlight the on‐screen ‘Use’<br />
button and press ENTER to place it on<br />
the Route Waypoint List.<br />
5. To add more waypoints to the route,<br />
repeat the process in Steps 3 and 4.<br />
You can rename the route if you<br />
want.<br />
6. Press PAGE to save it to the Saved<br />
Routes list, or hightlight the<br />
‘Navigate’ button and press ENTER to<br />
navigate.<br />
<strong>Forests</strong> <strong>Monitor</strong> ‐ <strong>Using</strong> <strong>GPS</strong>
Navigation<br />
• Use the Map, Compass, and Trip Computer Pages to navigate a route. The<br />
Route appears as a black line on the Map Page. To stop navigation, press<br />
Menu on the Map Page and select “Stop Navigation”.<br />
Map Page Compass Page Trip Computer Page<br />
<strong>Forests</strong> <strong>Monitor</strong> ‐ <strong>Using</strong> <strong>GPS</strong>
<strong>GPS</strong> checklist –before a field trip<br />
Before a field trip<br />
• Familiarize yourself and practice with your <strong>GPS</strong> receiver<br />
• Charged batteries + spares<br />
• Check what maps are available, e.g. of logging concessions, community lands<br />
or protected areas. Get copies of these if possible to plan your trip. Check<br />
some of the key locations on these maps against coordinates you collect on<br />
the ground.<br />
• Make sure you have video and photography equipment if these will be needed<br />
to prove any claims you make using <strong>GPS</strong>.<br />
• Input any key navigational landmarks into the GPs from available maps (enter<br />
them as waypoints), to assist with navigation in the field.<br />
• Check your <strong>GPS</strong> settings, and that your <strong>GPS</strong> is not on simulator mode!<br />
<strong>Forests</strong> <strong>Monitor</strong> ‐ <strong>Using</strong> <strong>GPS</strong>
<strong>GPS</strong> checklist – during a field trip<br />
• If you cannot get a signal, make sure there is nothing preventing this, such as tree<br />
canopy, buildings, etc. If you need to move away form your chosen location to get<br />
a signal, measure and write down how far away you have moved, and in which<br />
direction (using the digital compass in the <strong>GPS</strong>). This information can then be used<br />
to correct the coordinates you received<br />
• Get photographic evidence of important waypoints you make to prove what you<br />
have seen is actually where you say it is, and ALSO write down in a notebook<br />
comments about waypoints and routes (nature, place) to avoid confusion later on<br />
• Leave <strong>GPS</strong> receiver on vehicle dash‐board, or near a window if traveling by car<br />
while recording your Route.<br />
• Record waypoint at important locations, and write down relevant information<br />
relating to them.<br />
• If you get into trouble or have an accident, try and send your <strong>GPS</strong> position to<br />
colleagues so they can find you more easily.<br />
<strong>Forests</strong> <strong>Monitor</strong> ‐ <strong>Using</strong> <strong>GPS</strong>
Back from the field<br />
• Remember to permanently record information from notebooks into<br />
the <strong>GPS</strong> receiver, or onto a computer. If the receiver memory is<br />
limited, make sure you record all the data in this way before<br />
deleting it.<br />
• Download <strong>GPS</strong> data onto suitable program on PC<br />
• Link evidence images (film or photography) to <strong>GPS</strong> data (Data<br />
management)<br />
• Download <strong>GPS</strong> data onto suitable program on PC<br />
• Try and cross reference <strong>GPS</strong> data from field with official or<br />
community maps, and look for discrepancies.<br />
• Try downloading <strong>GPS</strong> data onto a map or satellite image to better<br />
communicate your field trip and findings.<br />
<strong>Forests</strong> <strong>Monitor</strong> ‐ <strong>Using</strong> <strong>GPS</strong>
Precision<br />
• Normal non‐military <strong>GPS</strong> receivers are not 100% accurate<br />
• Most models, including your model are accurate up to 10‐15<br />
meters.<br />
•This means that any coordinates you mark is within 10‐15 meters of<br />
the reality on the ground. Usually this is not important, but can be if<br />
you are working very close to boundaries. If you see a stump of a tree<br />
you think has been illegally cut very close to such a boundary, you<br />
need to be careful. You will need to take the 10‐15 meter precision<br />
window into account.<br />
<strong>Forests</strong> <strong>Monitor</strong> ‐ <strong>Using</strong> <strong>GPS</strong>
<strong>GPS</strong> coordinate settings<br />
Coordinate system<br />
• Your current location can be viewed on the<br />
<strong>GPS</strong> in the form of coordinates, since<br />
different maps and charts used different<br />
location formats, Garmin <strong>GPS</strong> units allow you<br />
to choose the correct coordinate system for<br />
the type of map you are using<br />
•The most common format is latitude and<br />
longitude, which is used by all Garmin units<br />
•On most models you may choose to change the<br />
position format to use With other coordinate<br />
systems such as UTM/UPS (this is the system that<br />
must be entered in COCIS forms)<br />
Changing coordinates<br />
displayed<br />
<strong>Forests</strong> <strong>Monitor</strong> ‐ <strong>Using</strong> <strong>GPS</strong>
Exercise<br />
This exercise is designed to practice the fundamentals of operating a <strong>GPS</strong><br />
receiver. You will need a <strong>GPS</strong>, paper and a pen.<br />
• 1. Initialise the <strong>GPS</strong><br />
• 2. Mark and name your starting point, i.e. YWCA main door<br />
• 3. Map the YWCA: take waypoints of at least the four corners of he<br />
YWCA, as well as the metal tower behind the building. Make sure each<br />
person in your group has a chance to measure at least one waypoint.<br />
• 4. Give each waypoint a name and a symbol of your choice to practice<br />
entering data.<br />
• 5. Note down in your notebook the name of each waypoint you<br />
created, together with information on the things you observed at that<br />
waypoint, the date, the time, and any other comments you think are<br />
important.<br />
• 6. Return to your starting point.