Professional Security LCD Monitor STM-19LM/17LM ... - DOMUSWIRE
Professional Security LCD Monitor STM-19LM/17LM ... - DOMUSWIRE
Professional Security LCD Monitor STM-19LM/17LM ... - DOMUSWIRE

Create successful ePaper yourself
Turn your PDF publications into a flip-book with our unique Google optimized e-Paper software.
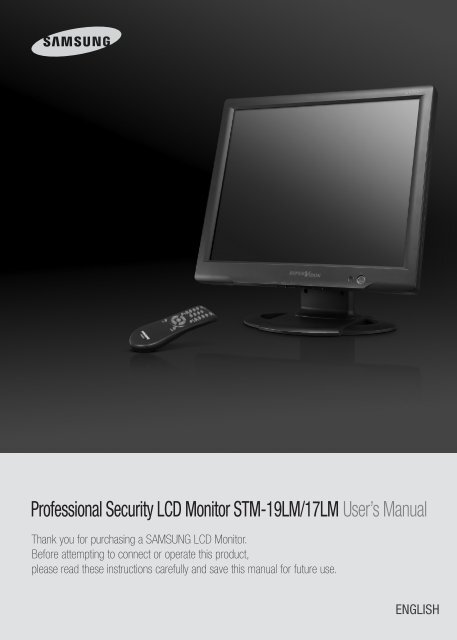
<strong>Professional</strong> <strong>Security</strong> <strong>LCD</strong> <strong>Monitor</strong> <strong>STM</strong>-<strong>19LM</strong>/<strong>17LM</strong> User’s Manual<br />
Thank you for purchasing a SAMSUNG <strong>LCD</strong> <strong>Monitor</strong>.<br />
Before attempting to connect or operate this product,<br />
please read these instructions carefully and save this manual for future use.<br />
1<br />
ENGLISH
<strong>Security</strong> TFT-<strong>LCD</strong> <strong>Monitor</strong> USER'S MANUAL<br />
<strong>Security</strong> TFT-<strong>LCD</strong> <strong>Monitor</strong> USER'S MANUAL<br />
CONTENTS<br />
Important Saety Instructions.................................................... 3<br />
SAFETY INSTRUCTION.......................................................................... 4<br />
CAUTIONS.............................................................................................. 5<br />
FCC RF INTERFERENCE STATEMENT................................................. 6<br />
CONNECTING WITH EXTERNAL EQUIPMENT................................... 6<br />
REMOTE FUNCTIONS........................................................................... 7<br />
CONTROLS AND FUNCTIONS.............................................................. 7<br />
OSD MENU DESCRIPTION.................................................................... 8<br />
1) Read these instructions.<br />
2) Keep these instructions.<br />
3) Heed all warnings.<br />
4) Follow all instructions.<br />
IMPORTANT SAFETY INSTRUCTIONS<br />
5) Do not use this aparatus near water.<br />
6) Clean only with dry cloth.<br />
7) Do not block any ventilation openings. Install in accordance with the manufacturer's instructions.<br />
8) Do not install near any heat sources such as radiators, heat registers, stoves, or other apparatus (including amplifiers)<br />
that produce heat.<br />
9) Do not defeat the safety purpose of the polarized or grounding-type plug.<br />
A polarized plug has two blades with one wider than the other.<br />
A grounding type plug has two blades and third grounding prong.<br />
The wide blade or the third prong are provided for your safety.<br />
If the provided plug does not fie into your outlet, consult an electrician for replacement of the obsolete outlet.<br />
10) Protect the power cord from being walked on or pinched particularly at plugs, convenience receptacles, and the<br />
point where they exit from the apparatus.<br />
11) Only use attachments/accessories specified by the manufacturer.<br />
12) Use only with the cart, stand, tripod, bracket, or table specified by the manufacturer, or sold with the apparatus.<br />
When a cart is used, use caution when moving the cart/apparatus combination to avoid injury from tip-over.<br />
MOUNTING GUIDE ..............................................................................13<br />
D-SUB CONNECTOR PIN ASSIGNMENTS .........................................13<br />
POWER MANAGEMENT......................................................................14<br />
TROUBLESHOOTING GUIDE...............................................................14<br />
SPECIFICATIONS...................................................................................15<br />
DIMENSION...........................................................................................15<br />
13) Unplug this apparatus during lightning storms or when unused for long periods of time.<br />
14) Refer all servicing to qualified service personnel. Servicing is required when the apparatus has been damaged in<br />
anyway, such as power-supply cord or plug is damaged, liquid has been spilled or objects have fallen into the<br />
apparatus, the apparatus has been exposed to rain or moisture, does not operate normally, or has been dropped.<br />
- The apparatus shall not be exposed to dripping or splashing and that no objects filled with liquids, such as vases,<br />
shall be placed on the apparatus.<br />
- Minimum distances(e.q. 10cm) around the apparatus for sufficient ventillation.<br />
"WARNING - To reduce the risk of fire or electric shock, do not expose the apparatus to rain or moisture."<br />
"The apparatus shall not be exposed to dripping or splashing and no objects filled with liquids, such as vaces, shall be<br />
placed on the apparatus.<br />
2 3
<strong>Security</strong> TFT-<strong>LCD</strong> <strong>Monitor</strong> USER'S MANUAL<br />
<strong>Security</strong> TFT-<strong>LCD</strong> <strong>Monitor</strong> USER'S MANUAL<br />
SAFETY INSTRUCTION<br />
Thank you for purchasing our product. Before operating this product, please read the instruction manual.<br />
1. Unplug this product from the wall outlet before cleaning.Do not use liquid cleaners or aerosol cleaners.<br />
Use a damp cloth for cleaning.<br />
2. Do not use this product near water.<br />
3. Do not place this product on an unstable cart, stand or table. The product may fall, causing serious damage to<br />
the product.<br />
4. Slots and openings in the cabinet and the back are provided for ventilation: to ensure reliable operation of the<br />
product, these openings must not be blocked by placing the product on a bed, sofa, rug or other similar<br />
surface. This product should never be placed near or over a heat register.This product should not be placed in a<br />
built-in installation unless proper ventilation is provided.<br />
5. This product should be operated from the type of power source indicated on the marking label. If you are not<br />
sure of the type of power available, consult your dealer or local power company.<br />
6. This product is equipped with a 3 wire grounding type plug having a third(grounding) pin. This is a safety<br />
feature. If you are unable to insert the plug into the outlet, contact your electrician to replace your obsolete outlet.<br />
Do not defeat the purpose of the grounding-type plug.<br />
7. Do not allow anything to rest on the power cord. Do not locate this product where persons will walk on the cord.<br />
8. If an extension cord is used with this product, make sure that the total of the ampere ratings on the products<br />
plugged into the extension cord do not exceed the extension cord ampere rating. Also, make sure that the total of<br />
all products plugged into the wall outlet does not exceed 10 amperes.<br />
9. Never push objects of any kind into this product through cabinet slots as they may touch dangerous voltage<br />
points or short out parts that could result in a risk of fire or electric shock. Never spill any kind of liquid on the<br />
product.<br />
10. Do not attempt to service this product yourself, as opening or removing covers may expose you to dangerous<br />
voltage points or other risks. Refer all servicing to service personnel.<br />
11. Unplug this product from the wall outlet and refer servicing to qualified service personnel under the following<br />
conditions.<br />
• When the power cord or plug is damaged or frayed.<br />
• If liquid has been spilled into the product.<br />
• If the product has been exposed to rain or water.<br />
• If the Product does not operate normally when the operating instructions are followed. Adjust only those<br />
controls that are covered by the operating instructions since improper adjustment of other controls may<br />
result in damage and will often require extensive work by a qualified technician to restore normal operation.<br />
• If the product has been dropped or the cabinet has been damaged.<br />
• If the product exhibits a distinct change in performance, indicating a need for service.<br />
CAUTION<br />
RISK OF ELECTRIC SHOCKS<br />
DO NOT OPEN<br />
CAUTION: TO REDUCE THE RISK OF ELECTRIC<br />
SHOCK, DO NOT REMOVE COVER (OR BACK).<br />
NO USER SERVICEABLE PARTS INSIDE. REFER<br />
SERVICING TO QUALIFIED SERVICE PER-<br />
SONNEL.<br />
This symbol is intended to alert the user to the presence of uninsulated<br />
“dangerous voltage” within the product’s enclosure that may be of suffcient<br />
magnitude to constitute a risk of electric shock to persons.<br />
This symbol is intended to alert the user to the presence of important<br />
operating and maintenance(servicing) instructions in the literature<br />
accompanying the appliance.<br />
CAUTIONS<br />
• NEVER REMOVE THE BACK COVER<br />
Removal of the back cover should be carried out only by qualified personnel.<br />
• DO NOT USE IN HOSTILE ENVIRONMENTS<br />
To prevent shock or fire hazard, do not expose the unit to rain or moisture. This unit is designed to be used in the<br />
office or home. Do not subject the unit to vibrations, dust of corrosive gases.<br />
• KEEP IN A WELL VENTILATED PLACE<br />
Ventilation holes are provided on the cabinet to prevent the temperature from rising. Do not cover the unit or<br />
place anything on the top of unit.<br />
• AVOID HEAT<br />
Avoid placing the unit in direct sunshine or near a heating appliance.<br />
• TO ELIMINATE EYE FATIGUE<br />
Do not use the unit against a bright back ground and where sunlight or other light sources will shine directly on<br />
the monitor.<br />
• BE CAREFUL OF HEAVY OBJECT<br />
Neither the monitor itself nor any other heavy object should rest on the power cord. Damage to a power cord can<br />
cause fire or electrical shock.<br />
4 5
<strong>Security</strong> TFT-<strong>LCD</strong> <strong>Monitor</strong> USER'S MANUAL<br />
<strong>Security</strong> TFT-<strong>LCD</strong> <strong>Monitor</strong> USER'S MANUAL<br />
FCC RF INTERFERENCE STATEMENT<br />
REMOTE FUNCTIONS<br />
NOTE<br />
This equipment has been tested and found to comply with the limits for a Class B digital device, pursuant to Part 15<br />
of the FCC Rules. These limits are designed to provide reasonable protection against harmful interference in a<br />
residential installation. This equipment generates, uses and can radiate radio frequency energy and, if not installed<br />
and used in accordance with the instructions, may cause harmful interference to radio communications. However,<br />
there is no guarantee that interference will not occur in a particular installation.<br />
If this equipment does cause harmful interference to radio or television reception which can be determined by<br />
turning the equipment off and on, the user is encouraged to try to correct the interference by one or more of the<br />
following measures.<br />
- Reorient or relocate the receiving antenna. - Increase the separation between the equipment and receiver.<br />
- Connect the equipment into an outlet on a circuit different from that to which the receiver is connected.<br />
- Consult the dealer or an experienced radio, TV technician for help.<br />
- Only shielded interface cable should be used.<br />
Finally, any changes or modifications to the equipment by the user not expressly approved by the grantee or<br />
manufacturer could void the users authority to operate such equipment.<br />
▶ DOC COMPLIANCE NOTICE<br />
This digital apparatus does not exceed the Class B limits for radio noise emissions from digital apparatus set out<br />
in the radio interference regulation of Canadian Department of communications.<br />
CONNECTING WITH EXTERNAL EQUIPMENT<br />
A. BOTTOM PANEL CONTROL<br />
1 2 3 4 5 6 7 8 9<br />
B. REMOTE CONTROLLER<br />
1. POWER( ) : Turns the power ON or OFF. There will be a few<br />
seconds delay before the display appears.<br />
2. SOURCE : Select pc or video( AV1 / AV2 / PC ) sources.<br />
3. APC (Auto Picture Control) : Select picture mode.<br />
4. ACC (Auto Colour Control) : Select Colour mode.<br />
5. AV1 : Select AV1 mode.<br />
6. AV2 : Select AV2 mode.<br />
7. S-VIDEO : Not operating.<br />
8. PC : Select PC mode<br />
9. AUTO : Auto geometry adjustment in PC Source.<br />
10. MUTE : Mute the sound.<br />
11. MENU : Activates and exits the On Screen Display.<br />
12. EXIT : Exit the On Screen Display.<br />
13. VOL(◀ ▶) : Increases or decreases the level of audio volume.<br />
14. UP/DOWN : Move to OSD menu.<br />
15. ENTER : Accepts your selection or displays the current mode.<br />
16. INFO : Not operating.<br />
17. STILL : Not operating.<br />
1<br />
3<br />
6<br />
7<br />
9<br />
11<br />
14<br />
13<br />
16<br />
2<br />
4<br />
5<br />
8<br />
10<br />
12<br />
15<br />
17<br />
DVR<br />
CAMERA A<br />
CAMERA B<br />
1. DC 12V IN<br />
2. D-SUB IN : PC Signal Input<br />
3. VIDEO 1(AV1) IN : Composite signal Input for AV1<br />
4. VIDEO 1(AV1) OUT : Video looping output for AV1<br />
5. VIDEO 2(AV2) IN : Composite signal Input for AV2<br />
6. VIDEO 2(AV2) OUT : Video looping output for AV2<br />
7, 8. AUDIO IN (L+R) : Stereo Audio Signal Input<br />
9. PC STEREO IN<br />
6 7
<strong>Security</strong> TFT-<strong>LCD</strong> <strong>Monitor</strong> USER'S MANUAL<br />
<strong>Security</strong> TFT-<strong>LCD</strong> <strong>Monitor</strong> USER'S MANUAL<br />
CONTROLS AND FUNCTIONS<br />
• HUE : Increase or decrease the hue of the picture.<br />
• SATURATION : Increase or decrease the saturation of the picture.<br />
• SHARPNESS : Increase or decrease the sharpness of the picture.<br />
• COLOR TEMP : Select the color temp of the picture.<br />
• PICTURE MODE : Select the picture mode of the picture.<br />
1 2 3 4 5 6 7 8<br />
B. SOUND MENU<br />
• Front Key Control<br />
1. SOURCE : Select input source, and move the previous menu.<br />
2. MENU : Activates and exits the On Screen Display. This button can also be used to move previous menu or status.<br />
OSD MENU(MAIN): Picture,Sound,PC(pc only ),Setup<br />
3/4. AUTO/ ▼ / ▲ : This button allows user to move the sub-menu of the activated function.<br />
▼ : Auto geometry adjustment<br />
5/6. ◀ VOL ▶ : Adjust menu settings. / Adjust the volume.<br />
7. IR Sensor : Remote controller sensor.<br />
8. POWER ON/OFF( )<br />
Turn the power ON or OFF. There will be a few seconds delay before the display appears. The power LED(next to<br />
the power switch) lights with green when the power is turned ON. The power is turned off by pressing the power<br />
switch again and the power LED goes Red.<br />
• OSD MENU DESCRIPTION<br />
A: PICTURE MENU (Only Video mode)<br />
1. VOLUME<br />
Press the MENU button and then up(▲) / down(▼) button to select the SOUND menu.<br />
- Press the right(▶) or enter button and then up(▲) / down(▼) button to select the<br />
Volume Press the left(◀) / right(▶) button to adjust Volume.<br />
2. MUTE<br />
- Press the up(▲) / down(▼) button to select the MUTE. Press left(◀) / right(▶)<br />
button to select desired Mute on / off.<br />
- Press the MENU button and then up(▲) / down(▼) button to select<br />
the PICTURE menu.<br />
- Press the up(▲) / down(▼) button to select picture sub menu.<br />
Press the left(◀) / right(▶) button to adjust picture setting.<br />
• CONTRAST : Increase or decrease the intensity (lightness or dimness) of the image.<br />
• BRIGHTNESS : Increase or decrease the intensity of the image.<br />
8 9
<strong>Security</strong> TFT-<strong>LCD</strong> <strong>Monitor</strong> USER'S MANUAL<br />
<strong>Security</strong> TFT-<strong>LCD</strong> <strong>Monitor</strong> USER'S MANUAL<br />
C. PC MENU(Only PC mode)<br />
3. PC SUB MENU (COLOR MODE)<br />
Press the MENU button and then up(▲) / down(▼) button to select the PC menu.<br />
Press the up(▲) / down(▼) button to select the COLOR MODE menu. Press the right(▶) or<br />
enter button<br />
1. PC SUB MENU (CONTRAST & BRIGHTNESS)<br />
- Press the up(▲) / down(▼) button to select the Contrast and Brightness<br />
- Press left(◀) / right(▶) button to adjust Contrast and Brightness Setting.<br />
3-1. AUTO COLOR<br />
- Press the up(▲) / down(▼) button to select the AUTO COLOR menu.<br />
- Press the right(▶) or enter button.<br />
2. PC SUB MENU (H / V. POSITION & CLOCK , PHASE)<br />
- Press the up(▲) / down(▼) button to select the PC sub Menu.<br />
- Press left(◀) / right(▶) button to adjust PC image Setting.<br />
• AUTO COLOR : Auto color geometry adjustment.<br />
3-2. COLOR TEMP<br />
- Press the up(▲) / down(▼) button to select the COLOR TEMP menu.<br />
- Press left(◀) / right(▶) button to select color temp mode.<br />
• H. POSITION : Move image horizontally on screen right or left.<br />
• V. POSITION : Move image vertically on screen up or down.<br />
• CLOCK : Adjust the vertical noise of screen image.<br />
• PHASE : Adjust the number of horizontal picture elements.<br />
10 11
<strong>Security</strong> TFT-<strong>LCD</strong> <strong>Monitor</strong> USER'S MANUAL<br />
<strong>Security</strong> TFT-<strong>LCD</strong> <strong>Monitor</strong> USER'S MANUAL<br />
3-3. USER in the COLOR TEMP MENU<br />
2. SETUP SUB MENU (OSD CONTROL)<br />
- Press the up(▲) / down(▼) button to select the SETUP sub Menu.<br />
- Press left(◀) / right(▶) button to adjust OSD Setting.<br />
- Press the up(▲) / down(▼) button to select the COLOR TEMP<br />
menu.<br />
D. SETUP MENU<br />
- Press the up(▲) / down(▼) button to select the desired Red,<br />
Green and Blue Mode.<br />
- Press the left(◀) / right(▶) button to adjust picture setting.<br />
• H. POSITION : Move OSD horizontally on screen right or left.<br />
• V. POSITION : Move OSD vertically on screen up or down.<br />
• OSD TIMER : Adjust the OSD displayed time.<br />
• TRANSPARENT : Adjust the OSD transparent.<br />
3. SETUP SUB MENU (RECALL)<br />
- Press the right(▶) or enter button to select the RECALL menu.<br />
Press the up(▲) / down(▼) button to select the SETUP menu. Press the right(▶) or enter button.<br />
• RECALL : Select to reset all setting to the factory default values.<br />
1. SETUP SUB MENU (LANGUAGE)<br />
- Press the left(◀) / right(▶) button to select desired osd language.<br />
12 13
<strong>Security</strong> TFT-<strong>LCD</strong> <strong>Monitor</strong> USER'S MANUAL<br />
<strong>Security</strong> TFT-<strong>LCD</strong> <strong>Monitor</strong> USER'S MANUAL<br />
Install Guide of wall mount bracket(STB-LM)<br />
MOUNTING GUIDE<br />
1) Make 4 holes in the wall using the bracket as a template, as below picture, and fix the bracket to the wall.<br />
2) Fit the monitor bracket onto the rear of the monitor.<br />
3) Finally, fit the two brackets together.<br />
<strong>Monitor</strong><br />
D-SUB CONNECTOR PIN ASSIGNMENTS<br />
Pad<br />
Arm<br />
Wall<br />
MODE LED COLOR MONITOR OPERATION<br />
ON GREEN Normal Operation<br />
STANDBY<br />
SUSPEND<br />
ACTIV OFF<br />
UNSUPPORTES<br />
MODE<br />
POWER MANAGEMENT<br />
This monitor features a power management system to “power down” upon receipt of the VESA DPMS (The display<br />
power management signaling) from a VESA DPMS video card. The VESA DPMS-compliant video card performs this<br />
signaling system through not sending horizontal, vertical, or sync signal. This monitor enters an appropriate mode<br />
through identifying each of the three modes of the signaling system.<br />
• POWER CONSUMPTION<br />
MODE POWER CONSUMPTION MODE POWER CONSUMPTION<br />
ON < 42W SUSPEND < 3W<br />
STANDBY < 3W ACTIVE OFF < 3W<br />
• LED INDICATOR<br />
The power management feature of the monitor is comprised of four stages : On(Green), Standby, Suspend, Active<br />
off(Amber) and Unsupported mode(Green).<br />
AMBER<br />
GREEN<br />
POWER OFF RED Not Operation<br />
Screen blanks after preset idle time And some electronic circuits or all<br />
Circuitry in the monitor shut down.<br />
Normal operation but the on screen Display will show error massage<br />
• PIN ASSIGNMENTS<br />
Pin 1 RED VIDEO Pin 9<br />
Pin 2 GREEN VIDEO Pin10 SIGNAL CABLE DETECT<br />
Pin 3 BLUE VIDEO Pin 11 GROUND<br />
Pin 4 GROUND Pin 12 SDA(for DDC)<br />
Pin 5 GROUND Pin 13 H-SYNC.(or H+V SYNC.)<br />
Pin 6 RED GROUND Pin 14 V-SYNC<br />
Pin 7 GREEN GROUND Pin 15 SCL(for DDC)<br />
Pin 8 BLUE GROUND<br />
• ACCESSORY<br />
D-SUB<br />
1. POWER CORD 2. USER’S MANUAL 3. PC cable 4. Adaptor<br />
5. Remote Control 6. Batteries 7. Wall mount (Option) 8. Rack mount (Option)<br />
TROUBLE<br />
No image on display screen<br />
“Check Input Signal” message<br />
on screen<br />
Display image is not centered, too<br />
small or toolarge in PC mode<br />
Vertical or Horizontal noise is<br />
present in the picture<br />
TROUBLESHOOTING GUIDE<br />
TROUBLESHOOTING TIP<br />
1. Check that power cord of the monitor have been connected securely<br />
into wall outlet or grounded extension cable or strip.<br />
2. Power switch should be in the ON position and LED is lit.<br />
3. Check that the Brightness and / or the Contrast adjustments of the Display<br />
haver not been turned down to minimum levels.<br />
1. The signal cable should be completely connected to the video card /<br />
computer<br />
2. The video card should be completely seated in its slot and the computer is<br />
switched ON.<br />
Push the down key in front side or Auto key in remocon.<br />
Adjust Clock and Phase in the OSD.<br />
14 15
<strong>Security</strong> TFT-<strong>LCD</strong> <strong>Monitor</strong> USER'S MANUAL<br />
<strong>Security</strong> TFT-<strong>LCD</strong> <strong>Monitor</strong> USER'S MANUAL<br />
Video<br />
Resolution<br />
SPECIFICATIONS<br />
Model Name <strong>STM</strong>-<strong>19LM</strong> <strong>STM</strong>-<strong>17LM</strong><br />
Composite<br />
2ch input 1.0Vp-p, 75Ω terminated, loop-through out<br />
VGA<br />
1ch input<br />
1280x1024@60Hz<br />
DIMENSION<br />
<strong>STM</strong>-<strong>19LM</strong> <strong>STM</strong>-<strong>17LM</strong><br />
Frequency<br />
VGAMode<br />
Horizontal(KHz)<br />
Vertical(Hz)<br />
31KHz ~ 82KHz<br />
50Hz ~ 75Hz<br />
720x480@60Hz, 720x576@50Hz, 800x600@60/75Hz<br />
1024x768@60/75Hz, 1280x1024@60/75Hz<br />
Power Consumption Max. 42W Max. 36W<br />
Dimensions<br />
(WxDxH)<br />
SET 430x421x200mm 382x390x200mm<br />
Packing 490x506x225mm 436x476x225mm<br />
Net Weight 6.43Kg 5.57Kg<br />
Weight(kg)<br />
Gross Weight 8.43Kg 7.42Kg<br />
Power Supply DC 12V / 4.16A<br />
CORRECT DISPOSAL OF BATTERIES IN THIS PRODUCT<br />
Environmental<br />
Considerations<br />
Operating Temperature<br />
Operating Humidity<br />
Storage Temperature<br />
Storage Humidity<br />
32°F~104°F (0°C~40°C)<br />
10%~80%, Non-condensing<br />
-4°F~113°F (-20°C~45°C)<br />
5%~95%,Non-condensing<br />
Size 19" Diagonal AM-TFT 17" Diagonal AM-TFT<br />
Active Display Area 376.32x301.056mm 337.92x270.336mm<br />
Pixel Pitch(mm) 0.294mm(H) x 0.294mm(V) 0.264mm(H) x 0.264mm(V)<br />
<strong>LCD</strong> Panel Spec<br />
Brightness(cd/m2)<br />
300cd/m2<br />
Contrast Ratio 800:1 1000:1<br />
Response Time(ms)<br />
5ms<br />
Viewing Angle(L/R/ T/B) 80/80/75/85 80/80/80/80<br />
• Technical specifications are subject to change without notice.<br />
16 17
SALES NETWORK<br />
• SAMSUNG TECHWIN CO., LTD.<br />
145-3, Sangdaewon1-dong, Jungwon-gu, Seongnam-si, Gyeonggi-do, 462-703, Korea<br />
TEL : +82-31-740-8151~8 FAX : +82-31-740-8145<br />
• SAMSUNG TECHWIN AMERICA Inc.<br />
1480 Charles Willard St, Carson, CA 90746, UNITED STATES<br />
Tol Free : +1-877-213-1222 FAX : +1-310-632-2195<br />
www.samsungcctvusa.com<br />
www.samsungtechwin.com<br />
www.samsungcctv.com<br />
• SAMSUNG TECHWIN EUROPE CO., LTD.<br />
Samsung House, 1000 Hillswood Drive, Hillswood Business<br />
Park Chertsey, Surrey, UNITED KINGDOM KT16 OPS<br />
TEL : +44-1932-45-5300 FAX : +44-1932-45-5325<br />
P/No. : L39ME0182 Rev.0<br />
VAN 09. 01