Heath Monochromator user information IMPORTANT: Before you ...
Heath Monochromator user information IMPORTANT: Before you ...
Heath Monochromator user information IMPORTANT: Before you ...

Create successful ePaper yourself
Turn your PDF publications into a flip-book with our unique Google optimized e-Paper software.
<strong>Heath</strong> <strong>Monochromator</strong> <strong>user</strong> <strong>information</strong><br />
<strong>IMPORTANT</strong>: <strong>Before</strong> <strong>you</strong> turn the computer ‘on’, make sure that the μDAC I/O is powered<br />
up by checking to see if the red LED on the μDAC is illuminated. If <strong>you</strong> do not start the<br />
system up in this order the I/O device may not initialise properly.<br />
Having started the computer <strong>you</strong> need to log on using the password... proton<br />
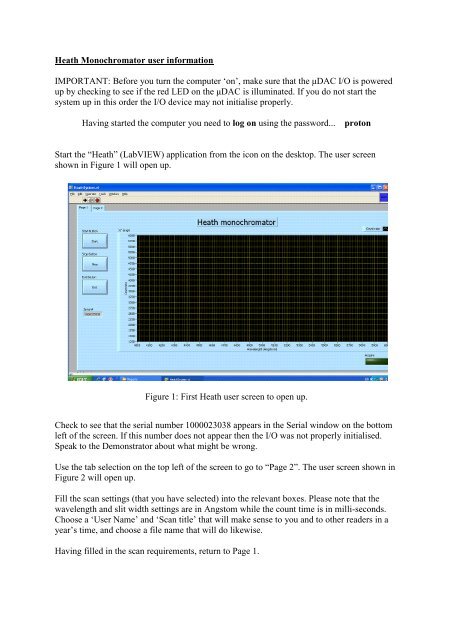
Start the “<strong>Heath</strong>” (LabVIEW) application from the icon on the desktop. The <strong>user</strong> screen<br />
shown in Figure 1 will open up.<br />
Figure 1: First <strong>Heath</strong> <strong>user</strong> screen to open up.<br />
Check to see that the serial number 1000023038 appears in the Serial window on the bottom<br />
left of the screen. If this number does not appear then the I/O was not properly initialised.<br />
Speak to the Demonstrator about what might be wrong.<br />
Use the tab selection on the top left of the screen to go to “Page 2”. The <strong>user</strong> screen shown in<br />
Figure 2 will open up.<br />
Fill the scan settings (that <strong>you</strong> have selected) into the relevant boxes. Please note that the<br />
wavelength and slit width settings are in Angstom while the count time is in milli-seconds.<br />
Choose a ‘User Name’ and ‘Scan title’ that will make sense to <strong>you</strong> and to other readers in a<br />
year’s time, and choose a file name that will do likewise.<br />
Having filled in the scan requirements, return to Page 1.
Figure 2: Second <strong>Heath</strong> <strong>user</strong> screen to open up.<br />
From Page 1, select the ‘Start’ button. The window shown in Figure 3 will open up that will<br />
prompt <strong>you</strong> to decide where the data is to be saved. Data may be saved to the Desktop or to<br />
the Reports folder. Ultimately all data should be saved in the Reports folder.<br />
Figure 3: Scan requirement acceptance and saving location windows.<br />
Once the ‘save location’ has been selected the scan will start automatically. A typical,<br />
completed scan is shown in Figure 4.
Figure 4: A typical, completed <strong>Heath</strong> <strong>Monochromator</strong> scan.<br />
The data from the scan can be retrieved from the folder into which it was saved. Part of a<br />
typical set of data is shown in Figure 5.<br />
Figure 5: Part of a typical data set retrieved from a <strong>Heath</strong> scan.