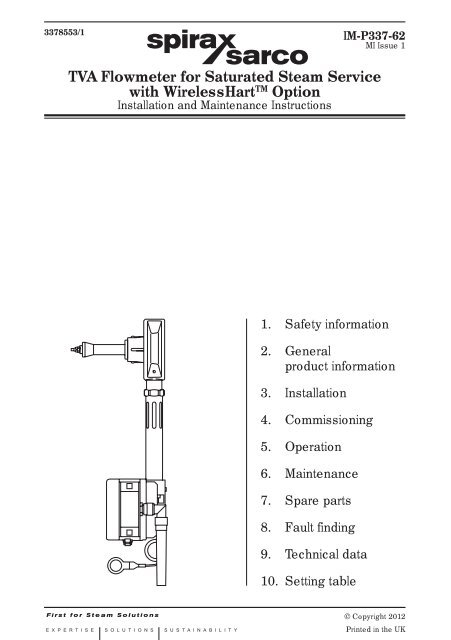
TVA Flowmeter for Saturated Steam Service with ... - Spirax Sarco
TVA Flowmeter for Saturated Steam Service with ... - Spirax Sarco
TVA Flowmeter for Saturated Steam Service with ... - Spirax Sarco

Create successful ePaper yourself
Turn your PDF publications into a flip-book with our unique Google optimized e-Paper software.
3378553/1<br />
IM-P337-62<br />
MI Issue 1<br />
<strong>TVA</strong> <strong>Flowmeter</strong> <strong>for</strong> <strong>Saturated</strong> <strong>Steam</strong> <strong>Service</strong><br />
<strong>with</strong> WirelessHart TM Option<br />
Installation and Maintenance Instructions<br />
1. Safety in<strong>for</strong>mation<br />
2. General<br />
product in<strong>for</strong>mation<br />
3. Installation<br />
4. Commissioning<br />
5. Operation<br />
6. Maintenance<br />
7. Spare parts<br />
8. Fault finding<br />
9. Technical data<br />
10. Setting table<br />
© Copyright 2012<br />
IM-P337-62 MI Issue 1 1<br />
Printed in the UK
2<br />
IM-P337-62 MI Issue 1
Safe operation of this unit can only be guaranteed if it is properly installed,<br />
commissioned and maintained by a qualified person (see Section 1.11) in compliance<br />
<strong>with</strong> the operating instructions. General installation and safety instructions <strong>for</strong><br />
pipeline and plant construction, as well as the proper use of tools and safety<br />
equipment must also be complied <strong>with</strong>.<br />
Manufacturer:-<br />
<strong>Spirax</strong>-<strong>Sarco</strong> Limited<br />
Charlton House<br />
Charlton Kings<br />
Cheltenham<br />
Glos<br />
GL53 8ER<br />
The product is designed and constructed to <strong>with</strong>stand the <strong>for</strong>ces encountered<br />
during normal use. Use of the product <strong>for</strong> any other purpose, or failure to install the<br />
product in accordance <strong>with</strong> these Installation and Maintenance Instructions, could<br />
cause damage to the product, will invalidate the marking, and may cause injury or<br />
fatality to personnel.<br />
EMC directive<br />
The product complies <strong>with</strong> the Electromagnetic Compatibility Directive 2004 / 108 / EC.<br />
A technical file <strong>with</strong> a reference number of 'UK Supply <strong>TVA</strong> flowmeter' supports the<br />
<strong>Spirax</strong> <strong>Sarco</strong> claim that the product complies <strong>with</strong> the requirements of the Directive<br />
and the product can be used in Class A (heavy industrial) and Class B (domestic /<br />
commercial areas).<br />
The following conditions should be avoided as they may create interference above<br />
the heavy industrial limits if:<br />
- The product or its wiring is located near a radio transmitter.<br />
- Cellular telephones and mobile radios may cause interference if used <strong>with</strong>in<br />
approximately 1 metre (39") of the product or its wiring. The actual separation<br />
distance necessary will vary according to the surroundings of the installation<br />
and the power of the transmitter.<br />
If this product is not used in the manner specified by this IMI, then the protection<br />
provided may be impaired.<br />
1.1 Intended use<br />
Referring to the Installation and Maintenance Instructions, name-plate and Technical<br />
In<strong>for</strong>mation Sheet, check that the product is suitable <strong>for</strong> the intended use / application.<br />
The product listed complies <strong>with</strong> the requirements of the European Pressure Equipment<br />
Directive 97 / 23 / EC, carries the mark when so required. The product falls <strong>with</strong>in<br />
the following Pressure Equipment Directive categories:<br />
<strong>TVA</strong> flowmetering<br />
system<br />
1. Safety in<strong>for</strong>mation<br />
Product<br />
Group 1<br />
Gases<br />
Group 2<br />
Gases<br />
Group 1<br />
Liquids<br />
Group 2<br />
Liquids<br />
DN50 to DN100 - 1 - -<br />
i) The product has been specifically designed <strong>for</strong> use on saturated steam only<br />
which is in Group 2 of the above mentioned Pressure Equipment Directive.<br />
IM-P337-62 MI Issue 1 3
ii)<br />
Check material suitability, pressure and temperature and their maximum<br />
and minimum values. If the maximum operating limits of the product are lower than<br />
those of the system in which it is being fitted, or if malfunction of the product<br />
could result in a dangerous overpressure or overtemperature occurrence, ensure<br />
a safety device is included in the system to prevent such over-limit situations.<br />
iii) Determine the correct installation situation and direction of fluid flow.<br />
iv) <strong>Spirax</strong> <strong>Sarco</strong> products are not intended to <strong>with</strong>stand external stresses that<br />
may be induced by any system to which they are fitted. It is the responsibility of<br />
the installer to consider these stresses and take adequate precautions to<br />
minimise them.<br />
v) Remove protection covers from all connections and protective film from all<br />
name-plates, where appropriate, be<strong>for</strong>e installation on steam or other high<br />
temperature applications.<br />
1.2 Access<br />
Ensure safe access and if necessary a safe working plat<strong>for</strong>m (suitably guarded)<br />
be<strong>for</strong>e attempting to work on the product. Arrange suitable lifting gear if required.<br />
1.3 Lighting<br />
Ensure adequate lighting, particularly where detailed or intricate work is required.<br />
1.4 Hazardous liquids or gases in the pipeline<br />
Consider what is in the pipeline or what may have been in the pipeline at some<br />
previous time. Consider: flammable materials, substances hazardous to health,<br />
extremes of temperature.<br />
1.5 Hazardous environment around the product<br />
Consider: explosion risk areas, lack of oxygen (e.g. tanks, pits), dangerous gases,<br />
extremes of temperature, hot surfaces, fire hazard (e.g. during welding), excessive<br />
noise, moving machinery.<br />
1.6 The system<br />
Consider the effect on the complete system of the work proposed. Will any proposed<br />
action (e.g. closing isolation valves, electrical isolation) put any other part of the<br />
system or any personnel at risk?<br />
Dangers might include isolation of vents or protective devices or the rendering<br />
ineffective of controls or alarms. Ensure isolation valves are turned on and off in a<br />
gradual way to avoid system shocks.<br />
1.7 Pressure systems<br />
Ensure that any pressure is isolated and safely vented to atmospheric pressure.<br />
Consider double isolation (double block and bleed) and the locking or labelling of<br />
closed valves. Do not assume that the system has depressurised even when the<br />
pressure gauge indicates zero.<br />
1.8 Temperature<br />
Allow time <strong>for</strong> temperature to normalise after isolation to avoid the danger of burns<br />
and consider whether protective clothing (including safety glasses) is required.<br />
4<br />
IM-P337-62 MI Issue 1
1.9 Tools and consumables<br />
Be<strong>for</strong>e starting work ensure that you have suitable tools and / or consumables<br />
available. Use only genuine <strong>Spirax</strong> <strong>Sarco</strong> replacement parts.<br />
1.10 Protective clothing<br />
Consider whether you and /or others in the vicinity require any protective clothing<br />
to protect against the hazards of, <strong>for</strong> example, chemicals, high / low temperature,<br />
radiation, noise, falling objects, and dangers to eyes and face.<br />
1.11 Permits to work<br />
All work must be carried out or be supervised by a suitably competent person.<br />
Installation and operating personnel should be trained in the correct use of the product<br />
according to the Installation and Maintenance Instructions.<br />
Where a <strong>for</strong>mal 'permit to work' system is in <strong>for</strong>ce it must be complied <strong>with</strong>. Where<br />
there is no such system, it is recommended that a responsible person should know<br />
what work is going on and, where necessary, arrange to have an assistant whose<br />
primary responsibility is safety.<br />
Post 'warning notices' if necessary.<br />
1.12 Handling<br />
Manual handling of large and /or heavy products may present a risk of injury. Lifting,<br />
pushing, pulling, carrying or supporting a load by bodily <strong>for</strong>ce can cause injury<br />
particularly to the back. You are advised to assess the risks taking into account the<br />
task, the individual, the load and the working environment and use the appropriate<br />
handling method depending on the circumstances of the work being done.<br />
1.13 Residual hazards<br />
In normal use the external surface of the product may be very hot. If used at the<br />
maximum permitted operating conditions the surface temperature of some products<br />
may reach temperatures of 250°C (482°F).<br />
Many products are not self-draining. Take due care when dismantling or removing the<br />
product from an installation (refer to 'Maintenance instructions').<br />
1.14 Freezing<br />
Provision must be made to protect products which are not self-draining against<br />
frost damage in environments where they may be exposed to temperatures below<br />
freezing point.<br />
1.15 Disposal<br />
Unless otherwise stated in the Installation and Maintenance Instructions, this product<br />
is recyclable and no ecological hazard is anticipated <strong>with</strong> its disposal providing due<br />
care is taken.<br />
1.16 Returning products<br />
Customers and stockists are reminded that under EC Health, Safety and Environment<br />
Law, when returning products to <strong>Spirax</strong> <strong>Sarco</strong> they must provide in<strong>for</strong>mation on<br />
any hazards and the precautions to be taken due to contamination residues or<br />
mechanical damage which may present a health, safety or environmental risk. This<br />
in<strong>for</strong>mation must be provided in writing including Health and Safety data sheets<br />
relating to any substances identified as hazardous or potentially hazardous.<br />
IM-P337-62 MI Issue 1 5
2. General product in<strong>for</strong>mation<br />
This manual explains how to install, commission and maintain the <strong>Spirax</strong> <strong>Sarco</strong> <strong>TVA</strong> flowmeter<br />
<strong>for</strong> use on saturated steam.<br />
2.1 Product description<br />
The <strong>Spirax</strong> <strong>Sarco</strong> <strong>TVA</strong> flowmeter is designed to reduce the cost of flowmetering and is<br />
used as an accurate means to measure saturated steam flowrates and record total flow.<br />
The <strong>TVA</strong> flowmeter is a stand alone device and requires no other equipment, such as differential<br />
pressure transmitters, pressure sensors, etc. to calculate mass flowrates of saturated steam.<br />
The <strong>TVA</strong> <strong>with</strong> wirelessHART TM utilises power harvested by the <strong>Spirax</strong> <strong>Sarco</strong> TEG10 and<br />
communicates via wirelessHART TM protocol.<br />
2.2 Equipment delivery and handling<br />
Factory shipment<br />
Prior to shipment, the <strong>Spirax</strong> <strong>Sarco</strong> <strong>TVA</strong> flowmeter is tested, calibrated and inspected to<br />
ensure proper operation. The wireless communications are also tested.<br />
Receipt of shipment<br />
Each carton should be inspected at the time of delivery <strong>for</strong> possible external damage. Any<br />
visible damage should be recorded immediately on the carrier’s copy of the delivery slip.<br />
Each carton should be unpacked carefully and its contents checked <strong>for</strong> damage.<br />
If it is found that some items have been damaged or are missing, notify <strong>Spirax</strong> <strong>Sarco</strong><br />
immediately and provide full details. In addition, damage must be reported to the carrier <strong>with</strong> a<br />
request <strong>for</strong> their on-site inspection of the damaged item and its shipping carton.<br />
Storage<br />
If a flowmeter is to be stored prior to installation, the environmental storage conditions should<br />
be at a temperature between 0°C and 55°C (32°F and 131°F), and between 10% and 90%<br />
relative humidity (non-condensing).<br />
2.3 Sizes and pipe connections<br />
DN50, DN80 and DN100<br />
The <strong>TVA</strong> flowmeter is of a wafer design, suitable<br />
<strong>for</strong> fitting between the following flanges:<br />
- EN 1092 PN16, PN25 and PN40<br />
- BS 10 Table H<br />
- ASME B 16.5 Class 150 and 300<br />
- Korean Standard KS 20.<br />
Fig. 1 <strong>TVA</strong> flowmeter<br />
6<br />
IM-P337-62 MI Issue 1
*<br />
2.4 Pressure/temperature limits<br />
Temperature °C<br />
200<br />
150<br />
100<br />
50<br />
0<br />
0<br />
3 5 10 15 20 25 30 32<br />
Pressure bar g<br />
The product should not be used in this region due to the limitations of the software.<br />
PMA Maximum allowable pressure @ 239°C (462°F)<br />
<strong>Saturated</strong> steam 32 bar g (464 psi g)<br />
otherwise as the specified flange rating<br />
TMA Maximum allowable temperature 239°C (462°F)<br />
Minimum allowable temperature 0°C (32°F)<br />
PMO Maximum operating pressure Horizontal flow 32 bar g (464 psi g)<br />
<strong>for</strong> saturated steam service Vertical flow 7 bar g (101 psi g)<br />
Minimum operating pressure 3 bar g (43.5 psi g)<br />
TMO Maximum operating temperature 239°C (462°F)<br />
Minimum operating temperature 0°C (32°F)<br />
Maximum electronics ambient temperature 55°C (131°F)<br />
Maximum electronics humidity level<br />
Maximum<br />
PMX differential<br />
pressure<br />
Pressure psi g<br />
0 100 200 300 400<br />
239<br />
90% RH (non-condensing)<br />
The pressure drop across the <strong>TVA</strong> flowmeter at the maximum<br />
rated flow is nominally 750 m bar (300 inches wg) <strong>for</strong> the DN50,<br />
and 500 m bar (200 inches wg) <strong>for</strong> the DN80 and DN100<br />
Cold hydraulic test pressure of: 52 bar g (754 psi g)<br />
* Important note<br />
<strong>Steam</strong><br />
saturation<br />
curve<br />
The product cannot be used below 3 bar g (43.5 psi g).<br />
400<br />
300<br />
200<br />
100<br />
Temperature °F<br />
Caution: If the electronic housing is<br />
mounted at an angle of 45° (or more)<br />
from the vertically downward position<br />
the PMO (maximum operating pressure)<br />
must be limited to 7 bar g (101 psi g).<br />
Fig. 2 Installation limiting conditions<br />
IM-P337-62 MI Issue 1 7
2.5 Technical data<br />
IP Rating<br />
Power supply<br />
Communication<br />
System uncertainty<br />
Per<strong>for</strong>mance to ISO 17025<br />
WL HT<br />
Wireless<br />
IP65<br />
TEG10 (TI-P196-01)<br />
WirelessHART TM maintenance port<br />
±2% of reading over the range of 10% to<br />
100% of maximum rated flow<br />
(95% confidence to 2 STD)<br />
±0.2% FSD from 2% to 10% of maximum rated flow<br />
Turndown: up to 50:1<br />
2.6 Electrical connections<br />
Power supply<br />
TEG10 2 pin plug<br />
2.7 Materials<br />
<strong>Flowmeter</strong> body<br />
Internals<br />
Spring<br />
<strong>Flowmeter</strong> stem<br />
Electronics housing<br />
Antenna<br />
Stainless steel 1.4408 CF8M<br />
431 S29 / S303 / S304 / S316<br />
Inconel ® X750 or equivalent<br />
Stainless steel 431 S29<br />
Aluminium alloy<br />
UV stabalised ABS<br />
8<br />
IM-P337-62 MI Issue 1
2.8 Dimensions/weights (approximate) in mm and kg<br />
<strong>TVA</strong> flowmeter <strong>with</strong> WirelessHART TM option<br />
Size A B C D E F G Weight<br />
DN50 35 103 333 160 105 142 401 3.37 kg<br />
DN80 45 133 345 160 105 142 401 5.08 kg<br />
DN100 60 162 355 215 105 142 401 7.98 kg<br />
D<br />
A<br />
B<br />
C<br />
G<br />
E<br />
F<br />
Fig. 3<br />
IM-P337-62 MI Issue 1 9
3. Installation<br />
Note: Be<strong>for</strong>e actioning any installation observe the 'Safety in<strong>for</strong>mation' in Section 1.<br />
To meet its specified accuracy and per<strong>for</strong>mance it is essential that the following installation<br />
guidelines are followed carefully. For steam applications sound steam engineering practices<br />
should be followed, including the use of separators. The installation must con<strong>for</strong>m to all<br />
relevant construction and electrical codes.<br />
There are three parts to the installation of the <strong>TVA</strong> flowmeter <strong>with</strong> WirelessHART TM :<br />
3.1 WirelessHART TM commissioning (Device based).<br />
3.2 HART TM gateway installation - Page 14.<br />
3.3 Mechanical installation - Page 18.<br />
It is advised that the device based HART TM configuration is carried out on a workbench<br />
be<strong>for</strong>e the flowmeter is installed into a pipeline (mechanical installation).<br />
3.1 Device based WirelessHART TM commissioning<br />
Quick start commissioning guide<br />
For commissioning, the device can be powered by the TEG10 or a standard dc supply, wired<br />
to the internal green power connector (located inside the enclosure).<br />
The device’s parameters are modified using a HART TM user configuration tool connected<br />
to the maintenance port located inside the enclosure. When communications have been<br />
established the device automatically enters the commissioning mode.<br />
During commission mode:<br />
- MODBUS communication to the flowmeter will stop.<br />
- The device will not update the wireless gateway <strong>with</strong> the current steam flow data.<br />
- If power is being supplied via the internal green power connector, the flowmeter will<br />
remain switched off (i.e. the front panel display will not illuminate).<br />
- If power is being supplied via the TEG10, the flowmeter will power up and will continue to<br />
update the total flow internally. It will not transmit the current total flow wirelessly.<br />
The device will automatically enter the run mode, 60 seconds after the configuration tool has<br />
been disconnected or has been exited. The gateway will be updated <strong>with</strong> the current flow<br />
data and parameters.<br />
Equipment required:<br />
- HART TM configuration tool: Communicator or PC / PDA / Smart phone, DD based host and<br />
a HART TM modem (drivers to be installed).<br />
- <strong>Spirax</strong> DDL software (Device Description Language) ~ obtained from <strong>Spirax</strong> <strong>Sarco</strong> http://<br />
www.spiraxsarco.com/<br />
- Commissioning supply: 5 - 12 Vdc, 20 mAmax (Class II Safety Extra Low Voltage).<br />
- WirelessHART TM Gateway.<br />
10<br />
IM-P337-62 MI Issue 1
Set-up:<br />
- Using a Phillips screw driver, unscrew the four<br />
black screws on the front of the device.<br />
- Separate the main and back enclosures (front<br />
panel and centre body come away together),<br />
sliding them over the four hexagonal standoffs<br />
- See Figure 4.<br />
Note: Do not separate the bonded front and<br />
centre enclosures.<br />
- It is not necessary to disconnect the sensor<br />
cable.<br />
- Apply a 5 - 12 Vdc supply via the commissioning<br />
supply connector (green). A 9 V battery would<br />
be suitable. See Figure 5. Note: The resistor Fig. 4<br />
normally required by other HART TM devices is<br />
not required.<br />
- Connect the HART TM configuration tool to the device’s maintenance port. The connections<br />
are not polarised so terminals can be connected either way round. See Figure 5.<br />
- Wait until the devices power-up sequence has been completed.<br />
Commission wiring diagram<br />
FSK HART<br />
maintenance port terminals<br />
+ -<br />
HART<br />
configuration<br />
tool<br />
Warning:<br />
Must be an approved Class II<br />
safety extra low voltage supply<br />
5-12 V dc<br />
20 mA max.<br />
(regulated)<br />
Use antistatic<br />
precautions<br />
FSK HART<br />
maintenance port terminals<br />
5 - 12 Vdc<br />
internal power<br />
supply<br />
Sensor cable<br />
assembly<br />
Fig. 5<br />
External TEG10 port<br />
IM-P337-62 MI Issue 1 11
- Wait until the devices power-up sequence has been completed (see Section 5.2.1 - status<br />
lights). Note: The screen will remain blank only the status lights illuminate.<br />
- Open, from a PC / PDA / Smart-phone the DD-host by double clicking on the icon (e.g.<br />
'DevCom2000') or switch on the HART TM communicator. See Figure 6.<br />
Fig. 6<br />
- 'Learning device' will appear <strong>for</strong> a couple of seconds. See Figure 6.<br />
Note: If the device is powered via the 5 - 12 Vdc commissioning supply (green connector),<br />
a device status window will pop up at regular interval, stating that more status are<br />
available. This is normal as the flowmeters will not be powered up (i.e. 9 V power supply<br />
is switched off). Select 'ignore all messages' or enter 9999 messages and 'ignore'.<br />
- Select 'Main->Online-> Device Setup-> Basic Setup'. See Figure 7.<br />
- Double click on 'Long tag'.<br />
- Enter a suitable unique long tag name (e.g. Boiler House <strong>Steam</strong> Meter) - 32 characters<br />
maximum. Note factory default 'IDX', where 'X' is the unique serial / hart device id number.<br />
No other device on the network must have the same long tag.<br />
- Press set (the long tag name line will turn grey and yellow).<br />
- Press the send button on the icon bar at the top of the page (the line will clear).<br />
Fig. 7<br />
12<br />
IM-P337-62 MI Issue 1
Setting network-id and join-key:<br />
- The network-id and join-key in the Gateway / Network must be the same as the details<br />
written to the device. See gateway set-up <strong>for</strong> details. If a new network is being established,<br />
then the examples below can be used. Note: If more than one network is in operation,<br />
then the network-id must differ and the join-key should differ.<br />
- Select 'Main-Online-DeviceSetup-DetailedSetup-OutputCondition-WirelessHartOutput'<br />
- Double click on 'Join Network' at the top of the screen. See Figure 8.<br />
- Enter Network id (decimal) e.g. "12345", press OK.<br />
- Enter Join Key 1 (hexadecimal) e.g. "53504952", press OK.<br />
- Enter Join Key 2 (hexadecimal) e.g. "41585341", press OK.<br />
- Enter Join Key 3 (hexadecimal) e.g. "52434F52", press OK.<br />
- Enter Join Key 4 (hexadecimal) e.g. "554C455A", press OK.<br />
- Press OK until the device joins the network.<br />
Basic commissioning is complete - For a more detailed set-up, see Section 9.<br />
Fig. 8<br />
System verification:<br />
- Close down the DD host and PC.<br />
- Disconnect the HART TM configuration tool from the maintenance port.<br />
- Ensure the WirelessHART TM gateway has 'advertising' activated.<br />
- From the gateway screen, verify the device joins to the network. (i.e. a device <strong>with</strong> your<br />
chosen long tag appears). This may take a number of minutes.<br />
- Remove the 5 - 12 Vdc commissioning supply.<br />
- Re-join the two enclosures and secure <strong>with</strong> the four black screws.<br />
WARNING: Ensure the sensor wires are not trapped / pinched by the enclosures.<br />
Follow the mechanical installation.<br />
IM-P337-62 MI Issue 1 13
3.2 HART TM Gateway installation<br />
Network guidelines<br />
WirelessHART TM field devices can be sited as they would have been placed <strong>with</strong> a wired<br />
installation in most cases. The network is self-organising and will take care of <strong>for</strong>ming the<br />
mesh network and establishing communications. It will adapt to the process plant environment<br />
<strong>with</strong>out additional interaction by an operator or engineer. However, some conditions must be<br />
considered and could require relocation of the WirelessHART TM field device (or at least the<br />
antenna).<br />
3.2.1 Placing Gateways<br />
In most cases the WirelessHART TM gateway (GW) should be sited first as this is the core<br />
element of a WirelessHART TM network.<br />
Where to place the gateway:<br />
1. The gateway can be placed close to the existing hard wired network interface, perhaps<br />
by a control or plant room. This will enable the shortest possible cable run to the wired<br />
network interface.<br />
2. Fitting the gateway central to the proposed Wireless device (<strong>TVA</strong>) network. This will allow<br />
as many of the wireless devices to have a direct link to the gateway, making the network<br />
more robust and reliable.<br />
For the best results, ensure that in either case each wireless device (<strong>TVA</strong>) has at least two<br />
neighbours <strong>with</strong>in range.<br />
Ensure:<br />
- Devices are located <strong>with</strong>in the specified range. See Technical wireless data.<br />
- The device has at least two or more neighbours, located <strong>with</strong>in the specified range.<br />
Other considerations:<br />
- Mount the devices at least 0.5 m (19.5") from any vertical surface (wall) to avoid near<br />
field reflections which can disturb the radio communication. The radio waves need some<br />
space in order to become established.<br />
- Mount the devices at least 1.5 m (58.5") off the ground. Radio waves need some vertical<br />
space to provide good connection between communication partners.<br />
- Ensure that the devices are at least 0.5 m (19.5") apart from each other to avoid cross-talk.<br />
If neighbouring units are to close the radio waves could disturb each other.<br />
- The best practice is to use at least five devices in a WirelessHART TM network. Less will<br />
work, but <strong>with</strong> more devices the network becomes stronger and more reliable because<br />
more alternative paths are available. The network can be extended any time, either due<br />
to the need <strong>for</strong> more measurement signals or also <strong>with</strong> repeaters <strong>with</strong>out measurement<br />
functionality to strengthen the network.<br />
- Aim <strong>for</strong> a signal strength of better than -70 dBm.<br />
- Do not place neighbours greater than 45° elevation.<br />
- Place repeater above the areas of dense infrastructure.<br />
- Outside: Only one neighbour maybe acceptable.<br />
Inside: Two is the minimum and three if there is a robust network.<br />
These rules can be relaxed, depending on the environment, but may result in the network<br />
becoming less reliable and can cause installation difficulties.<br />
14<br />
IM-P337-62 MI Issue 1
If the above guidelines are followed then a wireless site survey is not necessary. These can<br />
be helpful but should be conducted over a period of time as wireless networks are constantly<br />
changing.<br />
Note - Ensure:<br />
- Device(s) and gateway(s) have the same join-key and network-id.<br />
- Gateway(s) has advertising activated when initially setting up the network.<br />
- In multiple networks, the device join-key and network-id is the same as the intended<br />
gateways join-key and network-id.<br />
Gateway<br />
LAN (Ethernet)<br />
Fig. 9 Network<br />
IM-P337-62 MI Issue 1 15
Antenna<br />
To avoid unnecessary attenuation of the wireless signal, resulting in impaired operation, all<br />
antennas must be:<br />
- At least 6 cm (2.5") away from any structure.<br />
- Always be aligned to the vertical.<br />
- In sight of intended neighbours.<br />
Fig. 10<br />
To change the orientation of the antenna, loosen the knurled collar enough to allow<br />
movement, reposition and retighten finger tight. It may be necessary to rotate the electronics<br />
enclosure (see separate section <strong>for</strong> instructions).<br />
16<br />
IM-P337-62 MI Issue 1
Fig. 11<br />
WARNING:<br />
Do not completely disconnect the antenna.<br />
IM-P337-62 MI Issue 1 17
3.3 Mechanical installation<br />
CAUTION: If the electronic housing is mounted at an angle of 45° (or more) from the<br />
vertically downward position the PMO (maximum operating pressure) must be limited<br />
to 7 bar g (101 psi g) - see Figure 12.<br />
A bypass line will enable safe removal of the <strong>TVA</strong><br />
flowmeter <strong>for</strong> maintenance or calibration. Closing<br />
valves V1 and V2 and opening valve V3 will allow the<br />
<strong>TVA</strong> flowmeter to be isolated.<br />
Fig. 12<br />
Installation<br />
limiting conditions<br />
<strong>Steam</strong><br />
Separator<br />
Strainer<br />
V1<br />
V3<br />
Spool<br />
piece<br />
V2<br />
Fig. 13 Typical installation<br />
Trap set<br />
<strong>TVA</strong><br />
flowmeter<br />
3.3.1 Environmental conditions<br />
The flowmeter should be located in an environment that minimises the effects of heat, vibration,<br />
shock and electrical interference. (Pressure / temperature limits are detailed in Section 2.4).<br />
CAUTION: Do not lag (insulate) the <strong>TVA</strong> flowmeter or mating flanges as this may<br />
result in excessive temperatures in the electronics. Exceeding specified temperature<br />
limits will invalidate the warranty, adversely effect the per<strong>for</strong>mance and may damage<br />
the <strong>TVA</strong> flowmeter, see Figure 14.<br />
Fig. 14 Pipeline insulation<br />
Do not<br />
insulate the flanges of the <strong>TVA</strong> flowmeter<br />
Flow<br />
Other considerations<br />
Be sure to allow sufficient clearance <strong>for</strong>:<br />
- Removal of the enclosure end caps.<br />
- Viewing of the display. Note electronics housing<br />
and display can be rotated.<br />
- Antenna rotation.<br />
- Wireless communication (min. 1 m distance from source of interference).<br />
Warning: Do not install the flowmeter outdoors where it is subjected to driving rain or<br />
can freeze.<br />
18<br />
IM-P337-62 MI Issue 1
3.3.2 Mechanical installation<br />
Warning: Do not alter the adjustment nut at the back of the <strong>TVA</strong> flowmeter shaft, as<br />
this will affect the flowmeters calibration.<br />
Orientation<br />
The <strong>TVA</strong> flowmeter can be installed in any orientation when the pressure is below 7 bar g<br />
(101 psi g), see Figures 15, 16 and 17.<br />
When the pressure is above 7 bar g the <strong>TVA</strong> flowmeter must be installed in a horizontal pipe, <strong>with</strong><br />
the electronics housing below the body, see Figure 17.<br />
Note: The <strong>TVA</strong> flowmeter operates <strong>with</strong> flow in one direction only. It is not intended <strong>for</strong> use<br />
<strong>with</strong> bi-directional flow. The <strong>TVA</strong> flowmeter is clearly marked <strong>with</strong> a direction of flow arrow.<br />
Flow<br />
Fig. 15 Vertical flow limited to 7 bar g<br />
Flow<br />
CAUTION: If the electronic housing is<br />
mounted at an angle of 45° (or more) from<br />
the vertically downward position the PMO<br />
(maximum operating pressure) must be<br />
limited to 7 bar g (101 psi g) - see Figure 12.<br />
Flow<br />
Flow<br />
Fig. 16 Horizontal flow limited to 7 bar g<br />
Fig. 17 Horizontal flow up to 32 bar g<br />
IM-P337-62 MI Issue 1 19
Rotating the electronics enclosure<br />
The electronics housing can be rotated 270°<br />
to enable sufficient clearance <strong>for</strong> installation.<br />
To rotate the electronics housing, loosen the<br />
6 mm grub screw located on the rear of the<br />
electronics housing (see Figure 18). The<br />
electronics housing can now be rotated<br />
to the required position.<br />
When the electronics housing has been<br />
located into the correct position retighten the<br />
grub screw to a torque of 1.3 N m (11.5 lbf in).<br />
Warning: Do not loosen / remove the stem<br />
from the main body of the unit.<br />
Warning: Do not<br />
loosen / remove the<br />
stem from the main<br />
body of the unit.<br />
6 mm grub screw<br />
Fig. 18<br />
Upstream / downstream pipework<br />
The <strong>TVA</strong> flowmeter should be installed in pipework manufactured to BS 1600, ASME B 36.10<br />
Schedule 40 or EN 10216-2 / EN 10216-5 equivalent, which corresponds to the following<br />
pipeline internal diameters:<br />
Nominal diameter<br />
Nominal internal diameter<br />
50 mm 52 mm<br />
80 mm 77 mm<br />
100 mm 102 mm<br />
For different pipe standards / schedules, if the flowmeter is being operated at the extreme<br />
of its published maximum range, and maximum accuracy is required, downstream spool<br />
pieces manufactured from pipe to the above standard should be used.<br />
It is important that the internal upstream and downstream diameters of pipe are smooth.<br />
Ideally seamless pipes should be used and there should be no intrusive weld beads on the<br />
internal diameter. It is recommended that slip-on flanges be used to avoid any intrusive weld<br />
beads on the internal diameter of the pipe.<br />
Note: See Figures 19 to 22 <strong>for</strong> other considerations which need to be noted be<strong>for</strong>e<br />
determining the correct installation location.<br />
20<br />
IM-P337-62 MI Issue 1
The <strong>TVA</strong> flowmeter normally only requires a minimum of 6 pipe diameters upstream and<br />
3 downstream of clear straight pipe. These dimensions assume a measurement from a single<br />
90° bend (see Figure 19).<br />
6D Minimum<br />
3D Minimum<br />
Fig. 19<br />
Flow<br />
If any of the following configurations are present upstream of the <strong>TVA</strong> flowmeter:<br />
- Two right angled bends in two planes.<br />
- Pressure reducing valve.<br />
- Partly open valve.<br />
Then it is recommended that the minimum upstream clear pipework is doubled to 12 diameters<br />
(See Figure 20).<br />
12D Minimum<br />
3D Minimum<br />
Fig. 20<br />
Flow<br />
IM-P337-62 MI Issue 1 21
Avoid installing the <strong>TVA</strong> flowmeter downstream of an actuated valve as rapid cycling<br />
of the valve could give rise to inaccurate results or damage the flowmeter. See Figure 21.<br />
In configurations where there is more than one rapid acting pressure reducing valve<br />
close coupled, the <strong>TVA</strong> flowmeter should be installed <strong>with</strong> a minimum of 25 upstream and<br />
3 downstream pipe diameters away from the valves.<br />
Safety valves should also be as far away as possible from the flowmeter - at least 25D.<br />
25D Minimum<br />
3D Minimum<br />
Flow<br />
Fig. 21<br />
To install the <strong>TVA</strong> flowmeter pipeline unit into<br />
existing pipework and <strong>for</strong> aiding possible<br />
flowmeter removal, a spool piece can be<br />
fabricated locally - See dimension (A) in<br />
Figure 22.<br />
Size DN50 DN80 DN100<br />
180 mm 240 mm 300 mm<br />
Dimension A<br />
7.1" 9.5" 11.8"<br />
A<br />
Flow<br />
Spool piece<br />
Fig. 22<br />
22<br />
IM-P337-62 MI Issue 1
Location in pipework<br />
Bolt ring gaskets having the same internal diameter of the pipework are recommended. This<br />
will prevent possible inaccuracies being created by the gasket protruding into the pipe.<br />
It is important that the <strong>TVA</strong> flowmeter is located centrally in the pipework as any eccentricity<br />
may cause inaccurate readings. The <strong>TVA</strong> flowmeter has integral centering webs, which locate<br />
on the internal diameter of the pipework (see Figure 23).<br />
Integral centering webs<br />
Integral centering webs<br />
Fig. 23 Integral centering webs<br />
Fig. 24 Gaskets fitted correctly<br />
Fig. 25 Gaskets fitted incorrectly<br />
Fig. 26 Gaskets and pipe offline,<br />
fitting incorrectly<br />
IM-P337-62 MI Issue 1 23
3.4 Electrical installation<br />
The <strong>TVA</strong> flowmeter is designed to be powered by the <strong>Spirax</strong> <strong>Sarco</strong> TEG10 thermoelectric<br />
generator only. The power connection on the <strong>TVA</strong> head will accept the 2 pin connector<br />
from the TEG10 - For further Technical data regarding the TEG10 see either the Technical<br />
In<strong>for</strong>mation sheet TI-P196-01 or Installation and Maintenance Instructions IM-P196-02.<br />
Do not connect any other power supply to this port.<br />
4. Commissioning<br />
After all mechanical and electrical work<br />
has been completed, the following<br />
commissioning instructions should be<br />
followed.<br />
Note: The <strong>TVA</strong> flowmeter is factory set to<br />
display data in metric units. To commission<br />
the <strong>TVA</strong> to display imperial units see<br />
Section 4.4.2, page 30.<br />
LCD<br />
display<br />
5 button<br />
keypad<br />
Commissioning of the flowmeter is carried<br />
out through the display unit. The display<br />
unit consists of a small LCD display and a<br />
5 button key pad.<br />
Mounting<br />
screws<br />
Rotating the display<br />
The display can be rotated through 180° to enable ease of commissioning. To rotate the<br />
display disconnect the power supply, remove the mounting screws on the front, carefully remove<br />
the front and middle sections and rotate. Do not attempt to separate the display and the<br />
centre section. Carefully replace the display unit and replace mounting screws. Do not <strong>for</strong>ce<br />
the display unit into position. Reconnect the power supply. Note: Electrostatic discharge<br />
(ESD) procedures should be followed while rotating the display.<br />
4.1 Run mode<br />
Normally, the <strong>TVA</strong> flowmeter will operate in the run mode, displaying the total flow, flow, power,<br />
pressure or temperature of the fluid passing through the pipeline.<br />
After initial power up, the <strong>TVA</strong> flowmeter will automatically enter the run mode and all<br />
commissioning menus can be accessed from this mode. (See Section 4.2, Commissioning<br />
mode, <strong>for</strong> details on how to commission).<br />
In the run mode the fluid data is displayed on several screens which can be accessed by pressing<br />
the up or down keys. The display shows a numeric<br />
value and an arrow indicating the reading type, i.e.<br />
total flow, flow, power, pressure or temperature.<br />
All units (except °C) are implied <strong>with</strong> imperial or<br />
metric units being indicated by another arrow. The<br />
value of total flow is shown in two parts. The first<br />
five digits of the total flow will be displayed and<br />
after 10 seconds the following five digits will be<br />
displayed. To access the first five digits of total<br />
flow again it will be necessary to scroll up or down<br />
and return to the total flow display.<br />
Fig. 27 <strong>TVA</strong> flowmeter display unit<br />
Arrow<br />
total<br />
temp<br />
flow<br />
imp<br />
power pres<br />
Fig. 28<br />
24<br />
IM-P337-62 MI Issue 1
4.1.1 Run mode data sequence<br />
TOTAL<br />
HIGH<br />
FLOW<br />
POWER<br />
Power kW or MBtu/h.<br />
Pressure<br />
Pressure bar g or psi g, depending if<br />
metric or imperial units are selected.<br />
Temp. °C<br />
Temperature °C or °F.<br />
The following chart indicates the run mode data display sequence.<br />
Depending on the configuration, the flow units will be:<br />
Units <strong>Steam</strong><br />
Metric Kg/h, KW, bar g, °C<br />
Imperial lb/h, MBtu/h, psi g, °F<br />
The <strong>TVA</strong> flowmeter is factory set to display steam data in metric units and pressing the up or<br />
down keys will scroll through the following data.<br />
total<br />
flow power pres<br />
Total flow<br />
imp<br />
temp<br />
total<br />
flow power pres<br />
Temperature<br />
total<br />
flow power pres<br />
imp<br />
temp<br />
Flow<br />
imp<br />
temp<br />
total<br />
flow power pres<br />
Pressure<br />
total<br />
flow power pres<br />
imp<br />
temp<br />
Power<br />
Fig. 29<br />
imp<br />
temp<br />
IM-P337-62 MI Issue 1 25
4.1.2 Error display messages<br />
Any errors that occur will be displayed in the run mode. The errors will alternate <strong>with</strong> the normal<br />
run mode display and will be prioritised. The errors will be latched and can only be cancelled by<br />
pressing the 'OK' button. Once the error message has been cancelled the display will show the<br />
next (if any) error.<br />
Any continuous error will reinstate itself 2 seconds after it has been cancelled, and will be indicated<br />
by a flashing exclamation mark (!).<br />
The error messages are displayed over two screens and are:<br />
POWER<br />
OUt<br />
= Power interrupted.<br />
NO<br />
SIGNL<br />
= No signal from sensor.<br />
SENSR<br />
CONSt<br />
= Signal from sensor constant.<br />
HIGH<br />
FLOW<br />
= Flow above the maximum.<br />
26<br />
IM-P337-62 MI Issue 1
4.2 Commissioning mode - <strong>Flowmeter</strong><br />
The commissioning mode is used to re-range, and change the pass code.<br />
All data entry is per<strong>for</strong>med via a menu and sub menu configuration <strong>with</strong> the key pad buttons<br />
used <strong>for</strong> navigation, i.e. to go deeper into the menu the right hand key is pressed, to scroll up and<br />
down the menu the up and down keys are pressed and to exit from a sub-menu the left key is pressed.<br />
Any data is entered using the OK button. The previously entered selection will<br />
flash. After a period of five minutes <strong>with</strong>out any keys being pressed the <strong>TVA</strong> flowmeter will<br />
automatically default to the run mode.<br />
For a full commissioning flow chart see Section 4.3.<br />
To enter the commissioning mode press and hold down the 'OK' key <strong>for</strong> 3 seconds. The display<br />
then shows:<br />
ENtER<br />
PASS<br />
Followed by:<br />
BASIC<br />
dAtA<br />
7452<br />
The leading digit will flash indicating that this is the position of the cursor.<br />
The default factory set pass code is 7452. (This can be changed from <strong>with</strong>in the commissioning<br />
mode). The pass code can be entered by using the up and down keys to increment the flashing<br />
value and the left and right keys to move the cursor. Pressing 'OK' will enter the pass code.<br />
If an incorrect pass code is used the display will automatically return to the run mode.<br />
After the correct pass code is entered the display shows:<br />
To exit from the commissioning mode at any stage, continually pressing the left key will return to<br />
the run mode.<br />
Pressing the up and down buttons scrolls through the various first level menus.<br />
Pressing the right arrow button enters a particular sub-menu.<br />
ENtER<br />
PASS<br />
xxxx<br />
BASIC<br />
dAtA<br />
MEtER<br />
OUt<br />
PUts<br />
tESt<br />
ALARM<br />
SW.VER<br />
SEt<br />
PASS<br />
IM-P337-62 MI Issue 1 27
4.3 Wireless <strong>TVA</strong> flowmeter commissioning flow chart<br />
Software<br />
version number<br />
Normal run mode<br />
display sequence<br />
Default = 8888<br />
but user settable.<br />
Configuration<br />
sub-menus<br />
(test<br />
display)<br />
VER x.x<br />
Total<br />
high<br />
ENTER<br />
PASS<br />
xxxx<br />
BASIC<br />
dAtA<br />
Power on sequence; turn<br />
on all segments, then<br />
show the software version<br />
no.<br />
Total<br />
low<br />
kg or lbs<br />
(kWh or Mbtu)<br />
Flow<br />
Power<br />
Pressure<br />
Temp. °C<br />
kg/h or lb/h<br />
kW or MBtu/h<br />
bar g or psi g, depending if metric or<br />
imperial units are selected.<br />
°C or °F<br />
MEtER<br />
OUt<br />
PUtS<br />
Shaded areas of the menu are<br />
not applicable <strong>for</strong> the wireless<br />
<strong>TVA</strong> communications.<br />
Error Messages<br />
These alternate <strong>with</strong> the normal run mode display.<br />
They will be prioritised and will be latched when<br />
they occur.<br />
Pressing the 'OK' button will cancel the displayed<br />
alarm and allow the next one to be viewed.<br />
A continuous alarm will re-occur on the display<br />
2 seconds after it has been cancelled.<br />
xxxx<br />
xxxx<br />
SEt<br />
PASS<br />
SW.VER<br />
Power<br />
interrupted<br />
POWER<br />
OUt<br />
HIGH<br />
O/P<br />
ALARM<br />
ALARM<br />
LOW<br />
No<br />
signal from<br />
sensor<br />
NO<br />
SIGNL<br />
The 4-20 mA<br />
alarm can also<br />
be activated<br />
OFF<br />
tESt<br />
Signal<br />
from sensor<br />
constant<br />
SENSR<br />
CONST<br />
The 4-20 mA<br />
alarm can also<br />
be activated<br />
ON<br />
OFF<br />
Power<br />
alarm<br />
Flow<br />
above<br />
maximum<br />
HIGH<br />
FLOW<br />
Shows when<br />
flow exceeds<br />
maximum<br />
ON<br />
OFF<br />
CONST<br />
ALARM<br />
28<br />
IM-P337-62 MI Issue 1
dRy<br />
xxx%<br />
UNItS<br />
MEt<br />
tOtAL<br />
Mass<br />
IMP<br />
AtMOS<br />
PRES<br />
xxx.xx<br />
Energy<br />
dIR<br />
HORIZ<br />
S/N<br />
xxxxx<br />
DOWN<br />
CLEAR tOtAL<br />
ZErO MEtER<br />
UP<br />
4-20 mA<br />
SORCE<br />
FLOW<br />
POWER<br />
PULSE<br />
yES<br />
NO<br />
SORCE<br />
tOtAL<br />
ENRgy<br />
SEt.4 mA<br />
xxxxx<br />
in kg/h or lb/h,<br />
kW or Btu/h.<br />
Comms<br />
Baud<br />
NUM/<br />
PULSE<br />
PULSE<br />
WIDTH<br />
xxxxx<br />
in kg or lbs,<br />
kWh or MBtu.<br />
xxxmS<br />
Must not<br />
exceed 4 pulses<br />
per second.<br />
1200<br />
SEt.20 mA<br />
CHECK<br />
4 mA<br />
CHECK<br />
20 mA<br />
xxxxx<br />
OP = 4 mA<br />
Connect a DVM<br />
and use the up<br />
and down keys to<br />
set 4 or 20 mA.<br />
OP = 20 mA<br />
Type<br />
ASCII<br />
9600<br />
Modbus<br />
Add<br />
XXX<br />
Press OK to select<br />
dISP<br />
Display TEST<br />
4-20 mA<br />
OUt<br />
xxx.xxmA<br />
Shaded areas of the menu are<br />
not applicable <strong>for</strong> the wireless<br />
<strong>TVA</strong> communications.<br />
PULSE OUt<br />
ON<br />
CANCL<br />
OFF<br />
IM-P337-62 MI Issue 1 29
4.4 BASIC DAtA Sub menu<br />
BASIC<br />
dAtA<br />
dRy<br />
xxx%<br />
UNItS<br />
MEt<br />
tOtAL<br />
Mass<br />
IMP<br />
AtMOS<br />
PRES<br />
xxx.xx<br />
Energy<br />
4.4.1 dRy<br />
Pressing the right key will display the dryness fraction. This is the dryness fraction of the<br />
saturated steam being measured. This can then be edited to suit the application. Press the 'OK'<br />
button to confirm the selection.<br />
After the dryness fraction is entered the display will automatically step to the next sub menu<br />
and show 'UNItS'<br />
4.4.2 UNItS<br />
The units displayed and transmitted can be selected between metric (MEt), and imperial (IMP).<br />
A summary of the units is detailed in the Table below.<br />
Units <strong>Steam</strong><br />
Metric Kg/h, KW, bar g, °C<br />
Imperial lb /h, MBtu/h, psi g, °F<br />
Select either 'MEt' or 'IMP' and press the 'OK' button to confirm.<br />
Note: Only metric units in kg can be wirelessly transmitted.<br />
4.4.3 tOtAL<br />
This function allows selection of the units to be shown as Mass flow or Energy rate.<br />
4.4.4 AtMOS PRES<br />
This value compensates the flowrates <strong>for</strong> atmospheric pressure. It should be used if a high degree<br />
of accuracy is required or when the <strong>TVA</strong> flowmeter is installed high above sea level.<br />
Note: Values up to two decimal places can be entered.<br />
If metric units are selected pressure units are bar absolute, <strong>for</strong> imperial units psi absolute.<br />
30<br />
IM-P337-62 MI Issue 1
4.5 MEtER Sub-menu<br />
MEtER<br />
dIR<br />
HORIZ<br />
This sub-menu contains in<strong>for</strong>mation about the<br />
flowmeter and is used to zero the flowmeter<br />
and clear the total.<br />
S/N<br />
ZErO MEtER<br />
xxxxx<br />
DOWN<br />
UP<br />
CLEAR tOtAL<br />
4.5.1 dIR<br />
dIR is the orientation that the <strong>TVA</strong> flowmeter is installed in. The <strong>TVA</strong> flowmeter can be<br />
installed <strong>with</strong> horizontal flow up to a pressure of 32 bar g (464 psi g). For installations that require<br />
vertical flow either up or down the maximum pressure must not exceed 7 bar g<br />
(101 psi g). By selecting down or up the effect of gravity on the cone is taken into account.<br />
Note: Upon entering the dIR sub-menu, HORIZ is always shown first. The actual direction<br />
selected is the one which is flashing.<br />
4.5.2 S/N<br />
This is the factory set serial number of the <strong>TVA</strong> flowmeter and is displayed by pressing<br />
the right key.<br />
4.5.3 ZErO MEtER - Not used <strong>with</strong> wireless <strong>TVA</strong><br />
This function is used to zero the <strong>TVA</strong> flowmeter manually to compensate <strong>for</strong> any<br />
electronic drift.<br />
The procedure <strong>for</strong> zeroing the flowmeter is as follows:<br />
- Isolate the pipeline where the flowmeter is installed and ensure that there is no flow.<br />
The line temperatures should be above 5°C (41°F) and below 30°C (86°F).<br />
- Press and hold the 'OK' button <strong>for</strong> three seconds.<br />
On completion the display will step back to S/N.<br />
If 'ZErO ErrOr' is displayed, check to ensure that the line is isolated <strong>with</strong> no flow. If 'tEMP ErrOr'<br />
is displayed the line temperature is below 5°C (41°F). Allow the temperature to move above 5°C<br />
(41°F) and re-zero. Note: The flowmeter should ideally be zeroed once every 12 months.<br />
4.5.4 CLEAR tOtAL<br />
This function is used to clear the total by pressing and holding the OK key <strong>for</strong> 3 seconds.<br />
Note: The total is backed-up every 8 minutes in the <strong>TVA</strong> flowmeter's non-volatile memory.<br />
If power is lost the <strong>TVA</strong> flowmeter could lose up to 8 minutes worth of totalised steam.<br />
IM-P337-62 MI Issue 1 31
4.6 ALARM O/P and Power - Not used <strong>with</strong> wireless <strong>TVA</strong><br />
This sub-menu gives access to setting the action that is required on the 4-20 mA output<br />
when an error is detected by the <strong>TVA</strong> flowmeter electronics. It also gives access to the<br />
power alarm function.<br />
HIGH<br />
O/P<br />
ALARM<br />
LOW<br />
OFF<br />
POWER<br />
ALARM<br />
ON<br />
OFF<br />
4.6.1 CONSt ALARM<br />
This allows the constant flow alarm to be turned off.<br />
The constant alarm is switched to on by the default factory setting. It detects if the flow has<br />
been constant <strong>for</strong> long periods when at pressure, which may indicate a stuck cone due to<br />
debris.<br />
If the system that the <strong>TVA</strong> is fitted to, has long periods where there is zero flow, but the line<br />
is kept at a constant pressure, it is advisable to turn the alarm off to avoid unwanted alarm<br />
messages.<br />
ON<br />
CONST<br />
ALARM<br />
OFF<br />
4.7 SW.VER<br />
This allows the software version to be viewed.<br />
SW.VER<br />
xxxx<br />
4.8 SEt PASS<br />
This allows the default pass code to be changed to a user defined value.<br />
It is important that if the default pass code is changed that the new value is noted and kept safe.<br />
The new pass code can be recorded on the Table in Section 9, page 41.<br />
SEt<br />
PASS<br />
xxxx<br />
32<br />
IM-P337-62 MI Issue 1
5. Operation<br />
The <strong>TVA</strong> flowmeter operates by measuring the strain produced on a moving cone by an<br />
instantaneous flowrate. This strain is then converted into a density compensated mass flowrate<br />
and is transmitted via WirelessHART TM protocol. The unique design of the <strong>TVA</strong> flowmeter<br />
produces the high turndowns and high accuracy required in process applications.<br />
5.1 Operation modes<br />
The device has three operating modes; Power-up, Commissioning and Run mode.<br />
Power-up: The device goes through a self-test procedure, which takes approximately<br />
5 seconds. When the self-test is satisfactorily completed, the device enters into an initialization<br />
procedure, which takes approximately 26 seconds. During this period (a total of 31 seconds),<br />
it is not possible to connect to the network or communicate via the maintenance port.<br />
Power is then applied to the flowmeter and the device enters run mode. Note: If the initial<br />
self-test actually reveals a problem, the device enters a system failed state. See Light Status<br />
section. Note: the display will not illuminate until after the 31 second initialisation procedure.<br />
Commissioning: The device automatically enters commissioning mode when a HART TM<br />
configuration tool is communicating via the device’s maintenance port (see wiring diagram).<br />
Once commissioning procedure has been completed, the device will automatically revert back<br />
to run mode 60 seconds later. See the 'Quick start commissioning guide', Section 3.1, page 10.<br />
Run mode: The device transmits steam flow data and device parameters via a WirelessHART TM<br />
network to a wired host / HMI interface.<br />
5.2 Other features<br />
Reset: The device can be reset by sending the 'device reset' command (HART command 42). It<br />
can take up to 50 seconds to execute as the other devices in the network need to be in<strong>for</strong>med<br />
first. The resulting restart is identical to the normal power up sequence.<br />
Self-test: The device’s internal power supplies and non-volatile memory can be tested by<br />
sending the self-test command (HART command 41). A memory failure will cause the device<br />
to enter the system failure state. There is no recovery from system failure state, other than the<br />
failure is indicated by the lights. See the 'Light status' Sections - Page 34 to 36.<br />
IM-P337-62 MI Issue 1 33
5.2.1 Status lights<br />
The device has two dual-coloured and one single-coloured light. They are used to indicate the<br />
system (SYS), wireless network (RF) and MODBUS / FSK (COMM) operation. Note: In normal<br />
operation, no more than one light is on at the same time (i.e. there is a short delay between<br />
each light).<br />
1. Initial systems self-test (SYS) 2. System initialising (SYS)<br />
COMM<br />
RF<br />
SYS<br />
COMM<br />
RF<br />
SYS<br />
Solid green light on <strong>for</strong> 4 to 5s<br />
All other lights are off.<br />
Slow (3s off) flashing green light.<br />
The device takes 26 seconds to initialize.<br />
All other lights are off<br />
COMM<br />
RF<br />
SYS<br />
COMM<br />
RF<br />
SYS<br />
COMM<br />
RF<br />
SYS<br />
COMM<br />
RF<br />
SYS<br />
COMM<br />
RF<br />
SYS<br />
COMM<br />
RF<br />
SYS<br />
3. Normal system operation (SYS) 4. System failure (SYS)<br />
Fast flashing green light (1s off time).<br />
The other lights maybe illuminated. See<br />
below <strong>for</strong> further details<br />
Fast flashing green, amber and red light<br />
means a system failure (1s off time).<br />
5. SYS light permanently switch off<br />
There is a fault <strong>with</strong> the device or no power has been applied.<br />
34<br />
IM-P337-62 MI Issue 1
5.2.2 Wireless Communication (RF – Radio Frequency)<br />
The 'RF' light has two colours, green and amber. It shows the state of the wireless<br />
communication.<br />
1. Attempting to join the network: 2. Now connected to network:<br />
COMM<br />
RF<br />
SYS<br />
COMM<br />
RF<br />
SYS<br />
COMM<br />
RF<br />
SYS<br />
COMM<br />
RF<br />
SYS<br />
COMM<br />
RF<br />
SYS<br />
Fast flashing green light (1s off time)<br />
Slow flashing green light (3s off time)<br />
3. The requested burst rate has been declined by the network manager (RF):<br />
COMM<br />
RF<br />
SYS<br />
COMM<br />
RF<br />
SYS<br />
COMM<br />
RF<br />
SYS<br />
Slow flashing amber light (3s off time)<br />
4. RF light permanently switched off<br />
RF idle<br />
IM-P337-62 MI Issue 1 35
5.2.3 MODBUS / FSK HART Communication (COMM)<br />
The COMM light has two colours, green and red. It primarily shows the status of the internal<br />
MODBUS communication to the flowmeter. When a HART TM configuration tool is connected<br />
to the maintenance port and communication has been established, the light will flash red<br />
quickly, indicating commissioning mode has been entered.<br />
1. Initializing MODBUS<br />
communications:<br />
2. MODBUS normal communication <strong>with</strong><br />
flowmeter:<br />
COMM<br />
RF RF<br />
SYS<br />
COMM<br />
RF RF<br />
SYS<br />
COMM<br />
RF RF<br />
SYS<br />
COMM<br />
RF RF<br />
SYS<br />
COMM<br />
RF RF<br />
SYS<br />
COMM<br />
RF RF<br />
SYS<br />
COMM<br />
RF RF<br />
SYS<br />
COMM<br />
RF RF<br />
SYS<br />
Fast flashing green light (1s off time)<br />
Slow flashing green light (3s off time)<br />
3. MODBUS communication error(s): 4. Normal FSK HART TM communication:<br />
Slow flashing red light (3s off time)<br />
Fast flashing red light (1s off time)<br />
5. COMM light permanently off: MODBUS master is disabled.<br />
36<br />
IM-P337-62 MI Issue 1
6. Maintenance<br />
Frequency of re-calibration depends upon the service conditions experienced by the flowmeter<br />
and the application. Re-calibration frequency can be typically between 2 and 5 years.<br />
7. Spare parts<br />
There are no spare parts available <strong>for</strong> the wireless <strong>TVA</strong> flowmeter.<br />
8. Fault finding<br />
Many faults which occur on commissioning are found to be due to incorrect installation or<br />
commissioning, there<strong>for</strong>e it is recommended that a thorough check is carried out should there<br />
be a problem.<br />
The <strong>TVA</strong> flowmeter display has in-built diagnostic features and will indicate a number of errors<br />
on the display.<br />
The errors will alternate <strong>with</strong> the normal run mode display and will be shown according to priority.<br />
The errors will be latched and can only be cancelled by pressing the 'OK' button. Once the error<br />
message has been cancelled the display will show the next (if any) error.<br />
Any continuous error will re-instate itself 2 seconds after it has been cancelled, and will be<br />
indicated by a flashing exclamation mark (!).<br />
8.1 Function fault finding<br />
Symptom Action<br />
1. Ensure either the TEG10 or if in commissioning mode the 5 - 12 Vdc<br />
commission supply is connected correctly.<br />
2. Disconnect the supply and measure / verify the device is being<br />
1 supplied <strong>with</strong> the correct voltage. See technical in<strong>for</strong>mation below<br />
All lights are off and TEG10 IMI technical in<strong>for</strong>mation (IM-P196-02).<br />
3. Investigated local sources of electrical noise.<br />
Symptom Action<br />
1. Refer to: <strong>Spirax</strong>-<strong>Sarco</strong> Limited.<br />
2<br />
Display shows:<br />
NO SIGNL<br />
Symptom Action<br />
3<br />
Display shows:<br />
POWER Out<br />
Symptom Action<br />
4<br />
Display shows:<br />
SENSR CONST<br />
1. Power supply may have been interrupted. Ensure power supply is<br />
secure and cancel error using the 'OK' key.<br />
2. Totals transmitted may not be valid.<br />
1. Cone is possibly jammed. Remove unit from pipeline and<br />
check cone movement.<br />
2. Electronics faulty. Refer to: <strong>Spirax</strong>-<strong>Sarco</strong> Limited.<br />
IM-P337-62 MI Issue 1 37
Symptom Action<br />
5<br />
Display shows:<br />
HIGH FLOW<br />
Symptom Action<br />
6<br />
Flow indicated<br />
responds to<br />
changes in<br />
actual flow but<br />
value indicated<br />
does not<br />
correspond to<br />
actual flowrate<br />
1. The flowmeter is possibly undersized. Check sizing and replace if<br />
necessary.<br />
1. <strong>Flowmeter</strong> not properly centred in the pipeline. The axis of the flowmeter<br />
bore should be aligned <strong>with</strong> that of the pipe.<br />
2. Pipe Gaskets at the flowmeter protrude into the pipe bore. See<br />
Section 3, Figures 24, 25 and 26 <strong>for</strong> proper installation of gaskets.<br />
3. Irregularities on the surface of the pipe bore. Pipe bore should be free<br />
of irregularities.<br />
4. Signal falsified due to bi-phase medium. Bi-phase media are not<br />
permitted.<br />
5. Use a separator <strong>for</strong> wet steam applications to remove moisture<br />
droplets from the steam.<br />
6. Insufficient upstream/downstream pipe lengths. See Section 3 <strong>for</strong><br />
correct lengths of upstream and downstream pipes.<br />
7. Flow direction reversed. Check flow direction arrow on primary.<br />
Symptom Action<br />
1. Insufficient upstream and downstream pipe lengths. Re-install<br />
following the installation guidelines (Section 3).<br />
7<br />
Produces large<br />
amount of noise<br />
(banging and<br />
clattering)<br />
Symptom Action<br />
1. See actions in Symptom 1.<br />
2. Switch off the power, leave disconnected to 10 seconds and<br />
8 reconnect power.<br />
System failure.<br />
COMM: red<br />
RF: amber<br />
SYS: green<br />
(flashing together)<br />
Symptom<br />
9<br />
Device is not<br />
connecting to<br />
the wireless<br />
network.<br />
(RF fast flashing<br />
green light)<br />
Symptom<br />
10<br />
Burst rate<br />
declined<br />
(RF slow flashing<br />
amber light)<br />
Action<br />
1. See actions in Symptom 1.<br />
2. Ensure the wireless network complies <strong>with</strong> the recommended<br />
guidelines. See network installation section.<br />
Action<br />
1. Refer to gateway wireless bandwidth specifications, and decrease<br />
devices burst rate accordingly.<br />
38<br />
IM-P337-62 MI Issue 1
Symptom Action<br />
1. See actions in Symptom 2.<br />
2. Via the front panel keypad, ensure the <strong>TVA</strong> flowmeters commissioning<br />
11 parameters are correct. See Modbus parameters.<br />
Device COMM<br />
Error (COMM<br />
slow flashing amber/<br />
red light)<br />
Symptom<br />
12<br />
Device does<br />
not recognize<br />
the HART<br />
configuration<br />
tool<br />
Symptom<br />
13<br />
Device does<br />
not update<br />
the gateway<br />
<strong>with</strong> the flow<br />
meter variables<br />
(RF light off)<br />
Symptom<br />
14<br />
Host receiving<br />
unexpected<br />
event<br />
notifications<br />
Action<br />
1. See actions in Symptom 1.<br />
2. Ensure the tools leads are correctly connected to the maintenance<br />
port.<br />
3. Ensure the tools drivers are installed correctly.<br />
4. Ensure the pc port parameters are correctly set up. See modem<br />
manual.<br />
5. Ensure the host software has been correctly installed. See host<br />
manuals.<br />
6. Ensure the DD host polling address is the same as the devices<br />
polling address.<br />
Action<br />
1. See actions in Symptom 1.<br />
2. Ensure via the devices front panel display that the variables are<br />
actually changing.<br />
3. See actions in Symptom 11.<br />
4. Ensure the burst parameters are set correctly.<br />
Action<br />
1. See actions in Symptom 1.<br />
2. Investigate which events are occurring.<br />
See Section 8.3 - Appendix (page 40).<br />
Symptom<br />
15<br />
Device<br />
intermittently<br />
does not<br />
connect to the<br />
network<br />
Action<br />
1. Check signal strengths and communication quality.<br />
See Section 8.3 - Appendix (page 40).<br />
2. See actions in Symptom 1.<br />
3. See actions in Symptom 3.<br />
If symptoms are still present return and replace product.<br />
IM-P337-62 MI Issue 1 39
8.3 Appendix<br />
Abbreviations and definitions<br />
Access point<br />
ASME<br />
Cmd<br />
CRC<br />
dBi<br />
dBm<br />
DSSS<br />
Dyn<br />
FSK<br />
WirelessHART<br />
Gateway<br />
HART<br />
Hexadecimal<br />
HMI<br />
Host<br />
IAPWS<br />
MAC address<br />
Master<br />
Modem<br />
The radio which provides the connectivity to the WirelessHART TM<br />
network<br />
American Society of Mechanical Engineers<br />
Command<br />
Cyclic Redundancy Check. Error detecting code used to check<br />
communications and storage devices.<br />
Gain of the antenna in decibels. 'i' means relative to isotropic antenna.<br />
Power in decibels relative to 1 mW.<br />
Example: 0 dBm = 1 mW, 10 dBm = 10 mW, 20 mW = 100 mW<br />
Direct Sequence Spread Spectrum<br />
Dynamic<br />
Frequency Shift Keying. A scheme in which digital in<strong>for</strong>mation is<br />
transmitted through discrete frequency changes.<br />
Manages and connects the WirelessHART TM to the wired world. It<br />
normally comprises of an Access Point, Network Manager, Security<br />
Manager, Virtual Gateway and HOST Interface.<br />
Highway Addressable Remote Transducer<br />
0 1 2 3 4 5 6 7 8 9 A B C D E F<br />
Human Machine Interface. A graphics based interface between the<br />
user and the system.<br />
One of possibly several user applications that can be executed<br />
sequentially or simultaneously on a master.<br />
International Association <strong>for</strong> the Properties of Water and <strong>Steam</strong><br />
Media Access Control address. Unique identifier <strong>for</strong> assigned to a<br />
network interface.<br />
A device(s) that initiates communication on a WirelessHART TM network<br />
by issuing commands to the Field devices. HART TM supports primary<br />
and secondary masters.<br />
A modem (modulator-demodulator) device that enables a computer to<br />
transmit data to and from a digital to an analogue signal.<br />
MODBUS Communications Protocol (master-slave / client-server )<br />
Network<br />
manager<br />
Packed ASCII<br />
Preamble<br />
PRT<br />
PV<br />
QV<br />
SV<br />
TEG<br />
TDMA<br />
TV<br />
Var<br />
Forms, organizes, monitors and extends the network. It takes care <strong>for</strong><br />
distributing Join and Network Keys as well as communication slots and<br />
channels <strong>for</strong> all participants.<br />
Valid characters: @ A B C D E F G H I J K L M N O P Q R S T U V W X<br />
Y Z [ \ ] ^ _ SP ! " # $ % & ' ( ) * + , - . / 0 1 2 3 4 5 6 7 8 9 : ; < = > ?<br />
A synchronising pattern generating at the beginning of the HART<br />
message to allow proper start-up.<br />
Platinum Resistance Thermometer<br />
Primary Variable<br />
Quaternary Variable<br />
Secondary Variable<br />
Thermoelectric Generator<br />
Time Division Multiple Access<br />
Tertiary Variable<br />
Variable<br />
40<br />
IM-P337-62 MI Issue 1
9.1 Technical electrical data<br />
9.1.1 Commission supply (green connector)<br />
Supply voltage (Vdc)<br />
Supply current Maximum<br />
Cable length<br />
4.95 to 12.12 (regulated)<br />
20 mA<br />
9.1.2 External supply (TEG10 Only)<br />
3 metres (maximum)<br />
Parameter Minimum Typical Maximum<br />
Switch- on voltage (Vdc) 1.696 1.867 2.043<br />
Switch- off voltage (Vdc) 1.027 1.111 1.196<br />
To ensure the devices power cycle is clean and predictable, the external supply input has a<br />
different switch-on and switch off threshold (hysteresis).<br />
9.1.3 Technical wireless data<br />
Wireless protocol WirelessHART TM Version 7.3<br />
Operating frequency<br />
Number of channels 15<br />
Channel separation<br />
RF power level (configurable)<br />
Range (10 dB), typical<br />
Range (0 dB) , typical<br />
Antenna<br />
2.4000 to 2.4835 GHz<br />
5 MHz<br />
10 dBm or 0 dBm<br />
100 m Indoors<br />
300 m Outdoors<br />
25 m Indoors<br />
200 m Outdoors<br />
Omnidirectional dipole, position adjustable in<br />
vertical plane.<br />
9.1.4 Communication per<strong>for</strong>mance<br />
Device Variables<br />
Typical Update Rate (seconds)<br />
Total 16<br />
Flow 2<br />
Pressure 8<br />
Temperature 16<br />
Power 16<br />
Energy 16<br />
3.3 V Supply 1<br />
9 V supply 1<br />
9. Technical data<br />
IM-P337-62 MI Issue 1 41
9.2 HART TM parameters<br />
Basic set-up<br />
Parameters in bold can be changed/edited.<br />
Parameter Explanation Format Default<br />
Tag<br />
Long tag<br />
(required)<br />
Date<br />
Descriptor<br />
Message<br />
Final<br />
Assembly<br />
Number<br />
Modbus<br />
polling<br />
mode<br />
Device flags<br />
Device<br />
profile<br />
Identifies the device in<br />
Wireless network. In most<br />
installations it indicates<br />
the mounting locations<br />
and function. The term<br />
originates from the physical<br />
tags that were attached to<br />
the device.<br />
Identifies the device in<br />
Wireless network. It is also<br />
used <strong>for</strong> setting up burst<br />
mode and event notification.<br />
This must be unique.<br />
Enables the user to enter a<br />
specific date to be stored,<br />
e.g. installation, last<br />
parameter change or last<br />
calibration date.<br />
Description of device<br />
location or location. Can be<br />
used by the user in any way.<br />
Text associated about the<br />
field device. Can be used by<br />
the user in any way.<br />
The manufacturer revision<br />
number. Do not change.<br />
Enables polling if meter is<br />
attached or disable if acting<br />
as a repeater. The device<br />
will reset and there will<br />
be a brief loss of wireless<br />
connection after a change<br />
to this parameter.<br />
List the special features<br />
in the device. Using the<br />
mouse, right click and select<br />
'display value' to see the<br />
flag status.<br />
A description of the type of<br />
device.<br />
8 alphanumeric<br />
characters max.<br />
(Packed ASCII<br />
String)<br />
32 alphanumeric<br />
characters max.<br />
(ISO Latin 1)<br />
mm / dd / yy<br />
(Gregorian<br />
calendar)<br />
16 alphanumeric<br />
characters max.<br />
(Packed ASCII<br />
String)<br />
16 alphanumeric<br />
characters max.<br />
(Packed ASCII<br />
String)<br />
WITEG<br />
IDX**<br />
Date of manufacture<br />
DEFLT<br />
DESCRIPTOR<br />
SPIRAX SARCO<br />
DEFAULT<br />
MESSAGE VOID<br />
0 to 16,777215 -<br />
Enabled or disabled<br />
0x00 to 0xFF<br />
(hexadecimal)<br />
-<br />
Enabled<br />
0x00<br />
WirelessHART<br />
Device<br />
42<br />
IM-P337-62 MI Issue 1
Parameter Explanation Format Default<br />
Total burst<br />
message<br />
Number<br />
of events<br />
supported<br />
Universal<br />
Revision<br />
Field device<br />
revision<br />
Software<br />
revision<br />
Hardware<br />
revision<br />
Device id**<br />
Reset<br />
Default Cal<br />
Data<br />
The total amount of burst<br />
messages supported by this<br />
device.<br />
Details the number of<br />
events supported.<br />
Revision of the universal<br />
device description.<br />
The revision of the firmware<br />
in the device.<br />
Revision of the<br />
corresponding software or<br />
firmware.<br />
Revision of the<br />
corresponding electronics.<br />
Manufactures unique<br />
identification number. This<br />
number is also the devices<br />
serial number and part of<br />
the devices MAC address.<br />
This must not be changed.<br />
Reset to factory default.<br />
Note 1: This does not affect<br />
the flowmeters calibration<br />
data.<br />
Note 2: Burst parameters<br />
needs to be restored<br />
manually.<br />
Note 3: There will be a brief<br />
loss of wireless connection.<br />
- 4<br />
1<br />
- 7<br />
- -<br />
- -<br />
- -<br />
101 to 16,777215 -<br />
- -<br />
IM-P337-62 MI Issue 1 43
9.3 Detailed set-up<br />
Parameters in bold can be changed / edited.<br />
Polling<br />
address<br />
Num req<br />
preams<br />
Num resp<br />
preams<br />
Burst mode<br />
The HART address. As the MAC<br />
address and long tag are used to<br />
identify the device, leave this as<br />
address 0.<br />
The number of preambles required<br />
from the master, requested by the<br />
device.<br />
The number of preambles sent in the<br />
response message from the device to<br />
the master.<br />
Enables the device to periodically<br />
transmit data <strong>with</strong>out the master<br />
requesting it. Four burst messages can<br />
be commissioned.<br />
0 to 63 0<br />
- 5<br />
5 to 20 5<br />
Off or<br />
WirelessHART<br />
enabled<br />
Burst 1:<br />
Enabled<br />
Burst 2: OFF<br />
Burst 3: OFF<br />
Burst 4: OFF<br />
44<br />
IM-P337-62 MI Issue 1
Detailed set-up (continued)<br />
Parameters in bold can be changed / edited.<br />
Burst<br />
command<br />
Update<br />
period<br />
Max update<br />
period<br />
Trigger<br />
mode<br />
Trigger<br />
class<br />
Trigger<br />
units<br />
Selects the type of data sent:<br />
1: Send the primary variable (total)<br />
and units (kg).<br />
3: Sends up to four selectable<br />
dynamic variables loop current.<br />
Note the device does not have<br />
4 - 20 mA output so 0.00 mA will<br />
be sent.<br />
9: Sends the value and status of up to<br />
eight device variables.<br />
33: Sends the value and units of up to<br />
four device variables.<br />
48: Send the status of the device.<br />
The time interval the data is sent.<br />
Note: For the minimum update period<br />
see Communication Per<strong>for</strong>mance<br />
Table.<br />
Used when window, rising, falling or<br />
on-change has been selected as a<br />
trigger mode (see below). If a burst has<br />
not been triggered <strong>with</strong>in this period,<br />
the device will automatically send a<br />
burst to the gateway. This time must<br />
be equal to or greater than the update<br />
period (see above).<br />
Selects when the data is to be<br />
transmitted to the master:<br />
Continuous:<br />
Every update period (see above).<br />
Window:<br />
New data is sent if it exceeds (either<br />
above or below) the previous value by<br />
the specified level (see below).<br />
Rising:<br />
New data is sent if it has risen above<br />
the specified level.<br />
Falling:<br />
New data is sent if it has fallen below<br />
the specified level.<br />
On-change:<br />
Not used.<br />
Defines the class of the data that is<br />
being sent<br />
Define the units of the data that is<br />
being sent.<br />
Cmd 1 PV,<br />
Cmd 3 Dyn vars /<br />
current,<br />
Cmd 9 Device<br />
vars w / status,<br />
Cmd 33 Device<br />
variables,<br />
Cmd 48 Read<br />
additional Device<br />
Status<br />
1, 2, 4, 8, 16,<br />
32, 60 to 3600<br />
seconds<br />
1, 2, 4, 8, 16,<br />
32, 60 to 3600<br />
seconds<br />
Continuous<br />
Window<br />
Rising<br />
Falling<br />
On-change (Not<br />
used)<br />
Various, see<br />
options listed<br />
Various, see<br />
options listed<br />
Cmd 9<br />
16<br />
16<br />
Continuous<br />
Mass<br />
kg<br />
IM-P337-62 MI Issue 1 45
Detailed set-up (continued)<br />
Parameters in bold can be changed / edited.<br />
Trigger<br />
level<br />
Process<br />
variable<br />
Event<br />
notification<br />
control<br />
Event<br />
notification<br />
re-try time<br />
Maximum<br />
update time<br />
Event<br />
debounce<br />
interval<br />
Device<br />
status<br />
mask<br />
Ext dev<br />
status<br />
mask<br />
The level at which a transmission is<br />
triggered.<br />
Available if cmd 9 or cmd 33 is<br />
selected. Enables the user to map the<br />
device variables onto the process /<br />
burst variables.<br />
Enables the device to notify the<br />
gateway of changes in condition and<br />
status. The time of the change is also<br />
send by the device.<br />
The time the device will continuously<br />
re-send the notification of the event<br />
until an acknowledgement has been<br />
received.<br />
If an event or condition has not<br />
occurred <strong>with</strong>in this time period, then<br />
the device will automatically send an<br />
event notification to the gateway. This<br />
period should be equal or greater than<br />
event notification re-try time. Occurs<br />
only once.<br />
The time an event or a condition<br />
must be present, be<strong>for</strong>e notification<br />
is sent. This prevents spurious event<br />
notifications.<br />
Enables the status flags to trigger and<br />
event notification<br />
• More status Available: More<br />
operational in<strong>for</strong>mation is available<br />
• Cold start: Power failure or device<br />
reset has occurred<br />
• Configuration Changed. The device<br />
has been re-configured<br />
• Field Device Malfunction. The device<br />
has detected a serious problem.<br />
• Maintenance required: Not used.<br />
• Device variable alert: Not used.<br />
• Critical Power failure: Not used.<br />
- 0<br />
Various, see<br />
device variables<br />
Off or Enable<br />
event notification<br />
on TDMA data<br />
link layer<br />
0.1, 0.25, 0.5, 1,<br />
2, 4, 8, 16, 32, 60<br />
to 3600 seconds<br />
0.1, 0.25, 0.5, 1,<br />
2, 4, 8, 16, 32, 60<br />
to 3600 seconds<br />
0.1, 0.25, 0.5, 1,<br />
2, 4, 8, 16, 32, 60<br />
to 3600 seconds<br />
total<br />
Off<br />
32 seconds<br />
60 seconds<br />
4 seconds<br />
- Unmasked<br />
- Unmasked<br />
46<br />
IM-P337-62 MI Issue 1
Detailed set-up (continued)<br />
Parameters in bold can be changed / edited.<br />
Device<br />
diagnostic<br />
status 0<br />
mask<br />
Device<br />
diagnostic<br />
status 1<br />
mask<br />
Device<br />
diagnostic<br />
status 2<br />
mask<br />
AO<br />
saturation<br />
mask<br />
Operation<br />
mode mask<br />
• Simulation active: Device is in<br />
simulation mode.<br />
• Non-Volatile memory failure: The<br />
memory has been corrupted.<br />
• Volatile memory error<br />
• Watchdog reset executed: A<br />
watchdog reset has occurred.<br />
• Voltage conditions out of range:<br />
Supply out of range.<br />
• Environmental conditions:<br />
Environmental condition exceeded<br />
• Electronic failure: Hardware problem.<br />
- Unmasked<br />
Reserved. - Unmasked<br />
• Capacity Denied: Network manager<br />
has denied the burst request burst,<br />
five times in a row.<br />
• Sub device list change.<br />
• Duplicate master detect.<br />
• Device Diagnostic Status 3 mask.<br />
• Bandwidth allocation pending: The<br />
device has requested a bandwidth<br />
and is waiting <strong>for</strong> a response.<br />
- Unmasked<br />
No used. - Unmasked<br />
Not defined. - Unmasked<br />
IM-P337-62 MI Issue 1 47
Device<br />
specific<br />
status 0<br />
mask (1 - 5<br />
not used)<br />
Network ID<br />
These are flags specific to this device:<br />
• 3.3 V out of range: Indicates the<br />
internal voltage rail is outs of<br />
specification.<br />
• 9 V out of range: Indicates the<br />
internal voltage rail is outs of<br />
specification.<br />
• Flash CRC invalid: Internal nonvolatile<br />
memory has been corrupted.<br />
• Modbus fault: The devices internal<br />
modbus communication is not<br />
functioning correctly. 3 out of 5 polls<br />
unsuccessful.<br />
• Mote unresponsive: The devices<br />
internal wireless module has stopped<br />
working.<br />
• Invalid Modbus slave ID: The<br />
flowmeters modbus slave ID is<br />
incorrect or has not been detected.<br />
Verify from the front panel the<br />
Modbus parameters are correct. See<br />
below.<br />
The identification number of the<br />
network. This must be the same as the<br />
gateway and network. See gateway<br />
setup.<br />
- Unmasked<br />
0 to 99999<br />
(decimal)<br />
12345<br />
Join key 1<br />
53504952<br />
Join key 2 An encryption key used to keep<br />
41585341<br />
private sent and received data during<br />
8 Character<br />
the joining process. It also serves as<br />
(hexadecimal)<br />
authentication to the security manager<br />
Join key 3 that the device belongs to this network.<br />
52434F52<br />
Join key 4<br />
554C455A<br />
Radio<br />
power<br />
Join mode<br />
Radio output signal strength 0 or 10 dB 10<br />
When to join to the network.<br />
Do not attempt<br />
to join, join now<br />
or attempt to join<br />
immediately on<br />
power up or reset<br />
Attempt<br />
to join<br />
immediately<br />
on power up<br />
or reset<br />
**(X is the allocated device-id)<br />
48<br />
IM-P337-62 MI Issue 1
9.3.1 Test device – Device status – Configuration change<br />
Cfg chng count<br />
Battery life<br />
remaining<br />
Power status<br />
The number of time the device configuration has been updated.<br />
Not used.<br />
Not used.<br />
9.3.2 Test device – Device status – Time<br />
Current date and<br />
time<br />
Set date and<br />
time<br />
Power status<br />
Current date and time based on the real-time clock calendar in<br />
the device. The device does not maintain these parameters whilst<br />
powered-down, there<strong>for</strong>e initially these will read 01:01:1900 and time<br />
since boot-up until the current date and time is obtained from the<br />
wireless network.<br />
The date and time the real-time clock calendar in the device was<br />
updated from the wireless network. Updated every 15 minutes.<br />
Not used.<br />
9.3.3 Test device - Wireless status<br />
Wireless mode<br />
Join status<br />
Advertisement<br />
count<br />
Neighbour count<br />
Join attempts<br />
Search time<br />
See below.<br />
This shows the joining status. With the left mouse key, select join<br />
status and select display value using the right key. Note this display<br />
is not dynamic, ie it will not update whilst window is open. Need to<br />
repeat this sequence to refresh window.<br />
Counts the number of advertisements received from the gateway.<br />
The number of neighbours the device is connected to.<br />
The number of attempts the device has made to connect to the<br />
network.<br />
Time the device has taken to listen to the first advertisement from the<br />
gateway.<br />
IM-P337-62 MI Issue 1 49
9.3.4 Test device - Wireless Status - Mode<br />
Idle<br />
Active search<br />
Negotiating<br />
Quarantined<br />
Operational<br />
Deep sleep<br />
Suspended<br />
Re-synching<br />
The devices wireless transceiver is not active. It has no knowledge of<br />
the WirelessHART TM network.<br />
Looking <strong>for</strong> other WirelessHART TM neighbours<br />
Connection parameters are being exchanged between the device and<br />
the gateway<br />
The device has successfully joined the network but only has a<br />
security clearance to talk <strong>with</strong> the Network Manager. It is not<br />
available or allowed to per<strong>for</strong>m data acquisition or control functions<br />
or otherwise communicate <strong>with</strong> the Gateway.<br />
The device can be accessed by host Applications via the Gateway.<br />
It is integrated in the system's operation.<br />
The device is not connected to the network.<br />
The gateway manager has prevented the device from connecting to<br />
the network.<br />
The device is listening <strong>for</strong> a network and trying to synchronise to a<br />
slot time and absolute slot number.<br />
9.4.5 Test device - Event Status<br />
Shows an event notification has been sent and whether it has been<br />
acknowledged.<br />
Event status • Configuration Changed Event pending.<br />
• Device Status Event Pending.<br />
• More Status Available Event Pending.<br />
Time first unack<br />
The time stamp of the first event still unacknowledged (hh:mm:ss).<br />
event triggered<br />
50<br />
IM-P337-62 MI Issue 1
9.4 HART TM device variables<br />
No Name Explanation Units<br />
0 Total Totalized value of mass flow of steam over time. kg<br />
1 Flow<br />
2 Pressure<br />
3 Temperature<br />
4 Power<br />
5 Energy<br />
6 3.3 V supply<br />
7 9 V supply<br />
Mass flow reading (pressure, density, dryness, and<br />
viscosity compensated). Derived by measured the<br />
<strong>for</strong>ce exerted by fluid on a fixed target or moving<br />
cone. The <strong>for</strong>ce is measured using a strain gauge<br />
attached to a beam.<br />
<strong>Steam</strong> pressure which is derived from a PRT<br />
mounted in the steam space. The correlation<br />
between saturated steam temperature and pressure<br />
is obtained using ASME standard steam tables<br />
(IAPWS-97 / ASME).<br />
<strong>Steam</strong> temperature which is derived from a PRT<br />
mounted in the steam space.<br />
Calculated using enthalpy obtained from ASME<br />
standard steam tables, multiplied by instantaneous<br />
mass flow.<br />
Calculated using enthalpy obtained from ASME<br />
standard steam tables, multiplied by the total mass<br />
flow.<br />
Internal voltage supply generated from the<br />
TEG10 input. This variable is used <strong>for</strong> fault finding<br />
purposes.<br />
Internal voltage supply generated from the<br />
TEG10 input. This variable is used <strong>for</strong> fault finding<br />
purposes.<br />
kg / h<br />
bar g<br />
°C<br />
kW<br />
kWh<br />
mV<br />
mV<br />
9.4.1 WirelessHART TM signal strength guide<br />
Signal strength (dBm)<br />
Greater than -50<br />
Quality<br />
Excellent<br />
-60 to -50 Good<br />
-70 to -60 Medium<br />
-80 to -70 Poor<br />
Less than -80<br />
Bad<br />
IM-P337-62 MI Issue 1 51
9.4.2 WirelessHART TM communication quality guide<br />
Packets received (%)<br />
Quality<br />
100 Excellent<br />
93 to 99 Good<br />
69 to 92 Medium<br />
31 to 68 Poor<br />
less than 31%<br />
Bad<br />
9.4.3 HART TM dynamic variables (fixed mapped)<br />
Device variable number Name Units<br />
PV 0 Total kg<br />
PV 1 Flow kg / h<br />
TV 2 Pressure bar g<br />
QV 3 Temperature °C<br />
9.4.4 Modbus parameters (differs from standard <strong>TVA</strong>)<br />
Baud rate 1200<br />
Serial Communication Protocol<br />
MODBUS<br />
Address 002<br />
9.4.5 Compliance<br />
CE mark<br />
EMC and LVD<br />
RTT&T<br />
FCC<br />
Con<strong>for</strong>ms to all relevant EU directives<br />
Electromagnetic Compatibility Directive 2004 / 08 / EG and<br />
Low Directive 93 / 68 / EEC – EN 61010-1:2010<br />
Interference emission: EN 61326-1: 2006, Class B<br />
Interference immunity: EN 61326-1: 2006, Table 2 (industrial<br />
environment) also EN 61326-2-3 :2006 and EN 61326-2-1:2006<br />
Radio and Telecommunications Terminal Directive 1999 / 5 / EC,<br />
EN 301489 - 17 v 2.1.1 (2009-05) using technical requirements of<br />
EN 301489 - 1 v 1.1 (2008-04)<br />
Con<strong>for</strong>ms to unintentional radiator requirements of FCC rules<br />
CFR47:July 2008 Parts 15.109, ClassB<br />
Please note:<br />
This unit must not be used outside the EU and USA<br />
52<br />
IM-P337-62 MI Issue 1
10. Settings table<br />
This Table shows all changeable options, and enables records to be made of any changes<br />
made to the pass code or other settings. It provides a convenient reference should future changes<br />
be required.<br />
Sub-menu<br />
Changeable Factory Customer Further<br />
settings settings settings changes<br />
Dryness fraction 1.0<br />
Basic data<br />
Units<br />
Nominal pressure<br />
Atmospheric pressure<br />
4-20 mA<br />
Source data<br />
Metric<br />
1.01 bar a<br />
Flow<br />
4 mA setting 0<br />
<strong>Flowmeter</strong><br />
Outputs 20 mA setting maximum<br />
@ 32 bar g<br />
Pulse<br />
Source data<br />
Number of pulses<br />
Pulse width<br />
ON<br />
Total<br />
1 per kg<br />
50 mS<br />
Error<br />
High<br />
Pass code 7452<br />
IM-P337-62 MI Issue 1 53
54<br />
IM-P337-62 MI Issue 1
IM-P337-62 MI Issue 1 55
56<br />
IM-P337-62 MI Issue 1