free flow users guide - PBportal.de
free flow users guide - PBportal.de
free flow users guide - PBportal.de

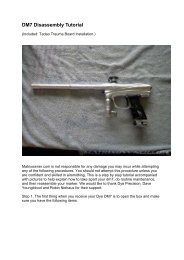
Create successful ePaper yourself
Turn your PDF publications into a flip-book with our unique Google optimized e-Paper software.
7. Free Flow Bolt – diffusing bolt that directs the firing pressure to the outsi<strong>de</strong> of the<br />
ball instead of hitting it directly (saves barrel breaks and increases effective<br />
range).<br />
8. Professional In-Line regulator – we’ve chosen this top quality regulator to handle<br />
the Free Flow Autococker While still maintaining unmatched reliability.<br />
9. DYE Boomstick or Smart Parts FREAK – the most approved, and most used<br />
barrel on the top level for only one reason: QUALITY.<br />
Basic Operations Knowledge<br />
Team Lockout Free Flow Autocockers are sensitive the final input pressure. The valve<br />
<strong>de</strong>sign is only effective in reducing cycling pressure when the final input pressure is set at<br />
300-320psi.<br />
The input pressure to the supplied Professional regulator from your propellant source<br />
should be a consistent. We recommend running approximately 600psi into the regulator.<br />
Velocity adjustments should be ma<strong>de</strong> using the supplied 3/16ths allen key in the back of<br />
the Autococker (see current WGP Users Manual). DO NOT ADJUST VELOCITY BY<br />
CHANGING THE OUTPUT PRESSURE OF THE REGULATOR! Adjusting the velocity<br />
by main spring tension assures consistent velocity readings and gives you a heads up on<br />
diagnosing minor problems associated with the valve retention system.<br />
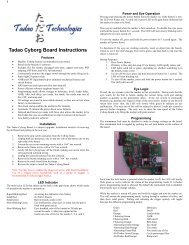
Adjusting the Palmers Micro Rock<br />
Contrary to the <strong>gui<strong>de</strong></strong> supplied from Palmers Pursuit Shop we suggest you adjust the<br />
Micro Rock using our proven tournament knowledge. This is the heart of the Free Flow<br />
system and if you adjust it improperly the gun functions at higher cycling pressures and<br />
can chop paint.<br />
ALWAYS WEAR SAFTEY APPROVED PAINTBALL GOGGLES WHEN<br />
ADJUSTING THE MICRO ROCK!!<br />
1. Make sure there is no paint in the chamber or attached to the gun<br />
2. Install gas source<br />
3. Screw the adjusting knob counter clockwise to reduce all pressure to the ram and<br />
“Bullit” valve<br />
4. While repeatedly activating the trigger mechanism, screw the adjusting knob<br />
clockwise – a slow leak is normal<br />
5. The ram will begin to move the bolt and the leaking should stop<br />
6. Keep screwing the adjusting knob clockwise until the gun fully cocks and the<br />
hammer fires.<br />
7. The Micro Rock is now at it’s minimum pressure<br />
8. Give the adjusting knob another ¼ turn over the minimum and the cycling<br />
pressure is set