October 2009 In this issue... • Featured Members Bob and Sue ...
October 2009 In this issue... • Featured Members Bob and Sue ...
October 2009 In this issue... • Featured Members Bob and Sue ...

Create successful ePaper yourself
Turn your PDF publications into a flip-book with our unique Google optimized e-Paper software.
Rice’s Ramblings<br />
Story <strong>and</strong> photos by Lee Rice<br />
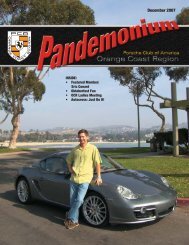
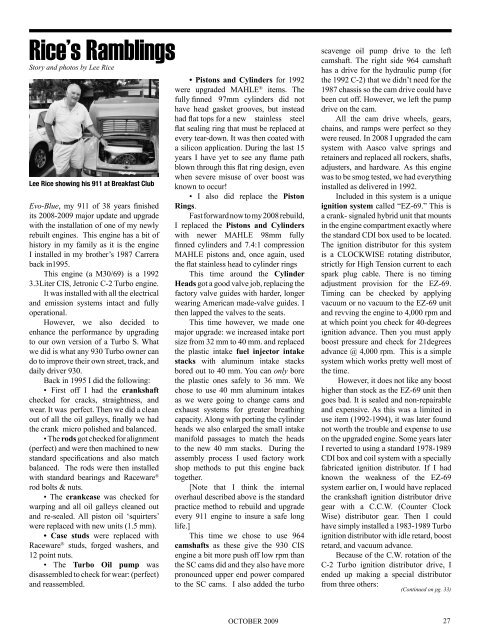
Lee Rice showing his 911 at Breakfast Club<br />
Evo-Blue, my 911 of 38 years finished<br />
its 2008-<strong>2009</strong> major update <strong>and</strong> upgrade<br />
with the installation of one of my newly<br />
rebuilt engines. This engine has a bit of<br />
history in my family as it is the engine<br />
I installed in my brother’s 1987 Carrera<br />
back in1995.<br />
This engine (a M30/69) is a 1992<br />
3.3Liter CIS, Jetronic C-2 Turbo engine.<br />
It was installed with all the electrical<br />
<strong>and</strong> emission systems intact <strong>and</strong> fully<br />
operational.<br />
However, we also decided to<br />
enhance the performance by upgrading<br />
to our own version of a Turbo S. What<br />
we did is what any 930 Turbo owner can<br />
do to improve their own street, track, <strong>and</strong><br />
daily driver 930.<br />
Back in 1995 I did the following:<br />
<strong>•</strong> First off I had the crankshaft<br />
checked for cracks, straightness, <strong>and</strong><br />
wear. It was perfect. Then we did a clean<br />
out of all the oil galleys, finally we had<br />
the crank micro polished <strong>and</strong> balanced.<br />
<strong>•</strong> The rods got checked for alignment<br />
(perfect) <strong>and</strong> were then machined to new<br />
st<strong>and</strong>ard specifications <strong>and</strong> also match<br />
balanced. The rods were then installed<br />
with st<strong>and</strong>ard bearings <strong>and</strong> Raceware ®<br />
rod bolts & nuts.<br />
<strong>•</strong> The crankcase was checked for<br />
warping <strong>and</strong> all oil galleys cleaned out<br />
<strong>and</strong> re-sealed. All piston oil ‘squirters’<br />
were replaced with new units (1.5 mm).<br />
<strong>•</strong> Case studs were replaced with<br />
Raceware ® studs, forged washers, <strong>and</strong><br />
12 point nuts.<br />
<strong>•</strong> The Turbo Oil pump was<br />
disassembled to check for wear: (perfect)<br />
<strong>and</strong> reassembled.<br />
<strong>•</strong> Pistons <strong>and</strong> Cylinders for 1992<br />
were upgraded MAHLE ® items. The<br />
fully finned 97mm cylinders did not<br />
have head gasket grooves, but instead<br />
had flat tops for a new stainless steel<br />
flat sealing ring that must be replaced at<br />
every tear-down. It was then coated with<br />
a silicon application. During the last 15<br />
years I have yet to see any flame path<br />
blown through <strong>this</strong> flat ring design, even<br />
when severe misuse of over boost was<br />
known to occur!<br />
<strong>•</strong> I also did replace the Piston<br />
Rings.<br />
Fast forward now to my 2008 rebuild,<br />
I replaced the Pistons <strong>and</strong> Cylinders<br />
with newer MAHLE 98mm fully<br />
finned cylinders <strong>and</strong> 7.4:1 compression<br />
MAHLE pistons <strong>and</strong>, once again, used<br />
the flat stainless head to cylinder rings<br />
This time around the Cylinder<br />
Heads got a good valve job, replacing the<br />
factory valve guides with harder, longer<br />
wearing American made-valve guides. I<br />
then lapped the valves to the seats.<br />
This time however, we made one<br />
major upgrade: we increased intake port<br />
size from 32 mm to 40 mm. <strong>and</strong> replaced<br />
the plastic intake fuel injector intake<br />
stacks with aluminum intake stacks<br />
bored out to 40 mm. You can only bore<br />
the plastic ones safely to 36 mm. We<br />
chose to use 40 mm aluminum intakes<br />
as we were going to change cams <strong>and</strong><br />
exhaust systems for greater breathing<br />
capacity. Along with porting the cylinder<br />
heads we also enlarged the small intake<br />
manifold passages to match the heads<br />
to the new 40 mm stacks. During the<br />
assembly process I used factory work<br />
shop methods to put <strong>this</strong> engine back<br />
together.<br />
[Note that I think the internal<br />
overhaul described above is the st<strong>and</strong>ard<br />
practice method to rebuild <strong>and</strong> upgrade<br />
every 911 engine to insure a safe long<br />
life.]<br />
This time we chose to use 964<br />
camshafts as these give the 930 CIS<br />
engine a bit more push off low rpm than<br />
the SC cams did <strong>and</strong> they also have more<br />
pronounced upper end power compared<br />
to the SC cams. I also added the turbo<br />
scavenge oil pump drive to the left<br />
camshaft. The right side 964 camshaft<br />
has a drive for the hydraulic pump (for<br />
the 1992 C-2) that we didn’t need for the<br />
1987 chassis so the cam drive could have<br />
been cut off. However, we left the pump<br />
drive on the cam.<br />
All the cam drive wheels, gears,<br />
chains, <strong>and</strong> ramps were perfect so they<br />
were reused. <strong>In</strong> 2008 I upgraded the cam<br />
system with Aasco valve springs <strong>and</strong><br />
retainers <strong>and</strong> replaced all rockers, shafts,<br />
adjusters, <strong>and</strong> hardware. As <strong>this</strong> engine<br />
was to be smog tested, we had everything<br />
installed as delivered in 1992.<br />
<strong>In</strong>cluded in <strong>this</strong> system is a unique<br />
ignition system called “EZ-69.” This is<br />
a crank- signaled hybrid unit that mounts<br />
in the engine compartment exactly where<br />
the st<strong>and</strong>ard CDI box used to be located.<br />
The ignition distributor for <strong>this</strong> system<br />
is a CLOCKWISE rotating distributor,<br />
strictly for High Tension current to each<br />
spark plug cable. There is no timing<br />
adjustment provision for the EZ-69.<br />
Timing can be checked by applying<br />
vacuum or no vacuum to the EZ-69 unit<br />
<strong>and</strong> revving the engine to 4,000 rpm <strong>and</strong><br />
at which point you check for 40-degrees<br />
ignition advance. Then you must apply<br />
boost pressure <strong>and</strong> check for 21degrees<br />
advance @ 4,000 rpm. This is a simple<br />
system which works pretty well most of<br />
the time.<br />
However, it does not like any boost<br />
higher than stock as the EZ-69 unit then<br />
goes bad. It is sealed <strong>and</strong> non-repairable<br />
<strong>and</strong> expensive. As <strong>this</strong> was a limited in<br />
use item (1992-1994), it was later found<br />
not worth the trouble <strong>and</strong> expense to use<br />
on the upgraded engine. Some years later<br />
I reverted to using a st<strong>and</strong>ard 1978-1989<br />
CDI box <strong>and</strong> coil system with a specially<br />
fabricated ignition distributor. If I had<br />
known the weakness of the EZ-69<br />
system earlier on, I would have replaced<br />
the crankshaft ignition distributor drive<br />
gear with a C.C.W. (Counter Clock<br />
Wise) distributor gear. Then I could<br />
have simply installed a 1983-1989 Turbo<br />
ignition distributor with idle retard, boost<br />
retard, <strong>and</strong> vacuum advance.<br />
Because of the C.W. rotation of the<br />
C-2 Turbo ignition distributor drive, I<br />
ended up making a special distributor<br />
from three others:<br />
(Continued on pg. 33)<br />
OCTOBER <strong>2009</strong> 27