How To Install the Corsair Airflow Pro Dynamic
How To Install the Corsair Airflow Pro Dynamic
How To Install the Corsair Airflow Pro Dynamic

Create successful ePaper yourself
Turn your PDF publications into a flip-book with our unique Google optimized e-Paper software.
<strong>How</strong> <strong>To</strong> <strong>Install</strong> <strong>the</strong> <strong>Corsair</strong> <strong>Airflow</strong> <strong>Pro</strong><br />
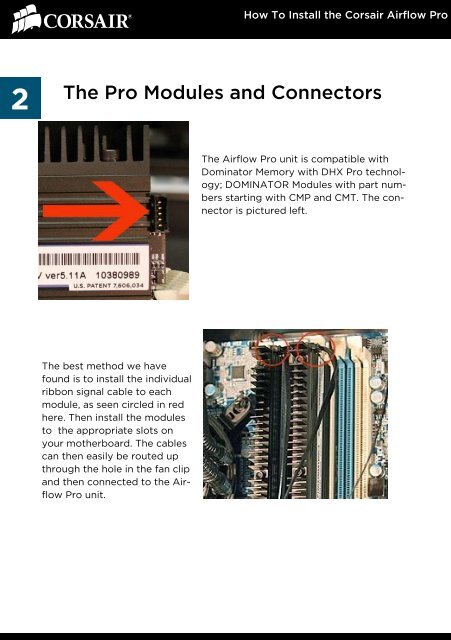
2 The <strong>Pro</strong> Modules and Connectors<br />
The best method we have<br />
found is to install <strong>the</strong> individual<br />
ribbon signal cable to each<br />
module, as seen circled in red<br />
here. Then install <strong>the</strong> modules<br />
to <strong>the</strong> appropriate slots on<br />
your mo<strong>the</strong>rboard. The cables<br />
can <strong>the</strong>n easily be routed up<br />
through <strong>the</strong> hole in <strong>the</strong> fan clip<br />
and <strong>the</strong>n connected to <strong>the</strong> <strong>Airflow</strong><br />
<strong>Pro</strong> unit.<br />
The <strong>Airflow</strong> <strong>Pro</strong> unit is compatible with<br />
Dominator Memory with DHX <strong>Pro</strong> technology;<br />
DOMINATOR Modules with part numbers<br />
starting with CMP and CMT. The connector<br />
is pictured left.