EnTERPRiSE CommuniCAToR PRoP KiT ... - Roddenberry.com
EnTERPRiSE CommuniCAToR PRoP KiT ... - Roddenberry.com
EnTERPRiSE CommuniCAToR PRoP KiT ... - Roddenberry.com

You also want an ePaper? Increase the reach of your titles
YUMPU automatically turns print PDFs into web optimized ePapers that Google loves.
8<br />
#PRP1765 - STAR TREK: En t e r p r is e Co m m u n ic a t o r Pr o p Kit As s e m b l y Ma n u a l<br />
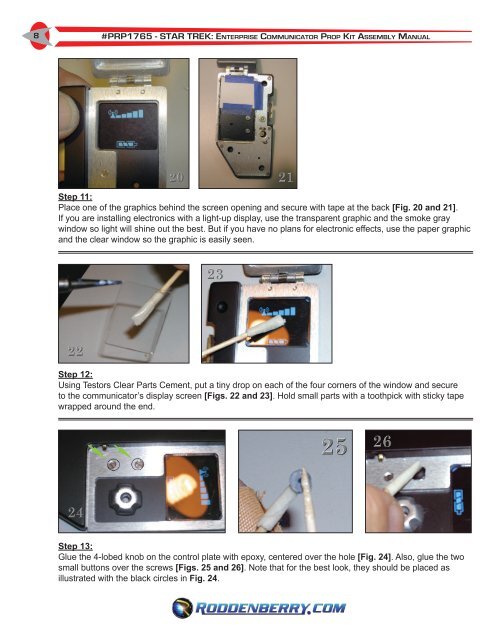
Step 11:<br />
Place one of the graphics behind the screen opening and secure with tape at the back [Fig. 20 and 21].<br />
If you are installing electronics with a light-up display, use the transparent graphic and the smoke gray<br />
window so light will shine out the best. But if you have no plans for electronic effects, use the paper graphic<br />
and the clear window so the graphic is easily seen.<br />
Step 12:<br />
Using Testors Clear Parts Cement, put a tiny drop on each of the four corners of the window and secure<br />
to the <strong>com</strong>municator’s display screen [Figs. 22 and 23]. Hold small parts with a toothpick with sticky tape<br />
wrapped around the end.<br />
Step 13:<br />
Glue the 4-lobed knob on the control plate with epoxy, centered over the hole [Fig. 24]. Also, glue the two<br />
small buttons over the screws [Figs. 25 and 26]. Note that for the best look, they should be placed as<br />
illustrated with the black circles in Fig. 24.