


Create successful ePaper yourself
Turn your PDF publications into a flip-book with our unique Google optimized e-Paper software.
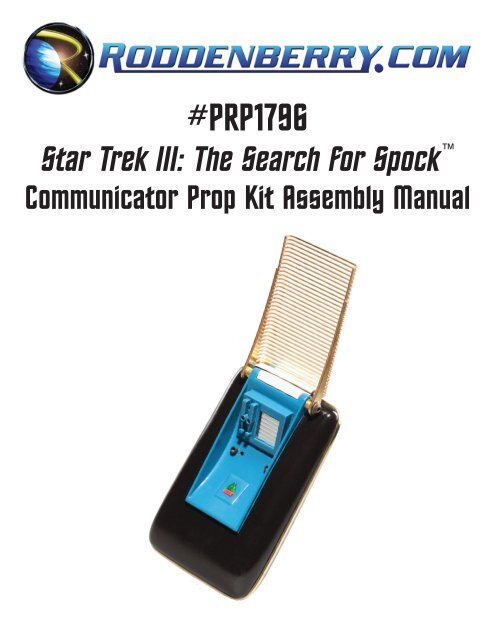
#PRP1796<br />
<strong>Star</strong> <strong>Trek</strong> <strong>III</strong>: The Search for Spock <br />
Communicator Prop Kit Assembly Manual
2<br />
#PRP1796 - STAR TREK <strong>III</strong> Co m m u n i c a to r Pr o p Kit As s e m b l y Ma n u a l<br />
Parts included in kit:<br />
• Upper and Lower Main Body<br />
• Etched Brass Antenna Grill<br />
(attached to upper body in kit)<br />
• Speaker Grill<br />
• Mid Plate (acrylic laser-cut)<br />
• 2 @ 2-56 x 1/2” Allen screws<br />
• 2 @ 4-40 x 1/4” button-head Allen screws<br />
• 2 @ brass spacers<br />
• 1 each green and red LED detail castings<br />
(actual LEDs not included in kit)<br />
Paints needed:<br />
Tools needed for assembly:<br />
• • 1/16” and 5/64” Allen wrenches<br />
• Files -- small jeweler’s file to get in the LED hole,<br />
wide file or sanding stick for general sanding and<br />
prep<br />
• X-Acto knife<br />
• Small-point pen or pencil<br />
• Automotive spot putty<br />
• 5-minute epoxy or JB Weld<br />
• Sandpaper in 400 and 600 grit<br />
• Masking tape (blue painter’s tape re<strong>com</strong>mended)<br />
• Rubber cement<br />
• Gold Metallic or similar gold finish paint OR Bare-Metal foil in gold OR Chartpak Gold Metallic Detail Tape<br />
1/8” wide (found either by itself or in the Chartpak Deco-Tape six-pack)<br />
• Chrome paint (not silver or aluminum) OR Bare Metal Foil in chrome<br />
• Gray or black primer<br />
• Gloss Black spray paint<br />
• Model Master Racing Blue #2940 OR Tamiya TS10 French Blue OR any medium-blue spray paints<br />
• Satin or Semi-Gloss White spray paint
#PRP1796 - STAR TREK <strong>III</strong> Co m m u n i c a to r Pr o p Kit As s e m b l y Ma n u a l 3<br />
Step 1: <strong>Star</strong>t by preparing the two body parts; remove the brass grill from the upper body and set aside,<br />
then remove all mold lines and sprue protrusions from these and the cast speaker grill detail, and sand<br />
smooth (Figs. 1 and 2).<br />
Step 2: Use your X-Acto knife to cut the edge sprue off as well as the interior wedges (Fig. 3).<br />
DO NOT cut off the four tabs on both the parts; they’re necessary to align the body and the mid plate.<br />
Sand smooth the upper and lower body parts, use spot putty if you need it to fill in any objectionable areas<br />
and sand -- do not fill in any of the screw holes including the two on the lower body and the three holes on<br />
the upper body. Also prepare the interior holes of both speaker grill and the triangular/rectangle LED hole<br />
(Fig. 3b).<br />
Step 3: The mid plate ships with tracing paper on and is slightly oversized. The mid plate should stick<br />
out from the body approx. .030” (1/32”) when you’re done. Cut the tracing paper middle out with your<br />
knife (Fig. 4), then using the bottom body half, locate the mid plate until it looks even.
4<br />
#PRP1796 - STAR TREK <strong>III</strong> Co m m u n i c a to r Pr o p Kit As s e m b l y Ma n u a l<br />
Step 4: With a pen or pencil trace the edge on the paper (Figs. 5 and 6), then file or sand to the pen mark<br />
(Fig. 7) making sure your edge is rounded (Fig. 8 and 11), and try not to recess the plate within the body if<br />
you can.<br />
These instructions offer several different finishing methods depending on your local availability of materials<br />
and skill <strong>com</strong>fort level. All materials and tools listed should be available at hobby stores.<br />
You may finish the mid plate edge using a bright gold spray paint--primer first then spray with the finish<br />
color. But for a polished metal look, you can use Bare-Metal brand gold foil, which is lightly adhesive on<br />
one side and can be burnished to give a realistic polished metal finish. Cut a strip approximately 1/4 - 3/8”<br />
wide and wrap around the edge being careful you don’t put on any wrinkles on the visible edge (Figs. 9, 10,<br />
11). Another alternative is using a bright polished gold graphic tape such as what Chartpak sells, available<br />
at art supply stores--use the 1/8” tape.
#PRP1796 - STAR TREK <strong>III</strong> Co m m u n i c a to r Pr o p Kit As s e m b l y Ma n u a l 5<br />
Step 5: Finish the speaker grill using either a chrome-finish paint (Krylon Chrome is a pretty good one),<br />
or by rubbing on with a Q-Tip a small square of Bare-Metal foil in polished chrome (Figs. 12 and 13). Set<br />
aside both mid plate and speaker grill.<br />
Step 6: Paint the lower and upper body gloss black, then set aside the lower body. When hard enough to<br />
accept mask-ing tape, mask the black areas of the upper body so the raised middle is exposed, then paint<br />
it in gloss blue (Fig. 14). Model Master Racing Blue #2940 is probably the most accurate color for this, but<br />
you may also use Tamiya TS10 French Blue or any medium blue or blue-gray shade; don’t go sky blue (too<br />
light) or navy blue (too dark).<br />
Step 7: When the blue is dry, mask it so the back panel is exposed (Fig. 15), then spray this in semi- gloss<br />
white. When dry and cured, remove all the tape.
6<br />
#PRP1796 - STAR TREK <strong>III</strong> Co m m u n i c a to r Pr o p Kit As s e m b l y Ma n u a l<br />
Step 8: Using epoxy or JB Weld (re<strong>com</strong>mended--it’s available in slow or fast set), glue the speaker grill in<br />
place; it will fit on only one way to look right (Fig. 16). Glue the green and red LED parts in place (Fig. 17);<br />
these should stick out of the surface approximately .050 (or 1/16” max). If you’re planning on putting lights<br />
in here, make sure the glue doesn’t cover the bottom of the LED parts. (Optional: apply a little Bare-Metal<br />
foil to the bottom of the LEDs).<br />
Step 9: Align the mid plate on the upper body and remove, noting its proper orientation. Apply a small<br />
amount of rubber cement on the upper body (Fig. 18) and glue the mid plate on (Fig. 19--painted mid plate<br />
shown). Don’t let it ooze onto your finished surface! This will make it easier to do the final assembly.<br />
Step 10: Place the lower shell on and screw it in place using the two 2-56 x 1/2” Allen screws (Fig. 20).<br />
Place the brass grill on and screw in using the two 4-40 x 1/4” button head screws and the two brass tube<br />
spacers (Fig. 21). Leave the screws loose so the grill will flip easy. Don’t over-tighten.
#PRP1796 - STAR TREK <strong>III</strong> Co m m u n i c a to r Pr o p Kit As s e m b l y Ma n u a l 7<br />
Congratulations, your <strong>Star</strong> <strong>Trek</strong> <strong>III</strong> Communicator is finished!<br />
IMPORTANT NOTES:<br />
The physical reproduction by any means known or yet to be invented (including molding<br />
and recasting, reverse-engineering, and stereo lithography scanning and printing) of<br />
this <strong>Roddenberry</strong>.<strong>com</strong> <strong>Star</strong> <strong>Trek</strong> <strong>III</strong> Communicator Prop Kit or its parts and graphics, or<br />
reproducing any pre-existing parts and graphics, is expressly prohibited under U.S. and<br />
international copyright and product protection laws.<br />
Copyright © 2009 <strong>Roddenberry</strong> Productions.<br />
<strong>Star</strong> <strong>Trek</strong> and related marks and logos are Trademarks of CBS Studios Inc. All rights reserved.


