
Create successful ePaper yourself
Turn your PDF publications into a flip-book with our unique Google optimized e-Paper software.
6<br />
#PRP1796 - STAR TREK <strong>III</strong> Co m m u n i c a to r Pr o p Kit As s e m b l y Ma n u a l<br />
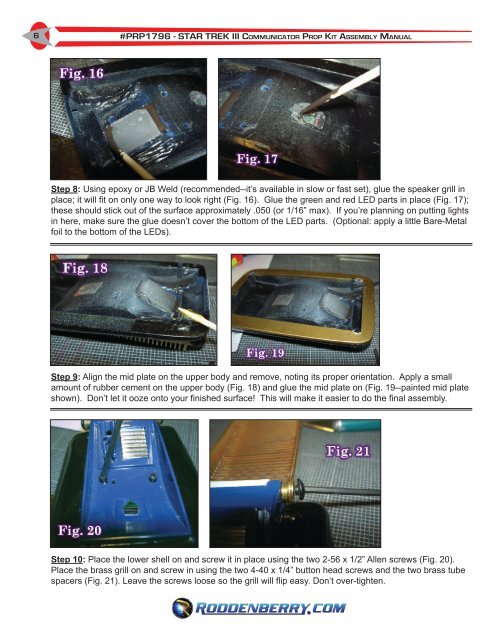
Step 8: Using epoxy or JB Weld (re<strong>com</strong>mended--it’s available in slow or fast set), glue the speaker grill in<br />
place; it will fit on only one way to look right (Fig. 16). Glue the green and red LED parts in place (Fig. 17);<br />
these should stick out of the surface approximately .050 (or 1/16” max). If you’re planning on putting lights<br />
in here, make sure the glue doesn’t cover the bottom of the LED parts. (Optional: apply a little Bare-Metal<br />
foil to the bottom of the LEDs).<br />
Step 9: Align the mid plate on the upper body and remove, noting its proper orientation. Apply a small<br />
amount of rubber cement on the upper body (Fig. 18) and glue the mid plate on (Fig. 19--painted mid plate<br />
shown). Don’t let it ooze onto your finished surface! This will make it easier to do the final assembly.<br />
Step 10: Place the lower shell on and screw it in place using the two 2-56 x 1/2” Allen screws (Fig. 20).<br />
Place the brass grill on and screw in using the two 4-40 x 1/4” button head screws and the two brass tube<br />
spacers (Fig. 21). Leave the screws loose so the grill will flip easy. Don’t over-tighten.