Networking Guide - Log in
Networking Guide - Log in
Networking Guide - Log in
You also want an ePaper? Increase the reach of your titles
YUMPU automatically turns print PDFs into web optimized ePapers that Google loves.
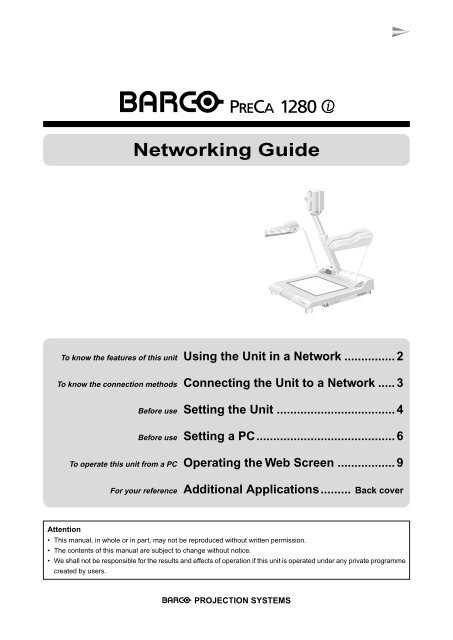
<strong>Network<strong>in</strong>g</strong> <strong>Guide</strong><br />
To know the features of this unit Us<strong>in</strong>g the Unit <strong>in</strong> a Network ............... 2<br />
To know the connection methods Connect<strong>in</strong>g the Unit to a Network ..... 3<br />
Before use Sett<strong>in</strong>g the Unit ................................... 4<br />
Before use Sett<strong>in</strong>g a PC......................................... 6<br />
To operate this unit from a PC Operat<strong>in</strong>g the Web Screen ................. 9<br />
For your reference<br />
Additional Applications......... Back cover<br />
Attention<br />
• This manual, <strong>in</strong> whole or <strong>in</strong> part, may not be reproduced without written permission.<br />
• The contents of this manual are subject to change without notice.<br />
• We shall not be responsible for the results and effects of operation if this unit is operated under any private programme<br />
created by users.<br />
PROJECTION SYSTEMS
Us<strong>in</strong>g the Unit <strong>in</strong> a Network<br />
When connected to a network, this unit can send images to distant locations, enabl<strong>in</strong>g presentation <strong>in</strong> a new style.<br />
Features<br />
• Conform<strong>in</strong>g to Ethernet (10BASE-T), the unit can be directly connected to a LAN or Internet l<strong>in</strong>e without us<strong>in</strong>g a PC.<br />
• If you use a Web browser on a computer <strong>in</strong> the connected network, images captured with this unit can be displayed and<br />
even downloaded. No special driver software is required.<br />
• Stor<strong>in</strong>g images captured with this unit as files <strong>in</strong> a server via a LAN, you can check the images from a domestic PC any<br />
time you want.<br />
• The Enable Control function permits you to operate this unit from a PC (see pages 10 and 11).<br />
• The last eight images can be seen at a glance <strong>in</strong> "Multiple w<strong>in</strong>dow system" on the Web screen.<br />
Conference room A<br />
Conference room B<br />
I<br />
Image captured by<br />
the<br />
<strong>in</strong><br />
conference room A<br />
Projector<br />
Projector<br />
Monitor<br />
PC PC PC PC<br />
Connected to a LAN<br />
: LAN connection The above figure shows an example of view<strong>in</strong>g an<br />
image captured by the<br />
<strong>in</strong> conference<br />
: RGB connection<br />
room A shown simultaneously <strong>in</strong> conference room B.<br />
: Signal flow<br />
The image can be seen even if there is no<br />
<strong>in</strong> conference room B.<br />
Operational environments<br />
OS: W<strong>in</strong>dows 95/98<br />
Software: Internet Explorer 5.0 or higher or Netscape Communicator 4.5 or higher<br />
Memory: 64MB or more<br />
To conference room<br />
C, D, and so on, or a<br />
server<br />
Caution<br />
• The size of an image captured with this unit may be as large as 3.5MB (for a full-sized BMP). To send such mass data via<br />
a network, consult the adm<strong>in</strong>istrator of your network.<br />
• Do NOT perform any network operation while this unit is access<strong>in</strong>g a PC card (with the PC card <strong>in</strong>dicator lit <strong>in</strong> green).<br />
2
Connect<strong>in</strong>g the Unit to a Network<br />
Before connection, turn off the power to the equipment to be connected.<br />
It is also requested that you consult the adm<strong>in</strong>istrator of your network <strong>in</strong><br />
advance.<br />
Turn off the<br />
power.<br />
LWhen connect<strong>in</strong>g to a LAN<br />
Rear of the unit<br />
Network<br />
10Base-T<br />
Commercially available 10/<br />
100BASE-TX (category 5)<br />
cable (straight)<br />
Hub<br />
PC<br />
to the<br />
Ethernet<br />
connector<br />
Commercially available 10/<br />
100BASE-TX (category 5)<br />
cable (straight)<br />
LWhen connect<strong>in</strong>g to a PC without connect<strong>in</strong>g to a LAN<br />
Rear of the unit<br />
10Base-T<br />
Commercially available 10/<br />
100BASE-TX (category 5)<br />
cable (cross)<br />
to the<br />
Ethernet<br />
connector<br />
PC<br />
Note on cables and hubs<br />
Cables and hubs for the 100BASE speed can also be used.<br />
3
Sett<strong>in</strong>g the Unit<br />
The network sett<strong>in</strong>gs are performed with a menu operation.<br />
There are two methods for the menu operation: us<strong>in</strong>g the<br />
operation panel and us<strong>in</strong>g a mouse.<br />
The method us<strong>in</strong>g a mouse is discussed here.<br />
2 Select “Setup.”<br />
Left-click on “Setup.”<br />
The Setup display appears.<br />
1 Display the menu.<br />
Right-click on the area <strong>in</strong> the upper one-fifths of the<br />
screen.<br />
Right-click<br />
on this area.<br />
3 Select “NetWork Sett<strong>in</strong>g.”<br />
Left-click on “NetWork Sett<strong>in</strong>g.”<br />
The NetWork Sett<strong>in</strong>g display appears.<br />
4 Check “Enable NetWork.”<br />
Left-click the “Enable NetWork” check box.<br />
A check mark ( ) appears <strong>in</strong> the box.<br />
Screen of the connected monitor<br />
or projector<br />
NetWork Sett<strong>in</strong>g display<br />
The IP Address and SubNet Mask values are <strong>in</strong>dicated as examples.<br />
Ask the adm<strong>in</strong>istrator of your network for the values to be actually entered.<br />
PowerOn Sett<strong>in</strong>g<br />
NetWork Sett<strong>in</strong>g<br />
Timer... Sett<strong>in</strong>g<br />
Return to W<strong>in</strong>dow<br />
NetWork Sett<strong>in</strong>g<br />
* Enable NetWork<br />
* Read Only ( FTP, WEB : disable Write / Control)<br />
Internal Server IP Address 192 168 001 002<br />
SubNet Mask 255 255 000 000<br />
User ID anonymous ( max 10 char.)<br />
Pass Word none ( max 10 char.)<br />
Enable FTP Client<br />
External Server IP Address 192 168 001 001<br />
User ID anonymous ( max 10 char.)<br />
Pass Word none ( max 10 char.)<br />
SAVE<br />
Default<br />
skip 0 1 2 3 4 5 6 7 8 9<br />
a b c d e f g h i j k l m<br />
n o p q r s t u v w x y z<br />
4
5 Enter the IP address.<br />
1 Left-click on the leftmost IP Address box.<br />
2 Left-click on the numeric keys on the lower area<br />
of the display.<br />
Enter three digits of the IP address. For a s<strong>in</strong>gledigit<br />
or two-digit number, first type 0 or 00.<br />
The cursor moves to the next box. Repeat the<br />
same operation.<br />
6 Enter the Subnet Mask.<br />
1 Left-click on the leftmost SubNet Mask box.<br />
2 Left-click on the numeric keys <strong>in</strong> the lower area<br />
of the display.<br />
Enter three digits of the Subnet Mask. For a<br />
s<strong>in</strong>gle-digit or two-digit number, first type 0 or 00.<br />
The cursor moves to the next box. Repeat the<br />
same operation.<br />
7 Register the sett<strong>in</strong>gs.<br />
Left-click on “Save.”<br />
8 Clear the menu.<br />
Sett<strong>in</strong>g items<br />
L Enable NetWork<br />
To enable/disable the network function<br />
L Read Only (FTP, WEB: disable Write/Control)<br />
If operat<strong>in</strong>g the unit from a PC, remove the check<br />
mark ( ).<br />
L Internal Server<br />
To set the IP address, subnet mask, user ID, and<br />
password for the FTP, HTTP, and Telnet servers<br />
of this unit.<br />
When you set “User ID” to other than “anonymous,”<br />
a certification will be requested before connect<strong>in</strong>g<br />
to the network. You can log on us<strong>in</strong>g the user ID<br />
and password specified here.<br />
L Enable FTP Client<br />
To enable/disable the function to send data to a file<br />
server. When the function is disabled, the menu<br />
button becomes <strong>in</strong>valid, prevent<strong>in</strong>g erroneous operation.<br />
L External Server<br />
To set an external FTP server. This item must be<br />
set if you want to send an image file to the FTP<br />
server. For FTP servers, ask the adm<strong>in</strong>istrator of<br />
your network.<br />
Left-click on “Return to W<strong>in</strong>dow.”<br />
9 Turn off the power, then turn it<br />
on aga<strong>in</strong>.<br />
Notes:<br />
• For details on the IP Address and SubNet Mask, ask the<br />
adm<strong>in</strong>istrator of your network.<br />
• If any item other than the IP Address and SubNet Mask<br />
must be set, perform the sett<strong>in</strong>g before step 7.<br />
• Be sure to reboot this unit any time after sett<strong>in</strong>g/chang<strong>in</strong>g<br />
the IP address.<br />
5
Sett<strong>in</strong>g a PC<br />
When us<strong>in</strong>g Internet Explorer 5.0<br />
To control this unit us<strong>in</strong>g Internet Explorer 5.0 as your Web<br />
browser, perform the follow<strong>in</strong>g sett<strong>in</strong>gs:<br />
4 Select “Connections.”<br />
Left-click on “Connections.”<br />
Attention:<br />
• Some special sett<strong>in</strong>gs may be required for your<br />
network. Please consult the adm<strong>in</strong>istrator of your<br />
network before start<strong>in</strong>g to make the sett<strong>in</strong>gs, to<br />
elim<strong>in</strong>ate caus<strong>in</strong>g any trouble <strong>in</strong> network<strong>in</strong>g.<br />
Left-click here.<br />
1 Start your PC.<br />
For details, refer to the <strong>in</strong>structions for the PC.<br />
2 Run Internet Explorer.<br />
For details, refer to the <strong>in</strong>structions for the PC or<br />
Internet Explorer.<br />
5 Select “LAN Sett<strong>in</strong>gs.”<br />
Left-click on “LAN Sett<strong>in</strong>gs.”<br />
3 Choose “Internet Options”<br />
from the “Tools” menu.<br />
Left-click on “Tools,” and a pop-up menu is displayed<br />
beneath. Then left-click on “Internet Options.”<br />
Left-click<strong>in</strong>g here displays a<br />
pop-up menu.<br />
Left-click here.<br />
6 Select “Advanced.”<br />
Left-click on “Advanced.”<br />
Left-click here.<br />
If “Advanced” is disabled, left-click on the “Use a<br />
proxy server” check box. A check mark ( ) appears,<br />
permitt<strong>in</strong>g you to select “Advanced.”<br />
6
7 Enter the IP address of this unit<br />
<strong>in</strong> the “Exceptions” field.<br />
Left-click <strong>in</strong> the “Exceptions” field, and type the IP<br />
address of this unit specified <strong>in</strong> step 5 on page 5.<br />
• Enter a dot (period) between each three digits.<br />
• If the three digits beg<strong>in</strong> with “0” or “00,” skip “0”<br />
<strong>in</strong>put (s).<br />
Example: when the address is<br />
192.168.1.2<br />
When us<strong>in</strong>g Netscape<br />
Communicator 4.5<br />
To control this unit us<strong>in</strong>g Netscape Communicator 4.5 as<br />
your Web browser, perform the follow<strong>in</strong>g sett<strong>in</strong>gs:<br />
Attention:<br />
• Some special sett<strong>in</strong>gs may be required for your<br />
network. Please consult the adm<strong>in</strong>istrator of your<br />
network before start<strong>in</strong>g to make the sett<strong>in</strong>gs, to<br />
elim<strong>in</strong>ate caus<strong>in</strong>g any trouble <strong>in</strong> network<strong>in</strong>g.<br />
1 Start your PC.<br />
For details, refer to the <strong>in</strong>structions for the PC.<br />
2 Run Netscape Communicator.<br />
Enter the address <strong>in</strong> this field.<br />
For details, refer to the <strong>in</strong>structions for the PC or<br />
Netscape Communicator.<br />
8 Select “OK.”<br />
Left-click on “OK.”<br />
Repeat this operation until the display <strong>in</strong> step 1 is<br />
restored.<br />
3 Choose “Preferences” from the<br />
“Edit” menu.<br />
Left-click on “Edit,” and a pop-up menu is displayed<br />
beneath. Then left-click on “Preferences.”<br />
Left-click<strong>in</strong>g here displays a<br />
pop-up menu.<br />
Cont<strong>in</strong>ue<br />
7
Sett<strong>in</strong>g a PC (Cont<strong>in</strong>ued)<br />
4 Select “Proxies” from<br />
“Advanced.”<br />
Left-click on “Advanced,” and a menu is displayed<br />
beneath. Then left-click on “Proxies.”<br />
7 Enter the IP address of this unit<br />
<strong>in</strong> the “Exceptions” field.<br />
Left-click <strong>in</strong> the “Exceptions” field, and type the IP<br />
address of this unit specified <strong>in</strong> step 5 on page 5.<br />
• Enter a dot (period) between each three digits.<br />
• If the three digits beg<strong>in</strong> with “0” or “00,” skip “0”<br />
<strong>in</strong>put (s).<br />
Example: when the address is<br />
192.168.1.2<br />
Left-click here.<br />
5 Select “Manual proxy<br />
configuration.”<br />
Left-click on “Manual proxy configuration.”<br />
Enter the address <strong>in</strong> this field.<br />
8 Select “OK.”<br />
Left-click on “OK.”<br />
Repeat this operation until the display <strong>in</strong> step 1 is<br />
restored.<br />
Left-click here.<br />
6 Select “View.”<br />
Left-click on “View.”<br />
Left-click here.<br />
8
Operat<strong>in</strong>g the Web Screen<br />
Web Screen Operations<br />
You can see and download the image be<strong>in</strong>g captured by this unit us<strong>in</strong>g a Web browser <strong>in</strong> a room distant from the unit.<br />
This may be helpful, e.g. when you want to observe the progress of a conference <strong>in</strong> another distant place.<br />
• For operation, use “S<strong>in</strong>gle w<strong>in</strong>dow system” and “Multiple w<strong>in</strong>dow system” on the Web screen.<br />
The operational procedure is the same. (See pages 10 and 11.)<br />
• The major difference between “S<strong>in</strong>gle w<strong>in</strong>dow system” and “Multiple w<strong>in</strong>dow system” is the number of captured images<br />
that can be displayed. While “S<strong>in</strong>gle w<strong>in</strong>dow system” can display the latest image, “Multiple w<strong>in</strong>dow system” can<br />
display the last eight updated images <strong>in</strong> addition to the latest one. Use either of them, accord<strong>in</strong>g to your purpose.<br />
• The operation may differ depend<strong>in</strong>g on the browser version.<br />
The display examples <strong>in</strong> section “Operat<strong>in</strong>g the WEB Screen” (pages 9 to 11) are those with Internet Explorer 5.0.<br />
To display the Web screen<br />
1 Run Internet Explorer or<br />
Netscape Communicator.<br />
2 Enter the IP address of this<br />
unit <strong>in</strong> the “Address” or<br />
“Location” field.<br />
3 Open “S<strong>in</strong>gle w<strong>in</strong>dow system”<br />
or “Multiple w<strong>in</strong>dow system.”<br />
Left-click on "S<strong>in</strong>gle w<strong>in</strong>dow system" or "Multiple<br />
w<strong>in</strong>dow system."<br />
Use either “S<strong>in</strong>gle w<strong>in</strong>dow system” or “Multiple<br />
w<strong>in</strong>dow system” referr<strong>in</strong>g to “What Can be Done<br />
on the Web Screen” on pages 10 and 11.<br />
Left-click <strong>in</strong> the correspond<strong>in</strong>g field, and type the<br />
IP address of this unit specified <strong>in</strong> step 5 on page<br />
5, and press the enter key.<br />
• Enter a dot (period) between each three digits.<br />
• If the three digits beg<strong>in</strong> with “0” or “00,” skip “0”<br />
<strong>in</strong>put (s).<br />
Enter the address <strong>in</strong> this field.<br />
The Web screen for this unit appears.<br />
Example: when the address is 192.168.1.2<br />
Click here.<br />
When “Multiple w<strong>in</strong>dow system” is not found on<br />
the screen, scroll the display downward.<br />
Note<br />
• If the Web screen of this unit is displayed<br />
simultaneously on multiple PCs, the operation<br />
speed will be decreased.<br />
Cont<strong>in</strong>ue<br />
9
Operat<strong>in</strong>g the Web Screen (Cont<strong>in</strong>ued)<br />
What Can be Done on the Web Screen<br />
What can be done with “S<strong>in</strong>gle w<strong>in</strong>dow system” can also be done with “Multiple w<strong>in</strong>dow system,” while the screen layouts are<br />
slightly different.<br />
S<strong>in</strong>gle w<strong>in</strong>dow system displays an image be<strong>in</strong>g captured by this unit.<br />
Sett<strong>in</strong>g the Interval Time for the preview display<br />
Set the time to update the display (preview display) to check<br />
images captured by this unit before actually load<strong>in</strong>g an image<br />
onto the PC. Left-click on the option button for the<br />
desired time value.<br />
• When you select “None,” the display is not updated after an<br />
image is once displayed.<br />
• The values listed for “Interval Time” are approximate durations.<br />
Operat<strong>in</strong>g this unit<br />
Set/adjust the unit by left-click<strong>in</strong>g on these items.<br />
Be sure to remove the check mark from the “Read Only<br />
(FTP, WEB: disable Write/Control)” check box, which<br />
can be accessed from the Setup menu of this unit.<br />
(See page 5.)<br />
• For details on the sett<strong>in</strong>g/adjustment items, see page 11.<br />
• Do NOT perform any network operation while this unit is<br />
access<strong>in</strong>g a PC card (with the PC card <strong>in</strong>dicator lit <strong>in</strong> green).<br />
Load<strong>in</strong>g an image<br />
Left-click on the preview display.<br />
When load<strong>in</strong>g of the image is completed, proceed<br />
to “Sav<strong>in</strong>g the loaded image” on page 11.<br />
• The loaded image is saved to a JPEG-format file.<br />
Sett<strong>in</strong>g the picture image size<br />
Left-click on the option button for the desired value.<br />
Note<br />
• When load<strong>in</strong>g an image onto a PC, the latest image at the<br />
time when you click on the display is loaded from this unit,<br />
which may be different from that on the preview display.<br />
10
Multiple w<strong>in</strong>dow system displays the last eight updated preview images <strong>in</strong> addition to the current image be<strong>in</strong>g<br />
captured by this unit.<br />
Check<strong>in</strong>g the transition of preview display<br />
If the eight-image display area is not seen, scroll the<br />
display.<br />
• The preview displays are updated each time a new image is<br />
loaded.<br />
• While the preview display is not updated eight times after display<strong>in</strong>g<br />
the Web screen, only the available images are displayed.<br />
Note<br />
• The last eight updated images displayed by Multiple w<strong>in</strong>dow<br />
system cannot be loaded onto the PC.<br />
Stor<strong>in</strong>g the Loaded Image<br />
1 Display the menu.<br />
Right-click on the image, and a context menu is displayed.<br />
Choose “Save As” from the menu.<br />
Right-click<strong>in</strong>g on the image<br />
displays a context menu.<br />
Items that can be set/adjusted on the Web screen<br />
L Light ON/OFF<br />
Selects “Upper lamps on,” “Lower lamps off,” and “Both<br />
off” <strong>in</strong> the sequence.<br />
L Auto Focus<br />
Turns on/off the auto-focus function.<br />
L Focus-Near/Focus-Far<br />
For f<strong>in</strong>e-adjustment of the focus. Left-click repeatedly<br />
on either “Focus-Near” or “Focus-Far.”<br />
L Zoom-OUT/Zoom-IN<br />
Zoom-OUT: To widen the area to be captured<br />
Zoom-IN: To enlarge the image<br />
Note<br />
• With some browser software, the latest image at<br />
the time when you click on “Save As” is saved,<br />
which may be different from that on the preview<br />
display.<br />
2 Specify a filename and save.<br />
Type a filename, then left-click on “Save.”<br />
Folder where the image file is to be saved.<br />
L AE ON/OFF<br />
Turns on/off the auto-iris function.<br />
L Iris +/-<br />
For f<strong>in</strong>e-adjustment of the iris. Left-click repeatedly on<br />
either “-” or “+.”<br />
L SXGA/XGA<br />
Switches the output mode.<br />
L White Balance<br />
Turns on/off the white-balance function.<br />
L TONE<br />
Selects “Natural,” “L<strong>in</strong>ear1,” “Document,” “L<strong>in</strong>ear2,” and<br />
“Picture” <strong>in</strong> sequence.<br />
L Reverse<br />
Selects “Normal,” “Nega,” and “BlueBack” <strong>in</strong> sequence.<br />
Enter the filename here.<br />
Click here.<br />
L T-GAIN+/-, R-GAIN+/-, G-GAIN+/-, B-GAIN+/-<br />
To adjust the colour<strong>in</strong>g.<br />
Each time you click on “+” or “-,” the correspond<strong>in</strong>g<br />
sett<strong>in</strong>g changes <strong>in</strong> the range of 50 to 150.<br />
L Sharpness +/-<br />
For contour adjustment.<br />
For details on these items, refer to pages 24 to 28 of the User’s<br />
Manual.<br />
11
Additional Applications<br />
Shoot<strong>in</strong>g a three-dimensional subject<br />
A solid object can be seen <strong>in</strong> sharp detail even from a distance.<br />
Projector<br />
Projector<br />
PC<br />
Pr<strong>in</strong>ter<br />
Shoot<strong>in</strong>g a white board and send<strong>in</strong>g handwrit<strong>in</strong>g<br />
A handwritten manuscript or memo can be sent to a distance just by shoot<strong>in</strong>g (there is no need to convert it to data for<br />
transmission).<br />
Set the camera<br />
head horizontally.<br />
Pr<strong>in</strong>ter<br />
PC


