Saxophones User Manual v.1.1.1 - Sample Modeling
Saxophones User Manual v.1.1.1 - Sample Modeling
Saxophones User Manual v.1.1.1 - Sample Modeling

You also want an ePaper? Increase the reach of your titles
YUMPU automatically turns print PDFs into web optimized ePapers that Google loves.
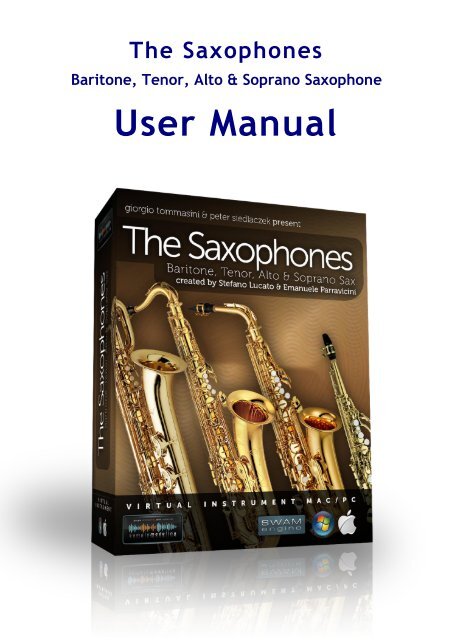
The <strong>Saxophones</strong><br />
Baritone, Tenor, Alto & Soprano Saxophone<br />
<strong>User</strong> <strong>Manual</strong>
Table of Contents<br />
Before you start 3<br />
Licensing 3<br />
Product Description 3<br />
System Requirements 4<br />
Supported formats 4<br />
Operating systems 4<br />
CPU load 4<br />
Stand-alone mode 5<br />
Hardware Requirements 5<br />
Audio 5<br />
MIDI 5<br />
The Instrument and its controls 6<br />
Main Instrument GUI 6<br />
Main Controls vs. articulations 8<br />
GUI Parameter Controls 8<br />
Main Page 9<br />
Options page 11<br />
Microtuning 13<br />
Microtuning using the mouse 14<br />
Microtuning using the Keyswitches 14<br />
Saving Microtuning settings 16<br />
Keyswitches 16<br />
Technical Support 17<br />
2
Before you start<br />
Even if these instruments are easy and intuitive to play, getting excellent results requires some<br />
practice and experience. Please read this <strong>User</strong> <strong>Manual</strong> carefully. It contains very important<br />
information which will help you to achieve best results in a much shorter time. Listen also to the<br />
demos and have a closer look into the demo MIDI file(s) available on our homepage<br />
www.samplemodeling.com. The demo MIDI files clearly show how the instrument is played and<br />
which parameters are most important for a realistic performance.<br />
Note: the MIDI note naming convention we are using is based on the Yamaha standard:<br />
the middle C is C3, corresponding to the MIDI note number 60.<br />
Licensing<br />
We provide two license keys per instrument. How to use them is a customer's choice. One can<br />
elect to install the instrument on two different systems, if both belong to him, and are not used<br />
simultaneously. Or, one can spare one license for future upgrades. Please note that operating<br />
system, or hard drive changes, do not affect instrument activation. However, major hardware<br />
upgrades, or installation of the instrument on a new computer require a new activation. In this<br />
case, deactivation of a previous license is required in order to free the license for a new<br />
installation. This is easily accomplished online and, if strictly necessary, even offline. Sharing<br />
unused license keys is strictly forbidden. Please note that all license keys are personalized, and<br />
that your email address will be displayed on the instrument GUI.<br />
Product description<br />
Our <strong>Saxophones</strong> belong to the most expressive virtual musical instruments. You can really PLAY<br />
them, shaping the sound like a real sax player does. They work on any up-to-date computer (see<br />
System Requirements), within any suitable host like a sequencer (Cubase, Logic, etc.), DAW<br />
(Digital Work Stations) or a free host application (see below). They use Stefano Lucato's<br />
proprietary SWAM (Synchronous Wavelength Acoustic <strong>Modeling</strong>) technology, providing the<br />
exceptional playability and realism which characterize all <strong>Sample</strong>modeling instruments. It´s not<br />
a sample player, using pre-recorded articulations, but a complex virtual instrument, capable of<br />
shaping almost any kind of articulations and phrases in real time. It can be played using any MIDI<br />
device like a keyboard, breath- or wind controller. [However, it´s essential to provide the<br />
suitable control using appropriate MIDI devices, as described in this <strong>Manual</strong>]. Direct programming<br />
in a sequencer (without any MIDI devices) is also possible.<br />
3
Note: Like a real instrument or other <strong>Sample</strong>modeling instruments, and differently<br />
from any conventional sample library, the saxophones allow continuous transition<br />
across the dynamics (from pp to ff), free from any phasing artifacts. To accomplish<br />
this, a suitable continuous physical MIDI controller (such as an expression or volume<br />
pedal (CC11 or CC7), a breath or a windcontroller (CC2)) is absolutely necessary.<br />
WITHOUT THIS CONTROLLER THE INSTRUMENT WILL NOT WORK, displaying the<br />
warning “Expression controller not received. Please move your expression controller”<br />
Other physical MIDI controllers, like sliders, knobs or a modwheel, though not<br />
recommended, can be used for this purpose. Please refer to other sections of this<br />
manual for further details.<br />
System Requirements<br />
Supported Plugin Formats<br />
PC:<br />
VST 32/64 bit<br />
Mac:<br />
AU or VST 32 or 64 bit<br />
Required operating systems<br />
PC:<br />
Windows 7 or XP, 32/64 bit<br />
Mac:<br />
Intel only, Mac OS 10.5 – 10.8<br />
CPU load<br />
The realism and expressiveness of the <strong>Saxophones</strong> is demanding in terms of CPU load. It needs<br />
an up-to-date computer with at least 1,6 GHz Core2Duo CPU. Less powerful systems may also<br />
prove satisfactory, but may require larger buffer sizes, involving higher latencies<br />
Note: This may not represent a real problem though. Using the freeze feature or<br />
bouncing the single MIDI tracks to audio is a useful remedy.<br />
4
Stand-alone mode<br />
If you are a PC user and do not have any host application being capable of running VST or AU<br />
plugins (like a sequencer, DAW or another audio application), you can install a free host<br />
application like the excellent SaviHost by Hermann Seib, or Cantabile Lite. Other VST Hosts,<br />
albeit not necessarily free, can be found for example on http://www.kvraudio.com/get.php, for<br />
example. Mac users may use the Garage Band belonging to the system.<br />
Hardware Requirements<br />
Audio Interface (Sound Card)<br />
A good quality audio interface (USB, FireWire, PCI) with suitable low latency drivers (like ASIO<br />
for the PC) is required. The allowed buffer size is 64 - 2048 samples. Recommended settings are<br />
256 samples, or 512 samples (higher latency, but less CPU load).<br />
MIDI devices<br />
The <strong>Saxophones</strong> (like any other virtual instruments) can be successfully used without any<br />
additional hardware (except the audio interface) by drawing the controller curves and<br />
programming the notes directly in the host sequencer. However, a much more “human” and<br />
interactive configuration is recommended – especially for real time playing - using external MIDI<br />
devices:<br />
- A MIDI keyboard with at least 5 octaves, Modwheel & Pitchbend, connected to the computer<br />
via USB or an external MIDI interface, equipped with a set of physical continuous MIDI<br />
controllers (usually knobs or sliders) to control effects like overblow, subharmonic, growl,<br />
etc.<br />
- An Expression pedal, controlling the dynamics via CC11. Although the dynamics can be<br />
controlled by any other physical controller (knob, slider), a pedal is highly recommended. As<br />
an alternative, a Breath Controller, like Yamaha BC3, can be used. A pedal or a Breath<br />
Controller are highly recommended.<br />
- Woodwind or brass players may prefer a Wind Controller like Yamaha WX or Akai EWI (USB or<br />
4000S); both provide excellent results.<br />
5
The Instrument and its controls<br />
Main Instrument GUI<br />
If properly activated (please read the enclosed “Installation Guide”), this is how the instrument<br />
looks after loading:<br />
Please select the proper default instrument preset (Keyboard or Windcontroller) using the<br />
Load button to the right of the upper central display window, according to your current input<br />
MIDI device(see also page 7)<br />
6
When you start playing, a warning message may appear, reminding you that an expression<br />
controller (preferably CC11, CC7 or CC2) is absolutely necessary for the proper functioning<br />
of the instrument:<br />
Per default, the software assigns the expression control to CC11 if in Keyboard mode and to CC2<br />
if in Windcontroller mode. These default settings can be manually changed. For example, if you<br />
wish to use a volume pedal to control the expression, just open the Options page (clicking on the<br />
"Options" button) and set the Expression CC to 7. If needed, this assignment can be permanently<br />
stored as a preset (see below). Automatic assignment is also possible. Just enter the Options<br />
page and activate “Exprs.CC AutoLearn” by moving the slider to the right. In this mode, the<br />
instrument recognizes the first incoming CC number (among 11, 2 and 7) and automatically<br />
assigns it to expression.<br />
The loaded Preset will be displayed as "Default Sax X Keyb.Contrl", where “X” is the type of the<br />
saxophone (“T” for tenor, “B for baritone etc.). These settings are suitable for playing the<br />
instrument with a MIDI (or USB) Keyboard, expression pedal, Pitchbend and Modwheel.<br />
With a Breath controller, please use the same Preset "Default Sax X Keyb.Contrl", but don't<br />
forget to remap Expression to CC2 in the Option Panel (see below).<br />
With a Wind Controller (e.g. EWI or WX), please load the Preset: "Default Sax X Wind.Contrl" , or<br />
click on "Reset” -> “Default Wind Controller". Expression is automatically remapped to CC2.<br />
Please note that in WC mode the legato/portamento time is controlled by CC5<br />
7
Main Controls vs. articulations<br />
Velocity controls:<br />
- Initial Attack (for detached notes)<br />
- Portamento Time (for Legato, if Port.Time Button is set to Velocity)<br />
Expression (CC11, CC2, CC7 or other CCs set on the OPTIONS page) controls the Dynamics (from<br />
pp to ff)<br />
ModWheel (CC1) controls Vibrato intensity<br />
CC19 controls Vibrato Rate<br />
PitchBend controls the pitch. The Pitchbend range (downwards - upwards, in semitones) can be<br />
directly set by the user on the main GUI (see page 9).<br />
Staccato, “SemiLegato”, and Legato Articulations are managed by a special algorithm which<br />
takes into account :<br />
- Note Velocity<br />
- Interval between the notes (semitones).<br />
- Time between Note-OFF and subsequent Note-ON<br />
GUI Parameter Controls<br />
There are three types of Controls on the Main Instrument GUI enabling a convenient data entry:<br />
- Sliders<br />
- +/- Buttons<br />
- Switches<br />
Sliders<br />
Set the desired value either by<br />
- dragging the Slider (while holding the left mouse button) or<br />
- acting on the slider with the mouse wheel<br />
+/- Buttons<br />
The values can be set in 3 different ways :<br />
- Clicking on “+” and “-“<br />
- Acting with the mouse wheel on the label (small steps), or on the +/- buttons (larger steps)<br />
- Dragging the mouse vertically after clicking on the displayed value<br />
Double-clicking on the slider or on the number displayed aside the +/- button reloads the<br />
previously saved or default settings.<br />
8
Load & Save *):<br />
M.Tune Hz :<br />
M.T.Cents :<br />
Reverb Time :<br />
Loads and saves instrument settings (Paths – see below)<br />
Master Tune frequency in Hz<br />
Master Tune in Cents (Linked to M.Tune Hz, A3 = 440Hz)<br />
Reverb Duration<br />
Reverb Mix : Reverb Amount (if set to 0, the Reverb is bypassed, saving CPU )<br />
Right-click to assign it to CC91<br />
Transp :<br />
PB D .. U .. :<br />
Panpot :<br />
Main Volume :<br />
Instr. :<br />
Instrument Transpose (Key Switches are not transposed)<br />
Pitch Bend Range; can be set for bending<br />
Down and Up independently (in semitones)<br />
Panning between L and R (see also Pan Type on the OPTIONS page)<br />
Right-click to assign it to CC10<br />
Instrument output level (in dB). Right-click to assign it to CC7<br />
Changes the instrument timbre (corresponding to different instruments or<br />
microphone placements)<br />
9
Rand.Dyn :<br />
Dyn.Pitch :<br />
Attack Dyn :<br />
Harm.Struct :<br />
FallDown :<br />
OverBlow :<br />
SubHarm :<br />
Growl :<br />
Flutter T :<br />
Breath N. :<br />
Key Noise :<br />
Dyn.Harm :<br />
Release :<br />
Compressor :<br />
Formant :<br />
Modal Res. :<br />
Port.Time :<br />
Reset :<br />
Options :<br />
Controls random modulation of dynamics and pitch<br />
Amount of Pitch Modulation while changing the dynamics. Also controlled by<br />
CC8<br />
Changes the attack behavior, assigning it to: 1. velocity (linear response,<br />
“Hard”), 2. Velocity (non-linear response, “soft”), and directly to Expression<br />
Spectral characteristics of the instrument (balance between odd and even<br />
harmonics)<br />
Clicking on this button triggers a fall. This effect is assigned also to the Key<br />
Switch C1. Assigning to a CC is also possible (see OPTIONS page)<br />
Clicking on it creates overblow. Also assigned to the Key Switch D1<br />
(momentary) and D#1 (latch), as well as to the sustain pedal (CC64)<br />
SubHarmonic Intensity, also controlled by CC20.<br />
Growl Intensity, also controlled by CC21. For a “cleaner” sound should be set<br />
to zero.<br />
Flutter Tongue Intensity, also controlled by CC23<br />
Breath Noise Intensity, also controlled by CC25<br />
Key Noise Intensity, also controlled by CC9<br />
Amount of Harmonics and SubHarmonics modulation during Attacks and<br />
Dynamics changes<br />
Release Time on Note-Off<br />
Audio Compression; controls the overall dynamic range from pp to ff<br />
Changes the Formants, hence the timbre of the instrument<br />
Intensity of Instrument Pipe Modal Resonance<br />
Selects the source of the portamento time control. The legato/portamento<br />
time can be controlled by: Velocity (default), CC (large values = long<br />
portamento time) or CC inverted (small values = long portamento time)<br />
Resets the engine and reloads the default or previously saved parameters<br />
Opens Midi CC Remapper and Advanced Parameter Settings (see below)<br />
Help & Credits : Opens Help and Credits page<br />
*) Load & Save paths are:<br />
Windows:<br />
/<strong>Sample</strong>modeling/SWAM/<strong>Saxophones</strong>/SaxB/Presets<br />
/<strong>Sample</strong>modeling/SWAM/<strong>Saxophones</strong>/SaxT/Presets<br />
/<strong>Sample</strong>modeling/SWAM/<strong>Saxophones</strong>/SaxA/Presets<br />
/<strong>Sample</strong>modeling/SWAM/<strong>Saxophones</strong>/SaxS/Presets<br />
10
Mac:<br />
/<strong>User</strong>s/<strong>Sample</strong>modeling/SWAM/<strong>Saxophones</strong>/SaxB/Presets<br />
/<strong>User</strong>s/<strong>Sample</strong>modeling/SWAM/<strong>Saxophones</strong>/SaxT/Presets<br />
/<strong>User</strong>s/<strong>Sample</strong>modeling/SWAM/<strong>Saxophones</strong>/SaxA/Presets<br />
/<strong>User</strong>s/<strong>Sample</strong>modeling/SWAM/<strong>Saxophones</strong>/SaxS/Presets<br />
OPTIONS page<br />
Clicking on the OPTIONS button opens the Midi CC Remapper, Microtuning section and Advanced<br />
Parameter settings.<br />
MIDI CC Mapping Options<br />
MIDI CC remapper allows to remap all the control parameters to any MIDI CC according to your<br />
needs.<br />
Note: OverBlow and FallDown have only On (CC>64) and Off status (CC
Advanced Parameters<br />
Attack to Sust Time :<br />
Portam: Max Time :<br />
Portam: Vel Sens :<br />
Auto Expression :<br />
Vibrato Rate :<br />
Vibrato Rand :<br />
Squeak -> Overblow:<br />
Expression Curve :<br />
Pan Behavior :<br />
Chromatic On/Off :<br />
Attack-Exprs Bias :<br />
ExprsCC AutoLearn :<br />
KS Oct.Transp. :<br />
Attack Start :<br />
Back to Main :<br />
Affects the velocity-dependent duration of the transition from<br />
attack to sustain.<br />
Maximum duration of portamento, i.e. the duration of a<br />
legato/portamento transition played at the lowest velocity.<br />
Controls the relationship between velocity and portamento duration<br />
(only if the Port.Time button on the Main Instrument GUI is set to<br />
velocity)<br />
modulation of the dynamics on transitions<br />
Vibrato Rate (also controlled by CC19)<br />
Rrandom modulation of Vibrato<br />
Crossfade between a brief squeak on attack (“S”), or a longer<br />
Overblow (“O”), if Overblow is triggered by a CC (CC Default: Sus<br />
Pedal). Not active if the Overblow is triggered by the Keyswitch (D1<br />
or D#1, see below)<br />
To cope with linear or logarithmic expression controllers (e.g.<br />
pedal) and optimize the overall expression controller curve<br />
Selects the pan behavior of the instrument vs. reverb (“Acoustic”:<br />
pan does not affect the reverb; “Balance”: pan affects both the<br />
instrument and the reverb)<br />
Activates an automatic chromatic scale during slow portamentos on<br />
larger intervals.<br />
modifies the Attack vs. Velocity curves, depending on Expression<br />
(disabled in Windcontroller mode).<br />
Enables or disables AutoLearn, i.e. the automatic detection of the<br />
incoming Expression CC<br />
KeySwitch Octave Transposition; “0” starts from the default<br />
position (depending on the instrument), “-12” starts 1 octave lower.<br />
See also “Keyswitches” below.<br />
progresively cuts the attack for more immediate attack response.<br />
Only if set to “0” the complete original attack will be played.<br />
Returns to the Main GUI<br />
12
Microtuning<br />
This is an entirely new feature, coping with the requirements of musicians using non-tempered<br />
scales.<br />
Our approach to microtuning yields maximal flexibility, allowing user-defined scales, where the<br />
extent of detuning (range +60/-60 cents) can be precisely set for each note by means of a series<br />
of sliders. The settings can be saved along with the instrument presets.<br />
The detuning can be applied in a selective manner to individual notes in realtime using the<br />
mouse or the keyswitches.<br />
The default preset is a detuning of -50 cents:<br />
Per default, the detuning is set, but not yet applied to any note. To apply the detuning, one can<br />
choose between two methods:<br />
1. Acting with the mouse on the instrument GUI<br />
2. “On the fly”, using Keyswitches.<br />
The “Temperament” slider, if set higher than zero, applies a kind of “spread intonation”:<br />
- it does not influence the pitch in the middle of the instrument;<br />
- the higher the pitch, the more upward detuning is applied;<br />
- the lower the pitch, the more downward detuning is applied.<br />
13
That means that the overall intonation of the instrument can be additionally “spaced apart” for<br />
some special effects.<br />
Applying the microtuning using the mouse<br />
This is the simplest method, suitable for settings which do not need to be changed “on the fly”.<br />
To detune the specific pitch, simply click on the microtuning bar on the main instrument GUI.<br />
This will apply the detuning (set on the Options page by the microtuning sliders) to that<br />
particular note (which is B in the example below):<br />
Clicking on the bargraph again will switch the detuning off.<br />
Double-click anywhere in the bargraph area will switch the detuning of all the notes off.<br />
Please note that the above works only on the main instrument page.<br />
Applying the microtuning using the keyswitches<br />
To apply microtuning to some notes using the keyswitches, one has to enter the Select Note<br />
Mode (SNM – see below), and press the appropriate keyswitches corresponding to the notes<br />
which must be detuned. For example, pressing the E1-keyswitch applies the detuning to all E<br />
notes.<br />
How to enter the Select Note Mode (SNM)<br />
The SNM is activated by sending a suitable CC value above 64. Which CC to use is the choice of<br />
the user: go to the Option page and enter the desired CC number in the field “MicroTuning (ON<br />
OFF)”. Entering “64” will define the sustain pedal, which is most suitable for this task. Pressing<br />
and holding the pedal switches SNM on.<br />
Note: CC64 (sus pedal) is, per default, assigned to Overblow (see OPTIONS page, field “Overblow<br />
(ON OFF))”. If using the sus pedal for Microtuning, the Overblow must be assigned to another<br />
controller, or to none, since it can be also controlled by the keyswitch D1.<br />
14
How to detune selected notes<br />
1. Enter the Select Note Mode (SNM) by pressing and holding the sus pedal (or send a<br />
value greater than 64 via the CC you have assigned to the Microtuning);<br />
2. Press the Keyswitches (even simultaneously) corresponding to the notes you want<br />
to detune.<br />
3. Exit SNM by releasing the sus pedal (or send a value below 64 via the CC you´ve<br />
assigned for this task)<br />
For example: you need an arabic scale in C and want to detune all E and B notes -50 ct. The<br />
steps are:<br />
Press and hold the sus pedal<br />
Press briefly E1 and B1<br />
Release the sus pedal<br />
Which notes and how much are detuned will be displayed on the instrument GUI:<br />
How to reset and modify the current microtuning<br />
As soon as you re-enter SNM (by pressing the sus pedal or sending a value greater than 64 via<br />
the CC you have assigned for this task) the current detuning of all the notes will be cancelled<br />
and the Microtuning display on the instrument GUI will be reset to zero:<br />
Keeping the pedal pressed, you can immediately detune a new set of notes by pressing the<br />
appropriate keyswitches (see 2. above).<br />
This way, activation of selective microtuning can be accomplished “on the fly”.<br />
15
How to save the microtuning settings<br />
The Microtuning settings – except those done “on the fly” with the Keyswitches – can be stored<br />
and loaded as instrument presets, using the Save/Load buttons on the Instrument GUI.<br />
Keyswitches<br />
Two parameters of the <strong>Saxophones</strong> can be triggered also by the Keyswitches C and D. In case of<br />
an overlap with the instrument range after transposing it, the Keyswitches can be moved to the<br />
left, being mapped to C and D one octave lower (see Options page)<br />
C triggers a short fall.<br />
D triggers a “squeak” (a short overblow on attack) or a continuous overblow, depending on its<br />
timing and velocity:<br />
- low velocity triggers a squeak (if the KS is pressed before the note-on)<br />
- higher velocity plays a continuous overblow (if the KS is pressed before the note-on)<br />
The latter can be also applied after the note-on (in the middle of a tone), if CC11 is above 60.<br />
D# behaves like D in latch mode.<br />
These Keyswitches are colored red on the instrument GUI. Please note that the Keyswitches<br />
involved in Microtuning (see above) include both red and blue Keyswitches.<br />
* * *<br />
16
Technical Support<br />
Before requesting technical support, please make sure that you have carefully read the <strong>User</strong><br />
<strong>Manual</strong> and the pertinent FAQ on our website:<br />
www.samplemodeling.com/en/faq.php (select “Swam-based instruments” on the top)<br />
You will find there the appropriate answer to the most questions quickly.<br />
Our Forum might also be a valuable source of technical information:<br />
http://www.samplemodeling.com/forum<br />
In case you still need a support, our first line customer care will be provided via email :<br />
info@samplemodeling.com<br />
or via our Contact page:<br />
http://www.samplemodeling.com/en/contact.php<br />
Note: please write your email address carefully - it´s not possible to reply to a<br />
misspelled address!<br />
More specific technical questions should be addressed to:<br />
http://www.swamengine.com/contact/<br />
When asking for a technical support, please do not forget to provide as much system information<br />
as possible, including computer, OS, audio interface, host application, software version, etc. If<br />
the problem can be demonstrated, a MIDI and/or an audio file is usually very helpful.<br />
Copyright © 2012 Giorgio Tommasini & Peter Siedlaczek<br />
All rights reserved.<br />
17