CyberCop Scanner Getting Started Guide
CyberCop Scanner Getting Started Guide
CyberCop Scanner Getting Started Guide

Create successful ePaper yourself
Turn your PDF publications into a flip-book with our unique Google optimized e-Paper software.
<strong>CyberCop</strong> <strong>Scanner</strong><br />
for Windows NT and Windows 2000<br />
<strong>Getting</strong> <strong>Started</strong> <strong>Guide</strong><br />
Version 5.5
COPYRIGHT<br />
Copyright © 1998-2000 Networks Associates Technology, Inc. All Rights Reserved. No part of this<br />
publication may be reproduced, transmitted, transcribed, stored in a retrieval system, or translated into<br />
any language in any form or by any means without the written permission of Networks Associates<br />
Technology, Inc., or its suppliers or affiliate companies.<br />
LICENSE AGREEMENT<br />
NOTICE TO ALL USERS: FOR THE SPECIFIC TERMS OF YOUR LICENSE TO USE THE<br />
SOFTWARE THAT THIS DOCUMENTATION DESCRIBES, CONSULT THE README.1ST,<br />
LICENSE.TXT, OR OTHER LICENSE DOCUMENT THAT ACCOMPANIES YOUR SOFTWARE,<br />
EITHER AS A TEXT FILE OR AS PART OF THE SOFTWARE PACKAGING. IF YOU DO NOT<br />
AGREE TO ALL OF THE TERMS SET FORTH THEREIN, DO NOT INSTALL THE SOFTWARE.<br />
IF APPLICABLE, YOU MAY RETURN THE PRODUCT TO THE PLACE OF PURCHASE FOR A<br />
FULL REFUND.<br />
NETWORK ASSOCIATES TRADEMARK ATTRIBUTIONS<br />
* ActiveHelp, Bomb Shelter, Building a World of Trust, CipherLink, Clean-Up, Cloaking, CNX,<br />
Compass 7, <strong>CyberCop</strong>, CyberMedia, Data Security Letter, Discover, Distributed Sniffer System, Dr<br />
Solomon’s, Enterprise Secure Cast, First Aid, ForceField, Gauntlet, GMT, GroupShield, HelpDesk,<br />
Hunter, ISDN Tel/Scope, LM 1, LANGuru, Leading Help Desk Technology, Magic Solutions, MagicSpy,<br />
MagicTree, Magic University, MagicWin, MagicWord, McAfee, McAfee Associates, MoneyMagic, More<br />
Power To You, Multimedia Cloaking, NetCrypto, NetOctopus, NetRoom, NetScan, Net Shield, NetShield,<br />
NetStalker, Net Tools, Network Associates, Network General, Network Uptime!, NetXRay, Nuts & Bolts,<br />
PC Medic, PCNotary, PGP, PGP (Pretty Good Privacy), PocketScope, Pop-Up, PowerTelnet, Pretty<br />
Good Privacy, PrimeSupport, RecoverKey, RecoverKey-International, ReportMagic, RingFence, Router<br />
PM, Safe & Sound, SalesMagic, SecureCast, Service Level Manager, ServiceMagic, Site Meter, Sniffer,<br />
SniffMaster, SniffNet, Stalker, Statistical Information Retrieval (SIR), SupportMagic, Switch PM,<br />
TeleSniffer, TIS, TMach, TMeg, Total Network Security, Total Network Visibility, Total Service Desk,<br />
Total Virus Defense, T-POD, Trusted Mach, Trusted Mail, Uninstaller, Virex, Virex-PC, Virus Forum,<br />
ViruScan, VirusScan, VShield, WebScan, WebShield, WebSniffer, WebStalker WebWall, and ZAC 2000<br />
are registered trademarks of Network Associates and/or its affiliates in the US and/or other countries. All<br />
other registered and unregistered trademarks in this document are the sole property of their respective<br />
owners.
Table of Contents<br />
Preface..................................................... ix<br />
SystemRequirements ............................................ix<br />
HowtoUsethe<strong>Getting</strong><strong>Started</strong><strong>Guide</strong> ................................x<br />
PartI:<strong>Getting</strong><strong>Started</strong> .........................................x<br />
PartII:AdvancedFeatures ....................................xi<br />
PartIII:Appendices ..........................................xi<br />
NetworkAssociatesContactInformation.............................xii<br />
Part One: <strong>Getting</strong> <strong>Started</strong><br />
Chapter1. <strong>CyberCop</strong><strong>Scanner</strong>inActiveSecurity.................1-1<br />
Introduction . . . . . . . . . . ..........................................1-1<br />
About Active Security . . ..........................................1-2<br />
BenefitsofActiveSecurity .......................................1-3<br />
HowActiveSecurityWorks .......................................1-4<br />
KeepingActiveSecuritySecure:DigitalCertificates ..............1-6<br />
WheretoGoFromHere ..........................................1-7<br />
Chapter2. Installing<strong>CyberCop</strong><strong>Scanner</strong> ........................2-1<br />
Introduction . . . . . . . . . . ..........................................2-1<br />
Installing <strong>CyberCop</strong> <strong>Scanner</strong> . . . . . . . . . .............................2-2<br />
Installing the CASL Interpreter . . . . . . . .............................2-5<br />
Uninstalling <strong>CyberCop</strong> <strong>Scanner</strong> . . . . . . .............................2-6<br />
WheretoGoFromHere ..........................................2-7<br />
Chapter3. <strong>Getting</strong><strong>Started</strong>:PerformingaScan ..................3-1<br />
Introduction . . . . . . . . . . ..........................................3-1<br />
About <strong>CyberCop</strong> <strong>Scanner</strong> . . . . . . . . . . . .............................3-2<br />
About the Security Management Interface (SMI) . . . . . . . . . .............3-3<br />
<strong>CyberCop</strong> <strong>Scanner</strong> <strong>Getting</strong> <strong>Started</strong> <strong>Guide</strong><br />
i
Table of Contents<br />
QuickTouroftheSMIConsole ....................................3-4<br />
TheServicesNode ..........................................3-5<br />
TheRepositoryNode ........................................3-5<br />
The Local Computer Node . . . . . . . .............................3-6<br />
TheReportViewer(RightPaneoftheSMIConsole) ..............3-6<br />
LoadingConfigurationFiles ......................................3-7<br />
About Configuration Files . . . . . . . .............................3-7<br />
About the Setup Walkthrough Program . . . . . . . . . . . . .............3-9<br />
DNSandNISDomainNames .............................3-9<br />
FakeDNSServerName.................................3-10<br />
IPRangetoScan ......................................3-10<br />
ModuleConfigurationTemplate..........................3-11<br />
ScanSettingsTemplate ................................3-11<br />
UsingtheDefaultConfigurationFile ..........................3-12<br />
SettingUpaNewConfigurationFile ..........................3-14<br />
CreatingaNewConfigurationFile ........................3-14<br />
Selecting and Deselecting Modules . . . . . . . . . . . ............3-16<br />
CreatingandEditingScanSettingsTemplates .............3-19<br />
Creating and Editing Module Configuration Templates . . . . . . . 3-21<br />
LoadinganExistingConfigurationFile ........................3-24<br />
Probing for Responsive Hosts . . . . . . . ............................3-25<br />
StartingaProbe ...........................................3-26<br />
Stopping a Probe . .........................................3-26<br />
ScanningaHost ...............................................3-27<br />
StartingaScan ............................................3-27<br />
ScanningOveraModem ....................................3-28<br />
ViewingCurrentlyRunningModules ..........................3-29<br />
Stopping Currently Running Modules . . . . . . . . . . . . . ............3-30<br />
ViewingResultsDuringaScan...............................3-31<br />
CancelingaScan ..........................................3-32<br />
ii<br />
Table of Contents
Table of Contents<br />
ScanningMultipleHosts ........................................3-33<br />
About Scanning Multiple Hosts . . ............................3-33<br />
SpecifyingaHostRange................................3-33<br />
SpecifyingaHostFile ..................................3-33<br />
EnteringaRangeofIPAddresses........................3-34<br />
ScanningUsingaHostRange ...............................3-35<br />
ScanningUsingaHostFile ..................................3-35<br />
UsingFixItModules ............................................3-36<br />
PerforminganInitialScan ...................................3-37<br />
Enabling and Disabling Fix It Modules . . . . . . . . . . . . . ............3-37<br />
Running Fix It Modules . . . . . . . . . ............................3-38<br />
Exiting<strong>CyberCop</strong><strong>Scanner</strong>.......................................3-39<br />
WheretoGoFromHere .........................................3-40<br />
Chapter4. WorkingWithScanResults..........................4-1<br />
Introduction . . . . . . . . . . ..........................................4-1<br />
SavingScanResults.............................................4-2<br />
About Scan Results . . . . . . . . . . . . .............................4-2<br />
About the Event Database . . . . . . . .............................4-2<br />
SavingResultsinanEventDatabase ..........................4-3<br />
Specifying an Event Database for Saving Results:<br />
In<strong>CyberCop</strong><strong>Scanner</strong> .................................4-3<br />
Specifying an Event Database for Saving Results:<br />
In the SMI Console Window . . . . . . . . . . . . . . . .............4-3<br />
ConfiguringanEventDatabase ...............................4-5<br />
ViewingScanResults............................................4-6<br />
ViewingResultsDuringaScan................................4-6<br />
ViewingResultsinanEventDatabase..........................4-8<br />
Opening the Report Viewer: In <strong>CyberCop</strong> <strong>Scanner</strong> . . . . . . . . . . . 4-8<br />
Opening the Report Viewer: In the SMI Console Window . . . . . 4-8<br />
UsingtheReportViewerTabs ...............................4-10<br />
TheResultsTab.......................................4-10<br />
TheReportListTab....................................4-11<br />
TheChartTab.........................................4-13<br />
TheQueryTab ........................................4-13<br />
<strong>CyberCop</strong> <strong>Scanner</strong> <strong>Getting</strong> <strong>Started</strong> <strong>Guide</strong><br />
iii
Table of Contents<br />
QueryinganEventDatabase.................................4-14<br />
GeneratingScanReports........................................4-16<br />
SelectinganEventDatabasetoGenerateaReport ..............4-16<br />
Specifying an Event Database to Generate a Report:<br />
In<strong>CyberCop</strong><strong>Scanner</strong> ................................4-16<br />
Specifying an Event Database to Generate a Report:<br />
In the SMI Console Window . . . . . . . . . . . . . . . ............4-17<br />
GeneratingaReport........................................4-18<br />
GeneratingaDifferentialReport ..............................4-20<br />
CustomizingaReport ......................................4-21<br />
PreviewingaReport........................................4-24<br />
ExportingaReport .........................................4-27<br />
PrintingaReport ..........................................4-27<br />
GeneratingNetworkMaps .......................................4-28<br />
GeneratingaNetworkMap ..................................4-28<br />
ViewingaNetworkMap .....................................4-29<br />
WheretoGoFromHere .........................................4-30<br />
Chapter 5. Using Brute Force Password Guessing Functions. . . . . . . 5-1<br />
Introduction . . . . . . . . . . ..........................................5-1<br />
About Password Guessing Functions . .............................5-2<br />
UsingtheCrackUtility ...........................................5-3<br />
About the Crack Utility . . . . . . . . . . .............................5-3<br />
Running Crack . . . ..........................................5-4<br />
CrackScreenControls.......................................5-6<br />
UsingtheSMBGrindUtility .......................................5-7<br />
About SMBGrind . ..........................................5-7<br />
Running SMBGrind . . . . . . . . . . . . .............................5-8<br />
SMBGrindScreenControls ...................................5-9<br />
WheretoGoFromHere .........................................5-10<br />
iv<br />
Table of Contents
Table of Contents<br />
Chapter 6. Running IDS (Intrusion Detection Software) Tests . . . . . . 6-1<br />
Introduction . . . . . . . . . . ..........................................6-1<br />
About IDS Tests . . . . . . ..........................................6-2<br />
PerformingIDSTests ............................................6-3<br />
WheretoGoFromHere ..........................................6-4<br />
Chapter 7. Using CASL Modules to Run Firewall Filter Checks. . . . . . 7-1<br />
Introduction . . . . . . . . . . ..........................................7-1<br />
About CASL Modules . . ..........................................7-2<br />
SettingUptoRunFirewallFilterChecks ............................7-3<br />
Running Firewall Filter Checks . . . . . . . .............................7-5<br />
WheretoGoFromHere ..........................................7-7<br />
Chapter 8. AutoUpdate: Updating <strong>CyberCop</strong> <strong>Scanner</strong> Files . . . . . . . . 8-1<br />
Introduction . . . . . . . . . . ..........................................8-1<br />
About the AutoUpdate Feature . . . . . . . .............................8-2<br />
Updating<strong>CyberCop</strong><strong>Scanner</strong> ......................................8-3<br />
Updating<strong>CyberCop</strong><strong>Scanner</strong>NowUsingAutoUpdate .............8-3<br />
Updating <strong>CyberCop</strong> <strong>Scanner</strong> Periodically Using AutoUpdate . . . . . . . 8-6<br />
DeletingScheduledUpdates ......................................8-9<br />
WheretoGoFromHere .........................................8-10<br />
Part Two: Advanced Features<br />
Chapter 1. Using NTCASL to Generate Custom Audit Packets . . . . . . 1-1<br />
Introduction . . . . . . . . . . ..........................................1-1<br />
About CASL (Custom Audit Scripting Language) . . . . . . . . .............1-2<br />
CreatinganExamplePacket ......................................1-3<br />
CASLScreenControls ...........................................1-6<br />
TheCASLScreen ...........................................1-6<br />
CASLMenus ...............................................1-7<br />
CASL Toolbar . . . . ..........................................1-9<br />
CASLListbox .............................................1-10<br />
WheretoGoFromHere .........................................1-12<br />
<strong>CyberCop</strong> <strong>Scanner</strong> <strong>Getting</strong> <strong>Started</strong> <strong>Guide</strong><br />
v
Table of Contents<br />
Chapter2. TheVulnerabilityDatabaseEditor ....................2-1<br />
Introduction . . . . . . . . . . ..........................................2-1<br />
About the Vulnerability Database . . . . . .............................2-2<br />
About Module Records . ..........................................2-3<br />
FlagsandSeveritySettings ..................................2-3<br />
Flags .................................................2-3<br />
Impact ................................................2-3<br />
RiskFactor ............................................2-4<br />
Complexity . . ..........................................2-5<br />
RootCause............................................2-6<br />
FixEase ..............................................2-6<br />
Popularity .............................................2-7<br />
ModuleDescriptions ........................................2-8<br />
ShortDescription.......................................2-8<br />
VerboseDescriptions ...................................2-8<br />
ModuleParameters .........................................2-8<br />
VulnID ................................................2-8<br />
Timeout...............................................2-8<br />
Editing Module Records ..........................................2-9<br />
Exporting Modules . . . . .........................................2-11<br />
Summary . . . . . . . . . . . . .........................................2-12<br />
Part Three: Appendices<br />
Appendix A. A <strong>Guide</strong> to CASL (Custom Audit Scripting Language) . . A-1<br />
Introduction . . . . . . . . . . ..........................................A-1<br />
About CASL . . . . . . . . . . ..........................................A-2<br />
ProgrammingWithCASL .........................................A-3<br />
StructuringCASLPrograms ..................................A-3<br />
vi<br />
Table of Contents
Table of Contents<br />
UnderstandinganExampleCASLProgram .....................A-4<br />
Step One: Defining TCP/IP Packets . . . . . . . . . . . .............A-5<br />
StepTwo:CreatingaTCPSYNPacket .....................A-5<br />
Step Three: Specifying a Destination Host<br />
fortheTCPSYNPacket ...............................A-5<br />
Step Four: Combining TCP SYN and IP Headers .............A-6<br />
StepFive:OutputtingtheTCPSYNPacket..................A-6<br />
StepSix:DefiningPortConnections .......................A-6<br />
Step Seven: Sending Connection Requests to Ports . . . . . . . . .A-7<br />
StepEight:ReadingTCPResponses ......................A-7<br />
StepNine:DeterminingTCPResponseTypes ...............A-7<br />
StepTen:VerifyinganOpenPortConnection ...............A-8<br />
Step Eleven: Evaluating the Completed Program . . . . . . . . . . . .A-8<br />
CASLReference ...............................................A-10<br />
ProgramStructure .........................................A-11<br />
Statements ...........................................A-11<br />
Variables.............................................A-11<br />
Syntax...............................................A-12<br />
ControlStatements ....................................A-14<br />
Lists .....................................................A-18<br />
ListCreation..........................................A-18<br />
Recursion ............................................A-18<br />
ListOperators ........................................A-19<br />
ListControl...........................................A-20<br />
PacketHeaders............................................A-21<br />
Definition ............................................A-21<br />
Instantiation ..........................................A-22<br />
FieldReference .......................................A-22<br />
SpecialFields.........................................A-22<br />
BufferSize ...........................................A-22<br />
BufferScale ..........................................A-23<br />
StructureExtraction ...................................A-23<br />
<strong>CyberCop</strong> <strong>Scanner</strong> <strong>Getting</strong> <strong>Started</strong> <strong>Guide</strong><br />
vii
Table of Contents<br />
Subroutines ..............................................A-24<br />
Declaration ...........................................A-24<br />
Argument Passing . . . . . . . . . ............................A-24<br />
Variable Argument Lists . . . . ............................A-25<br />
ReturnValues.........................................A-25<br />
Scope ...............................................A-25<br />
CASL Built-in Functions .........................................A-27<br />
Network I/O Built-in Functions . . . ............................A-27<br />
The IP Output Function . . . . . ............................A-27<br />
TheIPFixupFunction ..................................A-27<br />
The IP Input Function . . . . . . ............................A-28<br />
The IP Filters Function . . . . . ............................A-28<br />
The IP Range Function . . . . . ............................A-28<br />
File I/O Built-in Functions . . . . . . . ............................A-29<br />
MISC(Miscellaneous)Built-inFunctions.......................A-30<br />
Summary . . . . . . . . . . . . .........................................A-32<br />
Appendix B. Scanning: Command Line Options . . . . . . . . . . . . . . . . . . B-1<br />
Introduction . . . . . . . . . . ..........................................B-1<br />
Running Scans From the Command Line . . . . . . . . . . . . . . .............B-1<br />
engine ....................................................B-1<br />
Summary . . . . . . . . . . . . ..........................................B-3<br />
Glossary...................................................G-1<br />
viii<br />
Table of Contents
Preface<br />
This preface includes important information about <strong>CyberCop</strong> <strong>Scanner</strong>. We<br />
recommend that you read this preface thoroughly before using <strong>CyberCop</strong> <strong>Scanner</strong>.<br />
System Requirements<br />
The minimum system requirements that must be met to install and use the Security<br />
Management Interface and <strong>CyberCop</strong> <strong>Scanner</strong> are as follows:<br />
• Windows NT 4.0 with Service Pack 4.0<br />
• Internet Explorer 4.0 SP1<br />
• 266 MHz Pentium II processor<br />
• 128 MBofRAM<br />
• 200 MB of free disk space<br />
NOTE: This release of <strong>CyberCop</strong> <strong>Scanner</strong> and the Security Management<br />
Interface was tested under Windows NT 4.0 and Windows 2000 RC2. This<br />
release of <strong>CyberCop</strong> <strong>Scanner</strong> has not been fully tested with Internet Explorer 5.0.<br />
We also recommend that you obtain the Microsoft Data Access Components (MDAC)<br />
2.1 SP2, which can be downloaded from the Microsoft web site at<br />
http://www.microsoft.com/data/download.htm, even though it is not required.<br />
If your system does not meet the above-listed requirements, you must upgrade the<br />
system accordingly before installing <strong>CyberCop</strong> <strong>Scanner</strong>, which includes the Security<br />
Management Interface.<br />
<strong>CyberCop</strong> <strong>Scanner</strong> <strong>Getting</strong> <strong>Started</strong> <strong>Guide</strong><br />
ix
Preface<br />
How to Use the <strong>Getting</strong> <strong>Started</strong> <strong>Guide</strong><br />
This <strong>Getting</strong> <strong>Started</strong> <strong>Guide</strong> is divided into three parts. The parts include the following:<br />
• Part I: <strong>Getting</strong> <strong>Started</strong><br />
• Part II: Advanced Features<br />
• Part III: Appendices<br />
The contents of the above-listed parts are described below.<br />
Part I: <strong>Getting</strong> <strong>Started</strong><br />
Chapter 1, “<strong>CyberCop</strong> <strong>Scanner</strong> in Active Security,” describes how <strong>CyberCop</strong> <strong>Scanner</strong><br />
works when it is integrated into the Active Security suite of NAI products. <strong>CyberCop</strong><br />
<strong>Scanner</strong> can be used as a standalone product. Or, it can be used with other NAI<br />
products in the Active Security suite.<br />
Chapter 2, “Installing <strong>CyberCop</strong> <strong>Scanner</strong>,” includes step-by-step instructions for<br />
installing and uninstalling <strong>CyberCop</strong> <strong>Scanner</strong>. It also includes instructions for<br />
installing the CASL interpreter. Once you complete this chapter, you will be ready to<br />
begin the tutorial chapters.<br />
Chapter 3, “<strong>Getting</strong> <strong>Started</strong>: Performing a Scan,” is the first of several tutorial chapters.<br />
Chapter 3 leads you through configuring <strong>CyberCop</strong> <strong>Scanner</strong> and performing a scan.<br />
Chapter 4, “Working With Scan Results,” explains how scan results are saved. It also<br />
teaches you how to view scan results and generate scan reports and network maps<br />
using the scan results you obtained in Chapter 3.<br />
Chapter 5, “Using Brute Force Password Guessing Functions,” teaches you about the<br />
Crack utility and the SMB Grind utility. It includes a discussion of the Crack and SMB<br />
Grind utilities and instructions on how to use them.<br />
Chapter 6, “Running IDS (Intrusion Detection Software) Tests,” includes an<br />
explanation of the IDS testing tool for testing your intrusion detection software as well<br />
as a procedure for conducting IDS tests.<br />
Chapter 7, “Using CASL Modules to Run Firewall Filter Checks,” includes<br />
instructions for running filter checks on firewalls, screening routers, and other gateway<br />
machines using module class 12000, a class of modules written in the custom audit<br />
scripting language (CASL).<br />
Chapter 8, “AutoUpdate: Updating <strong>CyberCop</strong> <strong>Scanner</strong> Files,” explains how to<br />
download the most current <strong>CyberCop</strong> <strong>Scanner</strong> update packs (i.e. compressed files)<br />
from NAI’s FTP site to your system.<br />
x<br />
Preface
Part II: Advanced Features<br />
Part II: Advanced Features explains advanced functions of <strong>CyberCop</strong> <strong>Scanner</strong>.<br />
Preface<br />
Chapter 1, “Using NTCASL to Generate Custom Audit Packets” describes the<br />
<strong>CyberCop</strong> <strong>Scanner</strong> NTCASL user interface that allows you to generate custom packets<br />
that use the custom audit scripting language. You can then send your custom packets<br />
to a destination host to check for security holes in a network. You construct packets<br />
using tools provided in the NTCASL user interface. It is not necessary to know the<br />
custom audit scripting language to use the NTCASL user interface.<br />
Chapter 2, “The Vulnerability Database Editor,” is a brief introduction to the<br />
Vulnerability Database Editor.<br />
Part III: Appendices<br />
Part III: Appendices includes appendices that describe additional features of<br />
<strong>CyberCop</strong> <strong>Scanner</strong>.<br />
Appendix A, “CASL Reference <strong>Guide</strong>,” provides a detailed explanation of the custom<br />
audit scripting language (CASL) which you can use to write your own scripts using a<br />
text editor and run them using the CASL interpreter of <strong>CyberCop</strong> <strong>Scanner</strong>.<br />
Appendix A includes a description of CASL program structure and syntax, as well as<br />
a programming guide.<br />
Appendix B, “Scanning: Command Line Options,” contains options for running the<br />
scan engine from the command line.<br />
NOTE: The <strong>CyberCop</strong> <strong>Scanner</strong> <strong>Getting</strong> <strong>Started</strong> <strong>Guide</strong> is provided as a PDF file<br />
which you can print. If you are viewing the <strong>CyberCop</strong> <strong>Scanner</strong> <strong>Getting</strong> <strong>Started</strong><br />
<strong>Guide</strong> using a PDF viewer, we strongly recommend that you view the file using<br />
Adobe Acrobat Reader. You can download a copy of Acrobat Reader from the<br />
Adobe Systems Incorporated web site:<br />
http://www.adobe.com/prodindex/acrobat/readstep.html.<br />
Follow the download instructions, and then click Download to download Adobe<br />
Acrobat Reader to your system.<br />
<strong>CyberCop</strong> <strong>Scanner</strong> <strong>Getting</strong> <strong>Started</strong> <strong>Guide</strong><br />
xi
Preface<br />
Network Associates Contact Information<br />
You can contact Network Associates to order products, obtain product information, or<br />
get technical support. In this section, you will find information on how to contact us.<br />
If you would like to order Network Associates products or obtain product information,<br />
contact us at the following address and phone number:<br />
Network Associates, Inc.<br />
3965 Freedom Circle<br />
Santa Clara, CA 95054<br />
U.S.A.<br />
Tel: 972-308-9960<br />
You may direct all questions, comments and technical support requests to the Network<br />
Associates Customer Care department at any of the addresses or phone numbers listed<br />
below. Before you contact us for support, please have the following information ready:<br />
• product name and version number<br />
• operating system and version number along with any service packs and hotfixes<br />
you may have installed<br />
• computer brand and model, including CPU speed and RAM<br />
• steps to reproduce the problem you are having with the product<br />
We encourage you to use our site on the World Wide Web to get help with product<br />
support issues. Our site on the World Wide Web is http://support.nai.com. On our<br />
site, you can find answers to frequently asked product questions, virus information,<br />
and software updates.<br />
If you do not find information on the World Wide Web or do not have access to the<br />
World Wide Web, try to obtain help using one of Network Associates’ automated<br />
services listed below.<br />
Internet: support@nai.com<br />
CompuServe: GO NAI<br />
America Online: keyword NAI<br />
If Network Associates’ automated services do not have the desired information,<br />
contact us at the appropriate phone or fax number below. You can contact us Monday<br />
through Friday between 6:00 A.M. and 6:00 P.M Pacific time.<br />
xii<br />
Preface
Preface<br />
For corporate-licensed customers:<br />
Tel: 972-308-9960<br />
Fax: 408-970-9727<br />
For retail-licensed customers:<br />
Tel: 972-855-7044<br />
Fax: 408-970-9727<br />
<strong>CyberCop</strong> <strong>Scanner</strong> <strong>Getting</strong> <strong>Started</strong> <strong>Guide</strong><br />
xiii
Preface<br />
xiv<br />
Preface
Part One: <strong>Getting</strong> <strong>Started</strong><br />
1
1<strong>CyberCop</strong> <strong>Scanner</strong><br />
in Active Security<br />
Introduction<br />
1<br />
<strong>CyberCop</strong> <strong>Scanner</strong> can be used as either a standalone product or a product in the<br />
Active Security suite. This chapter describes the Active Security suite and <strong>CyberCop</strong><br />
<strong>Scanner</strong>’s role in the suite.<br />
<strong>CyberCop</strong> <strong>Scanner</strong> <strong>Getting</strong> <strong>Started</strong> <strong>Guide</strong> 1-1
<strong>CyberCop</strong> <strong>Scanner</strong> in Active Security<br />
About Active Security<br />
The Active Security suite of products is an evolutionary step in enterprise security:<br />
entirely automated enforcement of network security policies. Active Security enables<br />
you to take a proactive role in protecting your network by detecting vulnerabilities and<br />
responding to them.<br />
The Active Security concept is implemented as a highly integrated family of Network<br />
Associates software components, all working in concert to automatically detect and<br />
address any security vulnerabilities in your network that would violate your<br />
organization’s security policies.<br />
The Active Security integrated product family is comprised of the following Network<br />
Associates products:<br />
• <strong>CyberCop</strong> <strong>Scanner</strong> is a network security assessment tool that can scan devices<br />
on your network for more than 700 vulnerabilities. You configure <strong>CyberCop</strong><br />
<strong>Scanner</strong> to search for the vulnerabilities that concern you, in accordance with your<br />
security policy. We call <strong>CyberCop</strong> <strong>Scanner</strong> a sensor component because it scans<br />
the network for vulnerabilities.<br />
• Event Orchestrator receives messages from sensors on the network and then,<br />
based on your security policy, processes them and decides whether to send action<br />
messages to the Active Security actor components in response to them. You<br />
configure Event Orchestrator to respond to particular vulnerabilities in a manner<br />
that best enforces your security policies. Event Orchestrator is called an arbiter.<br />
• Gauntlet Firewall for Windows NT and Unix are the most secure firewalls on the<br />
market today. Gauntlet Firewall takes instructions from the arbiter and responds<br />
in a manner of your choosing. Gauntlet Firewall is an actor component.<br />
• Net Tools PKI Server supports secure, strongly authenticated communication<br />
among the sensor, the arbiter, and the actors by furnishing each product with<br />
X.509 certificates.<br />
The separately available McAfee HelpDesk and Magic Total Service Desk products<br />
can also be used as Active Security actors.<br />
You configure Active Security and your network to implement your security policies.<br />
Active Security takes it from there, watching your network for security holes and<br />
automatically triggering your designated response whenever it finds one, like a<br />
vigilant guardian.<br />
1-2 Chapter 1
Benefits of Active Security<br />
<strong>CyberCop</strong> <strong>Scanner</strong> in Active Security<br />
The Internet and the increasingly complex security needs of today’s geographically<br />
distributed “virtual” corporations are pushing the limits of what a corporate IT<br />
department can be reasonably expected to handle. Network administrators are being<br />
asked to protect more and more with limited resources.<br />
Most system failures are due to user error, not product flaw or hacker attack. Security<br />
vulnerabilities are most often introduced accidentally by the very people the system<br />
administrator is trying to protect: the sometimes naive internal user. Detecting and<br />
correcting these multiplying vulnerabilities as they arise takes constant work because<br />
existing security analysis tools make it too hard to be thorough and fast enough — they<br />
generate huge amounts of data, force you to parse it all, and then it still takes a further<br />
human decision and a manual action, like running a program to shut down a network<br />
port, to address each problem. An administrator simply can’t be everywhere at once.<br />
There are lots of tools for finding network security vulnerabilities, and you may think<br />
that simply using the tools is enough. This is a dangerous misconception. What<br />
matters is what you configure them to look for, and what actually happens when they<br />
find vulnerabilities. Without a network security policy tailored to your particular<br />
requirements, no network security tool can effectively protect you.<br />
In other words, you need to have a network security policy that reflects your<br />
organization’s security goals, and you need to be certain that your policy is being<br />
reliably carried out. This means that the security system needs to actually implement<br />
the policy, actively responding to vulnerabilities as they’re detected, working<br />
automatically rather than waiting for a human’s attention. Only automated security<br />
policy enforcement tools will do the job these days.<br />
Of course, having the world’s best security policy and an elegant automatic security<br />
system won’t protect you if a hacker could simply crack the security system itself.<br />
Your policy enforcer has to protect itself from tampering, too.<br />
Active Security is all of that: a secure system that you can train to automatically take<br />
any action your policy calls for whenever it finds any network security vulnerability<br />
that concerns you. It’s a technology that enables you to be far more diligent about<br />
cleaning up security holes as they arise because it’s more thorough than a person and<br />
faster than a person — once you’ve set it up for your network security policies, your<br />
administrator just runs a scan and Active Security does the rest. You can configure the<br />
system to automatically take care of some of the problems it may find — and if Active<br />
Security detects a problem it can’t handle on its own, it can alert the administrator via<br />
pager or email.<br />
Active Security is your network administrator’s most valuable weapon in the constant<br />
uphill battle of maintaining your network security.<br />
<strong>CyberCop</strong> <strong>Scanner</strong> <strong>Getting</strong> <strong>Started</strong> <strong>Guide</strong> 1-3
<strong>CyberCop</strong> <strong>Scanner</strong> in Active Security<br />
How Active Security Works<br />
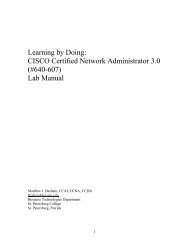
The Active Security suite is built on the idea of three types of programs, all working<br />
together to protect your network: sensors, arbiters, andactors.<br />
• Sensors scan the network for security vulnerabilities.<br />
• Arbiters decide how best to deal with a security vulnerability when a vulnerability<br />
is detected.<br />
• Actors address the problem, as instructed by the arbiters.<br />
Sensors<br />
Arbiters<br />
Actors<br />
watch decide what take responsive<br />
the network to do when<br />
action<br />
for trouble trouble happens<br />
Figure 1-1. The Active Security suite program types, including sensors,<br />
arbiters, and actors.<br />
In Active Security suite, each of these jobs is handled by a separate software<br />
component. Currently, the Active Security family includes:<br />
• one sensor program, <strong>CyberCop</strong> <strong>Scanner</strong>, for Windows NT<br />
• one arbiter program, Event Orchestrator, for Windows NT<br />
• two actor programs, Gauntlet Firewall, for Windows NT and Unix<br />
In addition to delegating actions to external actor components, the arbiter program<br />
(Event Orchestrator) is able to take certain kinds of action on its own; for example, it<br />
can send out an email message about a vulnerability it’s been informed of, or run a<br />
custom Visual Basic script.<br />
Network Associates’ McAfee HelpDesk product (available separately) can also serve<br />
as an additional actor, and future releases of Active Security will include more sensors<br />
and actors.<br />
Because your network security policy must drive your security tools, everything that<br />
each of the Active Security components does is configurable. Indeed, you must<br />
configure each component to implement your particular policies before you can use<br />
Active Security.<br />
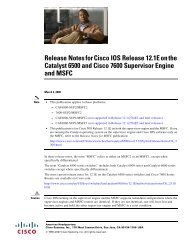
The figure below depicts how the Active Security integrated product suite works.<br />
1-4 Chapter 1
<strong>CyberCop</strong> <strong>Scanner</strong> in Active Security<br />
Your Security Policy<br />
(You decide what is important<br />
and how to respond)<br />
McAfee<br />
HelpDesk<br />
Gauntlet<br />
Firewall<br />
<strong>CyberCop</strong><br />
<strong>Scanner</strong><br />
(Proactively scanning<br />
internal network<br />
for vulnerabilities)<br />
Event Orchestrator<br />
(Accepts all alerts, compares<br />
with security policy, then<br />
initiates responses)<br />
Administrator<br />
alerts<br />
Figure 1-2. The Active Security suite.<br />
The above figure illustrates the following principles:<br />
• Your network security policy determines everything Active Security does.<br />
• Your network administrator runs one or more copies of <strong>CyberCop</strong> <strong>Scanner</strong> to<br />
examine your network for vulnerabilities.<br />
• One or more copies of Event Orchestrator listen to <strong>CyberCop</strong> <strong>Scanner</strong> and, when<br />
vulnerabilities are detected, automatically dispatch your custom predetermined<br />
responses — which may involve sending an alert to the administrator or running<br />
a Visual Basic script.<br />
• Some responses can be delegated to external actors, including Gauntlet Firewall<br />
and McAfee HelpDesk.<br />
The two remaining Active Security components, the Net Tools PKI Server and the<br />
Active Security Setup Panel, aren’t sensors, arbiters, or actors. Instead, they support<br />
the sensors, arbiters, and actor components by making it possible for them to<br />
communicate securely.<br />
IMPORTANT: The purpose of Active Security is to implement your network<br />
security policy. Do not activate any of the Active Security features until you<br />
have formulated a network security policy.<br />
<strong>CyberCop</strong> <strong>Scanner</strong> <strong>Getting</strong> <strong>Started</strong> <strong>Guide</strong> 1-5
<strong>CyberCop</strong> <strong>Scanner</strong> in Active Security<br />
Keeping Active Security Secure: Digital Certificates<br />
Because Active Security maintains your network security automatically, without<br />
human intervention, it’s vital to ensure that no malicious person can impersonate any<br />
Active Security component — if an attacker could send forged instructions to shut<br />
down parts of the system, or force your sensors to ignore certain vulnerabilities, the<br />
result could be devastating. Active Security guards against such attacks by strongly<br />
authenticating all of its communications with X.509 digital certificates. Every<br />
message sent between the Active Security components depends on these certificates.<br />
In fact, Active Security can’t start working until every component has received its own<br />
certificate.<br />
The NetTools PKI Server’s role in Active Security is to centrally manage the creation<br />
and distribution all of these digital certificates.<br />
The Active Security Setup Panel application’s role is to allow each sensor, arbiter, and<br />
actor component’s machine to interact with the PKI Server, for the purpose of creating<br />
a separate certificate for that separate machine (for your Windows NT computers only;<br />
getting a certificate for Gauntlet Firewall for UNIX works a little differently).<br />
1-6 Chapter 1
WheretoGoFromHere<br />
<strong>CyberCop</strong> <strong>Scanner</strong> in Active Security<br />
To learn more about Active Security, or to start using Active Security, please refer to<br />
the Active Security <strong>Getting</strong> <strong>Started</strong> <strong>Guide</strong>. The <strong>Getting</strong> <strong>Started</strong> <strong>Guide</strong> introduces the<br />
Active Security integrated family of products and explains how they interact. It<br />
describes the installation and configuration of the system at a high level, and provides<br />
a roadmap of how to go about setting up and rolling out the entire system.<br />
To learn more about using the products in the Active Security suite, refer to the<br />
documentation distributed with the products you are interested in.<br />
<strong>CyberCop</strong> <strong>Scanner</strong> <strong>Getting</strong> <strong>Started</strong> <strong>Guide</strong> 1-7
<strong>CyberCop</strong> <strong>Scanner</strong> in Active Security<br />
1-8 Chapter 1
2Installing <strong>CyberCop</strong> <strong>Scanner</strong><br />
2<br />
Introduction<br />
This chapter includes step-by-step instructions for installing (and uninstalling)<br />
<strong>CyberCop</strong> <strong>Scanner</strong>. It also includes instructions for installing the CASL interpreter.<br />
The CASL interpreter lets you write your own programs in a text editor that simulate<br />
attacks or information gathering checks.<br />
The minimum system requirements that must be met to install and use the Security<br />
Management Interface and <strong>CyberCop</strong> <strong>Scanner</strong> are as follows:<br />
• Windows NT 4.0 with Service Pack 4.0<br />
• Internet Explorer 4.0 SP1<br />
• 266 MHz Pentium II processor<br />
• 128 MBofRAM<br />
• 200 MB of free disk space<br />
If your system does not meet the above-listed requirements, you must upgrade the<br />
system accordingly before installing <strong>CyberCop</strong> <strong>Scanner</strong>, which includes the Security<br />
Management Interface.<br />
<strong>CyberCop</strong> <strong>Scanner</strong> <strong>Getting</strong> <strong>Started</strong> <strong>Guide</strong> 2-1
Installing <strong>CyberCop</strong> <strong>Scanner</strong><br />
Installing <strong>CyberCop</strong> <strong>Scanner</strong><br />
This section gives step-by-step instructions for installing <strong>CyberCop</strong> <strong>Scanner</strong> and SMI<br />
on the local computer. These instructions assume that you will be installing <strong>CyberCop</strong><br />
<strong>Scanner</strong> using the installation CD or installation files that you have downloaded from<br />
NAI's website.<br />
To install <strong>CyberCop</strong> <strong>Scanner</strong>, follow these steps:<br />
1. Double-click on the file setup.exe on the installation CD or in your downloaded<br />
installation files. Alternatively, if you are using the CD, from the Start menu<br />
select Start>Run D:\setup.exe, where "D:"representstheletterofyourCD-ROM<br />
drive.<br />
The Installation Wizard will check to make sure your operating system does not<br />
need to be updated. Required components include the following:<br />
• Windows NT Service Pack 4<br />
• Internet Explorer v.4.0 SP1<br />
If your computer does not have Windows NT Service Pack 4 or Internet Explorer<br />
v.4.0 SP1 installed, you will be prompted to exit the Installation Wizard and install<br />
them before continuing. You must install these components and then reboot your<br />
computer as necessary. Then restart the Installation Wizard.<br />
2. Next the <strong>CyberCop</strong> <strong>Scanner</strong> 5.5 screen will be displayed. Click the link for "Install<br />
<strong>CyberCop</strong> <strong>Scanner</strong> 5.5" to begin installing it on the local computer.<br />
3. Next a dialog box may open to inform you that system component updates are<br />
necessary to successfully install SMI. If you wish to continue the installation,<br />
click Update Now. The Installation Wizard will automatically perform the<br />
necessary updates. If your system components do not need to be updated, you will<br />
not see this dialog box.<br />
After the operating system has been updated, you will be prompted to restart your<br />
computer so that the new settings can take effect. To restart your computer now,<br />
click Yes. The Installation Wizard will automatically restart your computer. When<br />
you log on again, the installation will continue with the next step.<br />
4. Next a License Agreement dialog box will open. After reading the license<br />
agreement, enable the I Accept the Agreement button and then click Next to<br />
continue.<br />
5. The Installation Path dialog box will be displayed, allowing you to select a<br />
program group and destination directory for <strong>CyberCop</strong> <strong>Scanner</strong> and the Security<br />
Management Interface. By default, the program group Network Associates and<br />
the directory c:\Program Files\Network Associates\SMI Products\ are selected.<br />
2-2 Chapter 2
Installing <strong>CyberCop</strong> <strong>Scanner</strong><br />
You may select a different program group if you wish. Click the Browse button to<br />
select a different directory. If the specified directory does not exist, you will be<br />
asked if you want to create it. The disk space requirements on your local computer<br />
will also be displayed. Click Next to continue.<br />
6. The Event Forwarding dialog box will be displayed, with information about<br />
enabling forwarding of security events and configuring network security alerts.<br />
NOTE: Event forwarding and network alerting are not supported in this release<br />
of <strong>CyberCop</strong> <strong>Scanner</strong>.<br />
Click Next to continue. On the next screen, you will be asked to specify a logon<br />
user account to be used by the service that controls event forwarding and network<br />
security alerts. Select "Use 'LocalSystem' account." Then click Next.<br />
7. The Installing SMI dialog box will be displayed. Click Install to continue. A<br />
status bar will report progress as files are installed on your computer. Then a<br />
series of screens will be displayed reporting installation activity, including:<br />
• Product Registration dialog box, reporting that the <strong>CyberCop</strong> <strong>Scanner</strong><br />
installation kit is being registered and copied into the Repository<br />
• Installing Product dialog box, reporting that <strong>CyberCop</strong> <strong>Scanner</strong> is being<br />
installed for use.<br />
NOTE: If you have files from a previous version of <strong>CyberCop</strong> <strong>Scanner</strong> or a<br />
previous installation, the files will be removed to an alternate location:<br />
c:\Program Files\Network Associates\SMI Products\<strong>CyberCop</strong><br />
<strong>Scanner</strong>\Backup\ with a time and date stamp.<br />
8. Then a dialog box will report "Installation finished successfully." Click OK to<br />
continue.<br />
<strong>CyberCop</strong> <strong>Scanner</strong> <strong>Getting</strong> <strong>Started</strong> <strong>Guide</strong> 2-3
Installing <strong>CyberCop</strong> <strong>Scanner</strong><br />
NOTE: In order to improve performance, at the end of the installation <strong>CyberCop</strong><br />
<strong>Scanner</strong> sets three Windows NT TCP/IP Registry keys listed below. These<br />
changes will be activated the next time the computer is rebooted. The following<br />
Registry keys are set:<br />
• HKEY_LOCAL_MACHINE\System\CurrentControlSet\Services\Tcpip\<br />
Parameters\MaxFreeTcbs<br />
Value: 0xffffffff (4294967295)<br />
• HKEY_LOCAL_MACHINE\System\CurrentControlSet\Services\Tcpip\<br />
Parameters\MaxHashTableSize<br />
Value: 0x00010000 (65536)<br />
• HKEY_LOCAL_MACHINE\System\CurrentControlSet\Services\Tcpip\<br />
Parameters\MaxUserPort<br />
Value: 0x00010000 (65536)<br />
Installation of <strong>CyberCop</strong> <strong>Scanner</strong> and the Security Management Interface is now<br />
complete. <strong>CyberCop</strong> <strong>Scanner</strong> is ready for use.<br />
9. To start <strong>CyberCop</strong> <strong>Scanner</strong>, from the Start menu select<br />
Start>Programs><strong>CyberCop</strong> <strong>Scanner</strong>><strong>CyberCop</strong> <strong>Scanner</strong>.<br />
10. To access the report viewer of the Security Management Interface, from within<br />
<strong>CyberCop</strong> <strong>Scanner</strong>, select the Reports>View Results... menu item.<br />
2-4 Chapter 2
Installing <strong>CyberCop</strong> <strong>Scanner</strong><br />
Installing the CASL Interpreter<br />
CASL (custom audit scripting language) is a high-level programming language<br />
designed to write programs, often called scripts, that simulate low-level attacks or<br />
information gathering checks on networks.<br />
To write programs that simulate an attack or information gathering check, you need to<br />
write code that constructs packets and then sends those packets to a host on a network<br />
just as an actual attack or information gathering check would. You can execute the<br />
programs you create in CASL to determine if a network is vulnerable to the attack or<br />
the information gathering check simulated by the programs.<br />
To use CASL, you must install the interpreter. To install the CASL interpreter, follow<br />
these steps:<br />
1. On the Windows desktop, right- click on the My Computer icon and select<br />
Properties from the context menu. The System Properties dialog box will open.<br />
Alternatively, in the Windows Explorer, right-click on My Computer and select<br />
Properties from the context menu.<br />
2. In the System Properties dialog box, switch to the Environment tab.<br />
3. In the Variable textbox, enter CASL_DIR in the Variable textbox. Then, in the<br />
Value textbox enter c:\Program Files\Network Associates\ SMI<br />
Products\<strong>CyberCop</strong> <strong>Scanner</strong>\casl\.<br />
4. Click the OK button to close the dialog box.<br />
The CASL interpreter is now installed on your system.<br />
<strong>CyberCop</strong> <strong>Scanner</strong> <strong>Getting</strong> <strong>Started</strong> <strong>Guide</strong> 2-5
Installing <strong>CyberCop</strong> <strong>Scanner</strong><br />
Uninstalling <strong>CyberCop</strong> <strong>Scanner</strong><br />
To uninstall <strong>CyberCop</strong> <strong>Scanner</strong> and the Security Management Interface from your<br />
local computer, follow these steps:<br />
1. If the SMI console window is open, close it by clicking the close button at the top<br />
right of the screen. Also exit <strong>CyberCop</strong> <strong>Scanner</strong> if it is open.<br />
2. Open the Control Panel from the Start menu by selecting Start>Settings>Control<br />
Panel.<br />
3. In the Control Panel, double-click Add/Remove Programs to open the<br />
Add/Remove Programs Properties dialog box.<br />
In the Add/Remove Programs Properties dialog box, follow these steps to remove<br />
both <strong>CyberCop</strong> <strong>Scanner</strong> and the Security Management Interface:<br />
• Onthe Install/Uninstall tab, scroll through the list of programs and select<br />
Security Management Interface to highlight it. Then click the Add/Remove<br />
button.<br />
The Product Uninstaller screen will open, displaying both <strong>CyberCop</strong> <strong>Scanner</strong><br />
for SMI and Security Management Interface 1.0.<br />
• Select <strong>CyberCop</strong> <strong>Scanner</strong> for SMI to highlight it. Then click Next.<br />
The <strong>CyberCop</strong> <strong>Scanner</strong> for SMI screen will be displayed. Click the Uninstall<br />
button. A status bar will display progress as files are uninstalled. Then a<br />
dialog box will open reporting "Uninstallation succeeded." Click OK.<br />
• Next, on the Product Uninstaller screen, select Security Management<br />
Interface 1.0 to highlight it. Then click Next.<br />
The Security Management Interface 1.0 screen will be displayed. Click the<br />
Uninstall button. A status bar will display progress as files are uninstalled.<br />
Then a dialog box will open reporting "Uninstallation succeeded." Click OK.<br />
• You will be asked if you want to restart your computer now. Click Yes.<br />
Your computer will automatically be restarted. The Security Management Interface<br />
and <strong>CyberCop</strong> <strong>Scanner</strong> are now uninstalled from your computer.<br />
2-6 Chapter 2
WheretoGoFromHere<br />
Installing <strong>CyberCop</strong> <strong>Scanner</strong><br />
This chapter included step-by-step instructions for installing <strong>CyberCop</strong> <strong>Scanner</strong>,<br />
including the CASL interpreter. It also included instructions for uninstalling <strong>CyberCop</strong><br />
<strong>Scanner</strong> in case you need to remove it from your system. At this point, you are ready<br />
to use <strong>CyberCop</strong> <strong>Scanner</strong>. You can begin with the tutorial chapters, starting with<br />
Chapter 3. Chapter 3 leads you through configuring the software and performing a<br />
scan.<br />
<strong>CyberCop</strong> <strong>Scanner</strong> <strong>Getting</strong> <strong>Started</strong> <strong>Guide</strong> 2-7
Installing <strong>CyberCop</strong> <strong>Scanner</strong><br />
2-8 Chapter 2
3<strong>Getting</strong> <strong>Started</strong>:<br />
Performing a Scan<br />
Introduction<br />
3<br />
This chapter teaches you about the procedures required to perform a scan. In this<br />
chapter, you will learn the following:<br />
• how to start <strong>CyberCop</strong> <strong>Scanner</strong>, which includes the Security Management<br />
Interface<br />
• how to use the default configuration file and how to create a new configuration file<br />
• how to create a scan settings template and module configuration template and use<br />
them in a configuration file<br />
• how to select which modules and module classes are used for a scan<br />
• how to start and stop a network probe<br />
• how to start and stop a scan<br />
• how to scan multiple hosts by entering an IP address range or by using a host text<br />
file<br />
• how to use Fix It modules<br />
This chapter is the first of several tutorial chapters that will guide you through the<br />
<strong>CyberCop</strong> <strong>Scanner</strong> software. This chapter gives you the background you need to<br />
perform a scan. In the next chapter, Chapter 4, you will learn how to view scan results<br />
and generate scan reports.<br />
<strong>CyberCop</strong> <strong>Scanner</strong> <strong>Getting</strong> <strong>Started</strong> <strong>Guide</strong> 3-1
<strong>Getting</strong> <strong>Started</strong>: Performing a Scan<br />
About <strong>CyberCop</strong> <strong>Scanner</strong><br />
<strong>CyberCop</strong> <strong>Scanner</strong> includes sophisticated tools for performing scans against intranets,<br />
Web servers, firewalls, and screening routers to identify security vulnerabilities in<br />
networks. <strong>CyberCop</strong> <strong>Scanner</strong> works by running modules against a target system.<br />
Modules are pieces of code that either check for vulnerabilities on the target system or<br />
attempt to exploit the vulnerabilities of the target system.<br />
Modules are grouped into module classes according to their function. For instance,<br />
some module classes gather information about the assumptions intruders might make<br />
about a computer that would allow them access to your network. Other module classes<br />
run tests against a target host to determine whether vulnerable hardware or software is<br />
present on the machine.<br />
<strong>CyberCop</strong> <strong>Scanner</strong> includes operating system detection which can identify the<br />
operating system types of hosts on a network. Once operating system types are<br />
identified, <strong>CyberCop</strong> <strong>Scanner</strong> can optionally disable modules not pertaining to<br />
specified operating systems when scanning hosts.<br />
Certain modules, called "Fix It" modules, are used in conjunction with Windows NT<br />
Registry checks. Fix It modules can be enabled to change a Registry value in order to<br />
correct potential vulnerabilities detected by <strong>CyberCop</strong> <strong>Scanner</strong>. Still other modules<br />
initiate hostile Denial of Service attacks, which look for vulnerabilities that can only<br />
be detected properly if an attack is actually launched against a target host.<br />
There are over 600 modules in the <strong>CyberCop</strong> <strong>Scanner</strong> vulnerability database.<br />
Additional modules can be added to the vulnerability database via Network Associates<br />
module updates. Or, you can add your own modules to the vulnerability database via<br />
the Vulnerability Database Editor. <strong>CyberCop</strong> <strong>Scanner</strong> uses modules in the<br />
vulnerability database when it performs a scan against a target. Modules for which a<br />
target is found vulnerable will return data.<br />
<strong>CyberCop</strong> <strong>Scanner</strong> makes use of the Network Associates Security Management<br />
Interface (SMI), a built-in application framework which provides a centralized event<br />
database for storing <strong>CyberCop</strong> <strong>Scanner</strong> security results. SMI also provides a report<br />
viewer which allows you to query the database, preview data, and generate reports.<br />
To display the version of <strong>CyberCop</strong> <strong>Scanner</strong> installed on your system, select the<br />
Help>About <strong>Scanner</strong>UI... menu item.<br />
3-2 Chapter 3
<strong>Getting</strong> <strong>Started</strong>: Performing a Scan<br />
About the Security Management Interface (SMI)<br />
The Network Associates Security Management Interface (SMI) is the built-in<br />
application framework for NAI security applications such as <strong>CyberCop</strong> <strong>Scanner</strong>. SMI<br />
provides a single console window, called the SMI console window, with a centralized<br />
event database where <strong>CyberCop</strong> <strong>Scanner</strong> security results are stored. The SMI report<br />
viewer allows you to view data and query the event database, and to generate, preview,<br />
print, and export sophisticated graphical and text-based reports using over ten<br />
pre-defined report templates.<br />
The foundation for SMI is the Microsoft Management Console (MMC). MMC is a user<br />
interface which allows multiple programs to be accessed and run from a single console<br />
window.<br />
NOTE: Different NAI security applications use different features of SMI.<br />
<strong>CyberCop</strong> <strong>Scanner</strong> uses the centralized event database and report viewer of SMI.<br />
<strong>CyberCop</strong> <strong>Scanner</strong> does not support remote installation, remote management,<br />
event forwarding or network alerting.<br />
<strong>CyberCop</strong> <strong>Scanner</strong> <strong>Getting</strong> <strong>Started</strong> <strong>Guide</strong> 3-3
<strong>Getting</strong> <strong>Started</strong>: Performing a Scan<br />
Quick Tour of the SMI Console<br />
To start the SMI console, use one of the following methods:<br />
• From the Windows Start menu, choose Start>Programs>Network<br />
Associates>Security Management Interface. The SMI console window will open.<br />
• Alternatively, from within <strong>CyberCop</strong> <strong>Scanner</strong>, select the Reports>View<br />
Results... menu item to open the SMI report viewer. A dialog box will open<br />
allowing you to select a pre-existing event database. Select an event database and<br />
then click Open. The SMI console will open, displaying the SMI report viewer.<br />
Click the Show/Hide Console Tree toolbar icon to display the full SMI console<br />
window.<br />
In the left pane of the SMI console window, you will see the SMI console tree. The<br />
top-level node of the SMI console tree is called the Workspace node. Under the<br />
Workspace node are several nodes which represent the SMI configuration of the local<br />
computer.<br />
You will see the following components of the SMI console window:<br />
• Services node: Provides access to the SMI report viewer for viewing security<br />
results and generating reports.<br />
• Repository node: Stores installation kits and report templates used by <strong>CyberCop</strong><br />
<strong>Scanner</strong>. You do not need to access the Repository node when using <strong>CyberCop</strong><br />
<strong>Scanner</strong>.<br />
• Local Computer node: Allows you to configure the event database where<br />
<strong>CyberCop</strong> <strong>Scanner</strong> security results are stored.<br />
• Report Viewer: WhenyouclickontheWorkspace>Services>Event Database<br />
(events.mdb)><strong>CyberCop</strong> <strong>Scanner</strong> node, the right pane of the SMI console<br />
displays screen controls for the SMI report viewer.<br />
3-4 Chapter 3
The Services Node<br />
<strong>Getting</strong> <strong>Started</strong>: Performing a Scan<br />
The Workspace node of the SMI console tree includes a node called Services.The<br />
Services node provides access to the SMI report viewer, allowing you to view results<br />
in the centralized database where <strong>CyberCop</strong> <strong>Scanner</strong> security results are stored. This<br />
centralized database is called an event database, because it stores a record of each<br />
security event, or vulnerability, logged by <strong>CyberCop</strong> <strong>Scanner</strong>.<br />
By default, the local event database is called events.mdb and it is located at<br />
c:\Program Files\Network Associates\SMI Products\SMI\Shared\EventDB. It is<br />
represented on the SMI console tree by a node called Event Database (events.mdb)<br />
listed under the Services node.<br />
NOTE: You can also access the SMI report viewer from within <strong>CyberCop</strong><br />
<strong>Scanner</strong>, by selecting the Reports>View Results... menu item.<br />
The Repository Node<br />
The SMI console tree includes a node called the Repository. The Repository is<br />
necessary for registering product installation kits for NAI security applications. When<br />
the installation kit for an NAI security application is registered in the Repository, it is<br />
listed as a reference node under the Repository.<br />
When you click on the <strong>CyberCop</strong> <strong>Scanner</strong> node under the Repository, the node<br />
expands to list the version numbers of the SMI and <strong>CyberCop</strong> <strong>Scanner</strong> installation kits.<br />
AgentInfo, an SMI utility program, is also listed as a node under the Repository.<br />
WhenyouclickontheWorkspace>Repository><strong>CyberCop</strong><br />
<strong>Scanner</strong>>1.0-5.5.0>Reports node, the node expands to list the report templates<br />
installedwith<strong>CyberCop</strong><strong>Scanner</strong>.<br />
NOTE: You do not need to access the Repository when you use <strong>CyberCop</strong><br />
<strong>Scanner</strong>. The Repository is used by certain NAI security applications to perform<br />
remote installations. <strong>CyberCop</strong> <strong>Scanner</strong> does not support remote installation or<br />
remote management.<br />
<strong>CyberCop</strong> <strong>Scanner</strong> <strong>Getting</strong> <strong>Started</strong> <strong>Guide</strong> 3-5
<strong>Getting</strong> <strong>Started</strong>: Performing a Scan<br />
The Local Computer Node<br />
The Local Computer node is labeled with the host name of your local computer. Under<br />
the Local Computer node, you will see the AgentInfo node, indicating that AgentInfo,<br />
an SMI utility program, is installed on your local computer. AgentInfo allows you to<br />
configure the event database where <strong>CyberCop</strong> <strong>Scanner</strong> security results are stored.<br />
Using AgentInfo, you can select the location of the local event database where<br />
<strong>CyberCop</strong> <strong>Scanner</strong> security results (vulnerabilities) are stored. By default, the local<br />
event database is called events.mdb and it is located at c:\Program Files\Network<br />
Associates\SMI Products\SMI\Shared\EventDB. AgentInfo also allows you to specify<br />
which event database is used to generate reports of <strong>CyberCop</strong> <strong>Scanner</strong> results.<br />
NOTE: You can also select an event database for storing security results and<br />
specify which event database is used to generate reports from within <strong>CyberCop</strong><br />
<strong>Scanner</strong>.<br />
The Report Viewer (Right Pane of the SMI Console)<br />
When you click on any node on the SMI console tree, the right pane of the SMI console<br />
window displays information or screen controls related to that node.<br />
WhenyouclickontheWorkspace>Services>Event Database<br />
(events.mdb)><strong>CyberCop</strong> <strong>Scanner</strong> node, the right pane of the SMI console window<br />
displays the SMI report viewer. Menu commands, tabs, and toolbar icons specific to<br />
the report viewer are also displayed.<br />
The report viewer allows you to view <strong>CyberCop</strong> <strong>Scanner</strong> security results and generate<br />
a variety of graphical and text-based reports using pre-defined report templates.<br />
3-6 Chapter 3
<strong>Getting</strong> <strong>Started</strong>: Performing a Scan<br />
Loading Configuration Files<br />
This section describes the information contained in a scan configuration file and<br />
introduces the Setup Walkthrough program of <strong>CyberCop</strong> <strong>Scanner</strong>. It also explains how<br />
you can create scan settings templates and module configuration templates to store<br />
collections of desired scan settings and module settings which can be used when you<br />
create a configuration file.<br />
About Configuration Files<br />
In order to perform a scan of hosts on your network, you must first set up a scan<br />
configuration file. A scan configuration file stores the following scan information:<br />
• scan settings, such as host range to scan, operating system identification, scan<br />
engine options, and policy options<br />
• module settings, a preselected set of module classes and modules to run against<br />
the target host(s)<br />
• application settings, such as system file locations, as well as settings to display and<br />
report scan messages<br />
<strong>CyberCop</strong> <strong>Scanner</strong> includes a default scan configuration file, scanner.ini. The default<br />
configuration file includes a default selection of scan settings, module settings, and<br />
application settings that you can use to perform a scan. When you start <strong>CyberCop</strong><br />
<strong>Scanner</strong> for the first time, a Setup Walkthrough program guides you through loading<br />
the default configuration file. The Setup Walkthrough program can also be used to<br />
create new configuration files.<br />
Scan configuration files are saved with the file extension .ini. By default, they are<br />
stored in c:\Program Files\Network Associates\SMI Products\<strong>CyberCop</strong> <strong>Scanner</strong>,<br />
unless you specify otherwise.<br />
<strong>CyberCop</strong> <strong>Scanner</strong> also includes templates which you can use to store collections of<br />
desired scan settings and module settings:<br />
• Scan settings can be saved in a scan settings template, with the file extension<br />
.scn.<br />
• Module settings can be saved in a module configuration template with the file<br />
extension .mod.<br />
You can use these templates when you create new scan configuration files, to avoid<br />
having to configure settings individually. By default, templates are stored in<br />
c:\Program Files\Network Associates\SMI Products\<strong>CyberCop</strong> <strong>Scanner</strong>\templates,<br />
unless you specify otherwise.<br />
<strong>CyberCop</strong> <strong>Scanner</strong> <strong>Getting</strong> <strong>Started</strong> <strong>Guide</strong> 3-7
<strong>Getting</strong> <strong>Started</strong>: Performing a Scan<br />
<strong>CyberCop</strong> <strong>Scanner</strong> also includes a file scan.ini as an example scan configuration file<br />
to be used only for scans run from the command line. This example file is stored in<br />
c:\Program Files\Network Associates\SMI Products\<strong>CyberCop</strong> <strong>Scanner</strong>. In order to<br />
run scans from the command line, you must first make a copy of the example file and<br />
then edit the file to modify the scan settings and enable the modules you wish to use.<br />
Once a scan configuration file is loaded, you can view the selected scan settings and<br />
module settings on the Current Configuration tab. The Current Configuration tab<br />
lists the currently selected scan settings and module settings, in addition to the current<br />
settings of variables associated with modules in the Vulnerability Database.<br />
3-8 Chapter 3
<strong>Getting</strong> <strong>Started</strong>: Performing a Scan<br />
About the Setup Walkthrough Program<br />
When you start <strong>CyberCop</strong> <strong>Scanner</strong> for the first time, you will be prompted to create a<br />
startup scan configuration file. A Setup Walkthrough program will guide you<br />
through loading the default configuration file scanner.ini, allowing you to enter<br />
parameters specific to the network(s) that you will be scanning.<br />
You can also open the Setup Walkthrough program by selecting the File>New Config<br />
File... menu item. Alternatively, click the New toolbar icon.<br />
The Setup Walkthrough program will prompt you to specify the following information<br />
before you can use the default configuration file:<br />
• DNS domain name of the target network<br />
• NIS domain name of the target network<br />
• fake DNS server name<br />
• IP range to scan<br />
• module configuration template to use<br />
• scan settings template to use<br />
To view additional instructions for entering this information: Place the cursor in<br />
one of the textboxes. An explanation will be displayed in the NOTES section of the<br />
dialog box. Additional information is provided below.<br />
DNS and NIS Domain Names<br />
<strong>CyberCop</strong> <strong>Scanner</strong> will attempt to locate the DNS and NIS domain names in the<br />
Windows NT Registry. If <strong>CyberCop</strong> <strong>Scanner</strong> is unable to locate this information, these<br />
fields will be blank. You should enter the domain names of the target network,<br />
otherwise certain modules which depend on this information will not perform<br />
properly.<br />
<strong>CyberCop</strong> <strong>Scanner</strong> <strong>Getting</strong> <strong>Started</strong> <strong>Guide</strong> 3-9
<strong>Getting</strong> <strong>Started</strong>: Performing a Scan<br />
Fake DNS Server Name<br />
A number of <strong>CyberCop</strong> <strong>Scanner</strong> modules test the security of a DNS server. For internet<br />
connected systems, this requires having a fake DNS server to pass vulnerability<br />
information back to <strong>CyberCop</strong> <strong>Scanner</strong>. If your internal DNS system contains<br />
sensitive information, we recommend that you set up your own fake DNS server on<br />
your network. Otherwise, your information will be transmitted to the default DNS<br />
server, which is NAI’s fake DNS server. You have three options:<br />
• you can use the internet-connected NAI DNS fake servers<br />
• you can install an NAI fake server on your network<br />
• you can disable DNS checks (module class 17000 Domain Name System and<br />
BIND)<br />
If you wish to use your own fake server, instructions for installing and configuring the<br />
NAI DNS fake server on a network are included in the document displayed in the<br />
NOTES section of the Setup Walkthrough dialog box. To view this document, place<br />
the cursor in the Fake DNS Server Name textbox. The document is also available as a<br />
text file dns.txt included with your software distribution.<br />
NOTE: If you use the internet-connected NAI DNS fake servers, do not change<br />
the default entry in the Setup Walkthrough. Otherwise, the DNS checks will not<br />
work.<br />
IP Range to Scan<br />
By default, the Local Host is entered for the IP range to scan. You can enter a different<br />
host or range of hosts if you wish. For examples of how to enter an IP range, place the<br />
cursor in the IP Range to Scan textbox. Examples will be displayed in the NOTES<br />
section below the textbox.<br />
3-10 Chapter 3
<strong>Getting</strong> <strong>Started</strong>: Performing a Scan<br />
Module Configuration Template<br />
A module configuration template contains a preselected set of module classes and<br />
modules to run for a scan. In the Setup Walkthrough program, you will be asked to<br />
select one of the module configuration templates listed below:<br />
• Default<br />
• All Modules<br />
• CASL checks<br />
• Denial of Service<br />
• DNS checks<br />
• FTP checks<br />
• HTTP checks<br />
• Information checks<br />
• NT Policy checks<br />
• Password Grinding<br />
• Port Scanning<br />
• SMTP checks<br />
• Unix checks<br />
• Windows checks<br />
The Default template has the following modules disabled: module class 8000 (Denial<br />
of Service Attacks), module class 9000 (Password Guessing/Grinding), and certain<br />
modules in other module classes which are considered dangerous because they could<br />
cause machines to crash, for example certain port scanning modules.<br />
The All Modules template enables all modules including Denial of Service Attacks<br />
and other modules considered dangerous. The other module templates can be used to<br />
perform various types of scans.<br />
NOTE: Important! The module class named Denial of Service Attacks is<br />
disabled in the Default template. We recommend that you do not perform Denial<br />
of Service checks on your network for this tutorial. In order to check for these<br />
vulnerabilities, an actual hostile attack must be performed against a computer.<br />
Denial of Service Attacks can have undesirable effects, including network<br />
congestion, computer instability, crashes, and reboots.<br />
NOTE: Enabling password grinding functions can result in account lockout(s)<br />
for systems with password grinding protection enabled.<br />
Scan Settings Template<br />
Finally, you will be asked to select a scan settings template. A scan settings template<br />
contains a set of scan parameters that will be used for a scan. A default scan settings<br />
template labeled Default is provided.<br />
<strong>CyberCop</strong> <strong>Scanner</strong> <strong>Getting</strong> <strong>Started</strong> <strong>Guide</strong> 3-11
<strong>Getting</strong> <strong>Started</strong>: Performing a Scan<br />
Using the Default Configuration File<br />
When you start <strong>CyberCop</strong> <strong>Scanner</strong> for the first time, the Setup Walkthrough program<br />
will guide you through loading the default configuration file scanner.ini. You will be<br />
prompted to enter parameters specific to the network(s) that you will be scanning.<br />
To use the default configuration file, follow these steps:<br />
1. When you open <strong>CyberCop</strong> <strong>Scanner</strong> for the first time after installation, a dialog box<br />
asks if you wish to create a startup configuration file. Click Yes. The Setup<br />
Walkthrough program will open, with scanner.ini listed in the Scan<br />
Configuration File Name textbox.<br />
Then click Next.<br />
2. Next you will be prompted to enter the following information:<br />
• the DNS domain name of the target network<br />
• the NIS domain name of the target network<br />
• the fake DNS server name<br />
• the IP range to scan<br />
Enter this information in the textboxes provided. You should not leave these<br />
textboxes blank, otherwise certain modules which depend on this information will<br />
not work properly.<br />
NOTE: For an explanation of the above information, see the section, “About the<br />
Setup Walkthrough Program,” earlier in this chapter. You can also view<br />
instructions for entering this information by placing the cursor in one of the<br />
textboxes. An explanation will be displayed in the NOTES section of the Setup<br />
Walkthrough dialog box<br />
Click Next to continue.<br />
3. Next you must select a module configuration template. To use the default module<br />
configuration template, select Default to highlight it.<br />
NOTE: Important! The module class named Denial of Service Attacks is<br />
disabled in the Default template. We recommend that you do not perform Denial<br />
of Service checks on your network for this tutorial. In order to check for these<br />
vulnerabilities, an actual hostile attack must be performed against a computer.<br />
Denial of Service Attacks can have undesirable effects, including network<br />
congestion, computer instability, crashes, and reboots.<br />
Click Next to continue.<br />
3-12 Chapter 3
<strong>Getting</strong> <strong>Started</strong>: Performing a Scan<br />
4. Next you must select a scan settings template. To use the default scan settings<br />
template, select Default to highlight it.<br />
5. Click Finish to exit the Setup Walkthrough program.<br />
The Setup Walkthrough will be closed and the Scan menu will be enabled, allowing<br />
you to begin a scan. The name of the currently loaded scan configuration file<br />
(scanner.ini) will be displayed in the <strong>CyberCop</strong> <strong>Scanner</strong> title bar.<br />
You can view your selected scan settings using the Configure>Scan Settings... menu<br />
item. You can view the selected modules using the Configure>Module Settings...<br />
menu item. You can also view selected scan settings and module settings by switching<br />
to the Current Configuration tab of <strong>CyberCop</strong> <strong>Scanner</strong>. The Current Configuration<br />
tab also lists the current settings of variables associated with modules in the<br />
Vulnerability Database.<br />
<strong>CyberCop</strong> <strong>Scanner</strong> <strong>Getting</strong> <strong>Started</strong> <strong>Guide</strong> 3-13
<strong>Getting</strong> <strong>Started</strong>: Performing a Scan<br />
Setting Up a New Configuration File<br />
This section gives step-by-step instructions for creating a new scan configuration file.<br />
You will learn how to select and deselect modules and module classes for a scan. You<br />
will also learn how to create a scan settings template and a module configuration<br />
template.<br />
Creating a New Configuration File<br />
If you do not want to use the default configuration file, you can create a new<br />
configuration file. You can do this in two ways:<br />
• by selecting the File>New Config File... menu item. This option opens the Setup<br />
Walkthrough program, allowing you to select and/or edit a scan settings template<br />
and a module configuration template. Alternatively, click the New toolbar icon.<br />
• byusingtheConfigure menu to select the desired scan settings, module settings,<br />
and application settings. Then you can save these settings as a new configuration<br />
file by selecting the File>Save Config As... menu item.<br />
To create a new configuration file using the Setup Walkthrough program, follow these<br />
steps:<br />
1. Select the File>New Config File... menu item. The Setup Walkthrough program<br />
will open. Alternatively, click the New toolbar icon.<br />
2. In the Scan Configuration File Name textbox, enter a name for the new<br />
configuration file. You do not need to add the file extension .ini. It will be added<br />
automatically.<br />
By default, the file will be stored in c:\Program Files\Network Associates\SMI<br />
Products\<strong>CyberCop</strong> <strong>Scanner</strong>. To save the file in another location, click the Save<br />
As button to browse for a different directory or drive.<br />
Then click Next.<br />
3. Next you will be prompted to enter the following information:<br />
• the DNS domain name of the target network<br />
• the NIS domain name of the target network<br />
• the fake DNS server name<br />
• the IP range to scan<br />
Enter this information in the textboxes provided. You should not leave these<br />
textboxes blank, otherwise certain modules which depend on this information will<br />
not work properly.<br />
3-14 Chapter 3
<strong>Getting</strong> <strong>Started</strong>: Performing a Scan<br />
NOTE: For an explanation of the above information, see the section, “About the<br />
Setup Walkthrough Program,” earlier in this chapter. You can also view<br />
instructions for entering this information by placing the cursor in one of the<br />
textboxes. An explanation will be displayed in the NOTES section of the Setup<br />
Walkthrough dialog box<br />
Click Next to continue.<br />
4. Next you must select a module configuration template. <strong>CyberCop</strong> <strong>Scanner</strong><br />
includes several predefined module configuration templates which you can use to<br />
perform various types of scans.<br />
You have three options: select an existing template, edit an existing template, or<br />
create a new template. To learn more about selecting a module configuration<br />
template, see the section, “Creating and Editing Module Configuration<br />
Templates,” later in this chapter.<br />
NOTE: Important! The module class named Denial of Service Attacks is<br />
disabled in the Default template. We recommend that you do not perform Denial<br />
of Service checks on your network for this tutorial. In order to check for these<br />
vulnerabilities, an actual hostile attack must be performed against a computer.<br />
Denial of Service Attacks can have undesirable effects, including network<br />
congestion, computer instability, crashes, and reboots.<br />
Click Next to continue.<br />
5. Next you must select a scan settings template. You have three options: select an<br />
existing template, edit an existing template, or create a new template. To learn<br />
more about selecting a scan settings template, see the section, “Creating and<br />
Editing Scan Settings Templates,” later in this chapter.<br />
Then click Next.<br />
6. Click Finish to exit the Setup Walkthrough program.<br />
The new scan configuration file will be saved and loaded, ready to be used for the next<br />
scan. The Setup Walkthrough program will then close. The name of the new scan<br />
configuration file will be displayed in the <strong>CyberCop</strong> <strong>Scanner</strong> title bar.<br />
You can view your selected scan settings using the Configure>Scan Settings... menu<br />
item. You can view the selected modules using the Configure>Module Settings...<br />
menu item. You can also view selected scan settings and module settings by switching<br />
to the Current Configuration tab of <strong>CyberCop</strong> <strong>Scanner</strong>. The Current Configuration<br />
tab also lists the current settings of variables associated with modules in the<br />
Vulnerability Database.<br />
<strong>CyberCop</strong> <strong>Scanner</strong> <strong>Getting</strong> <strong>Started</strong> <strong>Guide</strong> 3-15
<strong>Getting</strong> <strong>Started</strong>: Performing a Scan<br />
Selecting and Deselecting Modules<br />
After loading a scan configuration file, you can change the module configuration by<br />
selecting or deselecting modules and module classes. To do this, you open the Module<br />
Configuration dialog box by choosing the Configure>Module Settings... menu item.<br />
The Module Configuration dialog box allows you to do the following:<br />
• view currently selected modules<br />
• view detailed descriptions of individual modules<br />
• select and deselect modules and module classes by (1) enabling and disabling<br />
checkboxes, (2) by using the dialog box buttons, or (3) by using context menus<br />
that are opened by right-clicking<br />
• select either vulnerability modules, which check for vulnerabilities, or CASL<br />
modules, which run CASL firewall filter checks<br />
• save changes as a new module configuration template to use in other scan<br />
configuration files<br />
• save changes to the scan configuration file<br />
Viewing Currently Selected Modules<br />
The Module Configuration dialog box displays two listboxes which allow you to view<br />
currently selected module classes and modules.<br />
• The Module Groups listbox displays the module classes available in the<br />
Vulnerability Database. The module class number (ID) and name are listed. A<br />
checkmark indicates that a module class has been enabled. To view the modules<br />
in a particular module class, click on a module class in the Module Groups listbox<br />
to highlight it.<br />
• The Module Selection listbox displays the modules available within a particular<br />
module class. The module number (ID) and name are listed. A checkmark<br />
indicates that a module has been selected for a scan.<br />
You can scroll through the listboxes to view which module classes and modules have<br />
been enabled. You can expand the width of one listbox relative to the other by dragging<br />
the vertical bar that separates them.<br />
Viewing a Module Description<br />
To view a detailed description of a module, do the following:<br />
1. First click on the module class to which the module belongs to highlight it. The<br />
Module Selection listbox on the right will display a list of the modules that belong<br />
to the highlighted module class.<br />
3-16 Chapter 3
<strong>Getting</strong> <strong>Started</strong>: Performing a Scan<br />
2. Next, in the Module Selection listbox, click on a module to highlight it. A<br />
description of the module will be displayed below the listbox in the Module<br />
Description box.<br />
NOTE: You can also view module descriptions for all modules in the<br />
Vulnerability Database by using the Vulnerability <strong>Guide</strong>, which is included in<br />
the report viewer. To view the Vulnerability <strong>Guide</strong>, select the Reports>View<br />
Results... menu item. The report viewer will open, listing available report<br />
templates. At the bottom of the list, double click on Vulnerability <strong>Guide</strong>. An<br />
indexed tree view of module numbers will be displayed. Click on a module<br />
number to display a description.<br />
Selecting and Deselecting Modules<br />
To select and deselect modules for a scan, try the following methods:<br />
1. In the Module Groups listbox, click on a checkbox to either enable the module<br />
class (checkmark in box) or disable it (no checkmark in box).<br />
Then, in the Module Selection listbox, click on an individual module checkbox to<br />
either enable it (checkmark in box) or disable it (no checkmark in box).<br />
NOTE: The module class to which a module belongs must be selected first,<br />
before you can select an individual module for a scan.<br />
2. Use the Module Configuration dialog box buttons:<br />
• Select Default<br />
• Unselect Dangerous<br />
• Select All/Unselect All<br />
NOTE: Important! The Select All button enables module class 8000 (Denial of<br />
Service Attacks) and other modules considered dangerous which are indicated<br />
by a red warning sign. We recommend that you do not perform Denial of Service<br />
checks on your network for this tutorial. In order to check for these<br />
vulnerabilities, an actual hostile attack must be performed against a computer.<br />
Denial of Service Attacks can have undesirable effects, including network<br />
congestion, computer instability, crashes, and reboots.<br />
NOTE: Enabling password grinding functions can result in account lockout(s)<br />
for systems with password grinding protection enabled.<br />
<strong>CyberCop</strong> <strong>Scanner</strong> <strong>Getting</strong> <strong>Started</strong> <strong>Guide</strong> 3-17
<strong>Getting</strong> <strong>Started</strong>: Performing a Scan<br />
• Select Group/Unselect Group<br />
• Copy From<br />
For a description of these buttons, refer to <strong>CyberCop</strong> <strong>Scanner</strong> Help, online help<br />
for <strong>CyberCop</strong> <strong>Scanner</strong>.<br />
3. Use the context menus. To open a context menu, right-click on either the Module<br />
Groups listbox or the Module Selection listbox. The context menus include menu<br />
commands similar to the dialog buttons listed above.<br />
Selecting CASL Modules or Vulnerability Modules<br />
<strong>CyberCop</strong> <strong>Scanner</strong> includes firewall filter checks which can be used to test intrusion<br />
detection software. The CASL firewall filter checks include the modules in module<br />
class 12000 (Packet Filter Verification Tests).<br />
1. To enable the CASL modules, click the Scan Type>CASL Modules radio button.<br />
Module class 12000 will be listed in the Module Groups listbox, allowing you to<br />
select individual CASL modules for a firewall filter check.<br />
2. To disable the CASL modules and return to the modules which perform<br />
vulnerability checks, click the Scan Type>Vulnerability radio button. All the<br />
available module classes except module class 12000 will be listed in the Module<br />
Groups listbox.<br />
NOTE: The Vulnerability module classes do not use all available module class<br />
numbers. Some module class numbers are skipped.<br />
Saving Changes as a Module Configuration Template<br />
To save changes as a new module configuration template, do the following:<br />
1. Enable the Save As Template checkbox.<br />
2. Enter a name for the template in the textbox. The file extension .mod will be<br />
added automatically. By default, the template will be saved in c:\Program<br />
Files\Network Associates\SMI Products\<strong>CyberCop</strong> <strong>Scanner</strong>\templates.<br />
Saving Changes to the Scan Configuration File<br />
To save changes to the currently loaded scan configuration file, do the following:<br />
1. Click the OK button. The changes will be saved and the Module Configuration<br />
dialog box will close.<br />
2. To cancel changes, click the Cancel button. The Module Configuration dialog box<br />
will close.<br />
3-18 Chapter 3
<strong>Getting</strong> <strong>Started</strong>: Performing a Scan<br />
Creating and Editing Scan Settings Templates<br />
You can create and edit scan settings templates to store collections of desired scan<br />
settings. You can use these templates when you create new scan configuration files, to<br />
avoid having to configure settings individually. You can also delete templates.<br />
Scan settings templates have the file extension .scn. By default, templates are stored<br />
in c:\Program Files\Network Associates\SMI Products\<strong>CyberCop</strong> <strong>Scanner</strong>\templates,<br />
unless you specify otherwise.<br />
To configure a scan settings template, follow the steps below.<br />
Creating a New Template<br />
To create a new template, do the following:<br />
1. Select the Configure>Scan Settings... menu item. The <strong>CyberCop</strong> <strong>Scanner</strong> Setup<br />
dialog box will open, displaying tabs that allow you to configure scan settings.<br />
2. Select the desired scan settings by switching between tabs and using the screen<br />
controls. For more information on scan settings, refer to <strong>CyberCop</strong> <strong>Scanner</strong> Help,<br />
online help for <strong>CyberCop</strong> <strong>Scanner</strong>, accessible by selecting the Help>Help<br />
Topics... menu item.<br />
3. On the Scan Settings tab, enable the Save As Template checkbox. Enter a name<br />
for the template in the textbox. You do not need to enter the file extension .scn.<br />
4. Click OK to close the dialog box and save the template.<br />
Alternatively, you can create a new template using the Setup Walkthrough program,<br />
as described below.<br />
The next time you create a new scan configuration file using the Setup Walkthrough<br />
program, the new template will be listed for you to select.<br />
Editing an Existing Template<br />
To edit an existing template, do the following:<br />
1. Open the Setup Walkthrough program by selecting the File>New Config File...<br />
menu item. Alternatively, click the New toolbar icon. The Setup Walkthrough<br />
dialog box will open.<br />
2. Enter a name in the Scan Configuration File Name textbox. Then click Next until<br />
the Scan Settings Templates listbox is displayed, listing available templates.<br />
3. Click on a template to highlight it, then click the Edit button to make changes.<br />
Alternatively, click the New button to create a new template.<br />
<strong>CyberCop</strong> <strong>Scanner</strong> <strong>Getting</strong> <strong>Started</strong> <strong>Guide</strong> 3-19
<strong>Getting</strong> <strong>Started</strong>: Performing a Scan<br />
The Edit <strong>CyberCop</strong> <strong>Scanner</strong> Template dialog box will open, allowing you to select<br />
desired scan settings. For more information on scan settings, refer to <strong>CyberCop</strong><br />
<strong>Scanner</strong> Help, online help for <strong>CyberCop</strong> <strong>Scanner</strong>, accessible by selecting the<br />
Help>Help Topics... menu item.<br />
NOTE: You cannot edit the default template. Therefore, you must save the<br />
edited template under a new name.<br />
4. After selecting scan settings, click OK to close the Edit <strong>CyberCop</strong> <strong>Scanner</strong><br />
Template dialog box and save the template.<br />
You can use the edited template in the current scan configuration file by continuing the<br />
Setup Walkthrough program, or you can use it in a new scan configuration file.<br />
Deleting a Template<br />
To delete a template, do the following:<br />
1. Open the Setup Walkthrough program by selecting the File>New Config File...<br />
menu item. Alternatively, click the New toolbar icon. The Setup Walkthrough<br />
dialog box will open.<br />
2. Enter a name in the Scan Configuration File Name textbox. Then click Next until<br />
the Scan Settings Templates listbox is displayed, listing available templates.<br />
3. Click on a template to highlight it, then click the Delete button to delete the<br />
template.<br />
The deleted template will be deleted from your <strong>CyberCop</strong> <strong>Scanner</strong> files and removed<br />
from the listbox.<br />
3-20 Chapter 3
<strong>Getting</strong> <strong>Started</strong>: Performing a Scan<br />
Creating and Editing Module Configuration Templates<br />
You can create and edit module configuration templates to store selected modules and<br />
module classes. You can use these templates when you create new scan configuration<br />
files, to avoid having to configure settings individually. You can also delete templates.<br />
Module configuration templates have the file extension .mod. By default, templates<br />
are stored in c:\Program Files\Network Associates\SMI Products\<strong>CyberCop</strong><br />
<strong>Scanner</strong>\templates, unless you specify otherwise.<br />
To configure a module configuration template, follow the steps below.<br />
Creating a New Template<br />
To create a new template, do the following:<br />
1. Select the Configure>Module Settings... menu item. The Module Configuration<br />
dialog box will open, allowing you to select and deselect modules and module<br />
classes. For more information on module settings, refer to <strong>CyberCop</strong> <strong>Scanner</strong><br />
Help, online help for <strong>CyberCop</strong> <strong>Scanner</strong>, accessible by selecting the Help>Help<br />
Topics... menu item.<br />
2. Enable the Save As Template checkbox. Enter a name for the template in the<br />
textbox. You do not need to enter the file extension .mod.<br />
3. Click OK to close the dialog box and save the template.<br />
Alternatively, you can create a new template using the Setup Walkthrough program,<br />
as described below.<br />
The next time you create a new scan configuration file using the Setup Walkthrough<br />
program, the new template will be listed for you to select.<br />
<strong>CyberCop</strong> <strong>Scanner</strong> <strong>Getting</strong> <strong>Started</strong> <strong>Guide</strong> 3-21
<strong>Getting</strong> <strong>Started</strong>: Performing a Scan<br />
Editing an Existing Template<br />
<strong>CyberCop</strong> <strong>Scanner</strong> includes several predefined module configuration templates which<br />
you can use to perform various types of scans, including the following:<br />
• Default<br />
• All Modules<br />
• CASL checks<br />
• Denial of Service<br />
• DNS checks<br />
• FTP checks<br />
• HTTP checks<br />
• Information checks<br />
• NT Policy checks<br />
• Password Grinding<br />
• Port Scanning<br />
• SMTP checks<br />
• Unix checks<br />
• Windows checks<br />
To edit an existing template, do the following:<br />
1. Open the Setup Walkthrough program by selecting the File>New Config File...<br />
menu item. Alternatively, click the New toolbar icon. The Setup Walkthrough<br />
dialog box will open.<br />
2. Enter a name in the Scan Configuration File Name textbox. Then click Next until<br />
the Module Configuration Templates listbox is displayed, listing available<br />
templates.<br />
3. Click on a template to highlight it, then click the Edit button to make changes.<br />
Alternatively, click the New button to create a new template.<br />
The Module Configuration dialog box will open, allowing you to select and<br />
deselect modules and module classes. For more information on module settings,<br />
refer to <strong>CyberCop</strong> <strong>Scanner</strong> Help, online help for <strong>CyberCop</strong> <strong>Scanner</strong>, accessible by<br />
selecting the Help>Help Topics... menu item.<br />
NOTE: You cannot edit the predefined templates included with <strong>CyberCop</strong><br />
<strong>Scanner</strong>. Therefore, you must save the edited template under a new name.<br />
4. After selecting desired settings, click OK to close the Module Configuration<br />
dialog box and save the template.<br />
You can use the edited template in the current scan configuration file by continuing the<br />
Setup Walkthrough program, or you can use it in a new scan configuration file.<br />
3-22 Chapter 3
<strong>Getting</strong> <strong>Started</strong>: Performing a Scan<br />
Deleting a Template<br />
To delete a template, do the following:<br />
1. Open the Setup Walkthrough program by selecting the File>New Config File...<br />
menu item. Alternatively, click the New toolbar icon. The Setup Walkthrough<br />
dialog box will open.<br />
2. Enter a name in the Scan Configuration File Name textbox. Then click Next until<br />
the Module Configuration Templates listbox is displayed, listing available<br />
templates.<br />
3. Click on a template to highlight it, then click the Delete button to delete the<br />
template.<br />
The deleted template will be deleted from your <strong>CyberCop</strong> <strong>Scanner</strong> files and removed<br />
from the listbox.<br />
<strong>CyberCop</strong> <strong>Scanner</strong> <strong>Getting</strong> <strong>Started</strong> <strong>Guide</strong> 3-23
<strong>Getting</strong> <strong>Started</strong>: Performing a Scan<br />
Loading an Existing Configuration File<br />
If you have previously created a scan configuration file, you can load it to use for the<br />
next scan.<br />
To load an existing scan configuration file, do the following:<br />
1. Select the File>Open Config File... menu item. Alternatively, click the Open<br />
button on the Toolbar. The Open dialog box will be displayed.<br />
2. Select the drive and the directory where the scan configuration file (.ini)youwish<br />
to use is located. By default, scan configuration files are located in c:\Program<br />
Files\Network Associates\SMI Products\<strong>CyberCop</strong> <strong>Scanner</strong>.<br />
3. Enter or select the name of the scan configuration file. Then click OK to close the<br />
dialog box.<br />
Once the scan configuration file is loaded, you can view your selected scan settings<br />
using the Configure>Scan Settings... menu item. You can view the selected modules<br />
using the Configure>Module Settings... menu item. You can also view selected scan<br />
settings and module settings by switching to the Current Configuration tab of<br />
<strong>CyberCop</strong> <strong>Scanner</strong>.<br />
3-24 Chapter 3
<strong>Getting</strong> <strong>Started</strong>: Performing a Scan<br />
Probing for Responsive Hosts<br />
You can use the probe feature of <strong>CyberCop</strong> <strong>Scanner</strong> to detect responsive hosts on a<br />
network without scanning them for vulnerabilities. You can use this feature to generate<br />
a network map and to troubleshoot hosts. The probe will be performed on the hosts<br />
specified in the currently loaded configuration file.<br />
For each host, probing does the following:<br />
• identifies if the host is responsive<br />
• determines the operating system type<br />
• performs a trace route to generate a network map<br />
Results during a probe can be viewed on the Scan Progress tab. The Scan Progress tab<br />
will list hosts that are found to be responsive. It will also list their operating system<br />
type, if identification of the operating system type is enabled. In addition, it will list<br />
unresponsive hosts that have been skipped, if displaying messages for hosts that have<br />
been skipped is enabled.<br />
Probe also runs module no. 1041 (Trace Route to Host). The results of the trace route<br />
are then saved to a .map file, if saving results to a map file is enabled. You can use the<br />
results to generate a network map using the Reports>Network Map... menu item.<br />
NOTE: To enable displaying messages for unresponsive hosts that have been<br />
skipped, select the Configure>Applications Settings... menu item. The<br />
Application Settings dialog box will open. In the Main Screen Display Attributes<br />
section of the dialog box, enable the Display Hosts Skipped Messages checkbox.<br />
To enable identification of the operating system type for responsive hosts, select<br />
the Configure>Scan Settings... menu item. The <strong>CyberCop</strong> <strong>Scanner</strong> Setup dialog<br />
box will open. Switch to the Scan Options tab and put a checkmark in the Enable<br />
Operating System Identification checkbox. This checkbox is enabled by default.<br />
To enable saving results of a probe to a .map file, select the Configure>Scan<br />
Settings... menu item. The <strong>CyberCop</strong> <strong>Scanner</strong> Setup dialog box will open.<br />
Switch to the Scan Options tab. Enable the Host Information File checkbox and<br />
specify a name for the network map file that will be generated. By default, the<br />
checkbox is enabled and the filename results.map is specified.<br />
<strong>CyberCop</strong> <strong>Scanner</strong> <strong>Getting</strong> <strong>Started</strong> <strong>Guide</strong> 3-25
<strong>Getting</strong> <strong>Started</strong>: Performing a Scan<br />
Starting a Probe<br />
Stopping a Probe<br />
To start a probe, do the following:<br />
1. Load the scan configuration file you wish to use. The probe will be performed on<br />
hosts specified in the currently loaded scan configuration file.<br />
2. If you wish to list unresponsive hosts that have been skipped, identify the<br />
operating system type, and also generate a network map, make sure the following<br />
scan settings and application settings are enabled:<br />
• To enable displaying messages for unresponsive hosts that have been<br />
skipped, select the Configure>Applications Settings... menu item. The<br />
Application Settings dialog box will open. In the Main Screen Display<br />
Attributes section of the dialog box, enable the Display Hosts Skipped<br />
Messages checkbox.<br />
• To enable identification of the operating system type for responsive hosts,<br />
select the Configure>Scan Settings... menu item. The <strong>CyberCop</strong> <strong>Scanner</strong><br />
Setup dialog box will open. Switch to the Scan Options tab and put a<br />
checkmark in the Enable Operating System Identification checkbox. This<br />
checkbox is enabled by default.<br />
• To enable saving results of a probe to a .map file, select the Configure>Scan<br />
Settings... menu item. The <strong>CyberCop</strong> <strong>Scanner</strong> Setup dialog box will open.<br />
Switch to the Scan Options tab. Enable the Host Information File checkbox<br />
and specify a name for the network map file that will be generated. By<br />
default, the checkbox is enabled and the filename results.map is specified.<br />
3. Select the Scan>Begin Probe menu item to start the probe. Alternatively, click<br />
the Begin Probe toolbar icon.<br />
The probe will begin. Results during the probe will be displayed on the Scan Progress<br />
tab of <strong>CyberCop</strong> <strong>Scanner</strong>.<br />
To stop a probe, do the following:<br />
Select the Scan>Cancel Scan... menu item. Alternatively, click the Cancel Scan<br />
toolbar icon. The probe will be stopped.<br />
Results of the incomplete probe will be displayed on the Scan Progress tab.<br />
3-26 Chapter 3
<strong>Getting</strong> <strong>Started</strong>: Performing a Scan<br />
Scanning a Host<br />
Starting a Scan<br />
This section gives step-by-step procedures for starting and stopping a scan. You will<br />
also learn how to view currently running modules and view results during a scan.<br />
After you load a scan configuration file, you can start a scan. The scan will be<br />
performed on the hosts specified in the current scan configuration file, using the<br />
pre-selected modules and module classes.<br />
Scan results will be saved in the event database specified in the current configuration<br />
file. By default, the local event database events.mdb located at c:\Program<br />
Files\Network Associates\SMI Products\SMI\Shared\EventDB is used, unless you<br />
specified otherwise.<br />
To start a scan, do the following:<br />
1. If you wish to specify an event database other than the one specified in the current<br />
scan configuration file for storing scan results, follow these steps:<br />
• Select the Configure>Scan Settings... menu item. The <strong>CyberCop</strong> <strong>Scanner</strong><br />
Setup dialog box will open.<br />
• On the Scan Settings tab, in the Scan Results Output Database textbox, enter<br />
the name and location of the event database you wish to use to store results.<br />
Alternatively, click the Browse button to select an event database.<br />
2. If you wish to identify the operating system type of hosts during a scan, you can<br />
do the following:<br />
• To identify the operating system type, select the Configure>Scan Settings...<br />
menu item. The <strong>CyberCop</strong> <strong>Scanner</strong> Setup dialog box will open. Switch to the<br />
Scan Options tab and put a checkmark in the Enable Operating System<br />
Identification checkbox. This checkbox is enabled by default.<br />
• If you wish to disable modules that are not pertinent to the operating system<br />
of a machine being scanned, on the Scan Options tab, enable both the Enable<br />
Operating System Identification checkbox and the Allow Modules to Be<br />
Disabled Based on Detected Operating System checkbox.<br />
• If you wish to scan only hosts that have a specified operating system, on the<br />
Scan Options tab, enable the Enable Operating System Identification<br />
checkbox and enable the Scan by OS checkbox. Then select operating<br />
systems to be scanned in the listbox to highlight them.<br />
3. Select the Scan>Begin Scan menu item to start the scan. Alternatively, click the<br />
Begin Scan toolbar icon.<br />
<strong>CyberCop</strong> <strong>Scanner</strong> <strong>Getting</strong> <strong>Started</strong> <strong>Guide</strong> 3-27
<strong>Getting</strong> <strong>Started</strong>: Performing a Scan<br />
The scan will begin. The progress of the scan will be displayed on the Scan Progress<br />
tab. In the Currently Running Hosts and Modules pane, the hosts currently being<br />
scanned will be displayed, along with the operating system detected and the status of<br />
the scan. In addition, a status bar will show scan progress. A running count of the<br />
number of vulnerabilities identified, the number of hosts to be scanned, and the<br />
number of hosts completed will also be displayed.<br />
Results of the scan, including vulnerabilities that are found and any module output,<br />
will be displayed on the Scan Results tab.<br />
You can view (but not change) the scan settings and module settings during a scan on<br />
the Current Configuration tab.<br />
Scanning Over a Modem<br />
Hosts that are accessible via analog modem and hosts that are on the other side of a<br />
firewall which prevents you from routing to them are called unroutable hosts. To scan<br />
unroutable hosts, follow the steps below.<br />
To run scans via an analog modem connection, you must first do the following:<br />
1. Select the Configure>Scan Settings... menu item. The <strong>CyberCop</strong> <strong>Scanner</strong> Setup<br />
dialog box will open.<br />
2. Switch to the Engine Options tab. Then enable the Scan Unroutable Hosts<br />
checkbox.<br />
NOTE: Certain modules require a raw Ethernet device to run. These modules<br />
will not function over an analog dialup connection.<br />
3-28 Chapter 3
<strong>Getting</strong> <strong>Started</strong>: Performing a Scan<br />
Viewing Currently Running Modules<br />
You can view the currently running modules on a particular host while a scan is in<br />
progress.<br />
To view currently running modules, do the following:<br />
1. Click the Scan Progress tab.<br />
On the Scan Progress tab, in the Currently Running Hosts and Modules pane, the<br />
hosts currently being scanned will be displayed.<br />
Above the Currently Running Hosts and Modules pane, the following information<br />
will also be displayed:<br />
• Hosts to Scan: number of hosts to be scanned<br />
• Hosts in Progress: number of hosts completed including skipped hosts<br />
• Hosts Scanned: number of hosts scanned (not including skipped hosts)<br />
• Vulnerabilities: total number of vulnerabilities found on all machines<br />
scanned<br />
• Start Time: start time of scan<br />
• Elapsed Time: elapsed time of scan<br />
2. In the Currently Running Hosts and Modules pane, double click on a desired host.<br />
The Currently Running Modules for Host Number dialog box will open. The host<br />
number is the ID number of the host listed in the Currently Running Hosts and<br />
Modules pane.<br />
The dialog box will list the modules currently running on that host.<br />
<strong>CyberCop</strong> <strong>Scanner</strong> <strong>Getting</strong> <strong>Started</strong> <strong>Guide</strong> 3-29
<strong>Getting</strong> <strong>Started</strong>: Performing a Scan<br />
Stopping Currently Running Modules<br />
You can stop a currently running module on a particular host while a scan is in<br />
progress. You can stop one module at a time.<br />
To stop a currently running module, do the following:<br />
1. Switch to the Scan Progress tab of <strong>CyberCop</strong> <strong>Scanner</strong>. In the Currently Running<br />
Hosts and Modules pane, the hosts currently being scanned will be listed.<br />
2. In the Currently Running Hosts and Modules pane, double click on a desired host<br />
to open the Currently Running Modules for Host Number dialog box. The dialog<br />
box will list the modules currently running on that host.<br />
3. To stop a currently running module, in the Currently Running Modules for Host<br />
Number dialog box, click on a module to highlight it. Then click the Stop Module<br />
button.<br />
The selected module will be stopped and removed from the list for that host.<br />
NOTE: Repeat this step if you want to delete more than one module.<br />
4. When you are finished, click OK to close the dialog box.<br />
3-30 Chapter 3
<strong>Getting</strong> <strong>Started</strong>: Performing a Scan<br />
Viewing Results During a Scan<br />
You can view scan results in real time during a scan using the Scan Results tab of<br />
<strong>CyberCop</strong> <strong>Scanner</strong>. You can hide and redisplay the Scan Results tab.<br />
To view results during a scan on the Scan Results tab, follow these steps:<br />
1. To display the Scan Results tab, do the following:<br />
• Select the Configure>Application Settings... menu item. The Application<br />
Settings dialog box will open.<br />
• In the Main Screen Display Attributes section of the dialog box, enable the<br />
Show Scan Results checkbox. The Scan Results tab will be displayed.<br />
NOTE: For large scans, it is recommended that the Show Scan Results checkbox<br />
be disabled. Otherwise, resource starvation may occur that can cause problems<br />
during a scan.<br />
The Scan Results tab includes three listboxes: Vulnerabilities, Module Output,<br />
and Module Descriptions. You can expand one listbox relative to another by<br />
clicking and dragging the horizontal or vertical line which separates them.<br />
2. On the Scan Results tab, in the Vulnerabilities listbox, an indexed tree view lists<br />
each host scanned. Click on a node in the tree view to expand it. A list of the<br />
vulnerabilities found on that host will be displayed. Vulnerabilities are listed by<br />
module number.<br />
3. Click on a vulnerability module number to highlight it. A detailed description of<br />
the module will be displayed in the Module Description listbox, including<br />
suggestions for fixes. Any module output generated by that module running on the<br />
selected host will be displayed in the Module Output listbox.<br />
4. Certain modules are "Fix It" modules used in conjunction with Windows NT<br />
Registry checks. These modules have a Fix It portion that can perform a fix to<br />
Registry values to correct potential vulnerabilities detected by <strong>CyberCop</strong> <strong>Scanner</strong>.<br />
<strong>CyberCop</strong> <strong>Scanner</strong> <strong>Getting</strong> <strong>Started</strong> <strong>Guide</strong> 3-31
<strong>Getting</strong> <strong>Started</strong>: Performing a Scan<br />
NOTE: Important! The Fix It modules work in conjunction with specific<br />
vulnerability checks on scanned machines. Fix It modules can be used to fix<br />
vulnerable registry settings found on scanned machines. As with any change to<br />
Windows registry settings, if the Fix It modules are not used correctly they can<br />
potentially have a serious impact on the normal functioning of scanned systems<br />
including (but not limited to) greatly restricted ability to participate on a<br />
network. You must keep a careful record of the machines to which you apply Fix<br />
It modules so that you can, if necessary, undo the changes later. <strong>CyberCop</strong><br />
<strong>Scanner</strong> does not log or report the machines on which Fix It modules were<br />
applied, nor does it log or report on whether or not the fix was successful on these<br />
machines.<br />
NOTE: In order to use the Fix It modules to perform a fix, you must have<br />
domain administrator access on the target host.<br />
Canceling a Scan<br />
If a host has vulnerabilities for which a Fix It module is available, the host node will<br />
display a wrench icon. Expand a node which displays a wrench icon. Vulnerabilities<br />
foundonthathostforwhichaFixItmoduleisavailablewillalsobeshowninthetree<br />
view with a wrench icon. Modules that do not display a wrench icon do not have a Fix<br />
It portion.<br />
After a scan is completed, you can enable the Fix It portion for individual<br />
vulnerabilities and hosts. Then you can perform the fixes. For information on enabling<br />
and running Fix It modules, see the section, “Using Fix It Modules,” later in this<br />
chapter.<br />
To cancel a scan, do the following:<br />
Select the Scan>Cancel Scan menu item. Alternatively, click the Cancel Scan toolbar<br />
icon.<br />
Results from the unfinished scan will be saved in the event database specified in the<br />
current configuration file. You can also view results from the unfinished scan on the<br />
Scan Progress tab.<br />
When you cancel a scan before it is finished, <strong>CyberCop</strong> <strong>Scanner</strong> generates a text file<br />
UnScannedHosts.txt located at c:\Program Files\Network Associates\SMI<br />
Products\<strong>CyberCop</strong> <strong>Scanner</strong>. This text file lists hosts that were not yet scanned when<br />
the scan was canceled. You can use this text file as a host file if you wish to resume<br />
the scan later.<br />
3-32 Chapter 3
<strong>Getting</strong> <strong>Started</strong>: Performing a Scan<br />
Scanning Multiple Hosts<br />
This section gives step-by-step procedures for scanning multiple hosts. You will also<br />
learn the syntax for specifying a range of hosts by their IP addresses.<br />
About Scanning Multiple Hosts<br />
You can configure <strong>CyberCop</strong> <strong>Scanner</strong> to scan multiple hosts. You can do this in two<br />
ways:<br />
• by specifying a Host Range<br />
• by specifying a Host File<br />
Both these options allow you to enter a range of IP addresses to be scanned, as<br />
described below.<br />
Specifying a Host Range<br />
A host range is a group of hosts specified as a range of IP addresses. To use a host<br />
range, you specify hosts to be scanned by entering a range of IP addresses in the Range<br />
textbox on the Scan Settings tab. <strong>CyberCop</strong> <strong>Scanner</strong> will scan each host with an IP<br />
address in this range. If you have chosen to skip unresponsive hosts, <strong>CyberCop</strong><br />
<strong>Scanner</strong> will attempt to scan a host first and then stop if the host is unresponsive.<br />
NOTE: To skip unresponsive hosts during a scan, select the Configure>Scan<br />
Settings... menu item. The <strong>CyberCop</strong> <strong>Scanner</strong> Setup dialog box will open.<br />
Switch to the Engine Options tab. In the Host Query section of the dialog box,<br />
disable the Scan Unresponsive Hosts checkbox (no checkmark in box).<br />
Specifying a Host File<br />
A host file is a text file listing hosts to be scanned. To use a host file, you specify a<br />
group of hosts to be scanned by entering a range of IP addresses into a text file.<br />
<strong>CyberCop</strong> <strong>Scanner</strong> will scan each host listed in the host text file. If you have chosen to<br />
skip unresponsive hosts, <strong>CyberCop</strong> <strong>Scanner</strong> will attempt to scan a host first and then<br />
stop if the host is unresponsive.<br />
A host file allows you to list hosts in a text file and save the list for a future scan.<br />
<strong>CyberCop</strong> <strong>Scanner</strong> includes a default host text file called hosts.txt, located at<br />
c:\Program Files\Network Associates\SMI Products\<strong>CyberCop</strong> <strong>Scanner</strong>. By default,<br />
this file includes only the local host. You can edit the file using Notepad to add hosts<br />
to be scanned.<br />
<strong>CyberCop</strong> <strong>Scanner</strong> <strong>Getting</strong> <strong>Started</strong> <strong>Guide</strong> 3-33
<strong>Getting</strong> <strong>Started</strong>: Performing a Scan<br />
Entering a Range of IP Addresses<br />
IP address ranges can be specified as in the following examples:<br />
10.0.0.1 scans one host.<br />
10.0.0.10-20 scans the range between 10 and 20 inclusive.<br />
10.0.0.10-20;-10.0.0.15 scans the range between 10 and 20, excluding host 15.<br />
10.0.0.1,10.0.0.2 scans two hosts (10.0.0.1 and 10.0.0.2) in the order listed.<br />
10.0.0.1;10.0.0.2 scans the same two hosts (10.0.0.1 and 10.0.0.2) in the order<br />
listed.<br />
10.0.0.1,2,4 scans three hosts (10.0.0.1, 10.0.0.2, and 10.0.0.4).<br />
10.0.0.0/24 scans a class C range 10.0.0.1-10.0.0.254.<br />
10.0.0.0/16 scans 10.0.1.0-10.0.254.254.<br />
127.0.0.1 scans the local host, which is running <strong>CyberCop</strong> <strong>Scanner</strong>.<br />
You can filter out a host or host(s) from a range of IP addresses by placing a minus<br />
sign (-) directly in front of the IP address you wish to exclude, as in the third example<br />
above.<br />
You can specify multiple single host IP addresses by separating them with a<br />
semi-colon, as in the fifth example above.<br />
You can specify a series of IP addresses on the same class C network by using commas<br />
to separate the last octet, as in the sixth example above.<br />
NOTE: Do not place leading or trailing spaces in the IP address line.<br />
3-34 Chapter 3
<strong>Getting</strong> <strong>Started</strong>: Performing a Scan<br />
Scanning Using a Host Range<br />
To scan hosts by entering an IP address range, do the following:<br />
1. Select the Configure>Scan Settings... menu item. The <strong>CyberCop</strong> <strong>Scanner</strong> Setup<br />
dialog box will open.<br />
2. On the Scan Settings tab, enable the Host Range radio button. Enter IP addresses<br />
(x.x.x.x where "x" is substituted with an IP number, 1-254) corresponding to<br />
target hosts on a network in the Range textbox. To learn how to specify a range of<br />
IP address, see the earlier section, “Entering a Range of IP Addresses.”<br />
3. Start a scan using the Scan>Begin Scan menu item. Alternatively, click the Begin<br />
Scan toolbar icon.<br />
Scanning Using a Host File<br />
To scan multiple hosts listed in a text file (also called a host file), do the following:<br />
1. Select the Configure>Scan Settings... menu item. The <strong>CyberCop</strong> <strong>Scanner</strong> Setup<br />
dialog box will open.<br />
2. On the Scan Settings tab, enable the Host File radio button. The File Name textbox<br />
will be enabled.<br />
3. The host file is a text file (.txt). You can edit the default host file, hosts.txt.<br />
Alternatively, you can create a new host file or load a different host file.<br />
• To create a new host file, enter a filename in the File Name textbox.<br />
• To load a different host file, click the "..."buttonnexttotheFileName<br />
textbox. The Open dialog box will be displayed, allowing you to load an<br />
existing host file (.txt).<br />
NOTE: If you cancel a scan before it is finished, <strong>CyberCop</strong> <strong>Scanner</strong> generates a<br />
text file UnScannedHosts.txt located at c:\Program Files\Network<br />
Associates\SMI Products\<strong>CyberCop</strong> <strong>Scanner</strong>. This text file lists hosts that were<br />
not yet scanned when the scan was canceled. You can use this text file as a host<br />
file if you wish to resume the scan later.<br />
4. To edit a host file, enter a filename in the File Name textbox. Then click the Edit<br />
File button. The text file will open in Notepad, allowing you to make changes to<br />
the file. Save the changes to the text file and then close the file.<br />
To learn how to specify a range of IP addresses, see the earlier section, “Entering<br />
a Range of IP Addresses.”<br />
5. Then start a scan by selecting the Scan>Begin Scan menu item. Alternatively,<br />
click the Begin Scan toolbar icon.<br />
<strong>CyberCop</strong> <strong>Scanner</strong> <strong>Getting</strong> <strong>Started</strong> <strong>Guide</strong> 3-35
<strong>Getting</strong> <strong>Started</strong>: Performing a Scan<br />
Using Fix It Modules<br />
Certain modules are "Fix It" modules used in conjunction with Windows NT Registry<br />
checks. These modules have a Fix It portion that can perform a fix to Registry values<br />
to correct potential vulnerabilities detected by <strong>CyberCop</strong> <strong>Scanner</strong>. After a scan is<br />
completed, you can enable the Fix It portion for individual vulnerabilities and hosts.<br />
Then you can perform the fixes.<br />
NOTE: Important! The Fix It modules work in conjunction with specific<br />
vulnerability checks on scanned machines. Fix It modules can be used to fix<br />
vulnerable registry settings found on scanned machines. As with any change to<br />
Windows registry settings, if the Fix It modules are not used correctly they can<br />
potentially have a serious impact on the normal functioning of scanned systems<br />
including (but not limited to) greatly restricted ability to participate on a<br />
network. You must keep a careful record of the machines to which you apply Fix<br />
It modules so that you can, if necessary, undo the changes later. <strong>CyberCop</strong><br />
<strong>Scanner</strong> does not log or report the machines on which Fix It modules were<br />
applied, nor does it log or report on whether or not the fix was successful on these<br />
machines.<br />
NOTE: In order to use the Fix It modules to perform a fix, you must have<br />
domain administrator access on the target host.<br />
To enable or disable the Fix It portion, you use the Scan Results tab after a scan is<br />
completed. The Scan Results tab displays an indexed tree view of vulnerabilities found<br />
for each host scanned. If a host has vulnerabilities for which a Fix It module is<br />
available, the host node in the indexed tree view displays a wrench icon.<br />
When you expand a node which displays a wrench icon, you will see that some of the<br />
vulnerabilities listed also display a wrench icon. If a vulnerability displays a wrench<br />
icon, then a Fix It module is available for that vulnerability.<br />
NOTE: You can also see which modules have Fix It portions on the Current<br />
Configuration tab of <strong>CyberCop</strong> <strong>Scanner</strong>. In the Selected Modules table, in the<br />
Fix column, a Yes value indicates that a Fix It portion is available. (A Yes value<br />
in this column does not mean that the Fix It portion has been enabled.)<br />
To use Fix It modules, you follow these general steps:<br />
1. First perform a scan and then view results to determine if any vulnerabilities that<br />
were found have Fix It modules associated with them.<br />
2. Enable or disable the Fix It portions of these modules for the vulnerabilities and<br />
hosts you choose.<br />
3-36 Chapter 3
<strong>Getting</strong> <strong>Started</strong>: Performing a Scan<br />
3. Begin a second scan to apply the enabled fixes. You must have domain<br />
administrator access on the target hosts in order to apply the fixes.<br />
Performing an Initial Scan<br />
To perform a scan to determine if Fix It modules can be used, follow these steps:<br />
1. First select modules that have Fix It portions for a scan. To see whether a selected<br />
module has a Fix It portion, switch to the Current Configuration tab. In the<br />
Selected Modules table, in the Fix column, a Yes value indicates that a Fix It<br />
portion is available. For example, certain modules in module classes 16000,<br />
18000, and 24000 have Fix It portions.<br />
2. Next perform a scan using these and any other modules you wish to run. You can<br />
view results in real time during a scan using the Scan Results tab.<br />
3. After the scan is completed, look at the results displayed on the Scan Results tab.<br />
If a host node in the indexed tree view displays a wrench icon, expand the node to<br />
list the vulnerabilities found on that host.<br />
Vulnerabilities for which a Fix It module is available will also display a wrench<br />
icon.<br />
Next you will enable or disable the Fix It portions for these vulnerabilities as desired.<br />
Enabling and Disabling Fix It Modules<br />
To enable and disable the Fix It portions of modules, you use the Scan Results tab.<br />
Follow these steps:<br />
1. In the Vulnerabilities listbox, expand a host node in the indexed tree view which<br />
displays a wrench icon. Individual fixes available for vulnerabilities found on that<br />
host will also display wrench icons.<br />
2. To enable all fixes for a particular host, click the wrench icon corresponding to the<br />
host node. A blue checkmark will be added over the wrench icon to indicate that<br />
all the available fixes are enabled for that host. Each available fix for that host will<br />
also display a wrench icon with a blue checkmark.<br />
3. To disable all fixes for a host, click on the wrench icon corresponding to the host<br />
node again to remove the blue checkmark. All the available fixes for that host will<br />
be disabled.<br />
4. To enable or disable individual fixes for vulnerabilities found on a host, in the<br />
expanded tree view, click a wrench icon for an individual fix to either enable it<br />
(blue checkmark added) or disable it (no blue checkmark).<br />
<strong>CyberCop</strong> <strong>Scanner</strong> <strong>Getting</strong> <strong>Started</strong> <strong>Guide</strong> 3-37
<strong>Getting</strong> <strong>Started</strong>: Performing a Scan<br />
Alternatively, right-click in the Vulnerabilities listbox to open a context menu<br />
containing menu items which allow you to select and unselect fixes. For more<br />
information about the context menu items, refer to <strong>CyberCop</strong> <strong>Scanner</strong> Help, online<br />
help for <strong>CyberCop</strong> <strong>Scanner</strong>, accessible by selecting the Help>Help Topics... menu<br />
item.<br />
Next you will run the enabled Fix It modules to perform the fixes.<br />
Running Fix It Modules<br />
To run the Fix It portions of the selected modules, choose the Scan>Begin Fix menu<br />
item. Alternatively, click the Begin Fix toolbar icon.<br />
The Scan Progress tab will move to the front. In the Scan Progress Messages pane, the<br />
following information will be listed:<br />
• the host to which a fix is being applied<br />
• the module number of the fix<br />
The Scan Progress tab will report progress as the fixes are performed.<br />
3-38 Chapter 3
Exiting <strong>CyberCop</strong> <strong>Scanner</strong><br />
<strong>Getting</strong> <strong>Started</strong>: Performing a Scan<br />
To exit <strong>CyberCop</strong> <strong>Scanner</strong>, select the File>Exit menu item. <strong>CyberCop</strong> <strong>Scanner</strong> will<br />
close.<br />
<strong>CyberCop</strong> <strong>Scanner</strong> <strong>Getting</strong> <strong>Started</strong> <strong>Guide</strong> 3-39
<strong>Getting</strong> <strong>Started</strong>: Performing a Scan<br />
WheretoGoFromHere<br />
You should now be familiar with the setup procedures required for performing a scan.<br />
You can:<br />
• configure a scan and select which modules and module classes are used for a scan<br />
• modify a scan configuration file, or load a different one<br />
• create scan settings templates and module configuration templates<br />
• start a scan or a probe<br />
• view currently running modules, and stop a currently running module if you<br />
choose to<br />
• view results during a scan<br />
• stop a scan in progress<br />
You can now go to Chapter 4, “Working With Scan Results.” Chapter 4 will lead you<br />
through the basics of viewing your scan results, and generating scan reports and<br />
network maps.<br />
3-40 Chapter 3
4Working With Scan Results<br />
4<br />
Introduction<br />
In Chapter 3, you learned how to perform a scan of your local host as well as how to<br />
scan multiple hosts. This chapter will lead you through working with your scan results.<br />
You will learn the following:<br />
• how to save scan results in a local event database<br />
• how to view scan results during a scan, and how to view scan results after a scan<br />
in the event database using the report viewer<br />
• how to query the event database to filter and sort scan records<br />
• how to generate and preview reports, including differential reports, and how to<br />
customize reports to specify which scan records are included in a report and how<br />
database fields will be sorted<br />
• how to export and print reports<br />
• how to generate a network map, which is a visual map of the scanned network<br />
Once you complete this chapter, you will be familiar with the above ways to work with<br />
your scan data.<br />
<strong>CyberCop</strong> <strong>Scanner</strong> <strong>Getting</strong> <strong>Started</strong> <strong>Guide</strong> 4-1
Working With Scan Results<br />
Saving Scan Results<br />
This section describes how scan results are saved in a local event database and explains<br />
how to specify which event database to use for storing results.<br />
About Scan Results<br />
During a scan, <strong>CyberCop</strong> <strong>Scanner</strong> scan results are automatically saved in a local event<br />
database. Data from unfinished scans is also saved in the event database. By default,<br />
the event database is named events.mdb and is located at c:\Program Files\Network<br />
Associates\SMI Products\SMI\Shared\EventDB.<br />
Scan results may also include a network map, which is a 3-dimensional rendition of<br />
links between the local host and target hosts. By default, the network map is saved with<br />
the filename results.map, located at c:\Program Files\Network Associates\SMI<br />
Products\<strong>CyberCop</strong> <strong>Scanner</strong>.<br />
Unless you specify otherwise, scan results and network maps are saved in the default<br />
locations given above. For example, if you perform ten scans, the results of the ten<br />
scans are appended to the default event database, events.mdb. If you want to store the<br />
results of each scan separately, you can specify a separate event database for each scan.<br />
This way, you can open different event databases as you wish to generate reports.<br />
After a scan, you can view scan results stored in the event database using the SMI<br />
report viewer. You can also generate reports that can be printed and exported into other<br />
applications. You can view network maps using the Reports>Network Map... menu<br />
item of <strong>CyberCop</strong> <strong>Scanner</strong>.<br />
About the Event Database<br />
The Security Management Interface stores <strong>CyberCop</strong> <strong>Scanner</strong> security results in a<br />
local event database. The database is called an event database because it stores a<br />
record of each security event, or vulnerability, logged by <strong>CyberCop</strong> <strong>Scanner</strong>.<br />
By default, the local event database is called events.mdb and it is located at<br />
c:\Program Files\Network Associates\SMI Products\SMI\Shared\EventDB. This<br />
default event database is used both for saving scan results and generating reports. If<br />
you wish, you may specify a different event database for saving scan results. In this<br />
way, you can save results from different scans in separate event databases. You may<br />
also specify which event database is used to generate a report.<br />
On the SMI console tree of the Security Management Interface, the local event<br />
database is represented by a node called Event Database (events.mdb), whichis<br />
listed under the Services node.<br />
4-2 Chapter 4
Working With Scan Results<br />
Saving Results in an Event Database<br />
By default, scan results are automatically saved in the local event database<br />
events.mdb, located at c:\Program Files\Network Associates\SMI<br />
Products\SMI\Shared\EventDB. You may specify a different event database where the<br />
results of the next scan will be saved. You can do this in two ways:<br />
• from within <strong>CyberCop</strong> <strong>Scanner</strong>, using the Configure>Scan Settings... menu item<br />
• from within the SMI console window, using the AgentInfo utility<br />
Specifying an Event Database for Saving Results:<br />
In <strong>CyberCop</strong> <strong>Scanner</strong><br />
To specify an event database for saving results from within <strong>CyberCop</strong> <strong>Scanner</strong>, follow<br />
these steps:<br />
1. From within <strong>CyberCop</strong> <strong>Scanner</strong>, select the Configure>Scan Settings... menu<br />
item. The <strong>CyberCop</strong> <strong>Scanner</strong> Setup dialog box will open, with the Scan Settings<br />
tab in front.<br />
2. On the Scan Settings tab, in the Scan Results textbox, the default output database<br />
will be listed. Click the Browse button to specify a different event database name.<br />
3. Enter the name of the event database you wish to use to store results for the next<br />
scan. You may choose an existing event database or specify a new one. The event<br />
database will be given a .mdb file extension. Then click Save.<br />
4. On the Scan Settings tab, click Apply to apply the changes. Or, click OK to apply<br />
the changes and also close the dialog box.<br />
During the next scan, <strong>CyberCop</strong> <strong>Scanner</strong> security results will be stored in the event<br />
database you specified.<br />
Specifying an Event Database for Saving Results:<br />
In the SMI Console Window<br />
To specify an event database for saving results from within the SMI console window,<br />
follow these steps:<br />
1. Open the SMI console window using the Start menu (Start>Programs>Network<br />
Associates>Security Management Interface).<br />
2. ClickontheWorkspace>Local Computer>AgentInfo>Event<br />
Configuration>Database node, where Local Computer is the host name of your<br />
local computer.<br />
The right pane of the SMI console window will display screen controls allowing<br />
you to change the default path to the local event database.<br />
<strong>CyberCop</strong> <strong>Scanner</strong> <strong>Getting</strong> <strong>Started</strong> <strong>Guide</strong> 4-3
Working With Scan Results<br />
3. Under the Database Path textbox, click the Change... button. The Database Path<br />
textbox will be enabled, allowing you to specify a different event database where<br />
security results will be saved.<br />
4. Enter the name and location of the event database you wish to use to store results<br />
for the next scan. The event database will be given a .mdb file extension. Then<br />
click OK.<br />
During the next scan, <strong>CyberCop</strong> <strong>Scanner</strong> security results will be stored in the event<br />
database you specified.<br />
4-4 Chapter 4
Working With Scan Results<br />
Configuring an Event Database<br />
From within the SMI console of the Security Management Interface, you can configure<br />
an event database to do the following:<br />
• specify where <strong>CyberCop</strong> <strong>Scanner</strong> security results will be stored for the next scan<br />
• enable automatic event database cleanup of events older than a specified age<br />
NOTE: Event forwarding to a remote event database is not supported in this<br />
release of <strong>CyberCop</strong> <strong>Scanner</strong>.<br />
To enable automatic cleanup of old events in an event database, do the following:<br />
1. Open the SMI console window using the Start menu (Start>Programs>Network<br />
Associates>Security Management Interface).<br />
2. On the SMI console tree, select the Workspace>Local<br />
Computer>AgentInfo>Event Configuration>Database node, where Local<br />
Computer is the host name of the local computer.<br />
The right pane of the SMI console window will display screen controls allowing<br />
you to change the database cleanup properties.<br />
3. Click the Change… button next to the Database Cleanup box.<br />
The Database Cleanup Settings dialog box will open, allowing you to specify the<br />
following cleanup settings:<br />
• the time when daily cleanups will begin<br />
• the age of events that will be removed<br />
4. Enable the checkbox to enable automatic database cleanup. Then click OK.<br />
<strong>CyberCop</strong> <strong>Scanner</strong> <strong>Getting</strong> <strong>Started</strong> <strong>Guide</strong> 4-5
Working With Scan Results<br />
Viewing Scan Results<br />
This section explains how to view scan results during a scan and how to view results<br />
stored in an event database after a scan is completed. This section also describes the<br />
four tabs of the report viewer and explains how they are used to view results. You can<br />
also query the event database to filter and sort scan records, as described below.<br />
Viewing Results During a Scan<br />
You can view scan results in real time during a scan using the Scan Results tab of<br />
<strong>CyberCop</strong> <strong>Scanner</strong>. You can hide and redisplay the Scan Results tab.<br />
To view results during a scan on the Scan Results tab, follow these steps:<br />
1. To display the Scan Results tab, do the following:<br />
• Select the Configure>Application Settings... menu item. The Application<br />
Settings dialog box will open.<br />
• In the Main Screen Display Attributes section of the dialog box, enable the<br />
Show Scan Results checkbox. The Scan Results tab will be displayed.<br />
NOTE: For large scans, it is recommended that the Show Scan Results checkbox<br />
be disabled. Otherwise, resource starvation may occur that can cause problems<br />
during a scan.<br />
The Scan Results tab includes three listboxes: Vulnerabilities, Module Output,<br />
and Module Descriptions. You can expand one listbox relative to another by<br />
clicking and dragging the horizontal or vertical line which separates them.<br />
2. On the Scan Results tab, in the Vulnerabilities listbox, an indexed tree view lists<br />
each host scanned. Click on a node in the tree view to expand it. A list of the<br />
vulnerabilities found on that host will be displayed. Vulnerabilities are listed by<br />
module number.<br />
3. Click on a vulnerability module number to highlight it. A detailed description of<br />
the module will be displayed in the Module Description listbox, including<br />
suggestions for fixes. Any module output generated by that module running on the<br />
selected host will be displayed in the Module Output listbox.<br />
4. Certain modules are "Fix It" modules used in conjunction with Windows NT<br />
Registry checks. These modules have a Fix It portion that can perform a fix to<br />
Registry values to correct potential vulnerabilities detected by <strong>CyberCop</strong> <strong>Scanner</strong>.<br />
4-6 Chapter 4
Working With Scan Results<br />
NOTE: Important! The Fix It modules work in conjunction with specific<br />
vulnerability checks on scanned machines. Fix It modules can be used to fix<br />
vulnerable registry settings found on scanned machines. As with any change to<br />
Windows registry settings, if the Fix It modules are not used correctly they can<br />
potentially have a serious impact on the normal functioning of scanned systems<br />
including (but not limited to) greatly restricted ability to participate on a<br />
network. You must keep a careful record of the machines to which you apply Fix<br />
It modules so that you can, if necessary, undo the changes later. <strong>CyberCop</strong><br />
<strong>Scanner</strong> does not log or report the machines on which Fix It modules were<br />
applied, nor does it log or report on whether or not the fix was successful on these<br />
machines.<br />
NOTE: In order to use the Fix It modules to perform a fix, you must have<br />
domain administrator access on the target host.<br />
If a host has vulnerabilities for which a Fix It module is available, the host node will<br />
display a wrench icon. Expand a node which displays a wrench icon. Vulnerabilities<br />
found on that host for which a Fix It module is available will also be shown in the tree<br />
view with a wrench icon. Modules that do not display a wrench icon do not have a Fix<br />
It portion.<br />
After a scan is completed, you can enable the Fix It portion for individual<br />
vulnerabilities and hosts. Then you can perform the fixes. For information on enabling<br />
and running Fix It modules, see the section, “Using Fix It Modules,” in Chapter 3.<br />
<strong>CyberCop</strong> <strong>Scanner</strong> <strong>Getting</strong> <strong>Started</strong> <strong>Guide</strong> 4-7
Working With Scan Results<br />
Viewing Results in an Event Database<br />
After a scan is completed, you can view events in the local event database using the<br />
report viewer. The report viewer is located in the SMI console window of the Security<br />
Management Interface. You can open the report viewer in two ways:<br />
• from within <strong>CyberCop</strong> <strong>Scanner</strong> using the Reports>View Results... menu item<br />
• from within the SMI console using the Workspace>Services>Event Database<br />
(events.mdb)><strong>CyberCop</strong> <strong>Scanner</strong> node on the console tree<br />
Opening the Report Viewer: In <strong>CyberCop</strong> <strong>Scanner</strong><br />
To open the report viewer from within <strong>CyberCop</strong> <strong>Scanner</strong>, do the following:<br />
1. From within <strong>CyberCop</strong> <strong>Scanner</strong>, select the Reports>View Results... menu item.<br />
A dialog box will open allowing you to select a pre-existing event database.<br />
2. Select an event database and then click Open. The SMI console window will open,<br />
displaying the report viewer.<br />
• If you selected the default event database events.mdb, the report viewer will<br />
be displayed with the Results List tab in front.<br />
• If you selected a different event database, the name of the event database will<br />
be displayed as a single node labeled Event Database (filename.mdb),<br />
where filename.mdb is the name of the event database you selected.<br />
Double-click on this node to expand it, and then double-click on the<br />
<strong>CyberCop</strong> <strong>Scanner</strong> node. The report viewer will be displayed, with the<br />
Results List tab in front, allowing you to select a report template.<br />
3. When the report viewer opens, the SMI console tree will be hidden. If you wish,<br />
you can display the SMI console tree using the Show/Hide Console Tree toolbar<br />
icon.<br />
Opening the Report Viewer: In the SMI Console Window<br />
To open the report viewer from within the SMI console window, do the following:<br />
1. Start the SMI console window using the Start menu (Start>Programs>Network<br />
Associates>Security Management Interface).<br />
2. On the SMI console tree, click on the Workspace>Services>Event Database<br />
(events.mdb)><strong>CyberCop</strong> <strong>Scanner</strong> node.<br />
The report viewer will be displayed in the right pane of the SMI console window,<br />
with the Results List tab in front, allowing you to select a report template. The<br />
filename of the event database currently being viewed is indicated by the name of<br />
the node:<br />
4-8 Chapter 4
Working With Scan Results<br />
• If the node is named Event Database (events.mdb), the report viewer will<br />
display events in the default event database, called events.mdb and located in<br />
the directory c:\Program Files\Network Associates\SMI<br />
Products\SMI\Shared\EventDB.<br />
• If the node lists a different event database as Event Database<br />
(filename.mdb), where filename.mdb is the name of the event database you<br />
selected, the report viewer will display events in that database.<br />
3. You can change which event database is opened in the report viewer by doing the<br />
following:<br />
• In the SMI console window, select the Snap-in>Settings... menu item. The<br />
Settings dialog box will open.<br />
• Switch to the Event Database tab. In the Event Database Path textbox, enter<br />
the path to the event database whose results you wish to view. Or, click the<br />
Browse button to select an event database.<br />
• Then click OK. You will be prompted to restart the SMI console. To do this,<br />
click the Close button at the top right of the SMI console window. Then<br />
restart the SMI console using the Start menu, and repeat Step 2 above.<br />
<strong>CyberCop</strong> <strong>Scanner</strong> <strong>Getting</strong> <strong>Started</strong> <strong>Guide</strong> 4-9
Working With Scan Results<br />
Using the Report Viewer Tabs<br />
The Results Tab<br />
The report viewer includes four tabs which allow you to view security results stored in<br />
the local event database, select a report template to generate a report, and query the<br />
event database. You can also filter and sort results in the event database.<br />
The report viewer is located in the SMI console window of the Security Management<br />
Interface. You can open the report viewer in two ways:<br />
• from within <strong>CyberCop</strong> <strong>Scanner</strong> by selecting the Reports>View Results... menu<br />
item<br />
• from within the SMI console by double-clicking the<br />
Workspace>Services>Event Database (events.mdb)><strong>CyberCop</strong> <strong>Scanner</strong><br />
node on the SMI console tree<br />
The following four tabs are described further below:<br />
• Results tab<br />
• Report List tab<br />
• Chart tab<br />
• Query tab<br />
The Results tab displays information about each security result, or vulnerability,<br />
logged by <strong>CyberCop</strong> <strong>Scanner</strong> in the event database. This feature allows you to view<br />
results in the event database without generating a report.<br />
On the Results tab, each row represents one database record. Each column represents<br />
a database field within a record. Note that some database fields on the Results tab are<br />
not used by <strong>CyberCop</strong> <strong>Scanner</strong>. These fields will be blank. You can click and drag<br />
columns (to the left and right) on the Results tab to resize them. You can also click and<br />
drag rows (up and down) to resize them.<br />
You can filter and sort the results displayed on the Results tab by querying the event<br />
database. In this way, you can select which database fields are displayed, in which<br />
order. To learn more about querying the database, see the section, “Querying an Event<br />
Database,” later in this chapter.<br />
4-10 Chapter 4
Working With Scan Results<br />
The Report List Tab<br />
The Report List tab allows you to generate a report. The Report List tab lists several<br />
pre-defined report templates for use with <strong>CyberCop</strong> <strong>Scanner</strong>, described in Table 4-1<br />
below.<br />
Table 4-1. The report templates listed on the Report List tab.<br />
This report template<br />
Differential Report by<br />
Host<br />
Differential Report by<br />
Scan Session<br />
Graphical Summary<br />
Report by<br />
Complexity<br />
Report by Ease of Fix<br />
Report by Host<br />
Report by Impact<br />
Report by OS Type<br />
Report by Policy<br />
Violation<br />
Report by Popularity<br />
Report by Risk<br />
Factor<br />
Does this<br />
Allows you to compare results for two hosts specified<br />
by IP address.<br />
Allows you to compare results for two scan sessions<br />
specified by date and time.<br />
Provides a graphical summary report with pie charts<br />
for different report categories (Complexity, Ease of<br />
Fix, Impact, Popularity, Risk Factor, Root Cause).<br />
For example, the Risk Factor pie chart shows the<br />
proportion of vulnerabilities found with Low,<br />
Medium, and High risk factors. Graphical Summary<br />
is a management report which contains only general<br />
network status information for a scan.<br />
Organizes results by the difficulty involved in<br />
exploiting a vulnerability (Low, Medium, High).<br />
Organizes results by the ease of fixing a vulnerability<br />
(Trivial, Simple, Moderate, Difficult, Infeasible).<br />
Organizes results by host IP address.<br />
Organizes results by the specific threat posed by a<br />
vulnerability (System Integrity, Confidentiality,<br />
Accountability, Data Integrity, Authorization,<br />
Availability, Intelligence).<br />
Organizes results by operating system type.<br />
Organizes results by type of policy violation.<br />
Organizes results by the likelihood that a<br />
vulnerability will be exploited (Obscure, Widespread,<br />
Popular).<br />
Organizes results by the severity of the threat posed<br />
by a vulnerability (Low, Medium, High).<br />
<strong>CyberCop</strong> <strong>Scanner</strong> <strong>Getting</strong> <strong>Started</strong> <strong>Guide</strong> 4-11
Working With Scan Results<br />
Report by Root<br />
Cause<br />
Report by Scan<br />
Session<br />
Report by<br />
Vulnerability ID<br />
Vulnerability <strong>Guide</strong><br />
Organizes results by the underlying cause of a<br />
vulnerability (Configuration, Implementation,<br />
Design).<br />
Organizes results by scan session date and time.<br />
Organizes results by module number.<br />
(Not a report template) Displays an indexed tree view<br />
of all modules in the Vulnerability Database. Click on<br />
a module number to view a detailed module<br />
description. The Vulnerability <strong>Guide</strong> can also be<br />
printed as a report.<br />
On the Report List tab, when you select a report template, you are asked whether you<br />
wish to customize the report. Customizing a report allows you to specify which<br />
database records will be included in the report, and which database fields will be<br />
included for those records. You can also specify how the database fields will be sorted<br />
(i.e., in which order they will be displayed). You can also choose to remove repeated<br />
information from the body of a report and display it in an appendix at the end of the<br />
report. To learn more about customizing a report, see the section, “Customizing a<br />
Report,” later in this chapter.<br />
When you generate a report, it is first displayed in a preview window which includes<br />
an indexed tree view of sections in the report. You can use the indexed tree view to<br />
navigate quickly to different sections in the report. You can also filter the previewed<br />
report to create sub-reports for easier viewing. To learn more about using the preview<br />
window, see the section, “Previewing a Report,” later in this chapter.<br />
After generating a report, you can print it or export it for use by another application.<br />
Reports can be exported in a variety of formats, including DOC (Microsoft Word),<br />
RTF (Rich Text Format), and HTML (Web Browser). To learn how to print a report,<br />
see the section, “Printing a Report,” later in this chapter. To learn more about exporting<br />
reports for use by another application, see the section, “Exporting a Report,” later in<br />
this chapter.<br />
4-12 Chapter 4
Working With Scan Results<br />
The Chart Tab<br />
The Chart tab provides a graphical representation of the database fields displayed on<br />
the Results tab.<br />
NOTE: The Chart tab is intended for use with other NAI security applications.<br />
It is not intended for use with <strong>CyberCop</strong> <strong>Scanner</strong>.<br />
The Query Tab<br />
The Query tab allows you to select which database fields in the event database are<br />
displayed on the Results tab. You can also sort these fields in the order you choose.<br />
The Query tab supports any valid SQL statement. To learn more about querying an<br />
event database, see the section, “Querying an Event Database,” later in this chapter.<br />
<strong>CyberCop</strong> <strong>Scanner</strong> <strong>Getting</strong> <strong>Started</strong> <strong>Guide</strong> 4-13
Working With Scan Results<br />
Querying an Event Database<br />
You can filter and sort the scan records displayed on the Results tab by querying the<br />
event database. In this way, you can select which database fields (columns) are<br />
displayed and in which sort order. To query the event database, you use the Query tab<br />
of the report viewer. The Query tab supports any valid SQL statement.<br />
To use the Query tab to query the event database, do the following:<br />
1. In the report viewer, switch to the Query tab. Each column on the Query tab<br />
represents a filter for data displayed on the Results tab.<br />
2. On the Query tab, in the Versions box at the top right of the screen, make sure that<br />
the current version number of <strong>CyberCop</strong> <strong>Scanner</strong> is selected and highlighted.<br />
3. At the far left of the Query tab, note the following rows which are labeled:<br />
• Field: Specifies which database fields (columns) are displayed on the Results<br />
tab. If an asterisk appears in the upper left, then all columns will be displayed<br />
on the Results tab.<br />
• Sort: Specifies the sort order (ascending or descending) of data displayed on<br />
the Results tab.<br />
• Visible: Specifies whether the data will be included (filtered in) or excluded<br />
(filtered out) on the Results tab.<br />
• Criteria: Specifies criteria for displaying data on the Results tab. The query<br />
expression must be entered into the cell manually.<br />
• Or: Specifies alternative criteria for displaying data on the Results tab.<br />
4. To specify which database fields (columns) to display on the Results tab, on the<br />
Query tab, click in the first cell of the first column, in the row labeled Field.<br />
A dropdown list will be displayed. The list includes all the database fields in the<br />
event database. Select one database field to display. The database field you select<br />
will be listed in the cell.<br />
You can repeat this step for multiple columns on the Query tab, to select additional<br />
database fields to be included.<br />
5. Next you can specify a sort order for the specified data. Click in the second cell of<br />
the first column, in the row labeled Sort.<br />
A dropdown list will be displayed. Select either an ascending or descending sort<br />
order. The sort order you choose will be displayed in the cell.<br />
4-14 Chapter 4
Working With Scan Results<br />
NOTE: The Query tab supports sorting of numeric fields and small comment<br />
fields in ascending or descending order. Sorting of Memo fields (large text fields<br />
such as module descriptions) is not supported. To avoid sorting a Memo field,<br />
leave the Sort cell underneath it blank.<br />
You can repeat this step for multiple columns on the Query tab, for each database<br />
field you have selected. The data will first be sorted using the sort order specified<br />
in the first column, and then sorted using the sort order specified in the second<br />
column, and so on for all columns.<br />
6. To specify whether data will be included (filtered in) or excluded (filtered out) on<br />
the Results tab, click in the third cell of the first column, in the row labeled<br />
Visible.<br />
An X will appear, indicating that the data will be included (filtered in). Click again<br />
to remove the X if you wish the data to be excluded (filtered out).<br />
7. Next you can specify filtering criteria for each filter column using the Criteria and<br />
Or: rows. In this way, you can specify criteria in the form "Include (or exclude)<br />
the data only if this applies, or this, or this."<br />
For example, to specify the criterion include (or exclude) the data "only if the IP<br />
address equals x.x.x.x," where x.x.x.x is the IP address, you would enter the<br />
following in the Criteria field:<br />
="10.0.0.1"<br />
where 10.0.0.1 is the IP address.<br />
NOTE: The query expression you enter must use the proper syntax. The Query<br />
tab supports any valid SQL statement.<br />
8. Switch to the Results tab. The data you specified using the Query tab will be<br />
displayed.<br />
<strong>CyberCop</strong> <strong>Scanner</strong> <strong>Getting</strong> <strong>Started</strong> <strong>Guide</strong> 4-15
Working With Scan Results<br />
Generating Scan Reports<br />
This section gives step-by-step procedures for generating, customizing, and<br />
previewing scan reports, including differential reports. It also explains how to export<br />
and print reports.<br />
Selecting an Event Database to Generate a Report<br />
By default, the report viewer uses the local event database events.mdb to display<br />
<strong>CyberCop</strong> <strong>Scanner</strong> results and generate reports. You can select a different, pre-existing<br />
event database to view results and generate a report. You can do this in two ways:<br />
• from within <strong>CyberCop</strong> <strong>Scanner</strong> using the Reports>View Results... menu item<br />
• from within the SMI console using the Snap-in>Settings... menu item<br />
Specifying an Event Database to Generate a Report:<br />
In <strong>CyberCop</strong> <strong>Scanner</strong><br />
To specify an event database from within <strong>CyberCop</strong> <strong>Scanner</strong> to view results and<br />
generate a report, do the following:<br />
1. In <strong>CyberCop</strong> <strong>Scanner</strong>, select the Reports>View Results… menu item. A dialog<br />
box will open allowing you to select a pre-existing event database.<br />
2. Select the event database whose results you wish to view and use to generate a<br />
report, and then click Open. The SMI console window will open, displaying the<br />
report viewer.<br />
3. If you selected a different database from the default database, the name of the<br />
event database will be displayed as a single node labeled Event Database<br />
(filename.mdb), where filename.mdb is the name of the event database you<br />
selected. Double-click on this node to expand it, and then double-click on the<br />
<strong>CyberCop</strong> <strong>Scanner</strong> node.<br />
The report viewer will open, with the Results List tab in front, allowing you to select<br />
a report template. Results from the event database you selected will be used when you<br />
generate a report.<br />
4-16 Chapter 4
Working With Scan Results<br />
Specifying an Event Database to Generate a Report:<br />
In the SMI Console Window<br />
To specify an event database from within the SMI console window to view results and<br />
generate a report, do the following:<br />
1. Open the SMI console window using the Start menu (Start>Programs>Network<br />
Associates>Security Management Interface). The SMI console window will open,<br />
with the Workspace node highlighted.<br />
2. In the SMI console window, select the Snap-in>Settings… menu item. The<br />
Settings dialog box will open.<br />
3. Switch to the Event Database tab. In the Event Database Path textbox, enter the<br />
path to the event database whose results you wish to view and use to generate a<br />
report. Or, click the Browse button to select an event database.<br />
4. Then click OK. You will be prompted to restart the SMI console. To restart the<br />
SMI console, click the Close button at the top right of the SMI console window.<br />
Then restart the SMI console using the Start menu.<br />
Click on the Workspace node to expand it. Under the Workspace>Services node,<br />
the event database you selected will now be listed as a node labeled Event<br />
Database (filename.mdb), where filename.mdb is the name of the event database<br />
you selected. This event database will now be used to generate reports.<br />
5. To disconnect from an event database and reconnect to the default event database<br />
events.mdb, select the Snap-in>Settings… menu item. Then clear the textbox on<br />
the Event Database tab to leave it blank. Restart the SMI console.<br />
The default event database events.mdb will now be used to generate reports.<br />
<strong>CyberCop</strong> <strong>Scanner</strong> <strong>Getting</strong> <strong>Started</strong> <strong>Guide</strong> 4-17
Working With Scan Results<br />
Generating a Report<br />
A report is generated using results stored in the default event database events.mdb,<br />
unless you specify a different event database. You can choose from over ten predefined<br />
report types for displaying <strong>CyberCop</strong> <strong>Scanner</strong> results.<br />
To generate a report, follow these steps:<br />
1. Open the report viewer from within <strong>CyberCop</strong> <strong>Scanner</strong> by selecting the<br />
Reports>View Results... menu item<br />
The report viewer will open with the Report List tab in front.<br />
The different types of graphical and text-based reports you can generate will be<br />
listed by name. Following each report name is a brief description of the report. To<br />
learn more about the different report templates, see the section, “Using the Report<br />
Viewer Tabs,” earlier in this chapter.<br />
2. Select the report type you wish to generate by clicking on the report name. The<br />
Report Preview dialog box will open, asking if you wish to customize the report.<br />
3. Next you may customize the report, to specify which database records will be<br />
included, and how the database fields within those records will be sorted.<br />
Click No if you do not wish to customize the report. Click Yes if you wish to<br />
customize the report. To learn how to use the options for customizing a report, see<br />
the section, “Customizing a Report,” later in this chapter.<br />
NOTE: Differential reports must be customized. See the next section,<br />
“Generating a Differential Report,” for more information.<br />
4. Click OK to close the Report Preview dialog box. The report will be generated and<br />
displayed in the report viewer.<br />
NOTE: Reports displayed on the Report List tab are not automatically updated<br />
when <strong>CyberCop</strong> <strong>Scanner</strong> detects new security events. To update a report while<br />
viewing it on the Report List tab, click the Refresh icon on the toolbar.<br />
5. Next you may preview the generated report.<br />
To the left of the generated report, the Preview tab will be displayed. The Preview<br />
tab provides an indexed tree view of sections in the report. You can use the<br />
indexed tree view to quickly navigate to certain sections in a long report. You can<br />
also filter a report to generate sub-reports, and you can search a report. To learn<br />
more about using the Preview tab to navigate and search through a report, see the<br />
section, “Previewing a Report,” later in this chapter.<br />
4-18 Chapter 4
Working With Scan Results<br />
6. When you are finished previewing a report, you can print it, export it, or close it.<br />
To learn about printing and exporting a report, see the sections, “Printing a<br />
Report” and “Exporting a Report,” later in this chapter.<br />
To close a report, right-click on the report to open a context menu and select the<br />
Close command. The list of report types will be redisplayed, allowing you to<br />
select a different report type.<br />
NOTE: When you generate and preview a report on the Report List tab, it will<br />
not be saved when you switch to another tab. Before switching tabs after<br />
generating a report, it is necessary to print or export the report.<br />
<strong>CyberCop</strong> <strong>Scanner</strong> <strong>Getting</strong> <strong>Started</strong> <strong>Guide</strong> 4-19
Working With Scan Results<br />
Generating a Differential Report<br />
You can generate a differential report which compares scan results for two host IP<br />
addresses or two scan sessions. To generate a differential report, you select one of the<br />
following report templates on the Report List tab of the report viewer:<br />
• Differential Report by Host<br />
• Differential Report by Scan Session<br />
To generate a differential report, do the following:<br />
1. On the Report List tab, click on the differential report template you wish to use to<br />
generate a report. The Report Preview dialog box will open, allowing you to<br />
customize the report.<br />
The options for customizing the report are similar to those described in the<br />
section, “Customizing a Report.” However, on the Data Selection tab, you are<br />
now given the option to select either two hosts or two scan sessions to compare.<br />
2. If you selected Differential Report by Host, on the Data Selection tab, the Host IP<br />
Address tab will be displayed. Select a host IP address from each of the two<br />
dropdown lists to compare.<br />
You may specify other filtering and sorting criteria in addition to the comparison<br />
criteria, as for other report templates.<br />
3. If you selected Differential Report by Scan Session, on the Data Selection tab, the<br />
Scan Session tab will be displayed. Select a scan session from each of the two<br />
dropdown lists to compare.<br />
You may specify other filtering and sorting criteria in addition to the comparison<br />
criteria, as for other report templates.<br />
4. Click OK to close the Report Preview dialog box. The report will be generated and<br />
displayed in the preview window. You can preview the report as described in the<br />
section “Previewing a Report.”<br />
NOTE: Differential reports take time to generate for large reports.<br />
4-20 Chapter 4
Working With Scan Results<br />
Customizing a Report<br />
Customizing a report allows you to specify which database scan records to include in<br />
the report, and which database fields to include for those records. You can also specify<br />
how the database fields will be sorted (i.e., in which order they will be displayed). In<br />
addition, you can choose to remove repeated information from the body of a report and<br />
display it in an appendix at the end of the report.<br />
For example, you can specify records to include according to their host IP addresses<br />
and scan session date and time. Then you can select which database fields will be<br />
included for each record, such as risk factor and OS type. Finally you can specify the<br />
sort order for this information, such as sorting by OS type first, and then vulnerability<br />
ID. Information in the report will then be displayed in this order for each record.<br />
To customize a report, do the following:<br />
1. On the Report List tab, select the report type you wish to generate by clicking on<br />
the report name. The Report Preview dialog box will open, asking if you wish to<br />
customize the report.<br />
2. Click Yes to begin customizing the report. The three tabs listed below will be<br />
displayed.<br />
Data Selection tab: Allows you to specify which scan records to include in the<br />
report. Scan records are filtered according to the values in their database fields.<br />
You can filter for a single value or a range of values.<br />
• To add a database field to be filtered, in the Database Fields listbox, select the<br />
field to highlight it and then click Add. A new filtering tab will be displayed,<br />
allowing you to filter values for the selected database field. By default, the<br />
database field Scan Session is selected as a starting point, allowing you to<br />
filter for scan date and time.<br />
• To remove a database field from the filtering tabs, select the tab to move it to<br />
the front. Then click Delete.<br />
• To specify values for filtering a database field, click on a filtering tab to move<br />
it to the front. From the dropdown listbox, select a filtering operator (any<br />
value, equal to, one of, less than, between). Depending on the operator you<br />
choose, additional screen controls will be displayed allowing you to specify<br />
values. For example, a dropdown listbox may be displayed which lists the<br />
values you can choose from<br />
<strong>CyberCop</strong> <strong>Scanner</strong> <strong>Getting</strong> <strong>Started</strong> <strong>Guide</strong> 4-21
Working With Scan Results<br />
Fields tab: Allows you to specify which database fields within a record to include<br />
in the report. The Database Fields listbox shows which database fields are<br />
available to be included in the report. The Report Fields listbox shows which<br />
database fields will be included in the report. You can move database fields to and<br />
from the Report Fields listbox.<br />
• To add a database field to the Report Fields listbox to include it in the report,<br />
select it in the Database Fields listbox to highlight it. Then click Add. You<br />
can select more than one database field at a time.<br />
• To add all database fields, click Add All.<br />
• To delete a database field from the Report Fields listbox to exclude it from<br />
the report, select it in the Report Fields listbox to highlight it. Then click<br />
Delete.<br />
• To delete all database fields, click Delete All.<br />
• You can move repeated information (non-host-specific information such as<br />
module descriptions) from the body of the report into an appendix at the end<br />
of the report. To do this, in Display Options, enable the Appendix radio<br />
button. To keep repeated information in the body of the report, enable the<br />
Embedded in Report Section radio button.<br />
Group tab: Allows you to specify the sort order of database fields displayed in<br />
the report. For example, you can sort information by host IP address first, and then<br />
by vulnerability ID. The sort order will also be used to generate the indexed tree<br />
view on the Preview tab, which allows you to quickly navigate to sections in the<br />
report.<br />
The Database Fields listbox shows which database fields are available to sort by.<br />
The Sort Fields listbox shows which database fields will be used to sort by. You<br />
can move database fields up and down in the sort order. You can sort database<br />
fields in descending or ascending order.<br />
• To add a database field to sort by, select it in the Database Fields listbox to<br />
highlight it. Then click Add. You can add database fields to the Sort Fields<br />
listbox one at a time.<br />
• To delete a database field from the Sort Fields listbox, click it to highlight it.<br />
Then click Delete.<br />
• To change the sort order of database fields in the Sort Fields listbox, select a<br />
database field to highlight it. Then click Up or Down to move it up or down<br />
in the list.<br />
• To specify a descending or ascending sort order, enable the Descending Order<br />
or Ascending Order radio button.<br />
4-22 Chapter 4
Working With Scan Results<br />
3. When you have customized the report options as desired, click OK to close the<br />
Report Preview dialog box. The report will be generated and displayed in the<br />
report viewer.<br />
4. Next you may preview the generated report. To learn more about previewing a<br />
report and using the indexed tree view to navigate through the report, see the next<br />
section, “Previewing a Report.”<br />
NOTE: When you generate a report on the Report List tab, it will not be saved<br />
when you switch to another tab. Before switching tabs after generating a report,<br />
it is necessary to print or export the report.<br />
<strong>CyberCop</strong> <strong>Scanner</strong> <strong>Getting</strong> <strong>Started</strong> <strong>Guide</strong> 4-23
Working With Scan Results<br />
Previewing a Report<br />
When you generate a report, it is first displayed in preview window which allows you<br />
to preview the report before exporting or printing it. The preview window includes a<br />
Preview tab and toolbar icons which allow you to navigate and search through a<br />
report.<br />
Certain report templates support being indexed in a tree view in which nodes represent<br />
different sections of the report. The indexed tree view is displayed as a column under<br />
the Preview tab, to the left of the generated report. If you chose to customize the report<br />
before generating it, the indexed tree view will list sections in the report according to<br />
the sort order you specified.<br />
The preview window allows you to do the following:<br />
• navigate quickly to different sections of the report, using the indexed tree view<br />
• navigate through the report page by page; or navigate to the beginning or end of<br />
the report<br />
• filter the report to generate sub-reports for easier viewing<br />
• in some cases, search the report for certain information<br />
• refresh the report to include the latest results in the event database<br />
• export a report<br />
• print a report<br />
• resize the previewed report<br />
• hide and redisplay the indexed tree view<br />
To use the screen controls of the preview window, follow these steps:<br />
1. You can navigate through large reports using the indexed tree view. To display a<br />
particular section of a report, click on the node that has the name of the section<br />
you want to jump to. For example, depending on the report type, nodes on the tree<br />
view can represent scan session date and time, host IP address, vulnerability ID,<br />
or risk factor. You can expand the indexed tree view to list all the sections of a<br />
report.<br />
2. You can navigate through a report using the toolbar icons on the lowest toolbar.<br />
The arrow icons (< and >) allow you to navigate forward and backward, page by<br />
page. The beginning and end icons (|< and >|) allow you to jump to the beginning<br />
and end of a report.<br />
3. You can filter a report to generate sub-reports with their own indexed tree views.<br />
To filter a report, move the cursor over headings in the report until the cursor<br />
changes to a magnifying glass. Then double-click on the report heading.<br />
4-24 Chapter 4
Working With Scan Results<br />
A sub-report will be generated containing only the information pertaining to that<br />
heading. For example, if you click on a particular host IP address in a report, a<br />
sub-report with information pertaining only to that host will be generated. If you<br />
click on a particular vulnerability ID in a report, a sub-report containing<br />
information on the occurrence of that vulnerability during different scan sessions<br />
will be generated.<br />
A new tab will be added for the sub-report. When you click on the new tab, it will<br />
move to the front and a new indexed tree view will be displayed, allowing you to<br />
navigate through the sub-report.<br />
You can switch between the tabs to view different sub-reports, and you can switch<br />
back to the Preview tab to view the full report.<br />
To delete a sub-report, move its tab to the front. Then click the delete icon (X) on<br />
the lowest toolbar (on the far left).<br />
4. In some cases, you can search a report for certain information. To search a report,<br />
enter the search item in the textbox next to the binocular toolbar icon on the lowest<br />
toolbar. Then click the binocular toolbar icon to begin the search.<br />
NOTE: Only a full report on the Preview tab can be searched. Differential<br />
reports, sub-reports, and the appendix cannot be searched. Only certain report<br />
headings, such as host IP address and vulnerability ID, can be searched.<br />
5. To refresh a report with the latest results from the event database, switch to the<br />
Preview tab to view the full report. Then click the lightening bolt toolbar icon on<br />
the lowest toolbar.<br />
NOTE: The Preview tab must be in front in order to refresh a report.<br />
6. To export a report for use in another application, click the envelope toolbar icon<br />
on the lowest toolbar.<br />
7. To print a report, click the printer toolbar icon on the lowest toolbar.<br />
8. To resize a report in the preview window, use the percent size (%) dropdown list<br />
on the lowest toolbar. You can select a size from the dropdown list. You can also<br />
enter a different size in the textbox. To enter a different size, enter the percent size<br />
(%) in the textbox and then press the Tab key or click using the mouse.<br />
9. To hide and redisplay the indexed tree view, click the tree view icon on the lowest<br />
toolbar.<br />
10. When you are finished viewing the report, right-click on the report to open a<br />
context menu and select Close to close the report. The list of report types will be<br />
redisplayed, allowing you to generate another report type.<br />
<strong>CyberCop</strong> <strong>Scanner</strong> <strong>Getting</strong> <strong>Started</strong> <strong>Guide</strong> 4-25
Working With Scan Results<br />
NOTE: When you generate and preview a report on the Report List tab, it will<br />
not be saved when you switch to another report viewer tab. Before switching tabs<br />
after generating a report, it is necessary to print or export the report.<br />
4-26 Chapter 4
Working With Scan Results<br />
Exporting a Report<br />
Printing a Report<br />
To export a report, follow these steps:<br />
1. Click the Export toolbar icon, which is shown as an envelope. The Export dialog<br />
box will open, providing screen controls for exporting the report.<br />
2. From the Format listbox, select a desired report format. Example formats include<br />
DOC (Microsoft Word), RTF (Rich Text Format), and HTML (Web browser).<br />
3. In the Destination listbox, select the report destination. Destinations include:<br />
• Disk File for saving the report to your hard disk or a floppy disk.<br />
• Exchange Folder for saving the report to a folder in the Microsoft Exchange<br />
Server.<br />
• Lotus Notes Database for saving the report to a database.<br />
• Microsoft Mail for e-mailing the report.<br />
4. Click the OK button to continue. You will be prompted to enter information<br />
specific to the options you selected. For example, if you choose to export the<br />
report as a DOC file to the Disk File destination, you will be prompted to enter a<br />
filename and location on the disk for saving the report.<br />
You can print a report from the SMI report viewer using one of the following methods:<br />
• Click the Print icon on the toolbar.<br />
• From the Snap-in menu, select Print.<br />
<strong>CyberCop</strong> <strong>Scanner</strong> <strong>Getting</strong> <strong>Started</strong> <strong>Guide</strong> 4-27
Working With Scan Results<br />
Generating Network Maps<br />
A network map is a 3-dimensional rendition of a network, including hosts, targets, and<br />
routers. Network maps are generated during a scan when module no. 1041(Trace<br />
Route to Host) is selected. You can verify whether module no. 1041 is selected using<br />
the Configure>Module Settings… menu item.<br />
Network maps are also generated when you scan a network using the Scan>Begin<br />
Probe menu item.<br />
The default filename for a network map is listed in the Configure>Scan<br />
Settings…>Scan Options tab. By default, it is named results.map unless you change<br />
it. In order to save the network map to this file, the Host Information File checkbox<br />
must be enabled.<br />
Generating a Network Map<br />
To generate a network map:<br />
1. To generate a network map during a scan, you must first enable Module no. 1041<br />
(Trace Route to Host). Select the Configure>Module Settings… menu item.<br />
Enable the checkbox for module class 1000, and then enable the checkbox for<br />
module no. 1041.<br />
2. Next, enter a name for the network map file that will be created.<br />
To do this, select the Configure>Scan Settings… menu item and switch to the<br />
Scan Options tab. On the Scan Options tab, the Host Information File textbox will<br />
list the default network map filename, results.map. You may change the filename<br />
if you wish. Network maps must be given a .map file extension.<br />
3. Enable the Host Information File checkbox. This checkbox must be enabled,<br />
otherwise the network map file will not be saved.<br />
4. Start a scan using the Scan>Begin Probe menu item. A network map will be<br />
generated for the scan.<br />
Alternatively, to generate a network map, begin a network probe using the<br />
Scan>Begin Probe menu item. When you scan a network using Probe, a network<br />
map is automatically generated.<br />
4-28 Chapter 4
Working With Scan Results<br />
Viewing a Network Map<br />
You can view a network map using the Reports>Network Map… menu item. You<br />
can practice using the controls of the Network Map screen to move the map around in<br />
the screen and zoom in and out on the map.<br />
1. To load a network map, select the Reports>Network Map... menu item. The<br />
network map file results.map will be opened automatically.<br />
2. To open a different network map file, click the Load Map... button. A dialog box<br />
will open allowing you to select a different network map file (*.map).<br />
3. Practice moving the network map around in the screen as follows:<br />
• To move the map up a hop in the network, click the Up arrow button. To<br />
move the map down a hop in the network, click the Down arrow button.<br />
• Tomovethemaptotheleftahopinthenetwork,clicktheLeft arrow button.<br />
To move the map to the right a hop in the network, click the Right arrow<br />
button.<br />
• The Network Map screen can automatically move the map around in the<br />
screen. Click the Start Fly-Through button to see what results. To turn off<br />
the fly-through option, click the Stop Fly-Through button.<br />
4. Next try using the zoom functions of the screen. Zoom in on the network map by<br />
clicking the + Magnifying Glass button. Zoom out on the map by clicking the<br />
–MagnifyingGlassbutton.<br />
5. To close the Network Map screen, click the Close button at the top right of the<br />
screen.<br />
<strong>CyberCop</strong> <strong>Scanner</strong> <strong>Getting</strong> <strong>Started</strong> <strong>Guide</strong> 4-29
Working With Scan Results<br />
WheretoGoFromHere<br />
Now that you have completed the tutorials in Chapters 3 and 4, you should be familiar<br />
with the basics of using <strong>CyberCop</strong> <strong>Scanner</strong>.<br />
• You can set up a configuration file.<br />
• You can start and stop a scan or a probe.<br />
• You can select the module groups and modules used for a scan.<br />
• You can view scan results and query an event database.<br />
• You can generate and preview scan reports, and you can customize reports to<br />
specify which scan records will be included and how they will be sorted.<br />
• You can generate a network map.<br />
You can go on to the remaining tutorial chapters, which describe how to use more<br />
advanced features of <strong>CyberCop</strong> <strong>Scanner</strong>. Or, you can practice taking more scans using<br />
what you have learned in Chapters 3 and 4.<br />
4-30 Chapter 4
5Using Brute Force Password<br />
Guessing Functions<br />
Introduction<br />
5<br />
<strong>CyberCop</strong> <strong>Scanner</strong> includes two programs that use brute force password guessing<br />
functions. These brute force methods determine if user accounts on a network are<br />
vulnerable to intruders. The two programs (sometimes called utilities) are Crack and<br />
SMBGrind.<br />
The Crack program attempts to break into a computer by guessing a user’s encrypted<br />
password. It does this by comparing a list of possible passwords with an actual account<br />
file for a network, thereby potentially gaining access to a user account. The SMBGrind<br />
program actually attempts to log on to a computer remotely. It grinds through a list of<br />
possible passwords and if a match is found it then logs on to the computer.<br />
The Crack and SMBGrind programs are available from the Tools menu. To open<br />
Crack, select Tools>Crack... To open SMBGrind, select Tools>SMBGrind...<br />
Password grinding methods similar to the method used by SMBGrind are also used by<br />
module class 9000 (Password Guessing/Grinding), which you can select for a scan<br />
along with other module classes as described in Chapter 3.<br />
This chapter will tell you about the above password guessing functions of <strong>CyberCop</strong><br />
<strong>Scanner</strong>. It also includes step-by-step instructions for using the Crack and SMBGrind<br />
programs to determine if user accounts are vulnerable to intruders.<br />
<strong>CyberCop</strong> <strong>Scanner</strong> <strong>Getting</strong> <strong>Started</strong> <strong>Guide</strong> 5-1
Using Brute Force Password Guessing Functions<br />
About Password Guessing Functions<br />
Brute force password guessing functions attempt to break into computers by trying to<br />
guess user account passwords. These functions generally run a large list of possible<br />
passwords against a user account. The password lists are contained in text files.<br />
Each password in the text file is run against the user account to see if it matches the<br />
user password. If the user password can be guessed successfully, it means that the<br />
computer is vulnerable to intruders who might also be able to guess the password and<br />
log on.<br />
There may be users on your network who have not selected secure passwords. For<br />
instance, users may be using a common password such as “guest” or “welcome” or an<br />
easily guessed name. These user accounts may be vulnerable to intruders. You can<br />
verify which computers on your network are vulnerable using <strong>CyberCop</strong> <strong>Scanner</strong>’s<br />
password guessing program: Crack and SMBGrind.<br />
5-2 Chapter 5
Using Brute Force Password Guessing Functions<br />
Using the Crack Utility<br />
This section describes the Crack utility and gives step-by-step instructions for running<br />
Crack to determine if user passwords are vulnerable.<br />
About the Crack Utility<br />
The Crack program attempts to determine a user password using two types of files:<br />
• a dictionary file (also called a passlist file)<br />
• an account file<br />
A dictionary file is a text file containing a list of words followed by a carriage return<br />
that might match a user password. An account file is a text file that lists user names on<br />
a network along with their actual encrypted passwords (using DES encryption). The<br />
Crack program works by running the contents of these two files against each other. If<br />
a word in the dictionary file matches a user’s actual encrypted password, then the<br />
Crack program is able to unlock the encrypted password string and determine the user<br />
password. The user password has then been guessed, or “cracked.”<br />
The dictionary file is a list of words which you can create as a text file or obtain from<br />
another source. (For instance, it may be possible to download a dictionary file over the<br />
internet.) <strong>CyberCop</strong> <strong>Scanner</strong> includes two files, passlist.txt and NTpasslist.txt, which<br />
contain several commonly used passwords on UNIX and Windows NT systems. You<br />
can add your own words to these text files or create your own dictionary file to use with<br />
the Crack program.<br />
The account file for a network lists the user names on the network along with their<br />
encrypted passwords. You may have access to this file as a network administrator. You<br />
can use the account file with the Crack program to determine if the user passwords are<br />
vulnerable.<br />
<strong>CyberCop</strong> <strong>Scanner</strong> <strong>Getting</strong> <strong>Started</strong> <strong>Guide</strong> 5-3
Using Brute Force Password Guessing Functions<br />
Running Crack<br />
5-4 Chapter 5<br />
To use the Crack program, do the following:<br />
1. Select the passlist file you want to use with Crack. The passlist file is a dictionary<br />
of passwords. You can either create a passlist file or get it from another source.<br />
• Click the Folder icon next to the Passlist File textbox. The Open dialog box<br />
opens.<br />
• Select the drive and the directory where the passlist file is stored. Then enter<br />
the name of the file you want to open in the File Name textbox.<br />
• Click the Open button to close the dialog box and open the selected file.<br />
2. Select the operation(s) you want Crack to apply to the passwords in the passlist<br />
file by enabling the appropriate checkbox(es). The checkboxes along with their<br />
operation are as follows.<br />
• Try Reversing Words automatically reverses each word in the passlist file.<br />
• Try UpperCase and Lower Case runs each word in the passlist file in all<br />
uppercase and all lowercase letters.<br />
• Append Numbers appends the numbers 0 through 9 to the end of each word<br />
in the passlist file.<br />
• Try Common Letter Substitutions replaces letters of each password in the<br />
passlist file with common symbols. For instance, if “a” were a letter in a<br />
password it would be replaced with “@.”<br />
If you select more than one operation, the program performs the operations<br />
separately.<br />
3. Now, select the account file you want to use with Crack. The account file is a list<br />
of user name and encrypted passwords. The account file can be obtained from a<br />
scan of the computer or from a UNIX password file.<br />
• Click the Folder icon next to the Account File textbox. The Open dialog box<br />
opens.<br />
• Then, select or enter the name of the file you want to open in the File Name<br />
textbox. Sometimes <strong>CyberCop</strong> can obtain an account file from the target of a<br />
scan. If this is the case, choose this file to use with Crack.<br />
• Click the Open button to open the selected file.<br />
A list of user accounts is displayed in the Crack screen. You can choose to run<br />
Crack against some or all of the accounts in the account file. Crack will try to<br />
guess the passwords for the accounts you select.<br />
4. To run Crack against all accounts, enable the Crack All Accounts option button.<br />
If you want run Crack against only some of the accounts, enable the Crack Only<br />
Selected Accounts options button. Then, select the desired user accounts by<br />
enabling the checkboxes next to the user accounts.
Using Brute Force Password Guessing Functions<br />
5. Click the Crack button to run Crack.<br />
The Progress screen is displayed when you run Crack. This screen displays the results<br />
and progress of Crack in real time.<br />
<strong>CyberCop</strong> <strong>Scanner</strong> <strong>Getting</strong> <strong>Started</strong> <strong>Guide</strong> 5-5
Using Brute Force Password Guessing Functions<br />
Crack Screen Controls<br />
To open the Crack screen, from the Tools menu select Crack. The Crack screen<br />
controls are described in Table 5-1 below.<br />
Table 5-1. The Crack screen controls.<br />
This screen control<br />
Passlist File<br />
Try Reversing Words<br />
Try Upper Case and<br />
Lower Case<br />
Append Numbers<br />
Try Common Letter<br />
Substitutions<br />
Account File<br />
Crack All Accounts<br />
Crack Only Selected<br />
Accounts<br />
Clear Account List<br />
Crack<br />
Does this<br />
Lets you select the .txt file that contains the user<br />
names and encrypted.<br />
Automatically reverses each word in the passlist file.<br />
For example, the password “one” would be reversed<br />
to the password “eno.” Crack would run both<br />
passwords against user accounts: one and eno.<br />
Changes the case of the letters of each word in the<br />
passlist file. The variations checked are all uppercase<br />
and all lowercase.<br />
Appends numbers to each word in the passlist file.<br />
Specifically, the numbers 0 through 9 are added to the<br />
end of each password.<br />
Replaces letters of each password in the passlist file<br />
with common symbols. For example, if “a” were a<br />
letter in a password it would be replaced with “@.”<br />
Or, “E” would be replaced with “3.”<br />
The file that contains the user accounts and the<br />
encrypted passwords you want Crack to use.<br />
Selects all user accounts in the user account file to be<br />
cracked.<br />
Runs Crack against selected users in the account file.<br />
Deselects the selected user accounts in the account<br />
file.<br />
Starts Crack. Click the Progress tab of the Crack<br />
screen to display the results.<br />
5-6 Chapter 5
Using Brute Force Password Guessing Functions<br />
Using the SMBGrind Utility<br />
About SMBGrind<br />
This section describes the SMBGrind utility and gives step-by-step instructions for<br />
running SMBGrind to attempt to determine a user password by logging on to a<br />
computer remotely.<br />
The SMBGrind program attempts to determine a user password by actually trying to<br />
log on to a computer remotely using SAMBA (the SMB protocol). To do this, the<br />
SMBGrind program uses two types of files:<br />
• a dictionary file (also called a passlist file)<br />
• a userlist file<br />
A dictionary file is a text file containing a list of words that might match a user<br />
password, as described in the previous section. A userlist file is a text file containing a<br />
list of common user names or a list of actual user names specific to a machine.<br />
<strong>CyberCop</strong> <strong>Scanner</strong> includes two files, userlist.txt and NTuserlist.txt, that contain<br />
common user names (such as “root” or “admin”) used on UNIX and Windows NT<br />
systems. If you are a network administrator, you may have access to the user list for<br />
your network, or you may be able to generate a list of user names to add to a text file.<br />
The SMBGrind program works by first running the contents of the userlist file against<br />
a target machine until it finds a match. If it finds a match, it then runs the contents of<br />
the dictionary file against the machine until it is able to log on. If the SMBGrind<br />
program is able to log on successfully, it has discovered the password. Then it logs off.<br />
<strong>CyberCop</strong> <strong>Scanner</strong> <strong>Getting</strong> <strong>Started</strong> <strong>Guide</strong> 5-7
Using Brute Force Password Guessing Functions<br />
Running SMBGrind<br />
To use SMBGrind, do the following:<br />
1. To open SMBGrind, select SMBGrind from the Tools menu.<br />
2. Enter the IP address of the destination host in the Hostname textbox. You may<br />
only run SMBGrind against one host at a time.<br />
3. In the NetBIOS Name textbox, enter the destination host name. Entering a name<br />
in this textbox is optional.<br />
4. Select the number of parallel grinders you want SMBGrind to spawn. The number<br />
of parallel grinders is the number of simultaneous attempted logons. You can<br />
select a value from 1 to 40 using the Parallel Grinders slider bar.<br />
5. Choose the userlist file you want to use with SMBGrind. The userlist file contains<br />
user names. You can create a userlist file, or you can get it from another source.<br />
• Click the Folder icon next to the Userlist File textbox. The Open dialog box<br />
opens.<br />
• Select the drive and the directory where the file is stored. Then, enter or select<br />
the name of the file you want to open in the File Name textbox.<br />
• Click the Open button to close the dialog box and open the selected file.<br />
6. Next, choose the passlist file you want to use with SMBGrind. The passlist file is<br />
a dictionary of passwords. You can either create a passlist file or get it from<br />
another source.<br />
• Click the Folder icon next to the Passlist File textbox. The Open dialog box<br />
opens.<br />
• Select the drive and the directory where the file is stored. Then, enter or select<br />
the name of the file you want to open in the File Name textbox.<br />
• Click the Open button to close the dialog box and open the selected file.<br />
7. Click the Grind button to run the SMBGrind program. You can cancel the<br />
program at any time by clicking the Cancel button.<br />
The SMBGrind results are displayed in the screen in real time.<br />
5-8 Chapter 5
SMBGrind Screen Controls<br />
Using Brute Force Password Guessing Functions<br />
To open SMBGrind, select SMBGrind from the Tools menu. The SMBGrind screen<br />
controls are described below in Table 5-2.<br />
Table 5-2. The SMBGrind screen controls.<br />
This screen control<br />
IP Address<br />
NetBIOS Name<br />
Parallel Grinders<br />
Userlist File<br />
Passlist File<br />
Grind<br />
Cancel<br />
Does this<br />
Lets you enter the IP address of the system you want<br />
to run SMBGrind against. You may only run<br />
SMBGrind against one host at a time.<br />
Lets you enter the NetBIOS of the system you want to<br />
runSMBGrindagainst.<br />
Allows you to choose the number of spawned grind<br />
processes. The range of values is from 1 to 40.<br />
Lets you select the file that contains the user account<br />
list SMBGrind will use.<br />
Lets you select the file that contains the password list<br />
SMBGrind will use.<br />
Starts SMBGrind against the target destination<br />
Cancels SMBGrind<br />
<strong>CyberCop</strong> <strong>Scanner</strong> <strong>Getting</strong> <strong>Started</strong> <strong>Guide</strong> 5-9
Using Brute Force Password Guessing Functions<br />
WheretoGoFromHere<br />
In this chapter, you learned how to use the Crack and SMBGrind programs of<br />
<strong>CyberCop</strong> <strong>Scanner</strong>. The programs will help you determine which systems on your<br />
network are vulnerable to intruders.<br />
The next chapter, Chapter 6, teaches you how to use the IDS (intrusion detection<br />
software) tool of <strong>CyberCop</strong> <strong>Scanner</strong>. You can use the IDS tool to test the effectiveness<br />
of your intrusion detection software.<br />
5-10 Chapter 5
6Running IDS (Intrusion<br />
Detection Software) Tests<br />
Introduction<br />
6<br />
Intrusion detection software detects misuse incidents on a system. If you have a<br />
host-based intrusion detection application, you can use <strong>CyberCop</strong> <strong>Scanner</strong>’s IDS<br />
testing tool to test the response of your IDS software to misuse incidents. This chapter<br />
includes a description of the IDS testing tool. It also includes a procedure for running<br />
IDS tests.<br />
<strong>CyberCop</strong> <strong>Scanner</strong> <strong>Getting</strong> <strong>Started</strong> <strong>Guide</strong> 6-1
Running IDS (Intrusion Detection Software) Tests<br />
About IDS Tests<br />
Host-based intrusion detection software monitors a system for misuse incidents.<br />
Examples of misuse incidents are illegal logons, password rattling, illegal file access,<br />
and software attacks. The IDS testing tool allows you to test your intrusion detection<br />
software, to make sure that it is set up properly.<br />
The IDS testing tool includes IDS modules, which are examples of misuse incidents.<br />
You can select which IDS modules to run against your intrusion detection software.<br />
The IDS generate packets to attack a target machine. For example, some IDS modules<br />
split the packets and send the fragments to the target machine in different ways. The<br />
IDS IP Fragmentation Test (8-Byte Tiny Frags) test, for instance, allows you to test<br />
whether your intrusion detection software correctly reassembles IP packets from<br />
fragmented IP packets to recognize the intrusion.<br />
The IDS module you select generates a packet which is sent to a target machine in a<br />
camouflaged form. The camouflaged packet is a scrambled version of the nominal<br />
form of the packet, thereby making it difficult for the intrusion detection software to<br />
detect. If your intrusion detection software is set up properly, it should be able to detect<br />
the camouflaged packets generated by an IDS module.<br />
6-2 Chapter 6
Performing IDS Tests<br />
To perform IDS tests, do the following:<br />
Running IDS (Intrusion Detection Software) Tests<br />
1. Select Tools>IDS Testing... The IDS Testing screen will open.<br />
2. Enter the IP address of the source host in the Source IP Address textbox. You can<br />
select an arbitrary IP address for a system on the network.<br />
3. In the Destination IP Address textbox, enter the IP Address of the destination host.<br />
4. The destination TCP port is displayed in the Destination TCP Port textbox. The<br />
default port is 80. Change the port only if you want to send the IDS script to a port<br />
other than the default port.<br />
5. From the Module Selection listbox, select the desired IDS script. You can only run<br />
one IDS script at a time against the intrusion detection software you are running<br />
the tests against.<br />
6. Click the Send Script button to run the script.<br />
7. Monitor the results of the IDS test using the intrusion detection software. It should<br />
detect the camouflaged form of the selected IDS script sent from the <strong>CyberCop</strong><br />
<strong>Scanner</strong> IDS tool.<br />
<strong>CyberCop</strong> <strong>Scanner</strong> <strong>Getting</strong> <strong>Started</strong> <strong>Guide</strong> 6-3
Running IDS (Intrusion Detection Software) Tests<br />
WheretoGoFromHere<br />
In this chapter, you learned how to use the IDS testing tool of <strong>CyberCop</strong> <strong>Scanner</strong>. You<br />
now know how to use the IDS testing tool to test the ability of your intrusion detection<br />
software to detect misuse incidents on a system.<br />
The next chapter, Chapter 7, gives instructions for running filter checks on firewalls,<br />
screening routers, and other gateway machines using module class 12000, a class of<br />
modules written in the custom audit scripting language (CASL).<br />
6-4 Chapter 6
7Using CASL Modules to Run<br />
Firewall Filter Checks<br />
Introduction<br />
7<br />
<strong>CyberCop</strong> <strong>Scanner</strong> includes a class of modules written in the custom audit scripting<br />
language that perform firewall filter checks on a network. The modules in this class<br />
(module class 12000) look for common misconfigurations in firewalls, screening<br />
routers, and other gateway machines by manipulating and sending IP packets to<br />
attempt to pass through filters. The firewall filter checks will help you determine<br />
whether your firewall filter rules are adequate. Any vulnerabilities that are found will<br />
aid you in correcting your filter rules.<br />
The CASL modules which perform these checks are available in the Module<br />
Configuration dialog box of <strong>CyberCop</strong> <strong>Scanner</strong>, accessed by selecting the<br />
Configure>Module Settings... menu item. This chapter includes a description of the<br />
CASL modules. It also includes a procedure for running CASL firewall filter checks<br />
on a network.<br />
<strong>CyberCop</strong> <strong>Scanner</strong> <strong>Getting</strong> <strong>Started</strong> <strong>Guide</strong> 7-1
Using CASL Modules to Run Firewall Filter Checks<br />
About CASL Modules<br />
<strong>CyberCop</strong> <strong>Scanner</strong> includes a class of modules written in the CASL language (Custom<br />
Audit Scripting Language) that perform firewall filter checks on a network. The<br />
modules in this class (module class 12000) look for common misconfigurations in<br />
firewalls, screening routers, and other gateway machines by manipulating and sending<br />
IP packets to attempt to pass through filters. If these checks find any vulnerabilities in<br />
your firewall filters, you should reconfigure your filters.<br />
The CASL modules which perform these checks are available by selecting the<br />
Configure>Module Settings... menu item to open the Module Configuration dialog<br />
box. In the Module Configuration dialog box, for the Scan Type, click the CASL<br />
Modules radio button.<br />
Some CASL modules check how a firewall handles fragmented or malformed packets,<br />
which can be used to trick a firewall into letting them through. For example,<br />
misconfigured firewall filters may allow IP fragments through, where they can be<br />
reassembled into packets that the firewall would not normally allow to pass.<br />
The CASL modules are run separately from other module classes. In the Module<br />
Configuration dialog box, you specify which CASL modules you want to run. Then on<br />
the Scan Settings tab, you specify a target host on a target network which is behind the<br />
firewall against which you wish to run the firewall filter checks. During the scan, the<br />
Scan Progress tab displays scan progress, just as for scans using other module classes.<br />
The CASL modules only send packets to the target host on the target network. They<br />
do not return any information about whether IP packets were allowed through the<br />
firewall filter. To monitor the results of a CASL firewall filter check, you need to run<br />
<strong>CyberCop</strong> Sentry (sentry.exe) on a host behind the firewall you are checking. The host<br />
may be the same as the target host specified on the Scan Settings tab, or it may be a<br />
different host. To install <strong>CyberCop</strong> Sentry, it is necessary to install <strong>CyberCop</strong> <strong>Scanner</strong><br />
on the target host.<br />
When <strong>CyberCop</strong> Sentry is running on the other side of the firewall, it automatically<br />
listens for packets that have passed through the firewall filter. It then reports how many<br />
CASL packets were able to pass through. You can save these results in a local event<br />
database on the target host where <strong>CyberCop</strong> Sentry is running.<br />
7-2 Chapter 7
Using CASL Modules to Run Firewall Filter Checks<br />
Setting Up to Run Firewall Filter Checks<br />
To set up to run firewall filter checks, you use three computers: (1) You run <strong>CyberCop</strong><br />
Sentry on a host behind the firewall you wish to check. (2) Then you run CASL<br />
modules from <strong>CyberCop</strong> <strong>Scanner</strong> on the local host. (3) You run the CASL modules<br />
against a single target host which is also behind the firewall you wish to check. The<br />
target host may be the same as the host running <strong>CyberCop</strong> Sentry if you choose.<br />
The target host and the host running <strong>CyberCop</strong> Sentry must be on the same network.<br />
Both must be on the opposite side of the firewall from the local host where <strong>CyberCop</strong><br />
<strong>Scanner</strong> is running. <strong>CyberCop</strong> <strong>Scanner</strong> will attempt to send CASL packets to the target<br />
host. <strong>CyberCop</strong> Sentry will detect CASL packets which pass through the firewall.<br />
<strong>CyberCop</strong> Sentry can be located anywhere on the network on the opposite side of the<br />
firewall where it will be able to see the IP packets if they pass through the firewall<br />
filter. It will continuously count packets transmitted on the network and report the<br />
following status information:<br />
• total <strong>CyberCop</strong> <strong>Scanner</strong> packets read<br />
• packets per second read<br />
• total of all packets read<br />
You will have the option to store results in a local event database on the host where<br />
<strong>CyberCop</strong> Sentry is running.<br />
To set up and run <strong>CyberCop</strong> Sentry, follow these steps:<br />
1. Install <strong>CyberCop</strong> <strong>Scanner</strong> (which includes <strong>CyberCop</strong> Sentry) on a host behind the<br />
firewall you wish to check. The host must be on the opposite side of the firewall<br />
from the local host which will be running <strong>CyberCop</strong> <strong>Scanner</strong> and sending the<br />
CASL packets.<br />
NOTE: You must install <strong>CyberCop</strong> <strong>Scanner</strong> on the host in order to install<br />
<strong>CyberCop</strong> Sentry. <strong>CyberCop</strong> Sentry requires additional drivers present in the<br />
<strong>CyberCop</strong> <strong>Scanner</strong> distribution, as well as the ability to store results to a local<br />
event database, in order to operate.<br />
2. Start <strong>CyberCop</strong> Sentry on the host where you installed it in one of the following<br />
ways:<br />
• from the Start menu (Start>Programs>Network Associates><strong>CyberCop</strong><br />
<strong>Scanner</strong>><strong>CyberCop</strong> Sentry)<br />
• by starting <strong>CyberCop</strong> <strong>Scanner</strong> and selecting the Tools><strong>CyberCop</strong> Sentry...<br />
menu item<br />
The <strong>CyberCop</strong> Sentry screen will open.<br />
<strong>CyberCop</strong> <strong>Scanner</strong> <strong>Getting</strong> <strong>Started</strong> <strong>Guide</strong> 7-3
Using CASL Modules to Run Firewall Filter Checks<br />
3. On the <strong>CyberCop</strong> Sentry screen, start the <strong>CyberCop</strong> Sentry engine by selecting the<br />
Engine>Start menu item. Alternatively, click the Start toolbar icon.<br />
The <strong>CyberCop</strong> Sentry screen will display a message "Sentry engine running"<br />
along with a list of any detected CASL packets. A running count of the total<br />
number of network packets, <strong>CyberCop</strong> <strong>Scanner</strong> packets, and packets per second<br />
detected by <strong>CyberCop</strong> Sentry will also be displayed.<br />
NOTE: No <strong>CyberCop</strong> <strong>Scanner</strong> packets will be detected until you start running<br />
CASL modules from the local host on the other side of the firewall.<br />
4. Next you run CASL modules from the local host on the other side of the firewall.<br />
To learn how to run the CASL modules from the local host on the other side of the<br />
firewall, see the next section, “Running Firewall Filter Checks.”<br />
5. When the scan is complete, you stop the <strong>CyberCop</strong> Sentry engine by selecting the<br />
Engine>Stop menu item. Alternatively, click the Stop toolbar icon.<br />
6. A message box will open prompting you to store the results displayed on the<br />
screen. Click Yes to store the results. Alternatively, select the File>Store Results<br />
menu item.<br />
By default, results will be saved in a local event database (events.mdb) located at<br />
c:\Program Files\Network Associates\SMI Products\SMI\Shared\EventDB on the<br />
host where <strong>CyberCop</strong> Sentry is running.<br />
7. Finally, you can clear the <strong>CyberCop</strong> Sentry display by selecting the File>Clear<br />
menu item. You can also close <strong>CyberCop</strong> Sentry by selecting File>Exit.<br />
7-4 Chapter 7
Running Firewall Filter Checks<br />
Using CASL Modules to Run Firewall Filter Checks<br />
To run CASL modules to perform firewall filter checks, follow these steps:<br />
1. First you must run <strong>CyberCop</strong> Sentry on a host behind the firewall whose filter you<br />
wish to check. To set up <strong>CyberCop</strong> Sentry on a host, see the previous section,<br />
“Setting Up to Run Firewall Filter Checks.”<br />
2. On the local host which will be running <strong>CyberCop</strong> <strong>Scanner</strong> and sending the CASL<br />
packets, start <strong>CyberCop</strong> <strong>Scanner</strong> and select the Configure>Module Settings...<br />
menu item. The Module Configuration dialog box will open, allowing you to<br />
select CASL modules for a scan.<br />
3. In the Module Configuration dialog box, for the Scan Type, click the CASL<br />
Modules radio button. The Module Groups listbox will display module class<br />
12000 (Packet Filter Verification Checks).<br />
Enable the checkbox for module class 12000. Then in the Module Selection<br />
listbox, select the CASL modules you wish to run. You may select multiple CASL<br />
modules to run at a time. Each CASL module will attempt in various ways to send<br />
IP packets through the firewall filter to the target host.<br />
Click OK to close the dialog box.<br />
4. Next select the Configure>Scan Settings... menu item. The <strong>CyberCop</strong> <strong>Scanner</strong><br />
Setup dialog box will open.<br />
5. On the Scan Settings tab, click the Host Range radio button. Then enter the IP<br />
address of a target host on the opposite side of the firewall you wish to check. The<br />
target host and the host running <strong>CyberCop</strong> Sentry must be on the same network,<br />
and they must both be on the opposite side of the firewall from the local host<br />
running <strong>CyberCop</strong> <strong>Scanner</strong>. The target host may be the host running <strong>CyberCop</strong><br />
Sentry if you wish.<br />
Click OK to close the dialog box.<br />
6. When you have selected the CASL modules you wish to run and specified the<br />
target host as described in Step 5 above, start a scan by selecting the Scan>Begin<br />
Scan menu item.<br />
The Scan Progress tab will display scan progress. The message line "Scan<br />
completed" will be displayed when the scan is complete.<br />
7. When the scan is complete (when the CASL modules have stopped transmitting<br />
packets), stop the <strong>CyberCop</strong> Sentry engine on the host where it is running by<br />
selecting the Engine>Stop menu item in <strong>CyberCop</strong> Sentry.<br />
<strong>CyberCop</strong> <strong>Scanner</strong> <strong>Getting</strong> <strong>Started</strong> <strong>Guide</strong> 7-5
Using CASL Modules to Run Firewall Filter Checks<br />
A message box will open on the <strong>CyberCop</strong> Sentry host prompting you to store the<br />
results displayed on the screen. Click Yes to store the results. Alternatively, select<br />
the File>Store Results menu item. By default, results will be saved in a local event<br />
database (events.mdb) located at c:\Program Files\Network Associates\SMI<br />
Products\SMI\Shared\EventDB on the host where <strong>CyberCop</strong> Sentry is running.<br />
You can use the SMI report viewer to view the <strong>CyberCop</strong> Sentry results and generate<br />
a report on the host where <strong>CyberCop</strong> Sentry is running.<br />
7-6 Chapter 7
WheretoGoFromHere<br />
Using CASL Modules to Run Firewall Filter Checks<br />
In this chapter you learned how to use the CASL modules to run predefined firewall<br />
filter checks on a network. You also learned how to monitor results using the Sentry<br />
daemon of <strong>CyberCop</strong> <strong>Scanner</strong>.<br />
The CASL modules used in the firewall filter checks are written in CASL (custom<br />
audit scripting language). CASL is a high-level programming language that allows you<br />
to write scripts that simulate attacks or perform information gathering checks.<br />
If you want to learn how you can customize packets to perform your own security<br />
audits, you can go on to Part II, Chapter 1, of this manual, “Using NTCASL to<br />
Generate Custom Audit Packets.” The NTCASL utility of <strong>CyberCop</strong> <strong>Scanner</strong> allows<br />
you to generate custom audit packets that use CASL (custom audit scripting language).<br />
You can then send your custom packets to a destination host to check for security holes<br />
in a network. In the NTCASL utility, you construct packets using tools provided in the<br />
NTCASL user interface. It is not necessary to know the custom audit scripting<br />
language to use the NTCASL user interface.<br />
If you wish to learn more about the custom audit scripting language to write your own<br />
scripts using a text editor, you can go on to Part III, Appendix A, “A <strong>Guide</strong> to CASL<br />
(Custom Audit Scripting Language).” Appendix A provides a detailed explanation of<br />
the custom audit scripting language. It includes a description of CASL program<br />
structure and syntax, as well as a programming reference guide. In order to use the<br />
custom audit scripting language, you need to have experience programming in a<br />
high-level language.<br />
In the next chapter, “AutoUpdate: Updating <strong>CyberCop</strong> <strong>Scanner</strong> Files,” you will learn<br />
about the AutoUpdate feature. The AutoUpdate feature allows you to download<br />
updates to the <strong>CyberCop</strong> <strong>Scanner</strong> software from NAI’s FTP site, or from another FTP<br />
site.<br />
<strong>CyberCop</strong> <strong>Scanner</strong> <strong>Getting</strong> <strong>Started</strong> <strong>Guide</strong> 7-7
Using CASL Modules to Run Firewall Filter Checks<br />
7-8 Chapter 7
8AutoUpdate: Updating<br />
<strong>CyberCop</strong> <strong>Scanner</strong> Files<br />
Introduction<br />
8<br />
The AutoUpdate feature lets NAI provide you with periodic updates to the <strong>CyberCop</strong><br />
<strong>Scanner</strong> software. Specifically, the AutoUpdate feature is a program that allows you<br />
to download NAI’s update packs for <strong>CyberCop</strong> <strong>Scanner</strong> from NAI’s FTP site (or<br />
another FTP site) to your system. You can schedule updates on a monthly or weekly<br />
basis, or you can perform an update now.<br />
The update packs are compressed files which add updated features, for instance new<br />
modules for the Vulnerability Database, to your current version of <strong>CyberCop</strong> <strong>Scanner</strong>.<br />
When you download the update packs from NAI’s FTP site (or another FTP site), you<br />
have the option to apply the update now as a patch to the <strong>CyberCop</strong> <strong>Scanner</strong> program<br />
files, or to wait until later. Before applying the update as a patch, the AutoUpdate<br />
program checks to make sure that the program files you have downloaded are newer<br />
than your existing <strong>CyberCop</strong> <strong>Scanner</strong> program files. If they are newer, the AutoUpdate<br />
program will then apply them as a patch to your <strong>CyberCop</strong> <strong>Scanner</strong> software.<br />
<strong>CyberCop</strong> <strong>Scanner</strong> <strong>Getting</strong> <strong>Started</strong> <strong>Guide</strong> 8-1
AutoUpdate: Updating <strong>CyberCop</strong> <strong>Scanner</strong> Files<br />
About the AutoUpdate Feature<br />
The AutoUpdate feature lets NAI provide you with periodic updates to the <strong>CyberCop</strong><br />
<strong>Scanner</strong> software. Specifically, the AutoUpdate feature is a program that allows you<br />
to download NAI’s update packs for <strong>CyberCop</strong> <strong>Scanner</strong> from NAI’s FTP site (or<br />
another FTP site) to your system. You can schedule updates on a monthly or weekly<br />
basis, or you can perform an update now.<br />
The update packs are compressed files which add updated features, for instance new<br />
modules for the Vulnerability Database, to your current version of <strong>CyberCop</strong> <strong>Scanner</strong>.<br />
When you download the update packs from NAI’s FTP site (or another FTP site), you<br />
have the option to apply the update now as a patch to the <strong>CyberCop</strong> <strong>Scanner</strong> program<br />
files, or wait until later. Before applying the update as a patch, the Update program<br />
checks to make sure that the program files you have downloaded are newer than your<br />
existing <strong>CyberCop</strong> <strong>Scanner</strong> program files. If they are newer, the AutoUpdate program<br />
will then apply them as a patch to your <strong>CyberCop</strong> <strong>Scanner</strong> software.<br />
8-2 Chapter 8
Updating <strong>CyberCop</strong> <strong>Scanner</strong><br />
AutoUpdate: Updating <strong>CyberCop</strong> <strong>Scanner</strong> Files<br />
You can update <strong>CyberCop</strong> <strong>Scanner</strong> by downloading an update pack and applying it<br />
now. You can also schedule periodic updates on a weekly or monthly basis. The first<br />
section below explains how to update <strong>CyberCop</strong> <strong>Scanner</strong> now. The section which<br />
follows it explains how to schedule future updates.<br />
Updating <strong>CyberCop</strong> <strong>Scanner</strong> Now Using AutoUpdate<br />
To update <strong>CyberCop</strong> <strong>Scanner</strong> now, do the following:<br />
1. Select Tools>AutoUpdate. The AutoUpdate program will start.<br />
2. Enable the Perform Update Now option button. Enabling this option button<br />
instructs the program to download an update pack now. Click the Next button to<br />
continue.<br />
3. Now, select FTP transfer method used by your network:<br />
• FTP<br />
• FTP Through Socks Proxy<br />
• FTP Through Web Proxy<br />
NOTE: You may already have a previously downloaded update pack. If you<br />
want to apply the update as a patch to your <strong>CyberCop</strong> <strong>Scanner</strong> software now,<br />
enable the Skip This, I Already Have an Update Patch checkbox.<br />
4. The next step is to enter information for the FTP transfer method you selected<br />
above. Follow the set of instructions below that correspond to your FTP transfer<br />
method.<br />
For FTP, enter the following information:<br />
• Directory to Save: Enter the drive and the directory where you want to store<br />
downloaded update packs.<br />
• Host Name or IP Address: Enter the host name or the IP address of the<br />
server where update packs will be downloaded from.<br />
• Path on Remote Host: Enter the drive and the directory on the remote host<br />
where the update packs are located.<br />
• User Name: Enter the user name of the remote host. If you are downloading<br />
update packs from an anonymous FTP site, do not enter a user name in this<br />
textbox.<br />
• Password: Enter the password for the remote host. If you are downloading<br />
update packs from an anonymous FTP site, do not enter a password in this<br />
textbox.<br />
<strong>CyberCop</strong> <strong>Scanner</strong> <strong>Getting</strong> <strong>Started</strong> <strong>Guide</strong> 8-3
AutoUpdate: Updating <strong>CyberCop</strong> <strong>Scanner</strong> Files<br />
• Click the Next button to continue.<br />
For FTP Through Socks Proxy, enter the following information:<br />
• Directory to Save: Enter the drive and the directory where you want to store<br />
downloaded update packs.<br />
• Host Name or IP Address: Enter the host name or the IP address of the<br />
server where update packs will be downloaded from.<br />
• Path on Remote Host: Enter the drive and the directory on the remote host<br />
where update packs are located.<br />
• User Name: Enter the user name of the remote host. If you are downloading<br />
the update packs from an anonymous FTP site, do not enter a user name in<br />
this textbox.<br />
• Password: Enter your password on the remote host. If you are downloading<br />
the update packs from an anonymous FTP site, do not enter a password in this<br />
textbox.<br />
• Proxy Host: Enter the system name where the socks proxy is installed.<br />
• Socks Proxy Port: Enter the port the socks proxy communicates to. The<br />
default port is 1080.<br />
• Click the Next button to continue.<br />
For FTP Through Web Proxy, enter the following information:<br />
• Directory to Save: Enter the drive and the directory where you want to store<br />
downloaded update packs.<br />
• Host Name or IP Address: Enter the host name or the IP address of the<br />
server where update packs will be downloaded from.<br />
• Path on Remote Host: Enter the drive and the directory on the remote host<br />
where update packs are located.<br />
• User Name: Enter the user name of the remote host. If you are downloading<br />
update packs from an anonymous FTP site, do not enter a user name in this<br />
textbox.<br />
• Password: Enter the password for the remote host. If you are downloading<br />
update packs from an anonymous FTP site, do not enter a password in this<br />
textbox.<br />
• Proxy Host: Enter the system name where the socks proxy is installed.<br />
For Skip This, do the following information:<br />
• Click the Folder icon.<br />
• Select the drive and the directory where the update pack is stored.<br />
8-4 Chapter 8
AutoUpdate: Updating <strong>CyberCop</strong> <strong>Scanner</strong> Files<br />
5. The AutoUpdate program will download the update pack from the selected FTP<br />
site and save it to the specified drive and directory.<br />
6. When the program finishes downloading the update pack, it asks you to confirm<br />
the update pack along with its signatures. Click the OK button.<br />
7. Click the Exit button to close the program. Your <strong>CyberCop</strong> <strong>Scanner</strong> software is<br />
now updated.<br />
<strong>CyberCop</strong> <strong>Scanner</strong> <strong>Getting</strong> <strong>Started</strong> <strong>Guide</strong> 8-5
AutoUpdate: Updating <strong>CyberCop</strong> <strong>Scanner</strong> Files<br />
Updating <strong>CyberCop</strong> <strong>Scanner</strong> Periodically Using<br />
AutoUpdate<br />
You must have Windows NT Scheduler enabled to schedule periodic updates to<br />
<strong>CyberCop</strong> <strong>Scanner</strong>.<br />
To schedule periodic updates to <strong>CyberCop</strong> <strong>Scanner</strong>, do the following:<br />
1. Select Tools>AutoUpdate. The AutoUpdate program will start.<br />
2. Enable the Schedule Update option button to set up an update for later. Click the<br />
Next button to continue.<br />
3. Now, select FTP transfer method used by your network:<br />
• FTP<br />
• FTP Through Socks Proxy<br />
• FTP Through Web Proxy<br />
4. Next, you have the option to automatically apply the update as a patch to your<br />
current version of <strong>CyberCop</strong> <strong>Scanner</strong>. If you wish to apply the update as a patch<br />
immediately after the update pack is downloaded, click the option button next to<br />
Actually Perform Update Once Files Have Been Retrieved.<br />
If you choose not to enable this button, then the update pack will be downloaded<br />
but the patch will not be applied to your <strong>CyberCop</strong> <strong>Scanner</strong> software. You can<br />
choose to apply the update as a patch later.<br />
After you have chosen whether to perform the update immediately or save the<br />
update pack for later, click Next to continue.<br />
5. The next step is to enter information for your FTP transfer method. Follow the set<br />
of instructions below that correspond to your FTP transfer method.<br />
NOTE: If you schedule a future update in the AutoUpdate program using a<br />
passworded FTP account, the FTP password will be displayed in the Windows<br />
NT Scheduler.<br />
For FTP, enter the following information:<br />
• Directory to Save: Enter the drive and the directory where you want to store<br />
downloaded update packs.<br />
• Host Name or IP Address: Enter the host name or the IP address of the<br />
server where update packs will be downloaded from.<br />
• Path on Remote Host: Enter the drive and the directory on the remote host<br />
where the update packs are located.<br />
8-6 Chapter 8
AutoUpdate: Updating <strong>CyberCop</strong> <strong>Scanner</strong> Files<br />
• User Name: Enter the user name of the remote host. If you are downloading<br />
update packs from an anonymous FTP site, do not enter a user name in this<br />
textbox.<br />
• Password: Enter the password for the remote host. If you are downloading<br />
update packs from an anonymous FTP site, do not enter a password in this<br />
textbox.<br />
• Click the Next button to continue.<br />
For FTP Through Socks Proxy, enter the following information:<br />
• Directory to Save: Enter the drive and the directory where you want to store<br />
downloaded update packs.<br />
• Host Name or IP Address: Enter the host name or the IP address of the<br />
server where update packs will be downloaded from.<br />
• Path on Remote Host: Enter the drive and the directory on the remote host<br />
where update packs are located.<br />
• User Name: Enter the user name of the remote host. If you are downloading<br />
the update packs from an anonymous FTP site, do not enter a user name in<br />
this textbox.<br />
• Password: Enter your password on the remote host. If you are downloading<br />
the update packs from an anonymous FTP site, do not enter a password in this<br />
textbox.<br />
• Proxy Host: Enter the system name where the socks proxy is installed.<br />
• Socks Proxy Port: Enter the port the socks proxy communicates to. The<br />
default port is 1080.<br />
• Click the Next button to continue.<br />
For FTP Through Web Proxy, enter the following information:<br />
• Directory to Save: Enter the drive and the directory where you want to store<br />
downloaded update packs.<br />
• Host Name or IP Address: Enter the host name or the IP address of the<br />
server where update packs will be downloaded from.<br />
• Path on Remote Host: Enter the drive and the directory on the remote host<br />
where update packs are located.<br />
• User Name: Enter the user name of the remote host. If you are downloading<br />
update packs from an anonymous FTP site, do not enter a user name in this<br />
textbox.<br />
• Password: Enter the password for the remote host. If you are downloading<br />
update packs from an anonymous FTP site, do not enter a password in this<br />
textbox.<br />
• Proxy Host: Enter the system name where the socks proxy is installed.<br />
• Click the Next button to continue.<br />
<strong>CyberCop</strong> <strong>Scanner</strong> <strong>Getting</strong> <strong>Started</strong> <strong>Guide</strong> 8-7
AutoUpdate: Updating <strong>CyberCop</strong> <strong>Scanner</strong> Files<br />
6. Next, select how often you wish to download the update packs. You can choose<br />
to download update packs on a monthly or weekly basis, and you can choose the<br />
day and time that updates are performed.<br />
• For monthly updates, click Reoccurring – Monthly on Day.<br />
• For weekly updates, click Reoccurring – Weekly on Day<br />
Then click Next to continue.<br />
7. Now specify which day and time to perform updates.<br />
• For monthly updates, select the day of the month you wish updates to occur.<br />
Then enter the time of day you wish the update to occur. (A 24-hour clock is<br />
used.)<br />
• For weekly updates, select the day of the week you wish updates to occur.<br />
Then enter the time of day you wish the updates to occur. (A 24-hour clock is<br />
used.)<br />
Then click Next to continue. A list of the currently scheduled update jobs will be<br />
displayed.<br />
8. If you wish to delete a currently scheduled update job from the list, or add another<br />
scheduled update, you have the following options:<br />
• To delete a scheduled update from the list, select a scheduled update to<br />
highlight it, and then click the Delete Job button. The selected scheduled<br />
update will be removed from the list.<br />
• To add another scheduled update, click the Back button until you return to the<br />
What Kind of Job Do You Wish to Schedule window. From this window, you<br />
can add another scheduled update as described above.<br />
9. When you have scheduled periodic updates as desired, click Next to continue.<br />
You can either exit the Update program now, or return to the beginning. To exit,<br />
click Finish.<br />
NOTE: It is recommended that you close all open <strong>CyberCop</strong> <strong>Scanner</strong> dialog<br />
boxes and windows, including the main window, before a scheduled update<br />
takes place.<br />
8-8 Chapter 8
Deleting Scheduled Updates<br />
You can delete previously scheduled updates.<br />
To delete scheduled updates, do the following:<br />
1. Select Tools>AutoUpdate.<br />
AutoUpdate: Updating <strong>CyberCop</strong> <strong>Scanner</strong> Files<br />
2. Click the Delete Scheduled Tasks button. Then click Next to continue.<br />
3. A list of the scheduled updates will be displayed. To delete a scheduled update,<br />
click it to highlight it. Then click the Delete Job button. The selected scheduled<br />
update will be removed from the list.<br />
4. To go back to the start of the program, click the Back button.<br />
<strong>CyberCop</strong> <strong>Scanner</strong> <strong>Getting</strong> <strong>Started</strong> <strong>Guide</strong> 8-9
AutoUpdate: Updating <strong>CyberCop</strong> <strong>Scanner</strong> Files<br />
WheretoGoFromHere<br />
In this chapter, you learned how to use the AutoUpdate feature of <strong>CyberCop</strong> <strong>Scanner</strong>.<br />
The AutoUpdate feature allows you to automatically download update packs from<br />
NAI’s FTP site (or another FTP site). You now know how to select whether you want<br />
to perform updates now, or schedule periodic (monthly or weekly) updates.<br />
Part II of this manual, “Advanced Features,” explains advanced functions of <strong>CyberCop</strong><br />
<strong>Scanner</strong>, including the <strong>CyberCop</strong> <strong>Scanner</strong> NTCASL user interface that allows you to<br />
generate custom packets that use the custom audit scripting language. You can then<br />
send your custom packets to a destination host to check for security holes in a network.<br />
You construct packets using tools provided in the NTCASL user interface. It is not<br />
necessary to know the custom audit scripting language to use the NTCASL user<br />
interface. Part II also includes a brief introduction to the Vulnerability Database<br />
Editor.<br />
8-10 Chapter 8
Part Two: Advanced Features<br />
1
1Using NTCASL to Generate<br />
Custom Audit Packets<br />
Introduction<br />
1<br />
CASL (custom audit scripting language) is a high-level programming language<br />
designed to write programs (often called scripts) that simulate low-level attacks or<br />
information gathering checks on networks. To write programs that simulate an attack<br />
or information gathering check, you need to write code that constructs packets and then<br />
sends those packets to a host on a network just as an actual attack or information<br />
gathering check would. You can execute the programs you create in CASL to<br />
determine if a network is vulnerable to the attack or the information gathering check<br />
simulated by the programs.<br />
You can use the NTCASL screen to create and send custom IP packets. In this chapter,<br />
you will create and send an example packet, specifically a ping packet. Then, you will<br />
learn more about the NTCASL screen controls.<br />
<strong>CyberCop</strong> <strong>Scanner</strong> <strong>Getting</strong> <strong>Started</strong> <strong>Guide</strong> 1-1
Using NTCASL to Generate Custom Audit Packets<br />
About CASL (Custom Audit Scripting Language)<br />
CASL is a high-level programming language designed to write programs (often called<br />
scripts) that simulate low-level attacks or information gathering checks on networks.<br />
To write programs that simulate an attack or information gathering check, you need to<br />
write code that constructs packets and then sends those packets to a host on a network<br />
just as an actual attack or information gathering check would. You can execute the<br />
programs you create in CASL to determine if a network is vulnerable to the attack or<br />
the information gathering check simulated by the programs. You can use the CASL<br />
screen to create and send custom IP packets.<br />
1-2 Chapter 1
Creating an Example Packet<br />
Using NTCASL to Generate Custom Audit Packets<br />
This section includes step-by-step instructions for creating and sending an example<br />
packet--a ping packet.<br />
To create a ping packet, follow these steps:<br />
1. Open CASL from Tools>CASL.<br />
2. From New select Packet to create an empty packet. A ping packet consists of an<br />
IP header, an ICMP fixed header, and a data component. In the steps below you<br />
add these items to the packet.<br />
3. Create an IP header for the packet.<br />
• Select the packet.<br />
• Then, from the listbox select IP Header and then click the Add button. The IP<br />
Header and its elements appear on the screen under the packet.<br />
4. Enter values for parameters for IP header elements, including Value Type, Value,<br />
and Bit Width. Other parameters are automatically selected (or, are not required<br />
by CASL).<br />
• Select the Version element under the IP header. Set element parameters as<br />
follows.<br />
Value Type: Integer<br />
Value: 4<br />
Bit Width: 4<br />
• Select the Transport Protocol element under the IP header. Set element<br />
parameters as follows.<br />
Value Type: Protocols<br />
Value: IPPROTO_ICMP<br />
Bit Width: 8<br />
• Select the Source Address element under the IP header. Set element<br />
parameters as follows.<br />
Value Type: IP Address<br />
Value: Enter the IP address you want the packet to appear to be from.<br />
Bit Width: 32<br />
• Select the Destination Address element under the IP header. Set element<br />
parameters as follows.<br />
Value Type: IP Address<br />
Value: Enter the IP address of the packet destination.<br />
Bit Width: 32<br />
<strong>CyberCop</strong> <strong>Scanner</strong> <strong>Getting</strong> <strong>Started</strong> <strong>Guide</strong> 1-3
Using NTCASL to Generate Custom Audit Packets<br />
5. Create an ICMP fixed header for the packet.<br />
• Select Packet.<br />
• Then, from the listbox select ICMP Fixed Header and click the Add button.<br />
The ICMP fixed header and its elements appear on the screen under the<br />
packet.<br />
6. Set parameters for the ICMP fixed header as follows.<br />
• Select the Message Type element under the IP header. Set element parameters<br />
as follows.<br />
Value Type: Integer<br />
Value: 8. (A value of 8 specifies an ICMP echo request, which you set up in<br />
the steps below.)<br />
Bit Width: 8<br />
7. An ICMP echo request requires that you create a component with two elements<br />
under the ICMP fixed header.<br />
• To create a component, from New select Component. Now, rename<br />
GenericComponent to ICMP Echo Request.<br />
• Create two elements by selecting Element from the New menu twice. There<br />
should be two elements: GenericElement1 and GenericElement2. Rename<br />
GenericElement1 to Echo_ID. Then rename GenericElement2 to Sequence<br />
Number.<br />
• Set parameters for Echo_ID. Select Echo_ID. Then, set Value Type to<br />
Integer, Value to 0, and Bit Width to 16.<br />
• Set parameters for Sequence Number. Select Sequence Number. Then, set<br />
Value Type to Integer, Value to 0, and Bit Width to 16.<br />
8. Add data to the packet as follows.<br />
• Select the packet.<br />
• Then, from the listbox choose Data and click the Next button. A Data<br />
component appears as a packet component.<br />
• Select Data. The Edit Data button appears on the screen.<br />
• Click the Edit Data Button. When you click the button, the program asks if<br />
you want to edit data. Click the Yes button to continue. The Edit Data dialog<br />
box opens.<br />
• Select 20 bytes in the Data Length listbox using the scrollbox arrows.<br />
• There are two option buttons in the dialog box—Text mode and Hex mode.<br />
Text mode lets you add text to data. Hex mode displays the text in<br />
hexadecimal format. You can edit hexadecimal values.<br />
For now, select the Text mode option button.<br />
1-4 Chapter 1
Using NTCASL to Generate Custom Audit Packets<br />
• Then, enter Echo Request Data... in the screen. Click the OK button to<br />
continue.<br />
9. Save the packet. From the File menu select Save Script. The Save As dialog box<br />
opens. Select the drive and the directory where you want the script file to be<br />
stored. Then, in the File Name textbox enter a name for the script. Click the Save<br />
button.<br />
10. Click the Play icon to send the packet. If the packet reaches the host, the host sends<br />
an ICMP echo reply to the source IP address of the packet.<br />
<strong>CyberCop</strong> <strong>Scanner</strong> <strong>Getting</strong> <strong>Started</strong> <strong>Guide</strong> 1-5
Using NTCASL to Generate Custom Audit Packets<br />
CASL Screen Controls<br />
The CASL Screen<br />
This section gives more details about the CASL screen controls which you can use to<br />
generate custom audit packets.<br />
The CASL screen includes menus, a toolbar, and a listbox, which are used to create<br />
(and send) packets. A packet generally consists of the following items:<br />
• components with elements<br />
• component groups<br />
• data components<br />
When you create a packet, items that make up the packet are shown on the left side of<br />
the screen. If you select an item, information about the item is displayed on the right<br />
side of the screen. You save packets as script files using the file extension .script.<br />
1-6 Chapter 1
CASL Menus<br />
Using NTCASL to Generate Custom Audit Packets<br />
CASL menus contain menu items for creating packets. Menus include File, New, and<br />
Help, as described in Table 1-1 below.<br />
Table 1-1. The CASL menus.<br />
Menu This menu item Does this<br />
File Open Script Opens the Open dialog box, which allows<br />
you to open previously saved script files<br />
(i.e. packets). Alternatively, you can click<br />
the Folder button on the toolbar to open the<br />
Open dialog box.<br />
Save Script<br />
Save Script As<br />
Exit<br />
Saves any changes to the specified script<br />
file. Alternatively, click the Diskette icon on<br />
the toolbar to save changes to the script file.<br />
Opens the Save As dialog box, which allows<br />
you to save packet changes to a new script<br />
file.<br />
Closes the CASL screen.<br />
New Packet Creates an empty packet. The empty packet<br />
is called GenericPacket by default. Group<br />
components, data components, and<br />
components with elements can be added to<br />
the packet. The packet can also be renamed.<br />
Group<br />
Component<br />
Creates an empty group. The empty group is<br />
called GenericGroup by default. A number is<br />
appended to the end of the GenericGroup<br />
name when more than one group is created.<br />
The group can be renamed. A group is used<br />
to group related components.<br />
Creates an empty component. The empty<br />
component is called GenericComponent by<br />
default. The component can be renamed.<br />
Elements are added under components.<br />
<strong>CyberCop</strong> <strong>Scanner</strong> <strong>Getting</strong> <strong>Started</strong> <strong>Guide</strong> 1-7
Using NTCASL to Generate Custom Audit Packets<br />
Element<br />
Creates an empty element. The empty<br />
element is called GenericElement by default.<br />
A number is appended to the end of the<br />
GenericElement name when more than one<br />
element is created. The element can be<br />
renamed. Elements are data values for<br />
numerical fields inside components.<br />
Help Help Displays <strong>CyberCop</strong> <strong>Scanner</strong> Help.<br />
About<br />
Opens the About <strong>Scanner</strong> dialog box, which<br />
displays the software version number<br />
installed on your system.<br />
1-8 Chapter 1
CASL Toolbar<br />
Using NTCASL to Generate Custom Audit Packets<br />
Toolbar buttons provide access to the most used screen functions. The toolbar buttons<br />
are described in Table 1-2 below.<br />
Table 1-2. The CASL toolbar.<br />
This button<br />
Folder<br />
Diskette<br />
Play<br />
Copy<br />
Delete<br />
Does this<br />
Displays the Open dialog box, which allows<br />
you to open previously saved script files (i.e.<br />
packets).<br />
Saves changes to the currently opened script.<br />
Sends the selected packet to the target<br />
destination address in the IP header.<br />
Copies an item used to create a packet. To<br />
copy an item, select the item in the packet and<br />
then click the Copy button.<br />
Deletes an item used to create a packet. To<br />
delete an item, select the item in the packet<br />
and then click the Delete button.<br />
<strong>CyberCop</strong> <strong>Scanner</strong> <strong>Getting</strong> <strong>Started</strong> <strong>Guide</strong> 1-9
Using NTCASL to Generate Custom Audit Packets<br />
CASL Listbox<br />
The CASL listbox includes items that can be added to a packet, described in Table 1-3<br />
below.<br />
Table 1-3. The CASL listbox.<br />
This listbox item<br />
Generic Packet<br />
Generic Group<br />
Generic Component<br />
Generic Element<br />
Data<br />
Does this<br />
Creates an empty packet. (Alternatively, select<br />
Packet from the New menu.) The empty packet<br />
is called GenericPacket by default. Group<br />
components, data components, and components<br />
with elements can be added to the packet. The<br />
packet can also be renamed.<br />
Creates an empty group. (Alternatively, select<br />
Group from the New menu.) The empty group<br />
is called GenericGroup by default. A number is<br />
appended to the end of the GenericGroup name<br />
when more than one group is created. The<br />
group can be renamed. A group is used to group<br />
related components.<br />
Creates an empty component. (Alternatively,<br />
select Component from the New menu.) The<br />
empty component is called GenericComponent<br />
by default. The component can be renamed.<br />
Elements are added under components, as<br />
described below.<br />
Creates an empty element.(Alternatively, select<br />
Element from the New menu.) The empty<br />
element is called GenericElement by default. A<br />
number is appended to the end of the<br />
GenericElement name when more than one<br />
element is created. The element can be<br />
renamed. Elements are data values for<br />
numerical fields inside components.<br />
Creates an empty data component. The empty<br />
data component is called Data by default. The<br />
data component can be renamed. Arbitrary<br />
length binary or text data can be entered in the<br />
data component.<br />
1-10 Chapter 1
Using NTCASL to Generate Custom Audit Packets<br />
ICMP Fixed Header<br />
TCP Header<br />
UDP Header<br />
IP Header<br />
Creates a component with the ICMP header<br />
structure predefined.<br />
TCP HeaderCreates a component with the TCP<br />
header structure predefined.<br />
Creates a component with the UDP header<br />
structure predefined.<br />
IP HeaderCreates a component with the IP<br />
header structure defined. An IP header must be<br />
used first in every packet you create.<br />
You can add any of the items listed in the table to a packet by selecting the item from<br />
the listbox and then clicking the Add button.<br />
<strong>CyberCop</strong> <strong>Scanner</strong> <strong>Getting</strong> <strong>Started</strong> <strong>Guide</strong> 1-11
Using NTCASL to Generate Custom Audit Packets<br />
WheretoGoFromHere<br />
In this chapter, you learned how to use the screen controls of the NTCASL user<br />
interface to generate a custom audit packet and send it to a destination host. You can<br />
generate custom packets to check for security holes on a network.<br />
CASL uses the custom audit scripting language to generate a CASL packet file. CASL<br />
allows you to write your own programs to perform security audits such as attacks or<br />
information gathering checks on a network.<br />
If you would like to learn more about CASL to write your own programs, you can go<br />
to Part III, Appendix A, “A <strong>Guide</strong> to CASL (Custom Audit Scripting Language).”<br />
Appendix A gives a detailed explanation of CASL, including program structure and<br />
syntax. It also includes a programming reference guide. You need to have experience<br />
using a high-level programming language in order to use CASL.<br />
1-12 Chapter 1
2The Vulnerability Database<br />
Editor<br />
Introduction<br />
2<br />
The Vulnerability Database Editor allows you to view and edit module records. It also<br />
allows you to export modules from the Vulnerability Database as *.1 files. A module<br />
record includes module reference parameters, descriptive options such as flags and<br />
severity settings, and verbose descriptions. <strong>CyberCop</strong> <strong>Scanner</strong> uses module records to<br />
access modules to run them during a scan, to pass certain parameters to modules, and<br />
to generate vulnerability descriptions in reports.<br />
The Vulnerability Database Editor is available by selecting the Configure>Module<br />
Settings... menu item of <strong>CyberCop</strong> <strong>Scanner</strong> to open the Module Configuration dialog<br />
box. In this dialog box, you right-click on a module name in the Module Selections<br />
listbox and then select Edit Vulnerability... from the context menu to view the<br />
module record for the selected module.<br />
NOTE: The Vulnerability Database Editor is intended for expert use only. Any<br />
changes made to module records in the Vulnerability Database could seriously<br />
impair the operation of <strong>CyberCop</strong> <strong>Scanner</strong>.<br />
<strong>CyberCop</strong> <strong>Scanner</strong> <strong>Getting</strong> <strong>Started</strong> <strong>Guide</strong> 2-1
The Vulnerability Database Editor<br />
About the Vulnerability Database<br />
<strong>CyberCop</strong> <strong>Scanner</strong> includes over 600 modules, grouped into classes, which perform<br />
various information gathering checks and attacks against a target host or network. The<br />
executable files for the module classes, stored in the directory c:\Program<br />
Files\Network Associates\SMI Products\<strong>CyberCop</strong> <strong>Scanner</strong>\modules, are run by<br />
<strong>CyberCop</strong> <strong>Scanner</strong>, which passes required parameters and arguments to them from the<br />
Vulnerability Database.<br />
The Vulnerability Database contains a module record for each module, which<br />
includes parameters which reference the executable file for the module, descriptive<br />
options such as flags and severity settings, and verbose descriptions. The module<br />
records are used by <strong>CyberCop</strong> <strong>Scanner</strong> to access modules during a scan and to generate<br />
reports of vulnerabilities that are found. In addition, the Vulnerability Database stores<br />
global variables, called module specific options, which are used by specific modules<br />
as parameters or arguments. Settings for these global variables can be viewed on the<br />
Module Options tab of <strong>CyberCop</strong> <strong>Scanner</strong>, accessible by selecting the<br />
Configure>Scan Settings... menu item.<br />
The Vulnerability Database consists of the file CCSVulnDB.mdb, a database file<br />
which contains the module records and module specific options used by <strong>CyberCop</strong><br />
<strong>Scanner</strong>. This database file is located at c:\Program Files\Network Associates\SMI<br />
Products\<strong>CyberCop</strong> <strong>Scanner</strong>.<br />
NOTE: Before making any changes to the Vulnerability Database, including<br />
changing any module specific options on the Module Options tab of <strong>CyberCop</strong><br />
<strong>Scanner</strong> and editing any module records using the Vulnerability Database Editor,<br />
it is strongly recommended that you create a backup copy of the<br />
CCSVulnDB.mdb database file. Otherwise, the database file will be<br />
overwritten and you will not be able to undo the changes.<br />
Making a backup copy of the CCSVulnDB.mdb database file ensures that you<br />
can retrieve the original module records and module specific options after<br />
making any changes.<br />
The Vulnerability Database Editor is built into the <strong>CyberCop</strong> <strong>Scanner</strong> user interface.<br />
The Vulnerability Database Editor allows you to modify information in a module<br />
record and to export modules as *.1 files with numerical filenames. It also allows you<br />
to modify module parameters.<br />
2-2 Chapter 2
About Module Records<br />
The Vulnerability Database Editor<br />
The Vulnerability Database Editor displays controls including listboxes, dropdown<br />
lists, and text fields, for viewing and modifying the information in a module record.<br />
Module information is listed below.<br />
Flags and Severity Settings<br />
A module record includes Flags and descriptive options such as Impact, Risk Factor,<br />
Complexity, Root Cause, Fix Ease, and Popularity.<br />
Flags<br />
There are several flags including One at a Time, Dangerous, Policy, and Access. These<br />
are internal flags used by <strong>CyberCop</strong> <strong>Scanner</strong> when running modules. Changing Flag<br />
settings is not recommended.<br />
One at a Time: One at a Time indicates that the module must be run on its own, so<br />
that no other modules will interfere with its operation.<br />
Dangerous: Dangerous indicates that the module has the potential to do damage, by<br />
performing a denial of service attack. Modules flagged as Dangerous are highlighted<br />
in red when they are selected in the Modules listbox in the Config>Module Config tab.<br />
Policy: Policy indicates that a module checks for policy violations, for example,<br />
exceeding allotted disk space or password age limits. Policy violation checks generally<br />
apply to Windows NT systems.<br />
Impact<br />
Impact indicates the specific threat posed by a vulnerability. A security problem in a<br />
computer system can pose many different risks. Some problems are more serious than<br />
others; while all problems should be considered in an audit, it is more important that<br />
the most serious and far-reaching vulnerabilities be addressed before the minor ones.<br />
<strong>CyberCop</strong> <strong>Scanner</strong> breaks the implications of a vulnerability down into several<br />
different categories, each of which represents an aspect of a computer system<br />
threatened by a security vulnerability.<br />
System Integrity: Some security problems threaten all the operations of a computer<br />
system, by allowing an attacker to obtain complete control of it's functioning. These<br />
problems include attacks that grant a remote attacker shell access to the system (or the<br />
ability to execute arbitrary commands) and the ability to modify arbitrary files on the<br />
system (and thus reconfigure it).<br />
<strong>CyberCop</strong> <strong>Scanner</strong> <strong>Getting</strong> <strong>Started</strong> <strong>Guide</strong> 2-3
The Vulnerability Database Editor<br />
Confidentiality: Many computer systems store information that is highly sensitive,<br />
due to user privacy requirements (such as the secure storage of personal<br />
communications in electronic mail) or organizational secrecy requirements (such as<br />
private financial data or proprietary software). Threats to confidentiality allow an<br />
attacker to gain access to this information illicitly.<br />
Accountability: Most computer systems have some type of logging capability that at<br />
least potentially allows the actions of an attacker to be traced back to their source.<br />
Systems that put a name to the activities of system users are said to provide<br />
"accountability". Because accountability acts as a deterrent to attacks (which are<br />
usually illegal), disabling these capabilities is often a priority for attackers.<br />
Data Integrity: Most users of computer systems assume that the data maintained by<br />
those systems is accurate and authentic. This can be extremely important for many<br />
applications, in which incorrect information can be legally, financially, or even<br />
medically disastrous. Attacks which attempt to illicitly modify information on a<br />
computer system are said to target the integrity of it's data.<br />
Authorization: Most users of computer systems have a limited amount of access to<br />
those systems; they can perform their own work, and work within their groups, but<br />
cannot directly manage the operation of the entire system. The mechanisms used to<br />
limit users to appropriate activities track the "authorization" of those activities.<br />
Availability: "Availability" is the general computer security goal of keeping a<br />
computer system "available" to it's legitimate users --- up and running smoothly and<br />
with reasonable, expected performance. Attacks that compromise the availability of a<br />
system are more widely referred to as "Denial of Service" attacks.<br />
Intelligence: Attackers often collect information about targeted systems before<br />
actually attempting to break in; information gathered by an attacker prior to a break-in<br />
attempt often greatly increases the odds of a successful intrusion, and, more<br />
importantly, amplifies the rewards made available by an attack. Attacks which involve<br />
the collection of information from a system prior to actual intrusion are said to impact<br />
"intelligence".<br />
Risk Factor<br />
Risk Factor indicates the severity of the threat posed by a vulnerability. The<br />
implications (or impact) of a vulnerability determine which aspects of a computer<br />
system are affected by exploitation of that security problem. To fully assess the<br />
technical risks posed by a problem, however, it is important to consider how "severe"<br />
the problem is. A minor problem that affects data integrity may only allow an attacker<br />
to insert random garbage into a file; a major problem might allow an attacker to control<br />
completely the contents of the same file.<br />
2-4 Chapter 2
The Vulnerability Database Editor<br />
Low: The scope of the implications of the attack are extremely limited, providing very<br />
little flexibility to an attacker. Exploitation of this type of problem may not even be<br />
noticeable to users of the system. It is important to understand, however, that several<br />
low-severity problems can often be leveraged together to perform a more severe<br />
attack.<br />
Medium: The results of the attack are serious, posing a real risk to the system or the<br />
privacy of its users. While complete access to the system cannot be obtained directly<br />
from the attack, the access it does provide can be instrumental in completely<br />
compromising the system.<br />
High: The attack is extremely powerful, posing a direct threat to the system.<br />
Exploitation of this problem can immediately meet the objectives of the attacker, and<br />
pose a serious risk to the vulnerable organization.<br />
Complexity<br />
Complexity indicates the difficulty involved in exploiting a vulnerability. Some<br />
attacks against computer systems are more complicated than others; exploiting a<br />
vulnerability in a WWW CGI program may involve merely inserting a "magic"<br />
character in form field, while other attacks may require a carefully coordinated series<br />
of interactions with obscure network services. Unfortunately, the complexity of an<br />
attack has more of an effect on the likelihood of it being defended against, rather than<br />
the likelihood of it being used by an attacker (who is probably wielding an arsenal of<br />
complex attacks to leverage against a computer system). Ironically, the most complex<br />
attacks are often the most popular.<br />
Low: The attack can be executed by an unskilled attacker without any special tools<br />
(perhaps by using standard Unix utilities, or by using their web browser). The problem<br />
may be obvious even to someone who is not familiar with the issues involved in<br />
computer security.<br />
Medium: A special-purpose software tool is required to exploit this problem; this tool<br />
is probably quite easy to use and understand by a neophyte hacker, but exploitation of<br />
this problem may be out of the reach of individuals that are not familiar with the<br />
security community or the hacker underground.<br />
High: Exploitation of this problem requires exploit code, which is difficult to write and<br />
may require access to specific types of computer systems. Actually using this tool may<br />
require specific knowledge of the vulnerability and the system on which it is present.<br />
<strong>CyberCop</strong> <strong>Scanner</strong> <strong>Getting</strong> <strong>Started</strong> <strong>Guide</strong> 2-5
The Vulnerability Database Editor<br />
Root Cause<br />
Root Cause indicates the underlying cause of a vulnerability. Many security problems<br />
can be avoided, proactively, by maintaining security awareness in the planning and<br />
design stages of network engineering. Others may be the result of poor operational<br />
practice (perhaps due to network administration lacking focus on security). Identifying<br />
the root causes of the vulnerabilities discovered in a network allows patterns of<br />
vulnerability to be identified.<br />
Configuration: The vulnerability exists because a component of the system was<br />
configured insecurely. Available access control mechanisms (such as password<br />
authentication for routers) have not been enabled, default configuration values remain<br />
present (default SNMP communities are still in place, for instance), or extensions have<br />
been made to the system that violate security.<br />
Implementation: The vulnerability exists due to a software implementation problem,<br />
because of a bug in a program deployed in the system. Prior to the initial discovery of<br />
this security problem, there was no way for an organization to be aware of this<br />
problem, and, unless the vulnerable software is removed or restricted from normal<br />
users, the only way to fix the problem is to apply vendor patches.<br />
Design: The vulnerability exists because of an insecure design, that is, the service<br />
implemented by the problematic software is fundamentally insecure, the design of the<br />
software neglects security concerns, or the protocol implemented by the software is<br />
inadequate. Similar software solutions for this service may have equivalent<br />
vulnerabilities, and there may not be any obvious way to defend against the threat<br />
without disabling the service provided by the vulnerable software.<br />
Fix Ease<br />
Fix ease indicates the simplicity of fixing a vulnerability, or the ease of resolution.<br />
When faced with a large number of serious vulnerabilities, it is important that security<br />
problems be solved as efficiently as possible. Because some problems are easier to<br />
solve than others, quickly addressing the easy problems first may rapidly increase the<br />
security of a vulnerable system. Additionally, fixing some problems poses risks of<br />
disrupting services, and resolution for those problems may thus require careful<br />
scheduling.<br />
Trivial: The problem can be resolved quickly and without risk of disruption by<br />
reconfiguration of vulnerable software.<br />
Simple: The problem might be solved by significant reconfiguration of the vulnerable<br />
system, or by a vendor patch. Minimal risk of disruption to services is present, but<br />
conscientious immediate effort to resolve the problem is reasonable.<br />
2-6 Chapter 2
The Vulnerability Database Editor<br />
Moderate: The problem requires a vendor patch to solve and presents a significant<br />
risk of service disruption. It is possible that resolution of this problem may require an<br />
upgrade to a substantially different version of software, or that the reconfiguration<br />
required to solve the problem has far-reaching impact on legitimate users.<br />
Difficult: The problem requires either an obscure, hard-to-find vendor patch to<br />
resolve, or requires manual source code editing to fix. Great risk of service disruption<br />
makes it impractical to solve this problem for mission critical systems without careful<br />
scheduling.<br />
Infeasible: This problem is due to a design-level flaw, and cannot be resolved by<br />
patching or reconfiguring vulnerable software. It is possible that the only way to<br />
address this problem is to cease using the vulnerable software or protocol, or to isolate<br />
it from the rest of the network and eliminate reliance on it completely.<br />
Popularity<br />
Popularity indicates the likelihood that a vulnerability will be exploited. It is important<br />
to understand that all attackers are not equally capable. The presence of obscure,<br />
complicated vulnerabilities may not be a strong indicator that a system has already<br />
been compromised; however, the presence of well known, widely exploited problems<br />
may be an immediate cause for alarm.<br />
Obscure: The attack is not widely known, or, more importantly, the information<br />
needed to exploit the problem is not widely available. The problem may affect a<br />
service that is not well understood, or may require knowledge not often maintained by<br />
casual attackers (such as the advanced mathematics needed to invent a cryptographic<br />
attack).<br />
Widespread: The attack has been published and is widely known to attackers.<br />
However, the relative rarity of vulnerable systems or the difficulty involved in<br />
exploiting the problem prevents it from representing a likely first avenue of attack on<br />
asystem.<br />
Popular: The attack has been published, often in computer underground publications<br />
or on widely-read "hacker" newsgroups, and is used often by neophyte attackers and<br />
by automated attacker tools. It is not unlikely that the system's vulnerability has been<br />
discovered by an attacker casually scanning large numbers of arbitrary addresses for<br />
vulnerable hosts.<br />
<strong>CyberCop</strong> <strong>Scanner</strong> <strong>Getting</strong> <strong>Started</strong> <strong>Guide</strong> 2-7
The Vulnerability Database Editor<br />
Module Descriptions<br />
Module descriptions include basic text information about the selected module.<br />
Short Description<br />
Module Parameters<br />
Short Description specifies the name of the module that will be displayed in the<br />
Module Configuration dialog box and also in any reports that are generated.<br />
Verbose Descriptions<br />
Verbose text descriptions can be entered for the categories Security Concerns,<br />
Suggestion, Reproduce, Tech Paper and References (for other sources of information),<br />
and Manager Description (high level description).<br />
Not all description categories are used by all modules. You can add text to the<br />
descriptions that apply to your network. However, it is not recommended that you<br />
change or delete existing text.<br />
The module parameter text fields include the top and bottom rows of the Edit<br />
Vulnerability dialog box of the Vulnerability Database Editor. These text fields allow<br />
editing of parameters or arguments in existing modules. As examples, some of these<br />
module parameters are described below.<br />
NOTE: Changing module parameters is not recommended. Any changes made<br />
to module parameters in the Vulnerability Database could seriously impair the<br />
operation of <strong>CyberCop</strong> <strong>Scanner</strong>.<br />
VulnID<br />
VulnID specifies the module number that will be listed in the Module Configuration<br />
dialog box and also in any reports that are generated. The Vulnerability ID matches the<br />
ID number in the module class executable file. Do not change the Vulnerability ID.<br />
Otherwise <strong>CyberCop</strong> <strong>Scanner</strong> will not be able to access the module to run it.<br />
Timeout<br />
Timeout sets a timeout value (in seconds) for the module that overrides the default<br />
value specified on the Scan Options tab (accessible by selecting the Configure>Scan<br />
Settings... menu item). If a value of 0 is specified in the Vulnerability Database, then<br />
the default value on the Scan Options tab is used. If a value of –1 is specified, then the<br />
module has no timeout and will continue running until it is finished.<br />
2-8 Chapter 2
The Vulnerability Database Editor<br />
Editing Module Records<br />
You edit module records using the Vulnerability Database Editor. Controls in the Edit<br />
Vulnerability Database Editor allow you to do the following:<br />
• You can edit information in a module record.<br />
• You can save changes made to a module record in the Vulnerability Database.<br />
• You can cancel changes made in the Edit Vulnerability dialog box to close the<br />
Vulnerability Database Editor without saving changes.<br />
To open the Vulnerability Database Editor, do the following:<br />
1. Select the Configure>Module Settings... menu item. The Module Configuration<br />
dialog box will open.<br />
2. In the Module Configuration dialog box, in the Module Selection listbox,<br />
right-click on a module nam or module number to open a context menu.<br />
3. From the context menu, select Edit Vulnerability... The Edit Vulnerability dialog<br />
box will open, allowing you to view and edit the module record for the selected<br />
module.<br />
NOTE: The Vulnerability Database Editor is intended for expert use only. You<br />
should be aware that changes made to module records in the Vulnerability<br />
Database could seriously impair the operation of <strong>CyberCop</strong> <strong>Scanner</strong>. It is<br />
strongly recommended that you do not make changes to module records in the<br />
Vulnerability Database.<br />
To edit a module record, do the following:<br />
NOTE: Before making any changes to the Vulnerability Database, including<br />
changing any module specific options on the Module Options tab of <strong>CyberCop</strong><br />
<strong>Scanner</strong> and editing any module records using the Vulnerability Database Editor,<br />
it is strongly recommended that you create a backup copy of the<br />
CCSVulnDB.mdb database file. Otherwise, the database file will be<br />
overwritten and you will not be able to undo the changes.<br />
Making a backup copy of the CCSVulnDB.mdb database file ensures that you<br />
can retrieve the original module records and module specific options after<br />
making any changes.<br />
1. You can edit information in the module record as follows:<br />
• Set descriptive options in the verbose text fields.<br />
• Set flags and severity settings.<br />
The above information options are described in more detail earlier in this chapter.<br />
<strong>CyberCop</strong> <strong>Scanner</strong> <strong>Getting</strong> <strong>Started</strong> <strong>Guide</strong> 2-9
The Vulnerability Database Editor<br />
To save changes made to a module record, do the following:<br />
• In the Edit Vulnerability dialog box, after editing information in a module record,<br />
click OK. The changes you made will be saved and the dialog box will close.<br />
NOTE: You will not be prompted before changes are saved. It is not possible to<br />
undo changes that are saved. To recover the original version of a module record,<br />
you must use a backup copy of the Vulnerability Database CCSVulnDB.mdb<br />
which you must create before making any changes.<br />
To cancel changes made in the Edit Vulnerability dialog box, do the following:<br />
• Click the Cancel button. The dialog box will close and changes will not be saved.<br />
Now you know how to use some of the controls of the Vulnerability Database Editor.<br />
2-10 Chapter 2
Exporting Modules<br />
The Vulnerability Database Editor<br />
To export a module as a *.1 file with a numerical filename, do the following:<br />
1. Select the Configure>Module Settings... menu item. The Module Configuration<br />
dialog box will open.<br />
2. In the Module Configuration dialog box, in the Module Selection listbox,<br />
right-click on a module name or module number to open a context menu.<br />
3. From the context menu, select Export Module... The Save As dialog box will<br />
open, allowing you to save the selected module as a module file (*.1) with a<br />
numerical filename.<br />
<strong>CyberCop</strong> <strong>Scanner</strong> <strong>Getting</strong> <strong>Started</strong> <strong>Guide</strong> 2-11
The Vulnerability Database Editor<br />
Summary<br />
In this chapter, you learned how to use the Vulnerability Database Editor to view and<br />
edit module records in the Vulnerability Database and to export modules. You should<br />
use caution when modifying any information in the Vulnerability Database, as changes<br />
could seriously impair operation of <strong>CyberCop</strong> <strong>Scanner</strong><br />
2-12 Chapter 2
Part Three: Appendices<br />
1
AA <strong>Guide</strong> to CASL (Custom<br />
Audit Scripting Language)<br />
Introduction<br />
A<br />
This chapter is a guide to CASL (custom audit scripting language). CASL is a<br />
high-level programming language. CASL lets you write programs in a text editor that<br />
simulate attacks or information gathering checks, making CASL ideal for evaluating<br />
network security. To write programs in CASL you must have the CASL interpreter<br />
installed on your system.<br />
In this chapter, you will find information on the following topics:<br />
• an explanation of CASL<br />
• an introduction to the main elements of CASL programs, including an example<br />
CASL program<br />
• a reference section containing detailed descriptions of the elements you can use in<br />
CASL programs<br />
• a summary of the CASL built-in functions you can use in CASL programs<br />
CASL is for expert use only. CASL requires high-level programming experience and<br />
an understanding of TCP/IP protocol.<br />
<strong>CyberCop</strong> <strong>Scanner</strong> <strong>Getting</strong> <strong>Started</strong> <strong>Guide</strong> A-1
A <strong>Guide</strong> to CASL (Custom Audit Scripting Language)<br />
About CASL<br />
CASL is a high-level programming language designed to write programs (often called<br />
scripts) that simulate low-level attacks or information gathering checks on networks.<br />
To write programs that simulate an attack or information gathering check, you need to<br />
write code that constructs packets and then sends those packets to a host on a network<br />
just as an actual attack or information gathering check would. You can execute the<br />
programs you create in CASL to determine if a network is vulnerable to the attack or<br />
the information gathering check simulated by the programs.<br />
Writing programs to simulate low-level attacks on networks is difficult, if not<br />
impossible, in most high-level programming languages. As an example, consider the<br />
Tear Drop attack. Tear Drop sends two IP packet fragments to a host. The two IP<br />
packet fragments overlap each other, which cause crashes on Windows NT and Linux<br />
operating systems. Sending overlapping IP packet fragments is difficult in C and<br />
impossible in COBOL. In CASL sending overlapping IP packet fragments is easy,<br />
making CASL ideal for simulating attacks like Tear Drop.<br />
Writing programs that are not operating system dependent is impossible in most<br />
high-level programming languages. For instance, consider the information gathering<br />
check TCP Stealth Port Scan. TCP Stealth Port Scan detects if a connection can be<br />
made to a port on a host. (TCP Stealth Port Scan does not open the connection.) In C,<br />
you need to write separate programs for different operating systems. For example, if<br />
you want to execute TCP Stealth Port Scan on the Windows NT and Linux operating<br />
systems, you write two programs—one for Windows NT and the other for Linux. In<br />
CASL, you can write one program for TCP Stealth Port Scan and execute it on many<br />
operating systems.<br />
The next section, “Programming With CASL,” is designed to familiarize you with the<br />
main elements of CASL programs. It also includes an example CASL program for<br />
TCP Stealth Port Scan.<br />
A-2 Appendix A
A <strong>Guide</strong> to CASL (Custom Audit Scripting Language)<br />
Programming With CASL<br />
This section is divided into two parts. The first part, “Structuring CASL Programs,”<br />
introduces you to the main elements of CASL programs. The second part,<br />
“Understanding an Example CASL Program,” includes an example CASL<br />
program—TCP Stealth Port Scan. This part guides you through the elements you use<br />
to create the TCP Stealth Port Scan program.<br />
Structuring CASL Programs<br />
You write CASL programs in a text editor. The main elements you use to write CASL<br />
programs (or, scripts) include:<br />
• statements<br />
• variables<br />
• comments<br />
• packets<br />
A CASL program consists of statements. A statement is defined as an action, for<br />
example calculating the value of 2+2 or reading a UDP packet. A statement operates<br />
on variables. A variable can be:<br />
• an ASCII character, which is represented in single quotes (e.g. ’c’)<br />
• a number, which is represented as either: 1) a positive or negative integer without<br />
quotes; or 2) an integer in hexidecimal format with 0X preceding the integer<br />
• a string, which is represented as either: 1) a sequence of characters in double quotes<br />
(e.g. "hello,world!"); or 2) control sequences represented in backslash quoted<br />
codes (e.g. new line is ’\n’)<br />
• a buffer, which holds a collection of data, generally input packets<br />
• a list, which holds a collection of data, generally output packets<br />
A CASL program supports comments that are ignored by the interpreter. A comment<br />
can be either a single line or multiple lines. A single line comment beings with "//". A<br />
multiple line comment begins with "/*" and ends with "*/".<br />
In a CASL program, you create packets, which are units of protocol data, from scratch.<br />
Or, you create packets using predefined packet templates included in CASL. Defining<br />
a packet in CASL consists of selecting the desired protocol structure and then setting<br />
data elements in the packet.<br />
The subsequent section includes an example CASL program, TCP Stealth Port Scan,<br />
which illustrates the main elements of a CASL program.<br />
<strong>CyberCop</strong> <strong>Scanner</strong> <strong>Getting</strong> <strong>Started</strong> <strong>Guide</strong> A-3
A <strong>Guide</strong> to CASL (Custom Audit Scripting Language)<br />
Understanding an Example CASL Program<br />
This section guides you through an example CASL program for TCP Stealth Port<br />
Scan. TCP Stealth Port Scan is an information gathering check. TCP Stealth Port Scan<br />
requests a connection to a port on a host by sending a TCP SYN packet to the host. The<br />
TCP Stealth Port Scan program then waits for a response to the TCP SYN packet. The<br />
TCP response can be:<br />
• an acknowledgment, indicating a service is listening and willing to accept a<br />
connection for the port,<br />
• a reset, indicating a service is not offered for the port, or<br />
• nothing, indicating something, for example a firewall, is filtering out the<br />
connection attempt<br />
Note that the TCP Stealth Port Scan does not open a connection to a port, even when<br />
a service is available on the port.<br />
This is the TCP Stealth Port Scan program created in CASL.<br />
#include "tcpip.casl"<br />
#include "packets.casl"<br />
for(i=1;i
A <strong>Guide</strong> to CASL (Custom Audit Scripting Language)<br />
NOTE: The key words in the TCP Stealth Port Scan program above are<br />
described in detail in the section "CASL Reference" later in this chapter.<br />
The sections below lead you through the steps you perform to create the TCP Stealth<br />
Port Scan program in CASL.<br />
Step One: Defining TCP/IP Packets<br />
To set up a TCP Stealth Port Scan program, you need to create TCP/IP packets. TCP/IP<br />
header defaults for TCP/IP packets are included in CASL. You enter the following<br />
statement to access TCP/IP header defaults:<br />
#include "tcpip.casl"<br />
#include "packets.casl"<br />
Step Two: Creating a TCP SYN Packet<br />
Next, you need to create a TCP SYN packet, which is the packet that requests a<br />
connection to a port on the destination host. You create a TCP SYN packet using a<br />
predefined TCP packet header template, changing predefined parameters in the<br />
template as appropriate. You enter the following statement to create a TCP SYN<br />
packet using the template:<br />
OurSYN = copy SYN;<br />
OurSYN.tcp_source = 10;<br />
OurSYN.tcp_destination = 2049;<br />
The above statement assigns a source port of 10 (an arbitrary number) and a<br />
destination port of 2049 (the TCP NFS port) to the TCP packet header for example<br />
purposes only. You can change the source port and the destination port numbers as you<br />
wish.<br />
Step Three: Specifying a Destination Host for the TCP<br />
SYN Packet<br />
Now, you add an IP header to the TCP SYN packet header. In the IP header, you<br />
specify the destination host for the TCP SYN packet. You enter the following<br />
statement to add an IP header to the TCP SYN packet header:<br />
IP= copy TCPIP;<br />
OurIP.ip_source = 127.0.0.1;<br />
OurIP.ip_destination = 127.0.0.2;<br />
The above statement defines the source host as 127.0.0.1 and the destination host as<br />
127.0.0.1. The source host and destination host IP addresses are provided for example<br />
only. If you write the TCP Stealth Port Scan in CASL, make sure that you enter IP<br />
addresses appropriate for desired source and destination hosts.<br />
<strong>CyberCop</strong> <strong>Scanner</strong> <strong>Getting</strong> <strong>Started</strong> <strong>Guide</strong> A-5
A <strong>Guide</strong> to CASL (Custom Audit Scripting Language)<br />
Step Four: Combining TCP SYN and IP Headers<br />
Next, you combine the TCP SYN and IP headers. There are two ways to combine TCP<br />
SYN and IP headers. You can combine them using either: 1) a list variable or; 2) list<br />
operators.<br />
You enter the following statement to combine TCP SYN and IP headers using a list<br />
variable:<br />
PacketList = [ OurIP, OurSYN ];<br />
The above statement creates a list called PacketList, with one operator for each<br />
component in the list. The opening bracket starts the list and the closing bracket ends<br />
the list. Individual values in the list are separated by a comma.<br />
You enter the following statement to combine TCP SYN and IP headers using list<br />
operators:<br />
PacketList = PacketList push OurSYN;<br />
PacketList = PacketList push OurIP;<br />
The above statement creates a list called PacketList, with a separate operator for each<br />
component in the list. TCP and IP headers are added to the list separately. (The last<br />
element added (or, pushed) onto the list is the first element written to the list.)<br />
Step Five: Outputting the TCP SYN Packet<br />
Next, you instruct the program to output the TCP SYN packet onto a network by<br />
entering the following statement:<br />
ip_output(PacketList);<br />
Step Six: Defining Port Connections<br />
Most standard network services listen to reserved ports. Therefore, you want to<br />
instruct TCP Stealth Port Scan to get information for reserved port nos. 1 through<br />
1023. You get information about reserved ports by looping through the ports. You<br />
enter the following statement to loop through reserved ports:<br />
for(i=1;i
A <strong>Guide</strong> to CASL (Custom Audit Scripting Language)<br />
Step Seven: Sending Connection Requests to Ports<br />
You enter the following statement to send connection requests to reserved ports.<br />
For (i = 1; i < 1023; i = i + 1) {<br />
OurSYN = copy SYN;<br />
OurSYN.tcp_source = 10;<br />
OurSYN.tcp_destination = i;<br />
OurIP = copy TCPIP;<br />
OurIP.tcp_source = 127.0.0.1;<br />
OurIP.tcp_destination = 127.0.0.2;<br />
OurPacket = [ OurIP, OurSYN ];<br />
ip_output(OurPacket);<br />
}<br />
Step Eight: Reading TCP Responses<br />
You use ip_input() routines to determine if a port on a destination host answered the<br />
program’s connection requests. ip_input() routines specify the time (in milliseconds)<br />
for attempting a connection. ip_input() routines also specify the packets types to be<br />
read using a tcp_dump filter.<br />
You enter the following statement to read a response to a packet:<br />
OurFilter = [ "src host ", 127.0.0.2, " and tcp src port ", i ];<br />
where i is equal to 103<br />
ReadPacket = ip_input(2000, OurFilter);<br />
If ip_input() does not read a packet successfully, it returns a value of zero. Each time<br />
ip_input() is used, you must check if it reads a packet successfully by comparing the<br />
returned value to 0. You enter the following statement to compare values:<br />
if(!ReadPacket)<br />
continue;<br />
In the above statement, continue tells the interpreter to move forward in the loop.<br />
When the program reads a packet, it returns a complete IP packet.<br />
Step Nine: Determining TCP Response Types<br />
Next, you need to determine if the complete IP packet is a TCP SYN+ACK or a TCP<br />
RST packet. If the IP packet is a TCP SYN+ACK packet, a service was listening and<br />
willing to accept a connection for the port. If the packet is a TCP RST packet, a service<br />
is not offered for the port. You can determine if the IP packet is a TCP SYN+ACK or<br />
a TCP RST packet by looking at its packet size and packet header, as described below.<br />
<strong>CyberCop</strong> <strong>Scanner</strong> <strong>Getting</strong> <strong>Started</strong> <strong>Guide</strong> A-7
A <strong>Guide</strong> to CASL (Custom Audit Scripting Language)<br />
First, you check the size of the IP packet. The IP packet must be large enough to<br />
contain a TCP and IP header. You enter the following statement to check the IP packet<br />
size:<br />
if(size(ReadPacket) < size(IP) + size(TCP))<br />
continue;<br />
The above statement tells the interpreter to move forward in the loop if the IP packet<br />
is smaller in size than the sum of the sizes of the TCP and IP headers. If the IP packet<br />
is large enough, the packet header can be extracted from the IP packet. You enter the<br />
following statement to extract the packet header:<br />
ReadIP = extract ip from ReadPacket;<br />
ReadTCP = extract tcp from ReadPacket;<br />
Each header in the above statement is extracted using the extract operator. Once the<br />
packet headers are extracted, you look at the individual fields of the TCP header to<br />
verify that they are set properly. The SYN and ACK fields should be set; the RST field<br />
should not be set. Note that if the aforementioned fields are not set properly, the<br />
connections to the port will be opened.<br />
Enter the following statement to view TCP header fields:<br />
if(ReadTCP.tcp_ack != 1 || ReadTCP.tcp_syn != 1 || ReadTCP.tcp_rst == 1)<br />
continue;<br />
where || is a logical or and != is not equal. The statement reads: If the ACK flag is not<br />
set, or the SYN flag is not set, or the RST flag is set restart the loop for the next port.<br />
If the programs proceeds in the loop after this statement, the packet is a TCP SYN +<br />
ACK packet. This packet type indicates that a service was listening and willing to<br />
accept a connection for the port.<br />
Step Ten: Verifying an Open Port Connection<br />
The print function notifies you if there is a port open for connection. You enter the<br />
following statement to see if a port is open for connection:<br />
print("Port", i, "Alive");<br />
If i is 1022, Port 1022 Alive is printed.<br />
Step Eleven: Evaluating the Completed Program<br />
The program for TCP Stealth Port Scan is now complete.<br />
#include "tcpip.casl"<br />
#include "packets.casl"<br />
for(i=1;i
A <strong>Guide</strong> to CASL (Custom Audit Scripting Language)<br />
OurSYN.tcp_destination = i;<br />
OurIP = copy TCPIP;<br />
OurIP.ip_source = 127.0.0.1;<br />
OurIP.ip_destination = 127.0.0.2;<br />
OurPacket = [ OurIP, OurSYN ];<br />
ip_output(OurPacket);<br />
OurFilter = [ "src host ", 127.0.0.2, " and tcp src port ", i ];<br />
ReadPacket = ip_input(2000, OurFilter);<br />
if(!ReadPacket)<br />
continue;<br />
if(size(ReadPacket) < size(IP) + size(TCP))<br />
continue;<br />
ReadIP=extract ip from ReadPacket<br />
ReadTCP=extract tcp from ReadPacket<br />
if(ReadTCP.tcp_ack != 1<br />
|| ReadTCP.tcp_syn != 1<br />
|| ReadTCP.tcp_rst == 1)<br />
continue;<br />
print("Port", i, "Alive");<br />
}<br />
You can write the above program in a text editor making changes where appropriate<br />
(for example changing IP addresses) and then execute the program.<br />
NOTE: Before testing CASL programs on critical networks, we recommend that<br />
you test them on non-critical networks. CASL programs are most often attacks,<br />
which means they can disrupt and disable networks.<br />
The next section, "CASL Reference," includes detailed descriptions of all the elements<br />
you can use in CASL programs.<br />
<strong>CyberCop</strong> <strong>Scanner</strong> <strong>Getting</strong> <strong>Started</strong> <strong>Guide</strong> A-9
A <strong>Guide</strong> to CASL (Custom Audit Scripting Language)<br />
CASL Reference<br />
This section includes a description of each element you can use in a CASL program,<br />
or script. It is divided into four main sections:<br />
• program structure<br />
• lists<br />
• packet headers<br />
• subroutines<br />
You can skip straight to the section that describes the element you are interested in.<br />
A-10 Appendix A
A <strong>Guide</strong> to CASL (Custom Audit Scripting Language)<br />
Program Structure<br />
This section includes definitions of elements related to CASL program structure. This<br />
section is divided into four main parts:<br />
• statements<br />
• variables<br />
• syntax<br />
• control statements<br />
Statements<br />
CASL programs consist of statements. Statements consist of control constructs and<br />
expressions. Control constructs are statements which define the flow of a program, for<br />
example loops (while and for) and conditionals (if). Expressions are sentences which<br />
evaluate to a value. You can execute statements in global scope, which eliminates the<br />
need for creating a program with routines. You do not need to use an entry point<br />
main() functioninCASL.<br />
Variables<br />
Statements operate on variables. Variables are dynamically typed, therefore they do<br />
not have a declared type and do not need to be declared prior to use. You can assign<br />
variables (described below) to expressions. There are five variable types—character,<br />
integer, string, buffer, and list.<br />
Characters<br />
Characters are ASCII characters. Characters are represented in single quotes (e.g. ’c’).<br />
Integers (Numbers)<br />
Integers (i.e. numbers) are represented as either: 1) positive or negative intergers<br />
without quotes; or 2) integers in hexidecimal format when 0X precedes the integer.<br />
Note that floating point and decimal point numbers are not allowed in CASL.<br />
Strings<br />
Strings are any number of characters enclosed in double quotes, for instance "hello<br />
world!" CASL treats strings as built-in types, not as arrays. (Perl and C treat strings as<br />
arrays.)<br />
<strong>CyberCop</strong> <strong>Scanner</strong> <strong>Getting</strong> <strong>Started</strong> <strong>Guide</strong> A-11
A <strong>Guide</strong> to CASL (Custom Audit Scripting Language)<br />
You can define string literals, which may include adjacent string literals. String<br />
literals are constant strings in a CASL source file, for example "hello world!"<br />
Adjacent string literals are concentrated into a single string. For example, "foo" "bar"<br />
is equivalent to the string "foobar". String literals can contain escape codes<br />
representing non-ASCII characters. Escape codes include "\n" (newline), "\r" (carriage<br />
return), "\t" (tab), and "\xNN" (the character represented by the ASCII hex code NN).<br />
Buffers<br />
Buffers are complex types, which can contain many pieces of information. Buffers<br />
express pieces of information as bytes. Buffers generally hold packet structures and<br />
input packets.<br />
Lists<br />
Like buffers, lists are complex types which can contain many pieces of information.<br />
Lists are discrete series of variables. Lists generally hold output packets.<br />
Syntax<br />
The subsequent sections describe the syntax used to express elements.<br />
Statements<br />
CASL code consists of statements. Statements are terminated with a semicolon. They<br />
are case sensitive and whitespace insensitive. Thus, you can indent and space CASL<br />
programs as you wish.<br />
You can use single statements or a collection of statements in CASL programs. Single<br />
statements stand on their own. A collection of statements can be grouped together.<br />
(When enclosed in curly braces, a collection of statements is treated as a single<br />
statement.)<br />
Comments are remarks in CASL source code that are ignored by the interpreter. A<br />
comment can be either a single line or multiple lines. A single line comment beings<br />
with "//". A multiple line comment begins with "/*" and ends with "*/".<br />
Variables<br />
Variables are the basic elements of CASL programs. You can use characters, integers,<br />
strings, buffers, and/or lists as variables. Variables are assigned names. When you<br />
assign a name to a variable, the name must: 1) start with a letter; and 2) consist of zero<br />
or more trailing letters, numbers, or the underscore "_" character. Examples of valid<br />
variable names include the following: foo, bar_baz, i, and z1. Examples of invalid<br />
variables include 1a and a@b.<br />
A-12 Appendix A
A <strong>Guide</strong> to CASL (Custom Audit Scripting Language)<br />
Variable Assignments<br />
Variable names are not valid until they are assigned to by an assignment operator, =.<br />
An assignment takes the value of the expression to the right of the = and assigns it to<br />
the variable on the left. The variable assigned to does not need to exist beforehand. For<br />
instance, i=cassigns the value of the variable c to i. In this example, c must exist<br />
beforehand; i does not need to exist beforehand.<br />
Increment and Decrement Operators<br />
Increment operators add a value of one to a variable. Decrement operators subtract a<br />
value of one to a variable. Both increment and decrement operators can be used with<br />
either preincrement or postincrement options. Preincrement adds the value one to a<br />
variable and then returns it for further expression evaluation. Postincrement subtracts<br />
the value one to a variable, however, it returns the original variable for further<br />
expression evaluation.<br />
Expressions for increment operators with preincrement and postincrement options are<br />
++x and x++, respectively. Expressions for decrement operators with the preincrement<br />
and postincrement options are --x and x--, respectively.<br />
Math<br />
CASL supports both standard mathematical operations and binary operations.<br />
Standard mathematical operations include addition, subtraction, multiplication, and<br />
division, which are represented by +, -,*, /,and% (modulo division), respectively. For<br />
example, if you want to increment a variable i by one, you use the statement i=i+1.<br />
Binary operations allow integers to be masked against one another to extract bit<br />
patterns. Supported binary operations include: AND (&), OR (|),XOR (^), NOT (~),<br />
and left/right shifts (>).<br />
Comparison Operators<br />
Comparison operators test the value of an expression. Comparison operators include:<br />
• x> y, which reads x is greater than y<br />
• x< y, which reads x is less than y<br />
• x>=y, which reads x is greater than or equal to y<br />
• x
A <strong>Guide</strong> to CASL (Custom Audit Scripting Language)<br />
if((i=1)==1)<br />
print(i);<br />
You can invert expressions for comparison with the ! operator. Expressions preceded<br />
by a ! evaluate false if the expression value is nonzero. For instance, if i is NOT 1 you<br />
enter the following:<br />
if(! (i == 1))<br />
print(i);<br />
Negation with ! is most useful when comparing something to zero. !z evaluates true if<br />
z is zero. You can combine these rules to see if a packet is read from ip_input() by<br />
writing:<br />
if(!(packet = ip_input(2000, filter))<br />
print("didn't get a packet");<br />
You do not need to compare an expression's value to >0to see if the expression is<br />
nonzero, for example if(i > 0). If the expression evaluates nonzero, it evaluates true. If<br />
the expressions is zero, it evaluates false. Consider the following statement:<br />
if(i)<br />
print(i);<br />
else<br />
print("i is zero");<br />
The above statement prints the value of i if i is not zero.<br />
Control Statements<br />
Control statements affect the flow of a program. Control statements are:<br />
• loops, which cause a piece of code to be executed zero or more times, or<br />
• conditionals, which cause a piece of code to be executed only if the condition is<br />
satisfied<br />
Control statements operate on other statements and are terminated with a semicolon.<br />
Loops<br />
There are two loops types in CASL–while and for. while and for are described in the<br />
subsequent sections.<br />
While<br />
while statements represent loops that are not implicitly terminated. while loops<br />
execute their bodies until their conditional arguments are satisfied. while loops are<br />
written as follows:<br />
while (conditional) statements<br />
A-14 Appendix A
A <strong>Guide</strong> to CASL (Custom Audit Scripting Language)<br />
In the above statement, conditional is an expression and statements is either a<br />
statement or a group of statements enclosed in curly braces. The following is an<br />
example statement for a while loop:<br />
while(i > 0)<br />
i=i-1;<br />
For<br />
for statements represent loops that generally have implicit termination. for statements<br />
consist of three parts: an initializer, a conditional, and an iterator.<br />
• The initializer is intended to set up a counter or some other place holder variable<br />
for the loop.<br />
• The conditional works the same way a while conditional works; it is intended to<br />
terminate the loop when the condition evaluates false.<br />
• The iterator is intended to move the loop forward, typically advancing or<br />
decrementing a counter.<br />
The following is an example statement for a for loop:<br />
for(i=0;i
A <strong>Guide</strong> to CASL (Custom Audit Scripting Language)<br />
Loop control statements are only valid within loops. If you are not in a loop, you<br />
cannot execute a break or continue. if conditionals are not loops and remember the<br />
control statement affects the closest loop.<br />
Consider the following statement:<br />
for(;;)<br />
while(1)<br />
if(c == 1)<br />
break;<br />
In the above statement, continue affects while, not for. continue is valid in this<br />
statement because it is executed while at least one loop is in effect.<br />
Now, consider the statement:<br />
if(1)<br />
break;<br />
The above statement is not valid because a loop is not present.<br />
Conditionals<br />
In CASL, conditional statements are if. When the conditional argument evaluates true,<br />
if executes its body of statements. Consider the following statement:<br />
if(i == 1) {<br />
print(i);<br />
print("done");<br />
}<br />
When i is equal to 1, the above statement executes code in the body of the conditional.<br />
Code can also be executed when a loop evaluates false using an else extension. The<br />
body of else is executed when if is false. For instance:<br />
if(0)<br />
print("foo");<br />
else<br />
print("bar");<br />
The above statement prints the string "bar". (The 0 conditional always evaluates false.)<br />
if/else statements can be chained indefinitely using else if. For instance:<br />
if(i == 1)<br />
print("foo");<br />
else if(i == 2)<br />
print("bar");<br />
elseif(i
A <strong>Guide</strong> to CASL (Custom Audit Scripting Language)<br />
print("baz");<br />
else<br />
print("quux");<br />
The above statement prints "foo" if i is 1, "bar" if i is 2, "baz" if i is 3,and"quux" if i<br />
is any other value.<br />
Subroutine Calls<br />
Subroutine calls divert control to code in the named subroutine. Subroutine calls pass<br />
arguments to subroutines, affecting execution of subroutines. Subroutines return<br />
values, which you can obtain by assigning subroutine call expressions to variables.<br />
The syntax for a subroutine call is function(argument0, argument1, argumentN),<br />
where function is the name of the function (e.g., ip_input) and argumentX is the<br />
argument at position X. For example if foo is a function that takes as an argument a<br />
value and has as a return value of the value plus one, the following statement prints a<br />
value of two:<br />
{<br />
i=1;<br />
i=foo(i);<br />
print(i);<br />
}<br />
<strong>CyberCop</strong> <strong>Scanner</strong> <strong>Getting</strong> <strong>Started</strong> <strong>Guide</strong> A-17
A <strong>Guide</strong> to CASL (Custom Audit Scripting Language)<br />
A-18 Appendix A<br />
Lists<br />
This section describes elements relating to lists. Lists represent collections of data,<br />
composed of individual variables. Lists can grow or shrink dynamically. You can use<br />
lists to represent complicated strings and packets. You can also use lists as data<br />
structures for CASL programs.<br />
List Creation<br />
There are two ways to create a list. You can create a list using a list comparison<br />
operator. Or, you can create a list by creating a new list and then using a list operator<br />
to assign an element to the list.<br />
As mentioned above, you can create a list using the list composition operators [and].<br />
The square brackets enclose a comma separated list of element. The following<br />
statement creates a new list:<br />
[ foo, bar, baz, 1 ]<br />
The above statement creates a list containing the variables foo, bar, baz, and1.<br />
You can also create a new list using a list operator to assign an element to the list. More<br />
specifically, you assign the name of the list to an expression with a list operator<br />
operating on the name and then insert a new element. Consider the following<br />
statement:<br />
list = list push foo;<br />
The above statement creates a new list called list which contains only the element foo.<br />
Recursion<br />
Lists can contain any variable, including other lists. Lists can nest indefinitely.<br />
Routines that act on lists expand elements from lists in the order it encounters them.<br />
For example:<br />
[ "foo ", "bar ", [ "baz ", "quux " ], "zarkle" ];<br />
The above statement defines a string list that evaluates to the following:<br />
"foo bar baz quux zarkle"<br />
When stepping through a list with list operators, an element of a list that is itself a list<br />
is returned as the entire list. It will not be returned as the first element of the list. The<br />
same string list above is processed with the following statement:<br />
{<br />
list = [ "foo ", "bar ", [ "baz ", "quux " ], "zarkle" ];<br />
x = pop list;<br />
y = pop list;<br />
z = pop list;
A <strong>Guide</strong> to CASL (Custom Audit Scripting Language)<br />
}<br />
print(z);<br />
The above statement prints the string "baz quux" because the value of z is equal to the<br />
third element of the list list.<br />
List Operators<br />
There are four list operators. They are as follows:<br />
• head, which takes an element from the head of the list<br />
• tail, which takes an element from the tail of the list<br />
• prepend, which adds an element to the head of the list<br />
• append, which adds an element to the tail of the list<br />
Head and tail operate on a list, evaluating to the element removed from the list. The<br />
following is an example head statement:<br />
{<br />
}<br />
list = [ foo, bar, baz ];<br />
x = head list;<br />
print(x);<br />
The above statement prints the value of foo, the first item (the head) of the list.<br />
NOTE: You can use the head statement format to create a tail statement. To<br />
create a tail statement, you simply replace head with tail in the head statement<br />
format.<br />
prepend and append operate on a list and an element to add to that list. If the list<br />
referred to doesn't already exist, it is created. An example of a prepend statement is:<br />
{<br />
list = [ foo, bar ];<br />
list = list prepend baz;<br />
print(list); // list is now [foo, bar, baz]<br />
}<br />
The above statement prints the values of foo, bar, andbaz.<br />
NOTE: You can use the format of the prepend statement to create an append<br />
statement. To create an append statement, you simply replace prepend with<br />
append in the prepend statement format.<br />
<strong>CyberCop</strong> <strong>Scanner</strong> <strong>Getting</strong> <strong>Started</strong> <strong>Guide</strong> A-19
A <strong>Guide</strong> to CASL (Custom Audit Scripting Language)<br />
The commonly used computer stack terms, push and pop, are aliases for prepend and<br />
head, respectively.<br />
List Control<br />
You can use the foreach statement to step through each element in a list. A foreach<br />
statement has two parts:1) a binding name; and 2) a list to operate on. The binding<br />
name is set to refer to each element in the list. The following is an example of a<br />
foreach statement:<br />
{<br />
list = [ foo, bar, baz ];<br />
foreach element [ list ] {<br />
print(element);<br />
}<br />
}<br />
The above statement prints the values of foo, bar, andbaz, in order. The looping<br />
control statements continue and break function as they normally do.<br />
NOTE: List expansion within foreach is recursive. A list containing other lists<br />
is expanded to all enlisted data elements.<br />
A-20 Appendix A
A <strong>Guide</strong> to CASL (Custom Audit Scripting Language)<br />
Packet Headers<br />
This section describes elements related to packet headers. You can create a packet that<br />
consists of a series of protocol headers, each with a fixed format. You can define fixed<br />
format protocol headers with the protocol structure construct. The format lays out<br />
bit-by-bit the order and the contents of a protocol structure.<br />
Definition<br />
Protocol structures are defined by define statements. A define statement creates a new<br />
structure with a specified name. The define statement consists of a curly-brace<br />
enclosed definition. The definition is composed of field specifiers which dictate the<br />
name, length, and order of the protocol fields. A basic protocol structure definition is<br />
as follows:<br />
define foo {<br />
// contents here<br />
}<br />
The above statement creates a new structure named foo. However, foo is meaningless<br />
since it does not define fields. Consider the statement below, where ip defines fields:<br />
define ip {<br />
ip_version: 4 bits;<br />
ip_headerlen: 4 bits;<br />
ip_tos: 8 bits;<br />
ip_length: 16 bits;<br />
ip_id: 16 bits;<br />
ip_df: 1 bit;<br />
ip_mf: 1 bit;<br />
ip_offset: 14 bits;<br />
ip_ttl: 8 bits;<br />
ip_protocol: 8 bits;<br />
ip_cksum: 16 bits;<br />
ip_source: 32 bits;<br />
ip_destination: 32 bits;<br />
}<br />
The above statement defines an IPv4 header. Each specifier enclosed in the curly<br />
braces denotes a field of the structure. Each field consists of a name, a colon, and a<br />
size. The name in a field can be any valid variable name. The size in a field can be<br />
specified in terms of any number of bits, bytes, words, and dwords. Words are16 bit<br />
quantities; dwords are 32 bit quantities. Protocol structure definitions can mix any<br />
combination of sizes specified in bytes, bits, word, or dwords.<br />
<strong>CyberCop</strong> <strong>Scanner</strong> <strong>Getting</strong> <strong>Started</strong> <strong>Guide</strong> A-21
A <strong>Guide</strong> to CASL (Custom Audit Scripting Language)<br />
Instantiation<br />
A new instance of a protocol structure is created by assigning its name to a variable<br />
with the new operator. This creates a buffer large enough to hold the structure, with<br />
all fields in the structure set to 0. When you assign a buffer to another variable, the<br />
buffer is copied. For example, consider the following statement:<br />
{<br />
x = new ip;<br />
y=x;<br />
z=y;<br />
}<br />
In the above statement, x, y,andz are all independent copies of ip structures.<br />
Field Reference<br />
Individual fields of a structure are referenced with the field reference operator. For<br />
instance, if x is an ip structure x.ip_ttl refers to the ip_ttl field of x.<br />
Any number can be assigned to a protocol structure field. Numbers are packed in<br />
Internet byte order into the field. Numbers will use as many bits as the field is large. It<br />
is an unchecked error to try to fit a value in a field that is too large for the value. For<br />
instance if foo is a field that is 1 bit wide, x.foo = 4 results in undefined behavior.<br />
Special Fields<br />
Every buffer variable has four special fields which reference arbitrary locations within<br />
the buffer. The fields are bits, bytes, words, and dwords. The fields are specified with<br />
ranges corresponding to how many of units are referenced.<br />
The syntax of a direct memory reference to a structure follows these examples:<br />
• z.bits[x .. y], which reads bits x through y of the buffer z<br />
• z.bytes[x .. ], which reads bytes x through the end of buffer z<br />
• z.word[x], which reads word x of buffer z<br />
The above-listed statements evaluate to integer numbers. The statements can be<br />
assigned to, for example:<br />
z.bit[10] = 1;<br />
The above statement sets the eleventh bit (counting from 0)ofthebufferz to 1.<br />
Buffer Size<br />
Buffers represent an arbitrary amount of data. You obtain buffer size using the size<br />
function. size evaluates to the size, in bytes, of its argument. Consider the following<br />
statement:<br />
A-22 Appendix A
A <strong>Guide</strong> to CASL (Custom Audit Scripting Language)<br />
{<br />
x = new ip;<br />
print(size(x));<br />
}<br />
The above statement prints 20, which is the size (in bytes) of an IP header.<br />
Variable Size Buffer<br />
A variable size buffer is a structure that is defined without any fields. A variable size<br />
buffer can only be accessed using special fields. A variable size buffer automatically<br />
expands to fit new data.<br />
Buffer Scale<br />
You can define a default scale in a variable size buffer. A default scale is defined in<br />
the definition using scale. scale can be represented in bits, bytes, words, or dwords.<br />
When scale is defined, you can access the associated special field in the buffer by<br />
specifying the range. You do not need to include the field reference.<br />
Structure Extraction<br />
A buffer can contain several structures. You can obtain a structure from the buffer by<br />
extracting data with the extract operator. Extract is specified as follows:<br />
foo = extract bar from baz;<br />
The above statement extracts a bar structure from the buffer baz, leaving the<br />
remaining bytes in baz. To leave remaining bytes, write the following:<br />
foo = extract z bytes from baz;<br />
The above statement extracts zbytesfrom baz, leaving the remaining bytes.<br />
<strong>CyberCop</strong> <strong>Scanner</strong> <strong>Getting</strong> <strong>Started</strong> <strong>Guide</strong> A-23
A <strong>Guide</strong> to CASL (Custom Audit Scripting Language)<br />
Subroutines<br />
This section describes elements related to subroutines.<br />
Declaration<br />
Subroutines are defined with the proc keyword. A subroutine takes a fixed number of<br />
arguments and returns a value. Subroutines can be defined anywhere. They do not<br />
require prototypes. To declare a new structure, you use the proc keyword as follows:<br />
proc foo(arg1, arg2, argN) {<br />
// statements<br />
}<br />
In the above statement, foo names the new function, argX specifies the name of the<br />
argument at place X, and the body of the function appears in curly braces. Within the<br />
body of the function, the variables named argX are replaced by the value of the<br />
arguments passed at place X. For instance, to declare a function called foo that takes<br />
an argument named x and adds 1 to it you write the following:<br />
proc foo(x) {<br />
x=x+1;<br />
print(x);<br />
}<br />
Argument Passing<br />
An argument specified in a function's declaration is called a formal argument. The<br />
name of the argument is available to all the statements executed in the body of this<br />
function. An argument passed to a function in a subroutine call is called a calling<br />
argument. Its value is made available through the name of the corresponding formal<br />
argument.<br />
Argument passing in CASL is by value. (There is one exception, which is described<br />
below.) Thus, the formal argument is bound to the VALUE of the calling argument not<br />
the actual calling argument. Consider the following statement:<br />
proc foo(x) {<br />
x=x+1;<br />
print(x);<br />
}<br />
In the above statement foo, the addition of 1 to the argument x is never seen by the<br />
caller of foo—it affects only the variable x within the function foo.<br />
A-24 Appendix A
A <strong>Guide</strong> to CASL (Custom Audit Scripting Language)<br />
The only exception to this argument is structure and list passing. References to lists<br />
and structures are passed. Changes to lists and structures affect variables on the caller<br />
side and variables in the body of the subroutine. Thus, it is easy to write routines that<br />
set fields within structure headers or to change the order of packet lists.<br />
Variable Argument Lists<br />
CASL supports creating procedures that take a variable number of argument using the<br />
list type. A variable argument function is defined as an argument that takes more<br />
calling arguments than formal arguments. The final formal argument becomes a list of<br />
all the extra calling arguments. Consider the following statement:<br />
proc foo(x) {<br />
...<br />
}<br />
foo(i, j, k);<br />
The above statement defines a function called foo. foo can take a variable number of<br />
arguments. The function call to foo() specifies three arguments; the definition<br />
specifies one argument. Therefore, x becomes a list containing i, j, andk.<br />
Return Values<br />
Subroutines end when either: 1) a curly brace is reached; or 2) a control reaches a<br />
return statement. A return statement ends the execution of a subroutine and causes the<br />
subroutine call to evaluate to the value specified as return argument. For instance, to<br />
make foo return the value it calculated change use the following statement:<br />
proc foo(x) {<br />
x=x+1;<br />
return(x);<br />
}<br />
In the above statement, a call to foo will evaluate to the argument passed to foo,plus1.<br />
Any variable can be returned through the return statement. Multiple values are<br />
returned from a function using list variable returns.<br />
Scope<br />
Scope is the space within which a variable is valid. When a program is executes within<br />
a subroutine, any variable it defines is accessible only within execution of the<br />
subroutine. The caller of the subroutine cannot access variables defined in the<br />
subroutine.<br />
Code that is not executing within a subroutine is in global scope. Variables defined in<br />
global scope are accessible anywhere—even within subroutines. The following<br />
statement illustrates this concept:<br />
<strong>CyberCop</strong> <strong>Scanner</strong> <strong>Getting</strong> <strong>Started</strong> <strong>Guide</strong> A-25
A <strong>Guide</strong> to CASL (Custom Audit Scripting Language)<br />
i=1;<br />
foo(i);<br />
//global<br />
proc foo(x) {<br />
x = x + 1;<br />
y = i;<br />
}<br />
return(x);<br />
// local, "x" can only be accessed within "foo"<br />
// "y" is local and can only be accessed within<br />
// "foo," but "i" is global and can be accessed<br />
// anywhere.<br />
A-26 Appendix A
CASL Built-in Functions<br />
A <strong>Guide</strong> to CASL (Custom Audit Scripting Language)<br />
The CASL interpreter includes built-in functions. Built-in functions are subroutines<br />
that cannot be easily programmed in CASL. Therefore, the CASL interpreter includes<br />
them as built-in functions. Built-in functions are divided into three categories: network<br />
I/O, file I/O, and misc (miscellaneous).<br />
Network I/O Built-in Functions<br />
Network I/O functions include subroutines that can be used to read packets from the<br />
network or to write packets to the network. Network I/O functions are described in<br />
subsequent sections.<br />
The IP Output Function<br />
IP output writes a complete IP packet (including the IP header) to the network. IP<br />
output in CASL is accomplished via the ip_output() routine. ip_output() takesasan<br />
argument a list of data elements that are expected to comprise an IP packet. A single<br />
buffer variable can also be passed to ip_output() for writing.<br />
Sending a well formed IP packet involves some tricky issues, for instance checksum<br />
and length calculation. The IP and transport headers require knowledge of the length<br />
of the entire packet, the lengths of the individual headers, and the calculation of a<br />
checksum over some of the headers and the data.<br />
You can write CASL code to compute checksums and lengths. However, this code can<br />
potentially be cumbersome and error-prone. Rather than requiring the implementation<br />
of CASL-scripted checksum and length calculation, the CASL interpreter provides a<br />
few shortcuts to solve these issues transparently. For the basic IP protocols (e.g. IP,<br />
TCP, UDP, and ICMP), the CASL interpreter automatically calculates checksum<br />
fields, packet lengths, and header lengths. The appropriate values are filled in before<br />
the packet is written to the wire. The computed values do not affect the passed in data;<br />
computed values only affect the packet written to the wire. In order to allow for<br />
arbitrary packets (possibly with intentionally bad header values) to be sent, CASL does<br />
not touch header fields it thinks have explicitly been filled in. For the basic IP<br />
protocols, this means that CASL does not fill in values for fields that already have<br />
nonzero values.<br />
The IP Fixup Function<br />
It is sometimes important to fill in the variable header fields of an IP datagram without<br />
outputting it to the network. This is a common requirement of IP fragmentation code.<br />
CASL supports this with the ip_fixup() procedure. Ip_fixup() takes the same<br />
arguments as ip_output(). However, instead of outputting the packet to the network,<br />
it returns a new packet. The new packet is a copy of the input with the appropriate<br />
header fields filled in.<br />
<strong>CyberCop</strong> <strong>Scanner</strong> <strong>Getting</strong> <strong>Started</strong> <strong>Guide</strong> A-27
A <strong>Guide</strong> to CASL (Custom Audit Scripting Language)<br />
The IP Input Function<br />
IP input reads a complete packet (starting with the IP header) from the wire. Packet<br />
input in CASL is done using the ip_input() routine. Ip_input takes as arguments a<br />
timeout value, specified in milliseconds, and a tcpdump filter. The timeout specifies<br />
how long to wait for a packet before giving up and the filter defines which packets to<br />
read. If the millisecond timer runs out before a packet is read, ip_input returns the<br />
integer value 0.<br />
If a packet is read successfully within the allotted time, it is returned minus the<br />
link-layer (Ethernet) header as a buffer. The size of the buffer can be queried with<br />
size() to determine the length of the inputted packet.<br />
The IP Filters Function<br />
CASL allows the explicit setting of global filters that affect all reads by using the<br />
ip_filter() routine. ip_filter takes as an argument a tcpdump filter, through which all<br />
packets read by CASL must successfully pass before being returned via ip_input.<br />
On some computer architectures (notably 4.4BSD) ip_filter() also sets kernel packet<br />
filters. Enabling a kernel packet filter prevents the CASL interpreter from reading<br />
packets you specified not be read. This can be a major performance benefit, as it<br />
prevents the CASL interpreter from needing to explicitly filter out spurious packets.<br />
The IP Range Function<br />
Ranges of IP addresses can be quickly parsed into a list of IP address using the<br />
ip_range routing. The argument is a string describing a range of address and the return<br />
value is a list of integers.<br />
A-28 Appendix A
File I/O Built-in Functions<br />
A <strong>Guide</strong> to CASL (Custom Audit Scripting Language)<br />
The file I/O functions are subroutines which can be used to read and write to files. The<br />
file I/O functions are described in the table below.<br />
Table A-1. File I/O built-in functions.<br />
Function<br />
open()<br />
close()<br />
read()<br />
write()<br />
fgets()<br />
rewind()<br />
fastforward()<br />
remove()<br />
Description<br />
Takes a filename as an argument, and returns a descriptor<br />
number that can be used to manipulate that file. If the file<br />
doesnotexist,itwillbecreated;ifitdoes,itwillbe<br />
appended to. If the file cannot be opened, "0" is returned.<br />
Takes a descriptor number as an argument, and closes the<br />
associated file, flushing any pending output and preventing<br />
further manipulation of the file.<br />
Takes as arguments a descriptor number and a count of<br />
bytes to read. It reads at most the specified number of bytes<br />
from the file, and returns a buffer containing those bytes.<br />
The number of bytes actually read by the file can be queried<br />
with the "size()"command; if no data was read, "0" will be<br />
returned.<br />
Takes as arguments a descriptor and a data element (which<br />
can be a list or a buffer, or any of the basic types) to write to<br />
the file matching that descriptor. The number of bytes<br />
written to the file is returned.<br />
Takes as arguments a descriptor and a number representing<br />
the maximum number of characters to read from a file. It<br />
then reads at most that many characters, stopping when a<br />
line terminator (the new line character) is found. It returns<br />
the data read, or "0" if nothing was read.<br />
Repositions the offset into the descriptor given as an<br />
argument, so that it points to the beginning of the file. This<br />
allowsthesamedatatobereadfromthesamefile<br />
descriptor twice.<br />
Repositions the offset into the descriptor given as an<br />
argument, so that it points to the end of the file. This allows<br />
recovery from rewind(), for further writing.<br />
Deletes the specified file from the system, returning "1" if<br />
successful.<br />
<strong>CyberCop</strong> <strong>Scanner</strong> <strong>Getting</strong> <strong>Started</strong> <strong>Guide</strong> A-29
A <strong>Guide</strong> to CASL (Custom Audit Scripting Language)<br />
seek()<br />
Repositions the offset into the descriptor give as an<br />
argument, so that it points the offset referenced by the<br />
second argument. A third argument can be given to specify<br />
what the new offset is relative to. The possible values are as<br />
follows. SEEK_SET to set the offset from the beginning of<br />
the file. SEEK_CUR to set the offset relative to the current<br />
offset. SEEK_END to set the offset value relative to the<br />
end of the file. Note if the third argument is not given, the<br />
default is SEEK_SET.<br />
MISC (Miscellaneous) Built-in Functions<br />
The misc (miscellaneous) built-in functions are described in the table below.<br />
Table A-2. Misc built-in functions.<br />
Function<br />
print()<br />
checksum()<br />
timer_start()<br />
timer_stop()<br />
tobuf()<br />
atoi()<br />
wait()<br />
Description<br />
Takes a list of data elements to write to standard output.<br />
It writes each of these elements, separated by a space, to<br />
standard output followed by a new line.<br />
Takes a list of data elements to perform an Internet<br />
checksum on. It returns an integer representing the<br />
checksum of these elements.<br />
Starts a stopwatch timer in the CASL interpreter. It<br />
returns a descriptor number, which can be used to<br />
retrieve the amount of time that has elapsed since the<br />
timer started.<br />
Takes a descriptor number as an argument, stops the<br />
stopwatch timer associated with the descriptor, and<br />
returns the number of milliseconds that have elapsed<br />
since the timer was started.<br />
Takes a list as an argument and returns a buffer<br />
containing the ordered contents of that list.<br />
Takes a string as an argument and returns the integer<br />
represented by that string.<br />
Takes an integer as an argument, representing the<br />
number of seconds for the interpreter to wait before<br />
continuing.<br />
A-30 Appendix A
A <strong>Guide</strong> to CASL (Custom Audit Scripting Language)<br />
getip()<br />
putip()<br />
getenv()<br />
setenv()<br />
strep()<br />
exit()<br />
size()<br />
rand()<br />
gettimeofday()<br />
Takes a string as an argument and returns a number<br />
representing the IP address contained in that string.<br />
Takes a binary IP address as an argument and returns a<br />
string representing that IP address.<br />
Retrieves the specified environment variable<br />
(represented as a string), returning it's value as a string<br />
(or null if the variable is not set).<br />
Changes the value of the environment variable specified<br />
as it's first argument (a string) to the value represented<br />
by it's second argument.<br />
Returns an ASCII string representation of an arbitrary<br />
variable, useful for obtaining strings representing<br />
integers.<br />
Exits the CASL interpreter, taking an optimal argument<br />
of the exit code.<br />
Returns the size in bytes of a buffer argument, or the<br />
number of entries in a list argument.<br />
Returns a pseudo random number. If an optional<br />
argument is given, the random number generated is<br />
seeded with that number.<br />
Returns the time in milliseconds since midnight.<br />
<strong>CyberCop</strong> <strong>Scanner</strong> <strong>Getting</strong> <strong>Started</strong> <strong>Guide</strong> A-31
A <strong>Guide</strong> to CASL (Custom Audit Scripting Language)<br />
Summary<br />
This chapter covered CASL. Specifically, this chapter:<br />
• explained the benefits of writing programs in CASL<br />
• introduced the main elements of a CASL program<br />
• provided a reference section, which contains detailed descriptions of elements that<br />
can be used in CASL programs<br />
• included a summary of CASL built-in functions that can be used in CASL<br />
programs<br />
You can use the information provided in this chapter as reference material when<br />
writing your own CASL programs.<br />
A-32 Appendix A
BScanning: Command Line<br />
Options<br />
Introduction<br />
B<br />
This appendix lists options that can be used when you want to run the scan engine<br />
(engine.exe) from the command line. You can also see a list of the available flags for<br />
the engine commandbyenteringthecommandnamefollowedbythe-h flag at the<br />
command prompt.<br />
Running Scans From the Command Line<br />
You can run the scan engine non-interactively from the command line. Running from<br />
the command line is useful for scheduled or script-defined scans. The command usage<br />
and the available flags and options are given below.<br />
engine<br />
For scheduling routine scans, it may be desirable to run <strong>CyberCop</strong> <strong>Scanner</strong> from the<br />
command line. To run <strong>CyberCop</strong> <strong>Scanner</strong> from the command line, you change to the<br />
directory where <strong>CyberCop</strong> <strong>Scanner</strong> is located and enter the following at the command<br />
prompt:<br />
>engine<br />
The default configuration file scan.ini will be used. The default configuration file is<br />
included in your <strong>CyberCop</strong> <strong>Scanner</strong> distribution. To use the file, you must make a copy<br />
of it and then edit it (using Notepad) to specify the desired host range, scan settings,<br />
and module settings. To specify a different configuration file, you use the -cf flag. By<br />
default, the results of the scan will be stored in the text file scan.txt. To specify a<br />
different output text file, you use the -of flag. You can also create a configuration file<br />
using the <strong>CyberCop</strong> <strong>Scanner</strong> graphical user interface and use it with a command line<br />
scan.<br />
NOTE: The command line version of the scan engine does not report results to<br />
the event database. It reports results to a text file.<br />
You may run either a scan or a probe from the command line. To specify the either a<br />
scan or a probe, you use the -rm flag. You may also run in either a normal mode or a<br />
debug mode. Debug mode allows you to debug scan engine operation. To specify<br />
either normal or debug mode, you use the -om flag. You may also specify either the<br />
console or a file as an output device during a scan. To do this, you use the -od flag.<br />
<strong>CyberCop</strong> <strong>Scanner</strong> <strong>Getting</strong> <strong>Started</strong> <strong>Guide</strong> B-1
Scanning: Command Line Options<br />
The available flags are listed below. To learn more about performing a scan or a probe<br />
and about specifying scan settings, refer to Chapter 3, “<strong>Getting</strong> <strong>Started</strong>: Performing a<br />
Scan.”<br />
Usage:<br />
engine [-cf file] [-of file] [-od device] [-om mode] [-rm mode]<br />
Flags and options:<br />
-cf configuration file in win.ini format (default is scan.ini)<br />
-of output file (default is scan.txt)<br />
-od output device use CONSOLE or FILE (default is CONSOLE)<br />
-om output mode output message mode; use DEBUG or NORMAL<br />
(default is NORMAL)<br />
-rm run mode use SCAN or PROBE (default is SCAN)<br />
-id engine id use an unsigned integer (default is 0)<br />
-h help lists available flags for engine command<br />
B-2 Appendix B
Summary<br />
Scanning: Command Line Options<br />
In this appendix, you learned about the options that can be used to run the scan engine<br />
from the command line.<br />
<strong>CyberCop</strong> <strong>Scanner</strong> <strong>Getting</strong> <strong>Started</strong> <strong>Guide</strong> B-3
Scanning: Command Line Options<br />
B-4 Appendix B
Glossary<br />
administrator<br />
authentication<br />
domain<br />
domain name system (DNS)<br />
dual-homed<br />
electronic mail (e-mail)<br />
firewall<br />
file transfer protocol (FTP)<br />
gateway<br />
Gopher<br />
hardened<br />
hypertext transfer protocol<br />
(HTTP)<br />
inside network<br />
The individual responsible for a system or network or systems.<br />
Method to guarantee that the sender of information is who the<br />
sender purports to be.<br />
A part of the DNS naming hierarchy. Domain names consist of<br />
a sequence of names (labels) separated by periods (dots).<br />
The online distributed database system used to map<br />
human-readable machine names into IP addresses. DNS servers<br />
throughout the Internet implement a hierarchical namespace<br />
that allows sites to assign machine names and addresses.<br />
A host with two network adapters, hence addresses, that acts as<br />
a router between the subnetworks to which those interfaces are<br />
attached.<br />
The electronic version of the postal system.<br />
A configuration of routers and networks placed between an<br />
organization’s internal internet and a connection to an external<br />
internet to provide security.<br />
The TCP/IP protocol for file transfer from one machine to<br />
another.<br />
Dedicated host that interconnects two different services or<br />
applications.<br />
A system for organizing and displaying files on Internet servers<br />
that existed before the World Wide Web. Gopher servers<br />
display hierarchically structured list of files.<br />
An operating system or application that has been modified to<br />
eliminate elements that make it vulnerable to attack or failure.<br />
A TCP/IP protocol that supports the World Wide Web.<br />
The network of machines protected by the firewall (inside the<br />
security perimeter).<br />
<strong>CyberCop</strong> <strong>Scanner</strong> <strong>Getting</strong> <strong>Started</strong> <strong>Guide</strong> G-1
Glossary<br />
Internet<br />
Internet Service Provider<br />
(ISP)<br />
IP address<br />
IP spoofing<br />
local area network (LAN)<br />
NetShow<br />
network<br />
network adapter<br />
NNTP<br />
outside network<br />
plug gateway<br />
post office protocol (POP)<br />
port<br />
A collection of interconnected computer networks that can<br />
communicate with each other using an agreed on set of<br />
protocols—referred to as TCP/IP, although these are only two<br />
of many.<br />
A company that provides access to the Internet, and often other<br />
services such as Web hosting to companies and individuals for<br />
a fee.<br />
A 32-bit integer address assigned to each host on the Internet.<br />
Altering an IP address to appear to be from a different host.<br />
Used by hackers to gain unauthorized to a networked resource.<br />
A group of computers and peripherals such as printers that are<br />
all connected to each other and are located in a centralized area,<br />
such as one floor of a building.<br />
A TCP/IP protocol that provides support for streaming audio<br />
and video.<br />
A group of computers and peripherals that are connected to<br />
each other.<br />
A physical device in a computer that links the computer to the<br />
network. Also called a network interface card.<br />
A TCP/IP protocol that provides support for Usenet news feeds<br />
and news reading. NNTP stands for network news transfer<br />
protocol.<br />
The network of machines not protected by the firewall (outside<br />
the security perimeter). When a firewall protects a network<br />
connected to the Internet, the outside network is the rest of the<br />
Internet.<br />
A general purpose program implemented as a proxy that allows<br />
data to flow from an inside host to an outside host. Plugs allow<br />
access through the firewall for data that doesn’t have its own<br />
proxy.<br />
A client-server protocol for handling user electronic mail<br />
boxes. The user’s mailbox is kept on the server, rather than on<br />
the user’s personal machine.<br />
A specific pathway for data and control information.<br />
G-2 Glossary
Glossary<br />
protocol<br />
proxy<br />
RealAudio/RealVideo<br />
router<br />
security perimeter<br />
service pack<br />
simple mail transfer protocol<br />
(SMTP)<br />
simple network management<br />
protocol (SNMP)<br />
smap<br />
smapd<br />
subnet<br />
A formal description of message formats and the rules that must<br />
be followed to exchange those messages.<br />
Specialized applications or programs that run on a firewall host.<br />
These programs take users’ requests for Internet services (such<br />
as FTP and TELNET) and forward them according to the site’s<br />
security policy. Proxies are replacements for actual services<br />
and serve as application- level gateways to the services.<br />
A TCP/IP protocol that supports audio data.<br />
A special purpose, dedicated machine that attaches to two or<br />
more networks and forwards packets from one to the other. An<br />
IP router forwards IP datagrams among the networks to which<br />
it is connected. An IP router uses the destination address on the<br />
datagram to choose the next hop to which it forwards a<br />
datagram.<br />
The perimeter around the networks the firewall is trying to<br />
protect.<br />
Software from Microsoft that address deficiencies in released<br />
versions of their software. A service pack can include updates,<br />
system administration tools, additional components, drivers,<br />
andsoon.<br />
A TCP/IP protocol for transferring electronic mail messages<br />
from one host to another. SMTP specifies how two hosts<br />
interact and the format of control messages they exchange to<br />
transfer mail.<br />
A protocol used to manage hosts, routers, and the networks to<br />
which they attach.<br />
A small program intended solely to handle incoming SMTP<br />
connections.<br />
A second program which is invoked regularly (typically once a<br />
minute) to process the files queued in the queue directory,<br />
normally by handing them to Sendmail for delivery.<br />
The portion of an IP address can be locally modified by using<br />
host address bits as additional network address bits. These<br />
newly designated network bits define a network within the<br />
larger network.<br />
<strong>CyberCop</strong> <strong>Scanner</strong> <strong>Getting</strong> <strong>Started</strong> <strong>Guide</strong> G-3
Glossary<br />
subnet addressing<br />
TELNET<br />
transmission control<br />
protocol/internet protocol<br />
(TCP/IP)<br />
transparency<br />
trusted network<br />
uniform resource locator<br />
(URL)<br />
untrusted network<br />
VDOLive<br />
virtual private network (VPN)<br />
Web (WWW, World Wide Web)<br />
Web browser<br />
well-known port<br />
wide area network<br />
An extension of the IP addressing scheme that allows a site to<br />
use a single IP network address for multiple physical networks<br />
by dividing the destination address into a network portion and<br />
local portion.<br />
A TCP/IP protocol that provides support for remote login and<br />
virtual terminal over a network.<br />
The suite of data communications protocols that underlies the<br />
Internet.<br />
A method for providing network access through a firewall<br />
without user interaction with the firewall. Access that is<br />
allowed at a site is done invisibly to the user.<br />
The network protected by the firewall (usually your corporate<br />
network).<br />
A string that gives the location of a information. The string<br />
begins with a protocol type (for example, FTP, HTTP) followed<br />
by the domain name of a server and the path name to a file on<br />
that server.<br />
The network not protected by the firewall, but from which the<br />
firewall accepts requests (usually the Internet).<br />
A protocol that supports streaming audio and video.<br />
A physically disparate set of networks that share a common<br />
security perimeter through secured internetwork<br />
communication.<br />
The large-scale information service that allows a user to browse<br />
information. The Web offers a hypermedia system that can<br />
store information as text, graphics, audio, etc.<br />
A software program that lets you access the World Wide Web.<br />
Netscape Navigator and Microsoft Internet Explorer are<br />
well-known Web browsers.<br />
Any of a set of protocol port numbers assigned for specific uses<br />
by transport level protocols (for example, SMTP and UDP).<br />
Each server listens at a well-known port, so clients can locate it.<br />
A network where the components are physically distant from<br />
each other.<br />
G-4 Glossary