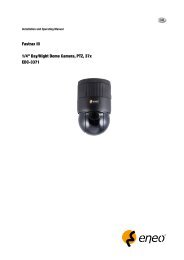
1/4â Dome, PTZ, Day&Night;, 22x EDMC-3221/E - eneo Home EN
1/4â Dome, PTZ, Day&Night;, 22x EDMC-3221/E - eneo Home EN
1/4â Dome, PTZ, Day&Night;, 22x EDMC-3221/E - eneo Home EN

You also want an ePaper? Increase the reach of your titles
YUMPU automatically turns print PDFs into web optimized ePapers that Google loves.
3.5 Preset (Shortcut: PRST)<br />
If you need to view specific places routinely, you should program Presets. A Preset is a<br />
programmed video scene with automatic pan, tilt, zoom, focus, and AE settings. Once<br />
programmed, placing the number position and pressing the PRST key on your controller calls up<br />
that Preset automatically. In addition, Presets may be assigned to alarm action or as the “home”<br />
position for the dome camera. As many as 120 Presets, whose positions are saved in the dome’s<br />
firmware, may be programmed.<br />
There are two pages of Preset menu. Each page has 60 Presets. Pages can be scrolled by<br />
pushing the Joystick to the left or right on the first or last No. of Preset.<br />
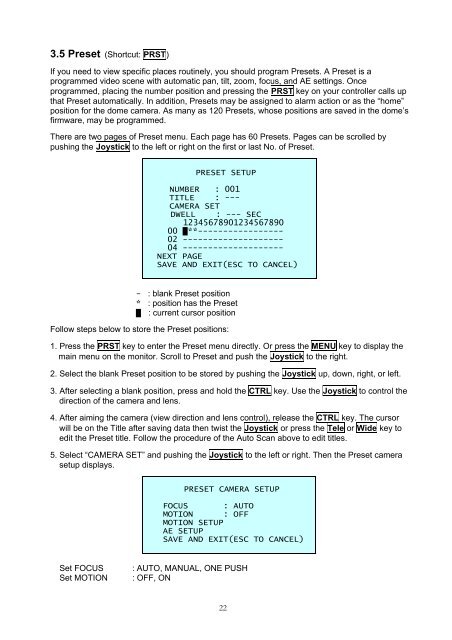
PRESET SETUP<br />
NUMBER : 001<br />
TITLE : ---<br />
CAMERA SET<br />
DWELL : --- SEC<br />
12345678901234567890<br />
00 █**-----------------<br />
02 --------------------<br />
04 --------------------<br />
NEXT PAGE<br />
SAVE AND EXIT(ESC TO CANCEL)<br />
- : blank Preset position<br />
* : position has the Preset<br />
█ : current cursor position<br />
Follow steps below to store the Preset positions:<br />
1. Press the PRST key to enter the Preset menu directly. Or press the M<strong>EN</strong>U key to display the<br />
main menu on the monitor. Scroll to Preset and push the Joystick to the right.<br />
2. Select the blank Preset position to be stored by pushing the Joystick up, down, right, or left.<br />
3. After selecting a blank position, press and hold the CTRL key. Use the Joystick to control the<br />
direction of the camera and lens.<br />
4. After aiming the camera (view direction and lens control), release the CTRL key. The cursor<br />
will be on the Title after saving data then twist the Joystick or press the Tele or Wide key to<br />
edit the Preset title. Follow the procedure of the Auto Scan above to edit titles.<br />
5. Select “CAMERA SET” and pushing the Joystick to the left or right. Then the Preset camera<br />
setup displays.<br />
PRESET CAMERA SETUP<br />
FOCUS : AUTO<br />
MOTION : OFF<br />
MOTION SETUP<br />
AE SETUP<br />
SAVE AND EXIT(ESC TO CANCEL)<br />
Set FOCUS<br />
Set MOTION<br />
: AUTO, MANUAL, ONE PUSH<br />
: OFF, ON<br />
22