Create successful ePaper yourself
Turn your PDF publications into a flip-book with our unique Google optimized e-Paper software.
<strong>2009</strong>-13<br />
<strong>Ford</strong> <strong>Flex</strong><br />
PRELIMINARY:<br />
Disconnect the negative battery cable.<br />
SUBWOOFER AMPLIFIER<br />
VEHICLE DISASSEMBLY<br />
Make:<br />
<strong>Ford</strong><br />
Model: <strong>Flex</strong><br />
Year: <strong>2009</strong>-13<br />
SPEAKERS AMPLIFIER<br />
1. With Panel Removal Tool, remove (2) plastic clips located on the<br />
inside corners of the tailgate running board.<br />
2. With Panel Removal Tool, unclip tailgate running board and<br />
remove.<br />
3. With Panel Removal Tool, unclip (2) screw caps on the Rear Right<br />
Pillar Panel and extract (1) 7mm screws inside each screw cap.<br />
4. Remove weather strip.<br />
5. With Panel Removal Tool, unclip Rear Right Pillar Panel, unplug and<br />
remove.<br />
6. With your fingers, unscrew (2) plastic clips on the right side utilized<br />
to strap a cargo net.<br />
7. Extract rear right passanger seatbelt lower bolt using a T-50 Torx.<br />
8. With Panel Removal Tool, unclip rear right passanger running<br />
board and extract (1) ¼” screw.<br />
9. With Panel Removal Tool, unclip screw cap from rear right upper<br />
panel betweet the rear door and rear side window and extract (1)<br />
7mm screw.<br />
<strong>10</strong>. With Panel Removal Tool, unclip rear right panel between rear<br />
door and rear side window and place it out of the way.<br />
11. With Panel Removal Tool, unclip subwoofer panel, unplug and<br />
remove..<br />
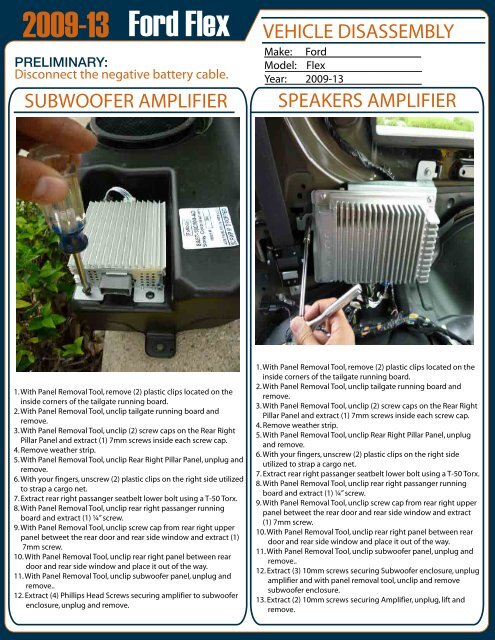
12. Extract (4) Phillips Head Screws securing amplifier to subwoofer<br />
enclosure, unplug and remove.<br />
1. With Panel Removal Tool, remove (2) plastic clips located on the<br />
inside corners of the tailgate running board.<br />
2. With Panel Removal Tool, unclip tailgate running board and<br />
remove.<br />
3. With Panel Removal Tool, unclip (2) screw caps on the Rear Right<br />
Pillar Panel and extract (1) 7mm screws inside each screw cap.<br />
4. Remove weather strip.<br />
5. With Panel Removal Tool, unclip Rear Right Pillar Panel, unplug<br />
and remove.<br />
OEM COLOR CODES<br />
6. With your fingers, unscrew (2) plastic clips on the right side<br />
utilized to strap a cargo net.<br />
7. Extract rear right passanger seatbelt lower bolt using a T-50 Torx.<br />
8. With Panel Removal Tool, unclip rear right passanger running<br />
+12 Volt Constant: Lt. Green/ Purple<br />
+12 Volt Acessory: Pink/ Black<br />
board and extract (1) ¼” screw.<br />
Ground: Black/ Lt. Green<br />
9. With Panel Removal Tool, unclip screw cap from rear right upper<br />
panel betweet the rear door and rear side window and extract<br />
Rear (1) 7mm Right screw. Positive:<br />
Rear Right Negative:<br />
Orange/ Red<br />
Brown/ Pink<br />
<strong>10</strong>. With Panel Removal Tool, unclip rear right panel between rear<br />
door and rear side window and place it out of the way.<br />
11. With Panel Removal Tool, unclip subwoofer panel, unplug and<br />
remove..<br />
12. Extract (3) <strong>10</strong>mm screws securing Subwoofer enclosure, unplug<br />
amplifier and with panel removal tool, unclip and remove<br />
subwoofer enclosure.<br />
13. Extract (2) <strong>10</strong>mm screws securing Amplifier, unplug, lift and<br />
remove.


