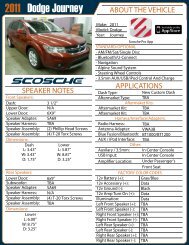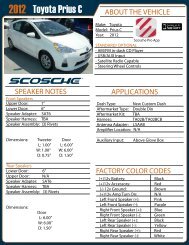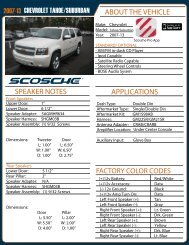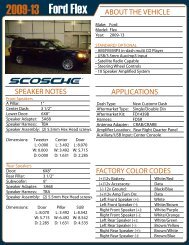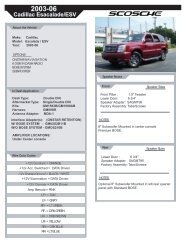
2009 Land Rover LR2 AE Page 1 - Scosche
2009 Land Rover LR2 AE Page 1 - Scosche
2009 Land Rover LR2 AE Page 1 - Scosche

You also want an ePaper? Increase the reach of your titles
YUMPU automatically turns print PDFs into web optimized ePapers that Google loves.
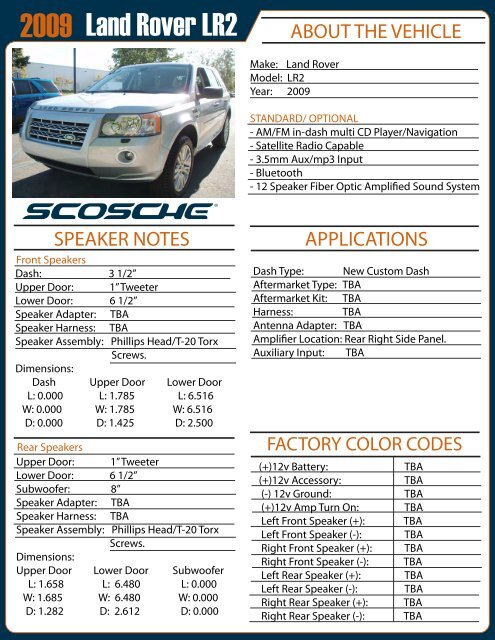
<strong>2009</strong><br />
<strong>Land</strong> <strong>Rover</strong> <strong>LR2</strong><br />
ABOUT THE VEHICLE<br />
Make: <strong>Land</strong> <strong>Rover</strong><br />
Model: <strong>LR2</strong><br />
Year: <strong>2009</strong><br />
STANDARD/ OPTIONAL<br />
- AM/FM in-dash multi CD Player/Navigation<br />
- Satellite Radio Capable<br />
- 3.5mm Aux/mp3 Input<br />
- Bluetooth<br />
- 12 Speaker Fiber Optic Amplified Sound System<br />
SPEAKER NOTES<br />
Front Speakers<br />
Dash: 3 1/2”<br />
Upper Door: 1” Tweeter<br />
Lower Door: 6 1/2”<br />
Speaker Adapter: TBA<br />
Speaker Harness: TBA<br />
Speaker Assembly: Phillips Head/T-20 Torx<br />
Screws.<br />
Dimensions:<br />
Dash Upper Door Lower Door<br />
L: 0.000 L: 1.785 L: 6.516<br />
W: 0.000 W: 1.785 W: 6.516<br />
D: 0.000 D: 1.425 D: 2.500<br />
Rear Speakers<br />
Upper Door: 1” Tweeter<br />
Lower Door: 6 1/2”<br />
Subwoofer: 8”<br />
Speaker Adapter: TBA<br />
Speaker Harness: TBA<br />
Speaker Assembly: Phillips Head/T-20 Torx<br />
Screws.<br />
Dimensions:<br />
Upper Door Lower Door Subwoofer<br />
L: 1.658 L: 6.480 L: 0.000<br />
W: 1.685 W: 6.480 W: 0.000<br />
D: 1.282 D: 2.612 D: 0.000<br />
APPLICATIONS<br />
Dash Type: New Custom Dash<br />
Aftermarket Type: TBA<br />
Aftermarket Kit: TBA<br />
Harness:<br />
TBA<br />
Antenna Adapter: TBA<br />
Amplifier Location: Rear Right Side Panel.<br />
Auxiliary Input: TBA<br />
FACTORY OEM COLOR COLOR CODES CODES<br />
(+)12v +12 Volt Battery: Constant: Lt. Green/ TBA Purple<br />
(+)12v +12 Volt Accessory: Acessory: Pink/ TBA Black<br />
(-) 12v Ground: Ground: Black/ TBA Lt. Green<br />
(+)12v Illumination:<br />
Amp Turn On: Lt. Blue/ TBARed<br />
Left Front Front Left Speaker Positive: (+): Orange/ TBALt. Green<br />
Left Front Front Left Speaker Negative: (-): Lt. Blue/ TBARed<br />
Right Front Front Right Speaker Positive: (+): White/ TBA Lt. Green<br />
Right Front Front Right Speaker Negative: (-): Drk. Green/ TBA Orange<br />
Left Rear Rear Left Speaker Positive: (+): Gray/ TBA Lt. Blue<br />
Left Rear Rear Left Speaker Negative:: (-): Tan/ Yellow TBA<br />
Right Rear Right Rear Speaker Positive: (+): Orange/ TBARed<br />
Right Rear Right Rear Speaker Negative: (-): Brown/ TBA Pink
<strong>2009</strong><br />
<strong>Land</strong> <strong>Rover</strong> <strong>LR2</strong><br />
PRELIMINARY:<br />
Disconnect the negative battery cable.<br />
RADIO REMOVAL<br />
VEHICLE DISASSEMBLY<br />
Make: <strong>Land</strong> <strong>Rover</strong><br />
Model: <strong>LR2</strong><br />
Year: <strong>2009</strong><br />
FRONT DOOR TWEETERS<br />
1. With Panel Removal Tool, unclip Center Speaker Panel, remove<br />
and extract the (2) Top T-20 Torx screws.<br />
2. With Panel Removal Tool, remove plastic mat above Hazard swich<br />
and extract (2) T-20 Torx screws.<br />
3. With panel Removal Tool, unclip Radio panel, unplug and remove.<br />
4. Extract (4) T-20 Torx screws securing Radio and Radio Face Plate,<br />
remove and unplug Radio Face Plate then remove and unplug<br />
Radio.<br />
CENTER DASH SPEAKER<br />
1. Follow steps 1-5 of Fron Door Speaker disassembly.<br />
2. With Panel Removal Tool, unclip tweeter panel, unplug and remove.<br />
3. With Pick Tool, unclip Tweeter from panel.<br />
FRONT DOOR SPEAKERS<br />
1. With Panel Removal Tool, unclip Center Speakers Panel.<br />
2. Extract (2) T-20 Torx screws securing Speakers, unplug and<br />
remove.<br />
SIDE DASH SPEAKERS<br />
1. With panel Removal Tool, unclip A Pillar Panel.<br />
2. With panel Removal Tool, unclip Side Dash Speaker grill.<br />
3. Extract (2) T-20 Torx screws securing Speaker, unplug and remove.<br />
OEM COLOR CODES<br />
+12 Volt Constant: Lt. Green/ Purple<br />
+12 Volt Acessory: Pink/ Black<br />
Ground: Black/ Lt. Green<br />
1. With Panel Removal Tool, unclip Door grip handle panel and<br />
extract Rear (1) Right Phillips Positive: Head screw from the Orange/ top and Red (1) T-20 Torx<br />
screw from the bottom.<br />
2. With<br />
Rear<br />
Pick<br />
Right<br />
Tool, unclip<br />
Negative:<br />
screw cap from<br />
Brown/<br />
inside the<br />
Pink<br />
door handle and<br />
extract (1) Phillips Head screw.<br />
3. Extract (1) Phillips Head screw towards the rear of the door panel<br />
storage compartment.<br />
4. Extract (1) Phillips head screw located at the top rear side of the<br />
panel.<br />
5. With panel Removal Tool, unclip Door panel, unplug and remove.<br />
6. Extract (3) Phillips head screw securing Speaker, unplug and with<br />
Panel Removal Tool, remove Speaker.
<strong>2009</strong><br />
<strong>Land</strong> <strong>Rover</strong> <strong>LR2</strong><br />
PRELIMINARY:<br />
Disconnect the negative battery cable.<br />
REAR DOOR TWEETERS<br />
VEHICLE DISASSEMBLY<br />
Make: <strong>Land</strong> <strong>Rover</strong><br />
Model: <strong>LR2</strong><br />
Year: <strong>2009</strong><br />
SUBWOOFER<br />
1. Follow steps 1-4 of Rear Door Speaker Disassembly.<br />
2. Extract (3) T-20 Torx screws securing Tweeter and remove.<br />
REAR DOOR SPEAKERS<br />
1. Remove the Cargo Cover.<br />
2. With Panel Removal Tool, unclip panel above the rear right<br />
passangers bottom seatbelt bolt.<br />
3. Remove spare tire cover panel and side carpet panel to the right.<br />
4. With Panel Removal Tool, unclip tailgate running board.<br />
5. Remove cargo net clip located on the top right panel by tailgate<br />
rubber seal.<br />
6. With panel Removal Tool, unclip Rear Side Panel and remove.<br />
7. Extract (4) 10mm screws securing Subwoofer Enclosure, unplug<br />
and remove.<br />
AMPLIFIER<br />
OEM COLOR CODES<br />
+12 Volt Constant: Lt. Green/ Purple<br />
+12 Volt Acessory: Pink/ Black<br />
Ground: Black/ Lt. Green<br />
1. With Panel Removal Tool, unclip Door grip handle panel and<br />
extract (1) Phillips Head screw from the top and (1) T-20 Torx<br />
screw from the bottom.<br />
2. With Pick Tool, unclip screw cap from inside the door handle and<br />
extract (1) Phillips Head screw.<br />
3. Extract (1) Phillips Head screw towards the rear of the door panel<br />
storage compartment.<br />
4. With panel Removal Tool, unclip Door panel, unplug and remove.<br />
5. Extract (3) Phillips head screw securing Speaker, unplug and with<br />
Panel Removal Tool, remove Speaker.<br />
Rear Right Positive:<br />
Rear Right Negative:<br />
Orange/ Red<br />
Brown/ Pink<br />
1. Remove the Cargo Cover.<br />
2. With Panel Removal Tool, unclip panel above the rear right<br />
passangers bottom seatbelt bolt.<br />
3. Remove spare tire cover panel and side carpet panel to the right.<br />
4. With Panel Removal Tool, unclip tailgate running board.<br />
5. Remove cargo net clip located on the top right panel by tailgate<br />
rubber seal.<br />
6. With panel Removal Tool, unclip Rear Side Panel and remove.<br />
7. Extract (4) 10mm screws securing amplifier, unplug and remove.