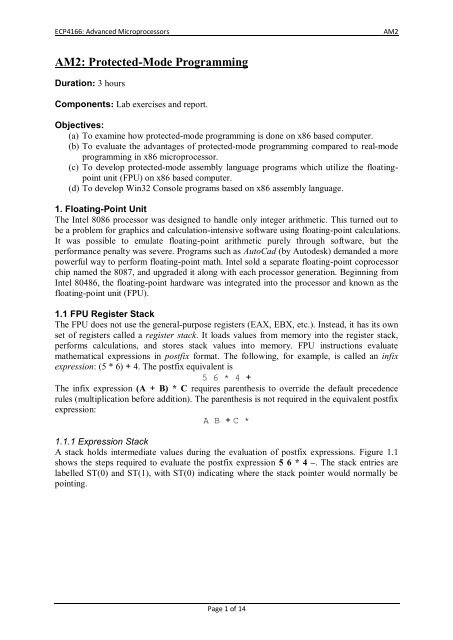
AM2: Protected-Mode Programming
AM2: Protected-Mode Programming
AM2: Protected-Mode Programming

Create successful ePaper yourself
Turn your PDF publications into a flip-book with our unique Google optimized e-Paper software.
ECP4166: Advanced Microprocessors<br />
<strong>AM2</strong><br />
<strong>AM2</strong>: <strong>Protected</strong>-<strong>Mode</strong> <strong>Programming</strong><br />
Duration: 3 hours<br />
Components: Lab exercises and report.<br />
Objectives:<br />
(a) To examine how protected-mode programming is done on x86 based computer.<br />
(b) To evaluate the advantages of protected-mode programming compared to real-mode<br />
programming in x86 microprocessor.<br />
(c) To develop protected-mode assembly language programs which utilize the floatingpoint<br />
unit (FPU) on x86 based computer.<br />
(d) To develop Win32 Console programs based on x86 assembly language.<br />
1. Floating-Point Unit<br />
The Intel 8086 processor was designed to handle only integer arithmetic. This turned out to<br />
be a problem for graphics and calculation-intensive software using floating-point calculations.<br />
It was possible to emulate floating-point arithmetic purely through software, but the<br />
performance penalty was severe. Programs such as AutoCad (by Autodesk) demanded a more<br />
powerful way to perform floating-point math. Intel sold a separate floating-point coprocessor<br />
chip named the 8087, and upgraded it along with each processor generation. Beginning from<br />
Intel 80486, the floating-point hardware was integrated into the processor and known as the<br />
floating-point unit (FPU).<br />
1.1 FPU Register Stack<br />
The FPU does not use the general-purpose registers (EAX, EBX, etc.). Instead, it has its own<br />
set of registers called a register stack. It loads values from memory into the register stack,<br />
performs calculations, and stores stack values into memory. FPU instructions evaluate<br />
mathematical expressions in postfix format. The following, for example, is called an infix<br />
expression: (5 * 6) + 4. The postfix equivalent is<br />
5 6 * 4 +<br />
The infix expression (A + B) * C requires parenthesis to override the default precedence<br />
rules (multiplication before addition). The parenthesis is not required in the equivalent postfix<br />
expression:<br />
A B + C *<br />
1.1.1 Expression Stack<br />
A stack holds intermediate values during the evaluation of postfix expressions. Figure 1.1<br />
shows the steps required to evaluate the postfix expression 5 6 * 4 –. The stack entries are<br />
labelled ST(0) and ST(1), with ST(0) indicating where the stack pointer would normally be<br />
pointing.<br />
Page 1 of 14
ECP4166: Advanced Microprocessors<br />
<strong>AM2</strong><br />
Figure 1.1: Evaluating the Postfix Expression 5 6 * 4 – .<br />
Table 1.1 contains some examples of translating infix to equivalent postfix expressions.<br />
Table 1.1 Infix to Postfix Examples<br />
Infix<br />
Postfix<br />
A + B A B +<br />
(A - B) / D A B - D /<br />
(A + B) * (C + D) A B + C D + *<br />
((A + B) / C) * (E - F) AB + C / EF - *<br />
1.2 FPU Data Registers<br />
The FPU has eight individually addressable 80-bit data registers named R0 through R7 (see<br />
Figure 2). Together, they are called a register stack. A three-bit field named TOP in the FPU<br />
status word identifies the register number that is currently the top of the stack. In Figure 1.2,<br />
for example, TOP equals binary 011, identifying R3 as the top of the stack. This stack<br />
location is also known as ST(0) (or simply ST) when writing floating-point instructions. The<br />
last register is ST(7).<br />
Figure 1.2: Floating-Point Data Register Stack.<br />
As we might expect, a push operation (also called load) decrements TOP by 1 and copies an<br />
operand into the register identified as ST(0). If TOP equals 0 before a push, TOP wraps<br />
around to register R7. A pop operation (also called store) copies the data at ST(0) into an<br />
operand, then adds 1 to TOP. If TOP equals 7 before the pop, it wraps around to register R0.<br />
Page 2 of 14
ECP4166: Advanced Microprocessors<br />
<strong>AM2</strong><br />
If loading a value into the stack would result in overwriting existing data in the register stack,<br />
a floating-point exception is generated. Figure 1.3 shows the same stack after 1.0 and 2.0<br />
have been pushed (loaded) on the stack.<br />
Figure 1.3: FPU Stack after Pushing 1.0 and 2.0.<br />
Although it is interesting to understand how the FPU implements the stack using a limited set<br />
of registers, we need only focus on the ST(n) notation, where ST(0) is always the top of stack.<br />
From this point forward, we refer to stack registers as ST(0), ST(1), and so on. Instruction<br />
operands cannot refer directly to register numbers.<br />
Floating-point values in registers use the IEEE 10-byte extended real format (also known as<br />
temporary real). When the FPU stores the result of an arithmetic operation in memory, it<br />
translates the result into one of the following formats: integer, long integer, single precision<br />
(short real), double precision (long real), or packed binary-coded decimal (BCD).<br />
1.3 Floating-Point Instruction Set<br />
The FPU instruction set is somewhat complex, so we will attempt here to give you an<br />
overview of its capabilities, along with specific examples that demonstrate code typically<br />
generated by compilers. In addition, we will see how you can exercise control over the FPU<br />
by changing its rounding mode. The instruction set contains the following basic categories of<br />
instructions:<br />
• Data transfer<br />
• Basic arithmetic<br />
• Comparison<br />
• Transcendental<br />
• Load constants (specialized predefined constants only)<br />
• x87 FPU control<br />
• x87 FPU and SIMD state management<br />
Floating-point instruction names begin with the letter F to distinguish them from CPU<br />
instructions. The second letter of the instruction mnemonic (often B or I) indicates how a<br />
memory operand is to be interpreted: B indicates a BCD operand, and I indicates a binary<br />
integer operand. If neither is specified, the memory operand is assumed to be in real-number<br />
format. For example, FBLD operates on BCD numbers, FILD operates on integers, and FLD<br />
operates on real numbers.<br />
Page 3 of 14
ECP4166: Advanced Microprocessors<br />
<strong>AM2</strong><br />
1.3.1 Operands<br />
A floating-point instruction can have zero operands, one operand, or two operands. If there<br />
are two operands, one must be a floating-point register. There are no immediate operands, but<br />
certain predefined constants (such as 0.0, _and log2 10) can be loaded into the stack.<br />
General-purpose registers such as EAX, EBX, ECX, and EDX cannot be operands. (The only<br />
exception is FSTSW, which stores the FPU status word in AX.) Memory-to-memory<br />
operations are not permitted. Integer operands must be loaded into the FPU from memory<br />
(never from CPU registers); they are automatically converted to floating-point format.<br />
Similarly, when storing floating-point values into integer memory operands, the values are<br />
automatically truncated or rounded into integers.<br />
1.3.2 Initialization (FINIT)<br />
The FINIT instruction initializes the FPU. It sets the FPU control word to 037Fh, which<br />
masks (hides) all floating-point exceptions, sets rounding to nearest even, and sets the<br />
calculation precision to 64 bits. We recommend calling FINIT at the beginning of your<br />
programs, so you know the starting state of the processor.<br />
1.3.3 Floating-Point Data Types<br />
Let’s quickly review the floating-point data types supported by MASM (QWORD, TBYTE,<br />
REAL4, REAL8, and REAL10), listed in Table 1.2. You will need to use these types when<br />
defining memory operands for FPU instructions. For example, when loading a floating-point<br />
variable into the FPU stack, the variable is defined as REAL4, REAL8, or REAL10:<br />
.data<br />
bigVal REAL10 1.212342342234234243E+864<br />
.code<br />
fld bigVal ; load variable into stack<br />
Table 1.2: Intrinsic Data Types.<br />
Type Usage<br />
QWORD 64-bit integer<br />
TBYTE 80-bit (10-byte) integer<br />
REAL4 32-bit (4-byte) IEEE short real<br />
REAL8 64-bit (8-byte) IEEE long real<br />
REAL10 80-bit (10-byte) IEEE extended real<br />
1.3.4 Reading and Writing Floating-Point Values<br />
In this experiment, the following two procedures for floating-point input-output (created by<br />
William Barrett of San Jose State University) are used:<br />
ReadFloat: Reads a floating-point value from the keyboard and pushes it on the floatingpoint<br />
stack. It accepts a wide variety of floating-point formats. Some examples<br />
are shown below:<br />
35 3.5E005<br />
+35. -3.5E+5<br />
-3.5 3.5E-4<br />
.35 +3.5E-4<br />
3.5E5<br />
WriteFloat: Writes the floating-point value at ST(0) to the console window in exponential<br />
format.<br />
ShowFPUStack: Another useful procedure, written by James Brink of Pacific Lutheran<br />
University, displays the FPU stack. It is called with no parameters:<br />
call ShowFPUStack<br />
Page 4 of 14
ECP4166: Advanced Microprocessors<br />
<strong>AM2</strong><br />
Example 1.1<br />
The following example program pushes two floating-point values on the FPU stack, displays<br />
it, inputs two values from the user, multiplies them, and displays their product:<br />
Note: Please refer to Appendix A on how to build and run this program.<br />
Sample input/output (user input shown in bold type):<br />
------ FPU Stack ------<br />
ST(0): +1.0000000E+001<br />
ST(1): +1.2345600E+002<br />
Please enter a real number: 3.5<br />
Please enter a real number: 4.2<br />
Their product is: +1.4700000E+001<br />
Example 1.2<br />
Let’s code the expression valD = -valA + (valB * valC). A possible step-by-step solution is:<br />
Load valA on the stack and negate it. Load valB into ST(0), moving valA down to ST(1).<br />
Multiply ST(0) by valC, leaving the product in ST(0). Add ST(1) and ST(0) and store the<br />
sum in valD:<br />
Page 5 of 14
ECP4166: Advanced Microprocessors<br />
<strong>AM2</strong><br />
Please refer to Appendix B on how to debug this program.<br />
Exercise 1.1<br />
Write a program that prompts the user for the radius of a circle. Calculate and display the<br />
circle’s circumference and area. Use the ReadFloat and WriteFloat procedures. Use the<br />
FLDPI instruction to load onto the register stack. Please refer to Appendix A on how to<br />
create, build and run your program.<br />
Exercise 1.2<br />
Write a program that asks the user to enter the X and Y coordinates of two points on a<br />
straight line. Calculate and display the gradient of the straight line. Use the ReadFloat and<br />
WriteFloat procedures in your program.<br />
2. Win32 Console <strong>Programming</strong><br />
On the surface, 32-bit console mode programs look and behave like 16-bit MS-DOS<br />
programs running in text mode. There are differences, however: The former runs in 32-bit<br />
protected mode, whereas MS-DOS programs run in real-address mode. They use different<br />
function libraries. Win32 programs call functions from the same library used by graphical<br />
Windows applications. MS-DOS programs use BIOS and MS-DOS interrupts that have<br />
existed since the introduction of the IBM-PC.<br />
2.1 Application <strong>Programming</strong> Interface<br />
An Application <strong>Programming</strong> Interface (API) is a collection of types, constants, and<br />
functions that provide a way to directly manipulate objects through programming. Therefore,<br />
the Win32 API lets you tap into the functions in the 32-bit version of MS-Windows. The<br />
Irvine32 link library used in this experiment is completely built on Win32 console functions.<br />
It is compatible with Win32 API functions and can be used for basic input output, simulations,<br />
timing, and other useful operations. Table 2.1 gives a complete list of procedures in the<br />
Irvine32 link library.<br />
Table 2.1: Procedures in the Irvine32 link library<br />
Procedure<br />
Description<br />
CloseFile<br />
Closes a disk file that was previously opened.<br />
Clrscr<br />
Clears the console window and locates the cursor at the upper left corner.<br />
CreateOutputFile Creates a new disk file for writing in output mode.<br />
Crlf<br />
Writes an end-of-line sequence to the console window.<br />
Delay<br />
Pauses the program execution for a specified n -millisecond interval.<br />
DumpMem<br />
Writes a block of memory to the console window in hexadecimal.<br />
DumpRegs<br />
Displays the EAX, EBX, ECX, EDX, ESI, EDI, EBP, ESP, EFLAGS, and EIP<br />
registers in hexadecimal. Also displays the most common CPU status flags.<br />
GetCommandTail Copies the program’s command-line arguments (called the command tail)<br />
into an array of bytes.<br />
Page 6 of 14
ECP4166: Advanced Microprocessors<br />
<strong>AM2</strong><br />
GetDateTime<br />
GetMaxXY<br />
GetMseconds<br />
GetTextColor<br />
Gotoxy<br />
IsDigit<br />
MsgBox<br />
MsgBoxAsk<br />
OpenInputFile<br />
ParseDecimal32<br />
ParseInteger32<br />
Random32<br />
Randomize<br />
RandomRange<br />
ReadChar<br />
ReadDec<br />
ReadFromFile<br />
ReadHex<br />
ReadInt<br />
ReadKey<br />
ReadString<br />
SetTextColor<br />
Str_compare<br />
Str_copy<br />
Str_length<br />
Str_trim<br />
Str_ucase<br />
WaitMsg<br />
WriteBin<br />
WriteBinB<br />
WriteChar<br />
WriteDec<br />
WriteHex<br />
WriteHexB<br />
WriteInt<br />
WriteStackFrame<br />
WriteStackFrameName<br />
WriteString<br />
WriteToFile<br />
WriteWindowsMsg<br />
Gets the current date and time from the system.<br />
Gets the number of columns and rows in the console window’s buffer.<br />
Returns the number of milliseconds elapsed since midnight.<br />
Returns the active foreground and background text colors in the console<br />
window.<br />
Locates the cursor at a specific row and column in the console window.<br />
Sets the Zero flag if the AL register contains the ASCII code for a decimal<br />
digit (0–9).<br />
Displays a popup message box.<br />
Display a yes/no question in a popup message box.<br />
Opens an existing disk file for input.<br />
Converts an unsigned decimal integer string to 32-bit binary.<br />
Converts a signed decimal integer string to 32-bit binary.<br />
Generates a 32-bit pseudorandom integer in the range 0 to FFFFFFFFh.<br />
Seeds the random number generator with a unique value.<br />
Generates a pseudorandom integer within a specified range.<br />
Waits for a single character to be typed at the keyboard and returns the<br />
character.<br />
Reads an unsigned 32-bit decimal integer from the keyboard, terminated by<br />
the Enter key.<br />
Reads an input disk file into a buffer.<br />
Reads a 32-bit hexadecimal integer from the keyboard, terminated by the<br />
Enter key.<br />
Reads a 32-bit signed decimal integer from the keyboard, terminated by the<br />
Enter key.<br />
Reads a character from the keyboard’s input buffer without waiting for<br />
input.<br />
Reads a string from the keyboard, terminated by the Enter key.<br />
Sets the foreground and background colors of all subsequent text output to<br />
the console.<br />
Compares two strings.<br />
Copies a source string to a destination string.<br />
Returns the length of a string in EAX.<br />
Removes unwanted characters from a string.<br />
Converts a string to uppercase letters.<br />
Displays a message and waits for a key to be pressed.<br />
Writes an unsigned 32-bit integer to the console window in ASCII binary<br />
format.<br />
Writes a binary integer to the console window in byte, word, or doubleword<br />
format.<br />
Writes a single character to the console window.<br />
Writes an unsigned 32-bit integer to the console window in decimal format.<br />
Writes a 32-bit integer to the console window in hexadecimal format.<br />
Writes a byte, word, or doubleword integer to the console window in<br />
hexadecimal format<br />
Writes a signed 32-bit integer to the console window in decimal format.<br />
Writes the current procedure’s stack frame to the console.<br />
Writes the current procedure’s name and stack frame to the console.<br />
Writes a null-terminated string to the console window.<br />
Writes a buffer to an output file.<br />
Displays a string containing the most recent error generated by MS-<br />
Windows.<br />
Page 7 of 14
ECP4166: Advanced Microprocessors<br />
<strong>AM2</strong><br />
Some of the procedures that are used in this experiment are described in the following<br />
sections.<br />
2.1.1 MsgBox<br />
The MsgBox procedure displays a graphical popup message box with an optional caption.<br />
(This works when the program is running in a console window.) Pass it the offset of a string<br />
in EDX, which will appear in the inside the box. Optionally, pass the offset of a string for the<br />
box’s title in EBX. To leave the title blank, set EBX to zero. Sample call:<br />
.data<br />
caption db "Dialog Title", 0<br />
HelloMsg<br />
.code<br />
mov ebx,OFFSET caption<br />
mov edx,OFFSET HelloMsg<br />
call MsgBox<br />
Sample output:<br />
BYTE "This is a pop-up message box.", 0dh,0ah<br />
BYTE "Click OK to continue...", 0<br />
2.1.2 MsgBoxAsk<br />
The MsgBoxAsk procedure displays a graphical popup message box with Yes and No<br />
buttons. (This works when the program is running in a console window.) Pass it the offset of<br />
a question string in EDX, which will appear in the inside the box. Optionally, pass the offset<br />
of a string for the box’s title in EBX. To leave the title blank, set EBX to zero. MsgBoxAsk<br />
returns an integer in EAX that tells you which button was selected by the user. The value will<br />
be one of two predefined Windows constants: IDYES (equal to 6) or IDNO (equal to 7).<br />
Sample call:<br />
.data<br />
caption BYTE "Survey Completed",0<br />
question<br />
BYTE "Thank you for completing the survey."<br />
BYTE 0dh,0ah<br />
BYTE "Would you like to receive the results?",0<br />
.code<br />
mov ebx,OFFSET caption<br />
mov edx,OFFSET question<br />
call MsgBoxAsk<br />
;(check return value in EAX)<br />
Page 8 of 14
ECP4166: Advanced Microprocessors<br />
<strong>AM2</strong><br />
Sample output:<br />
2.1.3 ReadString<br />
The ReadString procedure reads a string from the keyboard, stopping when the user presses<br />
the Enter key. Pass the offset of a buffer in EDX and set ECX to the maximum number of<br />
characters the user can enter, plus 1 (to save space for the terminating null byte). The<br />
procedure returns the count of the number of characters typed by the user in EAX.<br />
Sample call:<br />
.data<br />
buffer BYTE 21 DUP(0) ; input buffer<br />
byteCount DWORD ? ; holds counter<br />
.code<br />
mov edx,OFFSET buffer ; point to the buffer<br />
mov ecx,SIZEOF buffer ; specify max characters<br />
call ReadString ; input the string<br />
mov byteCount,eax ; number of characters<br />
ReadString automatically inserts a null terminator in memory at the end of the string. The<br />
following is a hexadecimal and ASCII dump of the first 8 bytes of buffer after the user has<br />
entered the string “ABCDEFG”:<br />
41 42 43 44 45 46 47 00 ABCDEFG<br />
The variable byteCount equals 7.<br />
2.1.4 WriteString<br />
The WriteString procedure writes a null-terminated string to the console window. Pass the<br />
string’s offset in EDX. Sample call:<br />
.data<br />
prompt BYTE "Enter your name: ",0<br />
.code<br />
mov edx,OFFSET prompt<br />
call WriteString<br />
2.1.5 WriteDec<br />
The WriteDec procedure writes a 32-bit unsigned integer to the console window in decimal<br />
format with no leading zeros. Pass the integer in EAX. Sample call:<br />
mov eax,295<br />
call WriteDec ; displays: "295"<br />
2.1.6 WriteToFile<br />
The WriteToFile procedure writes the contents of a buffer to an output file. Pass it a valid file<br />
handle in EAX, the offset of the buffer in EDX, and the number of bytes to write in ECX.<br />
When the procedure returns, if EAX is greater than zero, it contains a count of the number of<br />
bytes written; otherwise, an error occurred. The following code calls WriteToFile:<br />
Page 9 of 14
ECP4166: Advanced Microprocessors<br />
<strong>AM2</strong><br />
BUFFER_SIZE = 5000<br />
.data<br />
fileHandle DWORD ?<br />
buffer BYTE BUFFER_SIZE DUP(?)<br />
.code<br />
mov eax,fileHandle<br />
mov edx,OFFSET buffer<br />
mov ecx,BUFFER_SIZE<br />
call WriteToFile<br />
The following pseudocode describes how to handle the value returned in EAX after calling<br />
WriteToFile:<br />
if EAX = 0 then<br />
error occurred when writing to file<br />
call WriteWindowsMessage to see the error<br />
else<br />
EAX = number of bytes written to the file<br />
endif<br />
Example 2<br />
The following program creates a file in output mode, asks the user to enter some text, writes<br />
the text to the output file, reports the number of bytes written, and closes the file. It checks<br />
for errors after attempting to create the file:<br />
Page 10 of 14
ECP4166: Advanced Microprocessors<br />
<strong>AM2</strong><br />
Note: Please refer to Appendix A on how to create, build and run this program<br />
Exercise 2.1<br />
Modify the program in Example 2 so that it will display a graphical popup message box to<br />
ask the user whether the text file should be created. If the user selects “Yes”, the text file is<br />
created and the program terminates. Otherwise, the program will terminate directly.<br />
Exercise 2.2<br />
Write a program that performs the following operations:<br />
i. Create a new text file.<br />
ii. Prompt the user for a student identification number, name, and date of birth.<br />
iii. Display a graphical popup message box to ask the user if there are more data.<br />
iv. If there are, allow the user to enter the new data and go back to step (iii).<br />
v. Otherwise, write all data to the text file and exit the program.<br />
References<br />
1. Kip R. Irvine, “Assembly Language for x86 Processors”, 6 th Edition, Prentice-Hall<br />
Inc., U.S.A., 2010.<br />
2. Kip R. Irvine, Assembly Language for x86 Processors, 6 th Edition [Online]. Available:<br />
http://kipirvine.com/asm/<br />
Important Note:<br />
Lab assessment will be carried out during the lab session. It is the student's responsibility to<br />
complete the given tasks and report to the lab instructors for assessment.<br />
(END)<br />
Page 11 of 14
ECP4166: Advanced Microprocessors<br />
<strong>AM2</strong><br />
Appendix A<br />
Opening a project<br />
Visual Studio and Visual C++ Express require assembly language source files to belong to a<br />
project, which is a kind of container. A project holds configuration information such as the<br />
locations of the assembler, linker, and required libraries. A project has its own folder, and it<br />
holds the names and locations of all files belonging to it. We have created a sample project<br />
folder in the c:\ECP4166\<strong>AM2</strong>\Example\Project_Sample directory, and its name is Project.<br />
Do the following steps, in order:<br />
i. Start Visual Studio or Visual C++ Express.<br />
ii. First you will open an existing Visual Studio project file. If you're using Visual Studio,<br />
select Open Project from the File menu. Or, if you're using Visual C++ Express,<br />
select Open, and select Project/Solution.<br />
iii. Navigate to the c:\ECP4166\<strong>AM2</strong>\Example\Project_Sample folder and open the file<br />
named Project.sln.<br />
iv. In the Solution Explorer window, you will see the word Project. This is the name of<br />
a Visual Studio project.<br />
v. Next, you need to add the source code file (.asm) to the project. To do that, right-click<br />
on Project, select Add, select Existing Item, select the main.asm file, and click the<br />
Add button to close the dialog window. (You can use this sequence of commands in<br />
the future to add any asm file into a project.)<br />
vi. Next, you will open the main.asm file for editing. Double-click the main.asm file to<br />
open it in the editing window. (Visual Studio users may see a popup dialog asking for<br />
the encoding method used in the asm file. just click the OK button to continue.)<br />
Build the Program<br />
Next, you will build (assemble and link) the sample program. Select Build Project from the<br />
Build menu. You should see messages indicating the build progress in the Output window for<br />
Visual Studio at the bottom of the screen. If you do not see these messages, the project has<br />
probably not been modified since it was last built. No problem--just select Rebuild Project<br />
from the Build menu.<br />
Run the Program<br />
Select Start without Debugging from the Debug menu. The following console window<br />
should appear, although your window will be larger than the one shown here:<br />
Creating New Projects of Your Own<br />
Before long, you will want to create your own projects. The easiest way to do this is to copy<br />
the entire c:\ECP4166\<strong>AM2</strong>\Examples\Project_Sample folder to a new location. Copy it to<br />
a folder in which you have read/write permissions.<br />
Page 12 of 14
ECP4166: Advanced Microprocessors<br />
<strong>AM2</strong><br />
Appendix B<br />
Microsoft Visual Studio 2008 Debugger<br />
This debugger lets you do the following:<br />
Step through your program, viewing the source code<br />
Set breakpoints in your code<br />
View CPU registers and flags<br />
View a disassembly of your program<br />
Watch the values of program variables<br />
View the runtime stack<br />
Display blocks of memory<br />
Perform remote debugging across a network<br />
Open the Visual Studio Project file<br />
1. Go to the the folder in your computer that contains the project. You may use the<br />
sample project located at c:\ECP4166\<strong>AM2</strong>\Example\Project_Sample.<br />
2. Double-click the file named Project.sln.<br />
3. If there is already an asm file in the project, right-click on the asm file and<br />
select Remove in the Solution Explorer window. When prompted by a dialog window,<br />
click the Remove button.<br />
4. Right-click Project in the same window, select Add, and select Existing Item.<br />
5. Select your asm file. It will be added to your project.<br />
6. Select Save All from the File menu to save your project settings.<br />
7. Double-click your asm file in Solution Explorer to open it in the editor.<br />
Debugger Windows<br />
The debugging information is shown in the following windows after the debugger is<br />
invokved (press the F10 key). You can remove any debugger window by right-clicking on its<br />
Tab and selecting Hide. You can open any debugger window by selecting Windows from the<br />
Debug menu.<br />
Source Window<br />
The Source window displays the program's source file. Note that the first instruction has a<br />
yellow arrow next to it. The arrow always indicates the next instruction that is about to<br />
execute.<br />
Watch Window<br />
Select Windows from the Debug menu, and select Watch 1. A Watch window is like an<br />
electronic spreadsheet that displays the names and values of selected variables. As you step<br />
through a program, you can see variables in this window change value. Currently the window<br />
is empty, but you can drag any program variable into the window with your mouse.<br />
Click on the tab at the bottom of the screen labeled Watch 1 to bring it to the front. Drag the<br />
variables into the Watch window and note their current values. The values are currently<br />
displayed in decimal. You may select other format by right-clicking on the watch window<br />
and selecting the desired format from the popup menu.<br />
Page 13 of 14
ECP4166: Advanced Microprocessors<br />
<strong>AM2</strong><br />
Memory Window<br />
Select Windows from the Debug menu, and select Memory. The Memory window displays a<br />
raw dump of memory in either hexadecimal or decimal. It is particularly useful when<br />
working with array variables. For e.g., it can display the value of valD by typing &valD next<br />
to the Address label.<br />
The & before the variable name means to interpret the variable name as an address. In<br />
assembly language, all labels are implied addresses. Variable names are case-sensitive in the<br />
debugger.<br />
The Memory window displays a series of individual memory bytes, beginning at the address<br />
of valD. Right-click on the window, and select 64-bit Floating Point. Along the left side of<br />
the window is shown the address of the first value in each line.<br />
Register Window<br />
Select Windows from the Debug menu, and select Register. The Register window displays<br />
the contents of the CPU registers. The floating-point register stack and flag values are not<br />
shown by default, but you can add them by right-click in the Register window and select<br />
Floating Point and Flags, respectively.<br />
Debugging Program<br />
Step Over (F10)<br />
Pressing the F10 function key will single-step through the program. As you press F10, watch<br />
the yellow arrow in the Source window move from statement to statement. Notice the<br />
following as you step through the program:<br />
Individual register names (in the Register window) turn red, indicating that they have been<br />
modified. Variables in the Watch window turn red when they are modified. Memory<br />
locations in the Memory window turn red when they are modified. As soon as you reach the<br />
exit statement and press F10, the debugger halts.<br />
Step Into (F11)<br />
Another way to step through a program is to use the Trace (F11) command. It steps down into<br />
procedure calls. In contrast, the F10 key just executes procedure calls without tracing into the<br />
procedure code.<br />
Stopping and Restarting<br />
It's easy to either stop or restart your program inside the debugger while you're in the process<br />
of stepping through a program:<br />
To restart the program, select Restart from the Debug menu. The program is reloaded<br />
into memory, so any changes previously made to variables in the Watch window are<br />
undone. Also, you have to retype the name of your variable in the Memory window,<br />
because it resets itself to a default address.<br />
To stop debugging in the middle of a program, select Stop Debugging from the Debug<br />
menu.<br />
Note: Be sure to stop the debugger before trying to modify and re-assemble your program's<br />
source code. Otherwise, the linker will refuse to assemble your EXE file, indicating that it's<br />
currently in use.<br />
Page 14 of 14