
Create successful ePaper yourself
Turn your PDF publications into a flip-book with our unique Google optimized e-Paper software.
CONTROLS AND FEATURES<br />
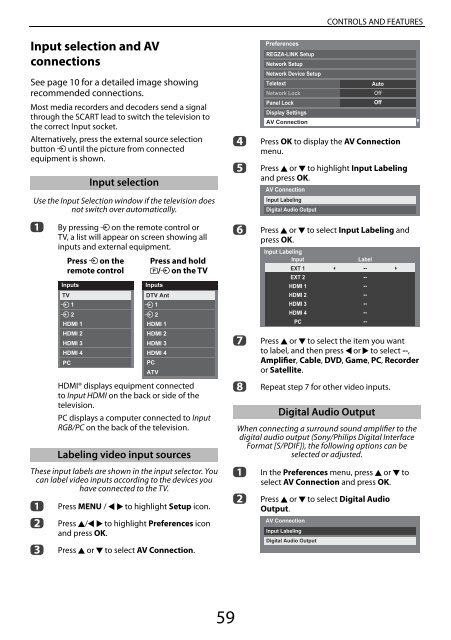
Input selection and AV<br />
connections<br />
See page 10 for a detailed image showing<br />
recommended connections.<br />
Most media recorders and decoders send a signal<br />
through the SCART lead to switch the television to<br />
the correct Input socket.<br />
Alternatively, press the external source selection<br />
button o until the picture from connected<br />
equipment is shown.<br />
Input selection<br />
Use the Input Selection window if the television does<br />
not switch over automatically.<br />
a<br />
By pressing o on the remote control or<br />
TV, a list will appear on screen showing all<br />
inputs and external equipment.<br />
Press o on the<br />
remote control<br />
Inputs<br />
TV<br />
1<br />
2<br />
HDMI 1<br />
HDMI 2<br />
HDMI 3<br />
HDMI 4<br />
PC<br />
Press and hold<br />
p/o on the TV<br />
Inputs<br />
DTV Ant<br />
1<br />
2<br />
HDMI 1<br />
HDMI 2<br />
HDMI 3<br />
HDMI 4<br />
PC<br />
ATV<br />
HDMI® displays equipment connected<br />
to Input HDMI on the back or side of the<br />
television.<br />
PC displays a computer connected to Input<br />
RGB/PC on the back of the television.<br />
Labeling video input sources<br />
These input labels are shown in the input selector. You<br />
can label video inputs according to the devices you<br />
have connected to the TV.<br />
a<br />
b<br />
c<br />
Press MENU / C c to highlight Setup icon.<br />
Press B/C c to highlight Preferences icon<br />
and press OK.<br />
Press B or b to select AV Connection.<br />
d<br />
e<br />
f<br />
g<br />
h<br />
Preferences<br />
REGZA-LINK Setup<br />
Network Setup<br />
Network Device Setup<br />
Teletext<br />
Network Lock<br />
Panel Lock<br />
Display Settings<br />
AV Connection<br />
Auto<br />
Off<br />
Off<br />
Press OK to display the AV Connection<br />
menu.<br />
Press B or b to highlight Input Labeling<br />
and press OK.<br />
AV Connection<br />
Input Labeling<br />
Digital Audio Output<br />
Press B or b to select Input Labeling and<br />
press OK.<br />
Input Labeling<br />
Input<br />
EXT 1<br />
EXT 2<br />
HDMI 1<br />
HDMI 2<br />
HDMI 3<br />
HDMI 4<br />
PC<br />
Label<br />
--<br />
--<br />
--<br />
--<br />
--<br />
--<br />
--<br />
Press B or b to select the item you want<br />
to label, and then press C or c to select --,<br />
Amplifier, Cable, DVD, Game, PC, Recorder<br />
or Satellite.<br />
Repeat step 7 for other video inputs.<br />
Digital Audio Output<br />
When connecting a surround sound amplifier to the<br />
digital audio output (Sony/Philips Digital Interface<br />
Format [S/PDIF]), the following options can be<br />
selected or adjusted.<br />
a In the Preferences menu, press B or b to<br />
select AV Connection and press OK.<br />
b Press B or b to select Digital Audio<br />
Output.<br />
AV Connection<br />
Input Labeling<br />
Digital Audio Output<br />
59