D7W TS.pdf - Espar
D7W TS.pdf - Espar
D7W TS.pdf - Espar

Create successful ePaper yourself
Turn your PDF publications into a flip-book with our unique Google optimized e-Paper software.
31<br />
4. Repair Steps<br />
1. Glow Plug Removal, Inspection and Replacement<br />
2. Glow Plug Screen Removal, Inspection and Replacement<br />
3. Series Resistor Removal<br />
4. Cover Removal<br />
5. 12-pin Plug Removal<br />
6. Temperature Sensor Replacement<br />
7. Flame Sensor Replacement<br />
8. Overheat Switch Removal<br />
9. Partial-Load Resistor Removal<br />
10 Water Pump Replacement<br />
11. Combustion Air Blower Removal<br />
12. Flame Tube Removal<br />
13. Heat Exchanger Removal, Inspection and Replacement<br />
14. Cover and Bracket Removal<br />
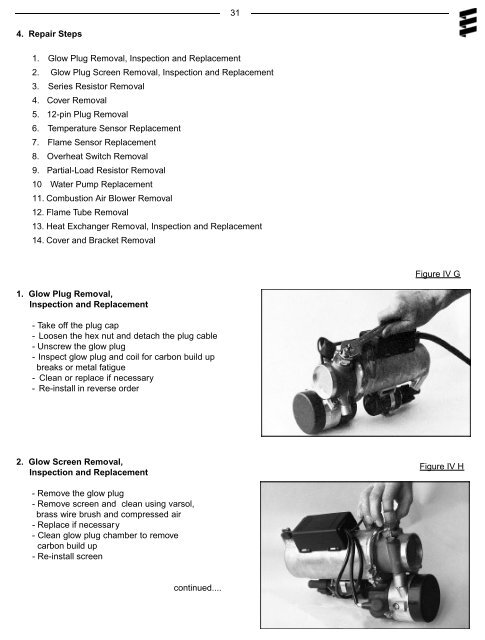
Figure IV G<br />
1. Glow Plug Removal,<br />
Inspection and Replacement<br />
- Take off the plug cap<br />
- Loosen the hex nut and detach the plug cable<br />
- Unscrew the glow plug<br />
- Inspect glow plug and coil for carbon build up<br />
breaks or metal fatigue<br />
- Clean or replace if necessary<br />
- Re-install in reverse order<br />
2. Glow Screen Removal,<br />
Inspection and Replacement<br />
Figure IV H<br />
- Remove the glow plug<br />
- Remove screen and clean using varsol,<br />
brass wire brush and compressed air<br />
- Replace if necessary<br />
- Clean glow plug chamber to remove<br />
carbon build up<br />
- Re-install screen<br />
continued....