IAQ50 Manual.cdr - Supco
IAQ50 Manual.cdr - Supco
IAQ50 Manual.cdr - Supco

You also want an ePaper? Increase the reach of your titles
YUMPU automatically turns print PDFs into web optimized ePapers that Google loves.
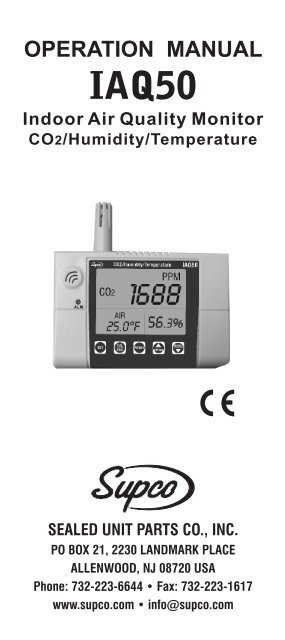
OPERATION MANUAL<br />
<strong>IAQ50</strong><br />
Indoor Air Quality Monitor<br />
CO2/Humidity/Temperature<br />
SEALED UNIT PARTS CO., INC.<br />
PO BOX 21, 2230 LANDMARK PLACE<br />
Model: ALLENWOOD, NJ 7721 08720 USA<br />
77231<br />
www.supco.com • info@supco.com<br />
7722<br />
77232<br />
Phone: 732-223-6644 • Fax: 732-223-1617
INTRODUCTION<br />
Ideal for Indoor Air Quality Diagnostics.<br />
Identify Sick Builiding Syndrome due to<br />
High CO2 Levels.<br />
Features/Benefits:<br />
• Triple displays of CO 2 level,<br />
temperature and humidity.<br />
• Stable NDIR sensor for CO 2 detection<br />
• Statistics of weighted averages<br />
TWA (8 hours weighted average)<br />
STEL (15 minutes weighted average)<br />
• Visible and audile CO 2 warning alarm<br />
• Alarm output for ventilation control<br />
• ABC(Automatic Baseline Calibration)<br />
and manual CO2 calibration<br />
• PC connect via RS232 interface<br />
• Includes 12 V Power Adapter<br />
1
MATERIAL SUPPLIED<br />
This package contains:<br />
Meter<br />
Adaptor<br />
Operation manual<br />
Plain white box<br />
POWER SUPPLY<br />
The meter is powered by an AC adaptor<br />
(12V/1A output).<br />
Air temp.<br />
Dew point<br />
Wet bulb<br />
temp. in<br />
o o<br />
C or F<br />
Symbols<br />
LCD DISPLAY<br />
MAX MIN AVG TWA STEL PPM<br />
CO<br />
CO2 CO2<br />
ALM<br />
HLD<br />
O<br />
MAX/MIN Maximun/Minimum readings<br />
TWA Time weighted average( 8 hours)<br />
STEL Short-term exposure limit<br />
(15 minutes weighted average)<br />
DP Dew point temperature<br />
AIR Air temperature<br />
WBT Wet bulb temperature<br />
% Unit of relative humidity<br />
o E (C/F) Celsius/Fahrenheit<br />
AVG/CO/ALM/HLD/<br />
Vain icons in these models<br />
%<br />
concentration<br />
in ppm<br />
Relative<br />
humidity in %<br />
2
X<br />
SET<br />
CAL<br />
ESC<br />
RESET<br />
DP/WB<br />
or<br />
X M N/<br />
AVG<br />
KEYPAD<br />
Enters setup mode.<br />
Saves and finishes settings.<br />
Enters CO calibration with<br />
DP/WB<br />
2<br />
.<br />
M N/<br />
AVG<br />
Enters RH calibration with .<br />
Exits setup page/mode.<br />
Resets the meter and clear MAX/MIN.<br />
Terminates during calibration.<br />
Selects AIR, DP, WBT temps display.<br />
Selects mode or increases value in<br />
calibration and setup.<br />
Activates MAX, MIN, STEL,TWA function.<br />
Selects mode or decreases value in<br />
calibration and setup.<br />
POWER ON/OFF<br />
OPERATION<br />
Plug in the adaptor and the meter turns<br />
on automatically with a short beep. It<br />
performs 30 seconds countdown(Fig.1)<br />
for meter warm up, then enters normal<br />
mode with current CO 2, temperature,<br />
and humidity readings displayed (Fig.2).<br />
Fig. 1<br />
CO2<br />
PPM<br />
O<br />
%<br />
Fig. 2<br />
3
X<br />
TAKING MEASUREMENT<br />
The meter starts taking measurement<br />
after power on and updates readings<br />
every second. In the condition of opera<br />
-ting environment change (ex. from high<br />
to low temp.), it takes 30 sec to respond<br />
for CO 2 sensor and 30 minutes for RH.<br />
NOTE: Do not hold the meter close to<br />
faces in case that exhalation affects<br />
CO 2 levels.<br />
AIR, DP, WBT<br />
Press DP/WB to switch temperatures<br />
display. The lower left display will cycle<br />
from air temperature, dew point temp.<br />
(Fig.3), and wet bulb temp.(Fig.4).<br />
CO2<br />
PPM<br />
CO2<br />
PPM<br />
O<br />
%<br />
O<br />
%<br />
Fig.3<br />
Fig.4<br />
MAX,MIN, STEL,TWA<br />
X<br />
Under normal mode, press M N/<br />
AVG to see<br />
the minimum, maximum, and weighted<br />
M N/<br />
AVG<br />
average readings. Each press of ,<br />
it displays MIN, MAX, STEL, TWA in<br />
sequence and returns to normal mode.<br />
In MIN and MAX modes, it shows the<br />
minimum and maximum readings of<br />
CO2<br />
on main display and of AIR or DP<br />
or WB temperature and humidity on<br />
the lower displays. (Fig.5)<br />
CO2<br />
PPM<br />
O<br />
4<br />
%<br />
Fig.5
In STEL and TWA modes, the main<br />
display shows the weighted average of<br />
CO 2 readings for the past 15 minutes<br />
(STEL) and 8 hours(TWA). The lower<br />
displays are the current AIR, DP/WB<br />
temperatures and humidity. (Fig.6)<br />
CO2<br />
STEL PPM<br />
O<br />
Fig.6<br />
NOTE:<br />
1.If the meter is turned on for shorter<br />
than 15 minutes, the STEL value will<br />
be the weighted average of readings<br />
taken since power on. Same for TWA<br />
values appear before 8 hours.<br />
2.It takes at least 5 minutes to calculate<br />
STEL and TWA. The display shows<br />
“----” (Fig.7) during the first 5 minutes<br />
from power on.<br />
STELCO2<br />
%<br />
O<br />
%<br />
Fig.7<br />
ALARM<br />
ALARM & OUTPUT<br />
The meter features visible and audible<br />
alarm to give warnings when CO 2<br />
concentration exceeds the limit. Users<br />
can set up 2 limits: An upper limit for<br />
alarm threshold that requires air<br />
conditioning and a lower limit to stop<br />
the alarm. (See P1.0 in setup for setting<br />
alarm limits).<br />
5
It emits beeps(Abt.80dB) with blinking<br />
LED when CO 2 level goes over the upper<br />
limit. Beeps can be stopped by pressing<br />
any key or automatically stops when<br />
CO 2 reading falls below lower limit.<br />
If the beeper is temporarily shut, it will<br />
sound again when readings fall below<br />
lower limit and then go over the upper<br />
limit again, or users press<br />
than 1 second to activate it.<br />
LED alarm keeps blinking when beeps<br />
are manually shut. It stops only when<br />
readings fall under the lower limit.<br />
RESET<br />
for more<br />
ALARM OUTPUT<br />
CO 2 / H umidity/<br />
Temperature <strong>IAQ50</strong><br />
Alarm<br />
Output<br />
RS232<br />
Adaptor<br />
The meter is designed with a relay<br />
to send output for further connection.<br />
When CO 2 readings go over the upper<br />
limit and cause alarming. The relay<br />
picks up automatically and send output.<br />
It can be connected to a ventilation<br />
system or activator for conditioning the<br />
air quality. The relay will drop out when<br />
CO 2 readings fall under the lower limit.<br />
6
DP/WB<br />
SETUP<br />
SET<br />
Hold down under normal mode for<br />
more than 1 sec to enter setup mode.<br />
CAL<br />
To exit setup, press<br />
ESC in P1.0, P3.0, or<br />
P4.0 and it returns to normal mode.<br />
Note:<br />
P2.0 is not applicable in these models<br />
but for future model with CO and CO 2<br />
measurements.<br />
P1.0 CO 2 ALARM: UPPER&LOWER LIMITS<br />
When entering setup mode, P1.0 and<br />
“AL” (Fig.8) are displayed on the LCD.<br />
SET<br />
Press again to go into P1.1 for setting<br />
CO 2 upper limit. The current set value<br />
will be blinking on LCD(Fig.9).<br />
CO2<br />
CO2<br />
PPM<br />
Fig. 8<br />
Fig. 9<br />
Press or to increase the value or<br />
X M N/<br />
AVG<br />
to decrease. Each press tunes 100<br />
ppm and the alarm range is from 100 to<br />
9900ppm.<br />
CAUTION:<br />
It’s suggested to set up the alarm<br />
value within specification range<br />
that accuracy is ensured. The out<br />
of spec readings are only for<br />
reference and not suitable to use<br />
as alarm limits.<br />
7
X<br />
X<br />
When the preferred value is set, press<br />
SET<br />
to go into P1.2 (Fig. 10) for lower<br />
limit setting. After both settings are<br />
SET<br />
CAL<br />
done, press to save or ESC without<br />
saving and return to P1.0.<br />
CO2<br />
PPM<br />
Fig. 10<br />
P3.0 TEMPERATURE SCALE<br />
Press DP/WB in P1.0 to access P3.0 for setting<br />
up temperature scale(Fig.11).<br />
Press<br />
SET and it goes into P3.1 with<br />
o o<br />
blinking C or F current set(Fig.12) on<br />
o o<br />
the lower left display. To switch C or F,<br />
M N/<br />
AVG<br />
press DP/WB or . Then press to save<br />
SET<br />
CAL<br />
the setting or without saving and<br />
ESC<br />
return to P3.0<br />
O<br />
Fig. 11<br />
Fig. 12<br />
P4.0 ABC SELECTION<br />
ABC (Automatic Baseline Calibration)<br />
is to implement baseline calibration to<br />
eliminate the zero drift of the infrared<br />
sensor. The ABC function default is off<br />
when turning on the meter. Users can<br />
enable it by following the procedure.<br />
M N/<br />
AVG<br />
DP/WB<br />
Press in P3.0 or in P1.0 to access<br />
P4.0 for selecting ABC function.(Fig.13).<br />
CO2<br />
Fig.13<br />
8
X<br />
Press<br />
SET<br />
and it goes into P4.1 with<br />
blinking “dis” default (Fig.14) on the<br />
lower left display. To enable the ABC<br />
M N/<br />
AVG<br />
function, press DP/WB or and “En” blinks<br />
for choice(Fig. 15). After the preferred<br />
SET<br />
selection is done, press to save the<br />
CAL<br />
setting or<br />
ESC without saving and return<br />
to P4.0<br />
CO2<br />
CO2<br />
Fig. 14 Fig. 15<br />
CO 2 CALIBRATION<br />
The meter is calibrated at standard<br />
400ppm CO 2 concentration in factory.<br />
It’s suggested to do either ABC or<br />
manual calibration regularly to maintain<br />
good accuracy.<br />
CAUTION:<br />
1. Do not calibrate the meter in the<br />
air with unknown CO 2 level.<br />
Otherwise, it will be taken as 400<br />
ppm and leads to inaccurate<br />
measurements.<br />
2. When operating the meter in the<br />
close indoor areas that are not<br />
ventilating, such as hospitals or<br />
offices with windows shut, be sure<br />
to disable the ABC function to<br />
prevent incorrect calibration.<br />
9
ABC (Automatic Baseline Calibration)<br />
ABC is to calibrate the meter at the<br />
minimum CO2<br />
reading detected during<br />
7 days continuous monitoring (power<br />
on). It is supposed that the ventilating<br />
area can have fresh air with CO 2 level<br />
in around 400ppm during a period of<br />
time. It’s not suitable to implement<br />
ABC in close area with higher CO level.<br />
2<br />
The ABC default is off. To enable the<br />
function, please refer to SETUP P4.0.<br />
<strong>Manual</strong> Calibration<br />
The manual calibration is suggested to<br />
be done in outdoor area with ventilating<br />
fresh air where CO 2 level is around 400<br />
ppm. Do not calibrate in places crowded<br />
with people or close to where with high<br />
CO 2 concentration such as ventilating<br />
outlets or fireplaces.<br />
Place the meter in the calibration site.<br />
CAL<br />
Turn on the meter and hold down<br />
ESC<br />
and DP/WB simultaneously to enter CO 2<br />
calibration mode (Fig.16). 400ppm and<br />
“CAL” are blinking on the LCD while<br />
performing calibration.<br />
CO2<br />
PPM<br />
Fig. 16<br />
Wait about 5 minutes until the blinking<br />
stops and the calibration is completed<br />
automatically and return to normal<br />
mode.<br />
To abort the calibration, press<br />
more than 1 second.<br />
10<br />
RESET<br />
for
X<br />
RH CALIBRATION<br />
The meter defaults to be calibrated the<br />
humidity with 33% and 75% salt solution.<br />
The ambient condition is recommended<br />
o<br />
to be at 25 C and stable humidity(better<br />
to be close to the calibrating value). To<br />
abort calibration, hold down<br />
than 1second at any time.<br />
for more<br />
CAUTION:<br />
Do not calibrate the humidity without<br />
the default calibration salt. Otherwise,<br />
it will cause permanent damage.<br />
RESET<br />
33% calibration<br />
Magnesium Chloride - MgCL2 • 6 H2O<br />
Plug the sensor probe into 33% salt<br />
CAL<br />
M N/<br />
AVG<br />
bottle. Hold down ESC and under<br />
normal mode to enter 33% calibration<br />
(Fig.17). “CAL” and calibrating value<br />
o<br />
(32.7% if at 25 C) are blinking on the<br />
LCD with current temperature at the left.<br />
Meter is now calibrating, and will finish<br />
in about 60 minutes when “CAL” and<br />
humidity stop blinking. (Fig.18)<br />
O<br />
%<br />
O<br />
%<br />
Fig. 17<br />
11<br />
Fig. 18<br />
75% calibration<br />
Sodium Chloride - NaCL<br />
After 33% calibration, plug the sensor<br />
probe into 75% salt bottle, then press<br />
SET<br />
to enter 75% calibration (Fig.19).
O<br />
%<br />
Calibration Salt Solutions<br />
are not available through<br />
SUPCO.<br />
Fig.19<br />
“CAL” and calibrating value (75.2% if<br />
o<br />
at 25 C) are blinking on the LCD with<br />
current temperature at the left. Meter is<br />
now calibrating. Wait about 60 minutes<br />
until blinking stops, then calibration is<br />
completed and it returns to normal mode.<br />
NOTE:<br />
Users can also calibrate either point.<br />
CAL<br />
To calibrate 33% only, press<br />
ESC to exit<br />
when 33% calibration is completed.<br />
X M N/<br />
AVG<br />
To calibrate 75% only, press DP/WB or<br />
within 5 minutes while initializing 33%<br />
calibration. And it skips 33% and enters<br />
75% calibration mode.<br />
TROUBLESHOOTING<br />
? Can’t power on<br />
Check whether the adaptor is well<br />
plugged.<br />
? Slow response<br />
Check whether the air flow channels on<br />
the rear were blocked.<br />
? Error messages<br />
E01: CO 2 sensor damaged.<br />
E02: The value is under range.<br />
E03: The value is over range.<br />
E04: The original data error results in<br />
this error (RH, DP, WB)<br />
E07: Too low voltage to measure CO2.<br />
Check if the adaptor output is 12V.<br />
E11: Retry humidity calibration.<br />
E17: Retry CO 2 calibration.<br />
E31: Temperature sensor damaged.<br />
E34: Humidity sensor damaged.<br />
12
PC CONNECTION<br />
The meter can do PC link for on-line<br />
logging and data analysis via RS232<br />
interface and software.<br />
The protocol is as follows.<br />
A. 9600 bps, 8 data bits, no parity.<br />
B. Format (ASCII)<br />
Model <strong>IAQ50</strong><br />
Cxxxxppm:Txxx.xC(F):Hxx.x%:<br />
dxxx.xC(F):wxxx.xC(F) LRC CRLF<br />
Description: $CO 2:Air:RH:DP:WBT LRC<br />
CRLF<br />
CO2<br />
Range<br />
SPECIFICATION<br />
<strong>IAQ50</strong><br />
0-2000ppm, Accuracy +50ppm<br />
+5% Reading<br />
2001-9999 Accuracy (not specified)<br />
Resolution 1 ppm<br />
Pressure +1.6% reading per kPa deviation<br />
Dependence from normal pressure, 100kPa<br />
Temperature<br />
Range 14°F-140°F (-10.0-60.0°C)<br />
Resolution 0.1°F / 0.1°C<br />
Accuracy +0.9°F / +0.6°C<br />
Humidity<br />
Range 0.0-99%<br />
Resolution 0.1%<br />
Accuracy +3% (10-90%) +5% (others)<br />
Warm Up 30 seconds<br />
Operating 32°F-106°F (0-50°C), 0-95%RH<br />
(avoid condensation)<br />
Storage 68°F-140°F (-20-60°C), 0-99%RH<br />
(avoid condensation)<br />
Power 12V adaptor<br />
13
WARRANTY<br />
The meter is warranted to be free from<br />
defects in material and workmanship<br />
for a period of 2 years from the date<br />
of purchase. This warranty covers<br />
normal operation and does not cover<br />
misuse, abuse, alteration, neglect,<br />
improper maintenance, or damage<br />
resulting from leaking batteries. Proof<br />
of purchase is required for warranty.<br />
Warranty is void if the meter<br />
has been opened.<br />
14
Appendix<br />
CO2 LEVELS AND GUIDELINES<br />
Non-Enforced Reference levels<br />
NIOSH recommendations<br />
250-350 ppm: normal outdoor ambient<br />
concentrations<br />
600 ppm: minimal air quality complaints<br />
600-1000 ppm: less clearly interpreted<br />
1000 ppm: indicates inadequate ventilation;<br />
complaints such as headaches,<br />
fatigue, and eye/throat irritation<br />
will be more widespread. 1000<br />
ppm should be used as an upper<br />
limit for indoor levels.<br />
EPA Taiwan: 600ppm and 1000ppm<br />
Type 1 indoor areas such as department<br />
stores, theaters, restaurants, libraries,<br />
the acceptable CO2 concentration of 8<br />
hours avarge is 1000ppm.<br />
Type 2 indoor areas with special requirements<br />
of good air quality such as schools,<br />
hospitals, day care centers, the<br />
suggested CO2 level is 600ppm.<br />
Regulatory exposure limit<br />
ASHRAE Standard 62-1989: 1000ppm<br />
CO2 concentration in occupied building<br />
should not exceed 1000ppm.<br />
Building bulletin 101 (BB101): 1500ppm<br />
UK standards for schools say that CO2 at<br />
averaged over the whole day(i.e. 9am to 3.30<br />
pm) should not exceed 1500ppm.<br />
OSHA: 5000ppm<br />
Time weighted average over five 8-hour work<br />
days should not exceed 5000ppm.<br />
Germany, Japan, Australia, UK...: 5000ppm<br />
8 hours weighted average in occupational<br />
exposure limit is 5000ppm.<br />
15