ST60 Tridata Instrument Owner's Handbook - Zanshin
ST60 Tridata Instrument Owner's Handbook - Zanshin
ST60 Tridata Instrument Owner's Handbook - Zanshin

You also want an ePaper? Increase the reach of your titles
YUMPU automatically turns print PDFs into web optimized ePapers that Google loves.
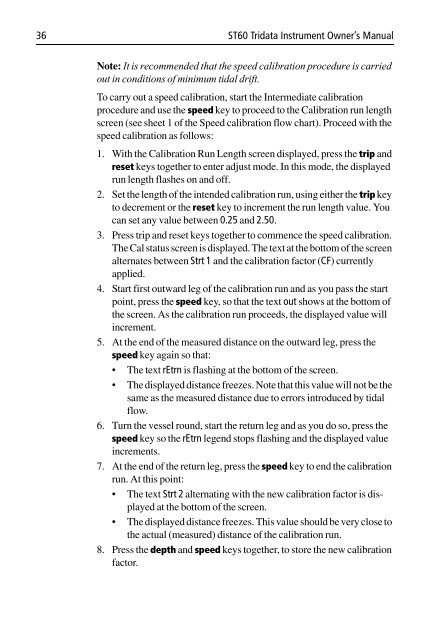
36 <strong>ST60</strong> <strong>Tridata</strong> <strong>Instrument</strong> Owner’s Manual<br />
Note: It is recommended that the speed calibration procedure is carried<br />
out in conditions of minimum tidal drift.<br />
To carry out a speed calibration, start the Intermediate calibration<br />
procedure and use the speed key to proceed to the Calibration run length<br />
screen (see sheet 1 of the Speed calibration flow chart). Proceed with the<br />
speed calibration as follows:<br />
1. With the Calibration Run Length screen displayed, press the trip and<br />
reset keys together to enter adjust mode. In this mode, the displayed<br />
run length flashes on and off.<br />
2. Set the length of the intended calibration run, using either the trip key<br />
to decrement or the reset key to increment the run length value. You<br />
can set any value between 0.25 and 2.50.<br />
3. Press trip and reset keys together to commence the speed calibration.<br />
The Cal status screen is displayed. The text at the bottom of the screen<br />
alternates between Strt 1 and the calibration factor (CF) currently<br />
applied.<br />
4. Start first outward leg of the calibration run and as you pass the start<br />
point, press the speed key, so that the text out shows at the bottom of<br />
the screen. As the calibration run proceeds, the displayed value will<br />
increment.<br />
5. At the end of the measured distance on the outward leg, press the<br />
speed key again so that:<br />
• The text rEtrn is flashing at the bottom of the screen.<br />
• The displayed distance freezes. Note that this value will not be the<br />
same as the measured distance due to errors introduced by tidal<br />
flow.<br />
6. Turn the vessel round, start the return leg and as you do so, press the<br />
speed key so the rEtrn legend stops flashing and the displayed value<br />
increments.<br />
7. At the end of the return leg, press the speed key to end the calibration<br />
run. At this point:<br />
• The text Strt 2 alternating with the new calibration factor is displayed<br />
at the bottom of the screen.<br />
• The displayed distance freezes. This value should be very close to<br />
the actual (measured) distance of the calibration run.<br />
8. Press the depth and speed keys together, to store the new calibration<br />
factor.