

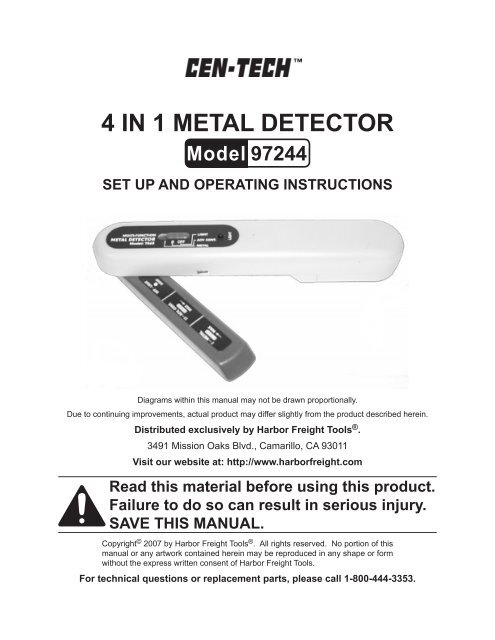
4 IN 1 METAL DETECTOR - Harbor Freight Tools
4 IN 1 METAL DETECTOR - Harbor Freight Tools
4 IN 1 METAL DETECTOR - Harbor Freight Tools

Create successful ePaper yourself
Turn your PDF publications into a flip-book with our unique Google optimized e-Paper software.
4 <strong>IN</strong> 1 <strong>METAL</strong> <strong>DETECTOR</strong><br />
Model 97244<br />
Set up And Operating Instructions<br />
Diagrams within this manual may not be drawn proportionally.<br />
Due to continuing improvements, actual product may differ slightly from the product described herein.<br />
Distributed exclusively by <strong>Harbor</strong> <strong>Freight</strong> <strong>Tools</strong> ® .<br />
3491 Mission Oaks Blvd., Camarillo, CA 93011<br />
Visit our website at: http://www.harborfreight.com<br />
Read this material before using this product.<br />
Failure to do so can result in serious injury.<br />
Save this manual.<br />
Copyright © 2007 by <strong>Harbor</strong> <strong>Freight</strong> <strong>Tools</strong> ® . All rights reserved. No portion of this<br />
manual or any artwork contained herein may be reproduced in any shape or form<br />
without the express written consent of <strong>Harbor</strong> <strong>Freight</strong> <strong>Tools</strong>.<br />
For technical questions or replacement parts, please call 1-800-444-3353.
Save This Manual<br />
Keep this manual for the safety warnings and precautions, assembly, operating,<br />
inspection, maintenance and cleaning procedures. Write the product’s serial number<br />
in the back of the manual near the assembly diagram (or month and year of purchase if<br />
product has no number). Keep this manual and the receipt in a safe and dry place for<br />
future reference.<br />
Important SAFETY Information<br />
In this manual, on the labeling, and all other information<br />
provided with this product:<br />
This is the safety alert symbol. It is used to alert you to potential<br />
personal injury hazards. Obey all safety messages that follow this<br />
symbol to avoid possible injury or death.<br />
Danger<br />
WARN<strong>IN</strong>G<br />
Caution<br />
Notice<br />
Caution<br />
DANGER indicates a hazardous situation<br />
which, if not avoided, will result in death or<br />
serious injury.<br />
WARN<strong>IN</strong>G indicates a hazardous situation<br />
which, if not avoided, could result in death<br />
or serious injury.<br />
CAUTION, used with the safety alert<br />
symbol, indicates a hazardous situation<br />
which, if not avoided, could result in minor<br />
or moderate injury.<br />
NOTICE is used to address practices not<br />
related to personal injury.<br />
CAUTION, without the safety alert symbol,<br />
is used to address practices not related to<br />
personal injury.<br />
SKU 97244 For technical questions, please call 1-800-444-3353.<br />
Page 2
General Safety Rules<br />
WARN<strong>IN</strong>G! Read all instructions<br />
Failure to follow all instructions listed below may result in electric shock,<br />
fire, and/or serious injury. The term “tool” in all of the warnings listed below<br />
refers to your battery-operated Metal Detector.<br />
SAVE THESE <strong>IN</strong>STRUCTIONS<br />
1.<br />
2.<br />
3.<br />
4.<br />
Work area safety<br />
a. Keep work area clean and well lit. Cluttered or dark areas invite accidents.<br />
b. Do not operate this tool in explosive atmospheres, such as in the presence<br />
of flammable liquids, gases or dust. This tool may create sparks which may<br />
ignite the dust or fumes.<br />
c. Keep children and bystanders away while operating this tool. Distractions<br />
can cause you to lose control.<br />
Electrical safety<br />
a. Avoid body contact with grounded surfaces such as pipes, radiators, ranges<br />
and refrigerators. There is an increased risk of electric shock if your body is<br />
grounded.<br />
b. Do not expose this tool to rain or wet conditions. Water entering this tool will<br />
increase the risk of electric shock.<br />
Personal safety<br />
a. Stay alert, watch what you are doing and use common sense when operat-<br />
ing this tool. Do not use this tool while you are tired or under the influence<br />
of drugs, alcohol or medication. A moment of inattention while operating this<br />
tool may result in serious personal injury.<br />
b. Use safety equipment. Always wear eye protection. Safety equipment such<br />
as dust mask, non-skid safety shoes, hard hat, or hearing protection used for<br />
appropriate conditions will reduce personal injuries.<br />
c. Do not overreach. Keep proper footing and balance at all times. This enables<br />
better control of the tool in unexpected situations.<br />
Tool use and care<br />
a. Do not force this tool. Use the correct tool for your application. The correct<br />
tool will do the job better and safer at the rate for which it was designed.<br />
b. Do not use this tool if the switch does not turn it on and off. Any tool that cannot<br />
be controlled with the switch is dangerous and must be repaired.<br />
c.<br />
Remove the Battery from this tool before making any adjustments, changing<br />
accessories, or storing the tool. Such preventive safety measures reduce the<br />
risk of starting the tool accidentally.<br />
SKU 97244 For technical questions, please call 1-800-444-3353.<br />
Page 3
d.<br />
Maintain tools. Check for misalignment or binding of moving parts, break-<br />
age of parts and any other condition that may affect the tool’s operation. If<br />
damaged, have the tool repaired before use. Many accidents are caused by<br />
poorly maintained tools.<br />
e.<br />
f.<br />
Store idle power tools out of the reach of children and do not allow people<br />
unfamiliar with this tool or these instructions to operate the tool. <strong>Tools</strong> are<br />
dangerous in the hands of untrained users.<br />
Use the tool in accordance with these instructions and in the manner intended<br />
for the particular type of tool, taking into account the working conditions and<br />
the work to be performed. Use of the tool for operations different from those<br />
intended could result in a hazardous situation.<br />
5.<br />
Service<br />
a. Have your tool serviced by a qualified repair person using only identical re-<br />
placement parts. This will ensure that the safety of the tool is maintained.<br />
Specific Safety Rules<br />
1.<br />
2.<br />
3.<br />
4.<br />
5.<br />
6.<br />
7.<br />
8.<br />
9.<br />
10.<br />
11.<br />
12.<br />
Always de-energize circuits and lockout/tagout switches before working.<br />
Always check Battery and test on known voltage sources before use.<br />
Aways wear ANSI-approved safety impact goggles during use.<br />
Keep this tool clean and dry at all times. Using this tool in damp or moist environments<br />
will reduce its sensitivity.<br />
Do not use this tool to measure voltages above the specified rated voltage.<br />
Shielded wires or live wires in metal conduits, casings,<br />
metal walls, or thick, dense walls will not be detected.<br />
Use with caution when nailing, cutting, or drilling into walls,<br />
ceilings, and floors that may contain wiring or pipes near the surface.<br />
power.<br />
WARN<strong>IN</strong>G<br />
WARN<strong>IN</strong>G<br />
WARN<strong>IN</strong>G<br />
When working near AC electrical wires, always turn off the<br />
This tool’s detection capability can vary due to moisture content of the materials,<br />
wall texture, paint, the size of the object detected, etc.<br />
Maintain labels and nameplates on the tool. These carry important safety information.<br />
If unreadable or missing, contact <strong>Harbor</strong> <strong>Freight</strong> <strong>Tools</strong> for a replacement.<br />
Avoid unintentional starting. Prepare to begin work before turning on the tool.<br />
This product is not a toy. Keep it out of reach of children.<br />
SKU 97244 For technical questions, please call 1-800-444-3353.<br />
Page 4
13.<br />
14.<br />
People with pacemakers should consult their physician(s) before use. Electromagnetic<br />
fields in close proximity to heart pacemaker could cause pacemaker<br />
interference or pacemaker failure. In addition, people with pacemakers should:<br />
• Avoid operating alone.<br />
• Properly maintain and inspect to avoid electrical shock.<br />
• Any power cord must be properly grounded. Ground Fault Circuit Interrupter<br />
(GFCI) should also be implemented – it prevents sustained electrical shock.<br />
The warnings, precautions, and instructions discussed in this instruction manual<br />
cannot cover all possible conditions and situations that may occur. It must be<br />
understood by the operator that common sense and caution are factors which<br />
cannot be built into this product, but must be supplied by the operator.<br />
Save these instructions.<br />
Specifications<br />
Product Functions<br />
Electrical Requirements<br />
Pivoting Detector Arm<br />
Unit Body<br />
Construction<br />
Used for Metal Detecting, Detecting AC Voltage/DC Polarity,<br />
and Features a Flashlight<br />
Power Source: 9V Battery / Type: 9V x 1 / (Qty. 1, Included)<br />
Rotates 270° with Molded Stop to Allow No Further Travel<br />
Consists of a 3-Position Switch and a Momentary Light<br />
Button, Both Located on the Unit’s Face / A Sensitivity Dial<br />
is Located on the Unit’s Side<br />
ABS Poly Material<br />
Unpacking<br />
When unpacking, check to make sure that the item is intact and undamaged. If<br />
any parts are missing or broken, please call <strong>Harbor</strong> <strong>Freight</strong> <strong>Tools</strong> at the number shown<br />
on the cover of this manual as soon as possible.<br />
Set Up Instructions<br />
Read the entire Important Safety Information section at the<br />
beginning of this manual including all text under subheadings therein<br />
before set up or use of this product.<br />
WARN<strong>IN</strong>G<br />
Turn the Power Switch of the tool to its “OFF” position and<br />
remove its Battery before making any adjustments to the<br />
tool.<br />
Note: For additional information regarding the parts listed in the following pages, refer<br />
to the “FUNCTIONS” section in this manual.<br />
SKU 97244 For technical questions, please call 1-800-444-3353.<br />
Page 5
Assembly<br />
1.<br />
Prior to use, install the included battery. To do so, slide the Battery Compartment<br />
Lid open. Install the Battery into the Battery Compartment, making sure to align<br />
the polarities as shown within the Battery Compartment. Then slide the Battery<br />
Compartment Lid shut. (See Figure A.)<br />
BATTERY COMPARTMENT LID<br />
9 VOLT BATTERY<br />
(<strong>IN</strong>CLUDED)<br />
FIGURE A<br />
Functions<br />
(1) Metal Sensor (2) LED Light (3) Sensitivity Knob<br />
(4) Selection Switch (5) Flashlight Switch (6) AC Voltage Detection Area<br />
FORWARD<br />
BACKWARD<br />
3 4 5<br />
2<br />
6<br />
FIGURE B<br />
1<br />
SKU 97244 For technical questions, please call 1-800-444-3353.<br />
Page 6
Functions - Continued<br />
(7) Metal Jut (8) Metal Plate (9) Battery Compartment Lid<br />
7<br />
FIGURE C<br />
8<br />
9<br />
Operating Instructions<br />
Read the entire Important Safety Information section at the<br />
beginning of this manual including all text under subheadings therein<br />
before set up or use of this product.<br />
Metal Detection<br />
1. NOTE: This Metal Detector can detect metals such as steel, iron, copper, brass,<br />
gold, and aluminum. By detecting hidden objects, this unit can also help to avoid<br />
drilling through power cables and gas pipes. This unit is not able to function<br />
on foil backed or metallic fabric surfaces. Nor can this unit detect plastic water<br />
pipes.<br />
2.<br />
Always verify the metal detecting function before attempting to detect a metallic<br />
object. To do so, set the Selection Switch (4) to the “I” position. Slowly adjust<br />
the Sensitivity Knob (3) unti the LED Light (2) stops illuminating and the Buzzer<br />
stops sounding (this is the maximum sensitivity position for metal detecting).<br />
Move the Metal Sensor (1) near a known metallic object. The metal detecting<br />
function is good if the LED Light illuminates and the Buzzer sounds.<br />
(See Figures B and D.)<br />
FIGURE D<br />
SKU 97244 For technical questions, please call 1-800-444-3353.<br />
Page 7
3.<br />
Make sure the Metal Detector is away from the area to be scanned or any other<br />
metallic object. Then open the Metal Sensor (1).<br />
(See Figures B and E.)<br />
4. Set the Selection Switch (4) to “I”. Slowly adjust the Sensitivity Knob (3) until the<br />
LED Light (2) stops illuminating and the Buzzer stops sounding. It is now that the<br />
Metal Detector has the highest sensitivity.<br />
(See Figures B and E.)<br />
5.<br />
6.<br />
Place the Metal Sensor (1) against the wall. Move the Sensor slowly and<br />
smoothly across the surface area. The LED Light (2) will illuminate and the<br />
Buzzer will sound when a metallic object is detected.<br />
(See Figures B and E.)<br />
To locate the precise position of the Metallic object, turn the Sensitivity Knob (3)<br />
forward slightly to reduce the detection sensitivity. Then scan the area again.<br />
(See Figures B and E.)<br />
FIGURE E<br />
AC Voltage Detection Mode<br />
1.<br />
Always verify the AC Voltage Detection function before attempting to test AC Voltage/Continuity.<br />
To do so, set the Selection Switch (4) to the “II” position. Open<br />
the Metal Sensor (1). Touch the Metal Plate (8) with your left hand thumb while<br />
using the free hand finger to touch the Metal Jut (7). If the LED Light (2) illuminates<br />
and the Buzzer sounds, it means the unit is functioning properly.<br />
(See Figures B, C, and F.)<br />
SKU 97244 For technical questions, please call 1-800-444-3353.<br />
Page 8
<strong>METAL</strong> PLATE (8)<br />
<strong>METAL</strong> JUT (7)<br />
FIGURE F<br />
2. To detect AC voltage, set the Selection Switch (4) to the “II” position (do not<br />
open the Metal Sensor (1). (See Figure B.)<br />
3.<br />
4.<br />
5.<br />
6.<br />
Turn the Sensitivity Knob (3) forward to its end for the maximum sensitivity.<br />
(See Figure B.)<br />
Move the AC Voltage Detection Area (6) of the unit near or across the surface to<br />
be tested. (See Figures B and G.)<br />
When the unit moves near a “hot” AC wire, the Buzzer will sound and the LED<br />
Light (2) will illuminate. (See Figures B and G.)<br />
To locate the wire more precisely, reduce the sensitivity by turning the Sensitivity<br />
Knob (3) slightly backward. Then try again. (See Figures B and G.)<br />
7. NOTE: Rubbing or banging the unit on the wall may generate static electricity,<br />
and cause a false indication.<br />
8. IMPORTANT: Because of the extremely small current required to cause the unit<br />
to give a signal, an abnormal indication may appear in some situations, i.e., a<br />
conductor with poor insulation touching a damp wall. When this occurs, the unit<br />
will indicate an existing voltage on the wall. In this situation, the unit is indicating<br />
a potential hazard which should be checked with a voltmeter.<br />
FIGURE G<br />
AC VOLTAGE DETECTION AREA<br />
(6)<br />
SKU 97244 For technical questions, please call 1-800-444-3353.<br />
Page 9
9.<br />
10.<br />
11.<br />
12.<br />
13.<br />
To distinguish between a “hot” wire and a ground wire, set the Selection Switch<br />
(4) to the “II” position. (See Figures B and H.)<br />
Turn the Sensitivity Knob (3) forward to its end for maximum sensitivity.<br />
(See Figures B and H.)<br />
Move the AC Voltage Detection Area (6) of the unit near the wires to be detected.<br />
(See Figures B and H.)<br />
Reduce the sensitivity to a suitable level by turning the Sensitivity Knob (3) backward.<br />
(See Figures B and H.)<br />
Compared with the neutral line, the “hot” wire can cause the unit to give a signal<br />
at a farther distance. (See Figures B and H.)<br />
AC VOLTAGE DETECTION AREA<br />
(6)<br />
FIGURE H<br />
14.<br />
To locate a break in a wire, the procedure is similar to the previous steps. Set the<br />
Sensitivity Knob (3) to a suitable lower level. When the signals of the LED Light<br />
(2) and Buzzer are interrupted, the break in the wire is found.<br />
(See Figures B and I.)<br />
AC VOLTAGE DETECTION AREA<br />
(6)<br />
FIGURE I<br />
SKU 97244 For technical questions, please call 1-800-444-3353.<br />
Page 10
Continuity / DC Battery Test<br />
1.<br />
To test a Battery, rotate the Metal Sensor (1) between 90° and 180°. Then set<br />
the Selection Switch (4) to the “II” position. (See Figures B and J.)<br />
2. Use your left hand thumb to touch the Metal Plate (8). (See Figures C and J.)<br />
3.<br />
Touch one electrode of a Battery with your right hand’s thumb. Meanwhile, another<br />
electrode of the Battery should touch the Metal Jut (7). The LED Light (2)<br />
will illuminate and the Buzzer will sound when the positive electrode touches the<br />
Metal Jut. NOTE: To avoid disturbance, keep far away from any electromagnetic<br />
fields. (See Figures C and J.)<br />
<strong>METAL</strong> PLATE (8)<br />
BATTERY<br />
FIGURE J<br />
<strong>METAL</strong> JUT (7)<br />
5.<br />
6.<br />
To test a Fuse, use your left hand thumb to touch the Metal Plate (8).<br />
(See Figures C and K.)<br />
Touch one conductive side of the Fuse with a free finger. Meanwhile, another<br />
conductive side of the Fuse should touch the Metal Jut (7). If the LED Light (2)<br />
illuminates and the Buzzer sounds the Fuse is good. (See Figures C and K.)<br />
FUSE<br />
FIGURE K<br />
<strong>METAL</strong> JUT (7)<br />
<strong>METAL</strong> PLATE (8)<br />
SKU 97244 For technical questions, please call 1-800-444-3353.<br />
Page 11
7.<br />
The method used in the Fuse test can also be used to test a Bulb. If the LED<br />
Light (2) illuminates and the Buzzer sounds, the Bulb is good.<br />
(See Figures C and L.)<br />
BULB<br />
<strong>METAL</strong> JUT (7)<br />
FIGURE L<br />
<strong>METAL</strong> PLATE (8)<br />
Microwave Leakage Detection<br />
1. Set the Selection Switch (4) to its “II” position. Turn the sensitivity knob forward<br />
for max. sensitivity.<br />
2.<br />
3.<br />
Move the AC Voltage Detection Area of the unit near the TV/monitor screen. The<br />
buzzer will sound and the LED will light when the unit detects the radiation.<br />
Move the unit away from the screen. The position where the LED and buzzer<br />
turn off is the position where the radiation is not severe.<br />
Flashlight Function<br />
1. Set the Selection Switch (4) to its “OFF” position. Then press the Flashlight<br />
Switch (5) to illuminate the LED Light (2). (See Figures B and M.)<br />
FIGURE M<br />
FLASHLIGHT SWITCH (5)<br />
SKU 97244 For technical questions, please call 1-800-444-3353.<br />
Page 12
Maintenance And Servicing<br />
Caution<br />
Make sure to turn the Selection Switch (4) to its “OFF”<br />
position and remove the Battery from the unit before<br />
performing any inspection, maintenance, or cleaning<br />
procedures.<br />
Cleaning and maintenance<br />
1. BEFORE EACH USE, inspect the general condition of the Metal Detector.<br />
Check for loose or binding of moving parts, cracked or broken parts, damaged<br />
electrical connections, and any other condition that may affect its safe operation.<br />
2. After Use, clean external surfaces of the tool with clean, moist cloth. Then<br />
dry. Do not introduce liquids into the internal workings of the unit.<br />
3. WHEN STOR<strong>IN</strong>G, remove the Battery from the Metal Detector.<br />
Troubleshooting<br />
Problem Possible Causes Probable Solutions<br />
Metal Detector will not<br />
turn on.<br />
1.<br />
2.<br />
3.<br />
Low Battery.<br />
Selector switch is in OFF position.<br />
Sensitivity Knob is set too low.<br />
1.<br />
2.<br />
3.<br />
Replace with new Battery.<br />
Use correct position.<br />
Adjust Knob.<br />
PLEASE READ THE FOLLOW<strong>IN</strong>G CAREFULLY<br />
The manufacturer and/or distributor has provided the parts list and assembly<br />
diagram in this manual as a reference tool only. Neither the manufacturer or<br />
distributor makes any representation or warranty of any kind to the buyer that<br />
he or she is qualified to make any repairs to the product, or that he or she is<br />
qualified to replace any parts of the product. In fact, the manufacturer and/<br />
or distributor expressly states that all repairs and parts replacements should<br />
be undertaken by certified and licensed technicians, and not by the buyer. The<br />
buyer assumes all risk and liability arising out of his or her repairs to the<br />
original product or replacement parts thereto, or arising out of his or her<br />
installation of replacement parts thereto.<br />
SKU 97244 For technical questions, please call 1-800-444-3353.<br />
Page 13
LIMITED 90 DAY WARRANTY<br />
<strong>Harbor</strong> <strong>Freight</strong> <strong>Tools</strong> Co. makes every effort to assure that its products meet high<br />
quality and durability standards, and warrants to the original purchaser that this product<br />
is free from defects in materials and workmanship for the period of 90 days from<br />
the date of purchase. This warranty does not apply to damage due directly or indirectly,<br />
to misuse, abuse, negligence or accidents, repairs or alterations outside our facilities,<br />
criminal activity, improper installation, normal wear and tear, or to lack of maintenance.<br />
We shall in no event be liable for death, injuries to persons or property, or for incidental,<br />
contingent, special or consequential damages arising from the use of our product. Some<br />
states do not allow the exclusion or limitation of incidental or consequential damages, so<br />
the above limitation of exclusion may not apply to you. This warranty is expressly<br />
in lieu of all other warranties, express or implied, including the<br />
warranties of merchantability and fitness.<br />
To take advantage of this warranty, the product or part must be returned to us<br />
with transportation charges prepaid. Proof of purchase date and an explanation of the<br />
complaint must accompany the merchandise. If our inspection verifies the defect, we<br />
will either repair or replace the product at our election or we may elect to refund the<br />
purchase price if we cannot readily and quickly provide you with a replacement. We will<br />
return repaired products at our expense, but if we determine there is no defect, or that<br />
the defect resulted from causes not within the scope of our warranty, then you must<br />
bear the cost of returning the product.<br />
Record Product’s Serial Number Here:<br />
Note: If product has no serial number, record month and year of purchase instead.<br />
Note: Replacement parts are not available for this product.<br />
SKU 97244 For technical questions, please call 1-800-444-3353.<br />
Page 14


