

1969 Camaro - Classic Auto Air
1969 Camaro - Classic Auto Air
1969 Camaro - Classic Auto Air

Create successful ePaper yourself
Turn your PDF publications into a flip-book with our unique Google optimized e-Paper software.
9<br />
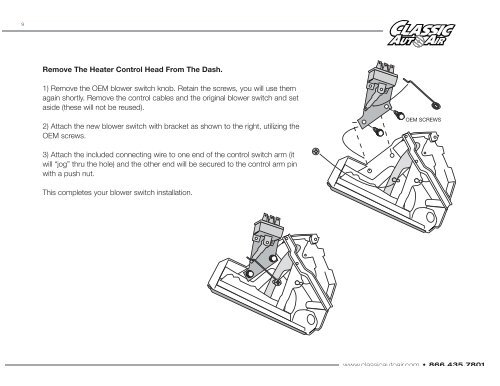
Remove The Heater Control Head From The Dash.<br />
1) Remove the OEM blower switch knob. Retain the screws, you will use them<br />
again shortly. Remove the control cables and the original blower switch and set<br />
aside (these will not be reused).<br />
2) Attach the new blower switch with bracket as shown to the right, utilizing the<br />
OEM screws.<br />
OEM SCREWS<br />
3) Attach the included connecting wire to one end of the control switch arm (it<br />
will “jog” thru the hole) and the other end will be secured to the control arm pin<br />
with a push nut.<br />
This completes your blower switch installation.<br />
www classicautoair com • 866.435.7801


