IT Handbook - Directories - University of Cincinnati
IT Handbook - Directories - University of Cincinnati
IT Handbook - Directories - University of Cincinnati

Create successful ePaper yourself
Turn your PDF publications into a flip-book with our unique Google optimized e-Paper software.
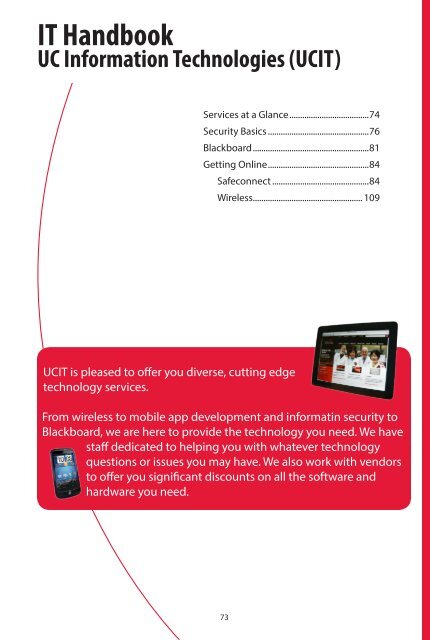
<strong>IT</strong> <strong>Handbook</strong><br />
UC Information Technologies (UC<strong>IT</strong>)<br />
Services at a Glance......................................74<br />
Security Basics................................................76<br />
Blackboard.......................................................81<br />
Getting Online................................................84<br />
Safeconnect..............................................84<br />
Wireless................................................... 109<br />
UC<strong>IT</strong> is pleased to <strong>of</strong>fer you diverse, cutting edge<br />
technology services.<br />
From wireless to mobile app development and informatin security to<br />
Blackboard, we are here to provide the technology you need. We have<br />
staff dedicated to helping you with whatever technology<br />
questions or issues you may have. We also work with vendors<br />
to <strong>of</strong>fer you significant discounts on all the s<strong>of</strong>tware and<br />
hardware you need.<br />
73
Services at a Glance<br />
Help Desk/ResNet: When you have a question or need support, the UC<strong>IT</strong> Help Desk is a quick phone<br />
call away! Just dial 556-HELP. Our Help Desk Technicians will get you the answer you need, or point<br />
you in the right direction. Having an issue with your device? Stop by ResNet, located on MainStreet,<br />
and let one <strong>of</strong> our technicians troubleshoot it for free!<br />
Visit uc.edu/ucit/helpdesk for more information.<br />
UC Mobile App: No Bearcat should be<br />
without the UC Mobile App – your mobile<br />
connection to campus maps, shuttle tracker,<br />
Blackboard, athletics and more! You can<br />
download the UC Mobile App for your<br />
Android (on.uc.edu/WLPsm8) or Apple (on.<br />
uc.edu/VtqRTV ) device.<br />
Have a passion for development or an<br />
idea for the next big app? Stop by the UC<br />
App Lab on MainStreet to learn how you<br />
can collaborate with UC students, faculty<br />
and developers to gain experience in the<br />
exciting world <strong>of</strong> mobile app development.<br />
Need help with technology?<br />
Our Help Desk is here for you!<br />
513-556-HELP(4357)<br />
helpdesk@uc.edu<br />
Or visit ResNet, our student walk-in<br />
help desk, on MainStreet across from<br />
Tangeman <strong>University</strong> Center (TUC)<br />
Blackboard: Blackboard is how you’ll end<br />
up communicating with most <strong>of</strong> your pr<strong>of</strong>essors on the Internet. Blackboard hosts your class syllabus,<br />
podcasts, links, videos and grades posted by your pr<strong>of</strong>essor. It is also a great way to connect with news<br />
and events at UC! To log on, use your UC-issued username and password at blackboard.uc.edu<br />
Email: That username and password you used on Blackboard also logs you onto your UC email<br />
account. Micros<strong>of</strong>t Office 365 is your <strong>of</strong>ficial school email. Make sure you check it <strong>of</strong>ten, so you don’t<br />
miss out on anything important. But it is a lot more than just that! Students can access calendars, web<br />
conferencing and Sky Drive Pro – your personal<br />
web storage cloud! Just go to mail.uc.edu and use<br />
your log on credentials. Learn more at uc.edu/<br />
ucit/email/<strong>of</strong>fice365.<br />
GENERAL POLICY ON THE<br />
USE OF INFORMATION TECHNOLOGY<br />
Secure Wireless: UC’s campus is 100% wireless.<br />
www.uc.edu/ucit/policies.html<br />
That means you can access our secured wireless<br />
network from every building and select green<br />
As an institution <strong>of</strong> higher learning, the<br />
university both uses information technology<br />
spaces on campus. Whether you have a smart<br />
and supplies it to the members <strong>of</strong> the university<br />
phone, tablet or laptop, you never have to worry community. This policy sets forth the general<br />
about staying connected to what matters to you! rights and responsibilities common to all uses <strong>of</strong><br />
You can even print from your dorm room with information technology.<br />
wireless printing in residence halls!<br />
To learn how to connect to our secured wireless<br />
network, contact the Help Desk or stop by ResNet on MainStreet.<br />
Computer Labs and File Storage: If you don’t have a computer, don’t worry! We do! We’ve got over<br />
400 computers or kiosks all over campus. And when it’s late, you can head over to UC<strong>IT</strong>@Langsam —<br />
our 24 hour computer lab on the fifth floor <strong>of</strong> Langsam Library. You’ll find 100 computers, quiet study<br />
areas and breakout rooms with SMART Boards. You’ve got access on your time, anytime!<br />
And with UC File Space, you even have a place to store your files, host your website or update your<br />
blog!<br />
74
uc.edu/ucit/students<br />
GoCharge Charging Stations: A long day on campus doesn’t have to mean the death <strong>of</strong> your phone<br />
or tablet’s battery! GoCharge, UC’s free mobile device charging stations, allow you to securely lock<br />
your device and leave it so it can charge while you’re away. Check out our GoCharge stations located<br />
at the Tangeman <strong>University</strong> Center’s food court and UC<strong>IT</strong>@Langsam, the 24-hour computer lab in<br />
Langsam Library.<br />
Information Security: UC<strong>IT</strong>’s Office <strong>of</strong> Information Security is here to help the UC community<br />
maintain a secure computing environment. But safety is everyone’s responsibility! Visit our website,<br />
uc.edu/infosec, or connect with Information Security @UC_OIS on Twitter for tips on how to keep your<br />
computer and information safe – like learning how to protect your personal information from being<br />
stolen with an email phishing scam.<br />
Free and Discounted S<strong>of</strong>tware: Did you know that students can download McAfee anti-virus<br />
s<strong>of</strong>tware for free? As a matter <strong>of</strong> fact, students can take advantage <strong>of</strong> more than 15 free or discounted<br />
s<strong>of</strong>tware programs, like Micros<strong>of</strong>t Office Suite! Before you make a s<strong>of</strong>tware purchase, be sure to check<br />
out all the discounts available by visiting uc.edu/ucit/ware/s<strong>of</strong>tware.<br />
Lynda.com: Lynda.com is an online video-training library with more than 1,400 s<strong>of</strong>tware, careerdevelopment,<br />
and technology training titles that is FREE to access anywhere using your UC username<br />
and password. Lynda’s video courses are taught by industry experts, teachers and pr<strong>of</strong>essionals AND<br />
allow you to earn certificates <strong>of</strong> completion! Learn more or check out an online training video at<br />
uc.edu/ucit/learningtechnologies/lynda.<br />
Order services: Student Get<strong>IT</strong> is the system you use to order <strong>IT</strong> items and services.<br />
Password Reset: Password Self-Service allows you to reset your password to any connected<br />
application without having to call Help Desk. You simply answer a few questions and, if you later<br />
forget your password, you can reset your password instantly using PSS. You will be prompted with<br />
your questions and then allowed to reset your password yourself!<br />
Printing: Each student recieves 150 free black and white prints per semester free <strong>of</strong> charge. After that,<br />
copies are 7 cents per page. Large page sizes and color printing are available in some locations.<br />
VPN: VPN stands for Virtual Private Network. It’s how to access UC systems when you aren’t on<br />
campus. Most <strong>of</strong> the time, you won’t need it because only restricted information and systems access<br />
requires VPN. But sometimes, you may need to access something from the library website that is only<br />
available to staff, students or faculty, and you’ll need to log into the VPN.<br />
UC<strong>IT</strong> @ Langsam<br />
Computer Lab located on West Campus • 540 Langsam Library • 513-556-0168<br />
Open 24 hours a day, 7 days a week!<br />
Equipped with macs, PCs & a sweet suite <strong>of</strong> s<strong>of</strong>tware.<br />
Plus, quiet study rooms with smart boards.<br />
More information about all our labs at labs.uc.edu/.<br />
75
Security Basics and Virus Information<br />
www.uc.edu/nfosec<br />
http://www.uc.edu/infosec/, 513-558-ISEC (4732)<br />
Information Security<br />
UC<strong>IT</strong>’s Office <strong>of</strong> Information Security <strong>of</strong>fers a wide variety <strong>of</strong> services. These include:<br />
• Links to FREE anti-virus/anti-spyware s<strong>of</strong>tware.<br />
• Education and awareness training<br />
• Tips and How-To pages on fighting spam & identity theft, protecting your laptop and more!<br />
• These <strong>of</strong>ferings and many more can be found at http://www.uc.edu/infosec.<br />
• If you suspect that you have been a victim <strong>of</strong> a computer crime or abuse while at UC, please report<br />
the incident to abuse@uc.edu. Give as much detail as possible: Who, What, When and Where.<br />
The NEVERS <strong>of</strong> password security<br />
Never disclose your password to others, either in<br />
person, by phone, or by e-mail. UC staff will never<br />
ask you for your password via e-mail or telephone.<br />
If you must write down your password, keep it in a<br />
locked location.<br />
Never leave your password at the default. Change<br />
it immediately.<br />
Never make your password less that eight<br />
characters if possible.<br />
Never use all numbers or all letters. Use a<br />
combination <strong>of</strong> upper and lower case letters,<br />
numbers, and special characters like @! & * [ ].<br />
Never use personal information that someone<br />
could easily guess or discover: your pet,<br />
hometown, sports team or really any word found<br />
in a dictionary. Make your password from a phrase<br />
(i.e., use the first letter <strong>of</strong> every word from a<br />
simple quote).<br />
The NEVERS <strong>of</strong> computer security<br />
Never leave your desktop computer unlocked<br />
when you walk away, and turn it <strong>of</strong>f at the end <strong>of</strong><br />
the day.<br />
Never download or install a screensaver; use what<br />
is preinstalled.<br />
Never install s<strong>of</strong>tware received from another user.<br />
Never download copyrighted materials such as<br />
music or movies illegally.<br />
Never leave your laptop unattended, even in the<br />
cab <strong>of</strong> your car. Protect it like your purse or wallet.<br />
Put location finding s<strong>of</strong>tware (such as lo-jac) on<br />
your laptop.<br />
Never check your laptop while flying.<br />
Never leave sensitive information vulnerable.<br />
Password protect or encrypt any sensitive<br />
information on laptop. Use security cables.<br />
Never keep the same pasword for longer than 90<br />
days.<br />
Password Security<br />
• Never disclose your password to others, either in person, by phone, or by e-mail.<br />
• Never leave your password at the default. Change it immediately.<br />
• Make your password eight or more characters where possible.<br />
• Do not reuse passwords. That way if your password is compromised at one site it won’t allow anyone<br />
access to all sites<br />
• Make your password from a phrase (i.e., use the first letter <strong>of</strong> every word from a simple quote).<br />
• Use a combination <strong>of</strong> upper and lower case letters, numbers, and special characters like @ ! & * [ ].<br />
• Never use all numbers or all letters.<br />
• Never use personal information that someone could easily guess or discover: your pet or hometown, etc.<br />
• Never use any word found in a dictionary or the name <strong>of</strong> a sports team.<br />
• If you must write down your password, keep it in a locked location.<br />
• Change your password frequently, at least every 90 days.<br />
• UC staff will never ask for your password via e-mail or telephone.<br />
• See http://www.uc.edu/infosec/password/choosepassword.html for more ideas!<br />
76
Desktop Security<br />
• When you need to walk away from your computer, either log<strong>of</strong>f OR<br />
lock your workstation by pressing Windows Key+L or set an automatic<br />
screensaver then require a password to wake up.<br />
• When finished using computer, log<strong>of</strong>f. This is especially true <strong>of</strong> lab<br />
computers!<br />
• Install the latest updates for any security patches.<br />
• Do not install s<strong>of</strong>tware—commercial, shareware, or freeware—<br />
borrowed or purchased from another user.<br />
• Use <strong>of</strong> peer-to-peer applications to share copyrighted materials, such<br />
as music or movies, is a direct violation <strong>of</strong> copyright laws. Do not do it!<br />
Be careful with QR<br />
codes!<br />
Some QR codes are<br />
dirty, meaning they can<br />
download viruses to your<br />
device. Only scan codes<br />
from trusted sources!<br />
Laptop Security<br />
• Your laptop is a gold mine for Identify Thieves. Protect it like you would your purse or wallet.<br />
• Use a laptop security cable to secure it to a desk when in an open work space.<br />
• Always keep a backup <strong>of</strong> your work, whether to an external hard drive or a secure cloud service.<br />
• Password protect or encrypt any sensitive information stored on the laptop.<br />
• When you are away, lock it in a drawer, overhead bin, cabinet or take it with you.<br />
• Never leave your laptop unattended in a public place, even for “just a minute”.<br />
• Never check your laptop as luggage when you travel.<br />
• Never leave your laptop in a car in plain view on the seat or the floor.<br />
• Never leave your laptop in a car over night.<br />
• Encrypt your hard drive if it is possible to do so.<br />
Spyware<br />
Spyware is used by the advertising industry and by crackers. Spyware and Adware are s<strong>of</strong>tware that when<br />
installed on your computer, may send you pop-up ads, redirect your browser to certain web sites, or monitor<br />
web sites you visit. Extremely invasive versions <strong>of</strong> spyware may track exactly what keys you type to steal<br />
username and password information.<br />
• Fight Spyware and other malicious s<strong>of</strong>tware by installing an anti-spyware/anti-virus package.<br />
• McAfee anti-virus/anti-spyware is available for FREE to UC students! http://www.uc.edu/infosec/ > Free<br />
Antivirus (in the top navigation bar).<br />
• Other tips to fight malicious s<strong>of</strong>tware: do not click on links with pop-up windows, chose “no” when you are<br />
asked unexpected questions; be wary <strong>of</strong> free, downloadable s<strong>of</strong>tware, and never follow e-mail links.<br />
• If you believe you have spyware on your system, please contact the UC<strong>IT</strong> Integrated Help Desk at 513-556-<br />
HELP (4357) for assistance in having it removed.<br />
Viruses, Worms and Trojans, Malware<br />
Viruses are computer programs designed to cause trouble to your computer. Worms are programs that<br />
replicate themselves and look for holes in networks or send themselves via e-mail to infect as many other<br />
computers as they can. Trojans are programs that carry hidden, malicious programs.<br />
• Fight malicious s<strong>of</strong>tware by installing an anti-spyware/anti-virus package.<br />
• McAfee anti-virus/anti-spyware is available for FREE to UC students! http://www.uc.edu/infosec/ > Free<br />
Antivirus (in the top navigation bar).<br />
• Do not open e-mail files from anyone you do not know.<br />
• Do not open e-mail attachments containing executables or movie files.<br />
• Some file extensions to avoid include: .EXE .COM .CMD .PIF .SCR .VBS .WMF .ASF .PDF .DOCX<br />
E-mails and Spam<br />
• Always password protect your e-mail account.<br />
• Do not use your personal e-mail account to send or receive sensitive information (credit card numbers,<br />
bank account info, SSNs, etc.).<br />
• Do not send or forward e-mail messages such as chain letters, jokes, and messages containing lewd,<br />
harassing, or <strong>of</strong>fensive information.<br />
• Visit http://www.uc.edu/infosec/info/fightspam.html to learn how to set up rules and filters to help manage<br />
Spam.<br />
• Be wary <strong>of</strong> unsolicited attachments, even from people you know. Viruses travel incognito using legitimate<br />
e-mail addresses to trick their way into users’ machines.<br />
• Do not click a link in an e-mail. Even if the link says one thing it may send you somewhere else.<br />
77
• Send Spam to spam@uce.gov and then delete it.<br />
• Report other e-mail abuses to abuse@uc.edu.<br />
A thorough review <strong>of</strong> “How To Fight Spam” will help to understand the world <strong>of</strong> spam and how you can help<br />
control it: http://www.uc.edu/infosec/info/fightspam.html<br />
Social Engineering and Phishing Attacks<br />
Social engineering is used by criminals to gain unauthorized access to a computer or secure building. This<br />
is a non-technical intrusion that relies on people’s complacency regarding the value <strong>of</strong> the information<br />
they possess and their responsibility to protect it. Social engineers’ ploys <strong>of</strong>ten involve tricking people into<br />
breaking normal security procedures. Examples <strong>of</strong> social engineering behavior include the following:<br />
• Someone calling on the phone asking for information such as a user ID and password.<br />
• Someone “dumpster diving” to find memos, system manuals, and printouts <strong>of</strong> sensitive information.<br />
• Someone pretending to be an outside consultant or temporary worker.<br />
• Someone “piggy-backing” entrance to a building by following in an authorized person, thus avoiding<br />
presenting ID. If you permit someone access, make sure you know who he or she is.<br />
• Someone creating a persona that makes him or her appear to be a person in authority, so people ask the<br />
hacker questions, rather than vice-versa. This is “reverse social engineering.”<br />
• Phishing uses e-mail or web sites to solicit personal (<strong>of</strong>ten financial) information. Attackers send e-mail,<br />
seemingly from a reputable credit card company or bank that requests account information. Often, the<br />
message suggests that there is a problem that needs their attention.<br />
• Learn more about phishing by watching this video: http://www.uc.edu/infosec/info/videos.html<br />
Phone / PDA / Mobile Device Security Tips<br />
• Set a password, lock pattern, or PIN on your phone to prevent unauthorized use and make it more difficult<br />
to hack if stolen or lost.<br />
• If your phone has Bluetooth functions, disable them until they’re needed, and then set visibility settings to<br />
“hidden” so that your device cannot be scanned by other Bluetooth devices.<br />
• Limit the amount <strong>of</strong> sensitive or personal information such as passwords and account information stored<br />
on your mobile device.<br />
• Consider purchasing anti-virus s<strong>of</strong>tware for your phone and make sure it is frequently updated.<br />
• Only download apps from trusted sources.<br />
• Do not jailbreak your mobile device as this can open up security holes<br />
• Treat mobile devices as you would your wallet, keys, or laptop; don’t leave them in plain sight and keep<br />
them close to you at all times.<br />
USB Drives / Thumb Drives / Jump Drives and other Mass Storage Devices<br />
These drives are a very convenient and commonly used method to hold personal files and school work.<br />
Unfortunately, the small physical size <strong>of</strong> these devices makes them easy to lose or to steal.<br />
• If you use a mass storage device to store any important or sensitive data—class work, research data, clinical<br />
information, personal files, etc.—make sure that the data is protected by encrypting the device.<br />
• Many modern mass storage devices come with a security utility that can encrypt sensitive files.<br />
• If you do not have encryption on your mass storage device, don’t keep sensitive information on it.<br />
Social Media Safety<br />
What is social media?<br />
Social media refers to the means <strong>of</strong> interactions among people in which they create, share, and exchange<br />
information and ideas in virtual communities and networks.<br />
What are some examples <strong>of</strong> social media web sites?<br />
Several social media sites have become extremely popular in the last few years for internet users <strong>of</strong> all ages.<br />
Some examples include: Facebook, Twitter, LinkdIn, Instagram, and Tumblr.<br />
What are some advantages <strong>of</strong> using social media web sites?<br />
• Easy Information Exchange Facebook and similar sites allow users to gain access to personal information<br />
very quickly, including home and cell phone numbers, addresses, photos, videos, and events.<br />
78
• Ability to Share Information Users <strong>of</strong> social media web sites can stay in contact with hundreds<br />
<strong>of</strong> people they have met (or not) and communicate with them by posting interesting things<br />
about themselves such as: Statuses, Images, Videos, Events, Locations, and so forth.<br />
What are some disadvantages <strong>of</strong> using social media web sites?<br />
• Easy Access If privacy settings are not set potential thieves, stalkers, or harassers can potentially<br />
find personal information through social media web sites very quickly, easily, and anonymously.<br />
Overly available personal information can also lead to issues when potential employers try to<br />
research you. By posting too much inappropriate information on social media sites, you put<br />
yourself to risk <strong>of</strong> not being hired, or possibly incriminating yourself.<br />
• Too Much Information Vast amounts <strong>of</strong> information coming from a large number <strong>of</strong> sources is<br />
constantly fed through social media sites to their users. Often this information can be biased,<br />
incorrect, or altered. This leads to many misinformed consumers.<br />
• Tool for Procrastinating or Wasting Time Surfing social media web sites can easily take up<br />
hours <strong>of</strong> time that could have been used for tasks such as studying, working, or anything else that may be<br />
productive.<br />
Your Personal Settings/What You Post<br />
The following questions are designed to help you make smart choices about your privacy settings, as well as<br />
what you decide to post on your site:<br />
• Would I want someone I don’t know to show up unannounced at my class, residence hall, or workplace?<br />
• Am I comfortable getting phone calls, e-mails, or other forms <strong>of</strong> attention from strangers?<br />
• Am I posting information about myself or my whereabouts that would leave me vulnerable to crime?<br />
• Would I be comfortable if a potential or current employer, parent, or close friend read what I posted?<br />
• What would my pr<strong>of</strong>ile say about me to future roommates or neighbors? Would they form negative<br />
preconceptions about me?<br />
• Am I posting information or photos portraying me engaging in illegal activities that are against the law or<br />
Student Code <strong>of</strong> Conduct?<br />
• Online photos can be easily copied, downloaded, or manipulated. Am I posting photos that would<br />
embarrass or incriminate me if they were shown in other venues? Am I willing to take the risk that someone<br />
may use my photo in a way in which I would not approve?<br />
Manage Your Privacy<br />
Having secure privacy settings on your social media site accounts is extremely important. All major social<br />
media sites have settings that allow the user to choose who can see what on their pr<strong>of</strong>ile. Consider how you<br />
should implement the following options:<br />
• Make your contact information private (Address, Phones Numbers, E-mail Addresses).<br />
• Limit who can search your pr<strong>of</strong>ile in search engines.<br />
• Manage who can view the photos you post.<br />
• Manage who can view your posted statuses.<br />
• Do not post locations and or times as this opens up many opportunities for crimes against you.<br />
What Others Post<br />
Facebook and similar web sites do not have mechanisms in place to verify information posted in individual<br />
pr<strong>of</strong>iles. What you see is not always true information. Consider these questions before divulging additional<br />
information about yourself or deciding if you want to meet an online acquaintance in person:<br />
• Is the information I am reading from a reliable, verifiable source?<br />
• Am I considering meeting someone for the first time in a public setting with a way to get myself out <strong>of</strong> a<br />
situation if it is unsafe?<br />
• Would I be aiding/abetting a crime or policy violation if I follow instructions found on someone’s pr<strong>of</strong>ile?<br />
• What are the possible advantages <strong>of</strong> getting to know this person better? Are there risks that I can reduce or<br />
eliminate before we proceed in deepening our involvement with each other?<br />
If you suspect that you have been a victim <strong>of</strong> a computer crime or abuse while at UC, please report the<br />
incident to abuse@uc.edu. Give as much detail as possible: who, what, when and where.<br />
79
Who Can Help?<br />
You can get help from one <strong>of</strong> these <strong>of</strong>fices or departments if you become a victim through affiliation with a<br />
social web site.<br />
Counseling Center.................................................... 513-556-0648<br />
Office <strong>of</strong> Student Life............................................... 513-556-5250<br />
Resident Education and Development.............. 513-556-6476<br />
UC 24-Hour Sexual Violence Crisis Line............. 513-218-9531<br />
UC Ombuds Office..................................................... 513-556-5956<br />
UC Police Department............................................. 513-556-1111 or 911 (Emergencies)<br />
UC Women’s Center................................................... 513-556-4401<br />
UCit Information Security........................................ 513-558-4732<br />
<strong>University</strong> Judicial Affairs........................................ 513-556-6814<br />
Peer-To-Peer (P2P) File Sharing<br />
Unauthorized peer-to-peer (P2P) file sharing on college and university campuses is receiving increasing<br />
attention from the entertainment industry, the media, and the United States Congress. Although P2P file<br />
sharing on university networks is not unlawful, such activity could be harmful especially as it can lead to<br />
a violation <strong>of</strong> the federal copyright law. Indeed, many students using popular s<strong>of</strong>tware such as Limewire,<br />
Frostwire, uTorrent, and Gnutella, intentionally or advertently infringe on copyrighted works relating to<br />
music, movies, computer s<strong>of</strong>tware, video games, and photographs. Lawsuit filings indicate copyright<br />
owners are taking the <strong>of</strong>fensive against infringements on their protected works. Students need to know<br />
their rights and responsibilities, and their potential liability for unlawful P2P activities.<br />
The basis for copyright law is found in Article 1 <strong>of</strong> the United States Constitution and codified in Title<br />
17 (the “Copyright Act”) <strong>of</strong> the United States Code. The Copyright Act lists exclusive rights <strong>of</strong> copyright<br />
holders, including reproduction and distribution <strong>of</strong> the copyrighted work, both <strong>of</strong> which are implicated in<br />
P2P file sharing. There are three types <strong>of</strong> infringement: direct, contributory, and vicarious. Under direct<br />
infringement, a person is liable for his or her own infringing conduct; under contributory infringement,<br />
a person may be liable if he or she knows <strong>of</strong> the infringing activity, and induces, causes, or materially<br />
contributes to the infringing conduct <strong>of</strong> another; under vicarious infringement, a person may be liable if he<br />
or she has the right and ability to supervise the infringing activity and also has a direct financial interest in<br />
the activity. Most users <strong>of</strong> P2P networks fall under the direct infringement category. However, even without<br />
directly infringing conduct, students who operate or encourage the use <strong>of</strong> such networks may be open to<br />
contributory or vicarious claims.<br />
Downloading, possessing or distributing copyrighted material without the owners’ permission is also a<br />
violation <strong>of</strong> the <strong>University</strong>’s General Policy on the Use <strong>of</strong> Information Technology (http://www.uc.edu/ucit/).<br />
The <strong>University</strong> <strong>of</strong> <strong>Cincinnati</strong> does not actively monitor illicit or inappropriate activities, nor is it under any<br />
obligation to defend or accept responsibility for its students’ illegal actions in the P2P context.<br />
The <strong>University</strong> <strong>of</strong> <strong>Cincinnati</strong> expects our user community to act in a proper and responsible computing<br />
manner. If illegal or inappropriate activities are brought to our attention, the <strong>University</strong> will take all<br />
reasonable and appropriate actions. Copyright violations will generate a report to the <strong>of</strong>fice <strong>of</strong> Student Life-<br />
<strong>University</strong> Judicial Affairs as part <strong>of</strong> the <strong>University</strong>’s disciplinary action process. This can result in a variety <strong>of</strong><br />
actions including removal <strong>of</strong> computer privileges and probation. Additionally, the copyright holder <strong>of</strong> the<br />
material found on your system may take legal action against violators.<br />
What can you do to be part <strong>of</strong> the solution? Avoid downloading, distributing, or possessing copyrighted<br />
material over the Internet and the UC internal network unless you have received explicit permission from<br />
the owner, their <strong>of</strong>ficial representative, or have paid an access or license fee to obtain the material. If you<br />
are using a peer-to-peer application you should consider removing it from your system prior to connecting<br />
to the <strong>University</strong>’s network. If you do not remove the application, you should ensure your system is set to<br />
prevent the application from acting as a provider <strong>of</strong> unlicensed materials to other users. Failure to restrict<br />
the application, whether you are aware <strong>of</strong> the violation or not, will result in the <strong>University</strong>’s Information<br />
Technology department (UC<strong>IT</strong>) removing your machine from the network until the copyright violation is<br />
rectified.<br />
80
Blackboard Learning System<br />
http://blackboard.uc.edu/<br />
Blackboard <strong>of</strong>fers you easy access to course materials, <strong>University</strong> resources, and personal tools from any<br />
computer connected to the Internet. Listed below is some introductory information that can help you<br />
successfully use the Blackboard Learning System at UC.<br />
Please note that all users must adhere to UC’s General Policy on the use <strong>of</strong> Information Technology located<br />
at http://www.uc.edu/ucit/policies/infotechuse.html .<br />
For detailed instructions on how to use the application, click on the “Help” tab in your Blackboard account or<br />
go directly to the documentation page at: http://blackboard.uc.edu/help. If you still have questions about<br />
Blackboard or your account, or if you need technical assistance, please call or e-mail the Blackboard Support<br />
Team at: 513-556-1602, blackboard@uc.edu.<br />
Password or Login Problems?<br />
If you have forgotten your password, click on the “Password Reset Tool” link in the middle <strong>of</strong> the login<br />
box. Fill in your username and click on the “Submit” button. You will be taken to the Password Self-Service<br />
website. When using the “Forgot Password?” on this website, you will need to answer your security questions<br />
before you are allowed to change your password.<br />
If you have not established your security questions or you cannot remember your answers, you will need to<br />
contact the UCit Help Desk at 513-556-4357 for assistance with having your password reset.<br />
Using Blackboard<br />
Once you log into your Blackboard account, you will see the “My UC” page in your browser window. You can<br />
always return to this page by clicking the “My UC” tab at the top <strong>of</strong> your screen. This screen lists all <strong>of</strong> the<br />
courses you are taking, announcements posted by the <strong>University</strong> or your instructors, and other information<br />
in boxes called “modules” that can be changed or customized by each user.<br />
To enter your courses, simply click on the name <strong>of</strong> the course you wish to enter in the “My Courses” box.<br />
From there, navigate through the course by clicking the buttons or text labels on the left side <strong>of</strong> the screen.<br />
Customizing Your Account<br />
Blackboard allows you to customize the way your “My UC” page appears by changing the color scheme and<br />
which “modules” (or boxes) display when you first log in. To customize the look <strong>of</strong> the modules, click the “Add<br />
Module” or “Personalize Page” buttons in the upper corners <strong>of</strong> the My UC page. You can change features <strong>of</strong><br />
an individual module by clicking on the “wheel” icon in the upper right corner <strong>of</strong> the module title bar.<br />
You can also edit your user pr<strong>of</strong>ile by clicking the Personal Information link in the Tools section <strong>of</strong> the “My<br />
UC” page on the left side <strong>of</strong> the screen. From here you can:<br />
• Edit Personal Information – change your name, e-mail address, and other information that appears in<br />
your user pr<strong>of</strong>ile.<br />
• Turn the Visual Text Box editor on and <strong>of</strong>f under the “Change Personal Settings” link.<br />
• Set Privacy Options - specify what personal pr<strong>of</strong>ile information appears in the User Directory. (By<br />
default, settings exclude the user pr<strong>of</strong>ile from the User Directory.)<br />
Courses Don’t Appear on Blackboard?<br />
Your courses should appear in the “My Courses” module on your main My UC page when you first log in. If<br />
none <strong>of</strong> your courses appear, or if some courses are missing, then you are not yet registered for the course. It<br />
takes at least 24 to 48 hours after registering for a course before it will appear in your Blackboard account.<br />
If the course is listed as “unavailable”, then you will need to contact your instructor directly and ask that they<br />
make the course available.<br />
E-mail Not Received Through Blackboard?<br />
This problem could happen for several reasons:<br />
1. Your “Personal Information” may have an incorrect e-mail address in Blackboard.<br />
2. You may be over your quota for the e-mail address that you have chosen to use in Blackboard.<br />
3. Your e-mail provider may have anti-spam filters in place that would affect the delivery <strong>of</strong> mail.<br />
81
If you have an invalid e-mail address in your “Personal Information” within Blackboard, any e-mail that is sent<br />
to you through Blackboard will be returned to the sender with an undeliverable message.<br />
To Verify Your E-mail Information Within Blackboard:<br />
1. Click the Personal Information link in the Blackboard Tools section <strong>of</strong> the “My UC” page on the left side <strong>of</strong><br />
the screen.<br />
2. Click on Edit Personal Information.<br />
3. Scroll down to the field labeled “e-mail” and enter your e-mail address.<br />
All e-mail providers have a limit (quota) on the amount <strong>of</strong> mail that you can store on their system at one<br />
time. If you reach or exceed this limit, they will no longer accept mail for your account and they will return an<br />
undeliverable message to the sender. It is important that you monitor your quota to ensure that your mail<br />
will be delivered.<br />
To see the current size <strong>of</strong> your UConnect mailbox and its quota, navigate to your inbox and place the cursor<br />
over your name at the top <strong>of</strong> the folder list. If you are using a commercial e-mail provider, please contact<br />
their technical support for more information about their storage limits.<br />
Filters intended to block unwanted e-mail may mistake e-mail messages sent through Blackboard as “spam.”<br />
If you are using an e-mail system other than UConnect, be sure to add @uc.edu to your e-mail system’s<br />
“whitelist” or “safe list” and check your “Junk” or “Spam” folder regularly.<br />
Assignments - How to Send to an Instructor<br />
Students complete the assignment in a separate file and send it back to the instructor through their<br />
Blackboard course menu. To send an assignment to your instructor:<br />
1. Click on the link for the assignment file within your course.<br />
2. Enter any comments for the instructor in the Comments box under Assignment Materials.<br />
3. Click “Browse My Computer” and locate the file to attach.<br />
4. Double-click the file to attach it to your assignment. You can add more files by repeating this process.<br />
5. Click “Save as Draft” to submit your assignment later, or<br />
6. Click “Submit” to send your assignment immediately.<br />
NOTE: Once an assignment is submitted to your instructor, it is no longer available for editing.<br />
Discussion Board - How to Use<br />
The Discussion Board allows students and instructors to post messages and participate in online discussions.<br />
To post a message:<br />
1. Click the “Tools” course menu link and then, in the next screen, choose the “Discussion Board” link.<br />
2. Click on the forum title (link) where you want to post a message.<br />
3. Click the “Create Thread” button in the upper left-hand side <strong>of</strong> the screen.<br />
4. Enter a subject for your post and then type your message in the text box. If you want to attach a file or<br />
post a paper with your message, click the “Browse My Computer” link under the Attachments section and<br />
select the file you wish to attach. (Please note that your instructor must allow this setting.)<br />
5. Click the “Save Draft” button at the bottom <strong>of</strong> the screen to save the changes to Blackboard, or<br />
6. Click “Submit” to post your message to the board immediately.<br />
Student Organization on Blackboard - How to Request<br />
Requests for student organizations on Blackboard must be submitted to Student Activities and Leadership<br />
Development. Approval for a student organization on Blackboard is based on the same criteria required for<br />
approval <strong>of</strong> any <strong>of</strong>ficial university student group. It must be registered in that <strong>of</strong>fice to receive the full rights<br />
and privileges <strong>of</strong> a campus based club or organization.<br />
218<br />
Troubleshooting Tips - Using the Blackboard S<strong>of</strong>tware<br />
• Use only a supported browser. Click on the Help tab in Blackboard and locate the list <strong>of</strong> supported<br />
browsers under the Resources section.<br />
• Check the browser settings to ensure that cookies and Java are enabled.<br />
• Make sure that you have “pop-up” blockers turned <strong>of</strong>f or add “uc.edu” to any popup blocker’s “whitelist” or<br />
“safe list.”<br />
• Clear your recent browsing history before beginning your session.<br />
82
Blackboard Help Center<br />
For detailed instructions on how to use the application, click on the “Help” tab within Blackboard, or go<br />
directly to the documentation page at: http://blackboard.uc.edu/help. Or contact us.<br />
Phone: (513) 556-1602<br />
Blackboard support during the term:<br />
Monday -Friday: 8 a.m. to 11 p.m. EST<br />
Saturday: Closed<br />
Sunday: 4 p.m. to 11 p.m. EST<br />
During term breaks:<br />
Monday -Thursday: 8 a.m. to 6 p.m. EST<br />
Friday: 8 a.m. to 5 p.m. EST<br />
Email: blackboard@uc.edu<br />
Getting answers couldn’t be easier.<br />
Send us an email!<br />
Taking Tests in Blackboard - Important Tips to Follow<br />
The most common problem that students encounter when taking an online test is when their computer<br />
loses connectivity with the Blackboard server. To help minimize the likelihood <strong>of</strong> this problem occurring<br />
during an online assessment, we recommend using the following checklist:<br />
• DO use a reliable and, if possible, fast internet connection (DSL, cable, broadband).<br />
• DO use a current release <strong>of</strong> Mozilla Firefox or another certified browser.<br />
• DO log out and back into Blackboard just before beginning a test. For security reasons, Blackboard sessions<br />
only last three hours so this will help insure you have ample time to complete your test.<br />
• DO periodically click the “Save” button during the test to record your answers.<br />
• Do NOT resize or minimize the browser window.<br />
• Do NOT use the Back button on your browser.<br />
• Do NOT double click on the link to begin the test or on any buttons or links inside the test.<br />
• Do NOT leave the test window open and unattended for any period <strong>of</strong> time.<br />
If you do experience technical difficulties during your exam, e-mail your instructor immediately to alert them<br />
<strong>of</strong> the problem. Be as descriptive as possible in your e-mail about what you were doing when the problem<br />
occurred, including the date and time in your description.<br />
Blackboard Mobile Learn:<br />
Mobile Learn can help users stay connected with push updates and the ability to check announcements,<br />
grades or course content wherever they are. Students can publish to journals and blogs, participate in<br />
discussion boards and e-mail their instructor or classmates. Mobile Learn is currently `available for Android,<br />
BlackBerry®, HP webOS devices, iPhone®, iPod touch®, and iPad.<br />
NOTE: Some course content may not be available on mobile devices.<br />
83
Getting Online: SafeConnect<br />
To improve service to our students, the <strong>University</strong> <strong>of</strong> <strong>Cincinnati</strong> Information Technologies department (UCit)<br />
utilizes SafeConnect to access the UC Network (UCnet) and the Internet from the dormitory environment.<br />
Students will be able to access the network from the dorms once they have gone through the SafeConnect<br />
logon procedure. Follow the SafeConnect logon procedure for your corresponding Operating System<br />
to access the UCnet. Your computer must have TCP/IP set to DHCP. Game box devices such as the Xbox,<br />
Playstation, Wii, etc. will not be required to perform the SafeConnect logon procedure.<br />
To access the UCNet:<br />
Your computer must be equipped with either a Network Interface Card (NIC) or Wireless NIC which supports<br />
a/b/g/N connectivity and enabled for a LAN connection.<br />
You must have a valid Central Login Service (CLS) username and password.<br />
Game box devices such as the XBox, Play Station, or Wii connect directly into a data jack with a Category 5e<br />
(or above) ethernet cable.<br />
***Personal Hubs, routers or wireless access points are not allowed on the UCNet.***<br />
For a user to access the UCNet, your computer must be authenticated and verified as having the appropriate<br />
security s<strong>of</strong>tware in place to minimize the vulnerabilities to pass viruses throughout the network. UC uses<br />
SafeConnect to provide this service. Please refer to “UCNet and SafeConnect” section <strong>of</strong> this manual for<br />
instructions and additional information on SafeConnect.<br />
SafeConnect Policy Key System Requirements<br />
Component<br />
Minimum Requirement<br />
OS Support Windows: XP, Vista and Windows 7 and 8<br />
(Other versions <strong>of</strong> Windows are not supported.)<br />
Linux: All versions with a GUI Desktop<br />
Mac: OSX 10.4 and above<br />
Supported OS Locales<br />
Hard Drive Space<br />
Any language supported by the OS<br />
Recommended<br />
McAfee VirusScan Enterprise V8.8 for Windows 2000, XP, 2003, Vista, 7 and 8.<br />
Download from http://www.uc.edu/ucit/ (if no anti-virus is installed during the SafeConnect Policy Key<br />
installation, the notification presented will provide a link to this site):<br />
Each room is equipped with a number <strong>of</strong> data jacks equal to the maximum capacity for that room (e.g.,<br />
double rooms have two jacks). Each Student Resident is allowed one active computer connection as<br />
a condition <strong>of</strong> his/her residence hall/apartment lease agreement. If additional connectivity is desired,<br />
the student may submit a request by completing the Online Data Jack Connectivity form. Information<br />
concerning this service is available through the reception area <strong>of</strong> each residence hall. Housing and Food<br />
Services Office must approve all service requests before service will be provided. If the request is approved,<br />
there will be an activation fee per school term for each additional data connection that is activated. This fee<br />
must be paid before activation.<br />
4MB<br />
Requests for Changes or Moves<br />
https://www.uc.edu/ucit/studentgetit/login.aspx<br />
Requests are not accepted during the first two weeks <strong>of</strong> school. Changes in your network data jack to<br />
another jack within the same room or moving your network connection to another room may be requested<br />
by submitting the Data Jack Connectivity Form. To order dormitory connectivity, enter the website shown<br />
above. To report dormitory connectivity problems, call the Help Desk at 513-556-HELP (4357).<br />
See below for Ethernet card and cable instructions.<br />
84
If you have trouble connecting, call our Help Desk or visit our<br />
ResNet support desk for personal assistance.<br />
Help Desk: 556-HELP(4357), Monday - Friday: 6 a.m. – 9 p.m. or<br />
Saturday and Sunday: 8 a.m. – 9 p.m.<br />
Visit the ResNet support desk on MainStreet across from the<br />
Tangeman <strong>University</strong> Center (TUC). Hours may vary.<br />
SafeConnect for Windows Vista, Windows 7 and Windows 8<br />
This example configuration is using a new install <strong>of</strong> Windows Vista. Based on your computer’s current status<br />
and installed s<strong>of</strong>tware, some <strong>of</strong> these steps may not apply to you or some additional steps may need to be<br />
taken. You must have Administrator right to the machine for the installation <strong>of</strong> the SafeConnect client to be<br />
installed.<br />
1. Connect your machine to the university’s network via a wireless or wired network connection within an<br />
on-campus resident facility.<br />
2. Open a web browser and attempt to connect to a website hosted outside <strong>of</strong> the university (ex. http://<br />
www.google.com, http://www.yahoo.com, http://www.cnn.com)<br />
3. You will be redirected to a sign-on page. Use your Central Login Service username and password.<br />
85
4. Once you log in for the first time, you will be asked to review the Network Usage Policy. If you accept<br />
the terms <strong>of</strong> this policy click on the link that says “Yes, I will install the Policy Key and accept the terms and<br />
conditions for Internet use”. If you chose not to accept the policy, you will not be granted internet access.<br />
5. You will now download the key and be prompted to install it.<br />
6. Select “Run” to continue with the installation.<br />
86
7. You may be presented with a Security Warning asking if you want to run the application titled<br />
ServiceInstaller.exe. Click “Run” to continue with the installation.<br />
8. You will now be prompted with the SafeConnect Installation window. Click “Install” to continue.<br />
9. Once the installation is complete, you will receive a prompt stating the installation was successful.<br />
10. The SafeConnect client will automatically start a compliancy check on the machine. If at any time the<br />
machine becomes noncompliant, follow the onscreen directions to remedy the issue. A warning message<br />
will appear notifying you that an anti-virus application was not found and provides links where you can<br />
obtain proper s<strong>of</strong>tware. It is recommended you install the free, <strong>University</strong> provided McAfee Anti-Virus<br />
s<strong>of</strong>tware.<br />
87
11. Click on the McAfee link to start the download.<br />
12. Click save.<br />
13. Save the zip file to a location <strong>of</strong> your choice.<br />
14. Once the download is complete, using Windows Explorer, navigate to the directory you downloaded the<br />
file.<br />
15. Right click on the zip file and select Extract All...<br />
88
16. The Extraction Wizard will appear. Select Next to continue.<br />
17. Select a location to extract the files to. The default location is the same as the location <strong>of</strong> the zip file you<br />
are extracting. Select ‘Show extracted files when complete’. Click Next to continue.<br />
18. From the list <strong>of</strong> extracted files, locate the Setupvse.exe file. This is the file you will need to execute to<br />
install the application.<br />
89
19. Execute the application by double clicking the file.<br />
20. You may receive a security warning when trying to execute the file. To continue with the installation, click<br />
Run.<br />
21. Click Next<br />
22. The default EULA window appears.<br />
90
23. You have to make some changes before you accept the Network Associates License Agreement. Change<br />
the License expiry type to ‘Perpetual’ and select the country where you bought the laptop (default is ‘United<br />
States’). If you chose to accept the license agreement, select accept and click OK.<br />
24. Select ‘Typical’ and click Next<br />
91
25. Select ‘Standard Protection’ and click Next.<br />
26. Click Install.<br />
92
27. During your anti-virus installation, you may receive a warning that your anti-virus is not running or your<br />
definitions are out <strong>of</strong> date. This is due to SafeConnect noticing the changes in compliancy. Do not attempt to<br />
resolve these issues until the anti-virus s<strong>of</strong>tware installation is complete. If you are installing McAfee, you will<br />
be prompted to update at the end <strong>of</strong> the installation. If you are using another Anti-Virus application, follow<br />
their procedures for updating the s<strong>of</strong>tware once the installation has finished.<br />
28. To finish the McAfee installation, be sure to select ‘Update Now’ and click Finish.<br />
29. McAfee will now check for updates. The updates will be installed if needed and when completed, click<br />
Close.<br />
93
30. The Windows Update setting will automatically be set for you as part <strong>of</strong> using SafeConnect. The setting<br />
will automatically download and install recommended updates for your computer from our on-site Windows<br />
Update server.<br />
31. This completes instructions on how to get a computer with Windows Vista compliant for the <strong>University</strong>’s<br />
Network. If for any reason you are still receiving warnings <strong>of</strong> an item that does not pass the compliancy<br />
check, please read the screen fully and follow the directions that it provides. If you need further assistance,<br />
you may contact the UCit Helpdesk by phone at 513-556-HELP (513-556-4357).<br />
94
SafeConnect for Windows XP<br />
This example configuration is using a new install <strong>of</strong> Windows<br />
XP Pr<strong>of</strong>essional. Based on your computers current status and<br />
installed s<strong>of</strong>tware some <strong>of</strong> these steps may not apply to you<br />
or some additional steps may need to be taken. You must have<br />
Administrator right to the machine for the installation <strong>of</strong> the<br />
SafeConnect client to be installed.<br />
Need help?<br />
Call the Help Desk 556-HELP(4357)<br />
Monday - Friday: 6 a.m. - 9 p.m.<br />
Saturday and Sunday: 8 a.m. - 9 p.m.<br />
Visit ResNet on MainStreet across from<br />
the Tangeman <strong>University</strong> Center (TUC).<br />
Hours may vary.<br />
1. Connect your machine to the <strong>University</strong>’s network via an ethernet cable or with a wireless connection.<br />
2. Open a web browser and attempt to connect to a web site hosted outside <strong>of</strong> the university (ex. http://<br />
www.google.com, http://www.yahoo.com, http://www.cnn.com)<br />
3. You will be redirected to a sign-on page. Login with your Central Login Service username and password.<br />
95
4. Once you login for the first time, you will be asked to review the Network Usage Policy. If you accept the<br />
terms <strong>of</strong> these policies click on the link that says “Yes, I will install the Policy Key and accept the terms and<br />
conditions for Internet Use”. If you chose not to accept the policy, you will not be granted internet access.<br />
5. You will now download the key and be prompted to install it.<br />
6. Select Run to continue with the installation.<br />
96
7. You may be presented with a Security Warning asking if you want to run the application titled<br />
ServiceInstaller.exe. Click Run to continue with the installation<br />
8. You will now be prompted with the SafeConnect Installation window. Click Install to continue.<br />
9. Once the installation is complete, you will receive a prompt stating the installation was successful.<br />
10. The SafeConnect client will automatically start a compliancy check. In this example, an anti-virus<br />
application is not installed. A warning message will appear notifying you that an anti-virus application was<br />
not found and provides links where you can obtain proper s<strong>of</strong>tware. It is recommended you install the free,<br />
<strong>University</strong> provided McAfee Anti-Virus s<strong>of</strong>tware.<br />
97
11. Click on the McAfee link to start the download. Save the zip file to a location <strong>of</strong> your choice.<br />
12. Once the download is complete, using Windows Explorer, navigate to the directory where you downloaded<br />
the file.<br />
13. Right click on the zip file and select Extract All...<br />
14. The Extraction Wizard will appear. Select Next to continue.<br />
15. Select a location to extract the files to. The default location is the same as the location <strong>of</strong> the zip file you are<br />
extracting. Click Next to continue.<br />
98
16. Once extraction is complete, open the location <strong>of</strong> the extracted files. Select “Show extracted files” and<br />
click Finish to continue.<br />
17. From the list <strong>of</strong> extracted files, locate the Setupvse.exe file. This is the file you will need to execute to<br />
install the application.<br />
99
18. Execute the application by double clicking the file.<br />
19. You may receive a security warning when trying to execute the file. To continue with the installation, click<br />
Run.<br />
20. Click Next.<br />
21. The default EULA window appears.<br />
100
22. You have to make some changes before you accept the Network Associates License Agreement. Change<br />
the License expiry type to ‘Perpetual’ and select the country where you bought the laptop (default is ‘United<br />
States’). If you chose to accept the license agreement, select accept and click OK.<br />
23. Select ‘Typical’ and click Next.<br />
101
24. Select ‘Standard Protection’ and click Next.<br />
25. Click Install.<br />
102
26. During your anti-virus installation, you may receive a warning that your anti-virus is not running or your<br />
definitions are out <strong>of</strong> date. This is due to SafeConnect noticing the changes in compliancy. Do not attempt to<br />
resolve these issues until the anti-virus s<strong>of</strong>tware installation is complete. If you are installing McAfee, you will<br />
be prompted to update at the end if the installation. If you are using another Anti-Virus application, follow<br />
their procedures for updating the s<strong>of</strong>tware once the installation has finished.<br />
27. To finish the McAfee installation, be sure to select ‘Update Now’ and click Finish.<br />
103
28. McAfee will now check for updates. The needed updates will be installed and when completed, click Close.<br />
29. The Windows Update setting will automatically be set for you as part <strong>of</strong> using SafeConnect. The setting will<br />
automatically download and install recommended updates for your computer from our on-site Windows Update<br />
server.<br />
30. This completes instructions on how to get a computer with Windows XP compliant for the <strong>University</strong>’s<br />
network. If for any reason you are still receiving warnings <strong>of</strong> an item that does not pass the compliancy check,<br />
please read the screen fully and follow the directions that it provides. If you need further assistance, you may<br />
contact the UCit Helpdesk by phone at 513-556-HELP (513-556-4357).<br />
104
SafeConnect Directions for Macintosh<br />
This example configuration is using an Apple Computer.<br />
1. Connect your machine to the <strong>University</strong>’s’ network via an<br />
ethernet cable or with a wireless connection.<br />
Need help?<br />
Call the Help Desk 556-HELP(4357)<br />
Monday - Friday: 6 a.m. - 9 p.m.<br />
Saturday and Sunday: 8 a.m. - 9 p.m.<br />
Visit ResNet on MainStreet across from<br />
the Tangeman <strong>University</strong> Center (TUC).<br />
Hours may vary.<br />
2. Open a web browser and attempt to connect to a web site<br />
hosted outside <strong>of</strong> the university (ex. http:// www.google.com,<br />
http://www.yahoo.com, http://www.cnn.com)<br />
3. You will be redirected to a sign-on page. Use your Central Login Service username and password<br />
105
4. Once you login for the first time, you will be asked to review the Network Usage Policy. If you accept the<br />
terms <strong>of</strong> these policies click on the link that says “Yes, I will install the Policy Key and accept the terms and<br />
conditions for Internet Use”. If you chose not to accept the policy, you will not be granted internet access.<br />
5. The policy key will prompt for download action. Select Open with Archive Utility, and click OK.<br />
106
6. When the download is complete, double click on MacPolicyKeyInstaller.zip.<br />
7. The installation will begin. Click Continue.<br />
8. Select Install for all users <strong>of</strong> this computer. Click Continue.<br />
107
9. Leave the installation location as default, click Install to continue.’<br />
10. The installation is now complete. Click Close to continue<br />
108
Getting online: Securewireless<br />
Securewireless is the Internet connection for students, staff and faculty.<br />
The wireless network at the <strong>University</strong> <strong>of</strong> <strong>Cincinnati</strong> consists <strong>of</strong> more than 4000 access points that provide<br />
coverage in all dorm spaces, buildings and green spaces. Security on the wireless network is incorporated<br />
with WPA2 enterprise, which encrypts the data with the Advanced Encryption Standard (AES). Access onto<br />
the wireless network requires authentication with your Central Login Credentials.<br />
Instructions for configuring WPA2 on your wireless begin on page 110 or at http://www.uc.edu/ucit/internet/<br />
oncampus/wireless_instructions_scripts.html.<br />
UC’s main campus is 100%<br />
wireless! That means you<br />
can stay connected in every<br />
building on campus, and even<br />
many green spaces!<br />
Visitors<br />
UC<strong>IT</strong> <strong>of</strong>fers a UCGuest internet<br />
connection for visitors to campus,<br />
such as parents and friends.<br />
But note, students should always<br />
use the Securewireless connection<br />
because it is faster and safer.<br />
Smartphones & Tablets<br />
Instructions for attaching your<br />
smartphones and tablets to<br />
Securewireless and your UConnect<br />
e-mail account are available on our<br />
website.<br />
www.uc.edu/ucit<br />
Wireless Cards<br />
All new external, internal and USB<br />
wireless cards must have WPA2<br />
Enterprise certification. It is also<br />
recommended that all new wireless<br />
cards support a/g/N. Wireless cards<br />
designated b/g/n will only connect<br />
at g speeds on the UC wireless<br />
network due to the physical<br />
limitations <strong>of</strong> the b/g band.<br />
Need help?<br />
Call the Help Desk 556-HELP(4357)<br />
Monday - Friday: 6 a.m. - 9 p.m.<br />
Saturday and Sunday: 8 a.m. - 9<br />
p.m.<br />
Visit ResNet on MainStreet across<br />
from the Tangeman <strong>University</strong><br />
Center (TUC). Hours may vary.<br />
109
Configuring Securewireless for Windows 8<br />
1. Move the mouse to the top right corner <strong>of</strong> your screen to activate the charm bar. Left Click on the<br />
settings button.<br />
2. Click on the networks “Available” icon in the charm bar.<br />
110
3. Securewireless should be displayed in the list <strong>of</strong> Wi-Fi networks. Select Securewireless.<br />
4. Check the “Connect automatically” box. Then select the “Connect” box.<br />
111
5. Enter your Central Login username and password when the<br />
Network Authentication box appears.<br />
6. Click Connect to accept certificate.<br />
7. You are online when “Connected” is displayed next to Securewireless.<br />
112
Configuring Securewireless for Windows 7<br />
113
114
115
116
117
118
119
120
121
Need help?<br />
Call the Help Desk 556-HELP(4357)<br />
Monday - Friday: 6 a.m. - 9 p.m.<br />
Saturday and Sunday: 8 a.m. - 9 p.m.<br />
Visit ResNet on MainStreet across from<br />
the Tangeman <strong>University</strong> Center (TUC).<br />
Hours may vary.<br />
122
Configuring Securewireless for Vista<br />
123
124
125
126
127
128
129
130
131
Configuring Securewireless for the Macintosh<br />
To setup your AirPort or Airport Extreme for use with WPA2.<br />
1. In the menu bar, click on the AirPort icon and choose “Open Internet Connect.”<br />
2. In the menu, select “AirPort” under Configuration. Next click on “Turn AirPort On.”<br />
3. Under Network, choose “Other.”<br />
4. Enter Securewireless and select WPA2 Enterprise. Enter username (6+2) and password (this is the same as<br />
your Central Login username and password). Click “OK” to proceed.<br />
5. If your connection is successful, your AirPort icon in the menu bar will become bold and show the signal<br />
strength (based on how many bars are bold – like this ). Once you have configured this, your computer<br />
should recognize when it is in a wireless area at UC and should automatically connect. If you are in a wireless<br />
areas and can’t connect, turn AirPort <strong>of</strong>f and then on again (through the AirPort Status Icon). This will usually<br />
fix the problem.<br />
132
Configuring Securewireless for Linux<br />
Before beginning, please note that this was tested on a laptop with Ubuntu 7.04 with Atheros chipset.<br />
Please make sure your flavor <strong>of</strong> Linux and wireless chipset will run WPA2-Enterprise. After any necessary<br />
changes are made to your machine, click the “Network Manager” icon in the upper right-hand corner <strong>of</strong> the<br />
window (by default) and the following drop down menu appears. Select “Securewireless” and the Wireless<br />
Network Key Required window will appear.<br />
In the dropdown boxes listed, please select the following. Where it states enter<br />
username (6+2) and password (this is the same as your Central Login username and password). Once done,<br />
click the Login to Network button and you will be connected.<br />
133