

Instructions - Classic Auto Air
Instructions - Classic Auto Air
Instructions - Classic Auto Air

Create successful ePaper yourself
Turn your PDF publications into a flip-book with our unique Google optimized e-Paper software.
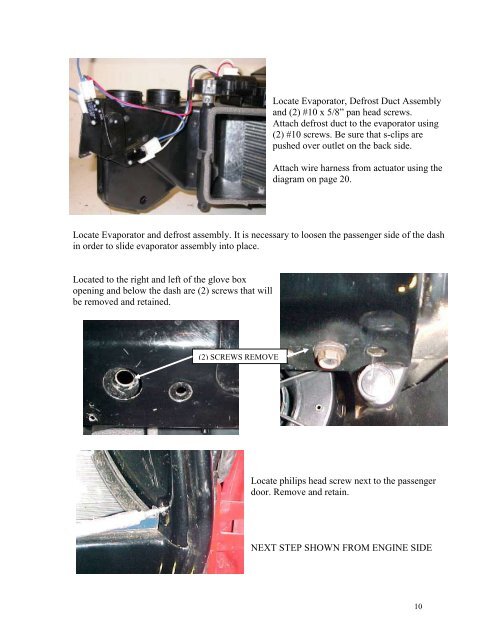
Locate Evaporator, Defrost Duct Assembly<br />
and (2) #10 x 5/8” pan head screws.<br />
Attach defrost duct to the evaporator using<br />
(2) #10 screws. Be sure that s-clips are<br />
pushed over outlet on the back side.<br />
Attach wire harness from actuator using the<br />
diagram on page 20.<br />
Locate Evaporator and defrost assembly. It is necessary to loosen the passenger side of the dash<br />
in order to slide evaporator assembly into place.<br />
Located to the right and left of the glove box<br />
opening and below the dash are (2) screws that will<br />
be removed and retained.<br />
(2) SCREWS REMOVE<br />
Locate philips head screw next to the passenger<br />
door. Remove and retain.<br />
NEXT STEP SHOWN FROM ENGINE SIDE<br />
10


