

Instructions - Classic Auto Air
Instructions - Classic Auto Air
Instructions - Classic Auto Air

Create successful ePaper yourself
Turn your PDF publications into a flip-book with our unique Google optimized e-Paper software.
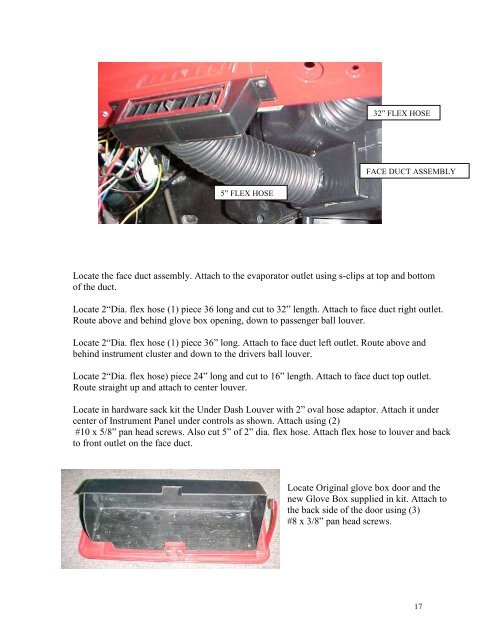
32” FLEX HOSE<br />
FACE DUCT ASSEMBLY<br />
5” FLEX HOSE<br />
Locate the face duct assembly. Attach to the evaporator outlet using s-clips at top and bottom<br />
of the duct.<br />
Locate 2“Dia. flex hose (1) piece 36 long and cut to 32” length. Attach to face duct right outlet.<br />
Route above and behind glove box opening, down to passenger ball louver.<br />
Locate 2“Dia. flex hose (1) piece 36” long. Attach to face duct left outlet. Route above and<br />
behind instrument cluster and down to the drivers ball louver.<br />
Locate 2“Dia. flex hose) piece 24” long and cut to 16” length. Attach to face duct top outlet.<br />
Route straight up and attach to center louver.<br />
Locate in hardware sack kit the Under Dash Louver with 2” oval hose adaptor. Attach it under<br />
center of Instrument Panel under controls as shown. Attach using (2)<br />
#10 x 5/8” pan head screws. Also cut 5” of 2” dia. flex hose. Attach flex hose to louver and back<br />
to front outlet on the face duct.<br />
Locate Original glove box door and the<br />
new Glove Box supplied in kit. Attach to<br />
the back side of the door using (3)<br />
#8 x 3/8” pan head screws.<br />
17


