

Instructions - Classic Auto Air
Instructions - Classic Auto Air
Instructions - Classic Auto Air

You also want an ePaper? Increase the reach of your titles
YUMPU automatically turns print PDFs into web optimized ePapers that Google loves.
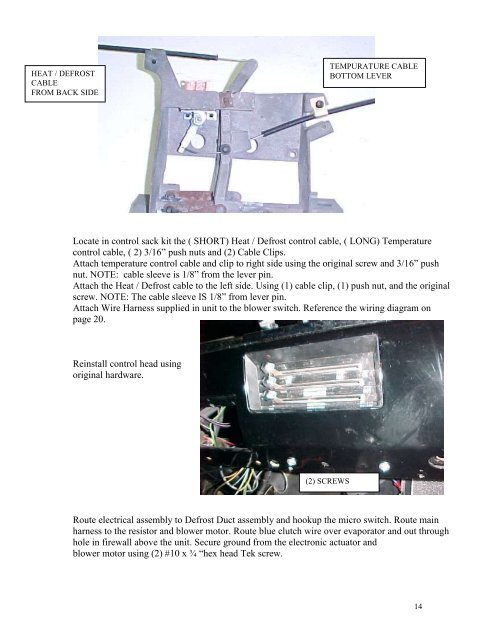
HEAT / DEFROST<br />
CABLE<br />
FROM BACK SIDE<br />
TEMPURATURE CABLE<br />
BOTTOM LEVER<br />
Locate in control sack kit the ( SHORT) Heat / Defrost control cable, ( LONG) Temperature<br />
control cable, ( 2) 3/16” push nuts and (2) Cable Clips.<br />
Attach temperature control cable and clip to right side using the original screw and 3/16” push<br />
nut. NOTE: cable sleeve is 1/8” from the lever pin.<br />
Attach the Heat / Defrost cable to the left side. Using (1) cable clip, (1) push nut, and the original<br />
screw. NOTE: The cable sleeve IS 1/8” from lever pin.<br />
Attach Wire Harness supplied in unit to the blower switch. Reference the wiring diagram on<br />
page 20.<br />
Reinstall control head using<br />
original hardware.<br />
(2) SCREWS<br />
Route electrical assembly to Defrost Duct assembly and hookup the micro switch. Route main<br />
harness to the resistor and blower motor. Route blue clutch wire over evaporator and out through<br />
hole in firewall above the unit. Secure ground from the electronic actuator and<br />
blower motor using (2) #10 x ¾ “hex head Tek screw.<br />
14


