Technical Service Manual PM2300 Series Liquid Oxygen Reservoir
Technical Service Manual PM2300 Series Liquid Oxygen Reservoir
Technical Service Manual PM2300 Series Liquid Oxygen Reservoir

You also want an ePaper? Increase the reach of your titles
YUMPU automatically turns print PDFs into web optimized ePapers that Google loves.
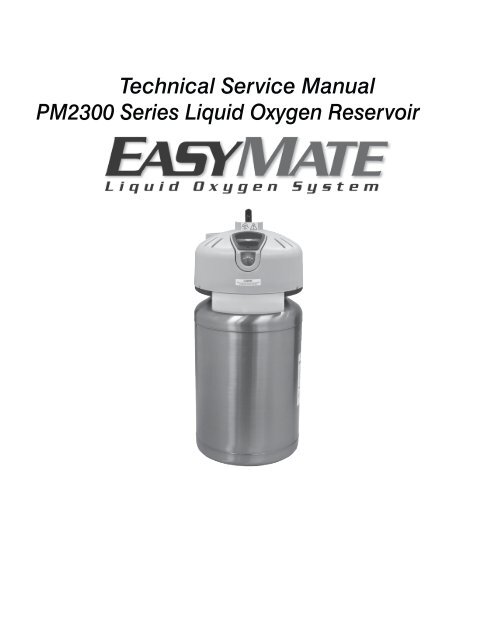
<strong>Technical</strong> <strong>Service</strong> <strong>Manual</strong><br />
<strong>PM2300</strong> <strong>Series</strong> <strong>Liquid</strong> <strong>Oxygen</strong> <strong>Reservoir</strong>
Contents<br />
Preface............................................................................................................................................2<br />
Definition of terms.....................................................................................................................2<br />
Safety information - Warnings and cautions...................................................................2<br />
1.0 Theory of Operation...........................................................................................................3<br />
2.0 Warnings and cautions......................................................................................................3<br />
3.0 Product Specifications.....................................................................................................6<br />
4.0 <strong>Service</strong> Tools Equipment Requirements.....................................................................7<br />
5.0 easymate <strong>Reservoir</strong> Fill Procedure..............................................................................8<br />
6.0 Troubleshooting...............................................................................................................12<br />
7.0 Removal, disassembly, assembly, Installation & replacement Instructions..... 13<br />
7.1 LOX Level Indicator Panel Removal & Installation for one (1) piece Shroud............................................ 13<br />
7.2 Battery Replacement................................................................................................................14<br />
7.3 PC Board Removal & Installation.............................................................................................15<br />
7.4 Shroud removal & installation..................................................................................................16<br />
7.1a LOX Level Indicator Panel Removal & Installation for two (2) piece Shroud ........................................19<br />
7.2a Battery Replacement for two (2) piece shroud......................................................................20<br />
7.3a PC Board Removal & Installation for two (2) piece shroud...................................................21<br />
7.4a Shroud removal & installation for two (2) piece shroud ......................................................22<br />
7.5 Fill Connector removal, disassembly, reassembly & installation......................................................25<br />
7.6 Pressure Relief Valve removal & installation............................................................................27<br />
7.7 Warming Coil removal & installation........................................................................................29<br />
7.8 VTF Valve removal & installation..............................................................................................31<br />
7.9 Economizer Valve removal, test & installation.........................................................................32<br />
7.10 Manifold Assembly removal, disassembly, reassembly & installation...................................37<br />
7.11 Handle Ring removal & installation.........................................................................................48<br />
8.0 Operation Verification Procedure.......................................................................................... 52<br />
Economizer Valve Assembly P/N 504985........................................................................................56<br />
One (1) piece Shroud Assembly......................................................................................................57<br />
Two (2) piece Shroud Assembly......................................................................................................58<br />
<strong>PM2300</strong> <strong>Series</strong> <strong>Liquid</strong> <strong>Oxygen</strong> <strong>Reservoir</strong><br />
<strong>Technical</strong> <strong>Service</strong> <strong>Manual</strong><br />
1
Preface<br />
Customer <strong>Service</strong> / Tech Support<br />
Phone<br />
Phone<br />
Fax<br />
Fax<br />
Web www.XXXXXXXXXXXXX.com<br />
This manual is intended to guide and help a qualified service technician in the safe handling, service,<br />
repair and calibration of the EasyMate <strong>PM2300</strong> <strong>Series</strong> <strong>Liquid</strong> <strong>Oxygen</strong> <strong>Reservoir</strong>. A qualified service<br />
technician should be trained in the safe handling of liquid oxygen and understand its inherent<br />
dangers. All qualified technicians should have completed the XXXXXXXXXXXXX EasyMate <strong>Series</strong><br />
<strong>Liquid</strong> <strong>Oxygen</strong> System <strong>Technical</strong> <strong>Service</strong> Training Program. It is recommended that only facilities<br />
with individuals who have completed this program service the EasyMate <strong>Reservoir</strong>.<br />
DO NOT attempt to use or perform any service function on the EasyMate <strong>PM2300</strong><br />
<strong>Series</strong> <strong>Liquid</strong> <strong>Oxygen</strong> <strong>Reservoir</strong> unless you have read and understand this manual<br />
as well as the User <strong>Manual</strong>.<br />
Prior to servicing (or packaging and shipping the <strong>PM2300</strong> <strong>Series</strong> <strong>Liquid</strong> <strong>Oxygen</strong> <strong>Reservoir</strong> for service)<br />
all oxygen must be depleted.<br />
To deplete oxygen from the <strong>PM2300</strong> <strong>Series</strong> <strong>Liquid</strong> <strong>Oxygen</strong> <strong>Reservoir</strong>, attach a flowmeter to the<br />
oxygen outlet and set to 6 LPM and allow it to flow until the EasyMate <strong>Reservoir</strong> is completely empty<br />
as indicated by the cessation of flow and the lack of head pressure.<br />
Place in a well ventilated area away from sources of ignition when allowing to deplete.<br />
Definition of terms<br />
LOX <strong>Liquid</strong> <strong>Oxygen</strong><br />
GOX Gaseous <strong>Oxygen</strong><br />
NER Normal Evaporation Rate<br />
VTF Vent-To-Fill<br />
OVP Operation Verification Procedure<br />
Safety information - Warnings and cautions<br />
DANGER<br />
WARNING<br />
CAUTION<br />
Indicates an imminently hazardous situation which, if not avoided, will result in<br />
death or serious injury.<br />
Indicates a potentially hazardous situation which, if not avoided, could result in<br />
death or serious injury.<br />
Indicates a potentially hazardous situation which, if not avoided, may result in<br />
minor or moderate injury.<br />
Symbol indicates the device complies with the requirements of Directive 93/42/EEC<br />
concerning medical devices and all applicable International Standards.<br />
(On CE marked Devices ONLY)<br />
<strong>PM2300</strong> <strong>Series</strong> <strong>Liquid</strong> <strong>Oxygen</strong> <strong>Reservoir</strong><br />
<strong>Technical</strong> <strong>Service</strong> <strong>Manual</strong><br />
2
1.0 Theory of Operation<br />
The EasyMate <strong>Reservoir</strong> is intended to provide supplemental oxygen to the long term oxygen<br />
patient up to 24 hours per day in an efficient easy to use package utilizing XXXXXXXXXXXXX’s<br />
unique thermal liquid level sensor system.<br />
When used in conjunction with the EasyMate PM2200 <strong>Liquid</strong> <strong>Oxygen</strong> Portable the EasyMate<br />
<strong>PM2300</strong> <strong>Liquid</strong> <strong>Oxygen</strong> <strong>Reservoir</strong> provides the most efficient, reliable and state of the art<br />
ambulatory LOX system available.<br />
While at home, the patient can receive continuous flow oxygen from the EasyMate <strong>Reservoir</strong> via<br />
a Flowmeter (P/N 1MFA1863) or a Dial Flowmeter (P/N <strong>PM2300</strong>FCV) or by filling (as per the user<br />
manual) their portable LOX unit (EasyMate Portable PM2200 <strong>Series</strong>) and ambulate in or away<br />
from their home without having to connect to the EasyMate <strong>Reservoir</strong>.<br />
<strong>Liquid</strong> oxygen stored in the EasyMate <strong>Reservoir</strong> is typically saturated and boiling at a temperature<br />
somewhere between about -277°F (-172°C) and -265°F (-165°C). The constant transfer of heat<br />
from the atmosphere into the EasyMate <strong>Reservoir</strong> keeps the liquid oxygen boiling and vaporizing<br />
into gas. If the heat energy transferring into the liquid oxygen is not controlled, vaporization<br />
occurs too rapidly, and excess oxygen is vented to the atmosphere and wasted. The cryogenic<br />
container is designed to minimize the transfer of heat from the atmosphere to the liquid oxygen<br />
contents. This is done by slowing the transfer of heat energy.<br />
Gaseous oxygen is produced in two ways within the EasyMate <strong>Reservoir</strong>. First by the normal<br />
evaporation rate boiling off the LOX and generating head pressure, until relief valve pressure is<br />
reached, where it vents off to the atmosphere. Secondly, by vaporization within the warming coil<br />
by allowing LOX to be pushed up the capillary tube and into the warming coil. This is controlled<br />
by the economizer valve.<br />
When filling a portable the head pressure pushes the LOX up the withdrawal/fill tube and out the<br />
fill connector when its VTF Valve is opened.<br />
When not in use the EasyMate <strong>Reservoir</strong> will eventually empty by venting off gaseous oxygen to<br />
the atmosphere continuously at a rate equal to the containers NER value, about 1.35 lbs. per day.<br />
2.0 Warnings and cautions<br />
WARNING<br />
This equipment is not intended for use by patients who would suffer immediate, permanent,<br />
or serious health consequences as a result of an interruption in the oxygen supply.<br />
• DO NOT smoke in an area where oxygen is being used or stored.<br />
• DO NOT disassemble or repair the EasyMate <strong>Reservoir</strong>, this could create a hazardous condition<br />
or cause equipment failure. If you have problems, questions, or are unsure if equipment is<br />
operating properly, call your <strong>Liquid</strong> <strong>Oxygen</strong> Supplier.<br />
• DO NOT use if dirt or contaminants are present on or around fill connectors on the Portable<br />
or EasyMate <strong>Reservoir</strong>.<br />
• DO NOT use oils, greases, lubricants or any combustible materials on or near the EasyMate<br />
<strong>Reservoir</strong>. Wash hands properly prior to usage.<br />
• DO NOT touch liquid oxygen or parts that have been in contact with liquid oxygen. <strong>Liquid</strong> oxygen<br />
is extremely cold (-297°F/-183 °C). When touched, liquid oxygen, or parts of the equipment that<br />
have been carrying liquid oxygen, can freeze skin and body tissue. Fill the EasyMate <strong>Reservoir</strong><br />
with only Medical Grade <strong>Liquid</strong> <strong>Oxygen</strong>. (USP applies only in the United States)<br />
<strong>PM2300</strong> <strong>Series</strong> <strong>Liquid</strong> <strong>Oxygen</strong> <strong>Reservoir</strong><br />
<strong>Technical</strong> <strong>Service</strong> <strong>Manual</strong><br />
3
WARNING<br />
• DO NOT point discharging oxygen toward anyone or toward any flammable material.<br />
• DO NOT attempt to adjust the pressure setting of the pressure relief valve; it has been<br />
pre-set at the factory.<br />
Keep equipment in a well-ventilated area at all times. The EasyMate <strong>Reservoir</strong> periodically<br />
releases small amounts of oxygen gas that must be ventilated to prevent buildup.<br />
• DO NOT store liquid oxygen equipment in a closet, car / trunk, or other confined area.<br />
• DO NOT place blankets, draperies, or other fabrics over equipment.<br />
TO AVOID INCREASED RISK OF FIRE<br />
• Keep the EasyMate <strong>Reservoir</strong> away from electrical appliances. Use and store the EasyMate<br />
<strong>Reservoir</strong> at least five feet from electrical appliances that may cause heat or sparks.<br />
• DO NOT use near any type of flame or flammable/explosive substances. Use and store<br />
EasyMate <strong>Reservoir</strong> at least five (5) feet away from equipment such as furnaces, water<br />
heaters, and stoves that may contain open flames.<br />
EXTREME COLD HAZARD<br />
• Extreme cold hazard. <strong>Liquid</strong> oxygen discharge from the Fill Connector can occur. When<br />
disconnecting the transfer line, never stand directly over the EasyMate <strong>Reservoir</strong> Fill Connector.<br />
If the EasyMate <strong>Reservoir</strong> Fill Connector stays open and minor liquid oxygen discharge<br />
occurs, carefully engage and disengage the transfer line to help dislodge any ice or other<br />
obstruction. If major liquid oxygen discharge (steady stream) occurs, open the VTF Valve (if<br />
safely possible) to vent pressure and stop the release of liquid oxygen. Open windows and<br />
doors to ventilate the room and do not walk on areas exposed to liquid oxygen for 60 minutes<br />
after frost disappears.<br />
• DO NOT press or move the plastic poppet in the center of the fill connector on the<br />
EasyMate <strong>Reservoir</strong>. This will cause a release of liquid oxygen from the fill connector.<br />
• DO NOT leave the <strong>Liquid</strong> <strong>Oxygen</strong> System unattended during the filling operation.<br />
FIRE HAZARD<br />
• Fire hazard. <strong>Liquid</strong> oxygen spilled on asphalt or any other combustible surface will<br />
increase the possibility of fire if an ignition source is present. ALWAYS fill the unit on a<br />
noncombustible surface, such as concrete or a steel drip pan.<br />
• Fire hazard. <strong>Liquid</strong> oxygen spillage will occur if the EasyMate <strong>Reservoir</strong> is tipped over.<br />
Before transporting, secure the EasyMate <strong>Reservoir</strong> containing liquid oxygen in an upright position.<br />
• Fire hazard. <strong>Oxygen</strong> can accumulate in a delivery vehicle. Exhaust vent gases to outside of<br />
vehicle.<br />
CAUTION<br />
• Only individuals instructed and trained in its use should operate this device.<br />
• This device contains magnetic, ferrous material that may affect the results of an MRI.<br />
• Only use oxygen safe liquid leak detector to test for leaks.<br />
• DO NOT autoclave.<br />
• DO NOT gas sterilize.<br />
• DO NOT clean with aromatic hydrocarbons.<br />
• DO NOT immerse device in any kind of liquid.<br />
• Store device in a clean well ventilated area when not in use.<br />
• Avoid tipping the EasyMate <strong>Reservoir</strong> over or placing it in a position where it could be<br />
knocked over and become damaged.<br />
<strong>PM2300</strong> <strong>Series</strong> <strong>Liquid</strong> <strong>Oxygen</strong> <strong>Reservoir</strong><br />
<strong>Technical</strong> <strong>Service</strong> <strong>Manual</strong><br />
4
Safety Facts<br />
Fire Safety<br />
The possibility of fire exists when the combination of a fuel, source of ignition, and oxygen is<br />
present, reference Figure 1. High concentrations of oxygen (air is approximately 21% oxygen)<br />
greatly enhance the possibility of combustion.<br />
• Obtain all replacement parts for medical oxygen equipment from the manufacturer.<br />
• Before servicing, clean all tools that come into contact with the oxygen system.<br />
• Use only recommended oxygen compatible cleaning and leak detection products.<br />
• Keep the EasyMate <strong>Reservoir</strong> upright at all times. Secure liquid oxygen equipment when<br />
transporting to prevent accidental tip over and spillage.<br />
• If a liquid oxygen spill occurs indoors, open doors and windows to ventilate the area. Avoid<br />
sources of ignition and do not walk on or roll equipment over the affected area.<br />
• Any clothing or porous material that is splashed with liquid oxygen or otherwise absorbs<br />
high concentrations of oxygen should be removed and aired for at least one hour away from<br />
any source of ignition.<br />
OXYGEN SOURCE<br />
Approximately 16% required<br />
for combustion.<br />
Normal air contains 21% oxygen.<br />
Some fuel materials contain<br />
sufficient oxygen within their<br />
make-up to support burning.<br />
OXYGEN<br />
FUEL<br />
HEAT<br />
IGNITION SOURCE<br />
Open flame - the sun<br />
Hot surfaces<br />
Sparks and arcs<br />
Friction - chemical action<br />
Electrical energy<br />
Compression of gases<br />
GASES<br />
Propane<br />
Butane<br />
Hydrogen<br />
Acetylene<br />
Carbon Monoxide Others<br />
Natural Gas<br />
LIQUIDS<br />
Gasoline Kerosene<br />
Turpentine Alcohol<br />
Paint Cod Liver Oil<br />
Varnish Lacquer<br />
Lotions Olive Oil<br />
Creams Others<br />
SOLIDS<br />
Coal Plastic<br />
Wood Sugar<br />
Paper Grain<br />
Cloth Hay<br />
Wax Cork<br />
Grease Others<br />
Figure 1, Combustion Triangle<br />
Explosion Safety<br />
• <strong>Liquid</strong> oxygen at atmospheric pressure expands at a ratio of approximately 860:1 (at 0 psig)<br />
when vaporizing into a gas, reference Figure 2. This can occur very rapidly when exposed to<br />
the heat in the atmosphere.<br />
• Ensure that the specified pressure relief devices are present and functioning properly in any<br />
device that will contain liquid oxygen. This includes transfer hose assemblies.<br />
<strong>PM2300</strong> <strong>Series</strong> <strong>Liquid</strong> <strong>Oxygen</strong> <strong>Reservoir</strong><br />
<strong>Technical</strong> <strong>Service</strong> <strong>Manual</strong><br />
Figure 2, LOX Expansion Ratio<br />
5
3.0 Product Specifications<br />
Model <strong>Series</strong><br />
Models<br />
Dimensions, Weights and Capacities<br />
<strong>PM2300</strong> <strong>Series</strong> <strong>Liquid</strong> <strong>Oxygen</strong> <strong>Reservoir</strong> “EasyMate”<br />
PM2335-0, PM2335-0CE, PM2345-0, PM2345-0CE<br />
(With Puritan-Bennett Fill Connector)<br />
Model PM2335 series, (35 Liter)<br />
LOX Capacity<br />
35 liters<br />
LOX Capacity<br />
88.1 lbs (40 kg)<br />
Gaseous equivalent<br />
30,100 liters<br />
Maximum Operating Pressure 23 psig (1.59 bar)<br />
Weight Empty<br />
44.7 lbs (20.3 kg)<br />
Weight Full<br />
132.8 lbs (60.2 kg)<br />
Shipping weight<br />
57.5 lbs (26.1 kg)<br />
Height 30 1 /4” (76.84 cm)<br />
Diameter 16” (40.6 cm)<br />
Model PM2345 series, (45 Liter)<br />
LOX Capacity<br />
45 liters<br />
LOX Capacity<br />
113.3 lbs (51 kg)<br />
Gaseous equivalent<br />
38,700 liters<br />
Maximum Operating Pressure 23 psig (1.59 bar)<br />
Weight Empty<br />
50.7 lbs (23 kg)<br />
Weight Full 164 lbs (74.4 kg)<br />
Shipping weight<br />
63.2 lbs (28.7 kg)<br />
Height 33 5 /8” (86.41 cm)<br />
Diameter 16” (40.6 cm)<br />
Operating Conditions<br />
Operating Temperature Range 0°F to 104°F (-17.7°C to 40°C)<br />
Storage Temperature Range<br />
-40°F to 158°F (-40°C to 70°C)<br />
Humidity<br />
95% Noncondensing<br />
Altitude<br />
uP TO 10,000 ft (3,048 meters)<br />
System Operating Specifications<br />
LOX Level Indicator Battery<br />
LOX Level Indicator<br />
Outlet Fitting Type<br />
<strong>Oxygen</strong> DISS Outlet Connection<br />
Maximum usable Flow<br />
NER<br />
Nominal Operating Pressure<br />
9 volt (Approx. life, 1 year)<br />
thermal sensor with LED Display<br />
oxygen Male DISS with demand check<br />
Restricted to a maximum flow of 8 lpm ±1 lpm<br />
directly from outlet fitting.<br />
6 LPM<br />
1.5 lbs/day NEW (0.68 kg/day)<br />
18 – 23 psi (1.24 – 1.59 bar)<br />
<strong>PM2300</strong> <strong>Series</strong> <strong>Liquid</strong> <strong>Oxygen</strong> <strong>Reservoir</strong><br />
<strong>Technical</strong> <strong>Service</strong> <strong>Manual</strong><br />
6
4.0 <strong>Service</strong> Tools Equipment Requirements<br />
Hand Tools: • #1 Phillips screw driver<br />
• #2 Phillips screw driver<br />
• 7/16 socket with 4” extension and ratchet handle<br />
• 1/2”, 9/16”, 5/8”, 3/4”, 7/8” and 1” combination wrenches<br />
• 5/32” hex key wrench (Allen)<br />
• Internal Snap Ring Pliers<br />
• Wire cutters<br />
• Dental pick or small Awl<br />
• 7/8” Flat open end wrench (P/N 504715)<br />
• VTF Valve Key (P/N 505400)<br />
• EasyMate <strong>Reservoir</strong> User <strong>Manual</strong> (P/N 505129)<br />
Supplies: • Loctite® 222MS or equivalent low strength thread locking compound<br />
• Alcohol for cleaning<br />
• <strong>Oxygen</strong> safe liquid leak detector<br />
Test Equipment: • Pressure test assembly (P/N 505646), reference Figure 3<br />
• LOX EasyMate <strong>Reservoir</strong> Pressurization Assembly (P/N 505650),<br />
reference Figure 4<br />
• Liter Meter kit, 0 – 8 LPM (P/N 505652), reference Figure 5<br />
• Economizer Valve Test kit (P/N 505651), reference Figure 6<br />
Figure 3 Figure 4<br />
<strong>PM2300</strong> <strong>Series</strong> <strong>Liquid</strong> <strong>Oxygen</strong> <strong>Reservoir</strong><br />
<strong>Technical</strong> <strong>Service</strong> <strong>Manual</strong><br />
Figure 5 figure 6<br />
7
5.0 easymate <strong>Reservoir</strong> Fill Procedure<br />
5.1 <strong>Liquid</strong> oxygen source requirements<br />
Refer to all applicable governing standards for the handling, storing, transport and filling of liquid<br />
oxygen.<br />
This fill procedure will help in the safe and efficient fill of the EasyMate <strong>Reservoir</strong>.<br />
The EasyMate <strong>Reservoir</strong> must only be filled with Medical Grade <strong>Liquid</strong> <strong>Oxygen</strong>. The saturation<br />
pressure should be a minimum of 23 psig (1.59 bar) to ensure proper operation and prevent<br />
any delay in use. In order to achieve the saturation pressure of the EasyMate <strong>Reservoir</strong>, the<br />
saturation pressure of the LOX fill source must be considered. The fill source saturation pressure<br />
requirement depends on the type of filling technique used. The most common technique<br />
“Standard Fill” uses a fill source with a saturation pressure of 40 - 50 psig (2.76 - 3.45 bar). The<br />
less common technique is the “Fast Fill” that requires a LOX saturation pressure of 20 - 22 psig<br />
(1.38 - 1.52 bar). In this case, the fill source must have a pressure building system, so that head<br />
pressure in the fill source can be raised in order to transfer the LOX into the EasyMate <strong>Reservoir</strong>.<br />
5.2 Required Equipment<br />
<strong>Liquid</strong> <strong>Oxygen</strong> source<br />
<strong>Liquid</strong> oxygen transfer line<br />
VTF Key (P/N 505400), reference Figure 7.<br />
Pressure gauge, fill monitoring (P/N 505648) or Pressure test assembly ( P/N 505646) or<br />
equivalent, reference Figure 8.<br />
Figure 7<br />
Figure 8<br />
<strong>PM2300</strong> <strong>Series</strong> <strong>Liquid</strong> <strong>Oxygen</strong> <strong>Reservoir</strong><br />
<strong>Technical</strong> <strong>Service</strong> <strong>Manual</strong><br />
8
EasyMate <strong>Reservoir</strong> Fill Procedure (continued)<br />
5.3 Pre-Fill Inspection<br />
Perform the following visual inspection procedure of the EasyMate <strong>Reservoir</strong> and determine its<br />
operational status before filling. Correct any problems before filling the EasyMate <strong>Reservoir</strong>.<br />
5.3.1 Ask the patient (where applicable) if there are any questions or concerns regarding the<br />
equipment since the last fill.<br />
5.3.2 Visually inspect the EasyMate <strong>Reservoir</strong> for overall product integrity (for example,<br />
damaged or missing components).<br />
5.3.3 Verify that all labels are present and legible on the unit, reference Figure 9, for CE Models 9a & 9b.<br />
5.3.4 Verify that no frost or heavy condensation is present on the container below the shroud and that<br />
there is no excessive venting from the relief valve. (Some venting from the relief valve is normal.)<br />
5.3.5 Verify that the liquid oxygen content level is consistent with the delivery schedule and<br />
expected patient usage.<br />
NOTE: A flashing bottom light for a half second “ON” and a half second “OFF” for eight (8)<br />
second duration, indicates the battery needs to be replaced.<br />
5.3.6 Verify that the fill connector is not worn, leaking, or damaged.<br />
5.3.7 Verify that the slots on the VTF Valve are not bent or broken.<br />
5.3.8 Verify that the Condensation Collection Container is in place and empty.<br />
Fill Connector Label<br />
Serial Number (SN) Label<br />
location is on the Container<br />
opposite the Condensation<br />
Collection Container<br />
LOX Level Label<br />
<strong>Oxygen</strong> Outlet<br />
Fitting Label<br />
Warning & Data Label<br />
Flowmeter<br />
Label<br />
Fill Connector Label<br />
Figure 9<br />
LOX Level Label<br />
<strong>Oxygen</strong> Outlet<br />
Fitting Label<br />
Flowmeter Label<br />
LOX Label<br />
CE Label<br />
Warning & Data<br />
Label<br />
<strong>PM2300</strong> <strong>Series</strong> <strong>Liquid</strong> <strong>Oxygen</strong> <strong>Reservoir</strong><br />
<strong>Technical</strong> <strong>Service</strong> <strong>Manual</strong><br />
Figure 9a<br />
9<br />
Figure 9b
5.4 Fill Procedure<br />
<strong>PM2300</strong> <strong>Series</strong> <strong>Liquid</strong> <strong>Oxygen</strong> <strong>Reservoir</strong><br />
<strong>Technical</strong> <strong>Service</strong> <strong>Manual</strong><br />
DANGER<br />
Explosive hazard. Extreme high pressure can rupture a transfer line. Make sure the<br />
specified pressure relief valve is present, in the proper location, and functioning properly on<br />
the transfer line assembly.<br />
WARNING<br />
• Fire hazard. <strong>Liquid</strong> oxygen spilled on asphalt or any other combustible surface will<br />
increase the possibility of fire if an ignition source is present. Always fill the unit on a<br />
noncombustible surface, such as concrete or a steel drip pan.<br />
• Explosive hazard. Extreme high pressure can rupture a transfer line. Make sure the<br />
specified pressure relief valve is present, in the proper location, and functioning properly on<br />
the transfer line assembly.<br />
• Fire hazard. <strong>Liquid</strong> oxygen spillage will occur if the EasyMate <strong>Reservoir</strong> is tipped over. Before<br />
transporting, secure EasyMate <strong>Reservoir</strong> units containing liquid oxygen in an upright position.<br />
• Fire hazard. <strong>Oxygen</strong> can accumulate in a delivery vehicle. Exhaust vent gases to outside of<br />
vehicle. (See CGA Safety Bulletin SB-9.)<br />
5.4.1 Wear proper protective clothing during the fill process.<br />
5.4.2 For the fill method being used, verify the proper saturation pressure of the fill source per<br />
section 5.1.<br />
5.4.3 Attach one end of the transfer line source adapter to the liquid withdrawal valve of the<br />
source tank. Position the source adapter relief valve straight up.<br />
5.4.4 Attach a 0 – 30 psig (0 – 2.07 bar) fill pressure gauge (P/N 505648 or equivalent) to the EasyMate<br />
<strong>Reservoir</strong> <strong>Oxygen</strong> Outlet Fitting. If the EasyMate <strong>Reservoir</strong> contains some liquid oxygen, verify that<br />
the EasyMate <strong>Reservoir</strong> pressure gauge reads in the range of 19 – 22 psig (1.31 – 1.52 bar). If the<br />
pressure reading exceeds 25 psig (1.72 bar), service is required DO NOT fill the EasyMate <strong>Reservoir</strong>.<br />
5.4.5 Remove the fill connector cover from the fill connector, if present.<br />
5.4.6 Check the fill connectors on both the EasyMate <strong>Reservoir</strong> and the fill adapter to ensure<br />
that they are clean and dry. Wipe the connectors with a clean, lint-free cloth or blow-dry<br />
with gaseous oxygen or nitrogen as needed.<br />
5.4.7 Using the VTF Key (P/N 505400), open the VTF Valve on the EasyMate <strong>Reservoir</strong> by<br />
rotating the tool a 1/4 counterclockwise.<br />
NOTE: At this point you may hear a venting noise if the EasyMate <strong>Reservoir</strong> unit is pressurized.<br />
5.4.8 Engage the transfer line to the fill connector on the EasyMate <strong>Reservoir</strong> by aligning the fill<br />
connector on the transfer line directly over the fill connector on the EasyMate <strong>Reservoir</strong>.<br />
Apply downward force.<br />
5.4.9 Maintain a downward force on the transfer line fill adapter while slowly opening the liquid valve<br />
on the source tank. At this point a vigorous audible venting noise will confirm that the filling<br />
process has begun. Adjust the source tank liquid valve as needed to maintain the pressure<br />
on the gauge at 19 – 21 psig (1.31 – 1.45 bar) during the fill.<br />
NOTE: It may be necessary to open the source tank liquid valve completely and partially close<br />
the EasyMate <strong>Reservoir</strong> VTF Valve to maintain the proper pressure throughout the fill.<br />
5.4.10 Close and reopen the VTF Valve on the <strong>Reservoir</strong> after 45 to 60 seconds have passed. This<br />
will minimize the possibility of the VTF Valve freezing in the open position.<br />
NOTE: As the level of liquid oxygen nears the top of the <strong>Reservoir</strong> inner container, the sound<br />
and appearance of vapors escaping through the VTF Valve will change. The vapor<br />
will become denser, and as liquid oxygen reaches the VTF Valve, a discharge of liquid<br />
oxygen will be visible and audible.<br />
10
WARNING<br />
Extreme cold hazard. <strong>Liquid</strong> oxygen discharge from the fill connector can occur. When<br />
disconnecting the transfer line, never stand directly over the EasyMate <strong>Reservoir</strong> fill connector.<br />
If the EasyMate <strong>Reservoir</strong> fill connector stays open and minor liquid oxygen discharge occurs,<br />
carefully engage and disengage the transfer line to help dislodge any ice or other obstruction.<br />
If major liquid oxygen discharge (steady stream) occurs, open the VTF Valve (if safely possible)<br />
to vent pressure and stop the release of liquid oxygen. Open windows and doors to ventilate the<br />
room and do not walk on areas exposed to liquid oxygen for 60 minutes after frost disappears.<br />
5.4.11 When you observe the first steady discharge (greater than 1 second) of liquid oxygen from<br />
the VTF Valve, close the VTF Valve and disconnect the transfer line from the EasyMate<br />
<strong>Reservoir</strong> by lifting the fill adapter straight up. If the transfer line will not disengage close<br />
the liquid valve on the source tank and allow the transfer line and fill connectors to thaw.<br />
CAUTION<br />
If the VTF Valve freezes in the open position, terminate the fill by disconnecting the transfer line<br />
and then allow the VTF Valve to warm until it closes easily. If the VTF Valve remains open for a<br />
period of time, the liquid oxygen in the unit will desaturate to a pressure lower than required.<br />
5.4.12 Close the source tank liquid valve when the frost melts from the transfer line assembly.<br />
5.4.13 Replace the fill connector cover, if present, on the EasyMate <strong>Reservoir</strong>. Close the source<br />
tank liquid valve when the frost melts from the transfer line assembly.<br />
5.5 Post-Fill Inspection<br />
Perform the following procedure to inspect the EasyMate <strong>Reservoir</strong> and determine its operational<br />
status after filling it with liquid oxygen. Correct observed problems before placing the unit in service.<br />
5.5.1 Verify that the EasyMate <strong>Reservoir</strong> fill connector is closed and not leaking.<br />
5.5.2 Verify that the VTF Valve is completely closed and not leaking.<br />
5.5.3 Verify that the fill pressure gauge attached to the EasyMate <strong>Reservoir</strong> <strong>Oxygen</strong> Outlet Fitting<br />
reads at least 20 psig (1.38 bar) within five minutes after terminating the fill.<br />
5.5.4 Verify that there is no frost or heavy condensation on the container below the shroud.<br />
5.5.5 Verify that all lights are illuminated when the contents indicator button is activated.<br />
5.5.6 Disconnect the pressure gauge from the EasyMate <strong>Reservoir</strong> <strong>Oxygen</strong> Outlet Fitting.<br />
5.6 Checking Saturation Pressure<br />
Perform the following procedure as needed to determine the saturation pressure of the liquid<br />
oxygen in the EasyMate <strong>Reservoir</strong> unit.<br />
5.6.1 Attach a 0 – 30 psig (0 – 2.07 bar) fill pressure gauge (P/N 505648 or equivalent) to the<br />
EasyMate <strong>Reservoir</strong> <strong>Oxygen</strong> Outlet Fitting. Note the pressure indicated on the gauge.<br />
5.6.2 Momentarily open the VTF Valve on the EasyMate <strong>Reservoir</strong> and observe the pressure<br />
gauge pointer as it drops.<br />
5.6.3 Note the pressure value where the gauge pointer drops the lowest and then close the VTF Valve.<br />
This is the approximate saturation pressure of the EasyMate <strong>Reservoir</strong>. Saturation pressure readings<br />
between 18 and 23 psig (1.24 – 1.59 bar) are in the acceptable pressure range.<br />
DANGER<br />
Explosive hazard. Extreme high pressure can rupture a transfer line. Make sure the<br />
specified pressure relief valve is present, in the proper location, and functioning properly on<br />
the transfer line assembly.<br />
<strong>PM2300</strong> <strong>Series</strong> <strong>Liquid</strong> <strong>Oxygen</strong> <strong>Reservoir</strong><br />
<strong>Technical</strong> <strong>Service</strong> <strong>Manual</strong><br />
11
6.0 Troubleshooting<br />
Problem Probable Cause Remedy<br />
1. LOX leaking from fill<br />
connector.<br />
2. LOX leaking from engaged fill<br />
connector.<br />
3. Unable to disengage transfer<br />
line or portable from fill<br />
connector.<br />
4. Excessively long Portable fill<br />
time.<br />
5. Low EasyMate <strong>Reservoir</strong><br />
pressure<br />
6. High EasyMate <strong>Reservoir</strong><br />
Pressure<br />
a) Ice crystals preventing poppet<br />
from closing completely.<br />
b) Damaged poppet or fill connector<br />
a) Lip seal on mating fill connector<br />
is damaged.<br />
a) Fill connectors are frozen<br />
together due to moisture.<br />
a) EasyMate <strong>Reservoir</strong> is empty.<br />
b) No head pressure due to major<br />
leak, defective Pressure Relief<br />
valve or open VTF Valve.<br />
a) VTF Valve not completely closed.<br />
b) EasyMate <strong>Reservoir</strong> not filled with<br />
LOX at proper saturation pressure.<br />
c) Pressure Relief Valve(s) not<br />
closing at proper pressure.<br />
d) Leak at a system Fitting (Warming<br />
Coil, threaded connection etc.).<br />
e) Economizer Valve stuck in the<br />
open position.<br />
a) Pressure relief Valves not opening<br />
at proper pressure<br />
7. Low flow at oxygen outlet a) Low pressure at oxygen outlet.<br />
b) Outlet Fitting Assembly Restrictor<br />
partially clogged.<br />
c) Partial obstruction in Capillary<br />
tube.<br />
8. No flow at oxygen outlet a) EasyMate <strong>Reservoir</strong> is empty.<br />
b) No head pressure due to major<br />
leak, defective Pressure Relief<br />
valve or open VTF Valve.<br />
c) Outlet Fitting Assembly Restrictor<br />
completely clogged.<br />
d) Total obstruction in Capillary<br />
tube.<br />
9. <strong>Liquid</strong> level indicator reads<br />
incorrectly<br />
a) Battery voltage low.<br />
b) Battery dead.<br />
10. High liquid oxygen loss rate a) Loss of container vacuum.<br />
b) Leak in system connection<br />
(Warming Coil, threaded<br />
connection etc.).<br />
11. Relief Valve(s) venting during<br />
extended use of oxygen at<br />
flows above 0.5 LPM<br />
a) Relief Valve(s) defective<br />
b) Economizer valve not functioning<br />
properly<br />
a) Engage and disengage mating fill<br />
connector several times to dislodge<br />
ice crystals.<br />
b) Open VTF Valve to vent head pressure<br />
to stop leak.<br />
a) Replace lip seal<br />
a) Close liquid valve on source tank and<br />
allow the fill connector to thaw.<br />
a) Fill EasyMate <strong>Reservoir</strong>.<br />
b) Find leak and repair.<br />
a) Close VTF Valve completely.<br />
b) Re-saturate LOX in EasyMate<br />
<strong>Reservoir</strong>.<br />
c) Test and/or replace Pressure Relief<br />
Valve(s).<br />
d) Perform leak test.<br />
e) Test and adjust and/or replace<br />
Economizer Valve.<br />
a) Test and/or replace Pressure Relief<br />
Valves<br />
a) See symptom 5.<br />
b) Replace Outlet Fitting Assembly.<br />
c) Clean and/or replace Capillary Tube<br />
and Warming Coil.<br />
a) Fill EasyMate <strong>Reservoir</strong>.<br />
b) Find leak and repair.<br />
c) Replace Outlet Fitting Assembly.<br />
d) Clean and/or replace Capillary Tube<br />
and Warming Coil.<br />
a) Replace battery.<br />
b) Replace battery.<br />
a) Perform NER test.<br />
b) Perform leak test.<br />
a) Replace relief Valve(s)<br />
b) Test and adjust or repair economizer<br />
valve<br />
<strong>PM2300</strong> <strong>Series</strong> <strong>Liquid</strong> <strong>Oxygen</strong> <strong>Reservoir</strong><br />
<strong>Technical</strong> <strong>Service</strong> <strong>Manual</strong><br />
12
7.0 Removal, disassembly, assembly, Installation & replacement<br />
Instructions<br />
7.1 LOX Level Indicator Panel Removal & Installation for one (1) piece Shroud, reference Figures 10 - 14<br />
(For two (2) piece shroud, reference page 19.)<br />
Removal<br />
7.1.1 Remove retaining screw.<br />
7.1.2 Pry up LOX Level Indicator Panel at its front edge.<br />
7.1.3 Lift off LOX Level Indicator Panel enough to access the Ribbon Cable and Grounding Cable,<br />
if equipped.<br />
7.1.4 Remove the Ribbon Cable by pulling the lock sleeve on the connector away from the PC<br />
board, disconnect Ribbon cable.<br />
7.1.5 Remove the Grounding Cable (if equipped) by pulling its bayonet connector off the<br />
corresponding terminal.<br />
Installation<br />
7.1.6 Connect the Grounding Cable (if equipped) to the PC Board.<br />
7.1.7 Connect the Ribbon Cable to the PC board with the contacts towards the battery side of<br />
the PC Board. Slide the locking sleeve towards the PC board to secure.<br />
NOTE: To insure proper orientation of the Ribbon Cable activate the LOX Level Indicator<br />
button. The lower LED should blink on and off (indicating empty if EasyMate<br />
<strong>Reservoir</strong> is empty) or will display the normal LOX level sequence ending with the<br />
level of the LOX in the EasyMate <strong>Reservoir</strong>. If the lower four and upper four LEDs<br />
flash alternately the Ribbon Cable has been connected upside-down.<br />
7.1.8 Align the tabs on the top of the LOX Level Indicator Panel with their corresponding slots in<br />
the Shroud and lower into position.<br />
7.1.9 Secure with retaining screw.<br />
Figure 10 Figure 11<br />
<strong>PM2300</strong> <strong>Series</strong> <strong>Liquid</strong> <strong>Oxygen</strong> <strong>Reservoir</strong><br />
<strong>Technical</strong> <strong>Service</strong> <strong>Manual</strong><br />
13
Removal, disassembly, assembly, Installation & replacement Instructions<br />
(continued)<br />
Figure 12 Figure 13<br />
Figure 14<br />
7.2 Battery Replacement for one (1) piece shroud, reference Figure 15 - 16<br />
(for two (2) piece shroud reference page 20)<br />
7.2.1 Remove LOX Level Indicator Panel as per section 7.1.<br />
7.2.2 Carefully lift bottom of battery away from the PC Board and disconnect from terminals.<br />
NOTE: Please discard batteries in accordance with local recycling practices.<br />
7.2.3 Align the new battery with the appropriate terminals and snap in to position.<br />
CAUTION<br />
DO NOT install the battery in reverse polarity. This will cause permanent damage to the PC Board.<br />
7.2.4 Install the LOX Level Indicator Panel as per section 7.1.<br />
<strong>PM2300</strong> <strong>Series</strong> <strong>Liquid</strong> <strong>Oxygen</strong> <strong>Reservoir</strong><br />
<strong>Technical</strong> <strong>Service</strong> <strong>Manual</strong><br />
14
Removal, disassembly, assembly, Installation & replacement Instructions<br />
(continued)<br />
Figure 15 Figure 16<br />
7.3 PC Board Removal & Installation for one (1) piece shroud, reference Figure 17 - 18<br />
(for two (2) piece shroud reference page 21)<br />
Removal<br />
7.3.1 Remove LOX Level Indicator Panel as per section 7.1.<br />
7.3.2 Remove Battery as per section 7.2.<br />
7.3.3 Remove all four (4) PC Board retaining screws and set aside along with the Ground Cable<br />
Terminal (if equipped).<br />
7.3.4 Remove the PC Board from the LOX Level Indicator Panel.<br />
Installation<br />
7.3.5 Place the PC Board into its position on the LOX Level Indicator Panel and align with<br />
mounting screw holes.<br />
7.3.6 Install the retaining screws and the Ground Cable Terminal (if equipped) with the upper left screw.<br />
Figure 17 Figure 18<br />
<strong>PM2300</strong> <strong>Series</strong> <strong>Liquid</strong> <strong>Oxygen</strong> <strong>Reservoir</strong><br />
<strong>Technical</strong> <strong>Service</strong> <strong>Manual</strong><br />
15
Removal, disassembly, assembly, Installation & replacement Instructions<br />
(continued)<br />
7.4 Shroud removal & installation, for one (1) piece shroud reference Figures 19 – 27<br />
(for two (2) piece shroud reference page 22)<br />
Removal<br />
7.4.1 Remove the LOX Level Indicator as per section 7.1.<br />
7.4.2 Remove the two (2) Outlet Fitting Retaining Screws.<br />
7.4.3 Push the Outlet Fitting Assembly inwards to release it from the Shroud.<br />
7.4.4 Push the Ribbon and Ground Cables into the unit through their access slot in the Shroud.<br />
7.4.5 Loosen the three (3) Shroud retaining screws.<br />
NOTE: It is not necessary to completely unscrew and remove the Shroud Retaining Screws<br />
to remove the Shroud. Loosening them about three (3) turns should be enough to<br />
remove the Shroud.<br />
7.4.6 Carefully lift the Shroud up and off the unit.<br />
Figure 19<br />
<strong>PM2300</strong> <strong>Series</strong> <strong>Liquid</strong> <strong>Oxygen</strong> <strong>Reservoir</strong><br />
<strong>Technical</strong> <strong>Service</strong> <strong>Manual</strong><br />
Figure 20<br />
16
Removal, disassembly, assembly, Installation & replacement Instructions<br />
(continued)<br />
Figure 21 Figure 22<br />
Figure 23<br />
<strong>PM2300</strong> <strong>Series</strong> <strong>Liquid</strong> <strong>Oxygen</strong> <strong>Reservoir</strong><br />
<strong>Technical</strong> <strong>Service</strong> <strong>Manual</strong><br />
17
Removal, disassembly, assembly, Installation & replacement Instructions<br />
(continued)<br />
Installation<br />
7.4.7 Position the Shroud at a 90° angle to its installed position with the Outlet Fitting in line with<br />
its position on the Shroud.<br />
7.4.8 Pass the Outlet Fitting through its corresponding port in the Shroud.<br />
7.4.9 Pass the Ribbon and Ground Cable (if equipped) through their access slot in the Shroud.<br />
7.4.10 Rotate the Shroud down onto the unit making sure of the alignment of the Shroud Retaining<br />
Screws and their corresponding slots in the Shroud.<br />
7.4.11 Tighten Shroud Retaining Screws while applying downward pressure on the Shroud.<br />
7.4.12 Install the LOX Level Indicator Panel as per section 7.1.<br />
Figure 24 Figure 25<br />
Figure 26 Figure 27<br />
<strong>PM2300</strong> <strong>Series</strong> <strong>Liquid</strong> <strong>Oxygen</strong> <strong>Reservoir</strong><br />
<strong>Technical</strong> <strong>Service</strong> <strong>Manual</strong><br />
18
Removal, disassembly, assembly, Installation & replacement Instructions<br />
(continued)<br />
7.1a LOX Level Indicator Panel Removal & Installation for two (2) piece Shroud , reference Figures 10a - 14a<br />
(For one (1) piece shroud, reference page 13.)<br />
Removal<br />
7.1a.1 Remove retaining screw.<br />
7.1a.2 Pry up LOX Level Indicator Panel at its rear edge.<br />
7.1a.3 Lift off LOX Level Indicator Panel enough to access the Ribbon Cable.<br />
7.1a.4 Remove the Ribbon Cable by pulling the lock sleeve on the connector away from the PC<br />
board, disconnect Ribbon cable.<br />
Installation<br />
7.1a.5 Connect the Ribbon Cable to the PC board with the contacts towards the battery side of<br />
the PC Board. Slide the locking sleeve towards the PC board to secure.<br />
NOTE: To insure proper orientation of the Ribbon Cable activate the LOX Level Indicator<br />
button. The lowest LED should blink on and off (indicating empty if EasyMate<br />
<strong>Reservoir</strong> is empty) or will display the normal LOX level sequence ending with the<br />
level of the LOX in the EasyMate <strong>Reservoir</strong>. If the lower four and upper four LEDs<br />
flash alternately the Ribbon Cable has been connected upside-down.<br />
7.1a.6 Align the tabs on the top of the LOX Level Indicator Panel with their corresponding slots in<br />
the Shroud and lower into position.<br />
7.1a.7 Secure with retaining screw.<br />
Figure 10a<br />
Figure 11a<br />
<strong>PM2300</strong> <strong>Series</strong> <strong>Liquid</strong> <strong>Oxygen</strong> <strong>Reservoir</strong><br />
<strong>Technical</strong> <strong>Service</strong> <strong>Manual</strong><br />
19
Removal, disassembly, assembly, Installation & replacement Instructions<br />
(continued)<br />
Figure 12a<br />
Figure 13a<br />
Figure 14a<br />
7.2a Battery Replacement for two (2) piece shroud, reference Figure 15a - 16a<br />
(for one (1) piece shroud, reference page 14)<br />
7.2a.1 Remove LOX Level Indicator Panel as per section 7.1a.<br />
7.2a.2 Carefully lift bottom of battery away from the PC Board and disconnect from terminals.<br />
NOTE: Please discard batteries in accordance with local recycling practices.<br />
7.2a.3 Align the new battery with the appropriate terminals and snap in to position.<br />
CAUTION<br />
DO NOT install the battery in reverse polarity. This will cause permanent damage to the<br />
PC Board.<br />
7.2a.4 Install the LOX Level Indicator Panel as per section 7.1a.<br />
<strong>PM2300</strong> <strong>Series</strong> <strong>Liquid</strong> <strong>Oxygen</strong> <strong>Reservoir</strong><br />
<strong>Technical</strong> <strong>Service</strong> <strong>Manual</strong><br />
20
Removal, disassembly, assembly, Installation & replacement Instructions<br />
(continued)<br />
Figure 15a<br />
Figure 16a<br />
7.3a PC Board Removal & Installation for two (2) piece shroud, reference Figure 17a - 18a<br />
(for one (1) piece shroud, reference page 15)<br />
Removal<br />
7.3a.1 Remove LOX Level Indicator Panel as per section 7.1a.<br />
7.3a.2 Remove Battery as per section 7.2a.<br />
7.3a.3 Remove all four (4) PC Board retaining screws.<br />
7.3a.4 Remove the PC Board from the LOX Level Indicator Panel.<br />
Installation<br />
7.3a.5 Place the PC Board into its position on the LOX Level Indicator Panel and align with<br />
mounting screw holes.<br />
7.3a.6 Install the retaining screws.<br />
Figure 18a<br />
Figure 17a<br />
<strong>PM2300</strong> <strong>Series</strong> <strong>Liquid</strong> <strong>Oxygen</strong> <strong>Reservoir</strong><br />
<strong>Technical</strong> <strong>Service</strong> <strong>Manual</strong><br />
21
Removal, disassembly, assembly, Installation & replacement Instructions<br />
(continued)<br />
7.4a Shroud removal & installation for two (2) piece shroud , reference Figures 19a – 27a<br />
(for one (1) piece shroud, reference page 16)<br />
Removal<br />
7.4a.1 Loosen the three (3) Shroud retaining screws.<br />
NOTE: It is not necessary to completely unscrew and remove the Shroud Retaining<br />
Screws to remove the Shroud. Loosening them about 3 turns should be enough<br />
to remove the Shroud.<br />
7.4a.2 Carefully lift the Shroud up and off the unit.<br />
7.4a.3 Remove the LOX Level Indicator as per section 7.1a.<br />
7.4a.4 Remove the two (2) Outlet Fitting Retaining Screws.<br />
7.4a.5 Remove one (1) Indicator Housing Retaining Screw.<br />
7.4a.6 Guide the Ribbon cable out of the Indicator Housing through the access slot.<br />
7.4a.7 Slide Indicator Housing off of Outlet Fitting<br />
7.4a.8 Loosen and remove compression fitting on the rear of Outlet Fitting.<br />
7.4a.9 Remove two (2) Housing Bracket Retaining on Indicator screws on Handle Ring and two (2)<br />
Indicator Housing Bracket Retaining screws on the Manifold.<br />
7.4a.10 Remove Indicator Housing Bracket.<br />
Figure 19a<br />
<strong>PM2300</strong> <strong>Series</strong> <strong>Liquid</strong> <strong>Oxygen</strong> <strong>Reservoir</strong><br />
<strong>Technical</strong> <strong>Service</strong> <strong>Manual</strong><br />
Figure 20a<br />
22
Removal, disassembly, assembly, Installation & replacement Instructions<br />
(continued)<br />
Figure 22a<br />
Figure 21a<br />
Figure 23a<br />
<strong>PM2300</strong> <strong>Series</strong> <strong>Liquid</strong> <strong>Oxygen</strong> <strong>Reservoir</strong><br />
<strong>Technical</strong> <strong>Service</strong> <strong>Manual</strong><br />
23
Removal, disassembly, assembly, Installation & replacement Instructions<br />
(continued)<br />
Installation<br />
7.4a.11 Install Indicator Housing Bracket, by securing two (2) Indicator Housing Bracket<br />
Retaining screws at Handle Ring and two (2) Indicator Housing Bracket Retaining screws<br />
on the Manifold.<br />
7.4a.12 Connect and tighten compression fitting onto rear of Outlet Fitting.<br />
7.4a.13 Slide Indicator Housing onto Outlet Fitting.<br />
7.4a.14 Guide the Ribbon through the access slot in the Indicator Housing.<br />
7.4a.15 Install and tighten one (1) Indicator Housing Retaining Screw.<br />
7.4a.16 Install and tighten the two (2) Outlet Fitting Retaining Screws.<br />
7.4a.17 Install Shroud onto unit insuring of the alignment of the Shroud Retaining Screws and<br />
their corresponding slots in the Shroud.<br />
7.4a.18 Tighten Shroud Retaining Screws while applying downward force on the Shroud.<br />
7.4a.19 Install the LOX Level Indicator Panel as per section 7.1a.<br />
Figure 24a<br />
Figure 25a<br />
Figure 26a<br />
Figure 27a<br />
<strong>PM2300</strong> <strong>Series</strong> <strong>Liquid</strong> <strong>Oxygen</strong> <strong>Reservoir</strong><br />
<strong>Technical</strong> <strong>Service</strong> <strong>Manual</strong><br />
24
Removal, disassembly, assembly, Installation & replacement Instructions<br />
(continued)<br />
7.5 Fill Connector removal, disassembly, reassembly & installation, reference Figures 28 – 33<br />
Removal<br />
7.5.1 Remove the Shroud as per section 7.4 for one (1) piece shroud or 7.4a for two (2) piece shroud.<br />
7.5.2 Using a 7/8” deep socket, hold the Fill Connector Body and use a 1” box wrench on the<br />
Compression Nut to loosen the nut.<br />
NOTE: The Fill Connector has been installed with a high torque and will require<br />
considerable force to remove.<br />
7.5.3 Unthread the Fill Connector from the Manifold Assembly and remove.<br />
NOTE: • The Compression Nut and Compression Ferrule should not come off or be<br />
removed from the Manifold Neck.<br />
• Whenever the Poppet Assembly is removed, all parts (including Neck, Compression<br />
Ferrule, Compression Nut, Poppet Assembly, Spacer and Poppet Retaining Snap<br />
Ring) should be cleaned of debris before reassembly. Debris in the Fill Connector<br />
may cause it to leak.<br />
Figure 28<br />
Figure 29 Figure 30<br />
<strong>PM2300</strong> <strong>Series</strong> <strong>Liquid</strong> <strong>Oxygen</strong> <strong>Reservoir</strong><br />
<strong>Technical</strong> <strong>Service</strong> <strong>Manual</strong><br />
25
Removal, disassembly, assembly, Installation & replacement Instructions<br />
(continued)<br />
Disassembly<br />
7.5.4 Using internal snap ring pliers remove the Poppet Retaining Snap Ring.<br />
7.5.5 Remove the Poppet Spacer and Poppet Assembly.<br />
Figure 31 Figure 32<br />
Assembly/replacement<br />
7.5.6 Place Poppet Assembly into the Fill Connector body.<br />
7.5.7 Place the Poppet Spacer in to the Fill Connector body.<br />
7.5.8 Using internal snap ring pliers install the Poppet Retaining Snap Ring.<br />
Figure 33<br />
Installation<br />
7.5.9 Thread the Fill Connector on to the Manifold Neck finger tight.<br />
7.5.10 With a 1” box wrench and a 7/8” socket wrench tighten the Fill Connector Compression<br />
Nut 1/4 turn past finger tight.<br />
7.5.11 Install the shroud as per section 7.4 for one (1) piece shroud or 7.4a for two (2) piece shroud.<br />
<strong>PM2300</strong> <strong>Series</strong> <strong>Liquid</strong> <strong>Oxygen</strong> <strong>Reservoir</strong><br />
<strong>Technical</strong> <strong>Service</strong> <strong>Manual</strong><br />
26
Removal, disassembly, assembly, Installation & replacement Instructions<br />
(continued)<br />
7.6 Pressure Relief Valve removal & installation, reference Figures 34 – 39<br />
Removal<br />
7.6.1 Remove the Shroud as per section 7.4 for one (1) piece shroud or 7.4a for two (2) piece shroud.<br />
7.6.2 Slide the Retaining Clip of the top of the Economizer Assembly.<br />
7.6.3 Remove the Retaining Clip Washer from the top of the Economizer Assembly.<br />
7.6.4 Remove the Pressure Relief Valve Retaining pins by pulling them straight out of the<br />
Economizer Assembly.<br />
7.6.5 Remove the Pressure Relief Valves from the Economizer Assembly.<br />
NOTE: Both Pressure Relief Valves are identical and relieve within the same pressure range.<br />
Figure 34 Figure 35<br />
Figure 36 Figure 37<br />
<strong>PM2300</strong> <strong>Series</strong> <strong>Liquid</strong> <strong>Oxygen</strong> <strong>Reservoir</strong><br />
<strong>Technical</strong> <strong>Service</strong> <strong>Manual</strong><br />
27
Removal, disassembly, assembly, Installation & replacement Instructions<br />
(continued)<br />
Installation<br />
7.6.6 Apply silicone lube to the Pressure Relief Valve sealing O-ring.<br />
7.6.7 Install the Pressure Relief Valve(s) into the Economizer Assembly.<br />
7.6.8 Install the Pressure Relief Valve Retaining Pins into the Economizer Assembly.<br />
7.6.9 Install the Retaining Clip Washer on to the Economizer Assembly.<br />
7.6.10 Install the Retaining Clip on to the Economizer Assembly.<br />
7.6.11 Install the shroud as per section 7.4 for one (1) piece shroud or 7.4a for two (2) piece shroud.<br />
Figure 38<br />
Figure 39<br />
<strong>PM2300</strong> <strong>Series</strong> <strong>Liquid</strong> <strong>Oxygen</strong> <strong>Reservoir</strong><br />
<strong>Technical</strong> <strong>Service</strong> <strong>Manual</strong><br />
28
Removal, disassembly, assembly, Installation & replacement Instructions<br />
(continued)<br />
7.7 Warming Coil removal & installation, reference Figures 40 – 45<br />
Removal<br />
7.7.1 Remove the Shroud as per section 7.4 for one (1) piece shroud or 7.4a for two (2) piece shroud.<br />
7.7.2 Holding the Outlet Fitting Assembly with a wrench loosen the Warming Coil Compression<br />
Nut with a wrench and disconnect.<br />
7.7.3 Holding the Economizer Valve Outlet Fitting with a wrench loosen the Warming Coil<br />
Compression Nut with a wrench and disconnect.<br />
7.7.4 Cut the 4 Cable Ties holding the Warming Coil to the Drip Tray and discard the Cable Ties.<br />
7.7.5 Carefully pull the Warming Coil away from the Economizer Assembly allowing the Capillary<br />
tube inside the Warming Coil to slide out and remain connected to the Economizer Assembly.<br />
Figure 40<br />
Figure 41<br />
Figure 40A<br />
<strong>PM2300</strong> <strong>Series</strong> <strong>Liquid</strong> <strong>Oxygen</strong> <strong>Reservoir</strong><br />
<strong>Technical</strong> <strong>Service</strong> <strong>Manual</strong><br />
Figure 42 Figure 43<br />
29
Removal, disassembly, assembly, Installation & replacement Instructions<br />
(continued)<br />
Installation<br />
7.7.6 Carefully feed the capillary Tube into one end of the Warming Coil until the Compression<br />
Nut engages the fitting on the Economizer Assembly.<br />
7.7.7 Thread the Compression Nut onto the fitting on the Economizer Assembly finger tight.<br />
7.7.8 Using a wrench to hold the Economizer Valve Outlet Fitting tighten the warming Coil<br />
Compression nut with a wrench 1/8 turn past finger tight.<br />
7.7.9 Connect the Outlet Fitting Assembly to the other end of the Warming Coil. Insure that the<br />
outlet fitting is only finger tight and oriented correctly.<br />
7.7.10 Using a wrench on both the Outlet Fitting Assembly and the Compression Nut tighten the<br />
compression nut 1/8 turn past finger tight.<br />
7.7.11 Install the shroud as per section 7.4 for one (1) piece shroud or 7.4a for two (2) piece shroud.<br />
Figure 44 Figure 45<br />
<strong>PM2300</strong> <strong>Series</strong> <strong>Liquid</strong> <strong>Oxygen</strong> <strong>Reservoir</strong><br />
<strong>Technical</strong> <strong>Service</strong> <strong>Manual</strong><br />
30
Removal, disassembly, assembly, Installation & replacement Instructions<br />
(continued)<br />
7.8 VTF Valve removal & installation, reference Figures 46 - 48 & Table 1<br />
Removal<br />
7.8.1 Remove the Shroud as per section 7.4 for one (1) piece shroud or 7.4a for two (2) piece shroud.<br />
7.8.2 Using a wrench to hold the fitting on to the Manifold Assembly and a wrench on the VTF<br />
Valve assembly, loosen and remove the VTF Valve Assembly.<br />
Figure 46<br />
Installation<br />
7.8.3 Apply three (3) wraps of oxygen safe Teflon Tape to the male threads of the VTF Valve<br />
Fitting on the Manifold Assembly in a clockwise direction.<br />
7.8.4 Thread the VTF Valve on to the Manifold Assembly until finger tight.<br />
7.8.5 Using wrenches on both the Manifold Fitting and the VTF Valve tighten at least one (1)<br />
complete turn ending with the VTF Valve in it proper orientation.<br />
7.8.6 Install the shroud as per section 7.4 for one (1) piece shroud or 7.4a for two (2) piece shroud.<br />
Figure 47 Figure 48<br />
<strong>PM2300</strong> <strong>Series</strong> <strong>Liquid</strong> <strong>Oxygen</strong> <strong>Reservoir</strong><br />
<strong>Technical</strong> <strong>Service</strong> <strong>Manual</strong><br />
31
Removal, disassembly, assembly, Installation & replacement Instructions<br />
(continued)<br />
7.9 Economizer Valve removal, test & installation , reference Figures 49 - 68<br />
Removal<br />
7.9.1 Remove the Shroud as per section 7.4 for one (1) piece shroud or 7.4a for two (2) piece shroud..<br />
7.9.2 Remove the Warming Coil as per section 7.7.<br />
7.9.3 Hold the Economizer Valve Assembly with your hand and loosen the Economizer Valve Outlet<br />
Fitting with a wrench.<br />
NOTE: Only loosen the Economizer Valve Outlet Fitting, DO NOT REMOVE.<br />
7.9.4 Using a wrench on both the Economizer Inlet Fitting and its Lock Nut, loosen the Lock nut.<br />
7.9.5 Holding the Economizer Inlet Fitting with a wrench, unthread the Economizer Valve from its<br />
inlet fitting.<br />
7.9.6 Carefully slip the Economizer Valve Assembly off the Capillary tube.<br />
Figure 49<br />
Figure 50<br />
<strong>PM2300</strong> <strong>Series</strong> <strong>Liquid</strong> <strong>Oxygen</strong> <strong>Reservoir</strong><br />
<strong>Technical</strong> <strong>Service</strong> <strong>Manual</strong><br />
Figure 51 Figure 52<br />
32
Removal, disassembly, assembly, Installation & replacement Instructions<br />
(continued)<br />
7.9 Economizer Valve removal, test & installation (continued)<br />
Bench Test<br />
7.9.7 Thread an Economizer Valve Inlet Test Fitting into the inlet of the Economizer Valve finger tight.<br />
NOTE: The inlet side has the flat area around the Inlet. DO NOT OVER TIGHTEN! The<br />
Economizer Valve will crack and leak if the fittings are over tightened.<br />
7.9.8 Insert and secure the Economizer Outlet Test Fitting finger tight in to the Economizers Outlet.<br />
NOTE: DO NOT OVER TIGHTEN! The Economizer Valve will crack and leak if the fittings<br />
are over tightened.<br />
7.9.9 Connect the DISS female fitting of the Pressure Test Assembly to the Economizer Valve<br />
Inlet Test Fitting.<br />
7.9.10 Connect a variable air or oxygen source 0 – 25 psi (0 –1.72 bar) to the bottom DISS male<br />
fitting (with ball valve) of the Pressure Test Assembly.<br />
7.9.11 Connect a flow indicator (liter meter) to the Economizer Outlet Test Fitting.<br />
7.9.12 Slowly increase the pressure source to 18 psig (1.24 bar). There should be no flow<br />
indicated on the liter meter. If so proceed to step 7.9.13.<br />
7.9.13 If flow is indicated on the liter meter turn the Economizer Valve Adjustment Screw slowly<br />
clockwise until there is no flow indicated on the liter meter.<br />
7.9.14 Slowly increase the pressure source to 19 psig (1.31 bar). There should be flow indicated<br />
on the liter meter. If so proceed to step 7.9.15.<br />
7.9.15 If there is no flow indicated on the liter meter, decrease the pressure source to below 18 psig<br />
(1.24 bar). Turn the Economizer Valve Adjustment Screw counter-clockwise 1/2 turn and<br />
repeat steps 7.9.11 to 7.9.14.<br />
NOTE: If you can not set the Economizer Valve as per steps 7.9.11 to 7.9.13 replace the<br />
Economizer valve diaphragm and retest.<br />
7.9.16 Slowly increase pressure source to 22 – 23 psig (1.52 – 1.59). Flow should still be<br />
indicated on the liter meter.<br />
7.9.17 Decrease pressure source to 18 psig (1.24 bar) there should be no flow indicated on the liter<br />
meter. If flow is indicated on the liter meter go back to step 7.9.12 and reset Economizer Valve.<br />
7.9.18 When the Economizer Valve has been adjusted to within specification, place a drop of<br />
Loctite 222MS on the Economizer Valve Adjustment Screw to secure.<br />
7.9.19 Disconnect the variable pressure source being sure to depressurize first.<br />
7.9.20 Remove the pressure source and Pressure Test Assembly.<br />
7.9.21 Remove the Economizer Inlet and Outlet Test Fittings.<br />
Figure 53 Figure 54<br />
<strong>PM2300</strong> <strong>Series</strong> <strong>Liquid</strong> <strong>Oxygen</strong> <strong>Reservoir</strong><br />
<strong>Technical</strong> <strong>Service</strong> <strong>Manual</strong><br />
33
Removal, disassembly, assembly, Installation & replacement Instructions<br />
(continued)<br />
Figure 55<br />
Figure 56<br />
Figure 57<br />
Figure 58<br />
Table 1, Economizer Test Chart<br />
Inlet Pressure<br />
Condition<br />
18 psi (1.24 bar) No Flow from Economizer<br />
19 psi (1.31 bar) Flow from Economizer<br />
22 – 23 psi (1.52 – 1.59 bar) Flow from Economizer<br />
<strong>PM2300</strong> <strong>Series</strong> <strong>Liquid</strong> <strong>Oxygen</strong> <strong>Reservoir</strong><br />
<strong>Technical</strong> <strong>Service</strong> <strong>Manual</strong><br />
34
Removal, disassembly, assembly, Installation & replacement Instructions<br />
(continued)<br />
Figure 59 Figure 60<br />
Figure 61 Figure 62<br />
<strong>PM2300</strong> <strong>Series</strong> <strong>Liquid</strong> <strong>Oxygen</strong> <strong>Reservoir</strong><br />
<strong>Technical</strong> <strong>Service</strong> <strong>Manual</strong><br />
35
Removal, disassembly, assembly, Installation & replacement Instructions<br />
(continued)<br />
7.9 Economizer Valve removal, test & installation (continued)<br />
Installation<br />
7.9.22 Carefully feed the capillary tube into the Economizer Valve Inlet through the Economizer<br />
Valve and out the Economizer Valve Outlet Fitting.<br />
7.9.23 Carefully thread the Economizer Valve assembly onto the Manifold until the fitting bottoms<br />
in the Economizer Valve body. DO NOT OVER TIGHTEN! The Economizer Valve will crack<br />
and leak if the fittings are over tightened.<br />
7.9.24 Turning counter-clockwise, position the Economizer Valve at a 45° angle to the front.<br />
7.9.25 Thread the Economizer Valve Lock Nut up against the Economizer Valve body finger tight.<br />
7.9.26 Hold the Economizer Valve with one hand in its position tighten the Economizer Valve<br />
Lock Nut with a wrench against the Economizer Valve body.<br />
7.9.27 Connect the Warming Coil as per section 7.7.<br />
7.9.28 Install the shroud as per section 7.4 for one (1) piece shroud or 7.4a for two (2) piece shroud.<br />
Figure 63<br />
Figure 64<br />
Figure 65<br />
Figure 66<br />
<strong>PM2300</strong> <strong>Series</strong> <strong>Liquid</strong> <strong>Oxygen</strong> <strong>Reservoir</strong><br />
<strong>Technical</strong> <strong>Service</strong> <strong>Manual</strong><br />
36
Removal, disassembly, assembly, Installation & replacement Instructions<br />
(continued)<br />
Figure 67 Figure 68<br />
7.10 Manifold Assembly removal, disassembly, reassembly & installation, reference<br />
Figures 67 - 113<br />
Removal or removal and disassembly<br />
7.10.1 Remove the Shroud as per section 7.4 for one (1) piece shroud or 7.4a for two (2) piece shroud.<br />
7.10.2 Remove the Torque Plate Retaining Screw.<br />
Skip to steps 7.10.11 & 7.10.12 if you wish to remove the Manifold as an assembly.<br />
7.10.2 Remove the Warming Coil as per section 7.7.<br />
7.10.3 Remove the VTF Valve as per section 7.8.<br />
7.10.4 Loosen and remove the VTF Valve Inlet Fitting.<br />
7.10.5 Remove the Economizer Valve Assembly as per section 7.9.<br />
7.10.6 Loosen and carefully remove the Economizer Valve Inlet Fitting by slipping it off the<br />
Capillary Tube.<br />
7.10.7 Remove the Ribbon Cable Access Port Cover.<br />
7.10.8 Lift and hold Torque Plate out of your way.<br />
7.10.9 Using a thin 7/8” open end wrench (P/N 504715) loosen and remove the Manifold Neck<br />
Assembly and Torque Plate.<br />
7.10.10 Lift and move Torque Plate as needed to loosen and unthread the four (4) Manifold<br />
Retaining Screws.<br />
7.10.11 Carefully lift the Manifold Assembly out of the EasyMate <strong>Reservoir</strong> Container.<br />
NOTE: Care should be taken so that Sensors on Sensor Board are not damaged while<br />
extracting Manifold Assembly from Cryogenic Container.<br />
7.10.12 Cut the four (4) pieces of Stainless Steel wire that secure the Sensor Board to the Sensor<br />
Board Spacers and the Fill Tube.<br />
7.10.13 Carefully feed the Ribbon Cable out the bottom of the Manifold Assembly.<br />
7.10.14 Carefully feed the Capillary Tube out the bottom of the Manifold.<br />
7.10.15 Remove the (4) Sensor Board Spacers from the Fill Tube.<br />
7.10.16 Slide the Manifold Spacer and O-ring off the Fill Tube.<br />
7.10.17 Slide the Manifold Body off the Fill Tube.<br />
NOTE: Be aware of the Fill Tube Compression Ring located on top of the fill tube flared<br />
end in the Manifold Body.<br />
<strong>PM2300</strong> <strong>Series</strong> <strong>Liquid</strong> <strong>Oxygen</strong> <strong>Reservoir</strong><br />
<strong>Technical</strong> <strong>Service</strong> <strong>Manual</strong><br />
37
Removal, disassembly, assembly, Installation & replacement Instructions<br />
(continued)<br />
Figure 69<br />
Figure 70<br />
Figure 71<br />
Figure 72<br />
Figure 73 Figure 74<br />
<strong>PM2300</strong> <strong>Series</strong> <strong>Liquid</strong> <strong>Oxygen</strong> <strong>Reservoir</strong><br />
<strong>Technical</strong> <strong>Service</strong> <strong>Manual</strong><br />
38
Removal, disassembly, assembly, Installation & replacement Instructions<br />
(continued)<br />
Figure 75<br />
Figure 76<br />
Figure 78<br />
Figure 77<br />
<strong>PM2300</strong> <strong>Series</strong> <strong>Liquid</strong> <strong>Oxygen</strong> <strong>Reservoir</strong><br />
<strong>Technical</strong> <strong>Service</strong> <strong>Manual</strong><br />
39
Removal, disassembly, assembly, Installation & replacement Instructions<br />
(continued)<br />
Figure 79<br />
Figure 80<br />
Figure 81<br />
Figure 82<br />
Figure 83<br />
<strong>PM2300</strong> <strong>Series</strong> <strong>Liquid</strong> <strong>Oxygen</strong> <strong>Reservoir</strong><br />
<strong>Technical</strong> <strong>Service</strong> <strong>Manual</strong><br />
40
Removal, disassembly, assembly, Installation & replacement Instructions<br />
(continued)<br />
Reassembly and/or installation<br />
Skip to step 7.10.26 if installing an assembled Manifold assembly<br />
7.10.18 Slide the Fill Tube into the top of the Manifold and through the O-ring and Manifold<br />
Spacer Plate. Note the orientation of Spacer Plate and Manifold.<br />
7.10.19 Feed the Capillary Tube into the Economizer valve port on the Manifold and through the<br />
O-ring and the Spacer Plate.<br />
7.10.20 Feed the Ribbon Cable through the Spacer Plate & O-ring then into its port from the<br />
bottom of the Manifold.<br />
7.10.21 Insure that the hole in the bottom of the Sensor Board aligns with the hole in the bottom<br />
of the Fill Tube.<br />
7.10.22 Attach the four (4) Sensor Board Spacers to the Fill Tube.<br />
7.10.23 Secure the Sensor Board, Capillary Tube, Fill Tube and Sensor Board Spacers with 3”<br />
length of .024” Stainless Steel wire.<br />
NOTE: • Insure that a Sensor Board Spacers are positioned at bottom, middle and top<br />
of the Sensor Board and one at the top of the Fill Tube about 1 1/4” below the<br />
Manifold Spacer.<br />
• At bottom of Fill Tube , ensure stainless steal wire passes through hole in<br />
Sensor Board, Sensor Board Spacer and Fill Tube.<br />
7.10.24 Place the Container Flange O-ring onto the Container Flange.<br />
7.10.25 Carefully slide the Manifold Assembly into the Container.<br />
7.10.26 Orient the Manifold Assembly so the Ribbon Cable is aligned with the Condensation<br />
Collection Container.<br />
7.10.27 Place a drop of Loctite 222MS thread locking compound on the threads of each Manifold<br />
Retaining Screw.<br />
7.10.28 Install the Manifold Retaining Screws into the Manifold and secure to 70 in/lbs torque.<br />
7.10.29 Install the Ribbon Cable Access Port Cover.<br />
7.10.30 Place the Fill tube Compression Ring Plate side up or to the Fill Tube Plate in the<br />
Manifold Assembly.<br />
7.10.31 Install the Manifold Neck Assembly and Torque Plate onto the Manifold Assembly and<br />
tighten.<br />
7.10.32 Place a drop of Loctite 222MS thread locking compound on the threads of the Lock Plate<br />
Retaining Screw.<br />
7.10.33 Secure the Torque plate with the Torque Plate Lock Screw.<br />
7.10.34 Apply three (3) wraps of oxygen safe Teflon Tape to the male threads of the inlet side of<br />
the Economizer Valve Inlet Fitting.<br />
7.10.35 Carefully feed the Capillary Tube through the Economizer Valve Inlet fitting.<br />
7.10.36 Thread the Economizer Valve Inlet Fitting into the Manifold and tighten.<br />
7.10.37 Install the Economizer Valve Assembly as per section 7.9.<br />
7.10.38 Apply three (3) wraps of oxygen safe Teflon tape to both ends of the VTF Valve Inlet Fitting.<br />
7.10.39 Thread and tighten one end of the VTF Valve Inlet Fitting into its port on the Manifold<br />
Assembly.<br />
7.10.40 Install the VTF Valve as per section 7.8.<br />
7.10.41 Install the shroud as per section 7.4 for one (1) piece shroud or 7.4a for two (2) piece shroud.<br />
<strong>PM2300</strong> <strong>Series</strong> <strong>Liquid</strong> <strong>Oxygen</strong> <strong>Reservoir</strong><br />
<strong>Technical</strong> <strong>Service</strong> <strong>Manual</strong><br />
41
Removal, disassembly, assembly, Installation & replacement Instructions<br />
(continued)<br />
Figure 84 Figure 85<br />
Figure 86<br />
<strong>PM2300</strong> <strong>Series</strong> <strong>Liquid</strong> <strong>Oxygen</strong> <strong>Reservoir</strong><br />
<strong>Technical</strong> <strong>Service</strong> <strong>Manual</strong><br />
42
Removal, disassembly, assembly, Installation & replacement Instructions<br />
(continued)<br />
Figure 87<br />
1 1 /4”<br />
31.8 mm<br />
9 3 /4”<br />
247.7 mm<br />
17 1 /4”<br />
438.2 mm<br />
Figure 88<br />
26 1 /2”<br />
673.1 mm<br />
<strong>PM2300</strong> <strong>Series</strong> <strong>Liquid</strong> <strong>Oxygen</strong> <strong>Reservoir</strong><br />
<strong>Technical</strong> <strong>Service</strong> <strong>Manual</strong><br />
43
Removal, disassembly, assembly, Installation & replacement Instructions<br />
(continued)<br />
Figure 89<br />
Figure 90<br />
Figure 91<br />
Figure 92<br />
Figure 93 Figure 94<br />
<strong>PM2300</strong> <strong>Series</strong> <strong>Liquid</strong> <strong>Oxygen</strong> <strong>Reservoir</strong><br />
<strong>Technical</strong> <strong>Service</strong> <strong>Manual</strong><br />
44
Removal, disassembly, assembly, Installation & replacement Instructions<br />
(continued)<br />
Figure 95<br />
Figure 96<br />
Figure 97<br />
Figure 98<br />
Figure 99<br />
<strong>PM2300</strong> <strong>Series</strong> <strong>Liquid</strong> <strong>Oxygen</strong> <strong>Reservoir</strong><br />
<strong>Technical</strong> <strong>Service</strong> <strong>Manual</strong><br />
45
Removal, disassembly, assembly, Installation & replacement Instructions<br />
(continued)<br />
Figure 100<br />
Figure 101<br />
Figure 102<br />
Figure 103<br />
Figure 104 Figure 105<br />
<strong>PM2300</strong> <strong>Series</strong> <strong>Liquid</strong> <strong>Oxygen</strong> <strong>Reservoir</strong><br />
<strong>Technical</strong> <strong>Service</strong> <strong>Manual</strong><br />
46
Removal, disassembly, assembly, Installation & replacement Instructions<br />
(continued)<br />
Figure 106<br />
Figure 107<br />
Figure 108<br />
Figure 109<br />
Figure 110 Figure 111<br />
<strong>PM2300</strong> <strong>Series</strong> <strong>Liquid</strong> <strong>Oxygen</strong> <strong>Reservoir</strong><br />
<strong>Technical</strong> <strong>Service</strong> <strong>Manual</strong><br />
47
Removal, disassembly, assembly, Installation & replacement Instructions<br />
(continued)<br />
Figure 112 Figure 113<br />
7.11 Handle Ring removal & installation, reference Figures 112 – 121<br />
Removal<br />
7.11.1 Remove the Shroud as per section 7.4 for one (1) piece shroud or 7.4a for two (2) piece shroud.<br />
7.11.2 Remove the Warming Coil as per section 7.7.<br />
7.11.3 Remove the Manifold Assembly as per section 7.10.<br />
7.11.4 Remove the Rubber Drip Skirt by stretching it over the Container’s manifold flange.<br />
7.11.5 Lift off the Drip Pan.<br />
7.11.6 Remove the Condensation Collection Container.<br />
7.11.7 Loosen and remove the Handle Ring retaining Nuts, Washers and the Ground Cable<br />
(if equipped).<br />
7.11.8 Lift off the Handle Ring.<br />
Figure 114 Figure 115<br />
<strong>PM2300</strong> <strong>Series</strong> <strong>Liquid</strong> <strong>Oxygen</strong> <strong>Reservoir</strong><br />
<strong>Technical</strong> <strong>Service</strong> <strong>Manual</strong><br />
48
Removal, disassembly, assembly, Installation & replacement Instructions<br />
(continued)<br />
Figure 116 Figure 117<br />
Figure 118<br />
Installation<br />
7.11.9 Insure that the Wicking Pad is in position around the Containers neck.<br />
7.11.10 Position the Handle Ring on to the EasyMate <strong>Reservoir</strong> Canister so the Pump-out Port<br />
passes through its clearance hole in the Handle Ring.<br />
7.11.11 Apply one or two drops of Loctite 222MS Thread Locking Compound to the threads of<br />
the 5 retaining studs on the Container.<br />
7.11.12 Install the Handle Ring Retaining Washers.<br />
7.11.13 Position the Container so the Condensation Collection Container slot is towards you.<br />
7.11.14 Install the Grounding cable, if equipped onto the stud just to the left on the<br />
Condensation Collection Container Slot.<br />
7.11.15 Install the Condensation Collection Container as per User manual.<br />
7.11.16 Install the Drip Pan so its drip hole aligns with the Condensation Collection Container.<br />
7.11.17 Install the Manifold Assembly as per section 7.10.<br />
7.11.18 Install the Warming Coil as per section 7.7.<br />
7.11.19 Install the shroud as per section 7.4 for one (1) piece shroud or 7.4a for two (2) piece shroud.<br />
<strong>PM2300</strong> <strong>Series</strong> <strong>Liquid</strong> <strong>Oxygen</strong> <strong>Reservoir</strong><br />
<strong>Technical</strong> <strong>Service</strong> <strong>Manual</strong><br />
49
Removal, disassembly, assembly, Installation & replacement Instructions<br />
(continued)<br />
Figure 119<br />
Figure 120<br />
Figure 121<br />
Figure 122<br />
7.12 Economizer Valve Diaphragm Replacement, reference Figures 121 - 128<br />
7.12.1 Remove the Economizer Valve Assembly as per section 7.9.<br />
7.12.2 Slide the Retaining Clip off the top of the Economizer Assembly.<br />
7.12.3 Remove the Retaining Clip Washer from the top of the Economizer Assembly.<br />
7.12.4 Remove the Economizer Valve Cap Retaining Screws.<br />
7.12.5 Remove the Economizer Valve Cap and Diaphragm Spring and Seat.<br />
7.12.6 Remove and discard the Economizer Valve Diaphragm.<br />
7.12.7 Install a new Economizer Valve Diaphragm.<br />
7.12.8 Install the Diaphragm Spring and Economizer Valve Cap.<br />
7.12.9 Install the Economizer Valve Cap Retaining Screws. DO NOT OVER TIGHTEN! The<br />
Economizer Valve will crack and leak if the fittings are over tightened.<br />
7.12.10 Install the Retaining Clip Washer onto the top of the Economizer Assembly.<br />
7.12.11 Install the Retaining Clip onto the top of the Economizer Assembly.<br />
7.12.12 Adjust the Economizer Valve as per Section 7.9.<br />
7.12.13 Install the Economizer Valve Assembly as per section 7.9.<br />
<strong>PM2300</strong> <strong>Series</strong> <strong>Liquid</strong> <strong>Oxygen</strong> <strong>Reservoir</strong><br />
<strong>Technical</strong> <strong>Service</strong> <strong>Manual</strong><br />
50
Removal, disassembly, assembly, Installation & replacement Instructions<br />
(continued)<br />
Figure 123<br />
Figure 124<br />
Figure 125<br />
Figure 126<br />
Figure 127 Figure 128<br />
<strong>PM2300</strong> <strong>Series</strong> <strong>Liquid</strong> <strong>Oxygen</strong> <strong>Reservoir</strong><br />
<strong>Technical</strong> <strong>Service</strong> <strong>Manual</strong><br />
51
Removal, disassembly, assembly, Installation & replacement Instructions<br />
(continued)<br />
8.0 Operation Verification Procedure (no LOX in EasyMate <strong>Reservoir</strong>), reference Figures 129 – 132<br />
8.1 Visual Inspection<br />
8.1.1 Visually inspect the EasyMate <strong>Reservoir</strong> for damage or missing components.<br />
8.1.2 Verify that all labels are present and legible including:<br />
a) Fill Connector Label<br />
b) LOX Level Label<br />
c) <strong>Oxygen</strong> Outlet Fitting Label<br />
d) Warning Label & Data<br />
e) Serial Number Label<br />
8.1.3 Verify that the Fill Connector in not worn or damaged.<br />
8.1.4 Using a VTF Valve Key (P/N 505400), open and close the VTF Valve to verify functionality.<br />
8.1.5 Verify that the Condensation Collection Container is empty and in place.<br />
8.2 Verify <strong>Liquid</strong> Level Indicator<br />
8.2.1 Press the <strong>Liquid</strong> Level Indicator Button.<br />
8.2.2 The bottom LED will flash (blink) slowly for 10 second (2 hz per second). This indicates<br />
that the EasyMate <strong>Reservoir</strong> is empty.<br />
8.2.3 If the LED flashes (blinks) rapidly for 8 second (1 hz per second) this indicates a low<br />
battery condition. Replace the battery as per section 7.2.<br />
8.2.4 If the top four (4) and the bottom four (4) LEDs flash (blink) alternately this indicates a<br />
disconnected or improperly connected Ribbon Cable. Reconnect the Ribbon Cable as per<br />
section 7.1.<br />
8.3 Pressurize EasyMate <strong>Reservoir</strong>, leak test<br />
8.3.1 Connect a variable oxygen pressure source to the LOX EasyMate <strong>Reservoir</strong> Pressurization<br />
Fixture (P/N 505650).<br />
8.3.2 Connect the EasyMate <strong>Reservoir</strong> Pressurization Fixture to the Fill Connector.<br />
8.3.3 Increase variable air or oxygen source to 20 psig (1.38 bar).<br />
8.3.4 Allow the pressure in the EasyMate <strong>Reservoir</strong> to stabilize for about 2 minutes.<br />
8.3.5 Listen for any audible leaks. If leaks are suspected, apply oxygen safe liquid leak detector<br />
to suspected leak area to confirm.<br />
8.3.6 Remove the EasyMate <strong>Reservoir</strong> Pressurization Fixture and make note of the time and the<br />
pressure on Pressure Test Assembly.<br />
8.3.7 Allow the EasyMate <strong>Reservoir</strong> to remain undisturbed for 8 hours.<br />
8.3.8 Check Pressure on the Pressure Test Assembly, there should not be a loss of more then<br />
1 psig (0.07 bar). If there is a loss of 1 psig (0.07 bar) or greater, retest for leaks with<br />
oxygen safe liquid leak detector and repair.<br />
8.4 Verify <strong>Oxygen</strong> Outlet Fitting flow (8 LPM)<br />
8.4.1 Connect a oxygen liter meter to the ball valve outlet fitting of the Pressure Test<br />
Assembly and open valve.<br />
<strong>PM2300</strong> <strong>Series</strong> <strong>Liquid</strong> <strong>Oxygen</strong> <strong>Reservoir</strong><br />
<strong>Technical</strong> <strong>Service</strong> <strong>Manual</strong><br />
52
8.0 Operation Verification Procedure (no LOX in EasyMate <strong>Reservoir</strong>) (continued)<br />
8.4.2 Connect a variable oxygen pressure source to the EasyMate <strong>Reservoir</strong> Pressurization<br />
Fixture, reference Figure 129.<br />
8.4.3 Increase variable oxygen source to 20 psig (1.38 bar).<br />
8.4.4 Allow the pressure in the EasyMate <strong>Reservoir</strong> to stabilize for about 2 minutes.<br />
8.4.5 Verify that the outlet flow is 8LPM +/- 1 LPM.<br />
8.4.6 Remove the liter meter from the Pressure Test assembly and close ball valve.<br />
8.5 Verify Pressure Relief valves<br />
8.5.1 Slowly increase pressure on the variable oxygen pressure source until both pressure relief<br />
valves open (crack).<br />
NOTE: You may apply oxygen safe liquid leak detector to the Pressure Relief Valves to<br />
help determine when they open.<br />
8.5.2 The opening (or cracking) pressure of both Pressure Relief Valves should be 21.5 – 24.5<br />
psig (1.48 – 1.69 bar).<br />
8.5.3 If either pressure relief Valve fails to open within the specification, it must be replaced as<br />
per section 7.6.<br />
8.5.4 Slowly decrease the variable oxygen pressure source until both Pressure Relief Valves<br />
have just closed (reset).<br />
8.5.5 Both Pressure relief valves should have closed (reset) at or above 21 psig (1.45 bar).<br />
8.5.6 If either Pressure Relief Valve fails to close (reset) within specification it must be replaced<br />
as per section 7.6.<br />
Figure 129<br />
<strong>PM2300</strong> <strong>Series</strong> <strong>Liquid</strong> <strong>Oxygen</strong> <strong>Reservoir</strong><br />
<strong>Technical</strong> <strong>Service</strong> <strong>Manual</strong><br />
53
8.0 Operation Verification Procedure (no LOX in EasyMate <strong>Reservoir</strong>) (continued)<br />
8.6 NER Test<br />
8.6.1 Fill the EasyMate <strong>Reservoir</strong> as per Fill Procedure in section 5.0 to at least 1/3 full.<br />
8.6.2 Allow the EasyMate <strong>Reservoir</strong> to remain undisturbed for approximately 24 hours.<br />
8.6.3 Carefully place the EasyMate <strong>Reservoir</strong> on a calibrated weight scale and record weight<br />
and time.<br />
8.6.4 Remove from scale and allow the EasyMate <strong>Reservoir</strong> to remain undisturbed for<br />
approximately 24 hours.<br />
8.6.5 Carefully place the EasyMate <strong>Reservoir</strong> on a calibrated weight scale and record weight<br />
and time.<br />
8.6.6 Calculate the NER with the following formula:<br />
Weight change (lbs.)<br />
Elapsed Time (hours)<br />
8.6.7 Confirm that the NER is .0625 lbs. per hour (1.5 lbs. per day) or less. If the NER is higher<br />
then specification repeat steps 8.7.1 to 8.7.6. If the NER still exceeds specification retest<br />
for leaks. If no leaks are found container may require repair. An NER value exceeding<br />
1.5 lbs/day does not necessarily constitute a loss of vacuum.<br />
Figure 130<br />
<strong>PM2300</strong> <strong>Series</strong> <strong>Liquid</strong> <strong>Oxygen</strong> <strong>Reservoir</strong><br />
<strong>Technical</strong> <strong>Service</strong> <strong>Manual</strong><br />
54
8.0 Operation Verification Procedure (no LOX in EasyMate <strong>Reservoir</strong>) (continued)<br />
8.7 Verify <strong>Liquid</strong> Level (reference User manual)<br />
8.7.1 Press the <strong>Liquid</strong> Level Indicator Activation Button.<br />
8.7.2 The <strong>Liquid</strong> Level Indicator LED lights should illuminate in sequence from bottom to top.<br />
8.7.3 Then the corresponding amount of LEDs will illuminate to the level of LOX in the EasyMate<br />
<strong>Reservoir</strong>. The LED will then all turn off (time out) in 5 seconds.<br />
Figure 131<br />
Figure 132<br />
<strong>PM2300</strong> <strong>Series</strong> <strong>Liquid</strong> <strong>Oxygen</strong> <strong>Reservoir</strong><br />
<strong>Technical</strong> <strong>Service</strong> <strong>Manual</strong><br />
55
ITEM<br />
NO.<br />
PART NO. / DESCRIPTION QTY.<br />
1 504993 - VALVE ASSY, PRIMARY RELIEF ECONOMIZER 2<br />
2 504986 - MANIFOLD, ECONOMIZER 1<br />
3 504988 - CAP, MANIFOLD, ECONOMIZER 1<br />
4 504989 - SCREW, ADJUSTMENT, ECONOMIZER 1<br />
5 504991 - CAP, SPRING SEAT, ECONOMIZER 1<br />
6 505104 - SPRING 1<br />
7 505111 - FITTING, INLET 1<br />
8 504987 - FITTING, OUTLET, ECONOMIZER 1<br />
9 504992 - DIAPHRAGM, ECONOMIZER 1<br />
10 505029 - O-RING #6 1<br />
11 505638 - O-RING, 9MM x 2MM 1<br />
12 505211 - WASHER, FLAT 1<br />
13 505212 - PIN, DOWEL 2<br />
14 505213 - CLIP, HAIRPIN 1<br />
15 505334 - GUIDE, INSERT, CAPILARY TUBE 1<br />
16 505333 - NUT, HEX, LOCK 1<br />
17 505572 - O-RING, #111, SILICONE 1<br />
18 503935 - SCREW 2<br />
18<br />
15<br />
9<br />
6<br />
5<br />
1<br />
11<br />
16<br />
2<br />
10<br />
4<br />
3<br />
14<br />
12<br />
13<br />
17<br />
1<br />
8<br />
<strong>PM2300</strong> <strong>Series</strong> <strong>Liquid</strong> <strong>Oxygen</strong> <strong>Reservoir</strong><br />
<strong>Technical</strong> <strong>Service</strong> <strong>Manual</strong><br />
Economizer Valve Assembly P/N 504985<br />
56
One (1) piece Shroud Assembly<br />
57
Two (2) piece Shroud Assembly<br />
58
505618 Rev3 (E) 02/10/09 Printed in USA