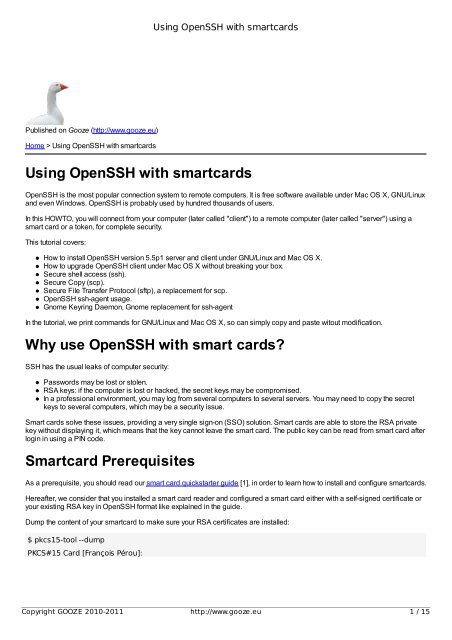
Using OpenSSH with smartcards Why use OpenSSH with smart ...
Using OpenSSH with smartcards Why use OpenSSH with smart ...
Using OpenSSH with smartcards Why use OpenSSH with smart ...
You also want an ePaper? Increase the reach of your titles
YUMPU automatically turns print PDFs into web optimized ePapers that Google loves.
<strong>Using</strong> <strong>OpenSSH</strong> <strong>with</strong> <strong><strong>smart</strong>cards</strong><br />
Published on Gooze (http://www.gooze.eu)<br />
Home > <strong>Using</strong> <strong>OpenSSH</strong> <strong>with</strong> <strong><strong>smart</strong>cards</strong><br />
<strong>Using</strong> <strong>OpenSSH</strong> <strong>with</strong> <strong><strong>smart</strong>cards</strong><br />
<strong>OpenSSH</strong> is the most popular connection system to remote computers. It is free software available under Mac OS X, GNU/Linux<br />
and even Windows. <strong>OpenSSH</strong> is probably <strong>use</strong>d by hundred thousands of <strong>use</strong>rs.<br />
In this HOWTO, you will connect from your computer (later called "client") to a remote computer (later called "server") using a<br />
<strong>smart</strong> card or a token, for complete security.<br />
This tutorial covers:<br />
How to install <strong>OpenSSH</strong> version 5.5p1 server and client under GNU/Linux and Mac OS X.<br />
How to upgrade <strong>OpenSSH</strong> client under Mac OS X <strong>with</strong>out breaking your box.<br />
Secure shell access (ssh).<br />
Secure Copy (scp).<br />
Secure File Transfer Protocol (sftp), a replacement for scp.<br />
<strong>OpenSSH</strong> ssh-agent usage.<br />
Gnome Keyring Daemon, Gnome replacement for ssh-agent<br />
In the tutorial, we print commands for GNU/Linux and Mac OS X, so can simply copy and paste witout modification.<br />
<strong>Why</strong> <strong>use</strong> <strong>OpenSSH</strong> <strong>with</strong> <strong>smart</strong> cards?<br />
SSH has the usual leaks of computer security:<br />
Passwords may be lost or stolen.<br />
RSA keys: if the computer is lost or hacked, the secret keys may be compromised.<br />
In a professional environment, you may log from several computers to several servers. You may need to copy the secret<br />
keys to several computers, which may be a security issue.<br />
Smart cards solve these issues, providing a very single sign-on (SSO) solution. Smart cards are able to store the RSA private<br />
key <strong>with</strong>out displaying it, which means that the key cannot leave the <strong>smart</strong> card. The public key can be read from <strong>smart</strong> card after<br />
login in using a PIN code.<br />
Smartcard Prerequisites<br />
As a prerequisite, you should read our <strong>smart</strong> card quickstarter guide [1], in order to learn how to install and configure <strong><strong>smart</strong>cards</strong>.<br />
Hereafter, we consider that you installed a <strong>smart</strong> card reader and configured a <strong>smart</strong> card either <strong>with</strong> a self-signed certificate or<br />
your existing RSA key in <strong>OpenSSH</strong> format like explained in the guide.<br />
Dump the content of your <strong>smart</strong>card to make sure your RSA certificates are installed:<br />
$ pkcs15-tool --dump<br />
PKCS#15 Card [François Pérou]:<br />
Copyright GOOZE 2010-2011 http://www.gooze.eu 1 / 15
<strong>Using</strong> <strong>OpenSSH</strong> <strong>with</strong> <strong><strong>smart</strong>cards</strong><br />
Version : 1<br />
Serial number : 2851294610040810<br />
Manufacturer ID: EnterSafe<br />
Last update : 20100919114626Z<br />
Flags : EID compliant<br />
PIN [User PIN]<br />
Com. Flags: 0x3<br />
ID : 01<br />
Flags : [0x32], local, initialized, needs-padding<br />
Length : min_len:4, max_len:16, stored_len:16<br />
Pad char : 0x00<br />
Reference : 1<br />
Type : ascii-numeric<br />
Path : 3f005015<br />
Private RSA Key [Private Key]<br />
Com. Flags : 3<br />
Usage : [0x4], sign<br />
Access Flags: [0x0]<br />
ModLength : 2048<br />
Key ref : 1<br />
Native : yes<br />
Path : 3f005015<br />
Auth ID : 01<br />
ID : f7af721c8db60f82d726930ccf7d253e73aa45c6<br />
Public RSA Key [Public Key]<br />
Com. Flags : 2<br />
Usage : [0x4], sign<br />
Access Flags: [0x0]<br />
ModLength : 2048<br />
Key ref : 0<br />
Native : no<br />
Path : 3f0050153000<br />
Auth ID :<br />
ID : f7af721c8db60f82d726930ccf7d253e73aa45c6<br />
Software prerequisites<br />
Although patches were submitted years ago, <strong>smart</strong> card support in <strong>OpenSSH</strong> is very recent:<br />
Only <strong>OpenSSH</strong> version 5.4p1 supports <strong>smart</strong>card using PKCS#11 authentication. Furthermore, there is a bug in <strong>OpenSSH</strong><br />
v5.4p1 release preventing ssh from reading pkcs#11 config in /etc/ssh/ssh_config. Although this is a minor bug, this proves to be<br />
tedious.<br />
Therefore we recommand using <strong>OpenSSH</strong> 5.5p1.<br />
To check <strong>OpenSSH</strong> version on your computer, running client:<br />
$ ssh -v<br />
<strong>OpenSSH</strong>_5.4p1, OpenSSL 0.9.8m 25 Feb 2010<br />
In this example, we are running <strong>OpenSSH</strong> 5.4p1.<br />
You should upgrade to <strong>OpenSSH</strong> 5.5p1.<br />
Copyright GOOZE 2010-2011 http://www.gooze.eu 2 / 15
<strong>Using</strong> <strong>OpenSSH</strong> <strong>with</strong> <strong><strong>smart</strong>cards</strong><br />
You should upgrade to <strong>OpenSSH</strong> 5.5p1.<br />
In the tutorial, you will learn how to upgrade <strong>OpenSSH</strong>.<br />
Understanding <strong>OpenSSH</strong> client and server logic<br />
When using <strong><strong>smart</strong>cards</strong>, you will connect from a client (usually your computer) to a server (a remote computer).<br />
<strong>OpenSSH</strong> should be installed on the client and on the server:<br />
Client is running SSH client, running from console using "ssh" syntax.<br />
Server is running SSH server, usually started automatically on boot by a daemon process.<br />
Of course, <strong>smart</strong>card authentication is performed on client.<br />
Installing <strong>OpenSSH</strong> on client<br />
This section describes how to install <strong>OpenSSH</strong> client on your station.<br />
<strong>OpenSSH</strong> client on GNU | Linux<br />
Installing <strong>OpenSSH</strong> client from binaries<br />
Recent GNU/Linux distributions offer <strong>OpenSSH</strong> 5.5p1: Debian SID, Ubuntu 10.10, etc ...<br />
After upgrading your distribution to the latest release, run:<br />
$ apt-get install openssh-client<br />
Then query <strong>OpenSSH</strong> version to make sure you have installed 5.5p1:<br />
$ ssh -v<br />
<strong>OpenSSH</strong>_5.5p1 Debian-4, OpenSSL 0.9.8o 01 Jun 2010<br />
Installing <strong>OpenSSH</strong> client from sources<br />
Remove <strong>OpenSSH</strong> binary packages:<br />
$ apt-get remove ssh<br />
Download <strong>OpenSSH</strong> sources from one of these mirrors [2].<br />
Untar and compile <strong>with</strong> some usual options:<br />
$ cd openssh<br />
$ ./configure --prefix=/usr --sysconfdir=/etc/ssh --libexecdir=/usr/lib/openssh --mandir=/usr/share/man<br />
$ make<br />
$ sudo make install<br />
You ssh client is ready for <strong><strong>smart</strong>cards</strong>.<br />
<strong>OpenSSH</strong> client on Mac OS X<br />
Copyright GOOZE 2010-2011 http://www.gooze.eu 3 / 15
<strong>Using</strong> <strong>OpenSSH</strong> <strong>with</strong> <strong><strong>smart</strong>cards</strong><br />
Mac OS X 10.8<br />
Mac OS X 10.8 (Mountain Lion) does not support PKCS#11.<br />
Mac OS X 10.7 / 10.6<br />
Mac OS X 10.7 (Lion) and Mac OS X 10.6 (Leopard) ship <strong>with</strong> a recent versiosn of <strong>OpenSSH</strong>, which supports <strong><strong>smart</strong>cards</strong>.<br />
If you are running Mac OS X 10.6, simply upgrade your system and skip this page<br />
Mac OS X 10.5<br />
Mac OS X 10.5 ships <strong>with</strong> <strong>OpenSSH</strong> 5.2p1, which is outdated:<br />
$ /usr/bin/ssh -v<br />
<strong>OpenSSH</strong>_5.2p1, OpenSSL 0.9.7l 28 Sep 2006<br />
<strong>OpenSSH</strong> 5.5p1 is available from MacPorts [3]<br />
Installing MacPorts will give you access to a vast repository of Free Software.<br />
The only drawback is that MacPorts does not provide binaries.<br />
During installation, compilation is automatic.<br />
Installing MacPorts<br />
To install MacPorts, read our MacPorts tutorial [4].<br />
Installing <strong>OpenSSH</strong> client<br />
To install openssh client, run the following commands:<br />
$ sudo port -d selfupdate<br />
$ sudo port install openssh<br />
---> Computing dependencies for openssh<br />
---> Dependencies to be installed: openssl zlib xauth pkgconfig xorg-libXext xorg-libX11 xorg-bigreqsproto<br />
xorg-inputproto xorg-kbproto xorg-libXau xorg-xproto xorg-libXdmcp xorg-util-macros xorg-xcmiscproto<br />
xorg-xextproto xorg-xf86bigfontproto xorg-xtrans xorg-libXmu xorg-libXt xorg-libsm xorg-libice<br />
This will automatically compile <strong>OpenSSH</strong> and its dependencies.<br />
If you are running a slow G4 computer, buy you a beer, it can take up to several hours!<br />
Note: Mac OS X ships <strong>with</strong> OpenSSL 0.97. Installing <strong>OpenSSH</strong> recent version requires OpenSSL 0.98. MacPorts may stop and<br />
ask you to upgrade OpenSSL. Enter the command and continue installation.<br />
In the end of installation process, the installer will also ask you to start <strong>OpenSSH</strong> server:<br />
###########################################################<br />
# A startup item has been generated that will aid in<br />
# starting openssh <strong>with</strong> launchd. It is disabled<br />
# by default. Execute the following command to start it,<br />
# and to ca<strong>use</strong> it to launch at startup:<br />
#<br />
# sudo port load openssh<br />
###########################################################<br />
Copyright GOOZE 2010-2011 http://www.gooze.eu 4 / 15
<strong>Using</strong> <strong>OpenSSH</strong> <strong>with</strong> <strong><strong>smart</strong>cards</strong><br />
Do not run this command, as you will continue using Mac OS X integrated <strong>OpenSSH</strong> server.<br />
Testing <strong>OpenSSH</strong> installation<br />
Please note that the legacy <strong>OpenSSH</strong> server and client from Apple is not removed.<br />
The newer version of <strong>OpenSSH</strong> is installed in /opt/local/ tree.<br />
Now the common SSH commands point to the MacPorts <strong>OpenSSH</strong> installation:<br />
$ which ssh ssh-agent ssh-add<br />
/opt/local/bin/ssh<br />
/opt/local/bin/ssh-agent<br />
/opt/local/bin/ssh-add<br />
Query ssh version:<br />
$ ssh -v<br />
<strong>OpenSSH</strong>_5.5p1, OpenSSL 0.9.8o 01 Jun 2010<br />
usage: ssh [-1246AaCfgKkMNnqsTtVvXxYy] [-b bind_address] [-c cipher_spec]<br />
[-D [bind_address:]port] [-e escape_char] [-F configfile]<br />
[-I pkcs11] [-i identity_file]<br />
[-L [bind_address:]port:host:hostport]<br />
[-l login_name] [-m mac_spec] [-O ctl_cmd] [-o option] [-p port]<br />
[-R [bind_address:]port:host:hostport] [-S ctl_path]<br />
[-W host:port] [-w local_tun[:remote_tun]]<br />
[<strong>use</strong>r@]hostname [command]<br />
You are running the cutting-age ssh 5.5p1, which supports <strong><strong>smart</strong>cards</strong>.<br />
Configuring launchd to run ssh-agent on startup<br />
Now we need to make sure that ssh-agent 5.5p1 is running on startup.<br />
Open the following file:<br />
/System/Library/LaunchAgents/org.openbsd.ssh-agent.plist<br />
Replace the line:<br />
/usr/bin/ssh-agent<br />
With:<br />
/opt/local/bin/ssh-agent<br />
To lauch ssh-agent automatically, you will also need to fix credentials:<br />
$sudo chown root:wheel /opt/local/bin/ssh*<br />
Reboot Mac OS X.<br />
Copyright GOOZE 2010-2011 http://www.gooze.eu 5 / 15
<strong>Using</strong> <strong>OpenSSH</strong> <strong>with</strong> <strong><strong>smart</strong>cards</strong><br />
Installing <strong>OpenSSH</strong> on server<br />
This section describes how to install <strong>OpenSSH</strong> server on your station.<br />
<strong>OpenSSH</strong> version on the server is not very important, although it is preferable to have a recent version.<br />
<strong>OpenSSH</strong> server on GNU | Linux<br />
To install <strong>OpenSSH</strong> server on a recent GNU/Linux station, enter:<br />
$ apt-get install openssh-server<br />
After installation, <strong>OpenSSH</strong> will start automatically.<br />
<strong>OpenSSH</strong> server on Mac OS X<br />
<strong>OpenSSH</strong> server is part of Mac OS X and you don't need to install any additional package.<br />
To enable the <strong>OpenSSH</strong> server of Mac OS X, open System Preferences:<br />
Click on sharing and enable Remote Login:<br />
Copyright GOOZE 2010-2011 http://www.gooze.eu 6 / 15
<strong>Using</strong> <strong>OpenSSH</strong> <strong>with</strong> <strong><strong>smart</strong>cards</strong><br />
This will start up <strong>OpenSSH</strong> server automatically.<br />
Reading SSH public key on card (client side)<br />
Connect the <strong>smart</strong> card reader and insert a <strong>smart</strong> card.<br />
If you are using a token, connect the USB key.<br />
In the next paragraphs, '*' indicate that text was shortened for readability.<br />
Query the available RSA keys:<br />
$ pkcs15-tool --list-public-keys<br />
<strong>Using</strong> reader <strong>with</strong> a card: OmniKey CardMan 4321 00 00<br />
Public RSA Key [Public Key]<br />
Com. Flags : 2<br />
Usage : [0x4], sign<br />
Access Flags: [0x0]<br />
ModLength : 2048<br />
Key ref : 0<br />
Native : no<br />
Path : 3f0050153000<br />
Auth ID : 01<br />
ID : 7645d913d5b4e03f3fe5*****f02324c23a7ebf<br />
In our example, the public key ID is 7645d913d5b4e03f3fe5*****f02324c23a7ebf4.<br />
Sometimes, there is no public key, only a private key. Try:<br />
$ pkcs15-tool --list-keys<br />
<strong>Using</strong> reader <strong>with</strong> a card: Feitian ePass2003 00 00<br />
Private RSA Key [Private Key]<br />
Object Flags : [0x3], private, modifiable<br />
Usage : [0x2E], decrypt, sign, signRecover, unwrap<br />
Access Flags : [0x0]<br />
Copyright GOOZE 2010-2011 http://www.gooze.eu 7 / 15
<strong>Using</strong> <strong>OpenSSH</strong> <strong>with</strong> <strong><strong>smart</strong>cards</strong><br />
ModLength : 2048<br />
Key ref : 0 (0x0)<br />
Native : yes<br />
Path : 3f0050152900<br />
Auth ID : 01<br />
ID : 7645d913d5b4e03f3fe5*****f02324c23a7ebf<br />
Now extract the RSA key in SSH format:<br />
$ pkcs15-tool --read-ssh-key 7645d913d5b4e03f3fe5*****f02324c23a7ebf4<br />
<strong>Using</strong> reader <strong>with</strong> a card: OmniKey CardMan 4321 00 00<br />
Please enter PIN [User PIN]:<br />
2048 65537 258115708996235*****134757454178319<br />
ssh-rsa AAAAB3NzaC*****ed0aZdx9FFu/w6l7P5KsndWgP<br />
Notice the RSA public key in SSH format:<br />
ssh-rsa AAAB3NzaC*****ed0aZdx9FFu/w6l7P5KsndWgP<br />
Installing public key on <strong>OpenSSH</strong> server<br />
In this section we will copy your public RSA key to the ~/.ssh/authorized_keys file on server.<br />
The .ssh notation denotes a hidden folder.<br />
This folder should be inside the home of the <strong>use</strong>r connecting.<br />
Please notice that on the server, the .ssh folder may not exist.<br />
In which case you will need to create it.<br />
In our example, we check that the .ssh exist:<br />
$ ls -lh /home/fperou/.ssh<br />
authorized_keys<br />
If the .ssh folder does not exist, create it using the <strong>use</strong>r account:<br />
$ mkdir ~/.ssh<br />
$ touch ~/.ssh/authorized_keys<br />
Copy the content of the public key (on <strong>smart</strong> card) to the ~/.ssh/authorized_keys file (on server). In our example:<br />
ssh-rsa AAAAB3NzaC1yc2EAAAADAQ********9FFu/w6l7P5KsndWgP<br />
<strong>Using</strong> ssh <strong>with</strong> <strong>smart</strong> cards<br />
In our example, we log using ssh client, <strong>use</strong>r 'fperou' on remote server 'remotehost':<br />
GNU/Linux:<br />
$ ssh -I /usr/lib/opensc-pkcs11.so fperou@remotehost<br />
Enter PIN for 'FRANCOIS PEROU (User PIN)':****<br />
Copyright GOOZE 2010-2011 http://www.gooze.eu 8 / 15
<strong>Using</strong> <strong>OpenSSH</strong> <strong>with</strong> <strong><strong>smart</strong>cards</strong><br />
francois@remotehost:~$<br />
To ease connection, you may add this line to /etc/ssh/ssh_config:<br />
PKCS11Provider /usr/lib/opensc-pkcs11.so<br />
Mac OS X:<br />
$ ssh -I /Library/OpenSC/lib/opensc-pkcs11.so fperou@remotehost<br />
Enter PIN for 'FRANCOIS PEROU (User PIN)':****<br />
francois@remotehost:~$<br />
To ease connection, you may add this line to /etc/ssh_config file (Mac OS X 10.6 / 10.7) or /opt/local/etc/ssh/ssh_config (Mac<br />
Ports):<br />
PKCS11Provider /Library/OpenSC/lib/opensc-pkcs11.so<br />
Exit and run the same command using verbose output:<br />
ssh -v francois@remotehost<br />
<strong>OpenSSH</strong>_5.5p1, OpenSSL 0.9.8m 25 Feb 2010<br />
debug1: Reading configuration data /usr/etc/ssh_config<br />
debug1: Connecting to ****.*****.com [88.160.168.33] port 22.<br />
debug1: Connection established.<br />
debug1: manufacturerID OpenSC (www.opensc-project.org [5] cryptokiVersion 2.20 libraryDescription<br />
libraryVersion 0.0<br />
debug1: label manufacturerID \ model serial \ flags 0x40d<br />
debug1: have 1 keys<br />
debug1: Remote protocol version 2.0, remote software version <strong>OpenSSH</strong>_5.3p1 Debian-3<br />
debug1: match: <strong>OpenSSH</strong>_5.3p1 Debian-3 pat <strong>OpenSSH</strong>*<br />
debug1: Enabling compatibility mode for protocol 2.0<br />
debug1: Local version string SSH-2.0-<strong>OpenSSH</strong>_5.4<br />
debug1: SSH2_MSG_KEXINIT sent<br />
debug1: SSH2_MSG_KEXINIT received<br />
debug1: kex: server->client aes128-ctr hmac-md5 none<br />
debug1: kex: client->server aes128-ctr hmac-md5 none<br />
debug1: SSH2_MSG_KEX_DH_GEX_REQUEST(1024
<strong>Using</strong> <strong>OpenSSH</strong> <strong>with</strong> <strong><strong>smart</strong>cards</strong><br />
debug1: pkcs11_provider_unref: 0x153fb90 refcount 2<br />
debug1: Authentication succeeded (publickey).<br />
debug1: channel 0: new [client-session]<br />
debug1: Requesting no-more-sessions@openssh.com [6]<br />
debug1: Entering interactive session.<br />
Linux firewall 2.6.32-trunk-486 #1 Sun Jan 10 05:53:18 UTC 2010 i686<br />
The programs included <strong>with</strong> the Debian GNU/Linux system are free software;<br />
the exact distribution terms for each program are described in the<br />
individual files in /usr/share/doc/*/copyright.<br />
Debian GNU/Linux comes <strong>with</strong> ABSOLUTELY NO WARRANTY, to the extent<br />
permitted by applicable law.<br />
Last login: Thu Apr 1 16:57:20 2010 from xxxxxxxxxxxx<br />
Make sure that <strong>OpenSSH</strong> is asking for PIN and not using local keys in ~/.ssh on the client side.<br />
<strong>Using</strong> scp <strong>with</strong> <strong><strong>smart</strong>cards</strong><br />
scp allows to specify any <strong>OpenSSH</strong> syntax using -o switch.<br />
GNU/Linux:<br />
To <strong>use</strong> <strong>smart</strong> cards, add this switch to your scp command line:<br />
-o PKCS11Provider=/usr/lib/opensc-pkcs11.so<br />
Therefore a common file transfer using scp would be:<br />
$ scp -v -o PKCS11Provider=/usr/lib/opensc-pkcs11.so filename <strong>use</strong>r@host:path<br />
To ease connection, you may add this line to /etc/ssh/ssh_config:<br />
PKCS11Provider /usr/lib/opensc-pkcs11.so<br />
Mac OS X:<br />
To <strong>use</strong> <strong>smart</strong> cards, add this switch to your scp command line:<br />
-o PKCS11Provider=/Library/OpenSC/lib/opensc-pkcs11.so<br />
Therefore a common file transfer using scp would be:<br />
$ scp -v -o PKCS11Provider=//Library/OpenSC/lib/opensc-pkcs11.so filename <strong>use</strong>r@host:path<br />
To ease connection, you may add this line to /opt/local/etc/ssh/ssh_config:<br />
PKCS11Provider /Library/OpenSC/lib/opensc-pkcs11.so<br />
It is possible to enter several filenames or wildcards to avoid sending multiple commands:<br />
$ scp -v filename1 filename2 filename-other* <strong>use</strong>r@host:path<br />
Copyright GOOZE 2010-2011 http://www.gooze.eu 10 / 15
<strong>Using</strong> <strong>OpenSSH</strong> <strong>with</strong> <strong><strong>smart</strong>cards</strong><br />
<strong>Using</strong> ssh authentication agent ssh-add <strong>with</strong> <strong><strong>smart</strong>cards</strong><br />
<strong>Using</strong> ssh-agent allows to <strong>use</strong> <strong><strong>smart</strong>cards</strong> easily, as you just enter your PIN code once in a session.<br />
Adding keys from PKCS#11 provider<br />
If you are running <strong>OpenSSH</strong> in a shell environment, to load keys, type:<br />
GNU/Linux:<br />
$ ssh-add -s /usr/lib/opensc-pkcs11.so<br />
Enter passphrase for PKCS#11:<br />
Mac OS X:<br />
$ ssh-add -s /Library/OpenSC/lib/opensc-pkcs11.so<br />
Enter passphrase for PKCS#11:<br />
Enter PIN code to authenticate.<br />
Now verify that keys have been loaded:<br />
$ ssh-add -l<br />
2048 75:9e:dd:32:aa:*************:fb:57:1f:ad:2e /usr/lib/opensc-pkcs11.so (RSA)<br />
2048 41:16:d5:c0:37:*************:75:d6:f1:81:dc /usr/lib/opensc-pkcs11.so (RSA)<br />
You will be able to <strong>use</strong> SSH, SCP, SFTP <strong>with</strong>out entering PIN code again.<br />
Now you may also comment this line, which becomes <strong>use</strong>less:<br />
# PKCS11Provider /usr/lib/opensc-pkcs11.so<br />
as ssh-agent will load RSA keys from <strong><strong>smart</strong>cards</strong>.<br />
Removing keys provided by PKCS#11 provider<br />
<strong>Using</strong> the usual command does not work:<br />
$ ssh-add -D<br />
This will remove all identities, but the <strong>smart</strong>card system will be left in a unusable state.<br />
Instead, you should run:<br />
GNU/Linux:<br />
$ ssh-add -e /usr/lib/opensc-pkcs11.so<br />
Mac OS X:<br />
$ ssh-add -e /Library/OpenSC/lib/opensc-pkcs11.so<br />
Copyright GOOZE 2010-2011 http://www.gooze.eu 11 / 15
<strong>Using</strong> <strong>OpenSSH</strong> <strong>with</strong> <strong><strong>smart</strong>cards</strong><br />
<strong>Using</strong> Gnome-keyring <strong>with</strong> <strong><strong>smart</strong>cards</strong> in Gnome<br />
Gnome includes a advanced password and key manager called Gnome-keyring, which acts as a replacement for ssh-agent.<br />
To <strong>use</strong> <strong><strong>smart</strong>cards</strong> <strong>with</strong>out problem, you will need at least Gnome 2.6.30 and Gnome-keyring-daemon 2.6.30. Our tests show<br />
that Gnome 2.6.28 keyring-manager is not able to load keys from PKCS#11 <strong><strong>smart</strong>cards</strong>.<br />
After starting Gnome 2.6.30, run gconf-editor to enable PKCS11 and ssh agent:<br />
Type gconf-edit and open /apps/gnome-keyring/daemon-components<br />
$ gconf-editor<br />
Make sure that pkcs11 and ssh are enabled.<br />
In our tests, we found that Gnome 2.6.30 needed some additional information on startup.<br />
Exit Gconfig and return to desktop.<br />
In the main menu bar, select System->Preferences->Startup Applications.<br />
Startup applications preferences dialog is displayed:<br />
Copyright GOOZE 2010-2011 http://www.gooze.eu 12 / 15
<strong>Using</strong> <strong>OpenSSH</strong> <strong>with</strong> <strong><strong>smart</strong>cards</strong><br />
Although Gnome-Keyring-Daemon is running on startup, you need to inform the daemon to load pkcs#11 and ssh extensions.<br />
Find the Certificate and Key storage icon. Make sure it is enabled:<br />
Copyright GOOZE 2010-2011 http://www.gooze.eu 13 / 15
<strong>Using</strong> <strong>OpenSSH</strong> <strong>with</strong> <strong><strong>smart</strong>cards</strong><br />
If you click on Edit, the command should be:<br />
gnome-keyring-daemon --start --components=pkcs11<br />
Find the Gnome SSH agent icon. Make sure it is enabled:<br />
If you click on Edit, the command should be:<br />
gnome-keyring-daemon --start --components=ssh<br />
Now load your public SSH keys from your <strong>smart</strong>card:<br />
$ ssh-add -s /usr/lib/opensc-pkcs11.so<br />
On prompt, enter PIN code:<br />
Copyright GOOZE 2010-2011 http://www.gooze.eu 14 / 15
<strong>Using</strong> <strong>OpenSSH</strong> <strong>with</strong> <strong><strong>smart</strong>cards</strong><br />
Enter passphrase for PKCS#11: ******<br />
Card added: /usr/lib/opensc-pkcs11.so<br />
You can now list public keys loaded by Gnome-Keyring and ssh-agent:<br />
$ ssh-add -L<br />
ssh-rsa AAAAB3NzaC1yc2EAAAADAQA**********XRVVUYDKsndWgP /usr/lib/opensc-pkcs11.so<br />
ssh-rsa AAAAB3NzaC1yc2EAAAADA*********R9EQ7MeKHsfot4xotz6YqE/RPve+1dAvTl /usr/lib/openscpkcs11.so<br />
You can now <strong>use</strong> your <strong>smart</strong>card in Gnome.<br />
We did not test sftp attachment in Nautilus 2.6.30, but it should work smoothly <strong>with</strong> RSA keys on <strong>smart</strong>card.<br />
Copyright GOOZE.EU 2011.<br />
Source URL: http://www.gooze.eu/howto/using-openssh-<strong>with</strong>-<strong><strong>smart</strong>cards</strong><br />
Links:<br />
[1] http://www.gooze.eu/howto/<strong>smart</strong>-card-quickstarter-guide<br />
[2] http://www.openssh.com/portable.html#mirrors<br />
[3] http://www.macports.org<br />
[4] http://www.gooze.eu/howto/macports-howto<br />
[5] http://www.opensc-project.org<br />
[6] mailto:no-more-sessions@openssh.com<br />
Copyright GOOZE 2010-2011 http://www.gooze.eu 15 / 15


