- Page 1: XX112-36-00 Kollector Hybrid Networ
- Page 5 and 6: Table of Contents CHAPTER 1, INTROD
- Page 7 and 8: Using the Language Translation Util
- Page 9 and 10: XX112-36-00 Rev 909 Kollector Hybri
- Page 11 and 12: What Is the Kollector? The Kollecto
- Page 13 and 14: No, ViconNet can handle an unlimite
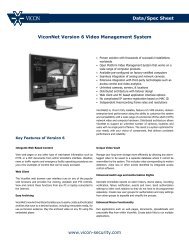
- Page 15 and 16: ViconNet Products ViconNet’s envi
- Page 17 and 18: Type Product Application Options Av
- Page 19 and 20: System Architecture The diagram sho
- Page 21 and 22: 12 • Introducing ViconNet XX112-3
- Page 23 and 24: Logging In Logging in to the ViconN
- Page 25 and 26: The following example illustrates t
- Page 27 and 28: Button Description • Configuring
- Page 29 and 30: Scheduler State The current operati
- Page 31 and 32: For the Kollectors, the maximum num
- Page 33 and 34: To activate or deactivate a camera,
- Page 35 and 36: Devices (cameras, encoders and so o
- Page 37 and 38: • Primary Info: Displays the Prim
- Page 39 and 40: • Start Playback From Time: Enabl
- Page 41 and 42: About Picture Quality and Refresh M
- Page 43 and 44: Function Controls The ViconNet Func
- Page 45 and 46: Option Description Backward: Rewind
- Page 47 and 48: The following example illustrates t
- Page 49 and 50: Each storage location (represented
- Page 51 and 52: Recorded Device Contents The record
- Page 53 and 54:
Date/Time Controls The From and To
- Page 55 and 56:
Zoom Controls The Zoom Controls ena
- Page 57 and 58:
Functions and Settings The function
- Page 59 and 60:
If the System Authentication featur
- Page 61 and 62:
Column Remote Time Description The
- Page 63 and 64:
Logging Out, Exiting or Shutting Do
- Page 65 and 66:
56 • Getting to Know ViconNet XX1
- Page 67 and 68:
• Defining Texting and Email, pag
- Page 69 and 70:
2. Select the Kollector for which y
- Page 71 and 72:
Configuring the Nucleus The Nucleus
- Page 73 and 74:
5. (Optional) To manually synchroni
- Page 75 and 76:
Step 5: Testing the Network In this
- Page 77 and 78:
Configuring/Modifying Cameras, Micr
- Page 79 and 80:
6. Select the required audio sample
- Page 81 and 82:
The following options are provided:
- Page 83 and 84:
Modifying Microphones The ViconNet
- Page 85 and 86:
Configuring/Modifying Relays The Vi
- Page 87 and 88:
Using Reset Nucleus The purpose of
- Page 89 and 90:
Using the Central Failure Notificat
- Page 91 and 92:
Configuring the Central Failure Not
- Page 93 and 94:
Configuring System Authorizations T
- Page 95 and 96:
The system provides two default gro
- Page 97 and 98:
2. Click . The options in the botto
- Page 99 and 100:
Configuring Site Authorization The
- Page 101 and 102:
4. Expand the branches in the Actio
- Page 103 and 104:
Configuring Auto Login Any user wit
- Page 105 and 106:
Configuring Storage Database Utilit
- Page 107 and 108:
5. Click the arrow next to the Sele
- Page 109 and 110:
Clearing Video and Audio Storage Lo
- Page 111 and 112:
Configuring System Authentication W
- Page 113 and 114:
4. Click Add. The next blank line i
- Page 115 and 116:
8. Navigate to and select the devic
- Page 117 and 118:
Configuring Manual Recording and Vi
- Page 119 and 120:
Configuring Automatic Recording The
- Page 121 and 122:
Option Mode Description The Mode (r
- Page 123 and 124:
Column Camera Name DSP FPS The came
- Page 125 and 126:
Using the Recording Verification Sy
- Page 127 and 128:
To activate the RVS mechanism (defa
- Page 129 and 130:
When a recording error, sampling fa
- Page 131 and 132:
After you create a macro, you can c
- Page 133 and 134:
NOTES: If you select the Record & D
- Page 135 and 136:
11. Configure the PTZ, Preset, Expa
- Page 137 and 138:
16. Click to close the Macro Editor
- Page 139 and 140:
Creating Matrix Macros The Kollecto
- Page 141 and 142:
Activating Relays in Macros The Kol
- Page 143 and 144:
5. Set the Sender Information (your
- Page 145 and 146:
To define picture quality and FPS p
- Page 147 and 148:
NOTES: This feature does not relate
- Page 149 and 150:
Defining Alarm Setup Links The Vico
- Page 151 and 152:
4. Select the alarm Display Setting
- Page 153 and 154:
9. Click . • If you selected Vide
- Page 155 and 156:
Option Description The Block Size C
- Page 157 and 158:
The following example shows an alar
- Page 159 and 160:
NOTE: You cannot select a macro wit
- Page 161 and 162:
When Not to Use VMD To conserve val
- Page 163 and 164:
4. In the Select devices for pre/po
- Page 165 and 166:
Video Analytics Engine ViconNet pro
- Page 167 and 168:
5. Select where to save the events,
- Page 169 and 170:
10. Select whether the event will t
- Page 171 and 172:
18. Depending on the system integra
- Page 173 and 174:
25. To clear all or some of the old
- Page 175 and 176:
34. Queries allow for easy and fast
- Page 177 and 178:
5. Click . The Scheduler Settings w
- Page 179 and 180:
If you open the Scheduler Settings
- Page 181 and 182:
Restoring and Backing Up System Set
- Page 183 and 184:
NOTE: If the relevant drivers are n
- Page 185 and 186:
Control How to Activate • Select
- Page 187 and 188:
To create a map set: 1. From the Sy
- Page 189 and 190:
6. Browse to and select the map you
- Page 191 and 192:
9. To add a text box (a comment dis
- Page 193 and 194:
CAUTION cont’d: Any editing that
- Page 195 and 196:
I-Onyx 9XX and Third Party Cameras
- Page 197 and 198:
6. Enter a User Name and Password f
- Page 199 and 200:
Using the Language Translation Util
- Page 201 and 202:
8. Repeat steps 8 to 10 above until
- Page 203 and 204:
Viewing the Settings Summary The Se
- Page 205 and 206:
NOTE: The ViconNet application alwa
- Page 207 and 208:
198 • Configuring the ViconNet Sy
- Page 209 and 210:
Overview The ViconNet system enable
- Page 211 and 212:
Step 1: Selecting the Display Mode
- Page 213 and 214:
Step 2: Selecting Cameras and Micro
- Page 215 and 216:
The following example shows four li
- Page 217 and 218:
Step 3: Controlling the Picture The
- Page 219 and 220:
Step 5: Operating a PTZ Camera The
- Page 221 and 222:
Option Description Sets the PTZ cam
- Page 223 and 224:
Overview The ViconNet system enable
- Page 225 and 226:
To record live video/audio (on-dema
- Page 227 and 228:
Automatic Recording The ViconNet sy
- Page 229 and 230:
Alarm Recording The ViconNet alarm
- Page 231 and 232:
Overview The ViconNet system enable
- Page 233 and 234:
Step 1: Selecting Recorded Video/Au
- Page 235 and 236:
4. (Optional) Select the required v
- Page 237 and 238:
Step 2: Changing the Main Window Di
- Page 239 and 240:
To select the playback time interva
- Page 241 and 242:
To select the playback start time:
- Page 243 and 244:
Step 5: Displaying Recorded Video/A
- Page 245 and 246:
Step 6: Playing Back from a Selecte
- Page 247 and 248:
Move Playback To Time While playbac
- Page 249 and 250:
Museum Search The Museum Search opt
- Page 251 and 252:
6. If you want to find specific fra
- Page 253 and 254:
Option Description The Minimum Numb
- Page 255 and 256:
6. Click the event you want to disp
- Page 257 and 258:
4. In the Archive area, navigate to
- Page 259 and 260:
9. When the Archive completed succe
- Page 261 and 262:
Creating Macros and Schedules Macro
- Page 263 and 264:
2. Select the appropriate macro in
- Page 265 and 266:
Overview The ViconNet system enable
- Page 267 and 268:
2. Click OK to continue to the Save
- Page 269 and 270:
Generating Device Status Reports Th
- Page 271 and 272:
3. Specify the report content time
- Page 273 and 274:
The video is displayed in the Video
- Page 275 and 276:
Generating Audit Log Reports The Au
- Page 277 and 278:
Generating RVS Log Reports The RVS
- Page 279 and 280:
Generating Events History Reports T
- Page 281 and 282:
• The video is displayed in the V
- Page 283 and 284:
2. The screen displays a list of th
- Page 285 and 286:
276 • Generating Reports XX112-36
- Page 287 and 288:
Printing Frames You can print out t
- Page 289 and 290:
Creating Video Clips You can create
- Page 291 and 292:
6. Click the Advanced tab and selec
- Page 293 and 294:
Disabling the Personal Firewall In
- Page 295 and 296:
286 • Configuring the Personal Fi
- Page 297 and 298:
Configuring the Network Adapter Whe
- Page 299 and 300:
3. In the Password field, enter you
- Page 301 and 302:
Step 1: Setting Up the VPN Server T
- Page 303 and 304:
To set up the IP address: 1. Repeat
- Page 305 and 306:
4. In the Company Name field, enter
- Page 307 and 308:
Step 3: Selecting the VPN Network A
- Page 309 and 310:
Troubleshooting If the application
- Page 311 and 312:
When video with analytic behavior i
- Page 313 and 314:
System Default When installing Vico
- Page 315 and 316:
Advanced Notes The actual service r
- Page 317:
Vicon Industries Inc. Corporate Hea