H-CMMD4059.pdf (621.43 кб) - Hyundai Electronics
H-CMMD4059.pdf (621.43 кб) - Hyundai Electronics
H-CMMD4059.pdf (621.43 кб) - Hyundai Electronics

You also want an ePaper? Increase the reach of your titles
YUMPU automatically turns print PDFs into web optimized ePapers that Google loves.
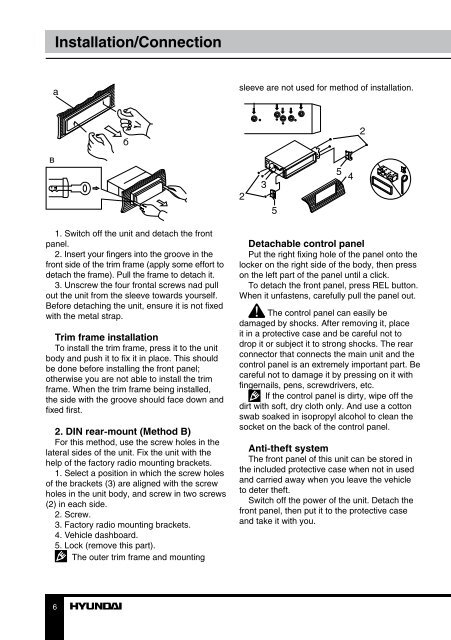
Installation/Connection<br />
а<br />
sleeve are not used for method of installation.<br />
б<br />
2<br />
в<br />
2<br />
3<br />
5<br />
5<br />
4<br />
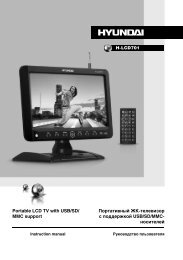
1. Switch off the unit and detach the front<br />
panel.<br />
2. Insert your fingers into the groove in the<br />
front side of the trim frame (apply some effort to<br />
detach the frame). Pull the frame to detach it.<br />
3. Unscrew the four frontal screws nad pull<br />
out the unit from the sleeve towards yourself.<br />
Before detaching the unit, ensure it is not fixed<br />
with the metal strap.<br />
Trim frame installation<br />
To install the trim frame, press it to the unit<br />
body and push it to fix it in place. This should<br />
be done before installing the front panel;<br />
otherwise you are not able to install the trim<br />
frame. When the trim frame being installed,<br />
the side with the groove should face down and<br />
fixed first.<br />
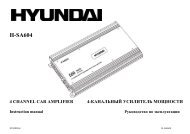
2. DIN rear-mount (Method B)<br />
For this method, use the screw holes in the<br />
lateral sides of the unit. Fix the unit with the<br />
help of the factory radio mounting brackets.<br />
1. Select a position in which the screw holes<br />
of the brackets (3) are aligned with the screw<br />
holes in the unit body, and screw in two screws<br />
(2) in each side.<br />
2. Screw.<br />
3. Factory radio mounting brackets.<br />
4. Vehicle dashboard.<br />
5. Lock (remove this part).<br />
The outer trim frame and mounting<br />
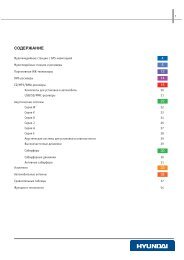
Detachable control panel<br />
Put the right fixing hole of the panel onto the<br />
locker on the right side of the body, then press<br />
on the left part of the panel until a click.<br />
To detach the front panel, press REL button.<br />
When it unfastens, carefully pull the panel out.<br />
The control panel can easily be<br />
damaged by shocks. After removing it, place<br />
it in a protective case and be careful not to<br />
drop it or subject it to strong shocks. The rear<br />
connector that connects the main unit and the<br />
control panel is an extremely important part. Be<br />
careful not to damage it by pressing on it with<br />
fingernails, pens, screwdrivers, etc.<br />
If the control panel is dirty, wipe off the<br />
dirt with soft, dry cloth only. And use a cotton<br />
swab soaked in isopropyl alcohol to clean the<br />
socket on the back of the control panel.<br />
Anti-theft system<br />
The front panel of this unit can be stored in<br />
the included protective case when not in used<br />
and carried away when you leave the vehicle<br />
to deter theft.<br />
Switch off the power of the unit. Detach the<br />
front panel, then put it to the protective case<br />
and take it with you.<br />
6