F1 Smart Treadmill - User Manual - Life Fitness
F1 Smart Treadmill - User Manual - Life Fitness
F1 Smart Treadmill - User Manual - Life Fitness

You also want an ePaper? Increase the reach of your titles
YUMPU automatically turns print PDFs into web optimized ePapers that Google loves.
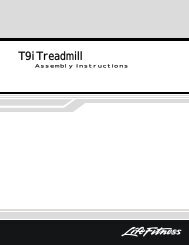
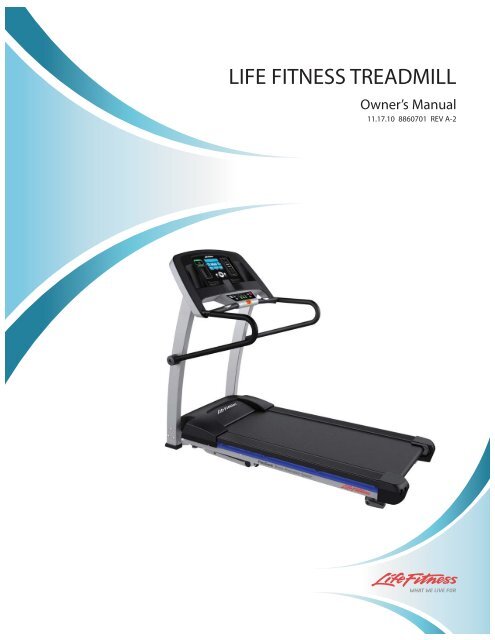
LIFE FITNESS TREADMILL<br />
Owner’s <strong>Manual</strong><br />
11.17.10 8860701 REV A-2
AMERICAS<br />
North America<br />
<strong>Life</strong> <strong>Fitness</strong> Inc.<br />
5100 N River Road<br />
Schiller Park, IL 60176 U.S.A<br />
Telephone: (847) 288 3300<br />
Fax: (847) 288 3703<br />
Service Email: commercialservicereply@lifefitness.com<br />
Sales/Marketing Email:commercialsales@lifefitness.com<br />
Operating Hours: 7:00 am-6:00 pm (CST)<br />
Brazil<br />
<strong>Life</strong> <strong>Fitness</strong> Brasil<br />
Av. Cidade Jardim, 900<br />
Jd. Paulistano<br />
São Paulo, SP 01454-000<br />
BRAZIL<br />
SAC: 0800 773 8282<br />
Telephone: +55 (11) 3095 5200<br />
Fax: +55 (11) 3095 5201<br />
Service Email: suporte@lifefitness.com.br<br />
Sales/Marketing Email: lifefitness@lifefitness.com.br<br />
Service Operating Hours:<br />
9:00 - 17:00 (BRT) (Monday-Friday)<br />
Store Operating Hours:<br />
9:00 -20:00 (BRT) (Monday-Friday)<br />
10:00 - 16:00 (BRT) (Saturday)<br />
Latin America & Caribbean*<br />
<strong>Life</strong> <strong>Fitness</strong> Inc.<br />
5100 N River Road<br />
Schiller Park, IL 60176 U.S.A<br />
Telephone: (847) 288 3300<br />
Fax: (847) 288 3703<br />
Service Email: customersupport@lifefitness.com<br />
Sales/Marketing Email:commercialsales@lifefitness.com<br />
Operating Hours: 7:00am-6:00pm (CST)<br />
EUROPE, MIDDLE EAST, & AFRICA (EMEA)<br />
Netherlands & Luxemburg<br />
<strong>Life</strong> <strong>Fitness</strong> Atlantic BV<br />
Bijdorpplein 25-31<br />
2992 LB Barendrecht<br />
THE NETHERLANDS<br />
Telephone: (+31) 180 646 666<br />
Fax: (+31) 180 646 699<br />
Service Email: service.benelux@lifefitness.com<br />
Sales/Marketing Email:<br />
marketing.benelux@lifefitness.com<br />
Operating Hours: 9.00h-17.00h (CET)<br />
United Kingdom & Ireland<br />
<strong>Life</strong> <strong>Fitness</strong> UK LTD<br />
Queen Adelaide<br />
Ely, Cambs, CB7 4UB<br />
Telephone: General Office (+44) 1353.666017<br />
Customer Support (+44) 1353.665507<br />
Fax: (+44) 1353.666018<br />
Service Email: uk.support@lifefitness.com<br />
Sales/Marketing Email: life@lifefitness.com<br />
Operating Hours:<br />
General Office: 9.00am - 5.00pm (GMT)<br />
Customer Support: 8.30am - 5.00pm (GMT)<br />
CORPORATE HEADQUARTERS<br />
5100 River Road<br />
Schiller Park, Illinois 60176 • U.S.A.<br />
847.288.3300 • FAX: 847.288.3703<br />
800.735.3867 (Toll-free within U.S.A., Canada)<br />
Global Website: www.lifefitness.com<br />
INTERNATIONAL OFFICES<br />
Germany & Switzerland<br />
<strong>Life</strong> <strong>Fitness</strong> Europe GMBH<br />
Siemensstraße 3<br />
85716 Unterschleißheim<br />
GERMANY<br />
Telephone: (+49) 89.31 77 51.0 (Germany)<br />
(+41) 0848 000 901 (Switzerland)<br />
Fax: (+49) 89.31 77 51.99 (Germany)<br />
(+41) 043 818 07 20 (Switzerland)<br />
Service Email: kundendienst@lifefitness.com<br />
Sales/Marketing Email: kundenberatung@lifefitness.com<br />
Operating Hours: 08.30 -16.30h (CET)<br />
Austria<br />
<strong>Life</strong> <strong>Fitness</strong> Austria<br />
Vertriebs G.m.b.H.<br />
Dückegasse 7-9/3/36<br />
1220 Vienna<br />
AUSTRIA<br />
Telephone: (+43) 1.61.57.198<br />
Fax: (+43) 1.61.57.198.20<br />
Service Email: kundendienst@lifefitness.com<br />
Marketing/Sales Email: kundenberatung@lifefitness.com<br />
Operating Hours: 9.00h-17.00h (MEZ)<br />
Spain<br />
<strong>Life</strong> <strong>Fitness</strong> IBERIA<br />
C/Frederic Mompou 5,1º1ª<br />
08960 Sant Just Desvern Barcelona<br />
SPAIN<br />
Telephone: (+34) 93.672.4660<br />
Fax: (+34) 93.672.4670<br />
Service Email: info.iberia@lifefitness.com<br />
Sales/Marketing Email: info.iberia@lifefitness.com<br />
Operating Hours:<br />
9.00h-18.00h (Monday-Thursday)<br />
8.30h-15.00h (Friday)<br />
Belgium<br />
<strong>Life</strong> <strong>Fitness</strong> Benelux NV<br />
Parc Industrial de Petit-Rechain<br />
4800 Verviers<br />
BELGIUM<br />
Telephone: (+32) 87 300 942<br />
Fax: (+32) 87 300 943<br />
Service Email: internationalservicesupport@lifefitness.com<br />
Sales/Marketing Email: marketing.benelux@lifefitness.com<br />
Operating Hours: 9.00h -17.00h (CET)<br />
Italy<br />
<strong>Life</strong> <strong>Fitness</strong> Europe GmbH<br />
Siemensstraße 3<br />
85716 Unterschleißheim<br />
GERMANY<br />
Telephone: (+39) 02-55378611<br />
Service: 800438836 (In Italy)<br />
Fax: (+39) 02-55378699<br />
Service Email: assistenzatecnica@lifefitness.com<br />
Sales/Marketing Email: info@lifefitnessitalia.com<br />
Operating Hours: 08:30 - 16:30h (CET)<br />
All Other EMEA countries &<br />
distributor business C-EMEA*<br />
Bijdorpplein 25-31<br />
2992 LB Barendrecht<br />
THE NETHERLANDS<br />
Telephone: (+31) 180 646 644<br />
Fax: (+31) 180 646 699<br />
Service Email: service.db.cemea@lifefitness.com<br />
Sales/Marketing Email:<br />
marketing.db.cemea@lifefitness.com<br />
Operating Hours: 9.00h-17.00h (CET)<br />
ASIA PACIFIC (AP)<br />
Japan<br />
<strong>Life</strong> <strong>Fitness</strong> Japan<br />
Nippon Brunswick Bldg., #8F<br />
5-27-7 Sendagaya<br />
Shibuya-Ku, Tokyo<br />
Japan 151-0051<br />
Telephone: (+81) 3.3359.4309<br />
Fax: (+81) 3.3359.4307<br />
Service Email: service@lifefitnessjapan.com<br />
Sales/Marketing Email: sales@lifefitnessjapan.com<br />
Operating Hours: 9.00h-17.00h (JAPAN)<br />
China and Hong Kong<br />
<strong>Life</strong> <strong>Fitness</strong> Asia Pacific LTD<br />
Room 2610, Miramar Tower<br />
132 Nathan Road<br />
Tsimshatsui, Kowloon<br />
HONG KONG<br />
Telephone: (+852) 2891.6677<br />
Fax: (+852) 2575.6001<br />
Service Email: HongKongEnquiry@lifefitness.com<br />
Sales/Marketing Email: ChinaEnquiry@lifefitness.com<br />
Operating Hours: 9.00h-18.00h<br />
All Other Asia Pacific countries &<br />
distributor business Asia Pacific*<br />
Room 2610, Miramar Tower<br />
132 Nathan Road<br />
Tsimshatsui, Kowloon<br />
HONG KONG<br />
Telephone: (+852) 2891.6677<br />
Fax: (+852) 2575.6001<br />
Service Email: HongKongEnquiry@lifefitness.com<br />
Sales/Marketing Email: ChinaEnquiry@lifefitness.com<br />
Operating Hours: 9.00h-18.00h<br />
1
Before using this product, it is essential to read this ENTIRE operation manual and ALL installation instructions.<br />
This will help in setting up the equipment quickly and in instructing others on how to use it correctly and safely.<br />
Note: This equipment generates, uses and can radiate radio frequency energy, and if not installed and used in accordance<br />
with the operation manual, may cause harmful interference to radio communications. However, there is no guarantee<br />
that the interference will not occur in a particular installation. If this equipment does cause harmful interference to<br />
radio or television reception, which can be determined by turning the equipment off and on, the user is encouraged to try<br />
to correct the interference by one or more of the following measures:<br />
• Re-orient or relocate the receiving antenna.<br />
• Increase the separation between the equipment and the receiver.<br />
• Connect the equipment into an outlet on a circuit different from that to which the receiver is connected.<br />
• Consult the dealer or an experienced radio/TV technician for help.<br />
Class HB (Home): Domestic use.<br />
CAUTION: Any changes or modifications to this equipment could void the product warranty.<br />
Any service other than cleaning or user maintenance, must be performed by an authorized service representative. There<br />
are no user-serviceable parts.<br />
2
TABLE OF CONTENTS<br />
1. Important Safety Instructions . . . . . . . . . . . . . . . . . . . . . . . . . . . . . . . . . . . . . . . . . . . . . . . . . . . . . . . . . . .5<br />
2. <strong>Life</strong> <strong>Fitness</strong> <strong>Treadmill</strong> Overview . . . . . . . . . . . . . . . . . . . . . . . . . . . . . . . . . . . . . . . . . . . . . . . . . . . . . . . .7<br />
3. Assembly . . . . . . . . . . . . . . . . . . . . . . . . . . . . . . . . . . . . . . . . . . . . . . . . . . . . . . . . . . . . . . . . . . . . . . . . . .8<br />
3.1 Unpacking . . . . . . . . . . . . . . . . . . . . . . . . . . . . . . . . . . . . . . . . . . . . . . . . . . . . . . . . . . . . . . . . . . . . . . . . .8<br />
3.2 Component List & Hardware . . . . . . . . . . . . . . . . . . . . . . . . . . . . . . . . . . . . . . . . . . . . . . . . . . . . . . . . . . .8<br />
3.3 Installing Uprights . . . . . . . . . . . . . . . . . . . . . . . . . . . . . . . . . . . . . . . . . . . . . . . . . . . . . . . . . . . . . . . . . . .9<br />
3.4 Installing the Console Assembly . . . . . . . . . . . . . . . . . . . . . . . . . . . . . . . . . . . . . . . . . . . . . . . . . . . . . . .10<br />
3.5 Installing the Handrails . . . . . . . . . . . . . . . . . . . . . . . . . . . . . . . . . . . . . . . . . . . . . . . . . . . . . . . . . . . . . . .11<br />
3.6 Tightening the Screws . . . . . . . . . . . . . . . . . . . . . . . . . . . . . . . . . . . . . . . . . . . . . . . . . . . . . . . . . . . . . . .11<br />
3.7 Attaching the Power Cord . . . . . . . . . . . . . . . . . . . . . . . . . . . . . . . . . . . . . . . . . . . . . . . . . . . . . . . . . . . . .11<br />
4. Setup . . . . . . . . . . . . . . . . . . . . . . . . . . . . . . . . . . . . . . . . . . . . . . . . . . . . . . . . . . . . . . . . . . . . . . . . . . . .12<br />
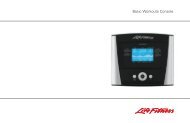
5. Console and Activity Zone Overview . . . . . . . . . . . . . . . . . . . . . . . . . . . . . . . . . . . . . . . . . . . . . . . . . . . .14<br />
6. Console Displays . . . . . . . . . . . . . . . . . . . . . . . . . . . . . . . . . . . . . . . . . . . . . . . . . . . . . . . . . . . . . . . . . . .16<br />
7. Workout Overviews . . . . . . . . . . . . . . . . . . . . . . . . . . . . . . . . . . . . . . . . . . . . . . . . . . . . . . . . . . . . . . . . .19<br />
8. Virtual Trainer . . . . . . . . . . . . . . . . . . . . . . . . . . . . . . . . . . . . . . . . . . . . . . . . . . . . . . . . . . . . . . . . . . . . . .23<br />
9. Heart Rate Zone Training ® Exercise . . . . . . . . . . . . . . . . . . . . . . . . . . . . . . . . . . . . . . . . . . . . . . . . . . . .24<br />
9.1 Why Heart Rate Zone Training ® Exercise? . . . . . . . . . . . . . . . . . . . . . . . . . . . . . . . . . . . . . . . . . . . . . . .24<br />
9.2 Heart Rate Monitoring . . . . . . . . . . . . . . . . . . . . . . . . . . . . . . . . . . . . . . . . . . . . . . . . . . . . . . . . . . . . . . .24<br />
10. Settings Menu . . . . . . . . . . . . . . . . . . . . . . . . . . . . . . . . . . . . . . . . . . . . . . . . . . . . . . . . . . . . . . . . . . . . . .25<br />
10.1 Settings . . . . . . . . . . . . . . . . . . . . . . . . . . . . . . . . . . . . . . . . . . . . . . . . . . . . . . . . . . . . . . . . . . . . . . . . . . .25<br />
10.2 Settings Menu States and Selection Options . . . . . . . . . . . . . . . . . . . . . . . . . . . . . . . . . . . . . . . . . . . . . .25<br />
11. Service and Technical Data . . . . . . . . . . . . . . . . . . . . . . . . . . . . . . . . . . . . . . . . . . . . . . . . . . . . . . . . . . .27<br />
11.1 Troubleshooting . . . . . . . . . . . . . . . . . . . . . . . . . . . . . . . . . . . . . . . . . . . . . . . . . . . . . . . . . . . . . . . . . . . .27<br />
11.2 How to Adjust and Tension the Striding Belt . . . . . . . . . . . . . . . . . . . . . . . . . . . . . . . . . . . . . . . . . . . . . .29<br />
11.3 Preventive Maintenance Tips . . . . . . . . . . . . . . . . . . . . . . . . . . . . . . . . . . . . . . . . . . . . . . . . . . . . . . . . . .30<br />
11.4 Using and Testing the Safety Stop Pull Cord . . . . . . . . . . . . . . . . . . . . . . . . . . . . . . . . . . . . . . . . . . . . . .31<br />
11.5 How to Obtain Product Service . . . . . . . . . . . . . . . . . . . . . . . . . . . . . . . . . . . . . . . . . . . . . . . . . . . . . . . .31<br />
12. Specifications . . . . . . . . . . . . . . . . . . . . . . . . . . . . . . . . . . . . . . . . . . . . . . . . . . . . . . . . . . . . . . . . . . . . . .32<br />
13. Warranty Information . . . . . . . . . . . . . . . . . . . . . . . . . . . . . . . . . . . . . . . . . . . . . . . . . . . . . . . . . . . . . . . .33<br />
© 2010 <strong>Life</strong> <strong>Fitness</strong>, a division of Brunswick Corporation. All rights reserved.<br />
3
This Operation <strong>Manual</strong> describes the functions of the following product:<br />
<strong>Life</strong> <strong>Fitness</strong> <strong>Treadmill</strong> Model:<br />
FTR <strong>Life</strong> <strong>Fitness</strong> <strong>Treadmill</strong><br />
Thank you for purchasing a <strong>Life</strong> <strong>Fitness</strong> treadmill. Before using this product please read this user manual in its entirety<br />
to ensure that you have the knowledge to safely and properly operate all of the features on your treadmill. We hope you<br />
achieve the product experience on your treadmill that you expect, but if you do have any service issues please go to the<br />
How to Obtain Product Service section which will provide information on obtaining domestic and international product<br />
service. See Specifications in this manual for product specific features.<br />
Statement of Purpose: The <strong>Treadmill</strong> is an exercise machine that enables users to walk or run in place on a moving surface.<br />
4<br />
CAUTION:<br />
Health-related injuries may result from incorrect or excessive use of exercise equipment. The manufacturer<br />
STRONGLY recommends seeing a physician for a complete medical exam before undertaking an exercise<br />
program, particularly if the user has a family history of high blood pressure or heart disease, is over the age of<br />
45, smokes, has high cholesterol, is obese, or has not exercised regularly in the past year. The<br />
manufacturer also recommends consulting a fitness professional on the correct use of this product.<br />
If at any time while exercising, the user experiences faintness, dizziness, pain, or shortness of breath,<br />
he or she must stop immediately.
1 IMPORTANT SAFETY INSTRUCTIONS<br />
WARNING: READ ALL INSTRUCTIONS BEFORE USING THE TREADMILL. SAVE THESE INSTRUCTIONS.<br />
DANGER: To reduce the risk of electrical shock, always unplug this <strong>Life</strong> <strong>Fitness</strong> product before cleaning or<br />
attempting any maintenance activity.<br />
WARNING: To reduce the risk of burns, fire, electric shock, or injury, it is imperative to connect each product to a<br />
properly grounded electrical outlet.<br />
WARNING: The treadmill should not be operated when folded up.<br />
WARNING: This treadmill has immobilization software. Only activate the software immobilization when the treadmill<br />
is not in use. Refer to this Owner’s <strong>Manual</strong> for instructions on immobilizing the treadmill. Keep the instructions out of<br />
the reach of children.<br />
WARNING: Fold the treadmill into the upright and locked position BEFORE rolling it over on its side or picking it up<br />
from the floor. The base or folding frame can swing around unexpectedly if this procedure is not followed.<br />
WARNING: Do not move the treadmill by lifting the console. Do not use the console as a handlebar during a<br />
workout.<br />
WARNING: Allow the running surface to come to a complete stop before folding up.<br />
WARNING: Heart rate monitoring systems may be inaccurate. Over exercising may result in serious injury or death.<br />
WARNING: Allow the running surface to come to a complete stop prior to folding it up.<br />
Risk of injury to persons – To avoid injury use extreme caution when stepping onto or off of a moving belt.<br />
• To disconnect, turn power OFF at the ON/OFF switch, then remove plug from electrical outlet.<br />
• Never operate a <strong>Life</strong> <strong>Fitness</strong> product if it has a damaged power cord or electrical plug, or if it has been dropped,<br />
damaged, or even partially immersed in water. Contact <strong>Life</strong> <strong>Fitness</strong> Customer Services.<br />
• Position this product so the power cord plug is accessible to the user.<br />
• Keep the power cord away from heated surfaces. Do not pull the equipment by the power cord or use the cord<br />
as a handle. Do not run the power cord on the floor, under or along the side of the treadmill.<br />
• If the electrical supply cord is damaged it must be replaced by the manufacturer, an authorized service agent, or<br />
a similarly qualified person to avoid a hazard.<br />
• Do not use this product in areas where aerosol spray products are being used or where oxygen is being<br />
administered. Such substances create the danger of combustion and explosion.<br />
• Always follow the console instructions for proper operation.<br />
• This appliance is not intended for use by persons (including children) with reduced physical, sensory or mental<br />
capabilities, or lack of experience and knowledge, unless they have been given supervision or instruction concerning<br />
use of the appliance by a person responsible for their safety.<br />
• Children should be supervised to ensure that they do not play with the appliance.<br />
• Do not use this product outdoors, near swimming pools, or in areas of high humidity.<br />
• Never operate a <strong>Life</strong> <strong>Fitness</strong> product with the air openings blocked. Keep air openings free of lint, hair or any<br />
obstructing material.<br />
• Never insert objects into any openings in this product. If an object should drop inside, turn off the power, unplug<br />
the power cord from the outlet and carefully retrieve it. If the item cannot be reached, contact <strong>Life</strong> <strong>Fitness</strong><br />
Customer Services.<br />
• Never place liquids of any type directly on the unit, except in a bottle holder or accessory tray. Lidded containers<br />
are recommended.<br />
• When using the treadmill, wear shoes with rubber or high traction soles. Do not use shoes with heels, leather<br />
soles, cleats or spikes. Make sure no stones are embedded in the soles. Do not use this product in bare feet.<br />
Keep all loose clothing, shoelaces and towels away from moving parts.<br />
• Do not reach into or underneath the unit, or tip it on its side during operation.<br />
• Keep an open area of 6.5 feet (2 meters) by 3 feet (1 meter) behind the treadmill clear of any obstructions,<br />
including walls, furniture and other equipment.<br />
5
6<br />
• Use the handrails whenever additional stability is required. In case of emergency, such as tripping, the user<br />
should grab the handrails and place his/her feet on the side platforms. The handrails may be held to enhance<br />
stability as needed, but are not for continuous use.<br />
• Never walk or jog backwards on the treadmill.<br />
• Immobilize the treadmill so the motors will not run when the unit is not in use. To do this, press and hold both<br />
the SPEED DOWN ARROW and the STOP key on the console.<br />
• Use caution when folding and unfolding the treadmill. Do not let the treadmill lower to the floor unassisted.<br />
Guide the deck to the floor by hand.<br />
• Use this unit only for its intended use as described in this manual. Do not use attachments not recommended by<br />
the manufacturer.<br />
• In conformity with the European Union Machinery directive 2006/42/EC, this equipment runs at sound pressure<br />
levels below 70 dB(A) at the average operating speed of 8 km/hr.<br />
• The universal electrical grounding symbol is:
2 LIFE FITNESS TREADMILL OVERVIEW<br />
7
3 ASSEMBLY<br />
For safety, and to save time and effort, read this Owner’s <strong>Manual</strong> completely before installing your <strong>Life</strong> <strong>Fitness</strong> <strong>Treadmill</strong>.<br />
Place the treadmill near where it will be used before beginning the unpacking procedure.<br />
3.1 UNPACKING<br />
These unpacking instructions assume you have already done the following:<br />
• Removed the top of the shipping carton.<br />
• Removed this Owner’s <strong>Manual</strong> from the top of the packaged material.<br />
The best method for unpacking the rest of the treadmill is as follows:<br />
• Remove all items on top of the running belt.<br />
• Break down the sides of the inner shipping carton.<br />
• DO NOT remove or unlatch the strap that is positioned over the walking surface.<br />
• Follow assembly instructions starting on page 9.<br />
WARNING: Fold the treadmill into the upright and locked position before rolling it over on its side or picking it up from<br />
the floor. The base or folding frame can swing around unexpectedly if this procedure is not followed.<br />
3.2 COMPONENT LIST & HARDWARE<br />
Identify the following components after unpacking your treadmill:<br />
1. Left Upright . . . . . . . . . . . . . . . . . . . . Qty: 1<br />
2. M8 X 60MM Bolt (Silver) . . . . . . . . . . Qty: 6<br />
3. Star Washers . . . . . . . . . . . . . . . . . . Qty: 14<br />
4. Right Upright . . . . . . . . . . . . . . . . . . . Qty: 1<br />
5. Console Assembly . . . . . . . . . . . . . . Qty: 1<br />
6. M8 X 60MM Bolt (Black) . . . . . . . . . . Qty: 2<br />
7. Handrail Left . . . . . . . . . . . . . . . . . . . Qty: 1<br />
8. M8 X 15MM Bolt (Black) . . . . . . . . . . Qty: 4<br />
9. M8 X 15MM Bolt (Silver) . . . . . . . . . . Qty: 6<br />
10. 6MM Hex Head Wrench . . . . . . . . . . Qty: 1<br />
11. Power Cord . . . . . . . . . . . . . . . . . . . . Qty: 1<br />
12. Emergency Stop Lanyard. . . . . . . . . Qty: 1<br />
13. Flat Washer . . . . . . . . . . . . . . . . . . . . Qty: 4<br />
14. Handrail Right . . . . . . . . . . . . . . . . . . Qty: 1<br />
8<br />
Tool Needed for Assembly:<br />
• 6MM Hex Wrench (included)<br />
STAR WASHER FLAT WASHER<br />
M8 X 15MM BOLT<br />
M8 X 60MM BOLT
3.3 INSTALLING UPRIGHTS<br />
Locate the LEFT UPRIGHT (1). The upright is marked “L”. Position the LEFT UPRIGHT near inside of the left bracket.<br />
a) Connect the two electrical connectors at the bottom of the upright.<br />
b) Set the upright in position while feeding the cable into the upright.<br />
c) Install all hardware and finger tighten at this time. Secure the LEFT UPRIGHT to the left bracket by using three<br />
M8 X 60MM SILVER BOLTS (2) and three STAR WASHERS (3). Secure the front of the upright by installing one<br />
M8 X 15MM SILVER BOLT (9) and one STAR WASHER (3).<br />
CAUTION: Do not pinch the wire when attaching the left upright to the left upright bracket. Carefully feed any excess<br />
wire into the upright tube. Connectors must be inside the upright tube after installation.<br />
2<br />
9<br />
3<br />
1<br />
Locate the RIGHT UPRIGHT (4). The upright is marked “R”. Position the RIGHT UPRIGHT near the inside of the right<br />
bracket. Install all hardware and finger tighten at this time. Secure the RIGHT UPRIGHT to the right bracket by using<br />
three M8 X 60MM SILVER BOLTS (2) and three STAR WASHERS (3). Secure the front of the upright by installing one<br />
M8 X 15MM SILVER BOLT (9) and one STAR WASHER (3).<br />
9
3.4 INSTALLING THE CONSOLE ASSEMBLY<br />
A second person, who is holding the console assembly in place, is recommended.<br />
WARNING: Do not tip the treadmill over on its side. The base frame can swing around unexpectedly if this procedure is<br />
not followed.<br />
Unbuckle the strap on the top of the treadmill.<br />
Fold the treadmill running surface up. Remove the CONSOLE ASSEMBLY (5) from under the walking belt. Fold the<br />
treadmill running surface back down.<br />
a) Set the console assembly into the slot on the right upright. (lower right image)<br />
10<br />
9<br />
b) Connect the two electrical connectors between the LEFT UPRIGHT and the CONSOLE ASSEMBLY. Push any<br />
excess wire into either the upright or the console assembly.<br />
c) Set the console on top of the uprights while pushing the connectors in to the upright. The tabs on the console set<br />
into slots on the uprights to help locate the assembly.<br />
d) Install the four M8 X 15MM SILVER SCREWS and STAR WASHERS that hold the console to the upright. Finger<br />
tighten the screws.<br />
9<br />
3<br />
3<br />
3 9<br />
3<br />
9
3.5 INSTALLING THE HANDRAILS<br />
Attach the RIGHT HANDRAIL (7). The handrails are marked “R” or “L”.<br />
a) Slide the handrail into the tube at the console.<br />
b) Install two M8 X 15MM BLACK SCREWS (8) with two FLAT WASHERS (13) on the top of the handrail. Finger<br />
tighten the screws.<br />
c) Install the M8 X 60MM BLACK SCREWS (6) and STAR WASHER (3) at the bottom of the handrail. Finger tighten<br />
the screws.<br />
6 3<br />
Repeat the above procedure for the LEFT HANDRAIL (7).<br />
3.6 TIGHTENING THE SCREWS<br />
6 3<br />
Use the supplied 6MM HEX WRENCH to tighten all 18 screws on the user assembly points.<br />
3.7 ATTACHING THE POWER CORD<br />
Insert the female plug of your treadmill’s power cord into the male outlet next to your treadmill’s power switch.<br />
8<br />
13<br />
8<br />
13<br />
7<br />
7<br />
11
4 SETUP<br />
ELECTRICAL POWER REQUIREMENTS<br />
Most <strong>Life</strong> <strong>Fitness</strong> <strong>Treadmill</strong>s are intended for use on a normal 120 volt circuit in the United States and Canada. Below is<br />
a table that provides the current rating for this product based on supply voltage. Make sure that the treadmill model<br />
supports the proper line voltage for the installation location before plugging into the outlet. Line voltage is noted on the<br />
product’s serial label.<br />
Supply Voltage (VAC) Frequency (Hz) Maximum Current (Amps)<br />
120 50 / 60 12<br />
230<br />
ELECTRICAL GROUNDING REQUIREMENTS<br />
50 / 60 10<br />
This <strong>Life</strong> <strong>Fitness</strong> product must be properly grounded. If the unit malfunctions or breaks down, proper grounding<br />
provides the path of least resistance for the electric current, which reduces the risk of shock to anyone touching or using<br />
the equipment. Each unit is equipped with an electrical cord, which includes an equipment grounding conductor and a<br />
grounding plug. The plug must be inserted into an outlet that has been properly installed and grounded in accordance<br />
with all local codes and ordinances. A temporary adapter must not be used to connect this plug to a two-pole receptacle<br />
in North America. If a properly grounded, correct amperage outlet is not available, a qualified electrician must install one.<br />
DANGER: A risk of electrical shock may result from improper connection of the equipment’s grounding conductor. Check<br />
with a qualified electrician if you are unsure about proper grounding techniques. Do not modify the plug provided with<br />
this product. If it will not fit an electrical outlet, have a proper outlet installed by a qualified electrician.<br />
TURNING THE UNIT ON<br />
To turn the treadmill on, locate the ON/OFF power switch at the front of the treadmill near the power cord and turn it ON.<br />
HOW TO STABILIZE THE LIFE FITNESS TREADMILL<br />
After placing the unit where it will be used, check its stability. If<br />
there is even a slight rocking motion or the unit is not stable,<br />
determine which stabilizing leg is not resting on the floor. To<br />
adjust, turn the STABILIZING LEG (A) or (B) until the rocking<br />
motion ceases and both stabilizing legs rest firmly on the floor.<br />
Note: If excessive vibration occurs during use, adjust the height<br />
of the levelers (A) closer to the uprights. Do not adjust the height<br />
of the levelers (B) further from the uprights.<br />
Note: It is extremely important that the stabilizing leg be correctly<br />
adjusted for proper operation.<br />
CHECKING THE BELT<br />
After the treadmill has been installed and stabilized, the belt must<br />
be checked to confirm proper tracking. First, ensure the power<br />
cord is plugged into a suitable outlet, as described in the above<br />
Electrical Requirements section. Then turn the treadmill on.<br />
Stand on the side rails of the treadmill and straddle the belt.<br />
To start the belt, press the WALK key, then press the<br />
SPEED UP arrow key until the treadmill reaches 4.0 mph/<br />
6.4 kph. If the striding belt appears off-center, see the instructions<br />
in Tracking (Centering) An Existing Or New Striding Belt<br />
(Section 11.2).<br />
Note: Normal belt operating position is for the belt to be located<br />
within the belt travel position indicators on the motor cover (see<br />
illustration to the right). If the belt is not in this position, see<br />
Section 11.2<br />
12<br />
18 mm<br />
9 mm
FOLDING AND UNFOLDING THE TREADMILL<br />
The treadmill’s deck can be folded up when not in use. To do so, make sure that the incline is set to 0%, then simply<br />
grab the deck and lift it until it locks into place. To lower the deck again, while pushing the running surface with one hand<br />
pull the release handle and slowly lower it to the ground. Make sure the deck is completely lowered before using the<br />
treadmill.<br />
POWER SWITCH<br />
Located on the front panel at the base of the treadmill, the ON/OFF switch has two positions - "I" (one) for ON and "0"<br />
(zero) for OFF.<br />
MOVING THE TREADMILL<br />
Turn the treadmill off and disconnect its power cord, then raise its deck.<br />
Note: If adjustments were made to the front levelers during setup, make sure to tighten the levelers snug against the<br />
base frame before moving.<br />
The treadmill may now be moved on its front platform wheels by pushing and pulling on its handrails. Do not attempt to<br />
move the treadmill by pushing or pulling on the deck or deck support tubing.<br />
IMMOBILIZING THE TREADMILL<br />
When it is necessary to immobilize the treadmill, press and hold both the SPEED DOWN ARROW and the STOP keys<br />
on the console. Use the same key sequence to mobilize the treadmill.<br />
13
5 CONSOLE AND ACTIVITY ZONE OVERVIEW<br />
A. Accessory Trays and Water Bottle Holders are located on either side of the display console.<br />
B. Energy Saver On / Off: The Energy Saver mode is used to minimize the power being pulled from the wall when the<br />
treadmill is not in use. The treadmill will automatically go into Energy Saver mode after ending a workout. Press the<br />
ENERGY SAVER button to either “wake up” the treadmill or put it into the Energy Saver mode. Energy Saver can be<br />
turned off in the Settings menu. An indicator LED will flash while in Energy Saver mode.<br />
C. Virtual Trainer: The USB port is used to upload goal-based programs and customized workouts from<br />
www.<strong>Life</strong><strong>Fitness</strong>virtualtrainer.com. <strong>User</strong>s can also save workouts to the USB and track progress on<br />
www.<strong>Life</strong><strong>Fitness</strong>virtualtrainer.com. For more information on Virtual Trainer, see Section 8.<br />
D. Reset: Use the RESET Button as a delete key when entering workout data. Press the Reset button 3 times to exit<br />
any workout.<br />
E. Enter: Use this key when entering data during workout set up.<br />
F. Navigation: Use this button for forward, back, up, and down navigation during workout or console set up as well<br />
as incline, time, and speed workout adjustments. While setting up a workout use the LEFT / RIGHT arrows to scroll<br />
through workout setup options, and then use the UP / DOWN arrows to adjust the values. During a workout, use the<br />
LEFT / RIGHT arrows to adjust the workout difficulty level or HR Target in HR Programs. Use the UP / DOWN arrows to<br />
adjust time.<br />
G. Settings: Press this button to enter a menu where the treadmill settings can be adjusted.<br />
H. Workout Selection: Select one of the following workouts by pressing the corresponding button: USB (Virtual<br />
Trainer), <strong>Manual</strong>, Random, Hill, Fat Burn, Cardio, or Fit Test and begin workout set-up (see Workout Overviews for a<br />
complete description).<br />
I. Reading Rack: <strong>User</strong>s can place Kindles ® , iPads ® , books, magazines or other reading devices on the built-in<br />
reading rack.<br />
J. iPod ® Docking Station: <strong>User</strong>s can dock, control, and charge their iPods during workouts. (See K. iPod Controls). An<br />
extra iPod ® pad was included with the treadmill. Set the pad behind smaller iPod players when they are docked. You<br />
may need to remove the protective case from your device to dock properly. A protective clip may be present on the<br />
iPod connector. Remove prior to docking.<br />
14
ACTIVITY ZONE<br />
K. IPOD CONTROLS: Use these keys to play/pause, skip back, skip forward, decrease volume, and increase volume.<br />
1. You must plug your headphones into the treadmill’s headphone jack (L) for the volume controls on the treadmill<br />
to function.<br />
2. All the controls on your iPod will still be active when docked to the treadmill except the volume control.<br />
3. The volume level is always set to ‘Low’ when an iPod is docked into the treadmill.<br />
L. Headphone Jack: Plug headphones into the jack to hear your docked iPod.<br />
M. Quick Start (Walk, Jog, Run): Press one of the Quick Start keys prior to a workout to have the treadmill belt begin<br />
moving at a preset value. The preset values are 2 mph / 3.2 kph (Walk), 4 mph / 6.4 kph (Jog), and 6 mph / 9.7 kph<br />
(Run). During a workout, press these buttons to immediately change the belt speed to the preset value. The user<br />
can customize the preset speeds by pressing the SPEED UP / DOWN arrow keys and holding the Walk, Jog, Run<br />
button for 5 seconds to set the displayed speed to the button they are pressing and holding.<br />
N. Incline Up / Down: Use the INCLINE UP / DOWN arrow keys to change the incline of the belt by increments of<br />
0.5% with each press of the arrows<br />
O. Speed Up / Down: Use the SPEED UP / DOWN arrow keys to change the speed of the belt by increments of 0.1<br />
mph with each press of the arrows.<br />
P. Pause / Resume: Press this key once during a workout to pause the workout. Press the key again to resume the<br />
workout. After a Pause, the treadmill speed shall be 0.5mph (0.8kph). The pause time is set for 5 minutes. The<br />
display counts down from 5:00 as soon as the PAUSE key is pressed. If the treadmill is not resumed from ‘Pause’<br />
the treadmill will go into ‘Power Save’ Mode.<br />
Q. Stop: Press once to display workout information. Press two times to reset the workout.<br />
R. Emergency Stop Magnet: This magnet is part of the E-Stop Lanyard. The lanyard is a safety feature which must be<br />
clipped to the user's clothing when the treadmill is in use. Then should the user stumble or fall, the lanyard will disconnect<br />
from the Activity Zone, stopping the treadmill's belt and resetting the console. To reset the system, simply<br />
reconnect the lanyard magnet to the Activity Zone. If the E-Stop lanyard is pulled, the treadmill will not show a workout<br />
summary to save to the USB.<br />
S. Heart Rate Sensors: The hand pulse sensors are the built-in heart rate monitoring system on the treadmill. During<br />
a workout, grasp the sensors that are set into the handlebars. For an accurate reading, use a comfortable grip. The<br />
console displays the heart rate after 15 to 20 seconds.<br />
15
6 CONSOLE DISPLAYS<br />
The console display was designed to reduce toggling between workout information. The design of each button on the<br />
treadmill’s console was designed to give the user tactile feedback. Each piece of workout feedback, including incline,<br />
time, speed, heart rate, calories and distance has its own dedicated window.<br />
1. USB<br />
The USB icon on the left side of the MESSAGE CENTER is displayed whenever a USB drive is plugged in. The USB<br />
can execute a workout from www.<strong>Life</strong>fitnessvirtualtrainer.com. See section 8 for more information on the <strong>Life</strong> <strong>Fitness</strong><br />
Virtual Trainer Website.<br />
2. Message Center<br />
The message center provides instructional information to the user. The message center will coach the user through<br />
setting up a workout, including selecting a workout and entering time, incline, and other workout specific information.<br />
Also during the workout if certain workout feedback like pace is turned on in the Settings Menu, the message center<br />
will periodically show that information.<br />
3. iPOD ®<br />
The iPod icon on the right side of the MESSAGE CENTER is displayed when a compatible iPod is docked.<br />
16
4. Heart Rate Center<br />
Heart Rate Display<br />
The heart rate display calculates the user’s actual heart rate in contractions or beats per minute during a workout. The<br />
user must be holding on to the contact heart rate electrodes or wearing a heart rate telemetry chest strap for the heart<br />
rate display to function. See Heart Rate Telemetry Chest Strap. <strong>Life</strong> <strong>Fitness</strong> recommends wearing the chest strap for<br />
the most accurate heart rate reading. If you are experiencing problems with your contact heart rate reading please<br />
read the section titled Contact Heart Rate for recommendations on improving the contact heart rate reading.<br />
Target Heart Rate Display<br />
Target heart rate is a percentage of a user’s maximum heart rate. The goal is to target a range that enables one’s heart<br />
and lungs to receive the most benefit from a workout. The console calculates target heart rate by taking the maximum<br />
heart rate (220 minus the user’s age) and multiplying it by an intensity level. <strong>Life</strong> <strong>Fitness</strong> intensity levels are 65% for<br />
weight loss and fat burning and 80% for improving cardiovascular endurance. The display will toggle between the 65%<br />
and 80% intensity levels. An arrow pointing up or down will illuminate to show when the user’s actual heart rate is<br />
above or below the target heart rate.<br />
Example: <strong>User</strong>’s Age is 45. 220 – 45 = 175. 175 is the Maximum Heart Rate for a 45 year old. 175 x 65% = 114.<br />
114 is the optimal target heart rate for weight loss and fat burning.<br />
5. Workout Profile Display<br />
The workout profile graphically displays the intensity of a workout with columns of various heights. During the workout<br />
the current intensity level the user is in is signified by an arrow located above the appropriate column.<br />
During a heart rate workout the workout profile acts like a graph of the user’s target heart rate percent. Each of the 9<br />
rows of the profile will represent the user’s actual heart rate as a percentage of their heart rate max. Therefore by the<br />
end of the workout, the user will be able to visually see their target heart rate ranges throughout the workout.<br />
Target Heart Rate<br />
Row<br />
Percent Range<br />
1 20 - 29%<br />
2 30 - 39%<br />
3 40 - 49%<br />
4 50 - 59%<br />
5 60 - 69%<br />
6 70 - 79%<br />
7 80 - 89%<br />
8 90 - 99 %<br />
9 100%<br />
Note: The percent in the table represents the user’s actual heart rate as a percent of their heart rate max. The heart<br />
rate max is 220-user’s age. For example: A 40 year old’s heart rate max would be 220-40 = 180. During their workout<br />
at the first interval their actual heart was 100. Therefore 100/180 = 0.56 or 56% and the profile would display the<br />
user at row 4 for the first interval of the workout.<br />
17
6. Results Center<br />
Distance Display<br />
Distance is shown in miles or kilometers in the Results Center. The distance formula tries to replicate miles as if the<br />
exercise was being conducted outdoors. The distance formula will not always be consistent with other <strong>Life</strong> <strong>Fitness</strong><br />
products or other manufacturer’s products. Distance can be set to kilometers or miles. See Settings Menu.<br />
Calorie Display<br />
A calorie is a unit used to measure energy. It represents the amount of energy obtained from food. One calorie is<br />
approximately enough energy to increase the temperature of 1 gram of water by 1 degree Celsius. The console<br />
calculates an average caloric burn based on a <strong>Life</strong> <strong>Fitness</strong> proprietary calorie equation. This formula may not<br />
match other manufacturer’s machines or other <strong>Life</strong> <strong>Fitness</strong> machines. This window can be switched to show Watts.<br />
Please see instructions in the Settings Menu section.<br />
7. Incline Display<br />
There are two types of levels used on <strong>Life</strong> <strong>Fitness</strong> treadmills. <strong>User</strong>s can adjust the current time segment and incline<br />
percentage during RANDOM, HILL, HEART RATE, or VIRTUAL TRAINER workouts. The first difficulty level corresponds<br />
to a range of actual incline percentages. Difficulty levels are used in RANDOM, HILL, HEART RATE, and<br />
VIRTUAL TRAINER workouts. So when a user selects a difficulty level of 10 it corresponds to a range of incline<br />
percentages between 3%– 7%. During RANDOM and HILL the difficulty level will be displayed only during workout<br />
setup. At all other times during these workouts the incline percentage is displayed. See the table below. The second<br />
type of level is an incline level or percentage. The incline level is manually adjusted by the user in a MANUAL workout.<br />
The range of possible incline percentages is 0 –12% and can be adjusted in 0.5% increments.<br />
Difficulty Level Incline Level<br />
20 8.0 - 12.0 Note: Adjusts in 0.5% increments<br />
19 7.5 - 11.5 Note: Adjusts in 0.5% increments<br />
18 7.0 - 11.0 Note: Adjusts in 0.5% increments<br />
17 6.5 - 10.5 Note: Adjusts in 0.5% increments<br />
16 6.0 - 10.0 Note: Adjusts in 0.5% increments<br />
15 5.5 - 9.5 Note: Adjusts in 0.5% increments<br />
14 5.0 - 9.0 Note: Adjusts in 0.5% increments<br />
13 4.5 - 8.5 Note: Adjusts in 0.5% increments<br />
12 4.0 - 8.0 Note: Adjusts in 0.5% increments<br />
11 3.5 - 7.5 Note: Adjusts in 0.5% increments<br />
10 3.0 - 7.0 Note: Adjusts in 0.5% increments<br />
9 2.5 - 6.5 Note: Adjusts in 0.5% increments<br />
8 2.0 - 6.0 Note: Adjusts in 0.5% increments<br />
7 1.5 - 5.5 Note: Adjusts in 0.5% increments<br />
6 1.0 - 5.0 Note: Adjusts in 0.5% increments<br />
5 0.5 - 4.5 Note: Adjusts in 0.5% increments<br />
4 0.0 - 4.0 Note: Adjusts in 0.5% increments<br />
3 0.0 - 3.0 Note: Adjusts in 0.3% increments<br />
2 0.0 - 2.0 Note: Adjusts in 0.15% increments<br />
1 0.0 - 1.0 Note: Adjusts in 0.1% increments<br />
8. Time Display<br />
The time window displays the total workout time set by the user during workout setup, which is a range from 99 to 1<br />
minute depending on the program. During the workout, time will count down from total workout time. The time set<br />
can be changed at any time during the workout with the up and down arrows.<br />
9. Speed Display<br />
Speed is displayed in miles per hour (MPH) or kilometers per hour (KPH). The formula tries to replicate miles per<br />
hour as if the exercise was being conducted outdoors. The speed range is 0.5 mph (0.8 kph) to 10.0 mph (16 kph)<br />
and is adjustable in increments of 0.1 mph. Speed units can be displayed in MPH or KPH by using the Settings<br />
Menu. See Settings Menu.<br />
18
7 WORKOUT OVERVIEWS<br />
Six workouts are pre-programmed for the <strong>Life</strong> <strong>Fitness</strong> <strong>Treadmill</strong>. Each workout has a different goal. Read the workout<br />
descriptions carefully so that you can develop a workout routine that focuses on reaching your specific goals.<br />
Note: The Virtual Trainer USB port gives you the ability to download and customize over 40 workouts. You can get<br />
recommended workout programs based on your individual goals. Visit www.<strong>Life</strong><strong>Fitness</strong>virtualtrainer.com for free<br />
access. See how to use Virtual Trainer in section 8.<br />
The workout descriptions on the following pages all have headers labeled Beginner-Just Starting, Experienced-Fit, and<br />
Advanced – Athlete. Beginner workouts are workouts designed for users just starting to workout or just starting a workout<br />
routine. Beginner workouts have limited gradual intensity adjustments. Experienced workouts are designed for users<br />
seeking a more challenging workout. These users should have a stronger fitness base. Advanced workouts are designed<br />
for athletes training for cardiovascular endurance and special events.<br />
Different workouts have different setup steps. This section provides details on the steps themselves.<br />
WORKOUT PROFILE<br />
To start a workout, select one of the six pre-programmed workout buttons on the right side<br />
of the console, or plug in your USB and select the USB workout button.<br />
When a workout is selected, the MESSAGE CENTER will display the first workout set-up<br />
step and show the current value for the set-up parameters. Throughout the workout setup<br />
process, use the UP / DOWN arrows on the NAVIGATION BUTTON to adjust the value that<br />
is selected. Use the LEFT / RIGHT arrows on the NAVIGATION BUTTON to scroll back and<br />
forth between different steps. In order to advance to the next step, either press the RIGHT<br />
arrow or ENTER key. After entering the last step, press ENTER to begin the workout.<br />
QUICK START workouts are the fastest way to begin exercising, and it bypasses the steps involved in selecting a<br />
specific workout program. Begin a QUICK START workout by pressing the WALK, JOG, or RUN buttons on the Activity<br />
Zone. After the WALK, JOG, or RUN key is pressed, a MANUAL workout begins immediately at the pre-programmed<br />
speed for the respective key pressed. While in this MANUAL workout, the user may at any time toggle between the<br />
three pre-programmed speeds: Walk (2 mph / 3.2 kph), Jog (4 mph / 6.4 kph), and Run (6 mph / 9.7 kph). The target<br />
heart rate will not be displayed during a QUICK START workout.<br />
19
MANUAL WORKOUT (Beginner – Just Starting)<br />
Access: This workout can be started by pressing the MANUAL workout key.<br />
Description: The MANUAL workout is a simple workout that has no pre-defined<br />
intensity levels. The MANUAL workout starts the user at 0.5 MPH and 0% incline.<br />
The user is in complete control of speed and incline settings.<br />
Goal: This workout was designed for users that do not have much experience working<br />
out on a product and like to have control of the level and speed/incline settings.<br />
RANDOM WORKOUT (Experienced – Fit)<br />
Access: This workout can be started by pressing the RANDOM workout key.<br />
Description: In this workout, the console creates a terrain of different hills and<br />
valleys. Over 1 million different patterns are possible. The RANDOM workout uses<br />
incline adjustments to create hills/valleys. Speed is controlled by the user.<br />
Goal: This workout was designed to provide the end-user with unlimited workout<br />
variety. The goal of this workout is to prevent workout boredom and improve<br />
motivation.<br />
HILL WORKOUT (Experienced – Fit)<br />
Access: This workout can be started by pressing the HILL workout key.<br />
Description: The <strong>Life</strong> <strong>Fitness</strong> patented hill workout is an interval training workout.<br />
Intervals are periods of intense aerobic exercise. The workout profile window displays<br />
the levels of the intervals, which together have the appearance of hills and valleys.<br />
Incline adjustments are used to simulate the hills/valleys, speed is controlled by the<br />
user.<br />
The HILL workout has two main phases in between the warm-up and cool down.<br />
Plateau: Increases the incline slightly and keeps it steady, to bring the heart rate to the low end of the target<br />
zone.<br />
Interval Training: Is a series of increasingly steeper hills, alternating with valleys, or periods of recovery. The<br />
heart rate should rise to the high end of the target zone during this segment.<br />
Goal: The computerized interval training workout has been scientifically demonstrated to promote greater cardiorespiratory<br />
improvement than steady-pace training. The goal of this workout is to improve cardiovascular endurance<br />
and break through fitness plateaus.<br />
FAT BURN WORKOUT * (Beginner – Just Starting)<br />
*Chest strap must be worn to execute the workout<br />
Access: This workout can be started by pressing the FAT BURN workout key.<br />
Description: The user must wear a chest strap for this workout to function properly.<br />
This program uses incline adjustments to increase and decrease heart rate. FAT<br />
BURN maintains the user at 65% of the user’s theoretical maximum heart rate. The<br />
console continuously monitors and displays the heart rate, adjusting the intensity<br />
level of the product to reach and maintain a target heart rate range. The intensity<br />
will not change as long as the user is between 60%-72% of their target heart rate.<br />
If the user’s heart rate cannot reach the target using incline, a message will appear in the MESSAGE CENTER<br />
requesting the user to change speed.<br />
Goal: The goal of the FAT BURN workout is to efficiently burn fat by eliminating over-training and under-training and<br />
also maximizing the aerobic benefits of exercise by using the body’s fat stores for energy.<br />
20
CARDIO WORKOUT * (Experienced – Fit)<br />
*Chest strap must be worn to execute the workout<br />
Access: This workout can be started by pressing the CARDIO workout key.<br />
Description: The user must wear a chest strap for this workout to function properly.<br />
This program uses incline adjustments to increase and decrease heart rate. CARDIO<br />
maintains the user at 80% of the user’s theoretical maximum heart rate. The console<br />
continuously monitors and displays the heart rate, adjusting the intensity level of the<br />
product to reach and maintain the target heart rate range. The intensity will not<br />
change as long as the user is between 72%-85% of their target heart rate.<br />
If the user’s heart rate cannot reach the target using incline, a message in the<br />
MESSAGE CENTER will appear requesting the user to change speed.<br />
Goal: The goal of the CARDIO workout is to place a heavier workload on the heart muscle to emphasize<br />
cardiovascular endurance.<br />
FIT TEST (All levels)<br />
Access: This workout can be started by pressing the FIT TEST workout key.<br />
Description: The FIT TEST workout estimates cardiovascular fitness and can be used to monitor improvements in<br />
endurance every four to six weeks. The user must wear a telemetry heart rate chest strap as the test score<br />
calculation is based on a heart rate reading. The workout duration will be five minutes at a 5% incline. Immediately<br />
afterward, the console will take the user's heart rate reading, calculate a fitness score and display the score in the<br />
MESSAGE CENTER.<br />
The Fit Test is considered to be a submax VO2 (volume of oxygen) test. It gauges how well the heart supplies<br />
oxygenated blood to the exercising muscles and how efficiently those muscles receive oxygen from the blood.<br />
Physicians and exercise physiologists generally regard this test as a good measure of aerobic capacity.<br />
Goal: The goal of the FIT TEST workout is to elevate the user’s hear rate to a level that is between 60% - 85% of<br />
their theoretical maximum heart rate.<br />
Suggested Exertion Levels<br />
<strong>Treadmill</strong> Fit Test Level<br />
Note: <strong>Treadmill</strong> will incline to 5% after a one minute warm-up.<br />
Within each suggested range, these additional guidelines can be used:<br />
* In cases of excessive weight, use lower half of range<br />
Inactive Active Very Active<br />
2-3 mph 3-4 mph 3.5-4.5 mph<br />
3.2-4.8 kph 4.8-6.4 kph 5.6-7.2 kph<br />
Lower Half of Range Upper Half of Range<br />
higher age lower age<br />
lower weight higher weight*<br />
short taller<br />
The treadmill will not accept:<br />
• heart rates less than 52 or greater than 200 beats per minute<br />
• body weights less than 75 pounds (34 kg) or greater than 400 pounds (181 kg)<br />
• ages below 10 or over 99 years<br />
• data input that exceeds human potential<br />
21
If you make an error when entering any Fit Test data, you can correct it by using the back arrow, inputting the correct<br />
information, and pressing ENTER. Once the test starts, you cannot change the workout time or speed. Use the STOP,<br />
RESET, SPEEDUP, SPEED DOWN, or PAUSE key to terminate the test.<br />
It is important for you to take the Fit Test under similar circumstances each time. Your heart rate is dependent on many<br />
factors, including:<br />
• amount of sleep the previous night (at least seven hours is recommended)<br />
• time of day<br />
• time you last ate (two to four hours after the last meal is recommended)<br />
• time since you last drank a liquid containing caffeine or alcohol, or smoked a cigarette<br />
(at least four hours is recommended)<br />
• time since you last exercised (at least six hours is recommended)<br />
For the most accurate Fit Test results, you should perform the Fit Test on three consecutive days and average the three<br />
scores.<br />
NOTE: To receive a proper Fit Test score, the work done must be within a training heart rate zone that is 60 percent to<br />
85 percent of the theoretical maximum heart rate (HRmax). This rate is defined by the American College of Sports<br />
Medicine's "Guidelines for Exercise Testing and Prescription" as equal to 220 minus an individual's age.<br />
The tables below list fit test results.<br />
RELATIVE FITNESS CLASSIFICATION FOR MEN<br />
Men Estimated VO 2 Max (ml/kg/min) Per Age Category<br />
Rating 10 - 29 30 - 39 40 - 49 50 - 59 60+<br />
Elite 55+ 53+ 51+ 47+ 43+<br />
Excellent 53 - 54 50 - 52 49 - 50 45 - 46 41 - 42<br />
Very Good 50 - 52 48 - 49 46 - 48 43 - 44 39 -40<br />
Above Average 45 - 49 43 - 47 42 - 45 39 - 42 35 - 38<br />
Average 41 - 44 38 - 42 37 - 41 34 - 38 31 - 34<br />
Below Average 38 - 40 36 - 37 34 - 36 32 - 33 29 - 30<br />
Low 35 - 37 34 - 35 32 - 33 29 - 31 26 - 28<br />
Very Low
8 VIRTUAL TRAINER<br />
The <strong>Life</strong> <strong>Fitness</strong> Virtual Trainer is a unique website that allows you to create your favorite workouts anytime, anywhere<br />
and also gives you access to the same workouts you use on <strong>Life</strong> <strong>Fitness</strong> treadmills in health clubs, hotels or recreation<br />
centers. Take advantage of these features and maximize your workout time. The workouts you create on the website<br />
can be downloaded and saved to any USB drive. Simply plug in your USB stick to your treadmill and begin your favorite<br />
workout instantly.<br />
To begin go to www.virtualtrainer.lifefitness.com<br />
1. Download & Save Workouts: Choose one of the following two options to get started: “Create Popular Workouts” or<br />
“Create Personalized Workouts”.<br />
2. After you have saved your workout, plug in the USB into the USB port on the equipment and begin your workout.<br />
3. Upload Your Saved Workout Results: Upload the results of your workouts from your USB stick to the website.<br />
Thousands of users upload their workout results regularly in order to track their progress. To use this feature, simply<br />
click on the UPLOAD RESULTS button to view a list of most recent workout results on your USB and choose the<br />
once you wish to upload.<br />
4. Track Your Progress: If you have uploaded workout results, clicking on TRACK PROGRESS button will display a<br />
graph showing your progress during the past month. You can easily adjust the start and end dates to check progress<br />
during periods of your choice.<br />
How to begin a workout from your USB:<br />
Step 1: Plug in your USB into the Virtual Trainer USB port (see page 14).<br />
Step 2: Select the USB button in the Workout Selection area (see page 14).<br />
Step 3: Workouts saved to your USB will appear in the message center of the console; use the arrows on the console to<br />
scroll to your desired program. Select ENTER.<br />
Step 4: Begin your Virtual Trainer workout.<br />
How to save your treadmill workout data onto your USB:<br />
1. You must either have a USB inserted into the treadmill port or you must insert the USB stick within 5 minutes of the<br />
workout ending and “Workout Summary” displayed on the console.<br />
2. The console will direct you to press the “USB” button to save the data.<br />
3. The console will confirm once the data is saved.<br />
Note: if you press ENTER, RESET, or pull the emergency stop prior to saving the data, the data will be lost.<br />
23
9 HEART RATE ZONE TRAINING ® EXERCISE<br />
9.1 WHY HEART RATE ZONE TRAINING ® EXERCISE?<br />
Research shows that maintaining a specific heart rate while exercising is the optimal way to<br />
monitor the intensity of a workout and to achieve maximum results. That is the idea behind the<br />
<strong>Life</strong> <strong>Fitness</strong> Heart Rate Zone Training ® approach to exercise. Zone Training identifies an<br />
exerciser's ideal heart rate range, or zone, for burning fat or increasing cardiovascular fitness.<br />
The zone is a percentage of the theoretical maximum (HRmax), and its value depends on the<br />
workout. This <strong>Life</strong> <strong>Fitness</strong> <strong>Treadmill</strong> features two exclusive workouts designed to take full<br />
advantage of the benefits of Heart Rate Zone Training+ exercise:<br />
24<br />
• FAT BURN • CARDIO<br />
Each workout offers different benefits, as discussed in Workout Overviews.<br />
Note: Consulting a fitness trainer is recommended for defining specific fitness goals and<br />
designing a workout program.<br />
To change the target heart rate during a workout, simply enter a new target heart rate using<br />
the NUMERIC keypad. To switch between programs during a workout, use the WORKOUT<br />
SELECTION keys. The Heart Rate Zone Training ® workout programs measure heart rate.<br />
Wear the telemetry chest strap, or grip the <strong>Life</strong>pulse TM sensors, to enable the treadmill’s<br />
on-board computer to monitor the heart rate during a workout. The computer automatically<br />
adjusts the incline level to maintain the target heart rate based on the actual heart rate.<br />
THE HEART RATE TELEMETRY CHEST STRAP<br />
The console is equipped with a wireless heart rate monitoring system in which electrodes, pressed against the skin, transfer<br />
heart rate signals from the user to the console. The electrodes are inside the chest strap (A) that the user wears during<br />
the workout. The transmitter strap delivers an optimal heart rate reading when the electrodes are in direct contact with the<br />
skin, or a thin layer of wet clothing. The electrodes are two grooved surfaces on the underside of the strap, and must<br />
remain wet to accurately transmit the electrical impulses of the heart back to the receiver. To use, first moisten the electrodes.<br />
Then, secure the strap as high under the chest muscles as possible. The strap should be snug, but comfortable<br />
enough to allow for normal breathing. Electrodes must be wet to work properly. If it becomes necessary to re-moisten,<br />
grasp the center of the strap, pull it away from your chest to expose the electrodes, and moisten. See diagram below for<br />
correct positioning of the strap.<br />
Note: Using the wireless chest strap will provide more accurate heart rate readings than the hand pulse sensors.<br />
Note: To ensure the highest performance, use the wireless chest strap that was provided with the product.<br />
CONTACT HEART RATE<br />
When using Contact Heart Rate make certain to grasp sensors firmly and keep hands still. If heart rate seems substantially<br />
higher or lower than expected, remove hands from sensors until heart rate disappears. Dry hands and grasp sensors<br />
again until heart rate seems accurate. If this does not work you may need to slow the machine to get an accurate reading.<br />
<strong>Life</strong> <strong>Fitness</strong> recommends for safety and accurate heart rate readings that the user stand on the side rails when attempting<br />
to monitor heart rate with contact electrodes.<br />
Note: The contact heart rate system may be less or more accurate with different individuals.
10 SETTINGS MENU<br />
10.1 SETTINGS<br />
The Settings menu can be accessed by pressing the SETTINGS Key when in the SELECT WORKOUT screen.<br />
Upon entering the Settings menu, the screen will display “SETTINGS MENU”.<br />
• Scroll through the Settings options using the NAVIGATION BUTTONS.<br />
• Adjust the Settings items with the UP and DOWN arrow keys.<br />
• Use the ENTER key or LEFT / RIGHT arrow keys to save modifications and move to the next option.<br />
• Use the RESET key to exit the Settings menu.<br />
10.2 SETTINGS MENU STATES AND SELECTION OPTIONS<br />
1. Units<br />
• Changes the unit of measure for speed and distance.<br />
• Selection options are: ENGLISH (miles and miles per hour) or METRIC (kilometers or kilometers per hour).<br />
2. Set Time<br />
• Set the date and time plus the time zone for workout tracking on the <strong>Life</strong> <strong>Fitness</strong> Virtual Trainer web site. Date<br />
and time are your local time. Time Zone is based on your location compared to Greenwich Mean Time.<br />
Major Cities Time Zone Values<br />
London 0<br />
New York City -4 Time is only used for Virtual trainer data transfer<br />
Minneapolis -5 through the USB.<br />
Los Angeles -7<br />
Hong Kong +8<br />
Berlin +2<br />
3. Beeps<br />
• Turns ON or OFF the audio feedback.<br />
• Selection options are: ON or OFF.<br />
4. Pace<br />
• Turns ON or OFF the Pace display in the message center.<br />
• Selection options are: ON or OFF.<br />
5. Statistics<br />
• Shows the total hours and distance accumulated on the treadmill.<br />
• Press ENTER to show statistics.<br />
6. Software Version<br />
• Shows the software version and part number.<br />
• Press ENTER to show software version and build date.<br />
25
7. Brightness<br />
• Changes the intensity of the display backlight LED’s.<br />
• Brightness Range is 1 - 10.<br />
8. Contrast<br />
• Changes the contrast of the display.<br />
• Contrast Range is 1 - 99.<br />
9. Wireless Heart Rate<br />
• Turns ON or OFF the telemetry heart rate receiver.<br />
• Selection options are: ON or OFF.<br />
10. Floor Model<br />
• Controls the ability for the treadmill to enter Energy Saver; Floor model ON turns off the Energy Saver feature.<br />
• Selection options are: ON or OFF.<br />
11. Belt Lube Timer<br />
• Tracks the total hours of workout and cool down time since the last belt lubrication. When the timer reaches 75<br />
hours it triggers a reminder message during every workout.<br />
• Press and hold the DOWN arrow key for 5 seconds to reset the time.<br />
26
11 SERVICE AND TECHNICAL DATA<br />
11.1 TROUBLESHOOTING<br />
Problem Cause / Solution<br />
The treadmill console does not turn<br />
on when the ON/OFF switch is<br />
turned on.<br />
I am having problems bolting the parts<br />
together when assembling the unit.<br />
The treadmill shakes a lot when I run<br />
on it.<br />
The contact heart rate sensors are not<br />
reading my heart rate correctly.<br />
The running belt is tracking to the left<br />
or right.<br />
The belt seems to slip when I run on it.<br />
The treadmill will not lock when I fold<br />
it up.<br />
The treadmill will not unfold.<br />
You may be in “Energy Saver Mode”. Press the “Energy Saver” button to<br />
see if console turns on.<br />
Check to see if the treadmill is plugged in and if the ON/OFF switch is on.<br />
If the ON/OFF switch is not lit verify that the treadmill power cord is not<br />
damaged and the wall outlet is functioning (tripped breaker in house).<br />
If the ON/OFF switch is lit verify that all the customer assembly connections<br />
are working properly. Unplug and re-plug each connection to verify.<br />
Look to see if any of the cables were pinched during assembly.<br />
1. Do not tighten the screws until the uprights, console and handrails<br />
are all installed.<br />
2. Check the screw threads for any damage.<br />
3. Tighten the hardware after all components are installed.<br />
1. Turn the treadmill OFF. Make sure all assembly hardware is tightened.<br />
2. If shaking still occurs, adjust the levelers under the stationary frame<br />
until the shaking decreases. See How to Stabilize the <strong>Life</strong> <strong>Fitness</strong><br />
<strong>Treadmill</strong>.<br />
Be sure to grasp the sensors firmly and keep hands still. If heart rate<br />
seems substantially higher or lower than expected, remove hands from<br />
sensors until heart rate disappears. <strong>Life</strong> <strong>Fitness</strong> recommends that the<br />
user stand on the side rails when attempting to monitor heart rate with<br />
contact sensors.<br />
Tips for contact heart rate:<br />
1. Dry hands to prevent slipping on the sensors.<br />
2. Apply hands to all four sensors (two in each hand).<br />
3. Grasp the sensors firmly.<br />
4. Apply constant pressure to the sensors.<br />
See How to Adjust and Tension the Striding Belt.<br />
You may need to tighten the walking belt. See How to Adjust and Tension<br />
the Striding Belt.<br />
The treadmill must be at 0% incline before folding it up. If the incline is<br />
not at 0% the treadmill will not lock.<br />
Make sure that you pull the release lever located on the top left side of<br />
the deck. You may need to push up on the folded part of the treadmill<br />
while pulling the lever to help release the locking pin.<br />
27
28<br />
Problem Cause / Solution<br />
When I try to save a workout on the<br />
USB stick I receive the following<br />
message: UNABLE TO SAVE SEE<br />
MANUAL.<br />
The wireless heart rate is not<br />
working.<br />
A heart rate reading is initially<br />
detected and functioning normally<br />
but then is lost.<br />
“OFF” is displayed in the incline window.<br />
“Immobilized” is displayed in window.<br />
iPod is not recognized.<br />
iPod is not charging while in<br />
Energy Saver mode.<br />
”Low Battery” message is displayed<br />
on the console.<br />
The console may not have recognized the USB stick. Try unplugging the<br />
USB stick and plugging it back in.<br />
The USB stick may be full.<br />
The USB stick may not be compatible with the product.<br />
Try using a different USB stick.<br />
Potential reasons for the wireless heart rate not to work properly include:<br />
1. The wireless heart rate is turned OFF in the Settings Menu. Enter the<br />
Settings Menu and verify that WIRELESS HR is turned ON.<br />
2. There is poor contact between the telemetry heart rate strap and the<br />
skin. Refer to Heart Rate Telemetry Strap for details.<br />
3. There is electrical interference from electrical appliances with the<br />
telemetry heart rate strap from fluorescent lights, kitchen appliances,<br />
etc. Move the treadmill to a different location or move electrical<br />
appliances away from the treadmill.<br />
4. The battery in the Heart Rate Telemetry Strap needs to be replaced.<br />
The battery is a CR2032 (3V).<br />
Use of personal electronic devices, such as cell phones and portable<br />
mp3 players, causes external noise interference.<br />
Equipment is in close proximity to other sources of noise such as audio/<br />
video equipment, fans, two way radios, and high voltage/high current<br />
power line<br />
Remove the source of noise or reposition the exercise equipment.<br />
This message relates to a problem with the Incline system.<br />
If the incline has been repeatedly moved up and down in a manual<br />
program, the lift motor may have activated a thermal protection device.<br />
Simply let the treadmill sit for 30 minutes and cycle power.<br />
The treadmill has been immobilized through software. Press the<br />
SPEED DOWN ARROW and STOP to exit this state.<br />
This is displayed if your version of the iPod Player is not supported by<br />
the treadmill.<br />
It may also be displayed if the connector on the treadmill or iPod<br />
is damaged.<br />
Your iPod will not charge if the treadmill enters Energy Saver mode. This<br />
is normal.<br />
The console has an internal battery that keeps the real time clock<br />
functioning if the treadmill is unplugged. This real time clock is only<br />
needed if you use the <strong>Life</strong> <strong>Fitness</strong> ”Virtual Trainer” website. You do<br />
not need to replace the battery if you do not use the website. Contact<br />
Customer Service for guidance on how to change the battery. The<br />
battery is a CR1632 (3V).
11.2 HOW TO ADJUST AND TENSION THE STRIDING BELT<br />
Do not move the treadmill or place hands under the treadmill while it is plugged into an electrical outlet!<br />
Tool Required: 6MM Hex Key Wrench<br />
THE BELT TENSIONING BOLTS<br />
The <strong>Life</strong> <strong>Fitness</strong> treadmill has access holes in the rear roller guards, which allow access to the tensioning bolts. These<br />
tensioning bolts make it possible to adjust tracking and centering of the striding belt (A) without removing the guards.<br />
Note: It is extremely important that the treadmill be correctly leveled prior to any tracking adjustments. An unstable unit<br />
may cause striding belt misalignment. See How To Stabilize the <strong>Life</strong> <strong>Fitness</strong> <strong>Treadmill</strong> prior to attempting any rear roller<br />
adjustments.<br />
Before proceeding, it is helpful to visualize the REAR ROLLER (B) pivot point (C). Each adjustment made to one side of<br />
the ROLLER must be met with an equal and opposite adjustment (D) to the other side of the ROLLER to maintain an<br />
ideal belt tension at the pivot point.<br />
TRACKING (CENTERING) AN EXISTING OR NEW STRIDING BELT<br />
1. Locate the two access holes to the BELT TENSIONING BOLTS (D) on each of the rear roller guards.<br />
2. Stand on the sides of the treadmill and straddle the belt. Enter the MANUAL Workout and set the belt speed to run<br />
at 4.0 mph (6.4 kph).<br />
3. If the striding belt has moved to the right, turn the right tension bolt 1/4 turn<br />
clockwise with the provided 6MM Hex Key Wrench, and then turn the left<br />
tension bolt 1/4 turn counter-clockwise to start striding belt tracking back to<br />
center of roller.<br />
4. If the striding belt has moved to the left, turn the left tension bolt 1/4 turn<br />
clockwise and then turn the right tension bolt 1/4 turn counter-clockwise to<br />
start striding belt tracking back to center of roller. Repeat adjustments until<br />
the striding belt appears centered. Allow the machine to continue running<br />
for several minutes to observe if tracking remains stabilized.<br />
Note: Do not exceed one full turn of the adjusting screws in either direction. If<br />
after one full turn the belt does not track properly, contact Customer Support<br />
Services.<br />
D<br />
D<br />
TENSIONING AN EXISTING STRIDING BELT<br />
Under normal usage, the treadmill striding belt may stretch slightly. If the belt starts to slip during use, take the steps<br />
listed below to correct the tension.<br />
1. Using the STOP key, stop the treadmill.<br />
2. Turn the belt tensioning bolts clockwise a quarter-turn per side to tension the belt. Do not exceed one full turn (four<br />
quarter-turns per side).<br />
3. Set the treadmill at 2.0-mph (3.2 kph) and get on to make sure the belt no longer slips. Also, check the striding belt’s<br />
tracking. If the striding belt drifts to the left or right see Tracking (Centering) an Existing or New Striding Belt.<br />
Note: Do not overtighten the tensioning bolts while making belt adjustments. Overtightening of bolts may over stretch<br />
and damage the striding belt or roller bearings. Do not exceed one full turn of either bolt in either direction.<br />
29
11.3 PREVENTIVE MAINTENANCE TIPS<br />
The <strong>Life</strong> <strong>Fitness</strong> <strong>Treadmill</strong> is backed by the engineering excellence and reliability of <strong>Life</strong> <strong>Fitness</strong> and is one of the most<br />
rugged and trouble-free pieces of exercise equipment on the market today.<br />
Note: Safety of the equipment can be maintained only if the equipment is examined regularly for damage or wear. Keep<br />
the equipment out of use until the defective parts are required or replaced. Pay special attention to parts that are subject<br />
to wear, as outlined below.<br />
The following preventive maintenance tips will keep the <strong>Life</strong> <strong>Fitness</strong> treadmill operating at peak performance:<br />
Lubricating the Walking Belt<br />
1. Turn the treadmill off with the ON / OFF switch and then unplug the power cord from the outlet.<br />
2. Loosen the rear roller adjustment bolts approximately 10 full turns. Be sure to note how many turns you have<br />
rotated the screws since this is how many turns you will tighten them at the end of this procedure.<br />
3. Using the Silicon lubricant approved by <strong>Life</strong> <strong>Fitness</strong>, apply one half of the bottle to the surface of the deck between<br />
the belt and the deck. Try to apply the majority of the lubricant to the center of the deck.<br />
4. Visually make sure the walking belt is centered on the deck and then tighten the rear roller adjustment bolts the<br />
same number of turns as when you loosened them.<br />
5. Plug the treadmill in and turn on the ON / OFF switch.<br />
6. Run the treadmill at 3 mph / 5 kph and check that the belt runs centered. If not, follow the instructions in How to<br />
Adjust and Tension the Striding Belt.<br />
7. Reset the LUBRICATE WALKING BELT message on the console. To reset the message enter the Settings Menu.<br />
Scroll to the Message: HOURS SINCE BELT LUBRICATION = XXXX. Press and hold the DOWN arrow key for 10<br />
seconds to reset the lubrication timer.<br />
30<br />
IMPORTANT: Turn the treadmill off and unplug prior to performing any maintenance.<br />
Weekly<br />
Monthly<br />
Yearly<br />
Inspect the power cord. If the cord is damaged call technical support. Make sure<br />
the cord is positioned in a location where it will not be damaged.<br />
Check the operation of the Emergency Stop System.<br />
Check the operation of the Stop Key.<br />
Check the position (centering) of the walking belt.<br />
Vacuum around and under the walking belt. It is normal for there to be some black<br />
dust behind the unit from the walking belt.<br />
Clean the display console and all exterior surfaces with mild soap, water and a soft<br />
cotton cloth or use a <strong>Life</strong> <strong>Fitness</strong> approved cleaner.<br />
Note: Do not use paper towels, ammonia or acid based cleaners on the product.<br />
At no time should cleaner be applied directly to any part of the equipment; spray<br />
the cleaner on a soft cloth and then wipe the unit.<br />
Inspect the exterior parts for wear and check that user assembly bolts are still tight.<br />
You will receive a message ‘LUBRICATE WALKING BELT’ on the console that<br />
reminds you to re-lubricate the belt at fixed intervals. The procedure to lubricate<br />
the walking belt is listed below.
LIFE FITNESS APPROVED CLEANERS<br />
Two preferred cleaners have been approved by <strong>Life</strong> <strong>Fitness</strong> reliability experts: PureGreen 24 and Gym Wipes. Both<br />
cleaners will safely and effectively remove dirt, grime and sweat from equipment. PureGreen 24 and the Antibacterial<br />
Force formula of Gym Wipes are both disinfectants that are effective against MRSA and H1N1.<br />
PureGreen 24 is available in a spray which is convenient for gym staff to use. Apply the spray to a microfiber cloth and<br />
wipe down the equipment. Use PureGreen 24 on the equipment for at least 2 minutes for general disinfection purposes<br />
and at least 10 minutes for fungus and viral control.<br />
Gym Wipes are large, durable pre-moistened wipes to use on the equipment before and after workouts. Use Gym Wipes<br />
on the equipment for at least 2 minutes for general disinfection purposes.<br />
Contact <strong>Life</strong> <strong>Fitness</strong> Customer Support Services to order these cleaners.<br />
Call 1-800-351-3737 or email: customersupport@lifefitness.com.<br />
LIFE FITNESS COMPATIBLE CLEANERS<br />
Mild soap and water or a mild non-abrasive household cleaner can also be used to clean the display and all exterior surfaces.<br />
Use a soft cotton cloth only. Apply the cleaner to the cotton cloth before cleaning. DO NOT use ammonia or acid<br />
based cleaners. DO NOT use abrasive cleaners. DO NOT use paper towels. DO NOT apply cleaners directly to the<br />
equipment surfaces.<br />
11.4 USING AND TESTING THE SAFETY STOP PULL CORD<br />
During operation of the treadmill, the lanyard on the Safety Stop Pull Cord should be attached to an item of the user’s<br />
clothing.<br />
While the treadmill is on and the console display is active, remove the Safety Stop Pull Cord from the treadmill. A message<br />
shall be displayed on the console similar to “EMERGENCY STOP - REPLACE KEY”. With the Safety Stop Pull<br />
Cord removed no keys shall function on the treadmill.<br />
Place the Safety Stop Pull Cord back in place. The treadmill will reset and will be ready for operation.<br />
11.5 HOW TO OBTAIN PRODUCT SERVICE<br />
1. Please contact your dealer or <strong>Life</strong> <strong>Fitness</strong> Customer Service at 1-800-351-3737.<br />
2. Verify the symptom and review the operating instructions and troubleshooting matrix.<br />
3. Locate and document the serial number of the treadmill. The treadmill’s serial number is located on the front<br />
of the treadmill near the power switch. Please also have proof of purchase information available.<br />
31
12 SPECIFICATIONS<br />
LIFE FITNESS TREADMILL SPECIFICATIONS<br />
Designed use: Home<br />
Maximum user weight: 300 pounds / 136 kilograms<br />
Speed range: 0.5 - 10.0 mph in 0.1 increments<br />
Elevation range: 0%-12% (in 0.5% increments)<br />
Motor: 2.5 HP continuous duty DC<br />
Rollers: Front: 2.6" (67mm) precision crowned<br />
Back: 2.0" (50mm) precision crowned<br />
Belt: 55" Length x 20" Width<br />
(147cm Length x 50cm Width), multi-ply<br />
Deck: Flex Deck cushioning<br />
Handrails: Ergo Crossbar with side handrails.<br />
Accessory tray: Standard, designed into system<br />
Physical Dimensions: Unfolded Folded<br />
Length: 77 inches / 196 centimeters 35 inches / 89 centimeters<br />
Width: 34 inches / 86 centimeters 34 inches / 86 centimeters<br />
Height: 59 inches / 150 centimeters 75 inches / 190.5 centimeters<br />
Weight:<br />
Shipping Dimensions:<br />
259 pounds / 117 kilograms<br />
Carton Length: 86.25 inches / 219 centimeters<br />
Carton Width: 33 inches / 84 centimeters<br />
Carton Height: 14 inches / 35.5 centimeters<br />
Total Weight: 284 pounds / 129 kilograms<br />
32
13 WARRANTY INFORMATION<br />
Model <strong>Life</strong>time 10 Years 5 Years 1 Year<br />
<strong>Life</strong> <strong>Fitness</strong><br />
<strong>Treadmill</strong><br />
Frame & <strong>Life</strong>springs Motor<br />
Electrical Parts,<br />
Mechanical Parts, &<br />
Console Parts*<br />
*Console and Heart Rate Chest Strap Battery 1 year warranty<br />
Labor, Console<br />
Battery and Heart<br />
Rate Chest Strap<br />
Battery<br />
WHAT IS COVERED:<br />
This <strong>Life</strong> <strong>Fitness</strong> consumer product ("Product") is warranted to be free of all defects in material and workmanship.<br />
WHO IS COVERED:<br />
The original purchaser or any person receiving a newly purchased Product as a gift from the original purchaser.<br />
HOW LONG IS IT COVERED:<br />
Residential: All electrical and mechanical components and labor are covered, after the date of purchase, as listed on the<br />
chart on the following page.<br />
Non-Residential: Warranty void (this Product is intended for residential use only).<br />
WHO PAYS SHIPPING & INSURANCE FOR SERVICE:<br />
If the Product or any warranted part must be returned to a service facility for repairs, <strong>Life</strong> <strong>Fitness</strong> will pay all shipping<br />
and insurance charges during the warranty period (within the United States only). The purchaser is responsible for shipping<br />
and insurance charges after the warranty has expired.<br />
WHAT WE WILL DO TO CORRECT COVERED DEFECTS:<br />
We will ship to you any new or rebuilt replacement part or component, or, at our option, replace the Product. Such<br />
replacement parts are warranted for the remaining portion of the original warranty period.<br />
WHAT IS NOT COVERED:<br />
Any failures or damage caused by unauthorized service, misuse, accident, negligence, improper assembly or installation,<br />
debris resulting from any construction activities in the Product's environment, rust or corrosion as a result of the Product's<br />
location, alterations or modifications without our written authorization or by failure on your part to use, operate and maintain<br />
the Product as set out in your <strong>User</strong> <strong>Manual</strong> ("<strong>Manual</strong>"). All terms of this warranty are void if this Product is moved<br />
beyond the continental borders of the United States of America (excluding Alaska, Hawaii and Canada) and are then<br />
subject to the terms provided by that country's local authorized <strong>Life</strong> <strong>Fitness</strong> Representative.<br />
WHAT YOU MUST DO:<br />
Retain proof of purchase (our receipt of the attached registration card assures registration of purchase information but is<br />
not required); use, operate and maintain the Product as specified in the <strong>Manual</strong>; notify the place of purchase of any<br />
defect within 10 days after discovery of the defect; if instructed, return any defective part for replacement or, if necessary,<br />
the entire Product for repair. <strong>Life</strong> <strong>Fitness</strong> reserves the right to decide whether or not a product is to be returned<br />
for repair.<br />
USER MANUAL:<br />
It is VERY IMPORTANT THAT YOU READ THE MANUAL before operating the Product. Remember to perform the periodic<br />
maintenance requirements specified in the <strong>Manual</strong> to assure proper operation and your continued satisfaction.<br />
PRODUCT REGISTRATION:<br />
Register online at www.lifefitness.com/home/product-registration.html. Our receipt assures that your name, address<br />
and date of purchase are on file as a registered owner of the Product. Failure to return the card will not affect your rights<br />
under this warranty. Being a registered owner assures coverage in the event you lose your proof of purchase. Please<br />
retain your proof of purchase, such as your bill of sale or receipt.<br />
33
HOW TO GET PARTS & SERVICE:<br />
Simply call Customer Service at 1-800-351-3737 or (+1) 847-288-3300, Monday through Friday from 8:00 a.m. to 5:00<br />
p.m. Central Standard Time, and tell them your name, address and the serial number of your Product (consoles and<br />
frames may have separate serial numbers). They will tell you how to get a replacement part, or, if necessary, arrange for<br />
service where your Product is located.<br />
EXCLUSIVE WARRANTY:<br />
THIS LIMITED WARRANTY IS IN LIEU OF ALL OTHER WARRANTIES OF ANY KIND EITHER EXPRESSED OR<br />
IMPLIED, INCLUDING BUT NOT LIMITED TO THE IMPLIED WARRANTIES OF MERCHANTABILITY AND FITNESS<br />
FOR A PARTICULAR PURPOSE, AND ALL OTHER OBLIGATIONS OR LIABILITIES ON OUR PART. We neither<br />
assume nor authorize any person to assure for us any other obligation or liability concerning the sale of this Product.<br />
Under no circumstances shall we be liable under this warranty, or otherwise, of any damage to any person or property,<br />
including any lost profits or lost savings, for any special, indirect, secondary, incidental or consequential damages of any<br />
nature arising out of the use of or inability to use this Product. Some states do not allow the exclusion or limitation of<br />
implied warranties or of liability for incidental or consequential damages, so the above limitations or exclusions may not<br />
apply to you. Warranties may vary outside the U.S. Contact <strong>Life</strong> <strong>Fitness</strong> for details.<br />
CHANGES IN WARRANTY NOT AUTHORIZED:<br />
No one is authorized to change, modify or extend the terms of this limited warranty.<br />
EFFECT OF U.S. STATE LAWS:<br />
This warranty gives you specific legal rights and you may have other rights which vary from state to state.<br />
34