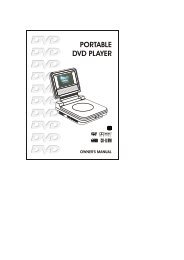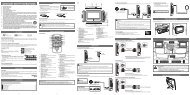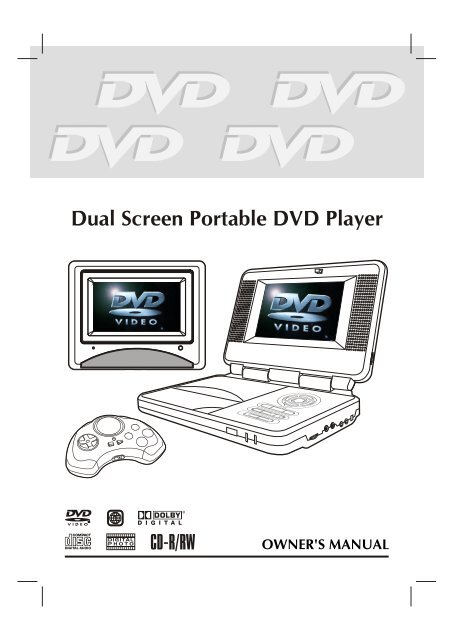
Dual Screen Portable DVD Player - Venturer
Dual Screen Portable DVD Player - Venturer
Dual Screen Portable DVD Player - Venturer

Create successful ePaper yourself
Turn your PDF publications into a flip-book with our unique Google optimized e-Paper software.
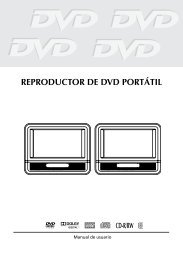
<strong>Dual</strong> <strong>Screen</strong> <strong>Portable</strong> <strong>DVD</strong> <strong>Player</strong><br />
DIGITAL<br />
PHOTO<br />
OWNER'S MANUAL
SAFETY PRECAUTIONS<br />
The following mark and symbols are located on<br />
bottom of the unit.<br />
The lightning flash with an arrowhead symbol, within the<br />
equilateral triangle, is intended to alert the user to the<br />
presence of uninsulated "dangerous voltage" within the<br />
product's enclosure that may be of sufficient magnitude<br />
to cause an electric shock.<br />
The exclamation point within the equilateral triangle is<br />
intended to alert the user to the presence of important<br />
operating and maintenance (servicing) instructions in<br />
this owner manual.<br />
Marking sign is located on bottom of the unit.<br />
WARNING: TO REDUCE THE RISK OF<br />
ELECTRIC SHOCK, DO NOT REMOVE COVER (OR<br />
BACK). NO USER-SERVICEABLE PARTS INSIDE.<br />
REFER SERVICING TO QUALIFIED SERVICE<br />
PERSONNEL.<br />
CAUTION<br />
INVISIBLE LASER RADIATION<br />
WHEN OPEN AND INTERLOCKS<br />
DEFEATED.<br />
AVOID EXPOSURE TO BEAM<br />
WARNING:<br />
TO PREVENT FIRE OR SHOCK HAZARD, DO NOT EXPOSE<br />
THIS APPLIANCE TO RAIN OR MOISTURE.<br />
CAUTION:<br />
TO PREVENT ELECTRIC SHOCK, MATCH WIDE BLADE OF<br />
PLUG TO WIDE SLOT, FULLY INSERT.<br />
DANGER OF EXPLOSION IF BATTERY IS INCORRECTLY<br />
REPLACED. REPLACE ONLY WITH THE SAME OR<br />
EQUIVALENT TYPE.<br />
This product<br />
contains a low<br />
power laser device.<br />
The symbol for<br />
Class II (Double<br />
lnsulation)<br />
On Placement<br />
• Do not use the unit in places which are extremely hot, cold, dusty, or humid.<br />
• Do not restrict the air flow of the unit by placing it in a place with poor air flow, by covering it with a cloth, or by placing it on carpeting.<br />
On Safety<br />
• When connecting or disconnecting the AC cord, grip the plug and not the cord itself. Pulling the cord may damage it and create<br />
a hazard.<br />
• When you are not going to use the unit for a long period of time, disconnect the AC power cord.<br />
On Condensation<br />
• When left in a heated room where it is warm and damp, water droplets or condensation may form inside the unit. When there<br />
is condensation inside the unit, the unit may not function normally. Let the unit stand for 1 to 2 hours before turning the power<br />
on, or gradually heat the room and dry the unit before use.<br />
FCC Information<br />
WARNING: Changes or modifications to this unit not expressly approved by the party responsible for compliance could void the<br />
user authority to operate the equipment.<br />
NOTE: This equipment has been tested and found to comply with the limits for a Class B digital device, pursuant to Part 15 of the<br />
FCC Rules. These limits are designed to provide reasonable protection against harmful interference in a residential installation.<br />
This equipment, used in accordance with the instructions, may cause harmful interference to radio communications.<br />
However, there is no guarantee that interference will not occur in a particular installation. If this equipment does cause harmful<br />
interference to radio or television reception, which can be determined by turning the equipment off and on, the user is encouraged<br />
to try to correct the interference by one or more of the following measures:<br />
• Reorient or relocate the receiving antenna.<br />
• Increase the separation between the equipment and receiver.<br />
• Connect the equipment into an outlet on a circuit different from that to which the receiver is connected.<br />
• Consult the dealer or an experienced radio/TV technician for help.<br />
Shielded cables must be used with this unit to ensure compliance with the Class FCC limits.<br />
WARNING:<br />
• Should any trouble occur, disconnect the AC power cord and refer servicing to a qualified technician.<br />
Notes on Copyright<br />
It is forbidden by law to copy, broadcast, show, broadcast on cable, play in public or rent copyrighted material without permission.<br />
Apparatus Claims of U.S. Patent Nos. 4,631,603; 4,577,216; 4,819,098 and 4,907,093 licensed for limited viewing uses only.<br />
<strong>DVD</strong> video discs are copy protected, and any recordings made from these discs will be distorted. This product incorporates<br />
copyright protection technology that is protected by method claims of certain U.S. patents and other intellectual property rights<br />
owned by Macrovision Corporation and other rights owners. Use of this copyright protection technology must be authorized by<br />
Macrovision Corporation, and is intended for home and other limited viewing uses only, unless otherwise authorized by Macrovision<br />
Corporation. Reverse engineering or disassembly is prohibited.<br />
E - 1
IMPORTANT SAFETY INSTRUCTIONS<br />
1) Read these instructions.<br />
2) Keep these instructions.<br />
3) Heed all warnings.<br />
4) Follow all instructions.<br />
5) Do not use this apparatus near water.<br />
6) Clean only with dry cloth.<br />
7) Do not block any ventilation openings. Install in accordance with the manufacturer’s instructions.<br />
8) Do not install near any heat sources such as radiators, heat registers, stoves, or other apparatus (including<br />
amplifiers) that produce heat.<br />
9) Do not defect the safety purpose of the polarized or grounding-type plug. A polarized plug has two blades with<br />
one wider than the other. A grounding type plug has two blades and a third grounding prong. The wide blade<br />
or the third prong are provided for your safety. If the provided plug does not fit into your outlet, consult an<br />
electrician for replacement of the obsolete outlet.<br />
10) Protect the power cord from being walked on or pinched particularly at plugs, convenience receptacles, and<br />
the point where they exit from the apparatus.<br />
11) Only use detachments/accessories specified by the manufacturer.<br />
12) Use only with the cart, stand, tripod, bracket, or table specified by the manufacturer, or sold<br />
with the apparatus. When a cart is used, use caution when moving the cart/apparatus<br />
combination to avoid injury from tip-over.<br />
13) Unplug this apparatus during lightning storms or when unused for long periods of time.<br />
14) Refer all servicing to qualified service personnel, Servicing is required when the apparatus has been damaged<br />
in any way, such as power-supply cord or plug is damaged, liquid has been spilled or objects have fallen into<br />
the apparatus, the apparatus has been exposed to rain or moisture, does not operate normally, or has been<br />
dropped.<br />
E - 2
TABLE OF CONTENTS<br />
Safety Precautions ..................................1<br />
Important Safety Instructions ................. 2<br />
Table Of Contents .................................... 3<br />
Disc Formats ............................................ 4<br />
Accessories ............................................... 5<br />
Remote Control ........................................ 5<br />
Control Reference Guide .................... 6-8<br />
<strong>Screen</strong> Viewing Angle Adjustment ......... 9<br />
Connections ............................................. 9<br />
Connecting the Monitors ....................................... 9<br />
Using Headphone/Earphones ............................... 9<br />
Power Supply .................................... 10-12<br />
Using the AC adapter ........................................... 10<br />
Using the Car power adapter ................................. 10<br />
Using the rechargeable battery pack .................. 11<br />
Turning on the unit .............................................. 12<br />
Connecting the other<br />
Equipment ........................................ 13-15<br />
Connecting the Game Consoles / other Video<br />
Equipment ............................................................. 13<br />
Connecting the Video Game System .................... 13<br />
Connecting to another source ............................. 14<br />
Connecting a TV .................................................... 14<br />
Using this Mointor with Other<br />
Equipment .......................................................... 15<br />
Sound System ....................................... 16<br />
Installation Guide .................................. 16<br />
Carrying Bag Installation ...................... 17<br />
Playing a Disc ................................... 18-19<br />
Playing a Disc ....................................................... 18<br />
Pausing playback (still mode) ............................... 18<br />
Stopping playback ................................................. 18<br />
To skip to a different track ...................................... 18<br />
Fast Foward/Fast Reverse ..................................... 19<br />
Skip (Forward/Reverse).......................................... 19<br />
Audio selection ....................................................... 19<br />
Subtitle selection .................................................... 20<br />
Angle selection ....................................................... 20<br />
Special Functions ............................ 21-22<br />
Display function ..................................................... 21<br />
GOTO function ....................................................... 21<br />
Locating a specific title ......................................... 22<br />
Locating a specific chapter/track .......................... 22<br />
Locating a specific time ......................................... 22<br />
CD / <strong>DVD</strong> programmable memory ....... 23<br />
<strong>DVD</strong> programmable memory ................................. 23<br />
CD programmable memory .................................. 23<br />
Repeat Playback .............................. 24-25<br />
Repeating a title/chapter (<strong>DVD</strong>) ............................ 24<br />
Repeating a single track/whole disc (CD) ........... 24<br />
Repeating a specific section (<strong>DVD</strong>/CD) .............. 25<br />
Playing Picture File Disc ........................ 26<br />
Playing a Picture file disc ....................................... 26<br />
Customizing the Function<br />
Settings ............................................. 27-28<br />
LANGUAGE setting ................................................. 27<br />
VIDEO setting ............................................................ 27<br />
AUDIO setting ........................................................... 28<br />
RATING (Factory Set) .............................................. 28<br />
Language Code List for<br />
Disc Language ....................................... 29<br />
Maintenance .......................................... 30<br />
Cleaning Disc .......................................................... 30<br />
Cleaning the Unit ................................................... 30<br />
Important Note ....................................................... 30<br />
Trouble Shooting Guide ....................... 31<br />
E - 3
DISC FORMATS<br />
The unit can playback.<br />
<strong>DVD</strong>s<br />
[8cm/12cm disc]<br />
Audio CDs<br />
[8cm/12cm disc]<br />
Region Management Information<br />
Region Management Information: This unit is designed and manufactured to respond to the Region Management<br />
Information that is encoded on <strong>DVD</strong> discs. If the Region number printed on the <strong>DVD</strong> disc does not correspond<br />
to the Region number of this unit, this unit cannot play that disc.<br />
The region number of this unit is 1.<br />
Disc Function or Operation that is Not Available<br />
When the symbol appears on the screen, it indicates that the function or operation attempted is not available<br />
at that time. This occurs because the <strong>DVD</strong> disc manufacturer determines the specific functions. Certain<br />
functions may not be available on some discs. Be sure to read the documentation provided with the <strong>DVD</strong>.<br />
Icons Used on <strong>DVD</strong>s<br />
Sample lcons<br />
2<br />
1. English<br />
2. French<br />
1. English<br />
2. French<br />
Language selections for audio<br />
2<br />
Language selections for subtitles<br />
<strong>Screen</strong> aspect ratio<br />
2<br />
Multiple camera angles<br />
Region code indicator<br />
Notes:<br />
• This Unit supports 2-channel (L/R) audio and 5.1ch (Multi-channel) MPEG Audio 1/2 (only when the DIGITAL<br />
AUDIO OUT coaxial jack is used for connection). It does not support 7.1 channel MPEG Audio Version 2.0.<br />
• When playing back a CD-G (Graphics) or CD EXTRA disc, the audio portion will be played, but the graphic<br />
images will not be shown.<br />
Title, Chapter and Tracks<br />
• <strong>DVD</strong>s are divided into “titles” and “chapters”. If the<br />
disc has more than one movie on it, each movie would<br />
be a separate “title”. “Chapters” are sections of titles.<br />
• Audio CDs are divided into “tracks”. A “track” is<br />
usually one song on an Audio CD.<br />
Note :<br />
• Numbers identify each title, chapter, and track on a disc. Most discs have these numbers recorded on them,<br />
but some do not.<br />
Notes on Unauthorized Discs<br />
You may not be able to play back some <strong>DVD</strong> discs on this unit if they were purchased from outside your<br />
geographic area or made for business purposes.<br />
E - 4
ACCESSORIES<br />
Please check and identify the supplied accessories.<br />
Remote control (with battery) ............................................................................................. x 1<br />
AC adaptor .......................................................................................................................... x 1<br />
AC power cord ..................................................................................................................... x 1<br />
Car power adaptor ............................................................................................................... x 1<br />
Mounting Strap for Monitor ................................................................................................... x 1<br />
Rechargeable battery pack (Model no.: BATT-2P) ............................................................ x 1<br />
Battery charger (Model no.: CHRR-2) ................................................................................. x 1<br />
Audio/Video cable .............................................................................................................. x 1<br />
Carrying bag (with 2 Straps and Elastic Band) ................................................................... x 1<br />
Game console ..................................................................................................................... x 1<br />
Using the Remote Control<br />
REMOTE CONTROL<br />
• Point the Remote Control at the REMOTE SENSOR located on the unit.<br />
• When there is a strong ambient light source, the performance of the infrared REMOTE SENSOR may be<br />
degraded, causing unreliable operation.<br />
• The recommended effective distance for remote operation is about 16 feet (5 meters).<br />
Remove the protective plastic tab before operating the Remote Control.<br />
TO CHANGE REMOTE BATTERY<br />
1. Open the battery door.<br />
2. Insert one CR2025 (3V) size battery.<br />
BATTERY REPLACEMENT<br />
When battery become weak, the operating distance of the Remote Control is greatly reduced and you<br />
will need to replace the battery.<br />
NOTE:<br />
• If the Remote Control is not to be used for a long time, remove the battery to avoid corrosion damage<br />
caused by battery leakage.<br />
• WARNING: Do not dispose of batteries in a fire, batteries may explode or leak.<br />
E - 5
CONTROL REFERENCE GUIDE<br />
Remote Control<br />
1) TV MODE button<br />
In stop mode, select whether to output the video<br />
signal. TV shows "AUTO" means output signal<br />
depends on <strong>DVD</strong> (either NTSC or PAL). TV<br />
shows "PAL" or "NTSC" which means output<br />
signal fixed to PAL or NTSC.<br />
2) STOP button<br />
Stop playing a disc.<br />
PLAY button<br />
Press to start or resume playback a disc.<br />
PAUSE button<br />
Pause playback, frame advance.<br />
3) PREV button<br />
Move backwards through titles, chapters or tracks<br />
on a disc.<br />
4) / SEARCH buttons<br />
SEARCH: Fast reverse playback.<br />
SEARCH: Fast forward playback.<br />
5) Number (0 - 9) buttons<br />
Use when creating programs, and entering a<br />
parental level password. To select a CD/MP3<br />
track directly.<br />
6) MEMORY button<br />
In stop mode, enter the number of a selected<br />
chapter or track.<br />
7) REPEAT A - B button<br />
Perform point-to-point repeat playback on a<br />
<strong>DVD</strong> or CD.<br />
8) MENU button<br />
Open and close <strong>DVD</strong> menu.<br />
9) NEXT button<br />
Move forward through titles, chapters or tracks<br />
on a disc.<br />
10) Cursor ( , , , ) buttons<br />
Use to highlight selections on a menu screen<br />
and make adjustments to certain settings.<br />
ENTER button<br />
Confirm selections on a menu screen.<br />
11) AUDIO button<br />
Select one of the audio sound tracks<br />
programmed on a <strong>DVD</strong> or select the audio<br />
output mode on a AUDIO CD.<br />
12) SUBTITLE/RETURN button<br />
Select one of the subtitle languages programmed<br />
on a <strong>DVD</strong>.<br />
Return to the normal operation after using the<br />
SETUP menu of a <strong>DVD</strong>.<br />
13) GOTO button<br />
Skip directly to a specific location on a <strong>DVD</strong> disc.<br />
14) DISPLAY button<br />
Change disc status information displayed on the<br />
screen.<br />
15) ANGLE button<br />
During <strong>DVD</strong> playing, switch the camera angle of<br />
the video presentation when scenes with<br />
multiple camera angles are recorded on a <strong>DVD</strong>.<br />
16) SETUP/REPEAT-DISC button<br />
In stop mode, Open and close the SETUP menu<br />
of the unit.<br />
Repeat chapter or title of a <strong>DVD</strong>.<br />
Repeat single track or whole CD.<br />
E - 6
CONTROL REFERENCE GUIDE<br />
Unit<br />
1) Cursor ( , , , ) button<br />
Use to highlight selections on a menu screen and<br />
make adjustments to certain settings.<br />
ENTER button<br />
Confirm selections on a menu screen.<br />
2) BRIGHTNESS button<br />
Adjust the relative lightness or darkness of the colour.<br />
3) DIGITAL OUT jack<br />
4) CONNECT TO MONITOR ports (output)<br />
5) AV IN / <strong>DVD</strong> switch<br />
Turn off AV IN mode. Turn on <strong>DVD</strong> mode.<br />
6) AUDIO & VIDEO IN / OUT jacks<br />
7) Headphone jacks<br />
8) VOLUME control<br />
Adjust the volume.<br />
9) BATTERY LOW indicator<br />
10) Power ON indicator<br />
When the Power ON/OFF switched to ON position,<br />
the light will illuminate.<br />
11) Remote sensor<br />
Receives the remote control unit signals<br />
12) ANGLE button<br />
During <strong>DVD</strong> playing, switch the camera angle of<br />
the video presentation when scenes with<br />
multiple camera angles are recorded on a <strong>DVD</strong>.<br />
AUDIO button<br />
Select one of the audio soundtracks programmed<br />
on a <strong>DVD</strong> or select the audio output mode on a AUDIO<br />
CD.<br />
MENU button<br />
Open and close <strong>DVD</strong>'s menu.<br />
PREV button<br />
Press PREV button to go back to previous chapters<br />
/tracks. Press and hold PREV button to begin fast<br />
scan. Four speeds are available.<br />
NEXT button<br />
Press NEXT button to advance to chapters /<br />
tracks. Press and hold NEXT button to begin fast<br />
scan. Four speeds are available.<br />
PAUSE button<br />
Press to pause playback of disc. Each time you press<br />
the PAUSE button the picture advances one frame.<br />
STOP button<br />
Stop playing a disc.<br />
PLAY button<br />
Press to start or resume playback a disc.<br />
13) Open button<br />
Open the disc door.<br />
14) Disc Door<br />
Close by pushing the disc door.<br />
15) BATTERY IN jack<br />
16) DC IN 9V jack<br />
17) POWER ON/OFF switch<br />
18) SCREEN switch<br />
Wide screen<br />
Normal screen<br />
19) COLOUR control<br />
Adjust for colour intensity.<br />
E - 7
CONTROL REFERENCE GUIDE<br />
Monitor<br />
1) VOLUME control<br />
Adjust the volume.<br />
2) Remote sensor<br />
Receives the remote control unit signals.<br />
3) SCREEN switch<br />
Wide screen<br />
Normal screen<br />
4) COLOUR control<br />
Adjust for colour intensity.<br />
5) BRIGHTNESS control<br />
Adjust the relative lightness or darkness of the<br />
colour.<br />
6) Headphone jacks<br />
7) CONNECT TO MAIN UNIT port (Input)<br />
8) AV / DIN switch<br />
9) VIDEO IN / AUDIO IN jacks<br />
10) AV IN indicator<br />
11) MONITOR ON/OFF switch<br />
Installing the Monitor in Car<br />
• Use supplied mounting straps installing the monitors onto the seat back in a car.<br />
1) Loop the safety band<br />
around the headrest.<br />
2) Tightly wrap the mounting<br />
strap around the headrest.<br />
Mounting<br />
Strap<br />
Elastic<br />
Safety Band<br />
SAFETY WARNING!<br />
• This unit should never be used by the vehicle's driver or left unsecured in the vehicle while driving.<br />
• If this unit is being used in your vehicle, be sure that it is secured or held safely, and does not obstruct<br />
any safey device, including air bags or seat belts.<br />
• All passengers should wear seat belts when using this unit in a moving vehicle.<br />
• If in doubt, please contact your vehicle manufacturer for further advice.<br />
E - 8
SCREEN VIEWING ANGLE ADJUSTMENT<br />
The Monitor is designed to allow users to have a comfortable viewing<br />
angle. The viewing angle can be adjusted as top -12°~ +12°.<br />
• Push screen frame to adjust viewing angle.<br />
Caution:<br />
• Do not force the screen frame over its maximum viewing angle settings<br />
as stated above. Attempting this will result in damaging the unit.<br />
Connecting the Monitor<br />
CONNECTIONS<br />
• Use supplied DIN cables to connect the monitor ports.<br />
Bottom of Monitor<br />
Rear of Main Unit<br />
CONNECT TO<br />
MAIN UNIT port<br />
(Input)<br />
CONNECT TO<br />
MONITOR ports<br />
(Output)<br />
DIN CABLE<br />
Using Headphones/Earphones<br />
• Turn down the volume before connection, and then adjust the level.<br />
• When headphones are connected on Monitor, no sound will be output from the Monitor's speakers.<br />
Caution:<br />
• Avoid listening to sound at excessive levels which could be harmful to your ears.<br />
Headphones/<br />
Earphones<br />
(3.5mm diameter plug)<br />
Headphones/<br />
Earphones<br />
(3.5mm diameter plug)<br />
Bottom of Monitor<br />
Right side of Main Unit<br />
Note: In AV IN mode, headphones are connected on unit, no sound will be output from the unit.<br />
E - 9
POWER SUPPLY<br />
A. Using the AC adaptor<br />
This AC adaptor operates on AC between 100V and 240V, But<br />
• In the U.S.A. and Canada, the AC power supply cord must be connected to a 120V AC power supply only.<br />
• When connecting to an AC supply outside of the U.S.A. and Canada, use plug adaptor to suit the AC outlet<br />
configuration.<br />
AC adaptor<br />
Power indicator<br />
AC power cord<br />
3<br />
To AC outlet<br />
2<br />
To AC adaptor<br />
1<br />
To DC IN 9V jack<br />
Left side of unit<br />
Cautions:<br />
• The included AC power supply cord and AC adaptor are for use with this unit only. Do not use them with other<br />
equipment.<br />
• To prevent electrical shock, match wide blade of plug to wide slot, fully insert.<br />
• When the unit is not going to be used for long time, disconnect the AC power supply cord from the AC outlet.<br />
B. Using the Car power adaptor<br />
The included Car power adaptor is designed for use with vehicles that have a 12V, negative ground<br />
electrical system.<br />
Input: 12V<br />
Output: 12V<br />
Car power adaptor<br />
2<br />
To the cigarette lighter socket<br />
1<br />
To DC IN 9V jack<br />
Left side of unit<br />
Cautions:<br />
• Use this unit only with the included Car power adaptor, use with other Car power adaptors could damage the unit.<br />
• The included Car power adaptor is for use with this unit only. Do not use it with other equipment.<br />
• In the interests of traffic safety, do not operate the unit or view video software while driving the vehicle.<br />
• Make sure the unit is secured correctly to prevent it from falling inside the vehicle in the event of an accident.<br />
• When the inside of the cigarette lighter socket is dirty with ashes or dust, the plug section may become hot due<br />
to poor contact. Be sure to clean the cigarette lighter socket before use.<br />
• After use, disconnect the Car power adaptor from both the unit and cigarette lighter socket.<br />
E - 10
POWER SUPPLY<br />
C. Using the rechargeable battery pack<br />
• Charge the rechargeable battery pack before using it for the first time.<br />
• The rechargeable battery pack is suitable when using the unit for portable use.<br />
■ To recharge the battery<br />
Remove the rechargeable battery pack from the unit (if being used).<br />
RECHARGEABLE BATTERY PACK<br />
(7.4V 3600mAh Li-ion Battery)<br />
CHARGING indicator<br />
POWER indicator<br />
1<br />
To "BATTERY IN" jack<br />
BATTERY CHARGER<br />
(DC 9V 3.0A)<br />
2<br />
To "ADAPTOR IN" jack<br />
4<br />
To wall outlet<br />
3<br />
To AC ADAPTOR<br />
AC ADAPTOR<br />
Cautions:<br />
• The included AC power supply cord and AC adaptor are for use with this unit only. Do not use them with<br />
other equipment.<br />
• To prevent electrical shock, match wide blade of plug to wide slot, fully insert.<br />
• When the unit is not going to be used for long time, disconnect the AC power supply cord from the AC outlet.<br />
• Recharging is complete when charging indicator goes out. Unplug the AC power supply cord from the AC<br />
adaptor, then remove the battery pack from the battery charger.<br />
■ To use rechargeable battery pack<br />
Attach it at the corresponding position at the back of the unit.<br />
Rear of unit<br />
RECHARGEABLE BATTERY PACK<br />
Left side of unit<br />
5<br />
ATTACH<br />
RECHARGEABLE<br />
BATTERY PACK<br />
TO UNIT<br />
RECHARGEABLE<br />
BATTERY PACK<br />
6<br />
TO "BATTERY<br />
IN" JACK<br />
E - 11
POWER SUPPLY<br />
■ Disconnecting the Battery Pack.<br />
Push the button to disconnect the<br />
RECHARGEABLE BATTERY PACK<br />
RECHARGEABLE BATTERY PACK<br />
bottom of the unit<br />
Warnings:<br />
• When RECHARGEABLE BATTERY PACK battery is low, player will stop playing.<br />
• During the playback, if the battery is low, the BATTERY LOW indicator on the unit front panel will turn into red and<br />
blink. At this time, please recharge the battery.<br />
• Do not short-circuit the terminals.<br />
• Use only the supplied AC ADAPTOR and BATTERY CHARGER to recharge the battery pack.<br />
• Detach the battery pack. (Even if the unit is off, it still uses some power. This can lead to discharging of the battery<br />
and malfunction.)<br />
• Recharge the battery pack when you are ready to use it again.<br />
• If the rechargeable battery pack is not used for a long period of time, discharge it and store it in a place that is cool,<br />
dry and dark.<br />
• While using the rechargeable battery pack, the ambient temperature should be 5°C (41°F) to 35°C (95°F).<br />
• To get the longest service from of the rechargeable battery pack, charge it under or close to indoor-temperature.<br />
• Do not throw used batteries into fire or water, dispose of them correctly.<br />
• Do not open the rechargeable battery pack.<br />
Note:<br />
Rechargeable battery pack only provides power to <strong>DVD</strong> player only and it cannot power up the Monitor. To<br />
power up the Monitor, the <strong>DVD</strong> player must be powered by Car power adaptor or AC adaptor.<br />
<strong>DVD</strong> <strong>Player</strong><br />
Monitor<br />
Rechargeable<br />
battery pack<br />
CANNOT<br />
WORK<br />
Turning on the unit<br />
1. Slide the POWER ON/OFF switch to the ON position.<br />
2. Slide the AV IN / <strong>DVD</strong> switch to <strong>DVD</strong> or AV IN mode on right side of unit.<br />
• If you select <strong>DVD</strong> the <strong>DVD</strong> logo (start-up picture) will appear on screen.<br />
E - 12
CONNECTING THE OTHER EQUIPMENT<br />
Using this Unit with Other Equipment<br />
A. Connecting the Game Consoles / other Video Equipment<br />
• You can connect your Game Consoles or other Video Equipment to playback through the system.<br />
Right side of unit<br />
AV IN<br />
<strong>DVD</strong><br />
To VIDEO<br />
& AUDIO<br />
IN /OUT<br />
Jack<br />
(Yellow)<br />
(Red)<br />
(Yellow)<br />
(Red)<br />
VIDEO<br />
OUT<br />
AUDIO/VIDEO CABLE<br />
(included)<br />
(White)<br />
AUDIO/VIDEO CABLE<br />
(White)<br />
AUDIO<br />
OUT<br />
Game Consoles /<br />
other Video Equipment<br />
Watching a Video Equipment<br />
1.Turn on the unit, slide the AV IN / <strong>DVD</strong> switch to select "AV IN".<br />
2.Turn on the video equipment and follow the instructions provided with it to playback.<br />
Note: If you have a mono VCR, the volume level from the speakers will be low.<br />
B. Connecting the Video Game System<br />
Right side of unit<br />
To VIDEO<br />
& AUDIO<br />
IN /OUT<br />
Jack<br />
(Yellow)<br />
(Red)<br />
AUDIO/VIDEO CABLE<br />
(included)<br />
(White)<br />
Playing a Video Game System<br />
1.Turn on the unit, slide the AV IN / <strong>DVD</strong> switch to select "AV IN".<br />
2.Turn on the video game system and follow the instructions provided with it to play game.<br />
E - 13<br />
(continued to next page)
CONNECTING THE OTHER EQUIPMENT<br />
C. Connecting to another source<br />
This unit can play Dolby Digital, but only in two channels.<br />
Analogue connection<br />
Right side of unit<br />
AV IN<br />
<strong>DVD</strong><br />
(No need to connect<br />
the Yellow video plug)<br />
Amplifier of<br />
stereo system, etc.<br />
(Red)<br />
(White)<br />
(Red)<br />
(White)<br />
AUDIO<br />
IN<br />
Digital connection<br />
AUDIO/VIDEO CABLE<br />
COAXIAL DIGITAL AUDIO CABLE<br />
Audio equipment with<br />
digital audio input jack<br />
Rear of unit<br />
Listening to another audio equipment<br />
1.Turn on the Unit.<br />
2.Turn on your audio equipment and follow the instructions provided with it to select the AUDIO IN or DIGITAL IN<br />
function.<br />
Notes:<br />
• If the external equipment is a television and this audio system is close to it, you may experience some interference.<br />
• Make sure to use correct Audio/Video cable, wrong plug connection may cause weak signal.<br />
• If you have a stereo VCR, make sure you set it in stereo mode.<br />
• Due to copyright protection, <strong>DVD</strong> movies cannot be copied. If you copy a <strong>DVD</strong> movie onto a videotape, the<br />
resulting copy will be unclear, with poor sound quality. This is NOT caused by a defective <strong>DVD</strong> system.<br />
D. Connecting a TV<br />
• If your TV has Audio/Video inputs<br />
Right side of unit<br />
AV IN <strong>DVD</strong> Watching a <strong>DVD</strong> on your TV<br />
1.Turn on the unit, slide the AV IN / <strong>DVD</strong> switch to select "<strong>DVD</strong>".<br />
2.Turn on the TV and follow the instructions provided with it to play the<br />
<strong>DVD</strong>.<br />
Notes: Please use the correct Audio/Video cable.<br />
To VIDEO<br />
& AUDIO<br />
IN /OUT<br />
Jack<br />
AUDIO/VIDEO CABLE<br />
(included)<br />
(Yellow)<br />
(Red)<br />
(White)<br />
AUDIO/VIDEO<br />
CABLE<br />
(Yellow)<br />
(Red)<br />
(White)<br />
VIDEO<br />
IN<br />
AUDIO<br />
IN<br />
TV<br />
E - 14
CONNECTING THE OTHER EQUIPMENT<br />
Using this Monitor with Other Equipment<br />
• You can playback <strong>DVD</strong> in Main Unit, also Game Consoles or other Video Equipment to playback in Monitor at<br />
the same time.<br />
EXAMPLE OF CONNECTION<br />
BOTTOM OF MONITOR<br />
REAR OF MAIN UNIT<br />
(Yellow)<br />
(White)<br />
(Red)<br />
CONNECT TO<br />
MAIN UNIT PORT<br />
(INPUT)<br />
DIN CABLE<br />
CONNECT TO<br />
MONITOR PORTS<br />
(OUTPUT)<br />
(Red)<br />
(White)<br />
(Yellow)<br />
Game Consoles /<br />
other Video Equipment<br />
Operation status<br />
Main Unit<br />
Monitor<br />
AV IN / <strong>DVD</strong> switch Display AV / DIN switch Display AV IN indicator<br />
AV IN mode AV IN AV mode AV ON<br />
<strong>DVD</strong> mode <strong>DVD</strong> AV mode AV ON<br />
AV IN mode AV IN DIN mode AV IN OFF<br />
<strong>DVD</strong> mode <strong>DVD</strong> DIN mode <strong>DVD</strong> OFF<br />
Display will change to blue screen if no video signal is detected.<br />
E - 15
SOUND SYSTEM<br />
Dolby Digital (for <strong>DVD</strong>)<br />
Dolby Digital is a sound system developed by Dolby Laboratories Inc. that gives movie theatre ambience to<br />
audio output when the unit is connected to a Dolby Digital 5.1 channel processor or amplifier.<br />
This unit automatically recognises <strong>DVD</strong>s that have been recorded with Dolby Digital.<br />
Not all Dolby Digital sources are recorded with 6 channels.<br />
Some sources marked Dolby Digital may be recorded in Dolby Surround, a 2 channel system. Look for this logo<br />
on your unit.<br />
Manufactured under license from Dolby Laboratories.<br />
'Dolby' and the double-D symbol are trademarks of Dolby Laboratories.<br />
INSTALLATION GUIDE<br />
E - 16
CARRYING BAG INSTALLATION<br />
1. Insert the unit into bag as shown.<br />
4. Take another strap and hook up the upper<br />
headrest of the driver's seat as shown.<br />
2. Insert the straps on carrying bag as shown.<br />
5. Take loop elastic band to around the headrest of<br />
the driver's seat and unit as shown.<br />
3. Take straps and hook up the neck headrest of the<br />
driver's seat as shown.<br />
6. Adjust the straps tightly so that the unit is secured.<br />
E - 17
<strong>DVD</strong> CD<br />
Basic playback<br />
PLAYING A DISC<br />
This owner’s manual explains the basic instructions of this unit. Some <strong>DVD</strong> discs are produced in<br />
a manner that allows specific or limited operation during playback. As such, the unit may not<br />
respond to all operating commands. This is not a defect in the unit. Refer to the instruction notes<br />
of discs.<br />
“ ” may appear on the screen during operation. A “ ” means that the desired operation<br />
is not permitted by the unit or disc.<br />
Playing a Disc<br />
1.Slide the POWER ON/OFF switch on the left side of unit to on mode.<br />
2.Slide the AV IN / <strong>DVD</strong> switch on the right side of unit to select <strong>DVD</strong> mode.<br />
See CUSTOMIZING THE FUNCTION SETTINGS (page 27 to 28) before proceeding to step 3.<br />
3.Press the OPEN button on the unit to open the disc door.<br />
4.Hold the disc by its sides and carefully fit in onto the central spindle in the disc compartment, with the label<br />
side facing up; press the disc down until you hear a “click”.<br />
5.Push the door to close.<br />
It takes a short while for your unit to load the disc. After loading, on some discs, the unit will automatically<br />
start playback of the disc.<br />
6.If disc play does not start automatically, press the PLAY button.<br />
Pausing playback (still mode)<br />
Press the II PAUSE button. To resume normal playback, press the<br />
PLAY button.<br />
Stopping playback<br />
Press the ■ STOP button to interrupt playback. To resume playback, press the PLAY button.<br />
If you press the ■ STOP button twice, the unit’s memory will be cleared and pressing the PLAY button will reset<br />
the disc to the beginning.<br />
To skip to a different track<br />
• Press the PREV button repeatedly to skip to the start of the current or previous track.<br />
• Press the NEXT button to skip to the next track.<br />
• For audio CD disc, use the number buttons (remote control only) to jump straight to a particular track number.<br />
E - 18<br />
(continued to next page)
<strong>DVD</strong><br />
Basic playback<br />
CD<br />
PLAYING A DISC<br />
Fast Forward/Fast Reverse<br />
1.Press the SEARCH or SEARCH button of the remote unit when a disc is playing.<br />
• The disc begins fast scan at x2 speed.<br />
• Four speeds are available. Each time SEARCH or SEARCH button is pressed, the speed of fast scan<br />
changes in the following sequence:<br />
Note :<br />
You also can press and hold / (PREV/NEXT) buttons on unit repeatedly to select different fast scan speeds.<br />
2.Press the<br />
PLAY button to resume playback at normal speed.<br />
Audio selection<br />
<strong>DVD</strong><br />
On some discs, the sound is recorded in two or more formats. Follow the directions below to select the type of<br />
playback.<br />
1.While a disc is playing, press the AUDIO button to show the current audio format number.<br />
2.Press the AUDIO button repeatedly to select the desired audio format.<br />
2/4 D 6 Ch Eng<br />
Notes :<br />
• If only one audio format is recorded, the number does not change.<br />
• About two seconds later, playback continues in the new audio format.<br />
E - 19<br />
(continued on next page)
<strong>DVD</strong><br />
Basic playback<br />
PLAYING A DISC<br />
Subtitle selection<br />
1.While a <strong>DVD</strong> is playing, press the SUBTITLE / RETURN button to display the current language setting, as shown<br />
in the example below.<br />
2.Press the SUBTITLE / RETURN button repeatedly to select the desired subtitle language.<br />
1/3 Eng<br />
Notes :<br />
• If only one language is recorded, the language does not change.<br />
• About two seconds later, playback continues with the new subtitle you selected.<br />
• The number of languages recorded differs depending on the disc.<br />
• If no button is pressed within a few seconds, playback continues without changing the current subtitle.<br />
• This function can only be used for discs on which subtitles have been recorded in multiple languages.<br />
• On some <strong>DVD</strong>s, subtitles are activated from the main menu of the <strong>DVD</strong>. Press the MENU button to activate the<br />
main menu.<br />
Angle selection<br />
Some <strong>DVD</strong>s contain scenes which have been shot from a number of different angles. For these discs, the same<br />
scene can be viewed from each of these different angles.<br />
1.While you are playing a <strong>DVD</strong> with different angles recorded, press the ANGLE button to view the number of the<br />
current angle available.<br />
2.Press the ANGLE button repeatedly to change the scene to the next angle in those recorded.<br />
• About two seconds later, playback continues from the new angle you selected.<br />
• If no button is pressed within 10 seconds, playback continues without changing the current angle.<br />
Sequence of angle shots (Example)<br />
1/2<br />
Angle<br />
1/3 Angle BitRate<br />
2/3 Angle BitRate<br />
3/3<br />
BitRate<br />
Notes:<br />
• This function can only be used for discs on which scenes shot from multiple angles have been recorded.<br />
• If only one angle is recorded, “ 1/1 ” is displayed.<br />
E - 20
<strong>DVD</strong><br />
Basic playback<br />
SPECIAL FUNCTIONS<br />
DISPLAY function<br />
Using DISPLAY, you can check the current settings of the following : ANGLE, AUDIO and SUBTITLE.<br />
• While the disc is playing, press the DISPLAY button of the remote unit to display the screen shown below.<br />
Elapsed time: Elapsed time from the beginning of the chapter which is currently playing.<br />
Remaining time: Remaining time of the title which is currently playing.<br />
Elapsed time Remaining time<br />
00:07:18<br />
01:12:18<br />
<strong>DVD</strong> Title 1/3 Chapter 1/35 00:07:18 01:12:18<br />
Audio<br />
2/4 D 6 Ch Eng<br />
Chapter<br />
Off<br />
Angle<br />
1/1 BitRate 9.472Mbps<br />
GOTO function<br />
This function allows you to skip directly to any part of the disc while a disc is playing. Press or button to highlight<br />
time.<br />
Time - - : - - : - -<br />
Title/Chapter - - - / - - -<br />
Note :<br />
• After setting, press the DISPLAY button again on the remote unit to return to the normal screen.<br />
E - 21<br />
(continued on next page)
<strong>DVD</strong><br />
Basic playback<br />
CD<br />
SPECIAL FUNCTIONS<br />
Locating a specific title<br />
<strong>DVD</strong><br />
If a <strong>DVD</strong> disc contains title numbers, you can locate a specific title by directly selecting a title number.<br />
1.In stop mode, press the GOTO button.<br />
2.Press or button to highlight a specific field and press the<br />
corresponding number button(s) for the title you want.<br />
3.Press the ENTER button to confirm. The unit will start playback about<br />
3 seconds later.<br />
Time - - : - - : - - Title/Chapter - - - / - - -<br />
Locating a specific chapter / track<br />
If you know the chapter / track number you want to play, you can locate a specifc chapter / track by directly selecting<br />
a chapter / track number.<br />
<strong>DVD</strong><br />
1.Press the GOTO button to search your desired chapter / track.<br />
2.Press or button to highlight a chapter / track and press the<br />
corresponding number button(s) for the chapter you want.<br />
Time - - : - - : - - Title/Chapter - - - / - - -<br />
3.Press the ENTER button to confirm. The unit will start playback<br />
about 3 seconds later.<br />
CD<br />
Time - - : - - : - - Track - - -<br />
Locating a specific time<br />
You can move to a specific location by entering its corresponding time (hours, minutes, seconds)<br />
1.Press the GOTO button.<br />
2.Press or button to highlight time.<br />
<strong>DVD</strong><br />
3.Press the corresponding number buttons for the setting point you<br />
want.<br />
4.Press the ENTER button to confirm. The unit will start playback<br />
about 3 seconds later.<br />
Time - - : - - : - - Title/Chapter - - - / - - -<br />
Notes :<br />
• Some discs may not respond to this process.<br />
• Some scenes may not be located as precisely as you specified.<br />
• This method for accessing specific locations is available only within<br />
the current title of the <strong>DVD</strong> disc.<br />
Time - - : - - : - -<br />
CD<br />
Track - - -<br />
E - 22
CD / <strong>DVD</strong> PROGRAMMABLE MEMORY<br />
Programmable memory<br />
The two types of programmed playback provided by this unit are title/chapter programmed playback and track programmed<br />
playback.<br />
Title / Chapter programmed playback (<strong>DVD</strong>)<br />
1.Press the MEMORY button while the disc is stopped.<br />
2.Enter the title numbers in - - . Use or button to move the highlight to chapter and enter the chapter numbers<br />
in - - .<br />
3.Use , , or button to move to the other field.<br />
4.Repeat steps 2 to 3.<br />
5.Press the PLAY button to start the programmed playback.<br />
Title<br />
Chapter<br />
Programmable memory (CD)<br />
Track programmed playback<br />
1.Press the MEMORY button while the disc is stopped.<br />
2.Enter the track numbers in - - - .<br />
Track<br />
3.Use , , or button to select other field.<br />
4.Repeat steps 2 to 3.<br />
5.Press the PLAY button to start the programmed playback.<br />
E - 23
<strong>DVD</strong><br />
REPEAT PLAYBACK<br />
You can play a specific title or chapter repeatedly.<br />
(Title repeat, chapter repeat, A-B repeat)<br />
Repeating a title<br />
You can play the same title repeatedly.<br />
1.While the disc is playing, press the REPEAT DISC button until<br />
the “ Repeat Title ” indicator displays on the screen. The current<br />
title is played repeatedly.<br />
Repeating a chapter<br />
You can play the same chapter repeatedly.<br />
2.While the disc is playing, press the REPEAT DISC button until<br />
the “ Repeat Chapter ” indicator displays on the screen. The<br />
current chapter is played repeatedly.<br />
To resume normal playback<br />
3.While the disc is playing, press the REPEAT DISC button until<br />
the “ Off ” indicator displays on the screen.<br />
You can play a single track or entire disc repeatedly.<br />
Repeating a single track<br />
You can play the same track repeatedly.<br />
1.While the disc is playing, press the REPEAT DISC button until<br />
the “ Repeat Single ” indicator displays on the screen. The current<br />
track is played repeatedly.<br />
Repeating a whole disc<br />
CD<br />
2.While the disc is playing, press the REPEAT DISC button until<br />
the “ Repeat All ” indicator displays on the screen. The whole<br />
disc is played repeatedly.<br />
To resume normal playback<br />
3.Press the REPEAT DISC button until the “ Off<br />
displays on the screen.<br />
” indicator<br />
E - 24<br />
(continued on next page)
<strong>DVD</strong><br />
REPEAT PLAYBACK<br />
Repeating a specific section<br />
You can play a specific section repeatedly.<br />
1.While the disc is playing, press the REPEAT A-B button at the<br />
beginning of the section (( Rep A- ) is displayed) you want to<br />
play repeatedly.<br />
2.Press the REPEAT A-B button again at the end of the section<br />
(( Rep A-B ) is displayed).<br />
3.The Unit will immediately begin replaying your selection.<br />
To resume normal playback<br />
4.While the disc is playing, press the REPEAT A-B button until<br />
the “ Off ” indicator displays on the screen.<br />
Notes :<br />
• A-B repeat can only be used within the same title. If the start and end of the section to be repeated are in different titles,<br />
A-B repeat is cancelled.<br />
• The A-B repeat function does not operate in scenes where different camera angles are recorded.<br />
E - 25
PLAYING PICTURE FILE DISC<br />
This unit can play Picture files recorded on CD-R and CD-RW discs.<br />
Playing a Picture file disc<br />
1. Slide the OPEN switch to open the disc door.<br />
2. Hold a Picture file disc by its sides and carefully fit onto the<br />
central support of compartment with the label side facing<br />
forward you until you hear a “click”.<br />
3. Push the door to close.<br />
4. The unit will take a short while to load the disc, automatically<br />
begin playback. The Picture files will be playback one by<br />
one.<br />
Press the , , or CURSOR button to select the file<br />
you want to view, then press ENTER button to confirm, and<br />
the selected file will be played.<br />
CD-ROM<br />
(Root)<br />
1 Folk<br />
2 Rock<br />
3 Flower<br />
4 Map<br />
5 Modern<br />
6<br />
7<br />
8<br />
1/117 00:00:35<br />
Single<br />
Car<br />
Calender<br />
Notes:<br />
• You can press the PAUSE button to interrupt playback, and press the PLAY button to resume<br />
playback.<br />
• You also can use GOTO function or use the numbered buttons to enter the number to quickly select any<br />
image.<br />
• Press the ANGLE button on the remote control to rotate the picture orientation by 90°.<br />
E - 26
CUSTOMIZING THE FUNCTION SETTINGS<br />
LANGUAGE setting<br />
1.Press the SETUP button in stop mode.<br />
2.Use or button to one language, then press the ENTER<br />
button. The screen will change to your selected language<br />
wordings immediately.<br />
3.To exit the SETUP MENU and return to the normal screen,<br />
press the RETURN button.<br />
VIDEO setting<br />
1.Press the SETUP button in stop mode.<br />
2.Use or button to select Video, then press the ENTER button.<br />
3.Use or button to select the options (TV Shape, Brightness or<br />
Edges) to be adjusted by press or button, then press the ENTER<br />
button. (The screen will change to your desired setting).<br />
4.Repeats step 2 and 3 above to adjust other options.<br />
5.To exit the FUNCTION SETUP MENU and return to the normal screen,<br />
press the RETURN button.<br />
Language<br />
English<br />
Deutsch<br />
Français<br />
Español<br />
Italiano<br />
Svenska<br />
Português<br />
Language<br />
TV Shape<br />
Brightness<br />
Edges<br />
Video Audio Rating<br />
Video Audio Rating<br />
Letter box<br />
Off<br />
Off<br />
Cut off when a wide-screen<br />
video image is played.<br />
Pan Scan<br />
• When wide-screen video is played, this mode clips the right and left<br />
sides of the image so that it can be viewed on a conventional screen.<br />
• Some wide-screen <strong>DVD</strong>s that do not permit Pan Scan mode playback<br />
are automatically played in letterbox mode (black bands top and bottom).<br />
Pan Scan<br />
Letter Box<br />
• When wide-screen video is played in this mode on a conventional<br />
screen, black bands appear at the top and bottom of the screen.<br />
Letter Box<br />
Wide-screen<br />
• This is the correct mode for playing wide-screen videos on a<br />
wide-screen.<br />
Wide-screen<br />
Notes :<br />
• The displayable picture size is preset on the <strong>DVD</strong> disc. Therefore the playback picture of some <strong>DVD</strong> discs may not<br />
conform to the picture size you select.<br />
• When you play <strong>DVD</strong> discs recorded in the 4:3 aspect ratio, the playback picture will always appear in the 4:3<br />
aspect ratio regardless of the TV shape setting.<br />
E - 27<br />
(continued to next page)
CUSTOMIZING THE FUNCTION SETTINGS<br />
AUDIO setting<br />
1.Press the SETUP button in stop mode.<br />
2.Use or button to select Audio, press the ENTER button<br />
repeatedly to select Digital Out type.<br />
3.To exit the FUNCTION SETUP MENU and return to the normal<br />
screen, press the RETURN button.<br />
Raw : Use this setting when the unit is connected to an external<br />
Dolby Digital decoder.<br />
PCM : Use this setting when the unit is connected to an external<br />
surround decoder or stereo.<br />
Language<br />
Digital Out<br />
Video Audio Rating<br />
Raw<br />
RATING (Factory Set)<br />
1. Press the SETUP button in stop mode.<br />
2. Press or button to select Rating,, press the ENTER button<br />
to enter Factory Set setting.<br />
3. Press or button to select Yes, press the ENTER button.<br />
Language Video Audio Rating<br />
Note:<br />
It takes 3-5 seconds to reset the unit to the factory default.<br />
Language Video Audio Rating<br />
Password<br />
Parental lock<br />
Factory Set<br />
- - - -<br />
8. Adult<br />
No<br />
Language Video Audio Rating<br />
Password<br />
Parental lock<br />
Factory Set<br />
- - - -<br />
8. Adult<br />
No<br />
No<br />
Yes<br />
E - 28
E - 29<br />
LANGUAGE CODE LIST FOR DISC LANGUAGE<br />
Code<br />
AA<br />
AB<br />
AF<br />
AM<br />
AR<br />
AS<br />
AY<br />
AZ<br />
BA<br />
BE<br />
BG<br />
BH<br />
BI<br />
BN<br />
BO<br />
BR<br />
CA<br />
CO<br />
CS<br />
CY<br />
DA<br />
DE<br />
DZ<br />
EL<br />
EN<br />
EO<br />
ES<br />
ET<br />
EU<br />
FA<br />
FI<br />
FJ<br />
FO<br />
FR<br />
Code<br />
FY<br />
GA<br />
GB<br />
GL<br />
GN<br />
GU<br />
HA<br />
HI<br />
HR<br />
HU<br />
HY<br />
IA<br />
IE<br />
IK<br />
IN<br />
IS<br />
IT<br />
IW<br />
JA<br />
JI<br />
JW<br />
KA<br />
KK<br />
KL<br />
KM<br />
KN<br />
KO<br />
KS<br />
KU<br />
KY<br />
LA<br />
LN<br />
LO<br />
LT<br />
LV<br />
Language Name<br />
Frisian<br />
Irish<br />
Scots Gaelic<br />
Galician<br />
Guarani<br />
Gujarati<br />
Hausa<br />
Hindi<br />
Croatian<br />
Hungarian<br />
Armenian<br />
Interlingua<br />
Interlingue<br />
Inupiak<br />
Indonesian<br />
Icelandic<br />
Italian<br />
Hebrew<br />
Japanese<br />
Yiddish<br />
Javanese<br />
Georgian<br />
Kazakh<br />
Greenlandic<br />
Cambodian<br />
Kannada<br />
Korean<br />
Kashmiri<br />
Kurdish<br />
Kirghiz<br />
Latin<br />
Lingala<br />
Laothian<br />
Lithuanian<br />
Latvian, Lettish<br />
Language Name<br />
Malagasy<br />
Maori<br />
Macedonian<br />
Malayalam<br />
Mongolian<br />
Moldavian<br />
Marathi<br />
Malay<br />
Maltese<br />
Burmese<br />
Nauru<br />
Nepali<br />
Dutch<br />
Norwegian<br />
Occitan<br />
(Afan) Oromo<br />
Oriya<br />
Panjabi<br />
Polish<br />
Pashto, Pushto<br />
Portuguese<br />
Quechua<br />
Rhaeto-<br />
Romance<br />
Kirundi<br />
Romanian<br />
Russian<br />
Kinyarwanda<br />
Sanskrit<br />
Sindhi<br />
Sangho<br />
Serbo-<br />
Croatian<br />
Singhalese<br />
Slovak<br />
Language Name<br />
Slovenian<br />
Samoan<br />
Shona<br />
Somali<br />
Albanian<br />
Serbian<br />
Siswat<br />
Sesotho<br />
Sundanese<br />
Swedish<br />
Swahili<br />
Tamil<br />
Telugu<br />
Tajik<br />
Thai<br />
Tigrinya<br />
Turkmen<br />
Tagalog<br />
Setswana<br />
Tonga<br />
Turish<br />
Tsonga<br />
Tatar<br />
Twi<br />
Ukrainian<br />
Urdu<br />
Uzbek<br />
Vietnamese<br />
Volapük<br />
Wolof<br />
Xhosa<br />
Yoruba<br />
Chinese<br />
Zulu<br />
Code<br />
MG<br />
MI<br />
MK<br />
ML<br />
MN<br />
MO<br />
MR<br />
MS<br />
MT<br />
MY<br />
NA<br />
NE<br />
NL<br />
NO<br />
OC<br />
OM<br />
OR<br />
PA<br />
PL<br />
PS<br />
PT<br />
QU<br />
RM<br />
RN<br />
RO<br />
RU<br />
RW<br />
SA<br />
SD<br />
SG<br />
SH<br />
SI<br />
SK<br />
Code<br />
SL<br />
SM<br />
SN<br />
SO<br />
SQ<br />
SR<br />
SS<br />
ST<br />
SU<br />
SV<br />
SW<br />
TA<br />
TE<br />
TG<br />
TH<br />
TI<br />
TK<br />
TL<br />
TN<br />
TO<br />
TR<br />
TS<br />
TT<br />
TW<br />
UK<br />
UR<br />
UZ<br />
VI<br />
VO<br />
WO<br />
XH<br />
YO<br />
ZH<br />
ZU<br />
Language Name<br />
Afar<br />
Abkhazian<br />
Afrikaans<br />
Ameharic<br />
Arabic<br />
Assamese<br />
Aymara<br />
Azerbaijani<br />
Bashkir<br />
Byerlorussian<br />
Bulgarian<br />
Bihari<br />
Bislama<br />
Bengali<br />
Bangla<br />
Tibetan<br />
Breton<br />
Catalan<br />
Corsican<br />
Czech<br />
Welsh<br />
Danish<br />
German<br />
Bhutani<br />
Greek<br />
English<br />
Esperanto<br />
Spanish<br />
Estonian<br />
Basque<br />
Persian<br />
Finnish<br />
Fiji<br />
Faroese<br />
French
MAINTENANCE<br />
Cleaning the Disc<br />
A defective or soiled disc inserted into the unit can cause sound to drop out during playback.<br />
Handle the disc by holding its inner and outer edges.<br />
• Do NOT touch the surface of the unlabeled side of the disc.<br />
• Do NOT stick paper or tape on the surface.<br />
• Do NOT expose the disc to direct sunlight or excessive heat.<br />
• Clean the disc before playback. Wipe the disc from the center outward with a<br />
cleaning cloth.<br />
• NEVER use solvents such as benzine or alcohol to clean the disc.<br />
• Do NOT use irregular shaped discs (example : heart shaped, octagonal, etc.). They may cause malfunctions.<br />
Cleaning the unit<br />
• Be sure to turn the unit off and disconnect the AC power cord before maintaining the unit.<br />
• Wipe the unit with a dry soft cloth.<br />
If the surfaces are extremely dirty, wipe clean with a cloth which has been dipped in a weak soap-and-water solution<br />
and wrung out thoroughly, then wipe with a dry cloth.<br />
• Never use alcohol, benzine, thinner, cleaning fluid or other chemicals. Do NOT use compressed air to remove dust.<br />
Important Note<br />
Before transporting the unit, remove disc from the disc compartment.<br />
E - 30
SYMPTOM CAUSE (AND REMEDY)<br />
TROUBLE SHOOTING GUIDE<br />
No power.<br />
• Check that the AC adaptor and AC power cord are connected.<br />
• Turn on the unit.<br />
The remote does not<br />
function.<br />
• Remove any obstacles between the remote and the unit.<br />
• Use the remote near the unit.<br />
• Point the remote at the remote sensor on the unit.<br />
• Replace the battery in the remote.<br />
<strong>DVD</strong><br />
No sound or only a very<br />
low-level sound is<br />
heard.<br />
• Make sure that you've select <strong>DVD</strong> mode.<br />
• The system is in pause mode or in Slow-motion Play mode. Press the PLAY button<br />
to return to normal play mode.<br />
• Fast forward or fast reverse is performed. Press the PLAY button to return to normal<br />
play mode.<br />
• Make sure that AUDIO output and AV IN input connections are correct.<br />
• This unit is too hot, shut off the unit for 30 minutes to cool down.<br />
No picture<br />
• The region number of the disc does not match the region number of the unit.<br />
• <strong>DVD</strong> mode is not selected, select <strong>DVD</strong> on AV IN/<strong>DVD</strong> switch.<br />
The picture is not clear<br />
• Clean the disc.<br />
• The disc is scratched.<br />
Severe hum or noise is<br />
heard.<br />
The disc does not play.<br />
• The plugs and jacks are dirty. Wipe them with a cloth slightly moistened with alcohol.<br />
• Clean the disc.<br />
• There is no disc inside ("No Disc" appears on the screen).<br />
• Insert the disc correctly with the playback side facing down on the disc tray.<br />
• Clean the disc.<br />
• A non-Valid disc has been inserted. The unit and disc region numbers are<br />
incompatible. Press the TV MODE button on the remote to output the video signal.<br />
• Condensation may have formed inside the unit due to a sudden change in temperature.<br />
Wait about an hour for it to clear and try again.<br />
Need More Help?<br />
DO NOT RETURN THIS TO THE STORE<br />
Please visit online help at<br />
http://www.1800customersupport.com<br />
Printed in China<br />
E - 31