Clydesdale 8491 Manual - Hearthstone Stoves
Clydesdale 8491 Manual - Hearthstone Stoves
Clydesdale 8491 Manual - Hearthstone Stoves
Create successful ePaper yourself
Turn your PDF publications into a flip-book with our unique Google optimized e-Paper software.
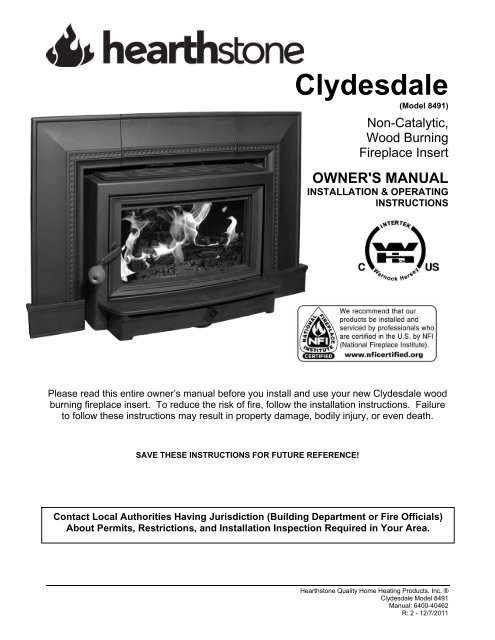
<strong>Clydesdale</strong><br />
(Model <strong>8491</strong>)<br />
Non-Catalytic,<br />
Wood Burning<br />
Fireplace Insert<br />
OWNER'S MANUAL<br />
INSTALLATION & OPERATING<br />
INSTRUCTIONS<br />
Please read this entire owner’s manual before you install and use your new <strong>Clydesdale</strong> wood<br />
burning fireplace insert. To reduce the risk of fire, follow the installation instructions. Failure<br />
to follow these instructions may result in property damage, bodily injury, or even death.<br />
SAVE THESE INSTRUCTIONS FOR FUTURE REFERENCE!<br />
Contact Local Authorities Having Jurisdiction (Building Department or Fire Officials)<br />
About Permits, Restrictions, and Installation Inspection Required in Your Area.<br />
<strong>Hearthstone</strong> Quality Home Heating Products, Inc. ®<br />
<strong>Clydesdale</strong> Model <strong>8491</strong><br />
<strong>Manual</strong>: 6400-40462<br />
R: 2 - 12/7/2011
<strong>Hearthstone</strong> <strong>Clydesdale</strong> Fireplace Insert Model <strong>8491</strong><br />
Intentionally Blank<br />
Page 2 of 33
<strong>Hearthstone</strong> <strong>Clydesdale</strong> Fireplace Insert Model <strong>8491</strong><br />
Table of Contents<br />
INTRODUCTION .......................................................................................................................................................... 4<br />
CODES ...................................................................................................................................................................... 4<br />
SAFETY INFORMATION ............................................................................................................................................... 5<br />
PERIODIC CHECKLIST ................................................................................................................................................ 6<br />
EMERGENCY PROCEDURES ........................................................................................................................................ 6<br />
SPECIFICATIONS ........................................................................................................................................................ 7<br />
INSTALLATION ........................................................................................................................................................... 8<br />
Unpacking ...................................................................................................................................................................... 8<br />
Packing List .................................................................................................................................................................... 8<br />
Hearth Requirements & Floor Protection ....................................................................................................................... 9<br />
Clearances to NFPA 211 Protected Surfaces ................................................................................................................ 9<br />
Clearance to combustibles ............................................................................................................................................. 9<br />
Installing the Insert ....................................................................................................................................................... 10<br />
Installing the surround .................................................................................................................................................. 14<br />
Removing & Reversing the Door .................................................................................................................................. 14<br />
Removing the Ash Lip Cover & Façade ....................................................................................................................... 15<br />
Blower Power Cord Routing ......................................................................................................................................... 16<br />
VENTING COMPONENTS & CONFIGURATION .............................................................................................................. 17<br />
Installing a Venting System .......................................................................................................................................... 17<br />
Connecting Your Wood Fireplace Insert ...................................................................................................................... 17<br />
Connecting to a Prefabricated Metal Chimney ............................................................................................................. 17<br />
Connection to a Masonry Chimney .............................................................................................................................. 18<br />
OPERATION ............................................................................................................................................................. 21<br />
Controls & Features ..................................................................................................................................................... 21<br />
Operating the Blower ................................................................................................................................................... 21<br />
Choosing Firewood ...................................................................................................................................................... 21<br />
Wood Heat Value: Sorted By Btu Content ................................................................................................................... 22<br />
Building a Fire .............................................................................................................................................................. 23<br />
Breaking in Your Wood Fireplace Insert ....................................................................................................................... 23<br />
Operating Your Insert Efficiently .................................................................................................................................. 24<br />
Intermittent Operation .................................................................................................................................................. 25<br />
Building a Fire for Everyday Use .................................................................................................................................. 25<br />
Disposal of Ashes ........................................................................................................................................................ 25<br />
Over-Fire Caution......................................................................................................................................................... 25<br />
MAINTENANCE ......................................................................................................................................................... 26<br />
Creosote Formation and Need for Removal ................................................................................................................. 26<br />
Gaskets ........................................................................................................................................................................ 26<br />
Glass ............................................................................................................................................................................ 26<br />
Cast Iron ...................................................................................................................................................................... 27<br />
Blower System ............................................................................................................................................................. 28<br />
TROUBLESHOOTING ................................................................................................................................................. 29<br />
Basic Heating Issues .................................................................................................................................................... 29<br />
Draft Sampling Access Port ......................................................................................................................................... 29<br />
Troubleshooting Guide ................................................................................................................................................. 30<br />
REPLACEMENT PARTS & OPTIONAL ACCESSORIES ................................................................................................... 31<br />
SAFETY LABEL ........................................................................................................................................................ 32<br />
Page 3 of 33
<strong>Hearthstone</strong> <strong>Clydesdale</strong> Fireplace Insert Model <strong>8491</strong><br />
Introduction<br />
Congratulations! You have just invested in a most<br />
unique wood burning Fireplace Insert – the<br />
<strong>Clydesdale</strong> Model <strong>8491</strong> is a clean burning EPA<br />
certified, non-catalytic wood burning Fireplace<br />
Insert. You can be proud to join the <strong>Hearthstone</strong><br />
family with our Premier Cast Iron Wood Burning<br />
Fireplace Insert. The generous firebox depth and<br />
width allows for loading of wood up to 22 inches<br />
long!<br />
Your purchase ensures years of clean, comfortable<br />
heat with minimal maintenance. You will receive the<br />
benefits of the most advanced technology in wood<br />
burning without the cost and maintenance<br />
requirements of a catalytic Fireplace Insert. The<br />
<strong>Clydesdale</strong> blends modern technology with the<br />
unique beauty and heating qualities of soapstone<br />
(used as the firebox lining) and cast iron. Soapstone<br />
is well known for its even heat production and long<br />
heat-retaining ability. We trust that you will<br />
appreciate the quality of our handcrafted product.<br />
Please read this manual in its entirety. Its purpose<br />
is to familiarize you with your Fireplace Insert's safe<br />
installation, proper break-in, operation and<br />
maintenance. It contains information that is useful to<br />
you now, and in the years to come. So keep it handy<br />
and refer to it as needed.<br />
Use these instructions as well as national, state, and<br />
local building codes to install your Fireplace Insert.<br />
Ensure to maintain the designated stovepipe and<br />
Fireplace Insert clearances to walls, ceilings, hearth,<br />
and other combustible surfaces. This will help<br />
reduce the risk of fire. Failure to follow these<br />
instructions can result in property damage, bodily<br />
injury, and even death.<br />
Keep furniture, drapes, curtains, wood, paper, and<br />
other combustibles far away from the Fireplace<br />
Insert. Never install the Fireplace Insert in a location<br />
where gasoline, kerosene, charcoal lighter fluid or<br />
other flammable liquids are used or stored.<br />
SAFETY NOTICE:<br />
A HOUSE FIRE MAY RESULT IF THIS FIREPLACE<br />
INSERT IS NOT INSTALLED PROPERLY. FOR YOUR<br />
SAFETY, CAREFULLY FOLLOW THE INSTALLATION<br />
INSTRUCTIONS. CONTACT LOCAL BUILDING OR<br />
FIRE OFFICIALS ABOUT RESTRICTIONS AND<br />
INSTALLATION INSPECTION IN YOUR AREA.<br />
The performance of your Fireplace Insert depends<br />
on many variables. Since all installations are<br />
unique, the general information and operating<br />
procedures presented here can only serve as useful<br />
guidelines rather than hard and fast rules. Should<br />
you have any questions, do not hesitate to contact<br />
your dealer for additional information.<br />
This Fireplace Insert is manufactured and warranted<br />
by:<br />
<strong>Hearthstone</strong> Quality Home Heating Products, Inc®<br />
317 Stafford Ave.<br />
Morrisville, VT. 05661<br />
www.hearthstonestoves.com<br />
Codes<br />
When you install your <strong>Clydesdale</strong> wood Fireplace<br />
Insert, it is imperative that you adhere to all local<br />
codes, which can be obtained from either of the<br />
following two National sources:<br />
American National Standards Institute, Inc.<br />
(ANSI)<br />
1430 Broadway<br />
New York, NY 10018<br />
www.ansi.org<br />
National Fire Protection Association, Inc.<br />
(NFPA)<br />
Battery March Park<br />
Quincy, MA 02269<br />
http://www.nfpa.org<br />
Page 4 of 33
<strong>Hearthstone</strong> <strong>Clydesdale</strong> Fireplace Insert Model <strong>8491</strong><br />
Safety Information<br />
Read and understand this Owner's <strong>Manual</strong><br />
thoroughly before installing and using this<br />
Fireplace Insert.<br />
Make sure to install your Fireplace Insert:<br />
According to the manufacturer's<br />
recommendations.<br />
In accordance with all applicable codes.<br />
With the proper sized chimney.<br />
When using your Fireplace Insert:<br />
Warn children and others unfamiliar with<br />
woodstoves of the danger of touching hot,<br />
radiating surfaces of your Fireplace Insert. For<br />
your additional safety, obtain hearth and stove<br />
guards through your local dealer.<br />
Follow recommended break-in procedure as<br />
outlined in this manual.<br />
Burn natural wood only. Higher efficiencies and<br />
lower emissions result when burning air-dried,<br />
seasoned wood, as compared to green or<br />
freshly cut wood.<br />
Use caution when loading firewood into a hot<br />
stove.<br />
Inspect the stovepipe, chimney connector and<br />
chimney, as recommended.<br />
Follow these safety precautions:<br />
Never modify this Fireplace Insert in any way,<br />
especially the primary air control system.<br />
Never burn kiln dried wood, painted or treated<br />
wood, solvents, trash, plywood, colored or<br />
glossy paper, plastic, artificial logs, cardboard,<br />
coal, or driftwood. Especially, do not burn<br />
coal in this Fireplace Insert.<br />
Never use gasoline type fuel, kerosene,<br />
charcoal lighter fluid, or other liquid fuels or solid<br />
fire starters to start or invigorate the fire. These<br />
fuels can possibly generate carbon monoxide,<br />
which can sap the supply of oxygen. Keep all<br />
such materials away from the Fireplace Insert.<br />
Never use a log grate or other device to elevate<br />
the fire.<br />
Do Not allow logs to rest against or otherwise<br />
come in contact with the glass when the door is<br />
closed.<br />
Do Not slam the door or use the door to force<br />
wood in to the Fireplace Insert.<br />
Never over-fire your Fireplace Insert<br />
Never put articles of clothing or candles on a hot<br />
Fireplace Insert.<br />
Do Not connect the Fireplace Insert to a flue<br />
that is serving another appliance.<br />
Other safety guidelines<br />
As a general rule, keep all combustible items<br />
such as furniture, drapes, clothing, and other<br />
items, at least 36" (0.92 m) from the Fireplace<br />
Insert<br />
Install a smoke detector, preferably in an area<br />
away from your wood Fireplace Insert.<br />
Install a CO detector as a rule. Wood burning<br />
appliances can generate little CO, but oil and<br />
gas burning appliances can produce huge<br />
amounts if not operating properly.<br />
Keep a fire extinguisher handy. We recommend<br />
the type rated "A B C."<br />
Dispose of ashes properly.<br />
Keep children and pets away from the stove;<br />
they could be burned by touching a hot stove.<br />
Clean your chimney system as needed.<br />
Page 5 of 33
<strong>Hearthstone</strong> <strong>Clydesdale</strong> Fireplace Insert Model <strong>8491</strong><br />
Periodic Checklist<br />
Perform each of these tasks at the specified<br />
intervals.<br />
At the End of Every Week:<br />
Empty ashes from the firebox (sooner if the<br />
firebox begins to fill up).<br />
At the Beginning of Every Other Month:<br />
A visual inspection of the flue liner or chimney<br />
for creosote is recommended depending upon<br />
your use of the stove.<br />
Check door seals using the "dollar bill test." -<br />
When the fire is out and the insert is cool, shut<br />
the door on a dollar bill. If the bill pulls out<br />
without any resistance, then your insert’s door<br />
isn't sealed properly. To tighten the seal, adjust<br />
the latch spring tension or change the door<br />
gasket if necessary.<br />
At the End of Every Season:<br />
Clean any chimney connector thoroughly.<br />
Replace any pieces that show signs of rust or<br />
deterioration.<br />
Inspect and, if necessary, clean your chimney<br />
(flue liner).<br />
Thoroughly clean out the firebox of the Fireplace<br />
Insert.<br />
Inspect all door gasket material and replace if<br />
worn, frayed, cracked or extremely hard.<br />
Replace any badly cracked refractory soapstone<br />
in the firebox.<br />
Clean dust away from the ash lip assembly and<br />
grills.<br />
Remove the Ash Lip Cover and inspect the<br />
blower assembly - clean if necessary.<br />
Emergency Procedures<br />
If you have a stovepipe or chimney fire, follow these<br />
instructions:<br />
1. If the fire is too threatening, leave the area and<br />
call the fire department immediately! If not,<br />
perform the next two steps.<br />
2. Close the primary air control.<br />
3. Keep the Fireplace Insert door closed!<br />
WARNING: DO NOT ATTEMPT TO PUT OUT A<br />
STOVEPIPE OR CHIMNEY FIRE BY THROWING<br />
WATER ONTO THE STOVE, STOVEPIPE, OR<br />
CHIMNEY. THE EXTREMELY HIGH<br />
TEMPERATURE ASSOCIATED WITH SUCH FIRES<br />
CAN CAUSE INSTANTANEOUS STEAM AND<br />
SERIOUS BODILY HARM.<br />
Once the chimney fire has expired, leave the primary<br />
air control closed and let the fire in the Fireplace<br />
Insert die out completely. DO NOT burn the<br />
Fireplace Insert again until the Fireplace Insert,<br />
connector pipe, liner, and chimney are all thoroughly<br />
inspected for any sign of damage. You must correct<br />
any damage before using your Fireplace Insert<br />
again.<br />
To remove the <strong>Clydesdale</strong> for inspection purposes,<br />
disconnect the venting from inside the firebox.<br />
Carefully remove the surround from the insert, and<br />
slide the insert away from the fireplace.<br />
Page 6 of 33
<strong>Hearthstone</strong> <strong>Clydesdale</strong> Fireplace Insert Model <strong>8491</strong><br />
Specifications<br />
Maximum Heat Output: 60,000 BTU per hour of<br />
cordwood (based on independent laboratory test<br />
results).<br />
Size of Heated Area:<br />
Up to 2,000 square feet.<br />
Firebox Capacity: 2.4 cubic feet or 48 pounds of<br />
wood (The amount and weight of wood contained per<br />
cubic foot of firebox volume can vary from 15 to 36<br />
lbs. per cubic foot depending on type of wood,<br />
moisture content, packing density and other factors.<br />
As a constant for comparison and test purposes, we<br />
are assuming 20 lbs. of seasoned hardwood per<br />
cubic foot of firebox volume).<br />
Maximum Log Length: 22” (55.88 cm)<br />
Height:<br />
Width:<br />
23.12" (58.72 cm)<br />
31.62” (80.31 cm)<br />
Depth:<br />
Front Door Size:<br />
Stovepipe Size:<br />
Metal Chimney:<br />
Masonry Chimney:<br />
Flue Exit:<br />
Actual Weight:<br />
Castings Finish:<br />
24.63” (62.56 cm)<br />
22" wide x 11.5" high<br />
(55.88 x 29.21 cm)<br />
6" (152 mm) diameter<br />
6" (152 mm) inside diameter<br />
6” (15.2cm) inside diameter<br />
(round flue)<br />
8” x 8” (20 x 20cm) (square<br />
flue)<br />
Top exit only<br />
550 pounds<br />
Painted Matte; and Porcelain<br />
Enamel<br />
Figure 1 – <strong>Clydesdale</strong> Dimensions<br />
Page 7 of 33
<strong>Hearthstone</strong> <strong>Clydesdale</strong> Fireplace Insert Model <strong>8491</strong><br />
Installation<br />
Unpacking<br />
<strong>Hearthstone</strong> packages your <strong>Clydesdale</strong> Fireplace<br />
Insert with the greatest care so that it ships safely.<br />
Under certain circumstances, however, damage can<br />
still occur during transit and handling. When you<br />
receive your Fireplace Insert, unpack it carefully,<br />
inspecting it, and all parts for damage. Also, ensure<br />
that all parts are included. If any parts are damaged<br />
or missing, please contact your dealer immediately.<br />
Packing List<br />
1- <strong>Clydesdale</strong> <strong>8491</strong> Fireplace Insert<br />
1- Façade and Ash Lip w/ blower (in place on insert)<br />
1- Façade Top Grill (in place on insert)<br />
1- Surround Kit Box (ships on top of insert)<br />
In Firebox:<br />
1- Box, Refractory Stone Kit<br />
1- Bag, Door Handle Kit<br />
1- Envelope, Owner’s <strong>Manual</strong> Packet<br />
1- Pouch, Touch-up Paint (Enamel only)<br />
Pre-Installation Prep<br />
When installing this unit in a fireplace, you must<br />
attach the provided metal label (3300-625) to the<br />
fireplace prior to installing the insert (see illustration<br />
on page 18).<br />
WITH ALL CHIMNEYS, A POSITIVE CONNECTION<br />
MUST BE MADE BETWEEN THE FIREPLACE<br />
INSERT’S FLUE COLLAR AND THE CHIMNEY (see<br />
page 17).<br />
Ensure that the Fireplace Insert will have enough<br />
clearance to combustible materials in the vicinity.<br />
These combustibles can include walls, floor, ceiling,<br />
fireplace mantle, and chimney decor. You must<br />
carefully consider the clearances to all of these<br />
combustibles before actually connecting your<br />
Fireplace Insert.<br />
Read this chapter to obtain a sound understanding<br />
of how to properly install your Fireplace Insert.<br />
Contact the following agency for more information:<br />
National Fire Protection Agency<br />
Batterymarch Park<br />
Quincy, MA 02269<br />
1-800-344-3555<br />
1-617-770-3000<br />
www.nfpa.org<br />
Figure 2 – Minimum Fireplace Dimensions<br />
Page 8 of 33
<strong>Hearthstone</strong> <strong>Clydesdale</strong> Fireplace Insert Model <strong>8491</strong><br />
Hearth Requirements & Floor<br />
Protection<br />
Combustible flooring must be protected with a<br />
covering of noncombustible material (slate, marble<br />
tiles, other noncombustible material can be used for<br />
this purpose). The floor protection must extend<br />
beyond the body of the Fireplace Insert at the<br />
minimum as follows and have a minimum “R-Value”<br />
of 1.0.<br />
Figure 3 – Hearth Requirements<br />
Noncombustible Material Thickness R-value<br />
Gypsum or plaster board 1 1 / 2 0.45<br />
Wallboard, Wonderboard, or<br />
Durock 1<br />
1 / 2 <br />
0.20<br />
Ceramic board (Fiberfrax or<br />
1 / 2 1.10<br />
Micor) 1<br />
Nominal solid clay brick 1 1 0.20<br />
Ceramic wall or floor tile 1 1 / 4 0.01<br />
Mineral wool insulation 2 1 3.12<br />
Cement mortar 2 1 0.20<br />
Horizontal still air 2 *<br />
1 / 8 0.92<br />
Floor protectors come with various types of<br />
specifications. To convert a floor protector’s<br />
specification to an R-value, do one of the following:<br />
1. If the R-value is given, use that value - no<br />
conversion is needed.<br />
2. If a K-factor is given with a required thickness (T)<br />
in inches, use this formula: R-value = 1/K x T<br />
3. If a C-factor is given, use the formula: R-value =<br />
1/C<br />
To determine the R-value of the proposed alternate<br />
floor protector:<br />
1. Use either the K-factor or the C-factor formula<br />
explained above to convert specifications not<br />
expressed as R-values.<br />
2. For multiple layers of floor protectors, simply add<br />
the R-values of each layer to determine the<br />
overall R-value of the layers.<br />
If the overall R-value of your setup is greater than the<br />
R-value of the specified floor protector, then your<br />
setup is acceptable.<br />
Clearances to NFPA 211 Protected<br />
Surfaces<br />
You can reduce the clearances to combustible<br />
surfaces by using any National Fire Protection<br />
Agency (NFPA) approved wall protection system.<br />
Refer to NFPA 211 for specific and complete details:<br />
National Fire Protection Agency<br />
Battery March Park<br />
Quincy, MA 02269<br />
1-800-344-3555<br />
1-617-770-3000<br />
www.nfpa.org<br />
Clearance to combustibles<br />
Figure 4 – clearances to combustibles<br />
A- Side wall = 12”<br />
B- Mantle and top trim = 27” *<br />
B- Mantle/ with mantle shield kit = 11” *<br />
C- Trim = 9”<br />
* Measured from top of sheet metal shroud<br />
1<br />
According to Intertek Testing Services, Inc.<br />
2<br />
According to ASHRAE Handbook of Fundamentals 1977<br />
Page 9 of 33
<strong>Hearthstone</strong> <strong>Clydesdale</strong> Fireplace Insert Model <strong>8491</strong><br />
Installing the Insert<br />
Step One: Remove the contents of the firebox. This<br />
will include the owner’s manual packet, a box of<br />
soapstone refractory bricks, the handle knob<br />
assembly, and a pouch containing enamel touch-up<br />
(if applicable).<br />
Step Two: Remove the <strong>Clydesdale</strong> from the pallet<br />
(see Photo 1).<br />
Locate the three mounting clips attached to the<br />
leveling bolts (two in the front and one in the back)<br />
that secure the insert to the shipping pallet.<br />
1. Using a 1/2” wrench, remove the rear lag<br />
screw and mounting clip.<br />
2. Check the front clips – if there is sufficient<br />
clearance above the lag screws to clear the<br />
facade, remove them.<br />
3. Otherwise, if the lag screw is close to and<br />
under the façade (see photo 1), carefully<br />
loosen the front clip lag screws about one<br />
turn. Take care to not damage the finish on<br />
the façade.<br />
4. Slide the insert backwards about one inch to<br />
disengage the front clips.<br />
5. Once all the clips are disengaged, turn the<br />
rear leveling bolt upward (tighten) to ease<br />
insert installation into the fireplace.<br />
The Insert ships with the Façade and ash lip cover<br />
installed. You should not need to remove these in a<br />
typical installation.<br />
through the knob. Turn the bolt onto the latch handle<br />
and tighten with a hex wrench. Handle is shown<br />
installed correctly in photo 2.<br />
Photo 2 – Door Handle & Latch Detail (Façade<br />
removed)<br />
Step Four: Measure the opening of the fireplace.<br />
When measuring the fireplace cavity, you will need to<br />
determine the following:<br />
1. Will the flue collar be installed in the forward<br />
or aft position The depth of the firebox will<br />
determine the location of the flue collar.<br />
NOTE: the collar is installed at the factory in<br />
the aft position to accommodate the most<br />
common type of install that requires use of<br />
an elbow or flex connector for attachment to<br />
the chimney liner. To change the collar to<br />
the forward position for a shallow fireplace,<br />
follow the instructions in step five. Proceed<br />
to the next step if the aft position is correct<br />
for your installation.<br />
Photo 1 – Pallet Mounting Clip Detail (Right Front<br />
Shown - Façade Installed)<br />
Step Three: Install the wooden knob onto the latch<br />
handle. The knob, bolt, and washer are located in a<br />
plastic bag removed from the firebox in step one.<br />
Place the washer onto the bolt and then push the bolt<br />
Figure 5 – Flue Collar Detail<br />
Page 10 of 33
<strong>Hearthstone</strong> <strong>Clydesdale</strong> Fireplace Insert Model <strong>8491</strong><br />
2. Note: With the collar is in the aft position - to<br />
properly attach the liner or connector to the<br />
flue collar using all three screws, you must<br />
remove the baffle/plenum and drop the flue<br />
collar into the firebox for attachment of the<br />
flue liner. If the baffle/plenum and flue collar<br />
do not need to be removed, you can skip to<br />
step 7.<br />
Step Five: Change the position of the flue collar if<br />
necessary. To remove the flue collar, reach in<br />
through the flue collar and locate the four bolts<br />
threaded down through the insert top on the corners<br />
of the flue collar. Remove the nuts with a 7/16”<br />
wrench. Lower, and turn the collar 180 degrees to<br />
the forward position. Fit the four holes on the collar<br />
over the four bolts. Fasten the nuts back onto the<br />
bolts and tighten them with the 7/16” wrench. Now<br />
place the insert into the fireplace opening and<br />
connect to the flue liner (meeting UL 1777).<br />
Draft Sampling<br />
Port<br />
Photo 5 - Collar in Default 30º Aft Position (air<br />
shroud removed for clarity)<br />
Photo 3 – Collar Mounting Detail (Inside Firebox)<br />
Photo 6 – Collar in Forward (90º Position)<br />
NOTE: In order to connect the liner to the flue<br />
collar properly with three screws when the flue<br />
collar is in the aft (default) position, you must<br />
remove the baffle/plenum and drop the collar into<br />
the firebox. Removing the baffle will also allow<br />
you to connect the flue liner to the flue collar in<br />
the forward position if space above the insert<br />
installed in the fireplace is limited.<br />
Photo 4 – Air Shroud Installed (default)<br />
Page 11 of 33
<strong>Hearthstone</strong> <strong>Clydesdale</strong> Fireplace Insert Model <strong>8491</strong><br />
Step Six: Remove the baffle/plenum.<br />
Stone Clips.<br />
Photo 7 – Stone Clip Detail<br />
NOTE: Before the baffle can be removed, the 3<br />
stone retaining clips (one in the rear and one on<br />
each side) must be removed from the firebox.<br />
Remove the clips by removing the fasteners that<br />
hold them to the firebox.<br />
1. To remove the baffle / secondary air plenum,<br />
loosen the two socket head machine screws that<br />
hold it in place with a 5/32” hex wrench (see<br />
photo below). Once these screws are loose, lift<br />
the baffle assembly off the screws and maneuver<br />
it carefully out of the firebox.<br />
into the fireplace opening. Drop the flue liner<br />
(meeting UL 1777) into the firebox through the<br />
flue collar opening. Attach the flue liner, or<br />
connector to the collar, push the collar and flue<br />
liner up to the top of the firebox, ensure the collar<br />
slips onto the four bolts, and secure it by turning<br />
the nuts back onto the bolts and tighten with a<br />
7/16” wrench.<br />
Place the baffle / secondary air assembly back into<br />
the firebox and re-install.<br />
CAUTION: THE BAFFLE MATERIAL IS A HIGH<br />
TEMPERATURE CERAMIC. IT WILL LAST FOR<br />
MANY YEARS UNDER NORMAL USE; HOWEVER,<br />
IT IS EASILY DAMAGED BY IMPACT OR FORCE.<br />
APPLY PRESSURE TO THE STAINLESS STEEL<br />
AIR TUBES AND CAST IRON ONLY!<br />
a. Place the baffle inside the stove with the ceramic<br />
board facing up, and the stainless steel shelf tabs<br />
forward.<br />
b. Lift the baffle and slide the rear baffle sleeves<br />
fully into the slots on the rear of the unit. The<br />
slots on the baffle will drop back onto the<br />
threaded rods in the back of the firebox<br />
c. Gently lower the front of the baffle until the shelf<br />
tabs are resting on the sidewall.<br />
d. To verify that the baffle is in the correct position,<br />
gently tug down on the front of the baffle. If it<br />
does not move – placement is correct. Tighten<br />
the machine screws loosened in step one.<br />
Ceramic Baffle<br />
Photo 8 – Plenum Fastener Detail<br />
The removable plenum/baffle assembly inside the<br />
<strong>Clydesdale</strong> firebox. (Shown looking straight into the<br />
firebox.)<br />
NOTE: If access to the top of the insert is<br />
restricted when installed, you will want to loosely<br />
attach the mounting bracket for the surround<br />
now. For installation details see the instructions<br />
provided with the surround.<br />
Shelf Tab<br />
Photo 9 – Baffle/Plenum Shelf Tab Detail<br />
2. With the baffle/plenum out of the firebox, remove<br />
the flue collar as described in step five. Place the<br />
flue collar in the firebox and insert the <strong>Clydesdale</strong><br />
Page 12 of 33
<strong>Hearthstone</strong> <strong>Clydesdale</strong> Fireplace Insert Model <strong>8491</strong><br />
Step Seven: With the unit in the desired position<br />
within the fireplace, level the unit using a box end<br />
wrench on the square portion of the left and right<br />
leveling bolts (if façade is installed). Use a 9/16”<br />
socket wrench on the Stover nut to adjust the rear<br />
leveling bolt (see photos 10 through 12).<br />
Step Eight: Install the soapstone refractory pieces in<br />
the firebox (see photos 13 through 15).<br />
The <strong>Clydesdale</strong> refractory stone set includes the<br />
following stones:<br />
9 ea: 4-1/2” x 9” (A)<br />
1 ea: 4-1/2” X 4-1/2” (B)<br />
2 ea: 4-1/2” X 12” Angled Cut (C)<br />
2 ea: 4-1/2” x 11-1/4” Angled Cut (D)<br />
A<br />
A<br />
A<br />
A<br />
A<br />
B<br />
A<br />
Photo 10 – Leveling Bolt Detail (Right Front Shown<br />
with Façade removed & Stover lock nut installed)<br />
Photo 13 – Firebox Floor Stones<br />
A<br />
A<br />
A<br />
Photo 11 – Rear Leveling Bolt Detail (With Stover<br />
lock nut installed - accessed in Firebox)<br />
Photo 14 – Install & Secure Firebox Rear Stones<br />
C<br />
D<br />
Photo 15 – Left and Right Side Stones<br />
Photo 12 – Rear Leveling Bolt (Rear View)<br />
Page 13 of 33
<strong>Hearthstone</strong> <strong>Clydesdale</strong> Fireplace Insert Model <strong>8491</strong><br />
Installing the surround<br />
Step Nine: Remove the surround components from<br />
the large cardboard box that accompanied the<br />
<strong>Clydesdale</strong> Insert. Included are the surround panels,<br />
assembly hardware, and surround mounting bracket.<br />
Refer to the instructions included with the surround<br />
for complete assembly and installation.<br />
Read this Owner’s <strong>Manual</strong> for all other installation<br />
and operational requirements.<br />
Removing & Reversing the Door<br />
To reverse the door to open from the right, first cover<br />
the ash lip cover with cardboard or a towel (to avoid<br />
scratching it), then remove the door.<br />
1. Open and support the door, then remove the machine<br />
screw securing the upper inner hinge. Lift the door off<br />
the lower, inner hinge section.<br />
1.<br />
3. Remove, and set aside the two hinge pins and any<br />
spacer washers.<br />
Photo 18 - Reversible Door Catch<br />
Inner Hinge<br />
Section<br />
Photo 16 – Upper Hinge Mounting Detail<br />
Outer Hinge<br />
Section<br />
Photo 17 – Lower Hinge Mounting Detail<br />
2. Remove the lower hinge section from the insert.<br />
Photo 19 – Reversible Door Stop<br />
4. Use a hex wrench to remove the door catch and the<br />
screws (and the door stop if present) on the right side.<br />
5. Reattach the door catch on the opposite side of the<br />
front, using the same screws. Reattach the screws<br />
(and door stop if present) on the left where the catch<br />
was.<br />
6. Remove the two Phillips head screws where the<br />
hinges will go on the left side – install them on the right<br />
side.<br />
7. Rotate both inner hinge sections 180 degrees and<br />
mount the lower hinge’s inner section on the left side<br />
of the insert.<br />
8. Rotate the door 180 degrees – you do not have to<br />
remove or adjust the handle.<br />
9. Insert the pin in the lower hinge’s outer section.<br />
10. Insert the hinge pin in the upper hinge’s inner section<br />
and place it on the upper outer hinge section still<br />
attached to the door, reinstall any spacers.<br />
11. Position the door so it is open about 80 degrees and<br />
place it on the lower inner hinge section.<br />
12. Attach the upper inner hinge section to the insert.<br />
13. Tap the pins down to seat them if necessary.<br />
14. Close the door and check its alignment – ensure it is<br />
square in the opening, and that it does not drag on the<br />
ash lip cover. Adjust the hinges/spacers if needed.<br />
15. Check the gasket seal using the dollar bill test. Close<br />
the door on a dollar bill – if the bill pulls out without any<br />
resistance at any point; this is where it will leak, adjust<br />
the door accordingly.<br />
Page 14 of 33
<strong>Hearthstone</strong> <strong>Clydesdale</strong> Fireplace Insert Model <strong>8491</strong><br />
Removing the Ash Lip Cover &<br />
Façade<br />
In some instances, it may become necessary to<br />
remove the Façade or Ash Lip Cover. To remove the<br />
Façade, you must first remove the Ash Lip Cover. To<br />
service the blower, you must also remove the Ash Lip<br />
Cover.<br />
1. To remove the Ash Lip Cover, loosen the two hex<br />
socket head set screws securing the ash lip cover as<br />
shown in photo 20. In order to lift the ash lip cover, you<br />
must loosen the set screws enough to clear the<br />
mounting clips (see photo 21).<br />
Ash Lip<br />
Cover<br />
Rear Notch<br />
Setscrews<br />
Photo 23 – Top Grill Adjustment Point Detail<br />
3. The Top Grill on brown enamel finish <strong>Clydesdale</strong>s<br />
uses three adjustment points to keep the grill from<br />
resting on the façade’s enamel surface. The draft port<br />
plug (see photo 32), and two setscrews (see photo<br />
above) are adjusted at the factory, but may need<br />
further adjustment after installation or maintenance.<br />
4. Lift the Façade up slightly and tilt it towards you so the<br />
mounting clips clear the lip on the stove body (see<br />
photo 24). Carefully move the Façade away from the<br />
insert and set aside.<br />
Set Screw (2)<br />
Façade Clip (2)<br />
Photo 20 – Ash Lip Cover Detail<br />
Ash Lip Cover<br />
Mounting Clip (2)<br />
Leave exposed<br />
Photo 21 – Ash Lip Cover Mounting Clip Detail<br />
2. To remove the Façade, first remove the top grill (see<br />
photo 22). On brown enamel <strong>Clydesdale</strong>s, carefully lift<br />
the grill straight up to avoid scratching or chipping the<br />
façade’s finish.<br />
Photo 24 – Façade Clip Detail (rear view)<br />
5. When ready, reinstall the Façade, Top Grill, and Ash<br />
Lip Cover.<br />
Note: The façade is correctly mounted when the clips<br />
are positioned as shown in photo 24. Do not remount<br />
the façade and place the mounting clip behind the<br />
second inner cast lip shown above.<br />
Top Grill<br />
Photo 22 – Top Grill<br />
Page 15 of 33
<strong>Hearthstone</strong> <strong>Clydesdale</strong> Fireplace Insert Model <strong>8491</strong><br />
Blower Power Cord Routing<br />
The <strong>Clydesdale</strong> <strong>8491</strong> ships from the factory with the<br />
blower system’s power cord routed on the left side of<br />
the insert as you face it. If your installation requires<br />
the cord on the right side, you must remove the<br />
façade and disassemble the ash lip assembly to<br />
access the wire clips to change the position of the<br />
power cord.<br />
1. Loosen Set Screw and remove Ash Lip Cover.<br />
Remove the Façade as described on page 15.<br />
4. Use a Phillips head screwdriver to remove the<br />
screws securing the wire loops on the left and<br />
transfer everything to the right side ensuring you<br />
place the loops in the equivalent locations<br />
(arrows). A wire loop must be placed on the<br />
screw closest to the corner to ensure the cord<br />
does not rub on the blower housing. Do not<br />
disconnect any wiring – there is more than<br />
sufficient length to route the cord to the right over<br />
the top of the blower speed control.<br />
Photo 25 – Set Screw Detail<br />
2. Remove screw and step bushing securing the air<br />
control to the bracket.<br />
Photo 28 – Wire Loop Mounting Detail<br />
5. Re-attach the ash lip assembly to the front of the<br />
insert. Ensure the cord is not touching the blower<br />
housing and is routed through the space above<br />
the mounting flange. Ensure the cord is not<br />
pinched in any way. Re-attach the screw and<br />
step bushing securing the air control to the<br />
bracket. Ensure the air control moves freely. Reinstall<br />
the façade and then the ash lip cover.<br />
Photo 26 – Air Control Mounting Detail<br />
3. Use a 1/2” socket, or wrench and remove the 4<br />
bolts and washers securing the Ash Lip<br />
Assembly to the body of the insert. There is no<br />
need to disconnect any wires.<br />
Photo 29 – Correctly Routed Cord Detail<br />
Photo 27 – Ash Lip Assembly Fastener Detail<br />
Page 16 of 33
<strong>Hearthstone</strong> <strong>Clydesdale</strong> Fireplace Insert Model <strong>8491</strong><br />
Venting Components & Configuration<br />
Installing a Venting System<br />
DO NOT CONNECT THIS UNIT TO ANY AIR<br />
DISTRIBUTION DUCT OR SYSTEM<br />
Secure all joints, including attaching the flue liner<br />
to the Fireplace Insert's flue collar, with three<br />
sheet metal screws. Install #10 x 1/2" (3 mm x 13<br />
mm) sheet metal screws into the holes pre-drilled in<br />
the flue collar. Eliminating the screws can cause<br />
joints to separate from the vibrations that result from<br />
a creosote chimney fire.<br />
Remember, the NFPA has recommended minimum<br />
clearances for chimney connectors to combustibles<br />
such as walls and ceilings. Once the Fireplace Insert<br />
is installed at safe distances from these combustible<br />
surfaces, it is important to maintain these connector<br />
clearances for the remainder of the installation.<br />
Connecting Your Wood Fireplace<br />
Insert<br />
You can connect your <strong>Clydesdale</strong> to a prefabricated<br />
metal chimney or a masonry chimney. See Figure 6<br />
for an example to aid in connections.<br />
With all chimneys, a positive connection must<br />
be made between the fireplace insert’s flue<br />
collar and the chimney.<br />
In an existing Masonry Chimney, use one of the<br />
approved following methods:<br />
In the U.S:<br />
1. Connect the insert to a listed 6” stainless steel<br />
flexible connector that connects to a listed 6”<br />
stainless steel liner extending the full length of<br />
the chimney.<br />
• A 22 ga. or greater Blue Steel 6”<br />
connector is also acceptable to<br />
attach to the flue liner.<br />
2. Connect the insert to a listed 6” stainless steel<br />
flexible connector that extends beyond the<br />
fireplace’s damper into an approved flue tile liner.<br />
3. In all cases, a sealed block off plate, or a plug of<br />
other noncombustible material such as unfaced<br />
fiberglass insulation, must be installed at the<br />
damper area of the existing fireplace to seal the<br />
chimney from the room air.<br />
In Canada:<br />
4. The fireplace insert must be installed with a<br />
continuous chimney liner with a minimum<br />
diameter of 6” extending from the fireplace insert<br />
to the top of the chimney. The chimney liner must<br />
conform to the class 3 requirements of chimney<br />
liner standards can/ulc-s635 or can/ulc-s640.<br />
Do not use aluminum or galvanized steel pipe<br />
as a connector or chimney liner. These<br />
materials are not suitable for solid fuel<br />
burning applications.<br />
Connecting to a Prefabricated<br />
Metal Chimney<br />
You can install the <strong>Clydesdale</strong> in masonry or zero<br />
clearance fireplaces. Before installing the stove in a<br />
factory-built fireplace, the fireplace must have the<br />
following characteristics:<br />
1) Listed per UL 127 or ULC S610.<br />
2) Include a full height listed chimney liner meeting<br />
type HT requirements (2100° Fahrenheit) per UL<br />
1777 (United States) or ULC S635 (Canada)<br />
standards.<br />
3) The means to prevent room air passage to the<br />
chimney cavity of the fireplace.<br />
4) Does not disturb the airflow in or within the<br />
fireplace when installed (louvers, or cooling air<br />
inlet or outlet ports must not be blocked).<br />
5) Not be altered in any way, except for the<br />
following:<br />
a) External trim pieces which do not affect the<br />
operation of the fireplace can be removed,<br />
providing they are stored on or within the<br />
fireplace for re-assembly if the insert is<br />
removed.<br />
b) The chimney damper can be removed to<br />
install the chimney liner.<br />
6) Must not have blocked circulating chambers (if<br />
available).<br />
7) The means for removing the insert to clean the<br />
chimney flue.<br />
8) Have a permanent metal warning label (provided<br />
with the <strong>Clydesdale</strong>—see following illustration)<br />
attached to the fireplace by riveting it to the<br />
outside wall, stating that the fireplace must be<br />
restored to its original condition for safe use<br />
without the insert.<br />
Page 17 of 33
<strong>Hearthstone</strong> <strong>Clydesdale</strong> Fireplace Insert Model <strong>8491</strong><br />
Remember, you must adhere to all previously<br />
described floor protection requirements when<br />
installing into a zero clearance fireplace.<br />
WARNING: DO NOT CONNECT THE FIREPLACE<br />
INSERT TO A CHIMNEY FLUE SERVING ANOTHER<br />
APPLIANCE.<br />
Ensure the size of the chimney’s flue is appropriate<br />
for the <strong>Clydesdale</strong>. The <strong>Clydesdale</strong> requires a 6"<br />
(152 mm) inside diameter flue for new installations.<br />
A 6” diameter flue provides adequate draft and<br />
performance. You can use an 8" (203 mm) diameter<br />
existing flue with a reducer. An oversized flue<br />
contributes to creosote accumulation. (In this case,<br />
bigger is NOT better.)<br />
There are two ways to install a prefabricated metal<br />
chimney:<br />
An interior installation where the chimney passes<br />
inside the residence through the ceiling and roof.<br />
An exterior installation where the chimney passes<br />
through the wall behind the Fireplace Insert then<br />
up the outside of the residence.<br />
Whenever possible, choose an interior chimney. An<br />
interior chimney heats quickly and retains its heat;<br />
thus promotes a better draft and discourages the<br />
formation of creosote. An exterior chimney does not<br />
benefit from the surrounding warmth of the building,<br />
so it typically operates at lower flue temperatures<br />
than an interior chimney. An exterior chimney’s draft<br />
is not as strong and may experience increased<br />
creosote accumulation.<br />
REMOVE THE DAMPER OR LOCK IT OPEN.<br />
Connection to a Masonry Chimney<br />
Hire a professional to examine the masonry chimney<br />
for cracks, loose mortar, and other signs of<br />
deterioration and blockage before connection. If the<br />
chimney needs repairs, complete them before<br />
installing and using your Fireplace Insert. Do not<br />
install your Fireplace Insert until the chimney is safe<br />
for use.<br />
Ensure the chimney’s cleanout is complete and<br />
working properly. To avoid a loss of draft, the<br />
cleanout must close off completely.<br />
Ensure the size of the chimney’s flue is appropriate<br />
for this Fireplace Insert and that it is not too large.<br />
Use a masonry chimney with a maximum 8" x 8" (203<br />
mm x 203 mm) tile size for best results. An oversized<br />
flue will contribute to the accumulation of creosote.<br />
Use the following checklist to ensure that your<br />
masonry chimney meets these minimum<br />
requirements:<br />
Chimney wall construction:<br />
A brick, modular block, rubble or stone wall at<br />
least 4" (102 mm) thick.<br />
Flue liner:<br />
Minimum ceramic flue liner thickness of 5/8" (16<br />
mm). Installed with refractory mortar and with at<br />
least 1" (25 mm) air space.<br />
An equivalent listed chimney flue liner system<br />
meeting type HT requirements or other approved<br />
material.<br />
Interior chimney requirements:<br />
At least 2" (51 mm) clearance to combustible<br />
structure<br />
Fire stops installed at the spaces where the<br />
chimney passes through floors and/or ceiling.<br />
Insulation must be 2" (51 mm) from the chimney.<br />
Exterior chimney requirements:<br />
At least 1" (25 mm) clearance to combustible<br />
structure.<br />
Chimney height requirements: (See page Error!<br />
Bookmark not defined.)<br />
At least 3 feet (0.9 m) higher than the highest<br />
part of the roof opening through which it passes.<br />
At least 2 feet (0.6 m) higher than any part of the<br />
roof within 10 feet (3 m) measured horizontally<br />
from the top of the chimney. This Fireplace<br />
Insert requires a minimum chimney height of 13<br />
feet (4 m). The maximum recommended<br />
chimney height is 30 feet (9m).<br />
IMPORTANT: You must seal the damper area<br />
around the chimney liner to prevent room air<br />
from entering the chimney cavity of the<br />
fireplace.<br />
WARNING: DO NOT REMOVE BRICKS OR<br />
MORTAR FROM THE EXISTING FIREPLACE!<br />
(Exception) Removal of masonry or steel (including<br />
the damper plate) from the smoke shelf and adjacent<br />
damper frame if necessary to accommodate a<br />
chimney liner, provided their removal will not weaken<br />
the structure of the fireplace and chimney, and will<br />
not reduce protection for clearance to combustible<br />
materials to less then required by the National<br />
Building Code.<br />
Page 18 of 33
<strong>Hearthstone</strong> <strong>Clydesdale</strong> Fireplace Insert Model <strong>8491</strong><br />
Figure 6 – Connecting to a masonry chimney<br />
Page 19 of 33
<strong>Hearthstone</strong> <strong>Clydesdale</strong> Fireplace Insert Model <strong>8491</strong><br />
Figure 7 – The 2 / 10 / 3 Chimney Exit Clearance Rule<br />
Figure 8 – Minimum Chimney Height Is 3’ Even At the Ridge<br />
Page 20 of 33
<strong>Hearthstone</strong> <strong>Clydesdale</strong> Fireplace Insert Model <strong>8491</strong><br />
Operation<br />
WARNING: HOT WHILE IN OPERATION. KEEP<br />
CHILDREN, CLOTHING AND FURNITURE AWAY.<br />
CONTACT MAY CAUSE SKIN BURNS.<br />
Please read this entire chapter before lighting your<br />
first fire. It explains the controls and features of your<br />
wood Fireplace Insert, how to choose firewood, burn<br />
rates, and how to break-in your Fireplace Insert and<br />
use it on a daily basis.<br />
Controls & Features<br />
WARNING: ONLY OPERATE WITH DOOR FULLY<br />
OPEN OR CLOSED. IF DOORS ARE LEFT PARTLY<br />
OPEN, GAS AND FLAME MAY BE DRAWN OUT OF<br />
THE OPENING, CREATING RISKS FROM BOTH<br />
FIRE AND SMOKE<br />
IF OPERATING WITH DOORS FULLY OPEN, YOU<br />
MUST USE THE ACCESSORY SCREEN AVAILIBLE<br />
THROUGH YOUR HEARTHSTONE DEALER<br />
DO NOT FORCE THE DOOR OPEN PAST THE<br />
DOOR STOP OR YOU COULD DAMAGE THE<br />
ENAMEL FINISH AND DOOR FRAME (ENAMELED<br />
STOVES ONLY).<br />
If operating with the door open, some fuels may<br />
create carbon monoxide, which can be hazardous or<br />
fatal to your health. Do not burn anything but clean,<br />
dry firewood<br />
FRONT DOOR & LATCH: The front door allows you<br />
to load wood into your Fireplace Insert; a fixed handle<br />
allows you to operate the front door and allows you to<br />
latch the front door closed. The front door is<br />
reversible (hinges moved to the left) to open from the<br />
right side. To open the door, lift the handle to the 10<br />
o’clock (or 2 o’clock for RH opening door) position,<br />
and pull out on the door. To latch the door, push the<br />
door closed tightly then lower the handle to the 8<br />
o’clock (4 o’clock for RH opening door) position. Pull<br />
lightly on the door handle to ensure it is properly<br />
latched. Do not force the door past the door stop<br />
if present; you could damage the door frame and<br />
finish.<br />
PRIMARY AIR CONTROL: The control handle is<br />
located on the front top center of the ash lip under the<br />
ash lip cover (see Figure 9). The primary air control<br />
allows you to regulate the amount of air entering the<br />
firebox. Generally, the more air allowed into the<br />
firebox, the faster and hotter the rate of burn;<br />
conversely, less air creates a slower burn. To fully<br />
open the primary air intake, pull the handle as far out<br />
as it will go away from the firebox; push the handle in<br />
as far as it will go towards the firebox to close the<br />
primary air control. The control does not completely<br />
stop the flow of air.<br />
Operating the Blower<br />
The blower is factory installed within the front ash lip.<br />
The blower will run only when the insert is hot. The<br />
blower control (notched wheel) is located in the<br />
bottom center of the ash lip (see Figure 9). Routing<br />
the power cord to the left or right of the insert is<br />
possible - follow the instructions provided in the<br />
installation section.<br />
Blower Speed Control<br />
Figure 9 – Primary Air, & Blower Speed Controls<br />
Choosing Firewood<br />
Primary Air Control<br />
Your <strong>Clydesdale</strong> Wood Burning Insert is designed to<br />
only burn natural firewood - also known as cordwood.<br />
CAUTION: DO NOT USE CHEMICALS OR<br />
FLAMMABLE FLUIDS SUCH AS GASOLINE,<br />
NAPHTHA, KEROSENE, CHARCOAL LIGHTER<br />
FLUID OR ENGINE OIL TO START A FIRE. DO NOT<br />
USE CHARCOAL, PELLETS, COAL, ARTIFICIAL<br />
LOGS OR ANY OTHER MATERIALS AS FUEL;<br />
THEY ARE NOT SAFE. DO NOT BURN GARBAGE.<br />
The quality of your firewood affects heat output,<br />
duration of burn and performance of your Fireplace<br />
Insert. Softwoods generally burn hotter and faster,<br />
while hardwoods burn longer and produce more long<br />
lasting coals. Density and moisture content are two<br />
critical factors to consider when purchasing wood for<br />
your Fireplace Insert.<br />
Page 21 of 33
<strong>Hearthstone</strong> <strong>Clydesdale</strong> Fireplace Insert Model <strong>8491</strong><br />
The following is a list of wood species and their<br />
relative BTU (British Thermal Unit) content. The<br />
higher the BTU content the longer the burn.<br />
Firewood with higher a BTU content is generally<br />
considered ideal for a wood stove.<br />
Wood Heat Value: Sorted By Btu<br />
Content<br />
Common Name Lb/ cord MBTU/ cord<br />
High<br />
Osage Orange (Hedge) 4,728 32.9<br />
Hickory, Shagbark 4,327 27.7<br />
Hop Hornbeam (Ironwood) 4,267 27.3<br />
Beech, Blue (Ironwood) 3,890 26.8<br />
Birch, Black 3,890 26.8<br />
Locust, Black 3,890 26.8<br />
Hickory, Bitternut 3,832 26.7<br />
Locust, Honey 3,832 26.7<br />
Apple 4,100 26.5<br />
Mulberry 3,712 25.8<br />
Oak, White 4,012 25.7<br />
Medium High<br />
Beech, European 3,757 24<br />
Maple, Sugar 3,757 24<br />
Oak, Red 3,757 24<br />
Ash, White 3,689 23.6<br />
Birch, Yellow 3,689 23.6<br />
Medium<br />
Juniper, Rocky Mtn 3,150 21.8<br />
Elm, Red 3,112 21.6<br />
Coffeetree, Kentucky 3.112 21.6<br />
Hackberry 3,247 20.8<br />
Tamarack 3,247 20.8<br />
Birch, Gray 3,179 20.3<br />
Birch, White (Paper) 3,179 20.3<br />
Walnut, Black 3,192 20.2<br />
Cherry 3,120 20<br />
Ash, Green 2,880 19.9<br />
Cherry, Black 2,880 19.9<br />
Elm, American 3,052 19.5<br />
Elm, White 3,052 19.5<br />
Sycamore 2,808 19.5<br />
Ash, Black 2,992 19.1<br />
Maple, Red 2,924 18.7<br />
Fir, Douglas 2,900 18.1<br />
Medium Low<br />
Boxelder 2,797 17.9<br />
Alder, Red 2,710 17.2<br />
Pine, Jack 2,669 17.1<br />
Pine, Norway (Red Pine) 2,669 17.1<br />
Pine, Pitch 2,669 17.1<br />
Catalpa 2,360 16.4<br />
Hemlock 2,482 15.9<br />
Spruce, Black 2,482 15.9<br />
Pine, Ponderosa 2,380 15.2<br />
Low<br />
Aspen, American 2,290 14.7<br />
Butternut (Walnut, White) 2,100 14.5<br />
Spruce 2,100 14.5<br />
Willow 2,100 14.5<br />
Fir, Balsam 2,236 14.3<br />
Pine, White (Eastern,<br />
2,236 14.3<br />
Western)<br />
Fir, Concolor (White) 2,104 14.1<br />
Basswood (Linden) 2,108 13.8<br />
Buckeye, Ohio 1,984 13.8<br />
Cottonwood 2,108 13.5<br />
Cedar, White 1,913 12.2<br />
Moisture content also plays a key role in the<br />
performance of your stove. Wood freshly cut from a<br />
living tree (green wood) contains a great deal of<br />
moisture. As you might expect, green wood has<br />
difficulty burning and should be seasoned before<br />
using it in your wood stove. To properly season<br />
green wood: split, stack and allow to air dry for a<br />
period of one year.<br />
Stack the firewood on skids or blocking to keep it off<br />
the ground, cover only the top of the stack. Plastic or<br />
tarps that cover the sides of the stack of wood trap<br />
moisture and prevent the wood from drying. As for<br />
stacking, an old Vermonter said, "The spaces<br />
between the logs should be large enough for a<br />
mouse to get through, but not for the cat that's<br />
chasing it."<br />
Do not store Firewood within the Fireplace<br />
Insert's specified clearances to combustible<br />
materials.<br />
Page 22 of 33
<strong>Hearthstone</strong> <strong>Clydesdale</strong> Fireplace Insert Model <strong>8491</strong><br />
<strong>Hearthstone</strong>’s Thermo-Ceramic<br />
Baffle System<br />
To enhance the combustion efficiency and reduce the<br />
particulate emissions of the fire in your stove,<br />
<strong>Hearthstone</strong> has developed an advanced THERMO-<br />
CERAMIC baffle system. This system uses a<br />
lightweight, durable ceramic material above the<br />
secondary air tubes to maintain high temperatures in<br />
the secondary combustion area to promote low<br />
emissions and high efficiency combustion. This<br />
material will not corrode, rust, dissolve, or lose its<br />
strength, however it is vulnerable to puncture or<br />
breakage due to rough handling.<br />
Please Exercise Care When Loading Wood or<br />
Cleaning Your Insert, To Not Damage the Thermo-<br />
Ceramic Baffle<br />
Located directly above the air tubes in the top of the<br />
firebox, this white or gray sheet of material will break<br />
if wood or cleaning brushes impact it. Use care when<br />
loading and cleaning your stove to avoid breaking<br />
this material. If the baffle fractures or a hole is<br />
punctured, the stove will function improperly. You<br />
must replace the board through a qualified<br />
<strong>Hearthstone</strong> dealer.<br />
Building a Fire<br />
Once you understand the controls of your <strong>Clydesdale</strong><br />
Fireplace Insert, and have chosen the appropriate<br />
firewood, you are ready to start a fire.<br />
Breaking in Your Wood Fireplace<br />
Insert<br />
It is imperative that you “break in” the Fireplace Insert<br />
slowly. Cast iron must be "seasoned"; over-firing a<br />
new Fireplace Insert may cause castings to crack or<br />
may damage other Fireplace Insert parts. Slowly<br />
driving the moisture out of the soapstone bricks lining<br />
the firebox will minimize the “shock” to the stone at its<br />
first exposure to high firebox temperatures.<br />
When you light your first fires, the Insert will emit<br />
some smoke and fumes. This is normal “off-gassing”<br />
of the paints and oils used when manufacturing the<br />
Fireplace Insert. If you find it necessary, open a few<br />
windows to vent your room. The smoke and fumes<br />
will usually subside after 10 to 20 minutes of<br />
operation. The odor and smoke will end once the<br />
Fireplace Insert is “cured”.<br />
The first fires may also produce other odors from<br />
“impurities” that exist in the area immediately<br />
surrounding the Fireplace Insert. Some of these<br />
impurities are residues of cleaning solvents, paint<br />
solvents, cigarettes, candle soot, pet hair, dust,<br />
adhesives, a new carpet, and new textiles. These<br />
odors will dissipate over time. You can alleviate<br />
these odors by opening a few windows or otherwise<br />
creating additional ventilation around your Fireplace<br />
Insert. If any odor persists, contact your dealer or an<br />
authorized service technician.<br />
If you adhere to the break-in procedure, as well as all<br />
other operating procedures in this manual, the cast<br />
iron and soapstone firebox lining of your Fireplace<br />
Insert will give you many years of trouble-free use.<br />
Avoid the following conditions that can cause the<br />
soapstone or cast iron pieces to break:<br />
Do not throw wood into the Fireplace Insert.<br />
Do not use the door as a lever to force wood into<br />
the Fireplace Insert.<br />
Do not load wood that is encrusted with ice into a<br />
burning, hot stove as the thermal shock can<br />
cause damage.<br />
Do not use a manufactured log grate. Burn the<br />
fire directly on the soapstone that lines the<br />
bottom of the firebox.<br />
The bottom layer of soapstone in the firebox is<br />
intended to prevent thermal stress to the cast iron,<br />
and should remain in place at all times.<br />
Do not over-fire the Fireplace Insert. (Refer to<br />
page 25).<br />
Building a Break in Fire<br />
1. Open the front door and place five or six double<br />
sheets of tightly twisted newspaper in the center<br />
of the firebox. Arrange kindling in a crisscross<br />
pattern over the newspaper. Kindling should be<br />
approximately ten pieces, 1/2" (13 mm) in<br />
diameter and 10" to 18" (254 mm to 457 mm)<br />
long.<br />
2. Fully open the primary air control by pulling the<br />
control handle fully out, away from the firebox.<br />
3. Light the paper under the kindling. Leave the<br />
front door slightly ajar momentarily until the<br />
kindling has started to burn and draft begins to<br />
pull.<br />
4. Close the door and allow the fire to burn. Keep<br />
the front door closed while the Fireplace Insert is<br />
in use.<br />
5. Keep a watchful eye on your fireplace insert to<br />
maintain a steady, low-heat fire. Your first fire<br />
should make the Fireplace Insert warm, but not<br />
Page 23 of 33
<strong>Hearthstone</strong> <strong>Clydesdale</strong> Fireplace Insert Model <strong>8491</strong><br />
hot to the touch. At most, add only a few small<br />
chunks of wood to the fire to reach safe break-in<br />
temperatures.<br />
6. Once the Fireplace Insert is warm but not hot to<br />
the touch, close the primary air control by<br />
pushing it in fully toward the firebox to allow the<br />
fire to die out completely.<br />
7. Let the Fireplace Insert return to room<br />
temperature.<br />
Your first fire and first fire each season thereafter<br />
should be built and maintained as outlined above.<br />
Your patience will be rewarded by a properly<br />
seasoned Fireplace Insert.<br />
Note: Because of the cool flue gas temperatures<br />
present during the break-in procedure, creosote<br />
may build up rapidly. Your door glass may also<br />
get dirty. A good hot fire will clean it. We<br />
recommend a visual inspection (and cleaning if<br />
necessary) of your stovepipe and chimney once<br />
the break-in procedure is completed.<br />
Operating Your Insert Efficiently<br />
<strong>Hearthstone</strong> designed your <strong>Clydesdale</strong> insert to burn<br />
firewood cleanly and efficiently. The following<br />
operational tips explain how to obtain the most heat<br />
possible with minimal creosote build-up and emitted<br />
pollutants.<br />
Burn Rate<br />
There are four basic burn rates: high burn, medium<br />
burn, low burn, and overnight burn. Each has its own<br />
purpose.<br />
High Burn Rate: We recommend a high burn rate<br />
once or twice a day to fully heat the stove and<br />
chimney; this also helps keep the amount of creosote<br />
in your stove and chimney to a minimum.<br />
After the fire is established and both the stove and<br />
chimney are hot, create a high burn for maximum<br />
heat output. Pull the primary air control out so that it’s<br />
fully open or almost fully open. Fully load the firebox<br />
with wood on a bed of hot coals or on an actively<br />
flaming fire.<br />
After you have attained a high burn rate, monitor the<br />
stove temperatures frequently to ensure that the<br />
stove is not over-fired. The surface temperature on<br />
top front of the insert (firebox body under grill) should<br />
not routinely exceed 600°Fahrenheit<br />
(316°Celcius). Once you understand how your<br />
insert burns and heats in your particular setting, you<br />
can easily create a high burn rate without risk to the<br />
stove or chimney.<br />
When your room’s temperature is comfortable,<br />
maintain your fire by loading smaller quantities of<br />
wood. Burning smaller amounts of wood at a high<br />
burn rate creates the least amount of creosote in your<br />
chimney, emits the lowest amount of pollutants, but<br />
provides shorter burn times.<br />
Medium to Medium Low Burn Rate: In general, you<br />
would usually create a medium to medium low burn<br />
rate, especially if your stove is left unattended<br />
periodically. Set the primary air control to a mid-range<br />
setting, appropriate to maintain a comfortable<br />
temperature in the heated area. This setting<br />
produces the most efficient overall burn.<br />
Low Burn Rate: Close the primary air control for a<br />
low burn rate. This setting provides the longest burn<br />
time. However, set a low burn rate only periodically.<br />
Over extended periods, a low burn rate promotes the<br />
accumulation of creosote. If you consistently maintain<br />
low burn rates, inspect your venting system<br />
frequently.<br />
Overnight Burn Rate: An overnight burn, as you<br />
might expect, allows you to keep an area heated<br />
while you sleep. To create an overnight burn, first<br />
ensure the stove and chimney is hot from an<br />
established fire. Next, pull the primary air control fully<br />
open, and then completely load the firebox with<br />
wood. Remember, larger pieces of wood burn longer.<br />
Allow the fire to burn intensely for 20 to 30 minutes.<br />
Finally, push the primary air control close to its lowest<br />
setting; the fire will settle into a lower burn rate with a<br />
small flame and more secondary gas ignition. The fire<br />
will now burn slowly and steadily. The longevity and<br />
intensity of the fire depends on the type, size and<br />
quality of the wood, the strength of the chimney draft,<br />
and other variables that vary from installation to<br />
installation. High draft installations or situations may<br />
require using a low burn rate setting.<br />
In the morning, you should find a bed of hot coals<br />
buried within the ashes. The insert should be warm to<br />
the touch but not hot. To restart the fire without<br />
relighting, simply stir and rake the ashes with a poker<br />
until the hot coals have come to the surface. Place a<br />
handful of kindling and a few small logs on the coals,<br />
close the door, and fully open the primary air control.<br />
The fire should re-ignite within 5 to 10 minutes. Once<br />
the fire is burning well, add a few larger logs, close<br />
the door, leave the primary air control fully open, and<br />
allow the fresh logs to ignite.<br />
Page 24 of 33
<strong>Hearthstone</strong> <strong>Clydesdale</strong> Fireplace Insert Model <strong>8491</strong><br />
Running a high burn rate at least once a day burns<br />
off accumulated creosote from within the insert and<br />
venting system. Now, in the morning after an<br />
extended low burn rate, is a good time to create your<br />
daily high burn rate; run it for about 20 minutes or so.<br />
Not only does this hot fire promote a clean stove and<br />
chimney, it also helps keep the glass cleaner for easy<br />
viewing of the fire within.<br />
Once the fire is burning briskly, regulate the primary<br />
air control to a medium setting for a medium, to<br />
medium low burn rate.<br />
Intermittent Operation<br />
If your Fireplace Insert is not used continuously or<br />
has not been used in quite some time, follow the<br />
break-in procedure at least once to minimize the<br />
stress of a hot fire on a cold Fireplace Insert before<br />
proceeding with normal operation. We recommend<br />
one break-in fire at the start of each heating season.<br />
Building a Fire for Everyday Use<br />
1. Open the front door and place five or six double<br />
sheets of tightly twisted newspaper in the center<br />
of the firebox. Arrange kindling in a crisscross<br />
pattern over the newspaper. Use about ten<br />
pieces of kindling approximately 1/2" (13 mm) in<br />
diameter and 10" to 18" (254 to 457 mm) long.<br />
You can place two or three small logs on top of<br />
the kindling if desired.<br />
2. Fully open the primary air control by pulling the<br />
control handle fully out, away from the firebox.<br />
3. Light the paper under the kindling. Leave the<br />
front door slightly ajar until the kindling starts to<br />
burn and draft begins to pull.<br />
4. Close the door and allow the fire to burn.<br />
5. If you did not add small logs in step 1, do so once<br />
the kindling is burning well. Open the front door<br />
and add small logs. Ensure you keep the logs<br />
away from the glass in front in order for the airwash<br />
system to work properly. Otherwise, keep<br />
the door closed while the insert is in use.<br />
6. Once the fire is burning well, add larger wood<br />
pieces to build the fire up. Use the primary air<br />
control to regulate the desired rate of burn. Pull<br />
the handle out to open the PRIMARY AIR<br />
CONTROL for a high rate of burn; push it in to<br />
reduce the primary air for a lower rate of burn.<br />
Note: When opening the front door to reload<br />
or re-arrange logs, open the door just a crack<br />
first, pause for a moment, then open the door<br />
completely. This procedure allows the firebox<br />
to clear of smoke before the door opens fully.<br />
Also, reloading on a bed of hot, red coals<br />
reduces smoking time and will bring fresh fuel<br />
up to a high temperature rapidly.<br />
Disposal of Ashes<br />
Place ashes in a metal container with a tight fitting lid.<br />
Place the closed container of ashes on a noncombustible<br />
floor, or on the ground outside, well<br />
away from all combustible materials or fumes,<br />
pending final disposal. If ashes are disposed of by<br />
burial in soil or otherwise locally dispersed, retain<br />
them in the closed container until all cinders have<br />
thoroughly cooled.<br />
Over-Fire Caution<br />
Over-firing means the Fireplace Insert is operating at<br />
temperatures above the recommended temperatures<br />
outlined above in the BURN RATE section. Carefully<br />
avoid over-firing since it will cause damage to the<br />
Fireplace Insert. Symptoms of over-firing include<br />
short burn times, a roaring sound in the Fireplace<br />
Insert or chimney, and discoloration of the finish.<br />
Over-firing can be caused by excessive draft,<br />
inappropriate fuel, and operator error. Correct an<br />
over-fire situation as follows:<br />
EXCESSIVE DRAFT: Contact your dealer to have a<br />
draft reading taken.<br />
INAPPROPRIATE FUEL: Do not burn coal; kiln dried<br />
lumber, pellets, wax logs, plastics, trash or anything<br />
other than natural cordwood.<br />
OPERATOR ERROR: Ensure all the gaskets are in<br />
good condition. Replace worn out or compressed<br />
gaskets. Do not burn the Fireplace Insert with the<br />
front door in a partially open position. The door must<br />
be fully closed or opened completely (e.g. when<br />
using viewing screen).<br />
If you suspect that your Fireplace Insert is over-firing,<br />
contact your dealer immediately. Damage done by<br />
over-firing is not covered by your warranty.<br />
Results of over-firing can include: warped or burned<br />
out internal parts, cracked firebox soapstone,<br />
discolored or warped external parts, and damaged<br />
enamel.<br />
NOTE: ANY SYMPTOMS OF OVER-FIRING WILL<br />
VOID YOUR WARRANTY!<br />
Page 25 of 33
<strong>Hearthstone</strong> <strong>Clydesdale</strong> Fireplace Insert Model <strong>8491</strong><br />
Maintenance<br />
Creosote Formation and Need for<br />
Removal<br />
Wood, when burned slowly, produces tar and other<br />
organic vapors, which combine with expelled<br />
moisture to form creosote. These creosote vapors<br />
condense in the relatively cool chimney flue of a<br />
slow-burning fire. As a result, creosote residue<br />
accumulates on the flue lining. When ignited, this<br />
creosote makes an extremely hot fire, which may<br />
damage the chimney or even destroy the house.<br />
Inspect the flue liner and chimney at least once every<br />
month during the heating season to determine if there<br />
is a creosote buildup.<br />
To prevent the buildup of creosote:<br />
1. Burn the Fireplace Insert with the primary air<br />
control fully open for 20 - 40 minutes daily to<br />
burn out creosote deposits from within the<br />
Fireplace Insert and the venting system.<br />
2. After reloading with wood, burn the Fireplace<br />
Insert with the primary air control fully open<br />
for 20 to 30 minutes. This manner of<br />
operation ensures early engagement of the<br />
secondary combustion system which, when<br />
engaged, minimizes creosote buildup in the<br />
chimney.<br />
If a creosote residue thicker than 1/4" (6 mm)<br />
accumulates, remove it to reduce the risk of a<br />
chimney fire.<br />
If your glass always remains dirty, your operating<br />
temperatures are probably too low, or your wood is<br />
not dry enough; therefore, there is a higher risk of<br />
creosote buildup.<br />
Inspect the venting system for creosote at the Insert<br />
connection and at the chimney’s top. Cooler<br />
surfaces tend to build creosote deposits faster, so it<br />
is important to check the chimney at the top (where it<br />
is coolest) as well as from the bottom at the Insert.<br />
Remove accumulated creosote with a cleaning brush<br />
specifically designed for the type of chimney in use.<br />
Use a certified chimney sweep to perform this<br />
service. Contact your dealer for the name of a<br />
certified chimney sweep in your area (your dealer<br />
may be a certified sweep!).<br />
We recommend that you have the entire system<br />
professionally inspected, cleaned, and repaired if<br />
necessary, before each heating season.<br />
Gaskets<br />
Depending on use, replace gasket materials every<br />
two to three seasons. If the door seal is leaking, a<br />
new gasket will assure a tight seal and improved<br />
performance. Contact your dealer for a gasket kit<br />
that includes instructions and gaskets for your<br />
Fireplace Insert.<br />
To replace the door gasket, first remove the old<br />
gasket with a utility or putty knife. Clean all gasket<br />
channels with a wire brush. Apply gasket cement to<br />
the channels and push the new gasket into place<br />
without stretching the gasket material. Immediately<br />
close the door to fully press the gasket into place and<br />
assure a positive seal.<br />
Glass<br />
Do not operate the Fireplace Insert with a broken<br />
door glass. Do not abuse the front door by striking or<br />
slamming.<br />
When necessary, clean the glass with low alkaline<br />
content commercial stove glass cleaners, which are<br />
available from your local dealer. Never attempt to<br />
clean the glass while the fire is burning, or if the glass<br />
is hot. Most deposits are easily cleaned by following<br />
the instructions provided with the cleaner. To clean<br />
heavier deposits, remove the door from the Fireplace<br />
Insert (take care to save hinge pins and spacers for<br />
reuse). Lay the door face down on a workbench or<br />
table with the handle hanging over the edge. Apply<br />
the cleaner to the glass and allow it to sit for a few<br />
minutes. Placing the door flat, it will allow the cleaner<br />
to penetrate rather than running off the surface of the<br />
glass. Wipe the cleaner off with a soft cloth.<br />
Important: scratching or etching the glass<br />
will weaken the integrity of the glass. Do not<br />
use a razor blade, steel wool, or any other<br />
abrasive material to clean the glass. Use low<br />
alkaline content cleaners only.<br />
The front door glass is a ceramic, shock-resistant<br />
glass, made specifically for use in woodstoves. Do<br />
not use any replacement glass other than the<br />
ceramic glass manufactured and supplied for use in<br />
this woodstove. Replacement glass is available<br />
through your local dealer.<br />
Replace the door glass immediately if broken.<br />
Contact your local dealer for a replacement glass kit.<br />
The glass kit comes with instructions and everything<br />
Page 26 of 33
<strong>Hearthstone</strong> <strong>Clydesdale</strong> Fireplace Insert Model <strong>8491</strong><br />
needed for the repair. If you replace the glass<br />
yourself, wear work gloves and safety glasses.<br />
Door removal and glass and glass gasket<br />
replacement procedure is as follows: Refer to<br />
Figure 10.<br />
1. Cover the Ash Lip Cover with cardboard or<br />
an old towel to avoid scratching it.<br />
2. Remove the door by opening it about 45<br />
degrees, support the door and remove the<br />
bottom hinge pin, then lift the top hinge pin<br />
until it clears the door hinge section. Move<br />
the door out and away from the insert.<br />
3. Place the door face down on a flat, smooth<br />
surface.<br />
4. Apply penetrating oil to the screws. Remove<br />
the screws to separate the glass retainer<br />
from the door.<br />
5. Carefully lift the damaged glass from the<br />
door casting and discard.<br />
6. Replace the screws.<br />
7. Install the door.<br />
WARNING: DO NOT USE SUBSTITUTE MATERIALS<br />
WHEN REPLACING THE GLASS OR ANY DOOR<br />
COMPONENTS. USE ONLY AUTHORIZED<br />
HEARTHSTONE COMPONENTS.<br />
Glass specifications: 320mm x 583mm x 5mm (12-<br />
5/64” x 22-15/16” x 0.197”) Neoceram.<br />
Figure 10 – Glass Replacement Components<br />
Cast Iron<br />
Exterior cast iron parts are either painted with black,<br />
high-temperature stove paint or porcelainized with<br />
enamel finishes in various colors.<br />
Use black, high-temperature stove paint (we<br />
recommend satin black by Stove Bright) to touch up<br />
and maintain the original appearance of painted cast<br />
iron. Use a damp sponge to wipe clean. Dry the cast<br />
iron thoroughly to prevent rusting.<br />
Clean enameled castings with a standard glass<br />
cleaner. With time and use, a very fine, subtle<br />
network of lines, commonly known as crazing, may<br />
appear seemingly beneath the surface of the enamel.<br />
Crazing is a natural predictable process and does not<br />
represent a flaw.<br />
Page 27 of 33
<strong>Hearthstone</strong> <strong>Clydesdale</strong> Fireplace Insert Model <strong>8491</strong><br />
Blower System<br />
For maximum efficiency, the blower system will require periodic cleaning to remove dust that will accumulate<br />
during normal use. To access the blower system, you must remove the Ash Lip Cover as described in the<br />
installation section of this manual.<br />
Remove the Ash Lip Cover and carefully vacuum components. Take care to avoid bending the fins on the<br />
blower fans. Inspect all wiring and mounting hardware for damage or deterioration.<br />
Photo 30 – Blower System (Ash Lip Cover Removed)<br />
1 2<br />
3<br />
4<br />
1. Left Blower Fan Assembly<br />
2. Right Blower Fan Assembly<br />
3. Power Cord<br />
4. Speed Control with Bracket<br />
Photo 31 – Blower Kit Major Components (Kit 94-57910)<br />
Page 28 of 33
<strong>Hearthstone</strong> <strong>Clydesdale</strong> Fireplace Insert Model <strong>8491</strong><br />
Troubleshooting<br />
Basic Heating Issues<br />
Virtually all woodstove operators experience basic<br />
common problems at one time or another. Most are<br />
correctable and generally require only a minor<br />
adjustment of the stove, installation, or operating<br />
technique. In cases where weather conditions<br />
dramatically affect stove performance, the problems<br />
are typically temporary and resolve themselves once<br />
the weather changes.<br />
Keep in mind that your house itself regulates<br />
room/house temperatures. How well the walls, floors<br />
and ceilings are insulated, the number and size of<br />
windows, the tightness of exterior doors, and the<br />
construction or style of your house (vaulted ceilings<br />
or other open spaces which collect large percentages<br />
of heat, ceiling fans, etc.) all are determining factors<br />
of room temperature.<br />
Your Insert's performance is also greatly dependant<br />
on its installation. One common cause of poor<br />
performance is inadequate draft. An oversized<br />
chimney flue is commonly the cause. Oversized<br />
flues result in decreased vacuum, which prevents the<br />
smoke from rising out the chimney. Oversized flues<br />
are also more difficult to heat effectively, especially<br />
when burning a high efficiency insert like the<br />
<strong>Clydesdale</strong>. Cool flue temperatures inhibit the<br />
establishment of a strong draft (and encourage<br />
accumulation of creosote). The lack of a strong draft<br />
will cause the fire to die down and may even force<br />
smoke into the room. If your chimney is the proper<br />
size and a strong draft is not easily established, there<br />
is the possibility the chimney is just too cold. Again,<br />
hot chimneys promote a stronger draft. Other draft<br />
issues and guidelines are as follows:<br />
1. AN "AIRTIGHT" HOUSE:<br />
a. Inadequate infiltration air supply in a superinsulated<br />
or especially well sealed home.<br />
b. Air starvation exacerbated by exhaust fans,<br />
such as clothes dryers, bathroom vent fans, or<br />
cook stove exhaust fans.<br />
2. TALL TREES OR BUILDINGS:<br />
a. These obstructions, in close proximity to the<br />
top of the chimney can cause chronic or<br />
occasional downdrafts.<br />
b. Consider the placement of other objects when<br />
selecting a site for a new chimney.<br />
3. WIND VELOCITY:<br />
a. Strong, steady winds generally create a strong<br />
(better) draft.<br />
b. “Gusty" wind conditions may cause erratic<br />
downdrafts. Strong winds can produce a<br />
negative pressure condition in the upwind side of<br />
a structure.<br />
4. BAROMETRIC PRESSURE:<br />
a. Chimney drafts are typically sluggish on balmy,<br />
wet or muggy days (low or falling barometric<br />
pressure). This is generally self-correcting as<br />
the weather changes.<br />
5. BRISKNESS OF FIRE:<br />
a. The hotter the fire, the hotter the chimney and,<br />
therefore, the stronger the draft.<br />
6. SEASONAL FACTORS:<br />
a. Early fall and late spring are generally difficult<br />
seasons in which to establish proper drafts. The<br />
colder the outside air is (relative to room<br />
temperatures) the stronger the draft.<br />
7. OPERATING THE FIREPLACE INSERT:<br />
a. There are days when a draft is just not easily<br />
established. As outlined above, seasonal factors<br />
or a cold chimney may be the cause.<br />
b. Starting the fire using small kindling and small<br />
wood pieces to obtain a quick, hot fire. Tend the<br />
fire frequently with small pieces until the chimney<br />
is hot and the draft is well established.<br />
c. Briefly partially open a window in the room with<br />
the insert to help establish a draft quickly.<br />
Draft Sampling Access Port<br />
The draft sampling port is located under the top grill<br />
on the front center of the stove’s body. Remove the<br />
bolt or setscrew and nut to check the draft reading.<br />
Ensure you replace the plug when finished.<br />
Used on Matte &<br />
Blue-Black Enamel<br />
Used on Brown<br />
Enamel only<br />
Photo 32 – Draft Port Detail<br />
Page 29 of 33
<strong>Hearthstone</strong> <strong>Clydesdale</strong> Fireplace Insert Model <strong>8491</strong><br />
Troubleshooting Guide<br />
PROBLEM POSSIBLE CAUSE SOLUTIONS<br />
INSERT SMOKES Operating Technique Fully open the primary air control one minute before opening<br />
door. Open front door slightly until firebox clears of smoke, then<br />
BACK-PUFFING OR<br />
GAS EXPLOSIONS<br />
UNCONTROLLED OR<br />
SHORT BURN<br />
Cold Chimney<br />
Reverse Draft at Startup<br />
Blocked Flue<br />
Oversized Chimney<br />
Undersized Chimney<br />
Chimney Too Short<br />
Incorrect installation<br />
Air Infiltration Into Chimney<br />
More Than One Appliance<br />
Connected to the Flue<br />
Operating Technique<br />
Extra Low Burn Rate<br />
Using accelerant<br />
Chimney Down-draft<br />
Excessive Ash Build-up<br />
Unsealed or Open Door<br />
Primary Air Control not<br />
operating properly<br />
open fully.<br />
Preheat the chimney when first starting a fire.<br />
Turn off all exhaust fans in home. Open window in room with<br />
unit until draft is established.<br />
Examine the chimney liner and cap for blockage or creosote<br />
accumulations. Check top of baffle for accumulated flue ash.<br />
Reline the chimney to the appropriate diameter<br />
Install a draft inducer or replace the chimney.<br />
Lengthen the chimney.<br />
Ensure metal flue liner extends the full length of chimney and is<br />
connected securely to the flue collar. Or, with masonry liner,<br />
ensure flue connector is sealed tightly to inside of chimney<br />
where it passes through the fireplace damper area.<br />
Seal all chimney and liner connections and any openings in or<br />
around clean-out doors.<br />
Disconnect all other appliances and seal openings.<br />
Fully open the primary air control one minute before opening the<br />
door and keep it fully open for a few minutes after reloading.<br />
Burn the Fireplace Insert at a higher burn rate.<br />
NEVER use accelerants to start or invigorate the fire.<br />
Install a chimney cap. Check chimney installation<br />
Empty ashes more frequently.<br />
Close the door tightly or replace the gaskets.<br />
Ensure Primary Air control shutter is opening and closing when<br />
control lever is moved. Note: Shutter is not designed to close<br />
completely.<br />
Reseal the Insert body with new gaskets where necessary.<br />
Shorten the chimney. Install a damper/restrictor in flue.<br />
Install a chimney cap.<br />
Deteriorated Gasket Seals<br />
Extra Long Chimney<br />
High Winds or Hilltop<br />
Location:<br />
Oversized Chimney<br />
Reline the chimney to the proper diameter.<br />
Over-Fire Damage<br />
Inspect unit – replace damaged or warped components.<br />
INSUFFICIENT HEAT Poor Quality or Green Wood Use only air-dried wood, preferably dried at least one year.<br />
Burn Rate Too Low<br />
Operate the Insert at a higher burn rate.<br />
Blocked Flue<br />
Examine the chimney liner and cap for blockage or creosote<br />
accumulations. Check top of baffle for excessive flue ash.<br />
Air Insulated Chimney Replace with a pre-fabricated insulated chimney system or a<br />
properly sized and lined masonry chimney.<br />
Cold Exterior Chimney Reline or insulate the chimney.<br />
Leaky flue connector or Check the installation – ensure connector is securely attached<br />
Chimney liner<br />
to flue collar. Check liner joints.<br />
Too Much Heat Loss From Caulk windows, seal openings in home. Increase energy<br />
House<br />
efficiency of home.<br />
DIRTY GLASS Poor Quality or Green Wood Use only air-dried wood, preferably dried at least one year.<br />
Burn Rate Too Low<br />
Operate the Fireplace Insert at a higher burn rate.<br />
Leaky flue connector or Check the installation – ensure connector is securely attached<br />
Chimney Liner<br />
to flue collar. Check liner joints.<br />
BLISTERING OF Operating Technique Do not over-fire the Insert. Monitor Insert temperatures. Use<br />
ENAMEL CASTING<br />
seasoned cord wood only.<br />
Excessive Draft<br />
Check gasket seals. Check chimney height. Install flue<br />
damper/restrictor. Install chimney cap.<br />
Page 30 of 33
<strong>Hearthstone</strong> <strong>Clydesdale</strong> Fireplace Insert Model <strong>8491</strong><br />
PART<br />
NUMBER:<br />
CASTINGS:*<br />
Replacement Parts & Optional Accessories<br />
DESCRIPTION:<br />
PART<br />
NUMBER:<br />
STEEL<br />
PARTS:<br />
DESCRIPTION:<br />
2410-901 BOTTOM 5470-039 LEVEL, SURROUND<br />
2410-905 BACK 5490-010 AIR SHROUD, BOTTOM<br />
2410-910 LEFT SIDE 5940-012 PRIMARY AIR CONTROL<br />
2410-915 RIGHT SIDE 5940-013 PRIMARY AIR GATE<br />
2410-926 ASH LIP/BLOWER HOUSING, FRONT 5940-014 PRIMARY AIR GATE CAP<br />
2410-927 ASHLIP/BLOWER HOUSING, TOP 5490-020 SURROUND CLIP<br />
2410-940 PRIMARY AIR MANIFOLD 5490-050 STONE CLIP, REAR<br />
2410-946 FRONT 5490-055 STONE CLIP, SIDE<br />
2410-947 CASTING, DOOR 5490-058 COLLAR, PLENUM, SEC., LEFT<br />
2410-951 FRONT FAÇADE 5490-059 COLLAR, PLENUM, SEC., RIGHT<br />
2410-955 SECONDARY AIR PLENUM CONNECTOR 5490-071 SECONDARY AIR TUBE #1<br />
2410-960 SECONDARY AIR PLENUM, LEFT 5490-072 SECONDARY AIR TUBE #2<br />
2410-965 SECONDARY AIR PLENUM, RIGHT 5490-073 SECONDARY AIR TUBE #3<br />
2410-970 TOP 5490-074 SECONDARY AIR TUBE #4<br />
2410-975 FLUE COLLAR 5490-075 CLIP, BAFFLE<br />
2410-991 SURROUND, STRAIGHT 5490-080 BAFFLE SUPPORT S.S.<br />
2410-993 SURROUND, LEFT 5491-011 SHROUD<br />
2410-994 SURROUND, RIGHT 5491-012 CLIP, ASHLIP COVER<br />
5491-013 HANDLE, AIR CONTROL<br />
KITS: 5491-014 WHEEL, SPEED CONTROL<br />
94-57910 BLOWER ASSEMBLY KIT 5491-015 BRACKET, SPEED CONTROL<br />
7000-130 GROMMET, SILICONE 5491-027 BRACKET, BLOWER, RIGHT<br />
7000-135 SLEEVE, GROMMET 5491-030 BRACKET, BLOWER, LEFT<br />
7200-601 CONTROL, SPEED, BLOWER 5491-035 SCREEN, ASHLIP<br />
7211-946 FAN, BLOWER, RT 5491-043 PLATE, CONNECTOR, SRRND<br />
7211-947 FAN, BLOWER, LT 5491-085 HINGE, DOOR<br />
94-58910 GLASS KIT 5491-087 SLIDING BRKT, SURROUND<br />
3030-049 CLYDESDALE GLASS 7000-301 SNAP DISC<br />
3160-080 GASKET TAPE, ADHESIVE BACK<br />
5491-046 RETAINER, GLASS SOAPSTONE:<br />
94-58912 DOOR GASKET KIT 1-0000-101 STONE, REF, 4.5”x9x1.25”<br />
3110-051 GASKET ROPE, LOW DENSITY, ½” 1-0400-900 STONE, REF, 4.5”x12”<br />
94-71910 DOOR HANDLE KIT 1-0400-901 STONE, REF, 4.5”x11.25”<br />
2410-948 HANDLE, DOOR 1-0400-902 STONE, REF, 4.5”x4.5”<br />
3900-190 KNOB<br />
94-73910 FRONT DOOR LATCH KIT MISC:<br />
5491-045 CATCH, LATCH 3120-490 BOARD, CERAMIC, BAFFLE, CLY<br />
5491-048 LATCH 3300-617 RATING LABEL<br />
3300-618 EPA HANG TAG, CLYDESDALE<br />
*All are matte part numbers.<br />
<strong>Clydesdale</strong> Accessories:<br />
94-5991110 Matte Surround Kit<br />
94-5970610 Matte Surround Caps<br />
94-5970659 Blue/Black Enamel Surround Caps<br />
94-79700 Mantle Shield<br />
94-69900 Screen Kit<br />
94-5990010 Matte Surround Extension<br />
Page 31 of 33
Safety Label<br />
Page 32 of 33
WARRANTY REGISTRATION<br />
The Original Purchaser can complete their warranty registration on our website at www.hearthstonestoves.com,<br />
or send a completed and signed Warranty Registration Form, which is enclosed in the Woodstove warranty<br />
packet, to the following address:<br />
<strong>Hearthstone</strong> Quality Home Heating Products, Inc.<br />
Warranty Department<br />
317 Stafford Avenue<br />
Morrisville, VT 05661<br />
NOTE: SENDING IN THE SIGNED WARRANTY REGISTRATION FORM IS NOT REQUIRED AS A<br />
CONDITION OF WARRANTY COVERAGE OR HEARTHSTONE’S PERFORMANCE.<br />
Page 33 of 33


