User manual - Bellman & Symfon
User manual - Bellman & Symfon
User manual - Bellman & Symfon

You also want an ePaper? Increase the reach of your titles
YUMPU automatically turns print PDFs into web optimized ePapers that Google loves.
BELLMAN AUDIO DOMINO<br />
DE<br />
DK<br />
EN<br />
ES<br />
FI<br />
FR<br />
IT<br />
JP<br />
NL<br />
PL<br />
SE<br />
SI-CN<br />
TR-CN<br />
APP<br />
PERSONAL HEARING SYSTEM
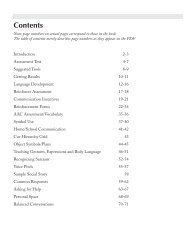
Contents<br />
50 Contents<br />
51 Introduction<br />
52 Figure references<br />
54 Getting started<br />
54 Testing<br />
55 Accessories<br />
56 What is in the box<br />
57 How to use <strong>Bellman</strong> Audio<br />
Domino<br />
58 Symbols and indicators<br />
59 Charging<br />
60 Using the Receiver Unit<br />
60 Switching on the Receiver Unit<br />
60 Selecting the sound volume<br />
61 Selecting the tone<br />
61 Using the Transmitter Unit<br />
61 Switching on the Transmitter Unit<br />
62 Listening via the Transmitter Unit<br />
62 Listening on the Receiver Unit’s<br />
microphone again<br />
63 Switching off<br />
63 Choice of microphones<br />
64 Choice of microphone on the<br />
Receiver Unit<br />
64 Choice of microphone on the<br />
Transmitter Unit<br />
65 External sound source<br />
65 External microphone<br />
66 Combined signal sources<br />
67 Wireless digital transfer<br />
68 Battery indicator<br />
68 Establishing a temporary link<br />
with another Transmitter Unit<br />
70 Troubleshooting in brief<br />
72 Safety regulations<br />
314 Appendix<br />
332 Areas of application<br />
340 Warranty card<br />
50
<strong>Bellman</strong> Audio Domino<br />
Personal Hearing System, BE2210/BE2230<br />
Introduction<br />
Thank you for choosing products from <strong>Bellman</strong> & <strong>Symfon</strong>.<br />
<strong>Bellman</strong> Audio is an assistive listening system. The system consists of a number<br />
of units which facilitate listening under different circumstances. <strong>Bellman</strong> Audio<br />
products make everyday life easier for many people and give them the freedom<br />
to freely pursue their interests.<br />
<strong>Bellman</strong> Audio Domino comprises easy-to-use wireless audio products which<br />
have been specially developed to help in circumstances where listening is difficult.<br />
The use of the latest technology in digital signal processing, encryption<br />
and wireless technology provides you with fantastic sound quality, secure and<br />
reliable radio transmission and great flexibility in how you use the system. The<br />
radio solution used and the flexible battery charging ensure that the products<br />
can be used safely and easily throughout the world.<br />
Read through the entire user <strong>manual</strong> before starting to use the product. Refer<br />
to the diagrams showing the accessories and connection options.<br />
DE<br />
DK<br />
EN<br />
ES<br />
FI<br />
FR<br />
IT<br />
JP<br />
NL<br />
PL<br />
SE<br />
SI-CN<br />
TR-CN<br />
APP<br />
51
Figure references<br />
Receiver unit<br />
1 Internal microphone for<br />
Receiver Unit<br />
2 Internal microphone setting LED<br />
Green: Omnidirectional microphone<br />
Orange: Directional microphone<br />
3 Battery status LED<br />
Green: Switched on with well<br />
charged battery<br />
Blinking Green: Switched on but the<br />
battery charge is low<br />
Blinking Orange: Switched on with<br />
flat battery - will soon switch itself<br />
off<br />
Orange: Charging<br />
4 LED for listening via transmitter<br />
Green: Omnidirectional microphone<br />
Orange: Directional microphone<br />
Orange and Green: Line in (external<br />
sound source)<br />
5 Button for selecting internal<br />
microphone<br />
6 On/off button<br />
7 Button for selecting listening via<br />
transmitter<br />
8 Volume and Tone LED Indicator<br />
9 Button for increasing sound level<br />
10 Button for reducing sound level<br />
11 Button for reducing treble<br />
12 Button for increasing treble<br />
52
13 Headphone output 3.5 mm jack<br />
plug<br />
14 Charging socket<br />
15 Clip<br />
Transmitter unit<br />
16 Internal microphone for Transmitter<br />
Unit<br />
17 Battery status LED<br />
Green: Switched on with well<br />
charged battery<br />
Blinking Orange and Green several<br />
times: An external sound source has<br />
been connected<br />
Blinking Green: Switched on but<br />
the battery charge is low<br />
Blinking Orange: Switched on with<br />
flat battery - will soon switch itself<br />
off<br />
Orange: Charging<br />
18 On/off button<br />
19 Button for pairing up Transmitter<br />
Unit with Receiver Units<br />
20 External sound source input<br />
2.5 mm jack plug<br />
21 Charging socket<br />
22 Clip<br />
DE<br />
DK<br />
EN<br />
ES<br />
FI<br />
FR<br />
IT<br />
JP<br />
NL<br />
PL<br />
SE<br />
SI-CN<br />
TR-CN<br />
APP<br />
53
Getting started<br />
Testing<br />
1 Both the Transmitter and Receiver Units are supplied with built-in rechargeable<br />
batteries. The batteries in both the Transmitter and Receiver Units must be fully<br />
charged before using the products for the first time. Please use the charger<br />
supplied.<br />
2 Connect the Headphones to the headphone output (13) and switch on the<br />
Receiver Unit with the On/Off button i (6). Listen to the Receiver Unit’s microphone<br />
and adjust the volume using the Volume Buttons + or - (9 or 10).<br />
3 Switch on the Transmitter Unit using the On/Off button i (18) and switch<br />
over to listen via the Transmitter Unit’s microphone by pressing the external<br />
sound button (7). If you connect the Transmitter Unit Sound Input (20) to the<br />
headphone output on an external sound source, you can, for example, listen to<br />
music via the Transmitter.<br />
The Receiver Unit always starts with the internal microphone (1) selected as a<br />
sound source. In addition, the volume control is always set to low volume to<br />
avoid unpleasant sound levels.<br />
The volume control adjusts the sound level. + (9) raises and - (10) lowers<br />
54
the volume while the Volume and Tone LED Indicator (8) shows the sound level.<br />
The more LEDs that are lit the higher the volume. The LED indicator goes out 5<br />
seconds after the sound volume has been set.<br />
The tone control adjusts the sound quality. > (12) increases and < (11) reduces<br />
the treble. The Volume and Tone LED Indicator (8) shows the tone setting. The<br />
LED indicator goes out 5 seconds after the sound quality has been set.<br />
When you have finished, you can switch off the Transmitter and Receiver Units<br />
by pressing the On/Off buttons i (6, 18) and holding them down until the Battery<br />
Status LEDs (3, 17) go out.<br />
Accessories<br />
The following accessories are available:<br />
• BE9122 Stereo headphones<br />
• BE9124 Ear phones<br />
• BE9125 Stetoclips<br />
• BE9126 Stereo Cable Kit, 5m (16 feet)<br />
• BE9127 External microphone, 5m (16 feet)<br />
• BE9128 Neck loop<br />
• BE9143 USB car charger<br />
• BE1360 Scart switch box<br />
DE<br />
DK<br />
EN<br />
ES<br />
FI<br />
FR<br />
IT<br />
JP<br />
NL<br />
PL<br />
SE<br />
SI-CN<br />
TR-CN<br />
APP<br />
For all accessories and for more information about the latest accessories please<br />
visit our website at http://www.bellman.com.<br />
55
What is in the box<br />
The box contains everything you normally need in order to use <strong>Bellman</strong><br />
Audio Domino. There are storage areas in the lining of the box for accessories<br />
supplied with the equipment. The box contains:<br />
A<br />
B<br />
C<br />
D<br />
E<br />
F<br />
G<br />
H<br />
I<br />
J<br />
K<br />
BE2210 Receiver unit<br />
BE2230 Transmitter unit<br />
BE9141 Travel case<br />
<strong>User</strong> <strong>manual</strong><br />
Pocket Reference Guide<br />
BE9142 Universal charger with 4 mains plugs<br />
BE9139 Charging cable, USB (2 off)<br />
BE9136 Microphone with clip<br />
BE9137 Stereo cable, 1. 5 m with adapter from 3. 5 mm jack to RCA (phono) connec tors<br />
BE9135 Neck strap with safety clasp (2 off)<br />
BE9124 In-ear Phones<br />
56
How to use <strong>Bellman</strong> Audio Domino<br />
The BE2210 and BE2230 <strong>Bellman</strong> Audio Domino Personal Hearing Systems are<br />
personal hearing systems which have been specifically developed to provide<br />
an excellent sound experience even in demanding situations. <strong>Bellman</strong> Audio<br />
Domino works extremely well for speech and music. You can use the built-in<br />
microphones in the Receiver Unit and the Transmitter Unit or use an external<br />
sound source. You can use the external microphone supplied as an external<br />
sound source or connect the Stereo Cable Set supplied to a stereo sound<br />
source.<br />
DE<br />
DK<br />
EN<br />
ES<br />
FI<br />
FR<br />
IT<br />
JP<br />
NL<br />
PL<br />
SE<br />
SI-CN<br />
TR-CN<br />
APP<br />
57
Symbols and indicators<br />
The following symbols are used in the user <strong>manual</strong> and can be explained as<br />
follows:<br />
The warning triangle indicates information which must be followed in order<br />
to guarantee operation and also in some cases to ensure personal safety.<br />
The light bulb (tip, note) indicates information which can be useful to help<br />
you get the most out of the product.<br />
I<br />
II<br />
III<br />
5 s<br />
IV<br />
I<br />
II<br />
A permanently lit LED is indicated by a solid<br />
indicator.<br />
A blinking LED is indicated by a sunlike solid<br />
indicator.<br />
III<br />
Indicators that are switched off are indicated by<br />
an empty circle.<br />
V<br />
IV<br />
V<br />
If a button must be held down for more than a<br />
certain time, this is indicated by a blue button<br />
and a stop watch symbol with a figure which<br />
corresponds to the number of seconds that the<br />
button must be held down for.<br />
Button presses are marked in blue on the specified<br />
button.<br />
58
Charging<br />
Both the Transmitter and Receiver Units are supplied with built-in rechargeable<br />
batteries. The batteries in both the Transmitter and Receiver Units must be<br />
charged before using the products for the first time.<br />
<strong>Bellman</strong> Audio Domino contains Lithium-Ion batteries and a universal charger<br />
with plugs for the EU, United Kingdom, USA and Australia to suit the majority of<br />
wall sockets used around the world.<br />
Warning: The product may only be charged with the charger supplied or<br />
using accessories from <strong>Bellman</strong> & <strong>Symfon</strong>.<br />
Connect the charger as illustrated in the fold-out section of the <strong>manual</strong>.<br />
Select the mains plug for the appropriate region and check that it is locked<br />
properly before it is connected to the wall socket. When the charging connectors<br />
are connected to the charger, the Transmitter Unit and the Receiver Unit,<br />
the Battery Status LEDs (3 and 17) change from green to orange to indicate that<br />
charging is taking place. When charging is finished, after about 2.5 h, the LEDs<br />
turn green again. You can charge one unit at a time or two at the same time.<br />
DE<br />
DK<br />
EN<br />
ES<br />
FI<br />
FR<br />
IT<br />
JP<br />
NL<br />
PL<br />
SE<br />
SI-CN<br />
TR-CN<br />
APP<br />
59
Using the Receiver Unit<br />
Connect BE9122 <strong>Bellman</strong> Stereo Headphones, BE9128 <strong>Bellman</strong> Neck Loop,<br />
BE9125 <strong>Bellman</strong> Stetoclip, BE9124 <strong>Bellman</strong> In-ear Phones or another listening<br />
product recommended by <strong>Bellman</strong> & <strong>Symfon</strong> to the headphone output (13) on<br />
the right-hand side as illustrated in the fold-out section of the <strong>manual</strong>.<br />
Switching on the Receiver Unit<br />
Press the On/Off button i (6). The Battery Status LED<br />
(3) starts to shine with a green light to indicate that the<br />
unit is on.<br />
The Receiver Unit always starts with the internal<br />
microphone selected as the sound source. In addition,<br />
the volume control is always set to low volume to avoid<br />
unpleasant sound levels.<br />
Selecting the sound volume<br />
Use the volume control’s + button (9) to increase and<br />
the - button (10) to decrease the sound level. The<br />
Volume and Tone LED Indicator (8) shows the sound<br />
level. The more LEDs that are lit the higher the volume.<br />
The LED indicator goes out 5 seconds after the sound<br />
volume has been set.<br />
60
Selecting the tone<br />
Use the tone control’s < button (11) to reduce and the<br />
> button (12) to increase the treble in the tone. The<br />
Volume and Tone LED Indicator (8) shows the selected<br />
setting. The LED indicator goes out 5 seconds after the<br />
sound quality has been set.<br />
The Receiver Unit can be used as a small and adaptable self-contained call<br />
amplifier, but together with the Transmitter Unit it opens up a whole new<br />
range of possibilities. You can achieve the greatest flexi-bility when using the<br />
Receiver Unit together with the Transmitter Unit.<br />
Using the Transmitter Unit<br />
Switching on the Transmitter Unit<br />
Press the On/Off button i (18). The Battery Status LED<br />
(17) starts to shine with a green light to indicate that<br />
the unit is on.<br />
DE<br />
DK<br />
EN<br />
ES<br />
FI<br />
FR<br />
IT<br />
JP<br />
NL<br />
PL<br />
SE<br />
SI-CN<br />
TR-CN<br />
APP<br />
61
Listening via the Transmitter<br />
Unit<br />
To listen on the microphone<br />
in the Transmitter Unit press<br />
the R button (7) on the<br />
Receiver Unit. The external<br />
sound LED (4) comes on<br />
and the sound detected in<br />
the Transmitter Unit is now<br />
heard in the headphones.<br />
Listening on the Receiver Unit’s microphone<br />
again<br />
If you want to switch back to the internal micro-phone,<br />
give a short press on the M button (5). The internal<br />
microphone LED (2) comes on and the sound now<br />
heard in the headphones comes from the Internal<br />
Microphone (1) again.<br />
62
OFF 1 s OFF 1 s<br />
Switching off<br />
When you have finished you<br />
can switch off the Transmitter<br />
and Receiver Units by pressing<br />
the On/Off buttons i (6,<br />
18) and holding them down<br />
until the Battery Status LEDs<br />
(3, 17) go out.<br />
Choice of microphones<br />
<strong>Bellman</strong> Audio Domino contains two microphone options so that you can easily<br />
switch between an omnidirectional and a directional microphone.<br />
The microphones on both the Receiver Unit and Transmitter Unit have this<br />
function.<br />
The Receiver Unit remembers the previously selected microphone setting<br />
if you switch between the internal microphone and the Transmitter Unit’s<br />
microphone.<br />
With the directional microphone you can ”point” towards the sound source<br />
that you are interested in listening to while reducing sound from other<br />
directions. This is particularly useful in difficult listening situations such as in<br />
crowds or in very noisy environments.<br />
DE<br />
DK<br />
EN<br />
ES<br />
FI<br />
FR<br />
IT<br />
JP<br />
NL<br />
PL<br />
SE<br />
SI-CN<br />
TR-CN<br />
APP<br />
63
Choice of microphone on the Receiver Unit<br />
You can switch between omnidirectional and di-rectional<br />
microphone reception by pressing the M button<br />
(5). The omnidirectional microphone is indicated<br />
by the Microphone LED (2) lighting up green and the<br />
directional microphone by it lighting up orange.<br />
Choice of microphone on<br />
the Transmitter Unit<br />
When you have chosen to<br />
listen via the Transmitter<br />
Unit by pressing the R<br />
button (7), you can switch<br />
between omnidirectional<br />
and directional microphone<br />
reception by pressing the<br />
R button (7).<br />
The omnidirectional microphone<br />
is indicated by the<br />
External Sound LED (4) lighting up green and the directional microphone by it<br />
lighting up orange.<br />
64
External sound source<br />
If the audio cable supplied, (which has a small 2.5 mm jack plug on one end), or<br />
if the External Microphone is connected to the Transmitter Unit’s<br />
external sound source input (20), the Transmitter Unit’s internal microphone<br />
will be disconnected and the external sound source will be automatically<br />
selected. The Battery Status LED blinks orange several times to confirm that<br />
an external sound source has been connected. The External Sound LED (4) will<br />
light up green and orange at the same time to indicate that the sound is coming<br />
from an external sound source.<br />
If the audio cable is disconnected, the sound will be reconnected to the Transmitter<br />
Unit’s microphone again.<br />
With the audio cable connected between a Transmitter Unit and a TV, hi-fi<br />
equipment, MP3 player or similar sound source you can listen to absolutely first<br />
class stereo sound without being limited by cables.<br />
The input sensitivity is automatically adjusted to suit different sound sources.<br />
External microphone<br />
You can connect an external microphone to the Transmitter’s 2.5 mm socket<br />
(20). The Battery Status LED blinks orange several times to confirm that an external<br />
sound source has been connected. The External Sound LED (4) will light<br />
up green and orange at the same time to indicate that the sound is coming<br />
from an external sound source.<br />
DE<br />
DK<br />
EN<br />
ES<br />
FI<br />
FR<br />
IT<br />
JP<br />
NL<br />
PL<br />
SE<br />
SI-CN<br />
TR-CN<br />
APP<br />
65
In some cases it may, for example, be easier for a lecturer to have an external<br />
microphone and a Transmitter Unit in his/her pocket than to speak in a loud<br />
voice or carry a wired microphone.<br />
A Transmitter Unit can transmit speech to one or more Receiver Units at the<br />
same time.<br />
The input sensitivity is automatically adjusted to a suitable amplification when<br />
an external microphone is connected.<br />
Please note that the Transmitter Unit’s Battery Status LED (17) blinks alternately<br />
green and orange several times when an external sound source is<br />
connected.<br />
Combined signal<br />
2 s<br />
sources<br />
When you are listening via<br />
the Transmitter Unit’s microphone<br />
or an External Sound<br />
Source, this sound can be<br />
combined with the sound<br />
that the internal microphone<br />
in the Receiver Unit is receiving.<br />
Choose to listen on the<br />
Transmitter Unit by pressing<br />
the R button (7). Hold down<br />
the M button (5) until both the MIC (2) and RF LEDs (4) light up.<br />
66
The sound from the Transmitter<br />
Unit is mixed with<br />
the sound from the internal<br />
microphone. You can adjust<br />
the balance between the<br />
Receiver Unit and the Transmitter<br />
Unit’s microphone<br />
by holding down the M<br />
button(5) at the same time as<br />
setting the balance using the<br />
< (11) or > buttons (12).<br />
If you want to go back to listening on the Transmitter Unit, press the R-button<br />
(7) and if you want to switch over to listening on the internal microphone, press<br />
the M button (5) instead.<br />
Wireless digital transfer<br />
<strong>Bellman</strong> Audio Domino uses the latest radio communications technology to<br />
digitally transfer sound with an exceptionally high sound quality in stereo.<br />
The radio transmission is encrypted to ensure the highest level of security and<br />
confidentiality.<br />
DE<br />
DK<br />
EN<br />
ES<br />
FI<br />
FR<br />
IT<br />
JP<br />
NL<br />
PL<br />
SE<br />
SI-CN<br />
TR-CN<br />
APP<br />
Radio communication takes place on 2.4 GHz which is a frequency range<br />
whose use is permitted throughout the world.<br />
67
Battery indicator<br />
The Battery Status LED (3, 17) normally lights up green. This indicates that the<br />
unit is switched on and the battery level is satisfactory.<br />
When the battery is low, the Battery Status LED (3, 17) blinks green until the<br />
battery is almost completely flat when it blinks orange instead. As soon as it<br />
blinks green it is time to charge the unit again. If the unit is not charged, it is<br />
switched off automatically.<br />
Charging starts automatically when you connect a charger to the Charging<br />
Socket (14, 21). Charging in progress is indicated on both the charger and<br />
the units by an orange light. Once the battery is fully charged, the indicator<br />
changes to green and the battery is continuously trickle charged until the<br />
charger is disconnected.<br />
Establishing a temporary link with another Transmitter Unit<br />
The radio link between the Transmitter and Receiver Units in the <strong>Bellman</strong> Audio<br />
Domino must be established in order for radio communication to operate. To<br />
make it easier to get started, Receiver Units and Transmitter Units which are<br />
supplied together are always paired up so that they will work together.<br />
Whenever you want to listen on another Transmitter Unit you can establish a<br />
temporary link with it. As soon as you switch off the Receiver Unit it returns to<br />
working with the paired Transmitter Unit again.<br />
68
Proceed as follows to establish a temporary radio link between a transmitter<br />
and a receiver:<br />
• Start both the units with the On/Off buttons i (6, 18).<br />
• Hold down CONNECT (19) on the Transmitter Unit.<br />
• Hold down both the M button (5) and the R button (7) on the Receiver Unit.<br />
5 s 5 s<br />
A ”running light” on the<br />
Receiver Unit’s Volume<br />
and Tone LED Indicator (8)<br />
moving towards the centre<br />
indicates that the link has<br />
been established.<br />
The link can only be established while the Transmitter Unit’s connection button<br />
is pressed down - this is for safety reasons to prevent a Receiver from being<br />
able to connect to another Transmitter unobserved.<br />
Please note that it is possible to connect several Receiver Units to the same<br />
Transmitter Unit by repeating the above procedure. There is, however, a risk<br />
that the number of receivers may affect the performance of the system.<br />
DE<br />
DK<br />
EN<br />
ES<br />
FI<br />
FR<br />
IT<br />
JP<br />
NL<br />
PL<br />
SE<br />
SI-CN<br />
TR-CN<br />
APP<br />
69
Troubleshooting in brief<br />
Problem<br />
Nothing happens when<br />
you try to start the units.<br />
No sound can be heard in<br />
the headphones when the<br />
Receiver Unit is switched<br />
on.<br />
No sound can be heard<br />
n the headphones when<br />
the Receiver Unit is<br />
switched on and External<br />
Sound is selected.<br />
Solution<br />
Connect the charger and check that charging starts within<br />
10 seconds.<br />
Please note! If charging does not start within 10 seconds,<br />
disconnect the charger immediately and contact the nearest<br />
dealer!<br />
Turn up the volume using the volume control (9).<br />
Check that the internal microphone has been selected as<br />
the signal source and that it works by gently scraping on<br />
the microphones (1).<br />
Check that the headphone plug is securely inserted in the<br />
headphone output.<br />
Connect the headphones to another sound source (with<br />
a 3.5 mm head-phone output) to test whether the headphones<br />
are working.<br />
Check that the Transmitter Unit is switched on.<br />
Check that the internal microphone has been selected as<br />
the signal source and that it works by gently scraping on<br />
the microphones (16).<br />
Check that the Transmitter is within range.<br />
70
Problem<br />
A high-pitched noise is<br />
heard in the headphones.<br />
The sound breaks up or<br />
comes and goes.<br />
Solution<br />
Connect the radio link and check that the connection is<br />
made without problems.<br />
Check that the Transmitter Unit can<br />
switch between the omnidirectional and directional<br />
microphone position.<br />
Check that the sound source is correctly connected to the<br />
Transmitter if the stereo cable is connected to the External<br />
Sound Source Input (20).<br />
Turn down the volume or increase the distance between<br />
the micro-phone and headphones.<br />
Direct the microphone away from you.<br />
The Receiver Unit is too far away from the Transmitter<br />
Unit. Move the units closer together.<br />
More than one Receiver is connec-ted to the Transmitter<br />
and at least one Receiver is too far away from the<br />
Transmitter.<br />
Too many Receivers are connected to the same Transmitter.<br />
There are too many transmitters on 2.4 GHz or too many<br />
Domino systems nearby which affect one another.<br />
Please note that walls, concrete panels and metal reduce the<br />
range.<br />
DE<br />
DK<br />
EN<br />
ES<br />
FI<br />
FR<br />
IT<br />
JP<br />
NL<br />
PL<br />
SE<br />
SI-CN<br />
TR-CN<br />
APP<br />
71
Safety regulations<br />
Please note: The BE2210 and BE2230 <strong>Bellman</strong> Audio Domino Personal Hearing<br />
Systems are not hearing instruments. <strong>Bellman</strong> & <strong>Symfon</strong> AB recommend<br />
that anyone who is experiencing hearing loss should consult a doctor.<br />
Warning! The BE2210 and BE2230 <strong>Bellman</strong> Audio Domino Personal Hearing<br />
Systems have a very powerful amplifier and the sound level can cause<br />
discomfort or, in serious cases, endanger hearing if the product is used<br />
carelessly. Always turn the volume down to a low level before putting on the<br />
headphones!<br />
Warning! The <strong>Bellman</strong> Audio Domino Personal Hearing System is<br />
powered by rechargeable Lithium-Ion batteries. Do not expose the<br />
batteries to fire or to direct sunlight. The batteries must only be changed by<br />
<strong>Bellman</strong> & <strong>Symfon</strong> staff and must only be replaced by batteries of the same<br />
type. The batteries must be charged fully before using the products for the<br />
first time. Batteries should be charged in temperatures of between +5°C and<br />
+40°C.<br />
Warning! The <strong>Bellman</strong> Audio Domino Personal Hearing System must only<br />
be charged by charging accessories recommended by <strong>Bellman</strong> & <strong>Symfon</strong>.<br />
72
Warning! For the safety of your children - Please be aware that this product<br />
may include small parts. Ensure that the package and small parts are kept<br />
out of reach of children.<br />
This symbol indicates that integral electrical equipment must not be treated<br />
as household waste. It should be taken to the relevant collection depot for<br />
the recycling of electrical and electronic equipment. You can obtain more<br />
detailed information about recycling of the product from your local authorities,<br />
from the nearest recycling station or from the shop you purchased the<br />
product from.<br />
DE<br />
DK<br />
EN<br />
ES<br />
FI<br />
FR<br />
IT<br />
JP<br />
NL<br />
PL<br />
SE<br />
SI-CN<br />
TR-CN<br />
APP<br />
73
Appendix<br />
Settings<br />
<strong>Bellman</strong> Audio Domino has more settings than those you can access in user<br />
mode. By going into the Settings Menu you can adjust settings that you do not<br />
normally need to change or which are adjusted when first used and never need<br />
to be changed again.<br />
Settings menu<br />
Start the Receiver Unit with the On/Off button i (6).<br />
Hold down the On/Off button i (6) and press the Volume<br />
Button - (10) within 1 second until the RF LED<br />
(4) starts to blink. When the RF LED (4) starts to blink,<br />
you can release both the buttons.<br />
Press the R button (7) within 2 seconds of the moment<br />
the RF LED (4) starts to blink and hold down the<br />
button until the RF LED (4) goes out. Release the R<br />
button (7) immediately when the RF LED (4) has gone<br />
out.<br />
You are now in Balance Control mode.<br />
314
Overview of the Settings Menu<br />
In the settings menu you can move<br />
between the different settings<br />
by pressing the R<br />
button (7) or the M<br />
button (5).<br />
Each press on the<br />
R button moves<br />
you clockwise<br />
on to the next<br />
setting in the<br />
list and the<br />
M button<br />
takes you<br />
anti-clockwise<br />
to the previous<br />
setting in the list.<br />
8 s<br />
BASS<br />
STEREO<br />
MAX<br />
When you have<br />
finished adjusting your<br />
settings, give a short press on<br />
the On/Off button i (6) to return<br />
to normal user mode.<br />
APP<br />
315
Balance control<br />
The balance between the right and left-hand channels can be set to compensate,<br />
for example, for a hearing loss in one ear.<br />
Press the < button (11) to adjust the balance on<br />
the left and the > button (12) to adjust the balance<br />
on the right.<br />
The standard setting is centred balance.<br />
Basic attenuation<br />
Different headphones have different sensitivity levels and you can<br />
compensate for this with basic attenuation. What you actually set is the<br />
attenuation you require at the maximum power output you want to have<br />
(which is therefore 0 dB attenuation). This settings is useful when you want<br />
to adjust the maximum volume in user mode for a pair of headphones or<br />
in-ear phones with a higher sensitivity than the BE9122 <strong>Bellman</strong> Stereo<br />
Headphones or, for example, if you want to limit the volume for a child.<br />
316
MAX<br />
Use the < button (11) to reduce the basic attenuation<br />
(increase the volume) and the > button to increase<br />
the basic attenuation (reduce the volume). The basic<br />
attenuation is adjusted in increments of 3 dB.<br />
The standard setting is 0 dB attenuation, which corresponds<br />
to the maximum output signal.<br />
STEREO<br />
Stereo/Mono<br />
The line-in signal can be rendered in either Stereo or<br />
in Mono. The speech intelligibility can be increased in<br />
certain listening situations such as when watching TV if<br />
the signal is in Mono.<br />
Press the + button to select Stereo.<br />
MONO<br />
Press the - button to select Mono.<br />
APP<br />
The standard setting is Stereo.<br />
317
Bass reduction<br />
Low-frequency interference such as fans and road noise can be tiring if you are<br />
exposed to it for a long period. By activating bass reduction, low-frequency<br />
interference and sounds are reduced.<br />
BASS<br />
Press the + button (9) to activate Bass Reduction.<br />
BASS<br />
Press the - button (10) to deactivate Bass Reduction<br />
and get level frequency response.<br />
The standard setting is deactivated Bass Reduction.<br />
318
Adjusting the Tone Control<br />
The Tone Control Blocking function has been developed in case you want to<br />
make it easier for the user to use <strong>Bellman</strong> Audio Domino. This setting can be<br />
used to choose whether the user should be able to adjust the tone control or<br />
not. If you choose to switch off the tone control buttons, you can preset the<br />
tone control that will be used in user mode.<br />
Activating and deactivating<br />
Tone Control in <strong>User</strong><br />
Mode<br />
Press the + button (9) to<br />
activate the tone control buttons<br />
and the - button<br />
(10) to deactivate them.<br />
The standard setting is tone control activated.<br />
Presetting the Tone Control<br />
Press the < button (11) and the > button (12) to preset<br />
the tone control to the level that will be used in user<br />
mode.<br />
APP<br />
The standard setting is Tone Control centred (level<br />
frequency response)<br />
319
Please note that if the tone control is on, the preset value will be changed as<br />
soon as the Tone Control is changed in user mode.<br />
8 s<br />
Resetting to the factory setting<br />
You can use this to reset all settings to the<br />
standard settings that the products were supplied<br />
with from the factory.<br />
Press and hold down the + button (9) until all the<br />
LEDs on the display are lit. After resetting is completed,<br />
the display will blink for a short period.<br />
Version information<br />
The product version information is presented here<br />
via a pattern of lit and blinking LEDs. This internal<br />
information is only intended as an aid for servicing<br />
and support.<br />
320
Pairing of units<br />
The Transmitter and Receiver Units in the <strong>Bellman</strong> Audio Domino system must<br />
have the radio link established in order for radio communication to operate.<br />
To make it easier to get started, a Receiver Unit and a Transmitter Unit which<br />
are paired together are always supplied so that they will work together. Where<br />
you want to pair a Receiver Unit with a Transmitter Unit which is different from<br />
the Receiver Unit it was originally supplied with, you can do this in the Settings<br />
Menu. Proceed as follows to pair up the units:<br />
5 s 5 s<br />
• Start both the units with<br />
the On/Off buttons i<br />
(6, 18).<br />
• Go into the Settings Menu.<br />
• Hold down the CONNECT<br />
button (19) on the Transmitter<br />
Unit.<br />
• Hold down both the M<br />
button (5) and the R button<br />
(7) on the Receiver<br />
Unit.<br />
APP<br />
A ”running light” on the Receiver Unit’s Volume and Tone LED Indicator (8)<br />
moving towards the centre indicates that the link has been established.<br />
321
322<br />
Please note! If you pair up a Transmitter Unit and a Receiver Unit in the<br />
Settings Menu, this replaces the pairing carried out in the factory. This can<br />
be useful when changing a Transmitter Unit under guarantee or if you want<br />
to pair up several Receiver Units to a Transmitter Unit (e.g. in a conference<br />
room).
Testing<br />
It is easy to test the <strong>Bellman</strong> Audio Domino Personal Hearing System. If <strong>Bellman</strong><br />
Audio Domino does not operate as described below, you can carry out further<br />
troubleshooting as instructed under Troubleshooting.<br />
How to test<br />
The testing of <strong>Bellman</strong> Audio Domino has been divided into three parts. One<br />
part for the Receiver Unit for which only the Receiver Unit is required, one part<br />
for the Transmitter Unit for which both units are required and finally one for<br />
charging the two units.<br />
Receiver Unit<br />
• Switch on the unit and make sure that the Battery Status LED (3) lights up green.<br />
• Connect the headphones to the Headphone Socket (13) and scrape carefully<br />
on the round microphone (1) with your finger and check that there is a scraping<br />
sound in the headphones.<br />
• Press the M button (5) and make sure that the Microphone LED (2) changes<br />
colour and lights up orange.<br />
• Scrape carefully on the small microphone hole on the top (1) and the round<br />
microphone (1) with your finger and check that there is a scraping sound in the<br />
headphones.<br />
• Press the buttons (9, 10, 11, 12) and check that the Volume and Tone Indicator<br />
changes.<br />
APP<br />
323
324<br />
Transmitter Unit<br />
• Switch on the unit and make sure that the Battery Status LED (17) lights up<br />
green.<br />
• Press the R button (7) and make sure that the External Sound LED (4) lights up<br />
green.<br />
• Carefully scrape on the round microphone hole (16) on the top of the Transmitter<br />
Unit with the finger and check that there is a scraping sound in the headphones.<br />
• Press the R button (7) and make sure that the External Sound LED (4) changes<br />
colour and lights up orange.<br />
• Carefully scrape on the round microphone (16) on the Transmitter Unit with the<br />
finger and check that there is a scraping sound in the headphones.<br />
• Connect an external sound source to the External Sound Source Input (20) and<br />
check that the sound from the sound source is heard in the headphones. The<br />
external sound source input (20) can be tested, for example, by connecting a<br />
CD player or a radio to the input via the audio cable supplied. The transmitter<br />
unit automatically switches to an external sound source when a connector is<br />
connected to the External Sound Source Input (20).
Charging<br />
• Connect the charger to the mains socket and check that the LEDs on the<br />
charger light up green.<br />
• Connect the charging cables to both the charger and to the charging sockets<br />
on the Receiver Unit and the Transmitter Unit (14, 21), see the fold-out section<br />
of the <strong>manual</strong>.<br />
• Check that the LEDs on the charger change from green to red.<br />
• Check that the Battery Status LEDs on both the Transmitter Unit and Receiver<br />
Unit light up orange.<br />
APP<br />
325
Troubleshooting<br />
Problem<br />
The sound is louder in one ear<br />
than in the other.<br />
The sound volume is low even<br />
though the volume is set to max.<br />
Solution<br />
Adjust the Balance in the Settings<br />
Menu.<br />
Adjust the Basic Attenuation in the<br />
Settings Menu.<br />
The sound is only in Mono even<br />
though it is connected via a stereo<br />
cable to a sound source which<br />
provides stereo sound.<br />
The bass reproduction is weak.<br />
The Tone Control cannot be adjusted.<br />
The Receiver Unit is behaving<br />
strangely.<br />
Change to Stereo in the Settings Menu.<br />
Switch off Bass Reduction in the<br />
Settings Menu.<br />
Use the Settings Menu to activate the<br />
Tone Control buttons or to adjust the<br />
sound.<br />
Reset the unit to the factory settings in<br />
the Settings Menu.<br />
326
Problem<br />
Solution<br />
The Receiver Unit loses its link to<br />
the Transmitter Unit when you switch<br />
off the Receiver Unit.<br />
Pair up the Receiver Unit and<br />
Transmitter unit permanently in the<br />
Settings Menu.<br />
Humming occurs when connecting<br />
the stereo cable during charging.<br />
Only use the charger supplied, BE9142.<br />
APP<br />
327
Technical information<br />
Power supply<br />
Battery power<br />
Operating time<br />
Transmitter charging time<br />
Receiver charging time<br />
Input signals<br />
Microphone<br />
External sound source input<br />
Output signals<br />
Headphone socket<br />
Distortion<br />
Frequency range<br />
Tone control<br />
Output power<br />
3.7V Li-Ion battery<br />
8 hours (standard battery)<br />
2.5 hours (standard battery)<br />
2.5 hours (standard battery)<br />
Built-in microphone (omnidirectional<br />
or directional)<br />
2.5 mm stereo jack plug<br />
(0 dBV max input signal)<br />
3.5 mm stereo jack plug<br />
0.05% THD (electrical)<br />
40-10 000 Hz<br />
+/- 10 dB, cut-off frequency 1.6 kHz<br />
100 mW (16 Ω load)<br />
328
Radio communication<br />
Frequency<br />
Range<br />
The following may also affect the<br />
performance:<br />
Security<br />
2.4 GHz, 3 channels<br />
25 metres, clear line of sight, indoors.<br />
Walls, concrete and metal reduce the<br />
range.<br />
More than one Receiver is connected<br />
to a Transmitter and at least one of<br />
the Receivers is too far away from the<br />
Transmitter.<br />
Too many Receivers are connected to<br />
the same Transmitter.<br />
Too many transmitters at 2.4 GHz or<br />
too many Domino systems close to one<br />
another.<br />
Encrypted communication, automatic<br />
channel searching, coexists with other<br />
radio transmitters on 2.4 GHz<br />
APP<br />
329
Additional information<br />
For indoor use only.<br />
Dimensions WxHxD<br />
Weight<br />
Colour<br />
Regulatory requirements<br />
48 x 99 x 22 (max) mm<br />
BE2210: 69 g, BE2230: 66 g<br />
Black/dark grey metallic with silvercoloured<br />
buttons.<br />
CE, FCC, RoHS, WEEE,<br />
Accessories<br />
The following accessories are available:<br />
• BE9122 Stereo headphones<br />
• BE9124 Ear phones<br />
• BE9125 Stetoclips<br />
• BE9126 Stereo cable set, 5m (16 feet)<br />
• BE9127 External microphone, 5m (16 feet)<br />
• BE9128 Neck loop<br />
• BE9143 USB car charger<br />
• BE1360 Scart switch<br />
330
ear phones headphones STETOCLIPS<br />
Neck loop<br />
microphone<br />
These original accessories<br />
are especially<br />
developed to maximize<br />
the performance of your<br />
Domino. Contact your<br />
nearest dealer or visit:<br />
www.bellman.com<br />
Scart switch CABLE KIT, 16 FEET car charger<br />
APP<br />
For Europe mainly<br />
331