your complete guide to outstanding outdoor areas - PlaceMakers
your complete guide to outstanding outdoor areas - PlaceMakers
your complete guide to outstanding outdoor areas - PlaceMakers

You also want an ePaper? Increase the reach of your titles
YUMPU automatically turns print PDFs into web optimized ePapers that Google loves.
“The most renewable natural resource” for more information visit our<br />
website www.nzwood.co.nz<br />
Please Note:<br />
Whilst the advice and recommendations contained in this brochure<br />
have been produced with proper care, they are offered only with the<br />
objective of assisting those interested in home improvement projects<br />
and <strong>PlaceMakers</strong> does not accept responsibility for the advice,<br />
recommendations, etc. contained herein.<br />
Updated: July 2008 (BSPG110116)<br />
www.placemakers.co.nz<br />
0800 KNOW HOW (0800 566 946)<br />
The piles in this example deck are 125 x 125mm H5 radiata pine piles, spaced at<br />
a maximum of 1200mm in each direction. The front row of piles is also set back<br />
from the front edge of the deck <strong>to</strong> allow it <strong>to</strong> overhang the piles and bearers.<br />
This provides a neater finish <strong>to</strong> the front of the deck, but the construction<br />
details used and the ‘best’ way are ultimately a personal preference. The piles<br />
themselves can also continue up through the deck <strong>to</strong> support a handrail or<br />
overhead pergola. A pergola may require a building consent. The construction<br />
methods used at this stage must be modified <strong>to</strong> suit any of these alternatives.<br />
(See Illustration 3).<br />
Illustration 3<br />
If you are running the piles up<br />
through the deck <strong>to</strong> form part of<br />
the handrail, or support an<br />
overhead pergola, fix the bearer<br />
by bolting it in place<br />
Nail a small wooden block <strong>to</strong> the<br />
pile or use a G Clamp <strong>to</strong> support<br />
the bearer in the correct position<br />
while you drill the hole. Remember<br />
<strong>to</strong> treat the holes with a timber<br />
preservative.<br />
If you are running the piles up through the deck <strong>to</strong> form part of the handrail,<br />
or <strong>to</strong> support an overhead pergola, fix the bearer by bolting it in place. Nail a<br />
small wooden block <strong>to</strong> the pile or use a G Clamp <strong>to</strong> support the bearer in the<br />
correct position while you drill the hole. Remember <strong>to</strong> treat the holes with a<br />
timber preservative.<br />
The concrete pads need <strong>to</strong> be at least 300mm in diameter or 300 x 300mm<br />
square and, for a low deck, 300mm deep. After you’ve dug the holes, insert the<br />
piles <strong>to</strong> check there will be at least 100mm of concrete all around each pile,<br />
including underneath.<br />
You have a choice about when <strong>to</strong> set the piles in concrete.<br />
Option 1<br />
Cover the bot<strong>to</strong>m of the hole with 100mm of concrete. Place the pile back in the<br />
hole with the cut end up. Pour a further 200mm of concrete and position the<br />
pile. Brace the pile in the correct position and leave <strong>to</strong> set for at least 24 hours.<br />
Then trim the piles <strong>to</strong> height and continue building the deck on <strong>to</strong>p. This option<br />
requires you set the posts exactly in place before the bearers are there <strong>to</strong> give<br />
you a line <strong>to</strong> work <strong>to</strong>.<br />
Option 2<br />
Hang the piles 100mm above the bot<strong>to</strong>m of the holes, and brace them in<br />
all directions very firmly. Trim the piles <strong>to</strong> height, and build and fix <strong>your</strong> deck<br />
framing on <strong>to</strong>p, supporting it with props of timber.<br />
Illustration 4: Bearers and Piles<br />
When the framing (bearers and joists) is fitted and fixed <strong>to</strong>gether <strong>to</strong> the piles,<br />
check that everything is straight, level and square, and then pour concrete in<strong>to</strong><br />
the holes.<br />
(Leave <strong>your</strong> concrete slightly lower than the <strong>to</strong>p of the hole <strong>to</strong> allow lawn or<br />
<strong>to</strong>psoil <strong>to</strong> cover it up.)<br />
When the concrete has set, nail down the decking, removing the temporary<br />
props at any stage.<br />
An alternative <strong>to</strong> setting the piles in concrete is using a Bowmac post bracket.<br />
These require less concrete, but provide little lateral bracing compared with<br />
posts set in concrete. (See Illustration 5).<br />
Trimming hint:<br />
Mark the piles on three<br />
sides before cutting.<br />
With Bowmac<br />
Illustration 5: Post Setting Detail<br />
Ledger<br />
With post<br />
embedded<br />
The piles are trimmed off <strong>to</strong> the underside of the bearers. (See Illustration 4 & 5).<br />
The ledger on the wall is actually a bearer. Level a stringline from under that, or<br />
a straight bearer held against it, <strong>to</strong> give you the trim-off height of the piles. Mark<br />
the cut around three sides of the pile with <strong>your</strong> square before cutting.<br />
This deck uses two 100 x 50mm nailed <strong>to</strong>gether as bearers. Nail at 300mm<br />
centres from opposite faces. Fix <strong>to</strong> each pile with two nails skewed (angle nailed)<br />
from each face. The piles at each end should also be connected <strong>to</strong> the bearer with<br />
a stainless steel ‘Nailon’ plate on each face.<br />
SPACING BETWEEN PILES ALONG THE BEARER<br />
Maximum span of joist<br />
Bearer size<br />
1.45m 100 x 75mm<br />
2.00m 100 x 100mm or two 100 x 50mm<br />
3.20m 125 x 100mm or two 125 x 50mm<br />
4.65m 150 x 100 or two 150 x 50mm<br />
Fitting the Joists<br />
You can see from Illustration 6 that the deck cantilevers over the last bearer <strong>to</strong><br />
produce an overhanging deck.<br />
Illustration 6: Cantilevered Deck Construction<br />
The joists should be spaced at maximum centres according <strong>to</strong> the table below.<br />
The spacing depends on the thickness of decking used.<br />
JOIST SELECTION CHART<br />
Joist size: mm Maximum Span of Joists<br />
Joist Spacings<br />
400mm<br />
450mm 600mm<br />
100 x 50 1.45m 1.40m 1.25m<br />
125 x 50 1.85m 1.80m 1.60m<br />
150 x 50 2.60m 2.40m 2.00m<br />
200 x 50 3.50m 3.35m 2.85m<br />
250 x 50 4.40m 4.25m 3.60m<br />
300 x 50 5.20m 5.05m 4.30m<br />
When you rest each joist on the ledger on the side of the house, leave a 10mm<br />
gap between the end of each joist and the wall. That s<strong>to</strong>ps moisture becoming<br />
trapped and causing decay. Fix each joist <strong>to</strong> every bearer with two nails through<br />
each face at every crossing. Let the end of each joist overlap <strong>your</strong> profile strings.<br />
Trim them all at once later, using the line and a square <strong>to</strong> accurately mark each<br />
joist. Fit a boundary joist <strong>to</strong> the ends of the main joists <strong>to</strong> give the edge of <strong>your</strong><br />
deck a neat finish.<br />
Decking<br />
Gap between<br />
joist and wall<br />
Gap between<br />
decking and wall<br />
150mm Step<br />
Decking height<br />
Joist<br />
Deck joist depth<br />
Ledger<br />
Packer<br />
Illustration 7<br />
DECKING MATERIAL SELECTION CHART<br />
Joist Spacing<br />
Decking Material<br />
400mm<br />
25mm thick Radiata Timber<br />
450mm<br />
25mm thick imported Hardwood<br />
600mm<br />
40mm thick Radiata Timber<br />
Start laying timber decking from the house in a full length board. Make sure that,<br />
like the joists, there’s a gap left between the first board and the wall. If joins are<br />
necessary they should be made on the joists and staggered at random between<br />
rows. An overhang of 10mm <strong>to</strong> 20mm at each end is usually preferred. The first<br />
two boards should be cut <strong>to</strong> this size before fixing with galvanized nails: • 60mm<br />
Galvanized Nails for 19mm decking • 75mm Galvanized Nails for 30mm decking.<br />
Check the boards are true and in a straight line as you fix them. Also check the<br />
distance <strong>to</strong> the outside bearer remains constant. Make up a spacer of 3mm <strong>to</strong><br />
5mm <strong>to</strong> ensure an even gap. Move it along as you nail. Small variations can be<br />
adjusted slightly as each board is fixed. Don’t cut the rest of the decking <strong>to</strong> length<br />
(apart from the first two). Let them overhang the end joists. Then trim them all off<br />
<strong>to</strong>gether by nailing a board <strong>to</strong> the deck as a <strong>guide</strong> for <strong>your</strong> circular saw.<br />
Kitset steps of various lengths are available from <strong>PlaceMakers</strong>. These are<br />
easily fitted <strong>to</strong> <strong>your</strong> deck. If the deck gives access <strong>to</strong> a building the steps must<br />
comply with the New Zealand Building Code Access requirements.<br />
There are various types of interior stains available, oilbased<br />
pigmented, solvent-based dye stain and waterbased<br />
dye stains. They all allow the grain of the timber <strong>to</strong><br />
show through. Stains are designed <strong>to</strong> be applied <strong>to</strong> raw or<br />
new timber only and all interior stains must be over coated<br />
with a clear finish <strong>to</strong> protect the colour from rubbing off<br />
due <strong>to</strong> excess handling.<br />
Clear finishes are available in water-based, oil-based and solvent-based<br />
formulations. Most are only suitable for interior surfaces; <strong>to</strong> protect, enhance and<br />
highlight the timber being coated.<br />
Oil-based clears will give timber a ‘golden’ look whereas water-based preparations<br />
will keep the timber looking natural without discolouration.<br />
Prior <strong>to</strong> staining/clear coating interior timbers, it is essential<br />
that all timber is clean, dry and free from contamination.<br />
The right preparation can greatly enhance the natural grains on the timber surface<br />
and while sanding may be tedious it is an important step in preparing the surface.<br />
Timber should be sanded smooth <strong>to</strong> allow the penetration of the stain/clear<br />
coating. If this is not carried out the product will not penetrate the timber surface<br />
creating adhesion problems. Sand out any marks, including planer ripples. Sand<br />
with the grain, starting with coarse sandpaper and working up <strong>to</strong> fine. Overfill any<br />
cracks or holes with appropriate filler then sand back levelling with the surrounding<br />
timber. Wood dust from sanding will cause problems if it is not removed properly.<br />
Ensure that the surface has been properly cleaned and free of contaminants.<br />
Always check the colour of the stain prior <strong>to</strong> commencement <strong>to</strong> see if the colour<br />
is correct as it is difficult <strong>to</strong> remove the stain from the timber fibres once staining<br />
has been <strong>complete</strong>d.<br />
Apply one coat of stain with a rag, following the grain of<br />
Please Note:<br />
Whilst the advice the and timber. recommendations contained in this brochure<br />
have been produced with proper care, they are offered only with the<br />
objective of assisting Oil-based those interested pigmented in home stains improvement projects<br />
and <strong>PlaceMakers</strong> Oil-based does not pigmented accept stains responsibility are designed for the for advice, use on light timbers such as Pine,<br />
recommendations, Ash etc. and contained Tawa. They herein. are applied in a circular motion on larger <strong>areas</strong> or following<br />
Updated: July 2008 the grain (BSPG110116) on smaller <strong>areas</strong>. Avoid applying <strong>to</strong>o much stain as this can lead <strong>to</strong><br />
excess film build and premature failure.<br />
Solvent-based dye stains<br />
Solvent-based dye stains are designed for harder exotic timbers. They penetrate<br />
and dye the fibres of the timber and give crisp colours allowing the natural beauty<br />
of the timber grain <strong>to</strong> show through.<br />
Water-based gel stains<br />
Water-based gel stains tend <strong>to</strong> be the easiest <strong>to</strong> use. They can be applied direct <strong>to</strong><br />
vertical surfaces without the stain running down the surface, are quicker drying,<br />
low odour, have good clarity and are suitable for all timber types.<br />
All rags used for staining must be disposed of correctly by soaking in water <strong>to</strong><br />
neutralise any oil/solvent content present. If this is not carried out the rags can<br />
become combustible and ignite, causing fires.<br />
Polyurethane clear coatings are available in oil-based,<br />
water-based and moisture cured finishes. They are normally<br />
available in gloss, satin and matt finishes. A clear coat will<br />
enhance and protect the natural beauty and colour of the<br />
timber and protect any stained surface from excess wear.<br />
Gloss products are preferred for floors as the lower gloss<br />
levels may polish up in high traffic <strong>areas</strong>.<br />
When clear coating Rimu, Totara and Matai timbers, avoid using oil-based<br />
finishes as these can react with the oils in the timber causing drying problems.<br />
Water-based is recommended for these timbers as a first coat.<br />
Surfaces must be in good, clean, dry condition, free from wax, grease and dust<br />
prior <strong>to</strong> clear coating. Sanding the surface smooth <strong>to</strong> remove any defects or<br />
damaged <strong>areas</strong> will give you a better look. Remember that clear coating over<br />
such defects will highlight them making them stand out. If the coating is left longer<br />
than 48 hours, a light sanding is required between coats <strong>to</strong> aid adhesion.<br />
Polyurethanes can be applied by brush or speed brush. Do not apply <strong>to</strong>o much<br />
at once, keep an even coating and wet edge. This will enable you <strong>to</strong> continue<br />
blending the coating in on larger <strong>areas</strong>. When coating <strong>to</strong>ngue and groove, <strong>complete</strong><br />
each board from one end <strong>to</strong> the other, this will help <strong>to</strong> maintain an even coating.<br />
The use of sanding sealer is recommended prior <strong>to</strong> clear coating; this helps seal<br />
porous timber and gives a greater film build on finishing coats.<br />
A minimum of 2 coats is recommended with a light sanding between coats <strong>to</strong> give<br />
you a smoother finish.<br />
For an exceptionally hard-wearing finish on floors, bench <strong>to</strong>ps, labora<strong>to</strong>ry and<br />
kitchen benches, moisture cured polyurethane is recommended. It is a single<br />
pack clear coating which cures by absorbing water from the atmosphere.<br />
All polyurethanes start as a gloss finish. A flattening agent is added <strong>to</strong> lower the<br />
gloss level, therefore it is very important that satin and matt finishes are stirred<br />
well with a flat stick <strong>to</strong> bind the agent and give a uniform gloss level.<br />
YOUR COMPLETE KNOW HOW GUIDE<br />
Deck piles<br />
• H5 treated radiata<br />
• 125 x 125mm available<br />
in various lengths from<br />
600mm <strong>to</strong> 3.6M<br />
SPACING THE PILES<br />
DIGGING THE HOLES<br />
PILES & BEARERS<br />
PILES & BEARERS<br />
FIXING THE BEARERS<br />
JOISTS & DECKING<br />
CONCRETING THE PILES<br />
Deck Railings<br />
TRIMMING THE PILES (If using option 1)<br />
• H3.2 treated radiata<br />
• Planer gauge or rough sawn finish<br />
• No.1 or SG8 wet graded timber<br />
• Available in 75 x 50mm or 100 x 50mm<br />
PILES & BEARERS / JOISTS & DECKING<br />
FITTING THE DECKING<br />
STEPS<br />
JOISTS & DECKING<br />
Interior Stains & Clears<br />
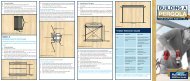
BUILDING A<br />
TIMBER<br />
DECK<br />
YOUR COMPLETE HOW TO GUIDE<br />
Preparation<br />
Staining<br />
CHOOSING YOUR<br />
DECKING<br />
TIMBER<br />
Clear Coating<br />
YOUR COMPLETE HOW TO GUIDE<br />
HOW TO GUIDES<br />
PUTTING UP A<br />
TIMBER<br />
STAINS<br />
AND CLEARS<br />
For help choosing <strong>your</strong> decking timber<br />
and instructions on how <strong>to</strong> build and<br />
stain <strong>your</strong> deck see these how <strong>to</strong><br />
<strong>guide</strong>s, available in-s<strong>to</strong>re or online at<br />
www.placemakers.co.nz<br />
KNOW<br />
HOW<br />
CARD<br />
SPEND *<br />
$<br />
250<br />
GET A<br />
$<br />
25<br />
*Terms and conditions apply.<br />
BONUS<br />
VOUCHER<br />
Don’t forget <strong>to</strong> use <strong>your</strong> Know How<br />
Card with every purchase.<br />
Stair Stringers<br />
• H4 treated radiata<br />
• 1-15 step sizes available<br />
*Steps purchased<br />
separately <strong>to</strong><br />
preferred width<br />
Metalex Timber<br />
Preservative<br />
Treat all timber cut ends <strong>to</strong><br />
protect against rotting and<br />
mildew growth.<br />
• Water resistant finish<br />
• Protects fibrous substrates<br />
• Easy <strong>to</strong> apply<br />
• Available in clear or green<br />
PROJECT CHECK LIST<br />
Materials<br />
• Timber pegs • Decking • Joists<br />
• Bearers • Stringers • Nails<br />
• Concrete • Fixings and brackets<br />
• Timber Preservative<br />
Tools<br />
• Stringline • Tape measure<br />
• Spirit level • Circular saw<br />
• Hammer • Hand saw<br />
• Electric drill • Set square<br />
Makita 1050W<br />
185mm Circular<br />
Saw 5030425<br />
Vitex Decking<br />
A medium-density, naturally stable<br />
and durable hardwood harvested<br />
as “community production” from the<br />
Solomon Islands, it silvers off <strong>to</strong> a<br />
fine even finish.<br />
• Available in 100 x 25mm<br />
or 150 x 25mm<br />
Purple Heart Decking<br />
Purple Heart hardwood is superior<br />
quality decking. It provides class 1<br />
durability for decking, with minimal<br />
leaching/bleeding.<br />
• Available in 100 x 25mm<br />
or 150 x 25mm<br />
Massa Decking<br />
Sustainably harvested heavy<br />
hardwood, kiln-dried, stable and<br />
extremely strong with a Class 1<br />
durability rating. A proven<br />
performer for decking, fl ooring<br />
beams and exterior joinery.<br />
Non-bleeding/leaching.<br />
• Available in 100 x 25mm<br />
or 150 x 25mm<br />
Composite Decking<br />
– Hybrideck<br />
This new generation composite<br />
decking is extremely stylish, looks<br />
and feels like timber. Made from<br />
recycled wood and plastic materials,<br />
it won’t warp, crack or splinter.<br />
• Available in finished sizes of<br />
130 x 19mm or 140 x 25mm<br />
Available colours<br />
All decking sizes quoted are nominal. FSC timber only available from selected s<strong>to</strong>res.<br />
5