FBM 2180 Installation Instruction - Emerson Process Management
FBM 2180 Installation Instruction - Emerson Process Management
FBM 2180 Installation Instruction - Emerson Process Management

You also want an ePaper? Increase the reach of your titles
YUMPU automatically turns print PDFs into web optimized ePapers that Google loves.
<strong>Installation</strong> <strong>Instruction</strong><br />
308019E, Edition 1<br />
May 2006<br />
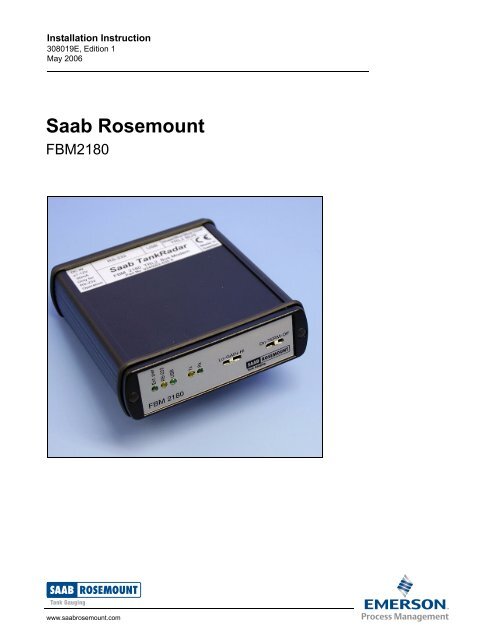
Saab Rosemount<br />
<strong>FBM</strong><strong>2180</strong><br />
www.saabrosemount.com
<strong>Installation</strong> <strong>Instruction</strong><br />
308019E, Edition 1<br />
May 2006<br />
Saab Rosemount<br />
<strong>FBM</strong> <strong>2180</strong><br />
<strong>Installation</strong> <strong>Instruction</strong><br />
Saab Rosemount<br />
Field Bus Modem <strong>2180</strong><br />
First edition<br />
Copyright © May 2006<br />
Saab Rosemount TankRadar AB<br />
www.saabrosemount.com
Saab Rosemount<br />
<strong>FBM</strong> <strong>2180</strong><br />
<strong>Installation</strong> <strong>Instruction</strong><br />
308019E, Edition 1<br />
May 2006<br />
Copyright © May 2006<br />
Saab Rosemount Tank Radar AB<br />
The contents, descriptions and specifications within this manual is subject<br />
to change without notice. Saab Marine Electronics AB accepts no<br />
responsibility for any errors that may appear in this manual.<br />
Trademarks<br />
HART is a registered trademark of HART Communication Foundation<br />
Modbus is a registered trademark of Modicon.<br />
Pentium is a registered trademark of Intel Corporation.<br />
Windows XP is trademark of Microsoft Corporation.<br />
Spare Parts<br />
Any substitution of non-recognized spare parts may jeopardize safety.<br />
Repair, e.g. substitution of components etc, may also jeopardize safety and<br />
is under no circumstances allowed.<br />
Saab Tank Control will not take any responsibility for faults, accidents, etc<br />
caused by non-recognized spare parts or any repair which is not made by<br />
Saab Tank Control.<br />
Specific FCC Requirements (USA only)<br />
Saab TankRadar REX generates and uses radio frequency energy. If it is not<br />
installed and used properly, that is, in strict accordance with the<br />
manufacturer´s instructions, it may violate FCC regulations on radio<br />
frequency emission.<br />
Saab TankRadar REX has been FCC certified under test conditions which<br />
assume a metallic tank. <strong>Installation</strong> on a non-metallic tank is not certified,<br />
and is not allowed.<br />
The FCC certificate for TankRadar REX requires that the tank is closed as<br />
far as emitted radio energy is concerned. Tanks with open manholes,<br />
external-floating-roof tanks without still pipes etc. are not covered by the<br />
certificate.<br />
www.saabrosemount.com
<strong>Installation</strong> <strong>Instruction</strong><br />
308019E, Edition 1<br />
May 2006<br />
Saab Rosemount TankRadar<br />
<strong>FBM</strong> <strong>2180</strong><br />
Contents<br />
Contents<br />
1. MOUNTING. . . . . . . . . . . . . . . . . . . . . . . . . . . . . . . . . . . . . . . . . . 1<br />
1.1 DIN RAIL MOUNTING . . . . . . . . . . . . . . . . . . . . . . . . . . . . . . . . . . . . . . . . . . . . . 1<br />
2. INSTALLATION . . . . . . . . . . . . . . . . . . . . . . . . . . . . . . . . . . . . . . . 2<br />
2.1 POWER SUPPLY . . . . . . . . . . . . . . . . . . . . . . . . . . . . . . . . . . . . . . . . . . . . . . . . . . . 2<br />
2.2 TRL/2 BUS . . . . . . . . . . . . . . . . . . . . . . . . . . . . . . . . . . . . . . . . . . . . . . . . . . . . . . . . 2<br />
2.3 RS 232 COMMUNICATION . . . . . . . . . . . . . . . . . . . . . . . . . . . . . . . . . . . . . . . . . . 3<br />
2.4 USB COMMUNICATION . . . . . . . . . . . . . . . . . . . . . . . . . . . . . . . . . . . . . . . . . . . . 3<br />
2.5 USB DRIVER INSTALLATION . . . . . . . . . . . . . . . . . . . . . . . . . . . . . . . . . . . . . . . 4<br />
3. OPERATION . . . . . . . . . . . . . . . . . . . . . . . . . . . . . . . . . . . . . . . . . 6<br />
3.1 FRONT PANEL . . . . . . . . . . . . . . . . . . . . . . . . . . . . . . . . . . . . . . . . . . . . . . . . . . . . 6<br />
3.2 COMMUNICATING WITH TANKMASTER . . . . . . . . . . . . . . . . . . . . . . . . . . 6<br />
3.2.1 USB Interface . . . . . . . . . . . . . . . . . . . . . . . . . . . . . . . . . . . . . . . . . . . 7<br />
3.2.2 RS 232 Interface . . . . . . . . . . . . . . . . . . . . . . . . . . . . . . . . . . . . . . . . . 7<br />
4. SPECIFICATIONS . . . . . . . . . . . . . . . . . . . . . . . . . . . . . . . . . . . . . 8<br />
i
Saab Rosemount TankRadar<br />
<strong>FBM</strong> <strong>2180</strong><br />
Contents<br />
<strong>Installation</strong> <strong>Instruction</strong><br />
308019E, Edition 1<br />
May 2006<br />
ii
<strong>Installation</strong> <strong>Instruction</strong><br />
308019E, Edition 1<br />
May 2006<br />
Saab Rosemount TankRadar<br />
<strong>FBM</strong> <strong>2180</strong><br />
Chapter 1 Mounting<br />
1. Mounting<br />
1.1 DIN Rail Mounting<br />
The <strong>FBM</strong> <strong>2180</strong> can be mounted on a DIN-rail 35 EN 50022. The<br />
following is delivered with the <strong>FBM</strong><strong>2180</strong> kit:<br />
• <strong>FBM</strong> <strong>2180</strong> TRL/2 Bus Modem<br />
• Four screws<br />
• Two DIN mounting clips<br />
20 mm<br />
4 x<br />
1 Attach the two DIN rail<br />
mounting clips to the back<br />
of the <strong>FBM</strong><strong>2180</strong> by using<br />
the four screws. There are<br />
four holes drilled on the<br />
modem housing to be used<br />
for the clips.<br />
2 Mount the <strong>FBM</strong><strong>2180</strong> on<br />
the DIN rail and make sure<br />
that the <strong>FBM</strong><strong>2180</strong> is<br />
securely fastened.<br />
15 mm 15 mm<br />
1
Saab Rosemount TankRadar<br />
<strong>FBM</strong> <strong>2180</strong><br />
Chapter 2 <strong>Installation</strong><br />
<strong>Installation</strong> <strong>Instruction</strong><br />
308019E, Edition 1<br />
May 2006<br />
2. <strong>Installation</strong><br />
2.1 Power Supply<br />
Use adapter 90-264 V ac/9 V dc 1.5 A for RS232 communication.<br />
DO NOT use external power supply when the modem is connected to the<br />
USB port. The USB interface itself supports power to the <strong>FBM</strong><strong>2180</strong><br />
modem.<br />
Power supply (polarity independent)<br />
(RS 232 communication only)<br />
2.2 TRL/2 Bus<br />
Use single twisted preferably shielded pair cable. Individual shielding is<br />
mandatory if parallel buses run in the same cable. Polarity independent.<br />
Recommended wiring length:<br />
Cable dimension<br />
AWG 20 (0.50 mm 2 )<br />
AWG 18 (0.75 mm 2 )<br />
Maximum Length<br />
3000 m<br />
4000 m<br />
TRL/2 Bus<br />
2
<strong>Installation</strong> <strong>Instruction</strong><br />
308019E, Edition 1<br />
May 2006<br />
Saab Rosemount TankRadar<br />
<strong>FBM</strong> <strong>2180</strong><br />
Chapter 2 <strong>Installation</strong><br />
2.3 RS 232 Communication<br />
The serial port on the <strong>FBM</strong><strong>2180</strong> fits to a standard M 9P Dsub connector.<br />
Connect the modem to the COM port on the PC with a standard RS232<br />
DTE-DCE cable (“straight” cable).<br />
RS 232 connector<br />
RS 232 port<br />
2.4 USB Communication<br />
For the USB port use cable type A>B. Do not use external power supply<br />
when using the USB port. The USB interface itself supports power to the<br />
<strong>FBM</strong><strong>2180</strong> modem.<br />
USB connector<br />
USB port<br />
3
Saab Rosemount TankRadar<br />
<strong>FBM</strong> <strong>2180</strong><br />
Chapter 2 <strong>Installation</strong><br />
<strong>Installation</strong> <strong>Instruction</strong><br />
308019E, Edition 1<br />
May 2006<br />
2.5 USB Driver <strong>Installation</strong><br />
The USB interface requires a Virtual COM Port driver. Saab Rosemount<br />
TankMaster version 4.F1 and higher fully supports Virtual COM Ports.<br />
The driver is included on the Saab Rosemount TankMaster CD version<br />
4.F1 and higher.<br />
To install the USB driver do the following:<br />
1 Plug the USB cable into the <strong>FBM</strong> <strong>2180</strong> and to the USB port on the computer.<br />
The Found New Hardware Wizard dialog for the <strong>FBM</strong> <strong>2180</strong> Serial<br />
Converter will appear:<br />
2 Follow the instructions on the screen for the <strong>FBM</strong> <strong>2180</strong> driver. The <strong>FBM</strong><br />
<strong>2180</strong> drivers can be found on the installation CD for the Saab Rosemount<br />
TankMaster software. If you have the drivers on another location, choose<br />
“Install from a list or specific location (Advanced)” and browse to the folder<br />
where the drivers are located.<br />
3 When the <strong>FBM</strong> <strong>2180</strong> driver installation is finished the Found New Hardware<br />
Wizard dialog for the <strong>FBM</strong> <strong>2180</strong> Serial Port driver will appear:<br />
4
<strong>Installation</strong> <strong>Instruction</strong><br />
308019E, Edition 1<br />
May 2006<br />
Saab Rosemount TankRadar<br />
<strong>FBM</strong> <strong>2180</strong><br />
Chapter 2 <strong>Installation</strong><br />
4 Follow the instructions on the screen for the <strong>FBM</strong> <strong>2180</strong> Serial Port driver.<br />
5 If you are using Windows XP operating system, you will see the warnings<br />
below appear during the USB driver installations:<br />
6 Please click the Continue Anyway button. Our drivers are Microsoft<br />
WHQL certified and work with the operating system.<br />
7 Once the USB drivers are installed you are ready to use the <strong>FBM</strong> <strong>2180</strong>.<br />
5
Saab Rosemount TankRadar<br />
<strong>FBM</strong> <strong>2180</strong><br />
Chapter 3 Operation<br />
<strong>Installation</strong> <strong>Instruction</strong><br />
308019E, Edition 1<br />
May 2006<br />
3. Operation<br />
3.1 Front Panel<br />
The <strong>FBM</strong> <strong>2180</strong> front LEDs show information on power supply,<br />
communication status and communication interface.<br />
LEDs for external power<br />
and communication<br />
Gain<br />
switch<br />
Termination<br />
switch<br />
External power<br />
Receive<br />
RS232<br />
Transmit<br />
USB<br />
The Termination switch is used if there are extremely short cables between<br />
the transmitter and the modem.<br />
The Gain switch is set to Lo by default. This setting is sufficient in most<br />
cases. The Hi Gain setting may be used if cable dimensions are insufficient<br />
resulting in a heavily damped communication signal.<br />
3.2 Communicating with TankMaster<br />
TankMaster WinSetup allows you to setup the communication between a<br />
PC, Field Communication Unit (FCU) and field instruments in a Saab<br />
Rosemount system. For each communication port that is used on the PC a<br />
protocol channel has to be configured (see the TankMaster WinSetup User´s<br />
Guide for more information on communication protocol setup).<br />
6
<strong>Installation</strong> <strong>Instruction</strong><br />
308019E, Edition 1<br />
May 2006<br />
Saab Rosemount TankRadar<br />
<strong>FBM</strong> <strong>2180</strong><br />
Chapter 3 Operation<br />
3.2.1 USB Interface<br />
The USB interface requires a Virtual COM Port driver. Virtual COM Ports<br />
are supported by Saab Rosemount TankMaster version 4.F1 or higher. See<br />
“USB Driver <strong>Installation</strong>” on page 4 for more information.<br />
In TankMaster WinSetup each <strong>FBM</strong> <strong>2180</strong> connected via a USB port is<br />
displayed as a virtual COM port designated <strong>FBM</strong> <strong>2180</strong> Serial Port. For<br />
each <strong>FBM</strong> <strong>2180</strong> a new Virtual COM Port is installed on the TankMaster<br />
PC.<br />
Virtual COM Port<br />
for USB<br />
communication<br />
3.2.2 RS 232 Interface<br />
For RS 232 communication simply connect to one of the COM ports on<br />
the PC and select the corresponding port in the Master Protocol Channel<br />
Configuration window:<br />
COM Port<br />
7
Saab Rosemount TankRadar<br />
<strong>FBM</strong> <strong>2180</strong><br />
Chapter 4 Specifications<br />
<strong>Installation</strong> <strong>Instruction</strong><br />
308019E, Edition 1<br />
May 2006<br />
4. Specifications<br />
Explosion protection<br />
Power supply (for RS-232)<br />
Cable to Host PC<br />
Field bus over voltage<br />
protection<br />
Field interface<br />
Computer/Host interface<br />
LED indicators<br />
None<br />
DC 7-12 V, max. 50 mA<br />
RS-232: 3 m (10 ft)<br />
USB: 3 m (10 ft)<br />
Galvanic insulation, transient suppressors<br />
TRL/2<br />
RS-232 or USB<br />
External power. Host connection<br />
TRL/2 transmit and receive<br />
8
<strong>Installation</strong> <strong>Instruction</strong><br />
308019E, Edition 1<br />
May 2006<br />
Saab Rosemount Tank Control local representative:<br />
<strong>Emerson</strong> <strong>Process</strong> <strong>Management</strong><br />
Saab Rosemount Tank Gauging<br />
Box 130 45<br />
SE-402 51 Göteborg<br />
SWEDEN<br />
Tel (International): +46 31 337 00 00<br />
Fax (International): +46 31 25 30 22<br />
E-mail: sales.srt@emersonprocess.com<br />
www.saabrosemount.com<br />
2006 Saab Rosemount Tank Radar AB. All rights reserved.